1. Activating Your iPad and Customizing Its Settings
In This Chapter
• Setting up your iPad
• Choosing and activating a wireless data plan
• Upgrading your iPad to iOS 6
• Custom configuring the preinstalled apps
• Personalizing your tablet
Before you can begin using an iPad you’ve just acquired, it must first be activated. Then—in addition to choosing your tablet’s Lock screen and Home screen wallpaper, and rearranging the app icons on your Home screen—you can customize your iPad, as well as individual apps, in a number of ways. Activating and customizing your iPad is the focus of this chapter.
If you’ve had your iPad for a while and it’s running iOS 5.1 (or earlier), you’ll need to upgrade the tablet to iOS 6. Directions for how to do this are covered in this chapter.
Turning Your iPad On or Off
Like any electronic device, your iPad has a power button, located near the top-right corner of the tablet. To turn on the iPad when it’s powered off, press the power button for between 1 and 3 seconds. You see the Apple logo appear and the iPad boots up within about 15 seconds, displaying the Lock Screen.
To turn off (power down) the iPad, press and hold the power button for between 3 and 5 seconds, until the Slide to Power Off slider appears. Then, swipe your finger from left to right along this slider.
When your iPad is completely powered off, none of its apps continue to work in the background and the tablet is not automatically able to connect to the Internet.
Placing Your iPad into Sleep Mode
In addition to being in a powered-on or powered-off state, your iPad can also be placed in Sleep Mode when it’s not actively being used. While in Sleep Mode, various apps can continue running in the background and the tablet automatically wakes up if an alert, alarm, or notification is generated by an app that requires your attention. Also while in Sleep Mode, the iPad can automatically access the Internet to check for incoming emails or update data within a specific app, for example.
To place your iPad into Sleep Mode, press the Power button once quickly (do not hold it down for several seconds as you would when powering it off). Or simply place an Apple Smart Cover or Smart Case cover flap (or compatible cover) over the iPad’s screen.
In Sleep Mode, your iPad’s screen is turned off. To wake up the iPad from Sleep Mode, quickly press and release either the Power button or the Home button on the tablet. Whenever you wake up the iPad, the Lock Screen appears.
If you’ll be using a Smart Cover or Smart Case with your iPad, when you place the cover over the tablet’s screen, the tablet automatically goes into Sleep Mode. However, when the Smart Cover or Smart Case is removed, the tablet automatically wakes up and returns you to the Lock Screen.
Depending on how the iPad is set up from within Settings, you can adjust the iPad’s Auto Lock feature to place the tablet into Sleep Mode if the tablet is left unattended for a predetermined amount of time.
Activating Your iPad
When you first purchase your iPad, take it out of the box, and turn it on, you see a black screen that displays the iPad logo. Before you can begin using your tablet, you must initialize it and set it up for the first time. When prompted, swipe your finger on the on-screen slider switch to begin the setup procedure.
The wireless setup procedure that’s built in to iOS 6 is used to initially set up your iPad. To do this, your tablet needs access to a Wi-Fi, 3G, or 4G network. Or, you can connect your tablet to your primary computer via the supplied USB cable and then use the iTunes software on your primary computer (PC or Mac) to initially set up your tablet. This setup procedure is mandatory, but you need to do it only once.
iPad Wireless Setup
If you’re setting up a brand-new iPad that comes with iOS 6.0 (or later) installed, and you’re within a Wi-Fi hotspot, you can use the wireless setup procedure. Wireless setup can also be done using a 3G/4G connection to the Internet if you have an iPad Wi-Fi + 3G/4G model.
The very first time you turn on a new tablet, you see a black screen with the word iPad displayed near the center of the screen (shown in Figure 1.1). Near the bottom-center of this screen is a virtual switch. Using your finger, slide this switch from left to right.

Figure 1.1. This is the first thing you see when you turn on your brand new iPad.
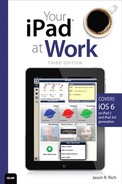
When the Welcome screen appears (shown in Figure 1.2), select your language (the default option is English), and then tap the right-pointing arrow icon that’s displayed near the upper-right corner of the screen.
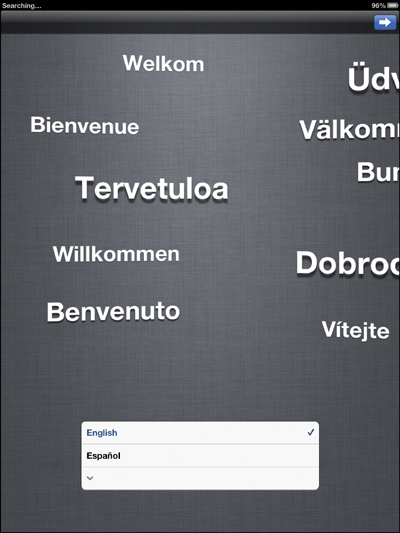
Figure 1.2. Select your language preference, and then tap the arrow icon to continue with the initial setup procedure.
Next, select your country or region. If you purchased the iPad in the United States, the default option is United States. Tap the Next icon that’s displayed near the top-right corner of the screen to continue.
You’ll now be asked to Choose a Network (shown in Figure 1.3). Select an available Wi-Fi network to which your tablet can connect to continue the initial setup procedure. You also have the option of using a cellular 3G or 4G connection. When your iPad has access to the Internet, tap on the Next icon.
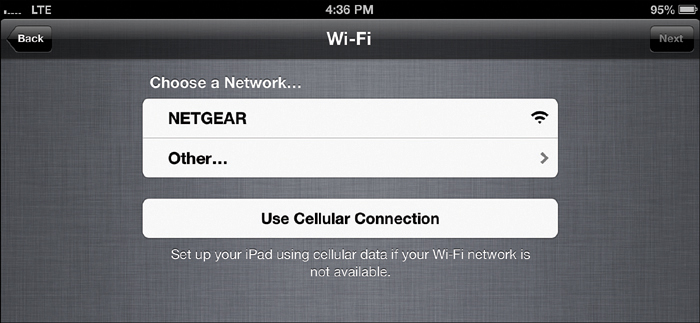
Figure 1.3. To continue with the wireless setup, choose a Wi-Fi or cellular network for your tablet to connect to.
If you’re using a Wi-Fi–only iPad model and no Wi-Fi network is available, you will be given the option to set up the tablet using iTunes on your primary computer.
On the screen that displays next, you can enable or disable the iPad’s Location Services feature. This option enables your iPad (and the various apps running on it) to pinpoint your exact location and utilize (and sometimes share) your location information. The pros and cons of this feature are covered in more detail later in this chapter, but for now, turn on this main location services feature. From the Settings app, you can later decide which specific apps can utilize this feature.
The Set Up iPad screen displays next. From this screen, you can set up your iPad from scratch or restore the tablet from a previous backup. Near the bottom center of this screen are the following three options (shown in Figure 1.4):
• Set Up As new iPad
• Restore from iCloud Backup
• Restore from iTunes Backup

Figure 1.4. When you activate your iPad, choose whether you want to set it up as a new device or restore your data from an older iPad.
If you’re upgrading from an older iPad model to a newer one, and want to load all your apps, iPad customizations, and data, you have two choices. If your backup data is stored on iCloud, select the Restore from iCloud Backup option. Or, if the backup data from your original iPad is stored on your primary computer (because it was created using the iTunes Sync or iTunes Wireless Sync process), connect your tablet to your primary computer via the supplied USB cable, and follow the on-screen prompts.
However, if you’re not upgrading, tap the Set Up As New iPad option, and then tap the Next icon that appears near the upper-right corner of the screen to continue.
When the Apple ID screen appears, you see a handful of enlarged app icons scrolling across the screen. Near the bottom center of this screen are two command icons:
• Sign In with an Apple ID
• Create a Free Apple ID
If you already own any other Apple computer or iOS device, chances are you already have an Apple ID account set up. Tap the Sign In with an Apple ID command icon to continue. When the next screen appears, use the iPad’s virtual keyboard to enter your Apple ID and password.
By entering your existing Apple ID and password, your new iPad automatically loads app-related data stored on iCloud, including your Contacts database, Calendar data, Safari bookmarks, and iCloud-related email account information.
If you don’t yet have an Apple ID, tap the Create a Free Apple ID command icon, and then follow the screen prompts to create one. After you have your Apple ID, you can continue with the setup procedure for your iPad. If you can’t remember your existing Apple ID or password, visit https://appleid.apple.com.
Next, you’ll be able to set up iCloud services from the Set Up iCloud screen. Near the bottom center of this screen, you can turn on or off the iCloud service. When you’ve made your selection, tap the Next icon that’s displayed in the upper-right corner of the screen.
Setting up iCloud is free, and because many apps enable you to share data and sync files using this online-based file sharing service, this is something you should do now. However, you have the opportunity to set up iCloud later via the Settings app.
Continue working your way through this step-by-step iPad activation procedure, which should take less than five more minutes to complete. You will also have the option to turn on the new Siri feature (as shown in Figure 1.5). Tap on the Use Siri option to activate it.

Figure 1.5. If you want to use Siri, you must first turn on this feature either when you set up the iPad initially or anytime from within Settings.
When you’re done, the Thank You screen appears. Now that your iPad has been set up, the tablet’s Home screen is displayed. On the Home screen are the app icons for all the core apps that come preinstalled on your tablet.
Your iPad is now fully activated and ready to be used. However, you might want to plug it in to charge the battery. You can see the level of battery life remaining by looking at the battery icon located in the upper-right corner of the tablet’s screen. You can use the iPad while it is charging. A lightning bolt graphic appears in the on-screen battery icon to indicate when the tablet is currently charging.
Upgrading Your iPad from iOS 5.x to iOS 6
To upgrade your existing iPad from iOS 5.x (or later) to iOS 6, follow these steps:
1. Make sure your iPad is able to connect to the Internet.
2. Plug in the tablet to an external power source.
3. Back up your iPad using iTunes Sync or to iCloud.
4. Launch Settings from the Home screen.
5. Tap on the General option that’s listed on the left side of the screen.
6. In Settings, on the right side of the screen, tap on the Software Update option.
7. Follow the on-screen prompts. Be patient; it will take up to 30 minutes for the new operating system to download and install itself on your tablet.
Upgrading the operating system on your iPad is free of charge. If you don’t have access to a Wi-Fi Internet connection, download the iOS upgrade using the iTunes software on your primary computer, connect your iPad to your computer via the supplied USB cable, and then transfer and install iOS 6 via the iTunes Sync connection.
Activating Your iPad’s Data Services
Now that you have activated your iPad, if you have an iPad that’s a Wi-Fi + 3G or Wi-Fi + 4G model, you can activate a wireless data service plan. To do this, make sure your iPad is not in Airplane Mode. (If it is in Airplane Mode, see the “Switching to Airplane Mode” section later in this chapter for information on where to turn off Airplane Mode.) You should see the 3G or 4G connection signal bars and the AT&T or Verizon label in the upper-left corner of the screen. Next, tap the Safari app icon from the Home screen.
In the U.S., before you’re allowed to gain access to the wireless web via a 3G or 4G connection, you must activate an account with AT&T Wireless, Verizon Wireless, or another compatible wireless data service provider.
This wireless data plan account setup procedure takes just a few minutes and requires a major credit card (or debit card) to activate.
When you tap the Safari icon for the first time, follow the on-screen prompts when asked if you want to set up an AT&T Wireless or Verizon Wireless account. You must choose a monthly service plan that costs between $14.99 and $50.00 per month, depending on the plan you choose. This is a month-to-month plan that you can cancel or change any time. No long-term service agreement is required; however, it is auto-renewing until you cancel it.
If you’re an AT&T Wireless customer who is upgrading from one iPad model to another, and you have an unlimited wireless data plan that’s no longer available and you want to keep it, visit www.att.com/ipadlanding, or call (800) 331-0500, to transfer your data plan. Do not cancel your existing data plan and then create a new one on your new iPad.
Customizing iPad’s Settings
Along with adding apps to your iPad to customize the tablet’s features and functionality, you can use the built-in Settings app to personalize a wide range of options that affect your interaction with the tablet, how it connects to the Internet, and how your apps function.
Regardless of what you use your iPad for, you will occasionally need to access the Settings app. Think of the Settings app as the control center for the tablet’s operating system. For example, it’s from here that you can put your tablet into Airplane Mode, find and connect to a Wi-Fi hotspot, set up your email accounts, and customize your tablet’s wallpapers. In fact, dozens of options are available from the various Settings menus and submenus that directly affect how your iPad operates.
After you launch the Settings app on any iPad model, you can see the screen is divided into two sections. On the left are the main options offered in the Settings app, starting with the virtual Airplane Mode (On/Off) switch that’s located near the top-left corner of the screen (shown in Figure 1.6).

Figure 1.6. The left side of the screen displays the main Settings menu. Tap on a menu option to display a relevant submenu on the right side of the iPad’s screen.
On the right side of the screen are the various submenu options available to you based on the highlighted selection on the left side of the screen. If you hold your iPad vertically (in portrait mode), you can see the entire main Settings screen at once. As you can see, the General option on the left is highlighted (in blue on your screen), and the specific options you can adjust on your iPad under the General option are displayed on the right side of the screen.
To select a different Settings category, tap its menu option that’s listed in the left column of the Settings screen.
Switching to Airplane Mode
The first option found under the Settings heading, in the left column of the main Settings app screen, is the virtual Airplane Mode On/Off switch. This option enables you to turn off the iPad’s capability to communicate with the Internet using a 3G (4G) or Wi-Fi connection. To switch Airplane mode to the On or Off position, simply tap the virtual switch that’s displayed near the upper-left corner of the main settings screen.
When Airplane mode is turned off, and you’re using an iPad with 3G (or 4G), the tablet automatically connects to the wireless data network to which you’ve subscribed (as long as you’re not within the signal radius of a Wi-Fi hotspot). The signal bars for this wireless data connection are displayed in the upper-left corner of the screen.
If you turn on Airplane mode, the tablet’s wireless data connection shuts down and your existing Wi-Fi connection also turns off. Everything else on your tablet remains functional. Some apps, however (such as FaceTime), do require an active Wi-Fi connection to work. When your tablet is in Airplane Mode, a small airplane-shaped icon appears in the upper-left corner of the screen.
While Airplane Mode is turned on, you have the option to reconnect to a Wi-Fi hotspot from the Wi-Fi settings option (discussed in the following section). This is useful if you’re aboard an airplane, for example, that offers Wi-Fi but does not allow you to utilize the 3G/4G capabilities of your tablet. You can also turn on Airplane Mode when you travel overseas and want to connect to the Web using only a Wi-Fi hotspot.
Connecting to a Wi-Fi Hotspot
Located directly below the Airplane Mode switch is the Wi-Fi option. When you tap Wi-Fi in the left column of the main Settings screen, the right side of the screen immediately displays the various options available to you for choosing and connecting to a Wi-Fi hotspot.
At the top, the first user-selectable option is labeled Wi-Fi. It’s accompanied by a virtual On/Off switch to its right. When the Wi-Fi option is turned on, your iPad immediately begins looking for all Wi-Fi hotspots in the vicinity.
The available networks are displayed under the Choose a Network heading on the right side of the screen. A lock icon to the right of any network listed in the Choose a Network section indicates the Wi-Fi hotspot is password protected. The signal strength of each Wi-Fi hotspot in your immediate area is also displayed to the right of the network’s name.
Tap a public hotspot that does not display a lock icon, unless you possess the password for a locked network. Keep in mind that the network options you see displayed under the Choose a Network heading are based on the active Wi-Fi hotspots in your immediate vicinity.
When you select a Wi-Fi network that is password protected, an Enter Password window displays on your screen. Using the iPad’s virtual keyboard, enter the correct password to connect to the Wi-Fi network you selected. You might also have to do this when connecting to a public Wi-Fi hotspot offered in a hotel, for example.
In a few seconds, a check mark appears to the left of your selected Wi-Fi hotspot, and a Wi-Fi signal indicator displays in the upper-left corner of your iPad’s screen to confirm that a Wi-Fi connection has been established.
If you leave the Wi-Fi option turned on, your iPad can automatically find and connect to an available Wi-Fi hotspot, with or without your approval, based on whether you have the Ask to Join Networks option turned on or off.
Benefits of Accessing the Web via a Wi-Fi Hotspot
There are several benefits to connecting to the Internet using a Wi-Fi connection, as opposed to a 3G or 4G connection (if you’re using an iPad 2 or new iPad with Wi-Fi + 3G or Wi-Fi + 4G capabilities).
• A Wi-Fi connection is often much faster than a 3G or even a 4G connection; however, the signal strength and number of people simultaneously accessing the Wi-Fi network affects your connection speed.
• When connected to the Internet via Wi-Fi, you can send and receive as much data as you’d like, stream content from the Web, and upload or download large files without worrying about using up your monthly wireless data allocation that’s associated with your 3G or 4G wireless data plan.
• Using a Wi-Fi connection, you can use the FaceTime app for videoconferencing, plus download movies and TV show episodes from iTunes directly onto your tablet. (With some wireless service providers, you can now use FaceTime with a 3G/4G Internet connection as well.)
The main drawback to using Wi-Fi to connect to the Internet from your iPad is that a Wi-Fi hotspot must be accessible, and you must stay within the radius of that Wi-Fi signal to remain connected to the Internet. The signal of most Wi-Fi hotspots only extends for several hundred feet from the wireless Internet router. When you go beyond this signal radius, your Internet connection is lost.
Configuring Notifications Settings
The Notifications option, also displayed in the left column of the Settings app, enables you to globally turn Notifications on or off using a virtual switch that appears on the right side of the screen. When turned off, all sounds, alerts, and Home screen badges are disabled.
From the Notifications option within Settings, you also can customize the Notification Center, which is continuously operational when your iPad is turned on. To learn more about Notification Center, refer to Chapter 4, “Using the Calendar, Reminders, Notification Center, and Clock Apps.”
By tapping on the Do Not Disturb option in Settings, you can temporarily disable alerts, alarms, and notifications. The Notification Center app continues gathering this information, but you will not be disturbed until the Do Not Disturb feature is turned off. Tap on the virtual on/off switch associated with the Do Not Disturb feature to turn it on or off.
Setting Location Services Options
One of the options available when you tap on the Privacy option in Settings is labeled Location Services. When this option is turned on, the iPad can automatically utilize the GPS functionality built in to the device along with various apps. Certain apps and services, such as Maps or Find My iPad, rely on knowing your exact location to function properly.
If you want to fully utilize Siri, it’s important that Location Services related to Siri be turned on as well. When you tap on Privacy within Settings, below the Location Services option, there’s a separate virtual On/Off switch associated with Siri. Make sure this switch remains in the default On setting.
When the option is off, your tablet cannot determine (or broadcast) your exact location. Keep in mind that some apps automatically track your whereabouts and add that geographic information to files. For example, if Location Services is turned on, when you snap a photo using the Camera app, the exact location where the photo was shot is automatically saved.
Likewise, when posting a tweet, you can set the Twitter app to automatically display your exact location within that tweet message if Location Services is turned on. And, theoretically, your boss, spouse, or someone else who knows your Apple ID could track your whereabouts using the Find My iPad service from any computer. Or, with your permission, the Find My Friends app can be used for this purpose.
If you don’t want the iPad tracking your whereabouts in real time, turn off this feature. When using Maps, for example, if the feature is turned off, you must manually enter your location each time you use the app.
Configuring Cellular Data Options
When you select the Cellular Data option, a virtual On/Off switch appears on the top-right side of the screen (see Figure 1.7). The Enable LTE and Data Roaming options also appear, along with a handful of other options that enable you to customize when and how the cellular data network gets used if you have a Wi-Fi + 3G/4G iPad model.
Figure 1.7. From the Cellular Data option, you can control whether your iPad can connect to the 3G or 4G wireless data network. You also can enable your tablet to roam (for an additional fee) to other networks for 3G or 4G Internet access.
When the Cellular Data option is on, your tablet can access either the 3G or 4G wireless data you subscribe to. When it’s off, your iPad can access the Internet only using a Wi-Fi connection, assuming a Wi-Fi hotspot is present.
When set to on, the Data Roaming option enables your iPad to connect to a 3G (or 4G) network outside the one you subscribe to. The ability to tap into another wireless data network might be useful if you must connect to the Internet, there’s no Wi-Fi hotspot present, and you’re outside the coverage area of your wireless data network (such as when you’re traveling abroad).
When your iPad is permitted to roam and connect to another 3G or 4G wireless data network (such as when you’re traveling abroad), you might incur hefty roaming charges, often as high as $20.00 per megabyte (MB). Refrain from using this feature unless you’ve secured a 3G or 4G data roaming plan in advance through your service provider, or you’re prepared to pay a fortune to access the Web.
You can view or modify your 3G (or 4G) wireless data plan account details by tapping the View Account option. After you log in with the username and password you created when you set up the account, you can do things such as change your credit card billing information or modify your monthly plan.
Adjusting the Screen Brightness
Also along the left column displayed in the Settings app is the Brightness & Wallpaper setting. When you tap this setting, the Brightness & Wallpaper options appear on the right side of the Settings screen (see Figure 1.8).

Figure 1.8. Use the Brightness slider to control how light or dark your iPad’s screen appears. You can change this based on the external lighting conditions where you’re using your iPad to make what’s displayed on the screen easier to view.
At the top of the screen is a Brightness slider. Place your finger on the white dot on the slider and drag it to the right to make the screen brighter, or drag it to the left to make the screen darker. Manually adjusting the brightness resets the “base” brightness of the Auto-Brightness option, making the screen easier to read in certain lighting conditions (based on your personal preference).
The Auto-Brightness option displayed under the brightness slider has a virtual On/Off switch associated with it. The default setting for this feature is On, which means the iPad uses its built-in ambient light sensor to automatically adjust the brightness of the screen. Leave the setting on unless you consistently have difficulty seeing what’s displayed on your iPad’s screen based on its brightness setting.
Customizing the Lock Screen and Home Screen Wallpapers
One of the ways you can customize the appearance of your iPad is to change the wallpaper displayed on the device’s Lock screen and behind your app icons on the Home screen.
Choosing a Preinstalled Wallpaper
From the Brightness & Wallpaper option in the Settings app, you can quickly change the wallpapers that are displayed on the tablet. Your iPad has 22 preinstalled wallpaper designs, plus you can use any digital images stored on your iPad (within the Photos app) as your Lock screen or Home screen wallpaper.
Below the brightness slider is the Wallpaper option. Here, you see a thumbnail graphic of your iPad’s Lock screen on the left and Home screen on the right. Tap either of these thumbnail images to change their appearance. The right side of the Settings screen changes, and two options are listed. The Wallpaper option is on top and the Camera Roll or Photos option is on the bottom.
Tap the Wallpaper option to display thumbnails for the 22 preinstalled wallpaper graphics you can choose from (shown in Figure 1.9).
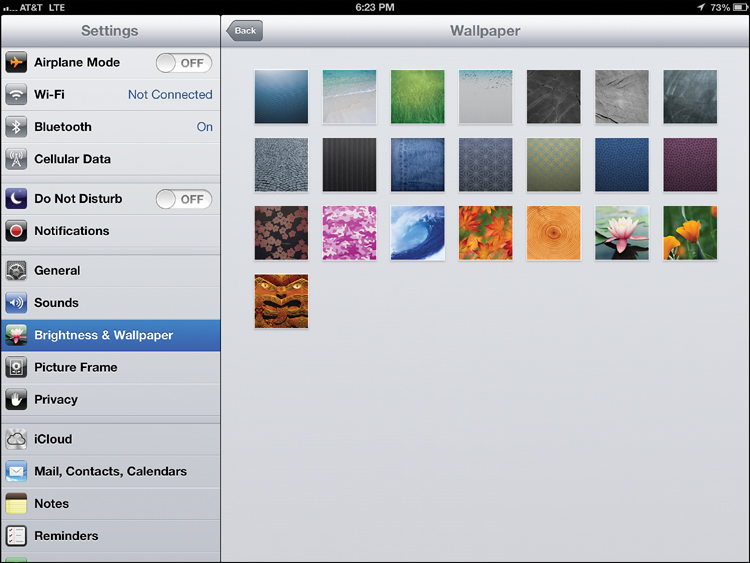
Figure 1.9. Choose from 22 preinstalled wallpaper graphics for your iPad’s Lock screen and Home screen.
When looking at the collection of wallpaper graphics, tap the one you’d like to use, such as the grey slate graphic that’s displayed on the top row. Next, the graphic you select is displayed in full-screen mode. In the upper-right corner of the screen are three command buttons. Choose one of these options by tapping its icon:
• Set Lock Screen: Tap this icon to change just the wallpaper graphic of your iPad’s Lock screen. This is the screen you see when you first turn on your tablet or wake it from Sleep Mode.
• Set Home Screen: Tap this icon to change just the wallpaper graphic of your iPad’s Home screen. This is the graphic that displays behind your app icons on each of your Home screen pages.
• Set Both: Tap this icon to use the same wallpaper graphic as both your Lock screen and your Home screen wallpapers.
After you make your selection, your newly selected wallpaper graphic is displayed when you return to the iPad’s Lock screen or Home screen.
Instead of choosing one of the preinstalled wallpaper graphics, you also have the option to use any of your own digital images. This includes photos you’ve transferred to your iPad and have stored in the Photos app, and photos you’ve shot using the tablet’s Camera app.
Displaying a Custom Image as a Wallpaper
To select one of your own photos to use as your Lock screen or Home screen wallpaper, tap the Brightness & Wallpaper option in the Settings app.
On the right side of the screen, tap the thumbnails of your iPad’s Lock screen and Home screen. Underneath the Wallpaper option, tap the folder that contains the image you want to use as your wallpaper. This might be a photo you’ve shot using your iPad (found in the Camera Roll folder), or a photo you’ve imported into the Photos app of your tablet. You could also use a photo you’ve saved on your iPad from your iCloud Photo Stream.
When the image thumbnails appear, tap on the one you want to use as your wallpaper for your Lock screen or Home screen (or both). When the photo you selected appears in full-screen mode, tap one of the three command icons that appear in the upper-right corner of the screen. Once again, your options include Set Lock Screen, Set Home Screen, or Set Both.
After you make your selection, your newly selected wallpaper graphic displays on your Lock screen and Home screen, as you can see in Figure 1.10 and Figure 1.11.

Figure 1.10. A newly selected Lock screen graphic, chosen from a photo stored on the iPad in the Photos app.

Figure 1.11. The image selected from the Settings app is displayed as your Home screen wallpaper appearing behind your app icons.
Transforming Your iPad into a Digital Picture Frame
When your iPad isn’t in use or on the go with you, it might sit idly on your desk. If this is the case, you could transform the device into a digital picture frame and have it display an animated slideshow of your favorite images when it’s not otherwise being used. You can set up and customize an animated slideshow using the Picture Frame option of the Settings app.
General Options
Several options found under the General heading are things you’ll probably never need to tinker with or adjust, such as International or Accessibility, so just leave them at their default settings. Others are things you might need to change often as you use your iPad for different tasks.
The General option of the Settings screen enables you to view and adjust the following options:
• About: Tap the About option to access information about your iPad, including its serial number, which version of the iOS is running, the memory capacity, and how much memory is currently available on the device. This is purely an informative screen with no options to customize or adjust.
• Software Update: Periodically, when Apple releases a revision to the iOS operating system, you must download and install an update. You can do it wirelessly using the Software Update feature. When you tap Software Update, your iPad checks to see whether a new version of the iOS is available and, if so, prompts you to download and install it.
• Usage: Tap the Usage option to decide whether to display your tablet’s battery life as a numeric percentage (such as 73%) or only as a battery-shaped graphic icon. Also, from this screen you can see how much data the iPad has sent or received using the 3G/4G wireless data network to which it’s connected.
Tap the Reset Statistics option to reset the Sent and Received settings. When you add the Sent and Received numbers together, you can determine your total data use since you last tapped the Reset Statistics icon. This feature is particularly useful to determine how much you’ll be billed when you’re overseas and roaming, or for making sure you don’t go beyond your monthly allocated data use based on the 3G/4G wireless data plan you have.
• Siri: Turn on or off the Siri feature, plus customize some of the settings associated with it.
• VPN: Customize Virtual Private Network settings, if applicable, so your tablet can access your wireless network at home or work.
• iTunes Wi-Fi Sync: Back up your iPad and sync data with your primary computer by linking the two devices via iTunes and your wireless network. This is an alternative to using the USB cable to connect your tablet directly to your primary computer.
• Spotlight Search: Select what content in your iPad will be searched when you use the Spotlight Search feature that’s built in to iOS 6. For example, you can opt to search Contacts, Applications, Music, Notes, Events, Mail, Reminders and/or Messages.
• Auto-Lock: Set your iPad to switch into Sleep Mode anytime it is left idle for a predetermined amount of time. This helps conserve battery life. From the Auto-Lock option, you can determine whether Sleep Mode should be activated after 2, 5, 10, or 15 minutes of nonuse. Or you can choose the Never option so the iPad never automatically switches into Sleep Mode, even if you leave it unattended for an extended period.
• Passcode Lock: Use this feature to set and then turn on or off the Passcode option built in to the iPad’s operating system. From the Lock Screen, you can adjust the settings so you can use Siri and/or the Picture Frame feature without first unlocking the tablet. Or if someone enters the wrong passcode 10 times in a row, you can have the tablet automatically erase its contents.
• Restrictions: Use these features to “childproof” your tablet. You have the option to Enable Restrictions and then manually set those restrictions. For example, you can block certain apps from being used, keep the user from deleting or adding apps to the iPad, keep someone from making in-app purchases, or keep someone from accessing certain types of iTunes or app content (including TV shows, movies, music, and podcasts).
• Use Side Switch To: There is a tiny switch located on the right side of your iPad, just above the volume up/down button. You can determine what the primary function of this switch should be. Use it either as a lock rotation switch or a mute switch.
• Multitasking Gestures: When the Multitasking Gestures option is set to On, several additional finger/hand motions are usable when interacting with your tablet’s touch-screen. For example, you can start with your fingers spread out and perform a full-hand pinch motion in any app to return to the Home screen. Or, you can swipe upward to reveal the multitasking bar (instead of pressing the Home button twice). You can then perform a full hand swipe to switch between apps in multitasking mode.
• Date & Time: Switch between a 12- or 24-hour clock and determine whether you want your iPad to automatically set the time or date (when it’s connected to the Internet). To ensure the time and date are correct regardless of what time zone you travel to, leave the Set Automatically option set to On.
• Keyboard: You can make certain customizations from the Settings screen that affect how your virtual keyboard responds as you type. The Keyboard option gives you six customizable settings, such as Auto-Capitalization, Auto-Correction, and Check Spelling. You also have the option to turn on or off the Split Keyboard feature, plus create and edit keyboard shortcuts that are useful when typing text. A keyboard shortcut might include typing “omw,” which the iPad translates into “on my way.”
• International: By default, if you purchased your iPad in the United States, the default language and keyboard options are for English. However, you can adjust these settings by tapping the International option.
• Accessibility: The Accessibility options are designed to make the iPad easier to use by people with various sight or hearing difficulties, or with some type of physical limitation.
• Reset: Every so often, you might run into a problem with your iPad, such as when the system crashes or you need to reset specific settings. To restore your iPad to its factory default settings and erase everything stored on it, tap the Reset option, and then tap the Erase All Content and Settings option. In general, you should refrain from using these settings unless you’re instructed to use them by an Apple Genius or technical support person.
In Settings, tap on the Sounds option to customize the audible elements of your iPad, including what you hear when an alert or alarm is generated or when you tap a key on the virtual keyboard. You also can associate specific sounds with events, such as receipt of a new email message, Tweet, or Facebook post.
If you plan to use any type of Bluetooth device with your tablet, such as wireless external speakers, a printer, a headset, or a wireless keyboard, you first need to turn on the Bluetooth feature on your iPad and then pair that device with your tablet. You can manage Bluetooth devices by first tapping on the Bluetooth option in Settings.
If you’re using your iPad without having a Bluetooth device connected, you can set the Bluetooth feature to Off to avoid getting notices about Bluetooth devices and prolong the tablet’s battery life.
When you set this feature to On, your iPad automatically seeks out any Bluetooth-compatible devices in the vicinity. The first time you use a particular Bluetooth device with your iPad, you must pair it. Follow the directions that came with the device or accessory to perform this initial setup task.
Before using any of the Reset options, which potentially erase important data from your iPad, be sure to perform an iTunes Sync or iCloud Backup to create a reliable backup.
Keeping Your iPad Private with the Passcode Lock Feature
There are several simple ways to protect the data stored on your iPad and keep it away from unauthorized users. If you want to keep data on your tablet private, the first thing to do is set up and activate the Passcode Lock feature that’s built in to the iOS.
To set up the Passcode Lock feature, from the Settings app, tap the General setting on the left side of the screen. Next, tap the Passcode Lock option that’s listed on the right side of the screen, and set the Passcode feature to On. (By default, the Passcode option is set to Off.)
When the Passcode Lock screen appears (see Figure 1.12), tap the Turn Passcode On button to activate this security feature.

Figure 1.12. From the Passcode Lock screen, you can set and then activate the Passcode Lock feature built in to the iPad. Use it to keep unauthorized people from using your tablet or accessing your sensitive data.
When the Set Passcode window appears on the tablet’s screen (see Figure 1.13), use the virtual numeric keypad to create a four-digit security passcode for your device. You must enter this code every time you turn on the tablet or wake it from Sleep Mode.

Figure 1.13. Create a four-digit numeric passcode for your iPad from this Set Passcode window.
You can enter any four-digit code as your passcode. When prompted, type the same code a second time. The Set Passcode window disappears and the feature becomes active.
From the Passcode Lock screen in the Settings app, you can further customize this feature. For example, tap the Require Passcode option to determine when the iPad prompts the user to enter the passcode. The default option is Immediately, meaning each time the tablet is turned on or woken up.
If you don’t believe a four-digit passcode is secure enough, turn off the Simple Passcode option, which makes a Change Passcode window appear along with the iPad’s full virtual keyboard. You can create a more complicated, alphanumeric passcode to protect your device from unauthorized use.
From the Passcode Lock screen, you can determine whether the Picture Frame app option is displayed on your Lock screen. This option has a virtual On/Off switch associated with it. When turned on, the Picture Frame app icon displays on the Lock screen. When turned off, you are not able to turn on the Picture Frame app from the Lock Screen because the icon does not display.
Also on the Passcode Lock screen is the Erase Data option. If an unauthorized user enters the wrong passcode 10 consecutive times, the iPad automatically erases all data stored on it when the feature is turned on.
Activating the Erase Data feature gives you an added layer of security if your tablet falls into the wrong hands. However, to recover the data later, you must have a reliable backup created using the iTunes Sync process or iCloud Backup feature; otherwise, that data is lost forever.
Other ways you can protect your privacy as you use your iPad are to tap on the Privacy option and adjust the available settings, and/or set up Restrictions by tapping on the General option in Settings, and then tapping on Restrictions. You can then block others from accessing or using specific apps or content that’s stored on your iPad.
Customizing iCloud Settings
From the left side of the Settings screen, tap the iCloud option to customize the settings associated with Apple’s online file-sharing and data backup service.
From Settings, however, you can adjust what data automatically gets wirelessly backed up and/or synced with the iCloud service, including Mail, Contacts, Calendars, Reminders, Safari Bookmarks (and related data), Notes, Photo Stream, and Documents & Data. You can also turn on or off the Find My iPad service. Your options are shown in Figure 1.14.

Figure 1.14. You can customize your iCloud settings from the Settings app.
Your free iCloud account comes with a predetermined amount of online storage space. Tap the Storage & Backup tab near the bottom of the iCloud screen to manage your existing online storage space or purchase additional online storage space. From the Storage & Backup screen within Settings, you can also turn on or off the Back Up to iCloud feature. This determines whether your iPad automatically and wirelessly backs up your tablet using iCloud.
Adjusting the Settings for Mail, Contacts, Calendars, Notes, and Reminders
If you use your iPad for work, five apps you will probably rely heavily on are Mail, Contacts, Calendars, Notes, and Reminders. From the Settings app, you can customize a handful of options pertaining to each of these apps, and you can set up your existing work and personal email accounts to work with your tablet. To adjust these app-specific options, launch Settings and then tap on the Mail, Contacts, Calendars option, the Notes option, or the Reminders option, respectively.
Setting Up the Twitter and Facebook Apps
The Twitter and Facebook online social networking services are fully integrated into iOS 6 and your iPad and are accessible from within several different iPad core applications, as well as the actual official Twitter and Facebook apps.
The Twitter features built in to the iPad’s operating system work with your existing Twitter account; however, you must download the free, official Twitter app. You can also set up a free Twitter account if you don’t already have one. Customize the settings as desired so you can send tweets from a variety of different iPad core apps, including Photos or Safari.
To set up your existing Twitter and Facebook accounts to work with your iPad, launch Settings. Scroll down on the left side of the screen until you see the Twitter and Facebook options. Tap on one of these options at a time. When prompted, enter your Twitter username and password or your Facebook username and password. You will also need to install the official Twitter and/or Facebook apps by tapping on the Install button that’s associated with each app.
From within Settings, you also have the option to create a new Twitter or Facebook account by tapping on the appropriate Create New Account button. Figure 1.15 shows the Twitter setup screen in Settings.

Figure 1.15. From Settings, set up your Twitter and/or Facebook accounts so many apps you’ll be using on your iPad can share app-specific content with these services.
You will need to enter your Twitter or Facebook account information once from within Settings to make each online social networking site integrate with the iPad’s preinstalled apps. Then, after you install the official Twitter and/or Facebook app, you must enter your username and password information again, but this time in the actual app.
Customizing Your Web Surfing Experience with Safari
Safari is the web browsing app built in to the iPad. It’s similar to the Safari web browser available on all Mac computers. The Safari app has a handful of settings you can customize using the Settings, such as which search engine to use, whether to show the Bookmarks Bar, or whether you want to block pop-up ads. These options, as well as the others found in the Safari settings, are explained in Chapter 3, “Working with Email and Surfing the Web.”
Customizing the Messages App
iMessage is an online-based text messaging service operated by Apple. This service works very much like the text messaging capabilities of your cell phone, but with this service, you can freely send and receive an unlimited number of messages. The service is compatible with all Macs, as well as with iOS-enabled mobile devices.
From your iPad, the iMessage service must be accessed using the Messages app, which comes preinstalled on the tablet. Tap the Messages option within Settings to set up an iMessage account using your Apple ID and to manage your account. You learn more about the Messages app and iMessage service from Chapter 12, “Conducting Video conferences and Virtual Meetings.”
Setting Up the Maps App
The newly revamped Maps app offers a wide range of new features that you’ll learn more about in Chapter 6, “Explore Your World with the Maps App.” From within Settings, however, you can customize some of the Maps app’s settings and options, such as whether you’ll hear turn-by-turn directions and whether you want distances displayed in miles or kilometers. In Settings, tap on the Maps option to adjust these settings.
Personalizing Music Settings
One of the apps built in to your iPad is the Music app, which transforms your tablet into a full-featured digital music player, and enables you to experience the music and audio files you have stored on your tablet. This includes music, podcasts, and audiobooks acquired from iTunes.
Using the Settings app, you can customize a handful of options relating to the Music app. From the left column of the main Settings app screen, tap the Music setting. Then, on the right side of the screen, adjust the Sound Check, EQ, Volume Limit, and Lyrics & Podcast Info options.
Each time you make a purchase from the iTunes Store, App Store, or Newsstand, for example, the cost of the purchase will be charged to the credit or debit card you have associated with your Apple ID. From within Settings, enter your Apple ID information when you first set up your iPad or anytime before you attempt to make an online purchase from one of Apple’s online ventures. To do this, launch Settings, tap on the iTunes & App Stores option, and then enter your Apple ID and password. Tap on the Sign In button to store this information.
Personalizing Video Settings
Use the Videos app that comes on your iPad to watch TV show episodes and movies you’ve purchased or rented from the iTunes Store. From the Settings app, you can adjust how the Videos app functions by turning on or off various settings.
From the Settings app, tap the Videos setting in the left column. When the Video options appear on the right side of the screen, you can adjust four main options, starting with the Start Playing feature. The default option for this feature is to resume playing a video where you last left off. However, you can change this option so videos always start at the beginning. You can also turn on or off closed captioning, for example.
Managing Your Photo Stream
If you opt to use the Photo Stream feature of Apple’s iCloud service, you will need to turn on this feature in your iPad, and then customize its functionality. To do this, launch Settings and tap on the Photos & Camera option.
Photo Stream automatically stores up to 1,000 of your most recently shot digital images online, and then makes them available on all your Macs, PCs, and iOS mobile devices that are linked to the same iCloud account. You also now have the option to share images stored in your Photo Stream with others.
Making App-Specific Adjustments
You can also customize settings for the preinstalled apps, such as the Photos, FaceTime, Notes, and App Store apps. These are all displayed toward the bottom of the main Settings screen’s left column.
To make adjustments that are specific to any of the apps listed, tap the app name (displayed in the left column of the Settings screen), and then adjust the app-specific settings on the right side of the screen. The customizations you can make are specific to each app.
As you begin installing optional apps on your iPad, apps that have customizable options are also adjustable from within the Settings app. When this is the case, those apps are listed within the left column of the main Settings app screen. For example, the Pages, Numbers, and Keynote apps are each listed within the Settings app after you install them.
Using the iPad’s Dictation Feature
While iOS 6 adds Siri functionality to the iPad, the Dictation mode that was introduced in iOS 5.1 remains available You can activate Dictation mode almost anytime the iPad’s virtual keyboard is visible. Simply tap on the microphone key that’s displayed between the .?123 and Spacebar keys (see Figure 1.16).

Figure 1.16. The Dictation feature enables you to speak directly to your tablet.
Instead of manually typing information into the iPad when using a compatible app, you can tap on the Dictation key once, which causes a larger microphone icon to be displayed (see Figure 1.17). At the same time, the iPad generates a quick tone. At this point, you can begin speaking to your iPad for up to 30 seconds in a normal voice.
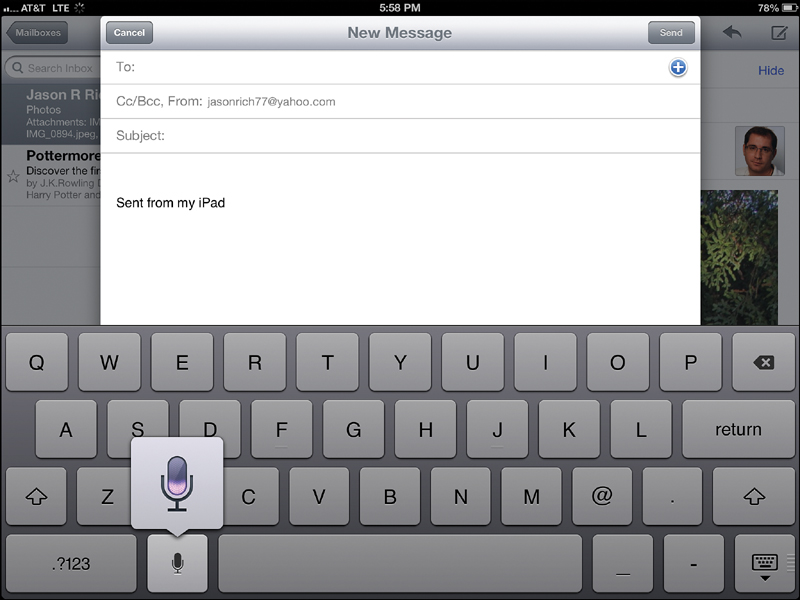
Figure 1.17. After tapping on the Dictation feature, a larger microphone-shaped icon displays, indicating that your iPad is recording what you’re saying, so start speaking.
In Dictation mode, anything you say is recorded by your tablet. Then, when you tap the Dictation key again on the virtual keyboard, your iPad translates whatever you said into text and inserts that text into the app you’re using.
This feature works with many different apps on your iPad and can be a huge time saver, as it is a viable alternative to touch-typing or manual data entry. As you’re speaking to your iPad when the Dictation mode is active, speak as clearly as possible using a normal volume and speed.
As you’re speaking, you can include punctuation in your text, by speaking that as well. For example, you can say, “comma,” “period,” “colon,” “open quotes,” “close quotes,” “exclamation point,” and so on.
For example, as you’re using the Pages or Notes app, you could say, “This is a test of the iPad’s dictation mode period I really love this feature exclamation point.” Your iPad translates this as, “This is a test of the iPad’s dictation mode. I really love this feature!” and enters the text into your Pages or Notes document.
Using the Dictation feature requires Internet access. If your tablet is connected to the Web using a 3G or 4G connection, using this feature utilizes some of your monthly wireless data allocation.
However, the Dictation feature translates speech to text faster using a Wi-Fi connection.
Use the Dictation mode to enter text into a text editor or word processor, compose tweets or Facebook page status updates, or insert text into virtually any compatible app without having to type. Keep in mind that the Dictation feature is different from Siri, which also uses your voice to interact with your iPad. You learn more about Siri in Chapter 2, “Interacting with Siri: Your Voice-Controlled Assistant.”
Now, Let’s Put Your iPad To Work
Now that you understand the basics of how to set up and interact with your iPad, let’s start putting it to work by focusing on the job-related tasks for which you can use many of the tablet’s preinstalled applications.