A. Set Up Your New iPhone or iPad
In This Appendix
![]() How to set up your iPhone or iPad
How to set up your iPhone or iPad
![]() Upgrade to the latest version of iOS 8
Upgrade to the latest version of iOS 8
If you purchased a brand-new iPhone or iPad (after September 19, 2014), iOS 8 came preinstalled; otherwise, you must upgrade your iOS mobile device from iOS 7 to iOS 8 to take full advantage of the latest features and functionality that your iPhone or iPad is capable of, and that you’ve been reading about in this book.
![]() Tip
Tip
To upgrade to iOS 8, make sure your iOS mobile device is connected to the Internet via a Wi-Fi connection. Also, confirm the battery is fully charged or that your iPhone or iPad is connected to an external power source. Next, use iCloud Backup or iTunes Sync to back up your device.
When you’re ready to upgrade the iOS, launch Settings, tap on the General option, and then tap on the Software Update option. Follow the onscreen prompts to download and install iOS 8. The process takes about 15 minutes.
To upgrade to iOS 8, your iPhone or iPad must have up to 6.9GB of available internal storage space (depending on the device). If not enough space is available, you’ll be instructed to access the device’s Usage settings to delete apps content, photos, and/or data (see Figure A.1).
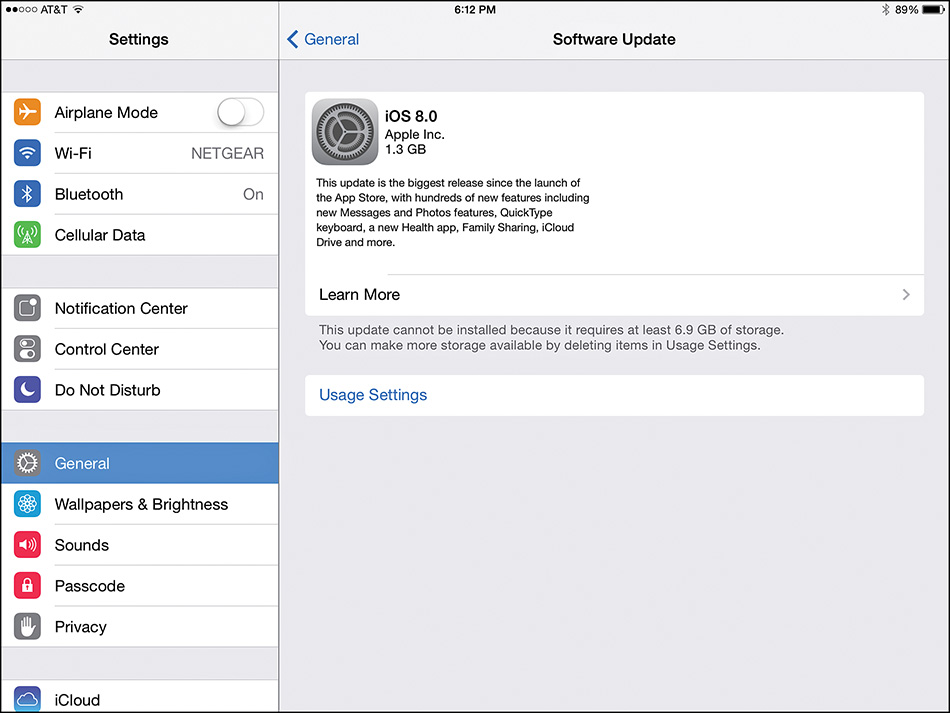
FIGURE A.1 When you attempt to upgrade to iOS 8, your iPhone or iPad must have at least 6.9GB of available storage; otherwise, you’ll be instructed to delete content to free up space.
Before deleting data, documents, or files, however, be sure this content is backed up. Any of your apps or purchased content can be reloaded after the iOS update is completed. However, if you have rented movies stored in your iOS mobile device (from the iTunes Store), these movies cannot be reloaded.
![]() What’s New
What’s New
Throughout the Setup and Activation process, depending on which device you’re using, several options are offered in addition to the ones outlined in the following section. For example, if you’re using an iOS mobile device with a TouchID sensor, during Setup you’re prompted to scan your fingerprint and activate this feature.
Likewise, if you’re setting up an iPhone 6 or iPhone 6 Plus, you’re asked to choose between the Standard and Zoomed Display mode. These and other device-specific options can be set up during the initial Setup and Activation process, or they can be adjusted at anytime from within Settings.
How to Activate Your New iPhone or iPad
To set up your brand-new iPhone or iPad that’s already running iOS 8, follow these steps:
1. Unpack the iPhone or iPad and charge its battery. (Right out of the box, the device should be partially charged.)
2. Turn on your iPhone or iPad by holding down the Power button until the Apple logo appears.
3. When the device is turned on, the Hello screen is displayed (shown in Figure A.2). Swipe your finger from left to right across the Slide To Set Up slider.
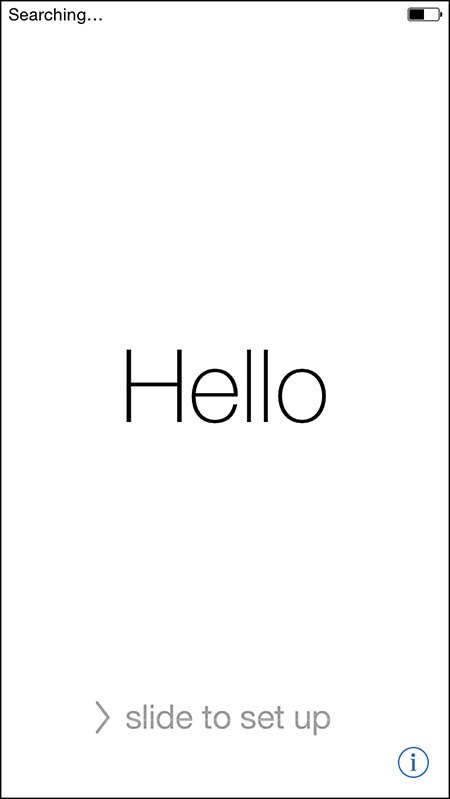
FIGURE A.2 From the Hello screen, slide your finger across the Slide To Set Up slider to get started using your iPhone or iPad.
If you’re activating a new iPhone and transferring service from your older iPhone, you’re prompted to confirm your iPhone’s phone number, billing address’s ZIP code, and the last four digitals of your Social Security number at the beginning of this process.
If you’re activating brand new service on a new iPhone, the Apple Store, cell-phone store, or consumer electronics store where you purchased the iPhone must activate it for you.
For iPad Cellular+Wi-Fi users, you’re promoted to either transfer your existing cellular data service plan from your old tablet or set up a new month-to-month plan using a credit or debit card.
4. Select your language by tapping on a menu option. English is listed first.
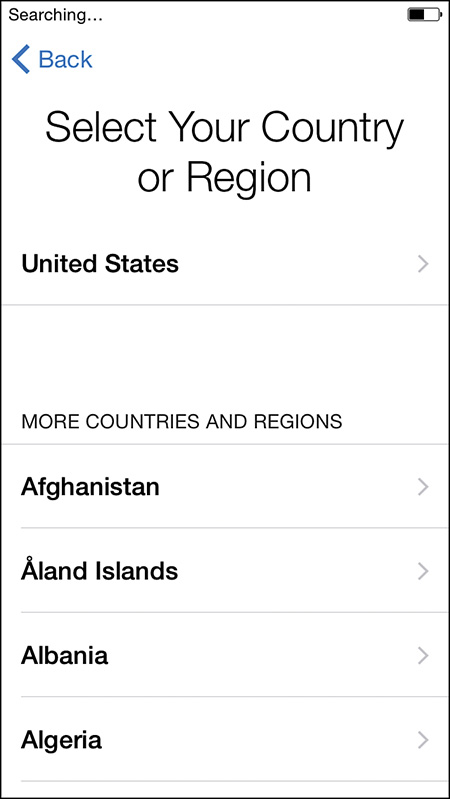
5. From the Select Your Country or Region screen, tap on the appropriate option (shown in Figure A.3).
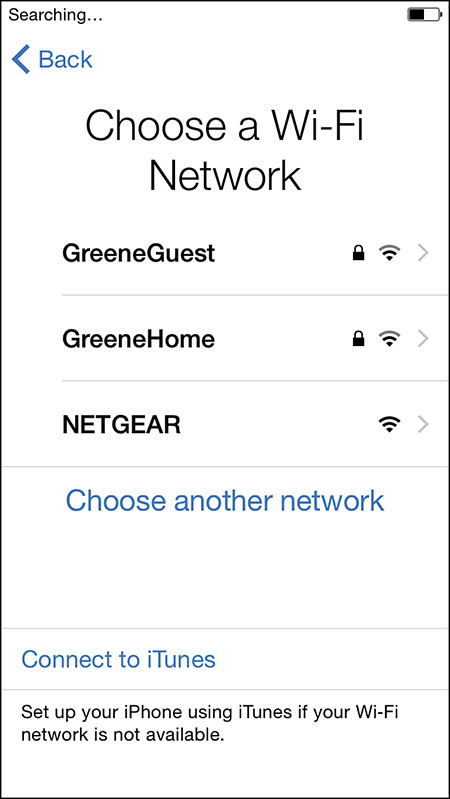
6. When the Choose a Wi-Fi Network screen appears (shown in Figure A.4), tap on an available Wi-Fi network (hotspot). If applicable, you can tap on the Use Cellular Connection option to enable your mobile device to access a 3G/4G LTE cellular data network and complete the setup process.
7. Your iOS mobile device will now be activated. When the Location Services screen appears, tap on Enable Location Services to turn on this feature and enable your iPhone or iPad to pinpoint your location.
8. From the Set Up iPhone (or iPad) screen (shown in Figure A.5), you’re given three options: Set Up as New iPhone (or iPad), Restore from iCloud Backup, or Restore from iTunes Backup.
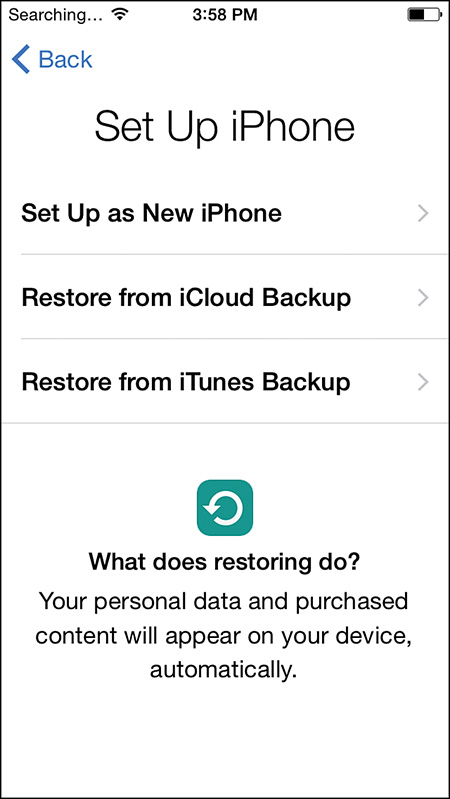
FIGURE A.5 If you are upgrading from an old iPhone to a new iPhone, or an older iPad to a new iPad, and want to restore your data from an existing iCloud backup or iTunes backup, select one of these options. Otherwise, choose the Set Up as New iPhone (or iPad) option.
![]() Note
Note
When you select the Restore from iCloud Backup or Restore from iTunes Backup option, the setup process automatically restores your personal settings, apps, files, photos, and documents to the new iPhone or iPad using content from your backup files. If you’re setting up a new iPhone or iPad and have no previously created backup files to restore, select the Set Up as New iPhone (or iPad) option.
9. From the Apple ID screen, you can either sign in with your Apple ID or create a free Apple ID. If you already have another Apple device (or you’re replacing an existing one), use the same Apple ID username and password, so that all of your Macs and iOS mobile devices can sync information via iCloud, as well as share iTunes Store, App Store, iBookstore, and Newsstand purchases. As soon as you enter your Apple ID information, any related content is transferred from iCloud to your new mobile device. See Chapter 4, “Sync, Share, and Print Files Using AirDrop, AirPlay, AirPrint, and Handoff,” for more information about iCloud’s features.
10. Accept the Terms and Conditions by tapping on the Agree option that’s displayed near the bottom-right corner of the screen. When the Terms and Conditions pop-up window appears, tap on the Agree button.
11. You now have the option of setting up and activating the Passcode option. To do this, create and enter a four-digit passcode, and then when prompted, enter the passcode again. To skip this step, tap on the Don’t Add Passcode option. If you skip this step now, you can activate this feature in the Settings app later.
12. To turn on and activate the Siri feature on your iOS mobile device, tap on the Use Siri option from the Siri screen. Then, from the Diagnostics screen, tap on either the Automatically Send or Don’t Send option, based on your personal preference.
13. The Welcome to iPhone (or iPad) screen appears when the setup process is just about completed (shown in Figure A.6). Tap on the Get Started option to begin using your iOS mobile device.
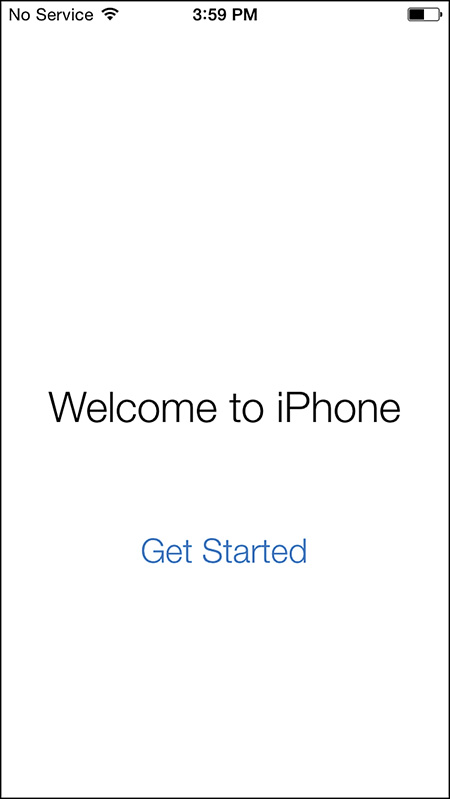
FIGURE A.6 The Welcome to iPhone (or iPad) screen is one of the last things you see before the setup process is fully completed.
14. The Home screen appears (shown in Figure A.7). You can now begin using your newly set up and activated iPhone or iPad. If your device needs to restore app-specific data, third-party apps, and photos, this continues in the background when the Home screen appears.
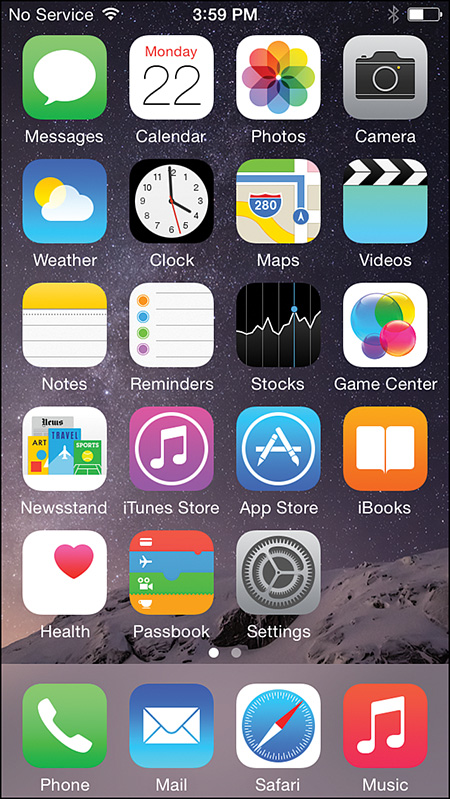
FIGURE A.7 When the Home screen is displayed, you now have full use of your iOS mobile device and all of the apps installed in it.
![]() Note
Note
If you’ve chosen to restore a backup file created from an older iPhone or iPad onto a new iPhone or iPad, some of your app-specific passwords do not transfer over. You might need to reenter your username and/or password the first time you relaunch the app on your new device.
It is also necessary to confirm your iCloud Keychain function on the new device before you’re permitted to access this information. This confirmation can be done from another Mac or iOS mobile device that’s linked to your iCloud account or by having Apple send your iPhone a text message with a confirmation code.
From the Home screen, you can launch any of the apps that come preinstalled with iOS 8 (as well as any third-party apps that have been installed from a previous backup). Swipe from right to left across the Home screen to access additional Home screens.
Displayed near the top-left corner of the screen is the cellular data network and/or Wi-Fi signal strength indicator. As long as one or both of these options are displayed, your iOS mobile device can freely access the Internet.
Using the App Store app, it’s now possible to find, purchase, download, and install new apps. Or using the iTunes Store app, you can acquire content, such as music, TV shows, movies, ringtones, music videos, or audiobooks, that you can enjoy using your iPhone or iPad.
![]() Tip
Tip
When your mobile device is set up and functional, be sure to use Settings to customize the functionality of your iPhone or iPad. This is covered in Chapter 1, “Tips and Tricks for Customizing Settings.”
![]() Note
Note
Apple periodically updates the iOS and the apps that come preinstalled on the device. For example, in Fall of 2014, when the Apple Pay feature launched, an update to iOS 8 was released.
To check for and install any new iOS updates (which are free), launch Settings, tap on the General option, and then tap on the Software Update option. If the message “iOS 8.0 Your Software Is Up To Date” is displayed, you already have the most current version of iOS 8 installed. However, if an update is available, a message appears on the Software Update screen, and you’re walked through the step-by-step update process when you tap on the Install Update option.
Now is the perfect time to turn on the Find My… feature from within Settings, so if your device gets lost or stolen, you’ll have tools available to help retrieve it or at least lock it down and erase its contents. To set up this feature, launch Settings, tap on the iCloud option, tap on the Find My option, and then turn on the virtual switch associated with the Find My iPhone (or iPad) option.
This must be done in advance, before your iPhone or iPad actually gets lost or stolen. Turning on the Find My iPhone (or iPad) feature needs to be only done once.
From the Find My… submenu screen in Settings, also turn on the Send Last Location option. This enables your mobile device to automatically send its location to you before its battery dies.
Also set up the iCloud Backup feature so that your iPhone or iPad automatically creates a backup of its contents via iCloud on a daily basis. To set up this feature, launch Settings, tap on the iCloud option, and then tap on the Backup option. From the Backup submenu screen, turn on the virtual switch associated with iCloud Backup. This needs to be done only once.
Finally, if you have not already done so, consider purchasing AppleCare+ for your device from Apple. In addition to providing you with two years of free technical support, AppleCare+ also covers repair and replacement costs when a wide range of otherwise costly problems arise. For more information about AppleCare+, visit www.apple.com/support/products/iphone.html.
AppleCare+ does not, however, cover the loss or theft of your device. For this type of coverage, you can purchase third-party insurance from a company like Worth Ave. Group (www.worthavegroup.com) or SquareTrade (www.squaretrade.com).