Chapter 7. Shop the iTunes Store
Music fans have been downloading songs from the Internet since the 1990s, from sites that were legal and others that were, well, not so much. People loved the convenience, but record companies saw potential profits slipping down millions of modem lines. They fought back by suing file-sharing services and other software companies for aiding and abetting copyright infringement.
The need for a legal music download site was obvious, but most early efforts resulted in skimpy song catalogs and confusing usage rights. Things changed dramatically in April 2003, when Apple opened its online iTunes Music Store, selling legal, iPod-ready digital versions of popular songs for 99 cents a pop. In January 2009, Apple announced it was even doing away with restrictive copy protections built into most Store songs. This liberating act gave consumers unfettered use of their songs and even the ability to play them on (gasp!) non-Apple players.
Now simply called the iTunes Store, the media emporium’s virtual shelves stock millions of songs, plus full-length movies, TV shows, iPod Touch applications, video games, audio books, podcasts, music videos, and more. It’s all custom-tailored for the iPod, and best of all, once you buy a title, it’s yours to keep (rentals, of course, come with a time limit). This chapter shows you how to find and use the media you’re looking for, and how to get the most out of the Store.
Get to the iTunes Store
Compared with buying gas, fighting traffic, and finding a parking spot at the mall, getting to the iTunes Store is easy. All you need is an Internet connection and a copy of iTunes running on your computer. Then you can either:
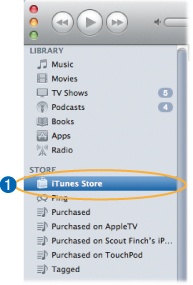
Click the iTunes Store icon in the Source list.
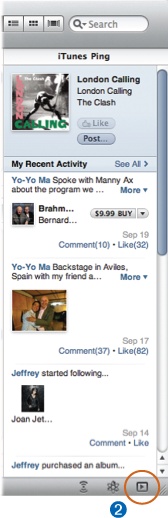
Click the icon in the lower-right corner of the iTunes window (circled) to slide open the Ping sidebar, where you can see all the albums and songs your friends like. Clicking any Buy button or music title here will sweep you into the Store. (And once you buy something, it shows up in your friends’ Ping sidebars, starting the cycle anew.)
The first method lands you squarely on the iTunes Store’s main page. You can start wandering around from there, clicking on what looks good.
You’ll only see the second option if you use Ping, Apple’s social networking service (see Ping Your Way to New Music), and have the Ping sidebar visible. If that’s the case, the sidebar can be a great way to learn about new music from your friends.
Once you land in the Store, you can preview suggested songs by clicking the musical-note icon in front of the track’s title. The Buy button is there waiting for your impulse purchase, making it extremely easy to run up your credit card tab.
If you have an iPod Touch and are in range of a wireless network, you can get to the Store a third way: over the airwaves, as explained on the next page.
Tip
Longtime iTunes Store customers—especially those still stuck on dial-up modems—may be deeply dismayed to see the loss of the Shopping Cart feature from earlier versions of iTunes. The Shopping Cart, which let you pile up songs and then download them all simultaneously at the end of your shopping session, has been loosely replaced with the Wish List feature, described on Plan Ahead: Wish Lists.
Shop the iTunes Store via WiFi
Owners of the iPod Touch don’t even need a computer to shop the iTunes Store—those lucky souls can tap their way right into the Store over a wireless Internet connection. Many WiFi-enabled Starbucks coffee shops also let you tap into the iTunes Store for free to browse and buy music, including whatever track is playing right there at Starbucks.
Now, to buy stuff when you’re out and about—and in the mood to shop:
Tap the purple iTunes icon on the iPod Touch’s Home screen. Make sure you have a WiFi connection; see Chapter 11 for guidance on making that happen.
The Store appears onscreen. Tap your way through categories like “New Releases” until you find an album or song that interests you. (Tap an album to see all its songs.)
Tap a title for a 30-second song preview.
Tap the Music, Videos, or Search buttons at the bottom of the window for targeted shopping. Type in search terms with the Touch keyboard.
To buy and download music or videos, tap the price onscreen, and then tap Buy Now.
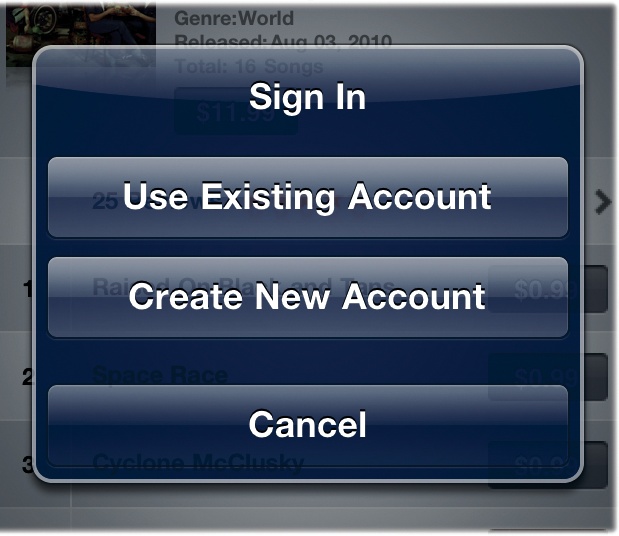
Type in your iTunes Store password and let the download begin. You can check the status of your purchase-in-progress by tapping the Downloads button, which also lets you pause your download if you need to. (If you don’t have an iTunes Store account, tap the Create New Account button on the Sign In screen and follow the steps. You can sign in and out of your account with a link at the bottom of the Store screen.)
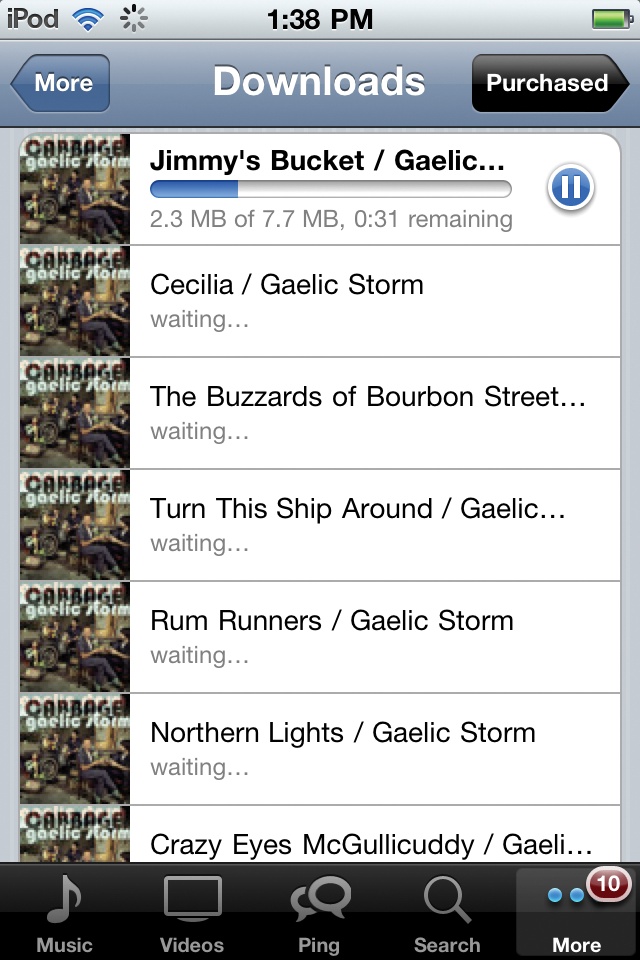
When the download is done, you have some brand-new media ready to play on your Touch—the new acquisitions land in your Purchased playlist.
To get those freshly harvested songs or videos back into the iTunes library on your computer, sync up the Touch when you get home. The tracks pop up in a new iTunes playlist called “Purchased on Touchy” (or whatever you named your wireless iPod this week).
The iTunes Store Layout
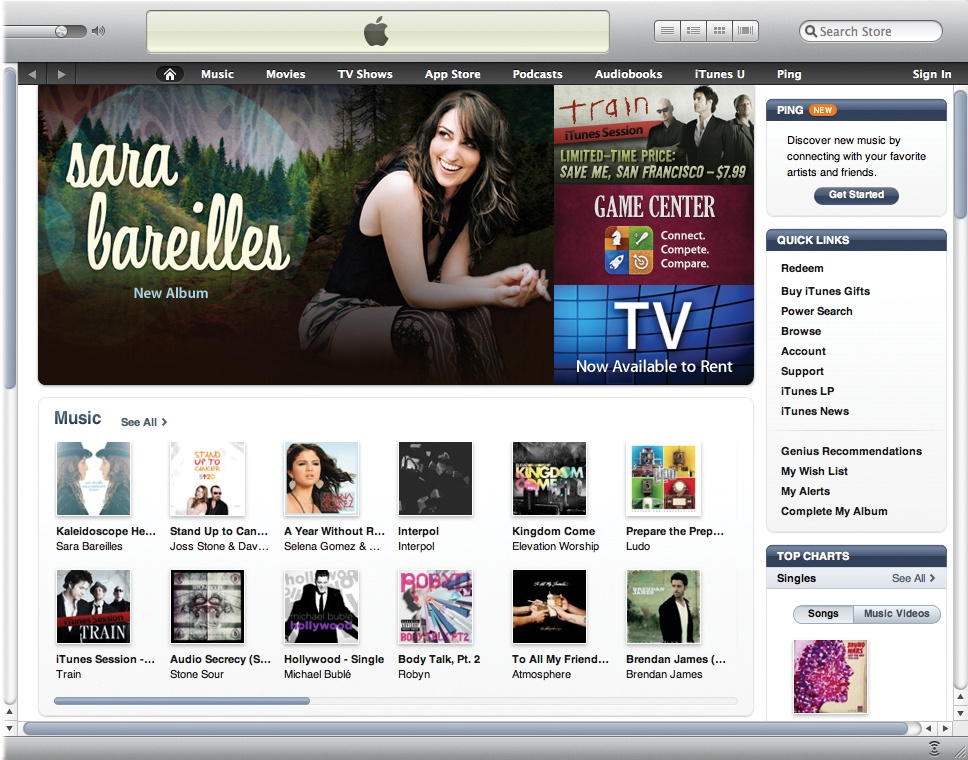
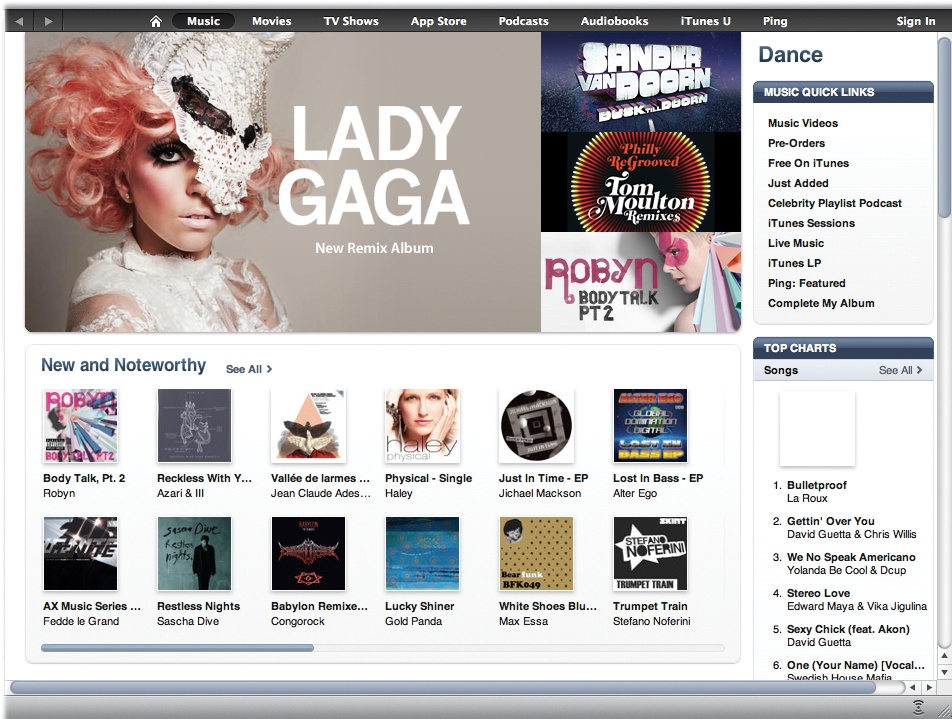
The iTunes Store is jam-packed with digital merchandise, all neatly filed by category across the top of the main window: Music, Movies, TV Shows, and so on. Click a tab to go to an “aisle” of the Store. You can also hover your mouse over a tab and click the triangle that appears; a pop-up menu lets you jump to a subcategory (Blues, Pop, and so on) within the selected section.
The main part of the iTunes Store window—that big piece of real estate smack in the center of your browser—highlights iTunes’ latest audio and video releases and specials. It’s usually stuffed full of digital goodies, so scroll down the page to see featured movies, TV shows, and apps. Free song downloads and other offers appear down below, too.
If you’re looking for a specific item, use the Search box in the upper-right corner to hunt your quarry; enter titles, artist names, and other searchable info.
The Quick Links box on the right side of the window has shortcuts to buying and redeeming iTunes gift certificates (see Give the Gift of iTunes), Genius suggestions, an advanced search feature, your account settings, tech support, and more.
As you scroll, you also see Top Ten lists along the right side of the screen, showing you the hottest-selling items in the Store at that very moment.
Navigate the Aisles of the iTunes Store
You navigate the iTunes Store aisles just as you’d navigate a website—by using links on the Store’s page. Most artist and album names have links—click on a performer’s name or an album cover to see a list of associated tracks.
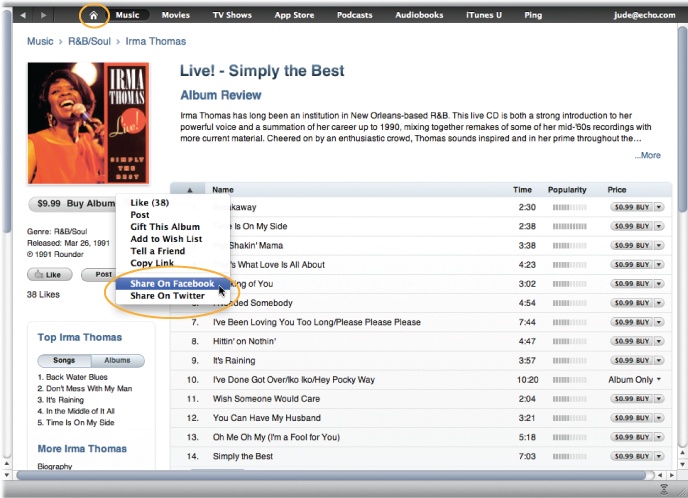
Click the button with the small house on it (circled below) to jump to the Store’s home page, or click iTunes’ Back button in the upper-left corner (to the left of the house) to return to a previous page.
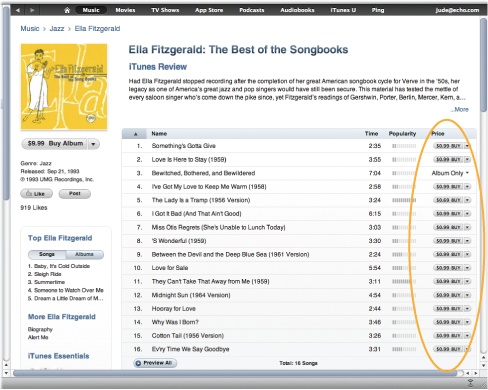
When you find a performer or album you’re interested in, click the name to jump to a page with more information. Not only do you see a list of all the tracks on the album, but you also find a list of other albums by the same artist, reviews from other iTunes users, and similar albums to buy. Double-click a track title to hear a 30-second snippet. Previews of audio books and videos are available, too.
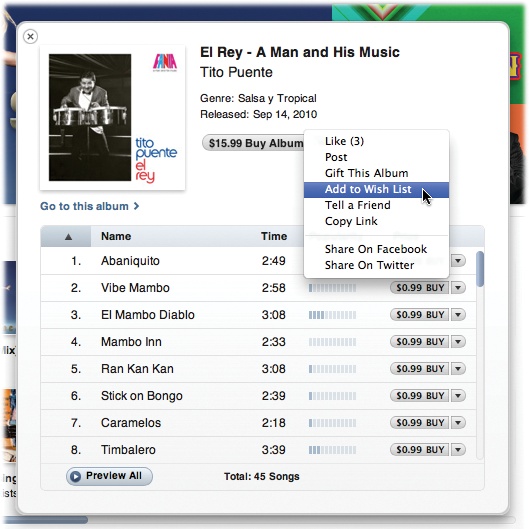
As you click around, the name of the artist, show, album, or whatever you’re looking at appears in the top-left corner of the screen. If you get excited by something you’ve found and want to share it with friends—or want to drop a not-so-subtle hint for your birthday— click the black triangle next to any Buy button to get a pop-up menu that lets you post a link to your discovery on your Facebook or Twitter page.
Set Up an iTunes Store Account
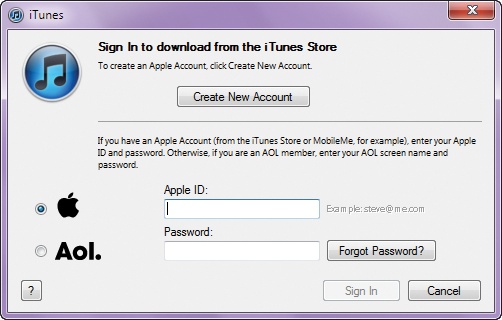
Before you can buy any of the cool stuff in the iTunes Store, you need to set up an account with Apple. To do so, click the “Sign In” button on the upper-right corner of the iTunes window.
Tip
America Online members with iTunes accounts can use their AOL email addresses to log into the Store. If you’re creating a new account, however, iTunes walks you through setting up an Apple Account that you can link to your AOL address.
If you’ve ever bought or registered an Apple product on the company’s website, signed up for an AppleCare tech-support plan (AppleCare—What It Is and Whether You Need It), have a MobileMe membership (Use MobileMe to Keep Data in Sync), or used another Apple service, you probably already have the requisite Apple login info. All you have to do is remember the ID (usually your email address) and password.
If you’ve never had an Apple ID, click Create New Account. The iTunes Store Welcome screen presents you with three steps you need to follow:
Agree to the terms for using the Store and buying music.
Create an Apple Account.
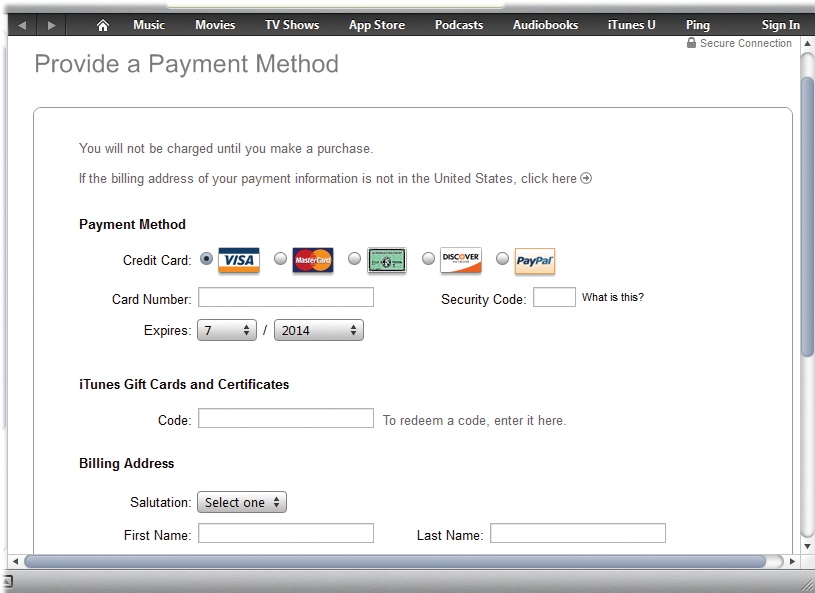
Supply a credit card or PayPal account number and billing address.
As your first step in creating an Apple Account, you must read and agree to the long scrolling legal agreement on the first screen. The 26-page statement informs you of your rights and responsibilities as an iTunes Store and App Store customer. It boils down to this: Thou shalt not download an album, burn it to CD, and then sell bootleg copies of it at your local convenience store and Third-party crashware apps are not our fault.
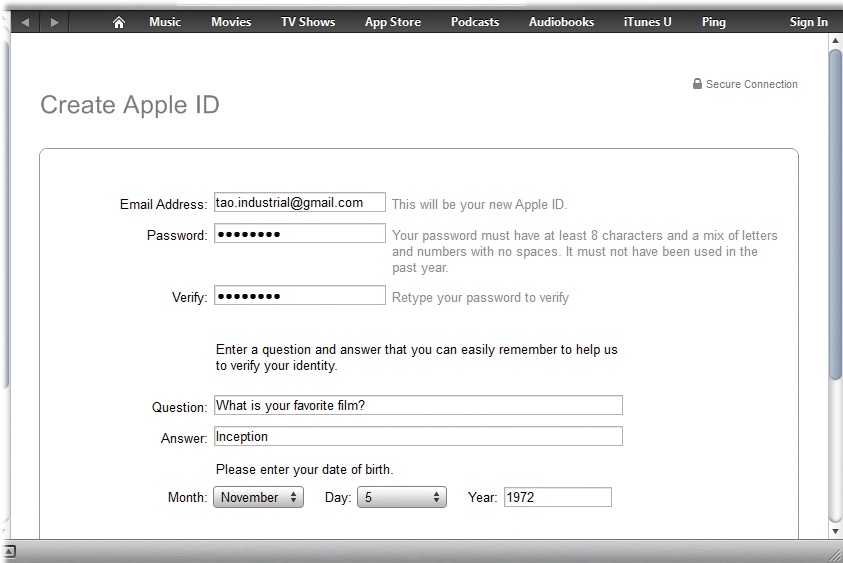
Click the Agree button to move on to step 2. Here you create an Apple ID, password, and secret question and answer. If you later have to click the “Forgot Password?” button in the Store sign-in box, this is the question you’ll have to answer to prove that you’re you. Apple also requests that you type in your birthday to help verify your identity—and to make sure you’re old enough to use the service (iTunes account holders have to be 13 or older).
On the third and final screen, you provide a valid credit card number and a billing address. You can pay for iTunes purchases with a PayPal account, too.
Click Done. You’ve got yourself an Apple Account. From now on, you can log into the iTunes Store by clicking the “Sign In” button in the upper-right corner of the iTunes window.
Change the Information in Your Apple Account
You can change your billing address, switch the credit card you have on file for iTunes Store purchases, and edit other information in your Apple Account without calling Apple. Just launch iTunes, click the Store icon in the Source list, and then sign into your account by clicking the Sign In button in the upper-right corner of the screen.
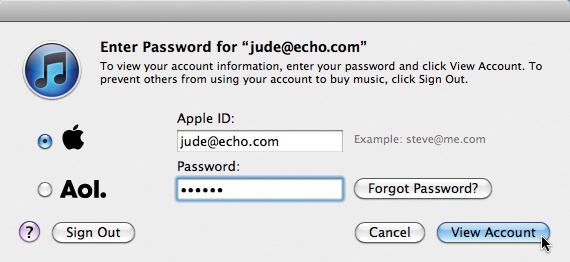
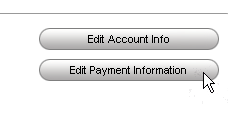
Once you do, you’ll see your account name (email address) in the main Store window. Click it. In the box that pops up, re-enter your password and click View Account. If you want to change your password or secret identity-proving question, click the Edit Account Info button. To change your billing address or credit card information, click the Edit Payment Information button. You can also deauthorize all the computers that can play songs purchased with this account (more on when and why you’d want to do that later).
And there are other account settings you can change here, too, like the nickname that appears when you post a customer review in the Store, or information in your Ping profile (Ping Your Way to New Music). You can also turn on the My iTunes feature, which lets you put widgets and news feeds on your blog or Facebook profile showing all the things you’ve snapped up in the Store lately.
Find Music by Genre
The main page of the iTunes Store can be a bit overwhelming, especially if you just want to slip in and buy a few Gregorian chant music tracks or browse the latest additions to the Classical section. To quickly find music by genre, hover your cursor over the Music tab at the top of the Store window until a down arrow appears. Click it to reveal a detailed drop-down menu.
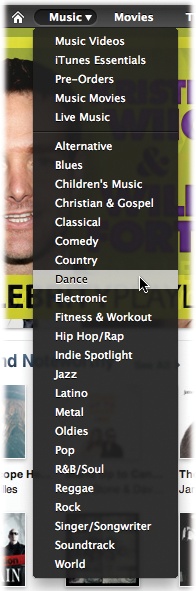
More than 20 tune genres await you, from Alternative to World, with Hip-Hop/Rap, Latino, Jazz, Reggae, and Rock in between. You’ll also find sections for Music Videos and Children’s Music.
Select one of the genres, and the middle section of the Store window displays the latest additions in that category, including the newest records and videos and other content recently added to iTunes’ ever-growing catalog. At the same time, the Top Sellers list in the right-hand column changes to reflect the most popular downloads for that genre.
Buy a Song or Album
Click any album name to see a list of its songs. To purchase any of the tunes, click the Buy Song button in the Price column. As of 2010, tracks cost 69 cents, 99 cents, or $1.29, depending on the age and popularity of the song. In most cases, you also have the option to buy the whole album (use the Buy Album button). Album prices vary as well, but tend to range from $8 to $12.
When you download an album, or even a song, you get a color picture of the album cover, which appears in iTunes when you play the song, or on the color screen of your iPod. Albums designated as “iTunes LPs” have even more multimedia extras, like videos and liner notes.
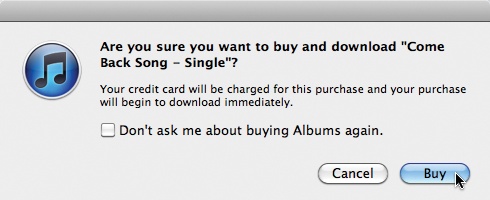
Once you click that Buy Song button, an alert box appears asking if you really want to buy the item you just clicked. Click the glowing Buy button to confirm your purchase, or click Cancel if you suddenly remember that your credit card is close to its limit this month. Once you click Buy the download begins, and you soon have a new bit of music in your iTunes library.
Tip
Buy three songs off an album and wish later you’d just bought the whole thing? If it’s within six months of your original purchase, click the Complete My Album link on the main Store page. You get whisked into a screen that lets you download the rest of the tracks—all for a price that’s less than paying for each remaining song.
Buy or Rent Movies and TV Shows
To buy video, just click the link on the Store’s main page for the type of video you want—a movie or a TV show. Apple’s full-length movie library is small but growing. You’ll see titles like Twilight, Iron Man, and a handful of Pixar classics like WALL-E and Monsters, Inc. Compared to little ol’ song files, movies take up a ton of hard drive space—up to a full gigabyte or more—so be prepared for a download time of 30 minutes or so, depending on your Internet connection.
If you want to watch a movie but not own it, check the flick’s Store page to see if it’s available as a rental. Rentals cost less than $5, download just like regular Store-purchased movies, and you can play them on your iPod or computer. You have 30 days to start watching the rental and 24 hours to finish it.
Dozens of old and new TV shows, like Mad Men, The Daily Show, and The Office, are also available by episode or for an entire season. If you sign up for a Season Pass, iTunes automatically downloads each new show as it’s released. But even half-hour TV shows are big files: One 30-minute episode of 30 Rock in standard definition, for instance, runs close to 300 megabytes.
Want to catch that Family Guy episode you missed, but don’t want to shell out the simoleons to own it? With iTunes 10, you can rent episodes of certain TV shows for 99 cents each. You have 30 days to start watching them and 48 hours to finish them up on your iPod, your computer, or your second-generation Apple TV. But whether you rent a movie or a TV show, when the rental period expires, the file deletes itself.
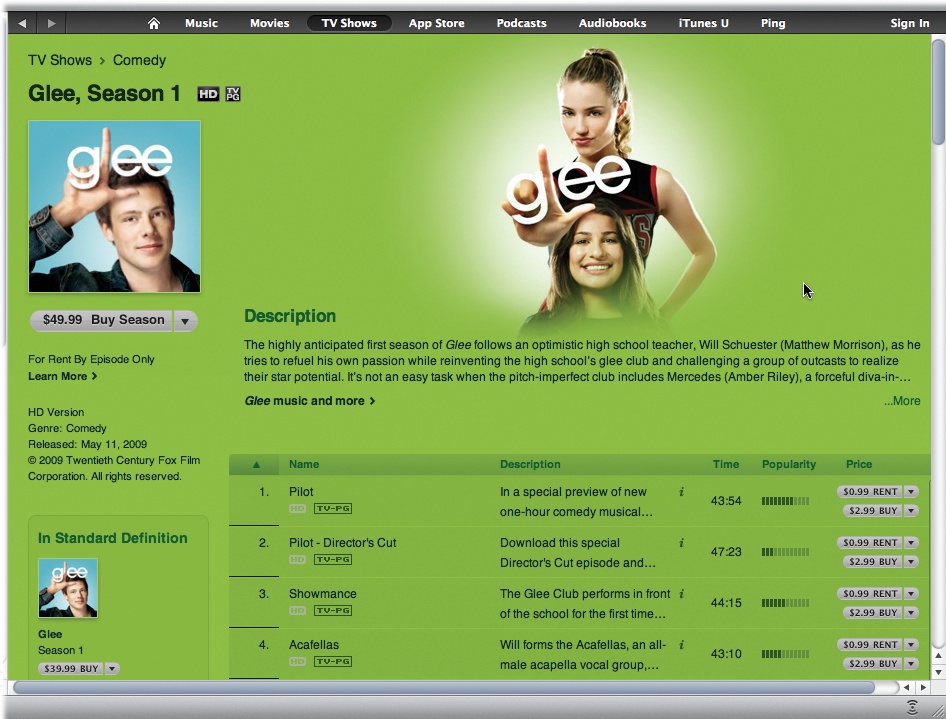
To get a movie or TV show, just click the Buy or Rent button next to the title you want. Once you pay and download movies or TV shows from the iTunes Store, they land in your iTunes library.
Many videos in the iTunes Store come in high definition as well as standard definition. The HD versions look great on a computer or an Apple TV. When you download a high-def show, you also get a standard-definition version of it to play on the iPod. (See Chapter 8 if you want to ‘Pod-view video.)
Buy iPod Touch Apps
The App Store hosts more than 250,000 little programs you can add to your iPod Touch to make it a tiny pocket computer as well as a stylish media machine. Currency converters, 3-D video games, newsreaders, eBooks, blogging tools, guitar-chord programs, and mobile versions of popular sites like Facebook and eBay are among the many offerings.
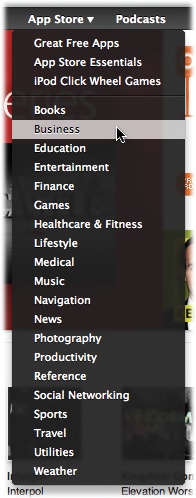
Click the App Store menu in the main Store window to see the program categories, like Sports and Finance. Many apps are free (each category’s page has a list of freebies), and most for-pay programs cost less than $10.
You purchase apps just as you do music and movies: see, click, buy. Your libraries sync up when you connect the Touch with iTunes. (You can also buy apps right on the Touch, as Chapter 3 explains.) Note that some apps are intended for the iPhone and its hardware, so, as with any software, check the system requirements before you buy.

Buy iPod Games
The iTunes Store first started selling games when the original video iPods—the ones with the click wheel—appeared on the scene. While the Store has thousands of games for the iPod Touch, it also offers dozens of titles for older video-capable iPods, like the iPod Classic and pre-2010 Nanos. To find these elusive treasures, visit the App Store menu at the top of the Store window and choose iPod Click Wheel Games.
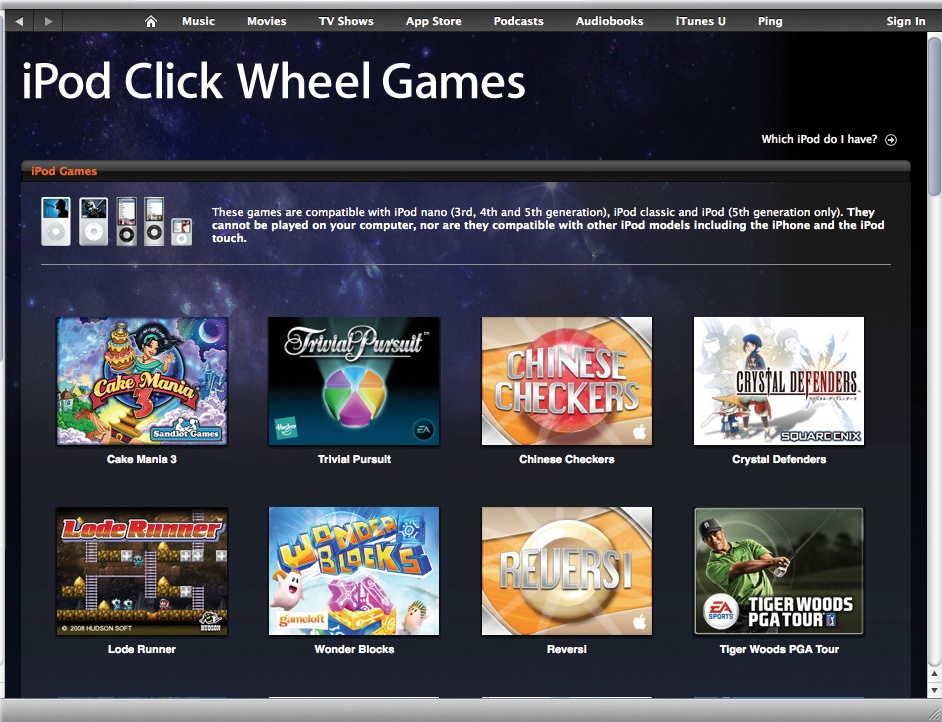
Game classics like Ms. Pac-Man, Tetris, and Sonic the Hedgehog are among the offerings. Newer titles like Spore Origins, Sudoku, Bejeweled, Peggle, and several Sims games are also in stock. And there are video versions of old kitchen-table favorites, like Monopoly, Uno, Scrabble, and Mahjong.
You buy and download games just as you do anything else in the Store. Once you purchase a game, it shows up in the Apps library in the Source list (click a purchased title to see accompanying directions). After you sync the game to your iPod, you can find it in iPod→Extras→Games. When you start the game, it transforms your iPod’s scroll wheel and center button into game controls.
Unlike music or video files, however, you can play iPod games only on the iPod. They don’t, alas, work in iTunes.
Buy Audio books
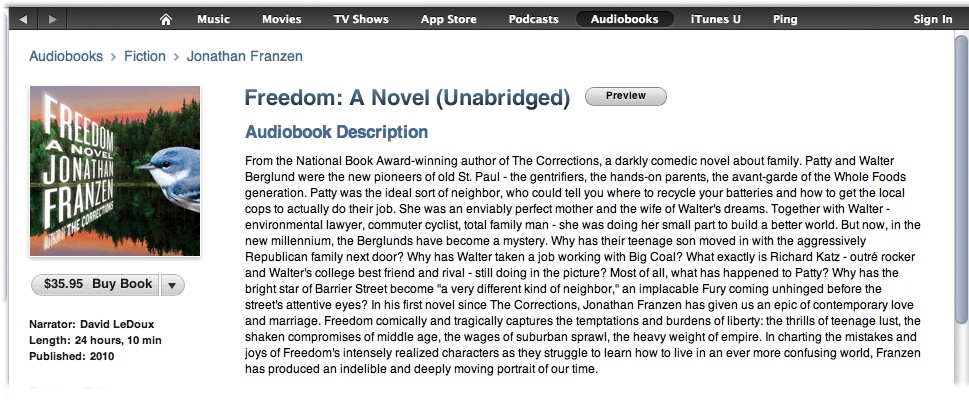
If you have an iPod Touch, you can both read and hear commercial eBooks, from best-sellers to a raft of other tomes. The other iPods don’t display book pages, but any iPod can play an audiobook, even the tiny Shuffle.
Some people just like the sound of a good book, and iTunes has plenty to offer in its Audiobooks area, including verbal versions of the latest best-sellers. Prices depend on the title, but they’re usually cheaper than buying a hardback copy—which would be four times the size of your iPod, anyway. Click any title’s name and then the Buy Book button; the rest of the process works just like buying music.
If audio books are your thing, you can find even more iTunes- and iPod-friendly books—along with radio shows and recorded periodicals like The New York Times—at Audible.com (www.audible.com). To purchase Audible’s wares, though, you need to go to the site and create an Audible account. The Audible site has all the details, plus a selection of subscription plans to choose from.
If you use Windows, you’ll need to download a small piece of software from Audible called Audible Download Manager; details and instructions for the past several versions of Windows are at http://tinyurl.com/lm2963. Mac fans don’t need to worry about that, as the Audible files land directly in iTunes when you buy them.
Note
“Where are the Stephen King eBooks for sale in the iTunes Store?” you ask. The App Store does have a Books category, but many of these are stand-alone apps devoted to just one title. If you’re looking for a way to read eBooks as you would on an Amazon Kindle or other dedicated eReader, well, you need an app on your iPod for that. Download Apple’s iBooks app, Amazon’s Kindle app, or Barnes & Noble’s Nook app (all free) from the Books area of the App Store, and use your app to buy eBook versions of current best-sellers from the app’s dedicated online bookstores. See The iPod as eBook and Text Reader for more on using electronics books and other text on your iPod.
Download and Subscribe to Podcasts
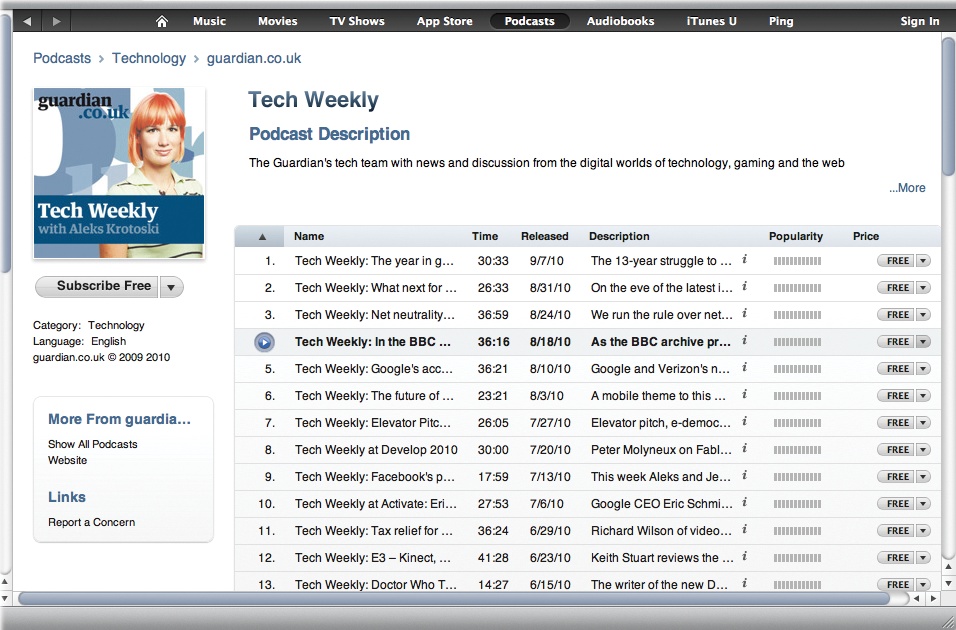
The iTunes Store hosts thousands upon thousands of podcasts, those free audio (and video!) programs put out by everyone from big television networks to a guy in his basement with a microphone.
To see what podcasts are available, click the Podcasts link at the top of the Store’s main page. If you click the menu under the Podcasts list, you can jump to just audio or video podcasts, or to podcasts on a specific topic. On the main Podcasts page, you can browse shows by category, search for podcast names by keyword (use the iTunes Store’s Search box), or click around until you find something that sounds good.
Many podcasters produce regular installments of their shows, releasing new episodes as they’re ready. You can have iTunes keep a lookout for fresh editions of your favorite podcasts and automatically download them. All you have to do is subscribe to the podcast: Click the podcast you want, and then click the Subscribe Now button underneath the artwork. If you want to try out a single podcast, click the Free link near its title to download just that one show.
Tired of a podcast and want to stop the automatic downloads? In the Source list, click Podcasts and, in the middle of the window, click the unwanted show. Then click the Unsubscribe button at the bottom of the window.
What to Do if Your Download Gets Interrupted
It’s bound to happen sometime: You’re breathlessly downloading a hot new album or movie from iTunes and your computer freezes, or your Internet connection goes on the fritz. Or you and your iPod Touch were in the middle of snagging an album when the rest of the gang decided it was time to leave the coffee shop.
If this happens, don’t worry. Even if your computer crashes or you get knocked offline while you’re downloading your purchases, iTunes is designed to pick up where it left off. Just restart the program and reconnect to the Internet.
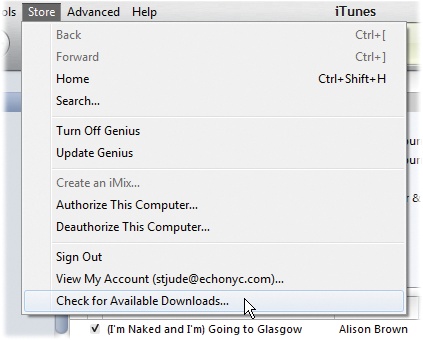
If, for some reason, iTunes doesn’t go back to whatever it was downloading, choose Store→Check for Available Downloads to resume your downloading business.
You can use this same command to check for available purchases anytime you think you might have something waiting, like a new episode from a TV Show Season Pass. You’ll also find digital booklets included with albums here—those don’t download to your Touch from the WiFi Store because they’re PDF files meant to be viewed on your computer.
Tip
If you need help from a human at Apple, you can either call them at (800) 275-2273 or drop them an email. To email them, click the Support link on the iTunes Store’s main page. You’ll see the main iTunes service and support page; click any link in the Customer Service area and then, at the bottom of the page that appears, fill out the Email Support form. Live online chat is also available for some issues.
Other Cool iTunes Store Features
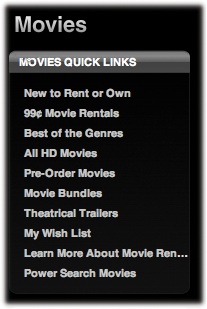
Apple has loaded the iTunes Store with plenty of unique, ear-inspiring special collections—all designed to separate you from your money. Just check the Quick Links box on the main page of each Store section. The Movies page, for example, has links to current theatrical trailers that you can watch in peace, without people yapping through them. Take some time and check out:
iTunes Extras. Miss those bonus treats, like cast interviews and deleted scenes, that you get with movies on DVD? The iTunes Extras area of the Movies section lists all the films with additional material—they’re sort of like iTunes LPs, except for movies. Happily, Extras don’t cost extra.
iTunes Essentials. Looking for a quick course in, say, the works of Johnny Cash or Jock Rock? Click the Store’s Music tab and then click the link labeled iTunes Essentials to see the vast collection of specialized collections you can buy with a click and a credit card.
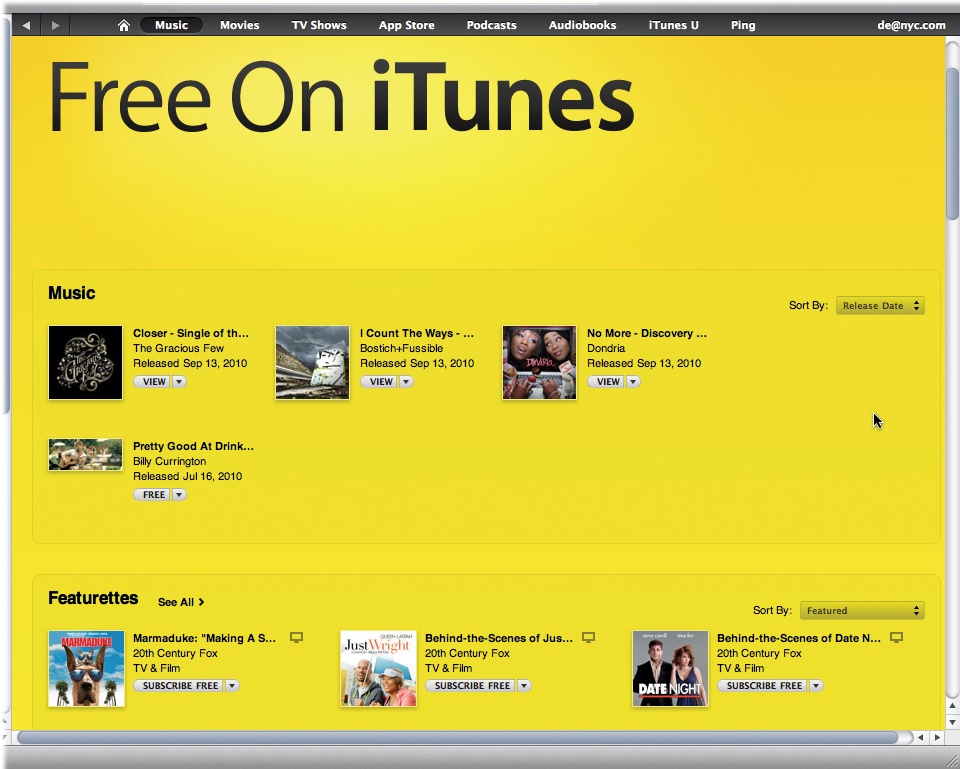
Free on iTunes. While most of the content in the iTunes Store costs money, plenty of things are available for free. To see what won’t cost you a buck, click the tab for the Music section of the Store. In the Quick Links box on the right side of the page, click the Free on iTunes link. Here, you can find everything from free songs by up-and-coming indie bands to video podcasts from Hollywood directors, all there for your cost-conscious downloading pleasure.
Ping Your Way to New Music
Facebook, MySpace, Twitter, Tumblr, Flickr—if there’s anything the top social-networking sites have proved, it’s that people like to share stuff with their friends. And now there’s Ping, Apple’s very own social network designed to connect people who have a mutual love of music.
In case you had any doubt what Ping was supposed to be, Steve Jobs himself described it as “Facebook and Twitter meet iTunes” when he introduced the service in September 2010. (While Ping was originally supposed to link with Facebook through the Facebook Connect service so you could easily update your profile with your Ping activities, a case of “unfriending” between Apple and Facebook prevented the partnership. So far, anyway.)
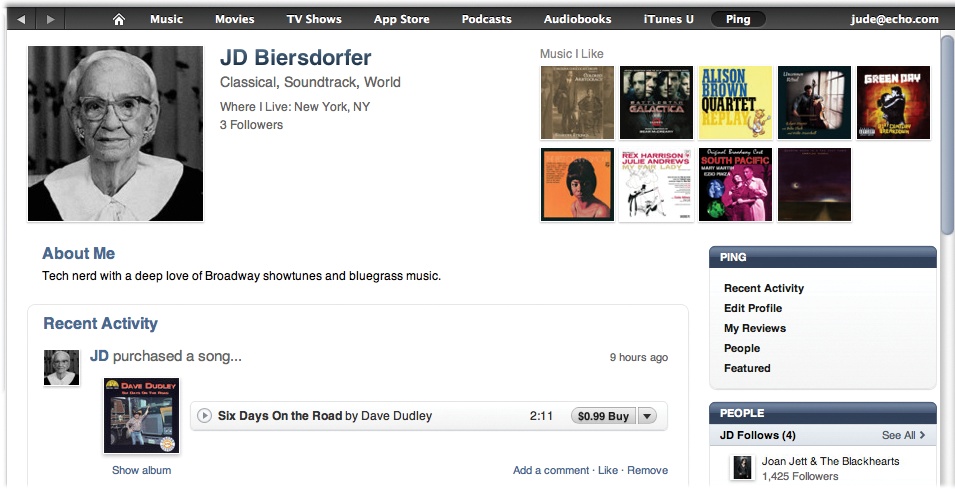
As with any social network, the first thing you have to do is set up your profile page, your own little part of Ping where you can list your favorite bands and artists, keep track of upcoming events, exchange notes with other music-minded pals, and listen to samples of what your friends are listening to on iTunes.
To set up your Ping profile:
Click the Ping link in the Source list. Apple doesn’t force all iTunes users to join, so you have to click a button that says Turn On Ping and agree to the legal disclaimer about using the service and privacy.
Fill in your personal details. Like most social-networking sites, you fill in your name, the city where you live, and other information. You can also add a photo to your profile page. Since this is a music-themed service, you can announce your three favorite genres of music on your page, too. You can tell as much or as little about yourself as you want, and even select up to eight iTunes tracks (complete with audio samples) to display on your page. People who follow you see your info (they see your Ping status updates and iTunes purchases as you make them), and, in return, you can see theirs if you follow them.
Adjust privacy settings. As part of the Ping profile setup, you’re asked how public you want to be so other members can find you. You have three choices. You can let everyone else on the service look at and “follow” your profile page—whether you know them or not, which is a good way to find new friends (and sometimes stalkers). You can also make your basic profile visible to others only after you give them permission to see it. And lastly, you can hide your page from everyone and just use it as a personal place to track concert listings.
Find friends. Once you set up your profile page and privacy settings, Ping encourages you to find other media lovers on the service. You can search for the email addresses of people you know and invite them to be your Ping friends. At the same time, your friends—and links to their Ping pages—appear on your own patch of Ping real estate.
Once you get Ping set up, it works just like any other social network. You can post your thoughts on the current state of music—and read those of your Ping friends. You can sign up to follow bands and musicians who use Ping—to see what Lady Gaga, Yo-Yo Ma, and others are up to, for example. You can write your own album reviews, comment on friends’ pages, browse music news, and check concert listings for your favorite groups. You can click the Like button next to albums or tracks to publicly post your approval.
Items you buy in the iTunes Store get listed on your Ping page, so everyone knows what you’re into these days. If you’d rather keep your ‘80s synth-pop addiction a secret, hide your purchases by clicking the Remove button next to the item on your Recent Activity feed.
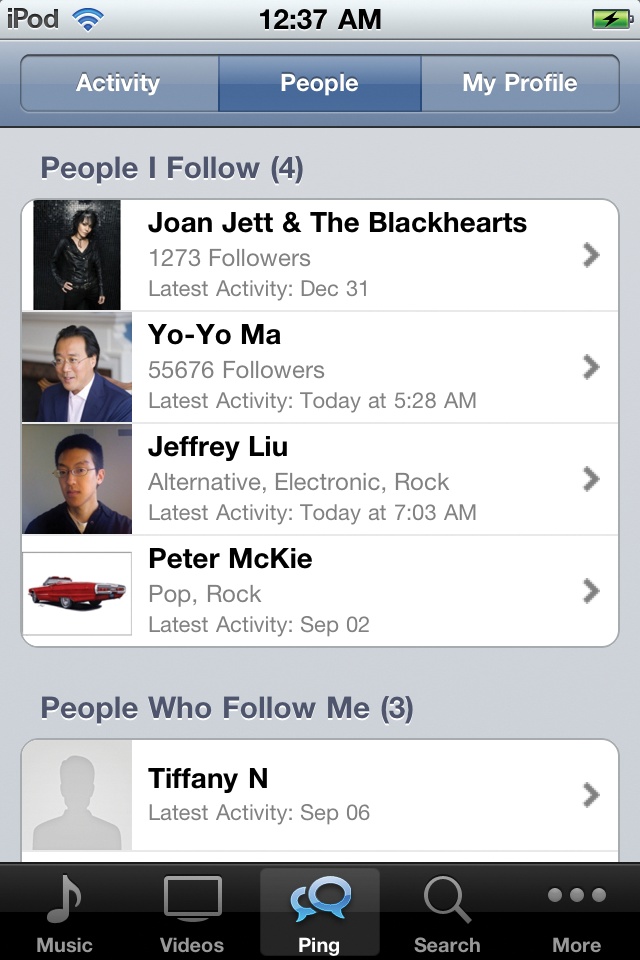
If you use the handy Ping sidebar to see what your pals are listening to, you’re not chained to the desktop for updates. On the iPod Touch, tap Home→iTunes→Ping to call up a mini version (right) and keep up with Ping things while you’re out.
lf you decide that Ping isn’t for you and you want to turn it off, click the Account link on the main Store page and log into your iTunes account. On the Account Settings page, click the buttons to either edit your profile (which you can also do from a link on your Ping page itself) or turn off Ping for good.
Give the Gift of iTunes
If you’re stumped trying to find something for The Person Who Has Everything, consider a gift of iTunes purchase credit or music. Apple conveniently gives you several ways to send the gift that keeps on giving—or at least the gift that keeps on rocking out.
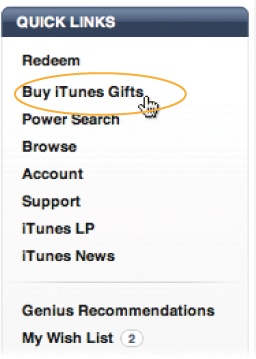
Gift certificates. To buy one, click Buy iTunes Gifts in the Quick Links box on the Store’s main page, and then select a gift denomination ($10 to $50). You can have the certificate emailed to the recipient, or you can print it out so you can deliver it yourself. The rest of the process is like buying anything else on the Web: fill in your address, add a message, and so on. You need an Apple ID to send and use gift certificates.
To redeem an electronic gift certificate, go to the iTunes Store and click the Redeem link in the main window. Copy the Redeem Code from your email and paste it into the box provided. (If you got a printed certificate, then type in the gift code on the form.) Click Redeem. Then start shopping.
Gift cards. The brightly colored prepaid iTunes Music Card is a fun spin on the gift certificate concept. Available in dollar amounts ranging from $15 to $100, givers can find cards at places like Amazon.com, Target, and Apple’s own stores. You can also buy them in the iTunes Store (and have them mailed out by the Postal Service) by clicking the Buy iTunes Gifts link. Recipients can spend it all in one place—the iTunes Store—by clicking the Redeem link on the Store’s main page.
Gift content. In a daring feat of bending a noun into a verb, the iTunes Store also lets you “gift” selections of music, videos, or apps. Your recipient can download your thoughtful picks right from the Store onto their own computers. You can send iTunes goodies to any pal with an email address. Click the triangle next to an item’s Buy button and choose “Gift This…” from the menu.
Gift playlists. If you’re proud of a certain iTunes playlist you made yourself, you can send all the songs on it—if they’re available in the iTunes Store—to a friend with a couple of clicks. Just select the playlist in the iTunes Source list and click the arrow that appears next to its name. A box pops up asking of you’d like to send the list as a gift or publish it as an iMix. Click the Give Playlist button, which takes you back to the iTunes Store to make it all happen over the Internet.
Plan Ahead: Wish Lists
With no paper money flying about to remind you of reality, it’s easy to rack up hefty credit card charges at the iTunes Store. Consider, then, making an iTunes Wish List to keep track of songs you want to buy…when your budget allows.
For iTunes customers still using dial-up Internet connections, the Wish List replaces the old Shopping Cart feature as a place to park your stuff before you’re ready to download all your purchases at the end of your shopping session. (The 1-Click instant download of iTunes purchases can overwhelm a poor dial-up modem if you aren’t done shopping.)
Adding items to your Wish List is easy: When you see something you want, click the triangle next to the Buy button and choose Add to Wish List from the pop-up menu.
To see all the items that have piled up in your list, visit the Quick Links box on the Store’s home page and click the My Wish List link. If your wishes have changed since you added an item to the list, select the item and click the X that appears next to it to remove it. When you’re ready to buy something from the Wish List, click the Buy button next to the item. The file begins downloading to your computer.
If you’ve been using the Wish List as a substitute Shopping Cart to hold your songs until you’re ready to download them all, there’s a special button just for you. It’s the Buy All button up in the top-right corner of the Wish List screen. Click it and let your dial-up modem have a few hours to itself to download your purchases.
iTunes Allowance Accounts
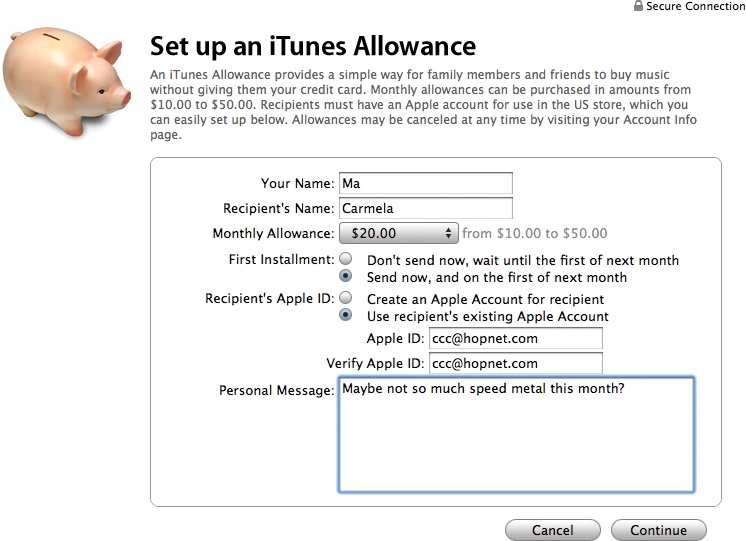
Allowance accounts are a lot like iTunes gift certificates. You, the parent (or other financial authority), decide how many dollars’ worth of Store goods you want to give a family member or friend (from $10 to $50). Unlike gift certificates, however, allowance accounts automatically replenish themselves on the first day of each month—an excellent way to keep music-loving kids out of your wallet while teaching them to budget their money.
Both you and the recipient need to have Apple IDs, but you can create one for the recipient during the set-up process. To set up an allowance, from the iTunes Store’s main page, click the Buy iTunes Gifts link, scroll down to the Allowances section and click “Set up an allowance now”. Fill out the form. After you select the amount you want to deposit each month, fill in your recipient’s Apple ID and password.
Once the giftee logs into the designated Apple Account, she can begin spending—no credit card required. When she exhausts the allowance amount, she can’t buy anything else until the following month. (Of course, if the recipient has a credit card on file, she can always put the difference on the card.) If you need to cancel an allowance account, click the Account link on the Store’s main page to take care of the matter.
Set Up Parental Controls for the Store
If you have children with their own allowance accounts, you may not want them wandering around the iTunes Store buying just anything. With the Parental Controls feature, you can give your children the freedom to spend and discover, but restrict the types of things they can buy—without having to helicopter over them every time they click a Store link.
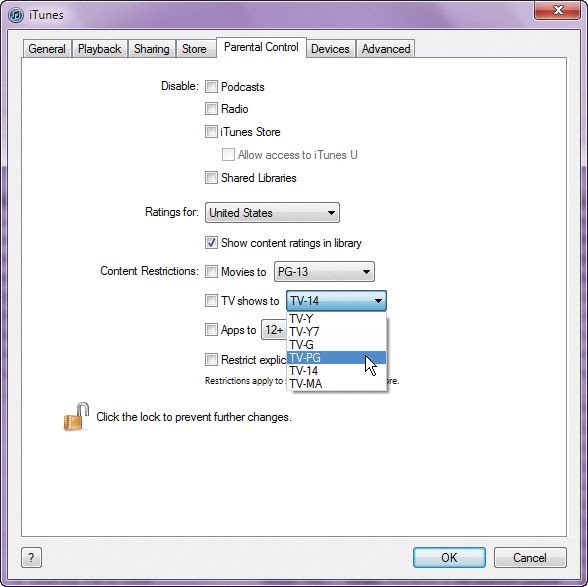
In the iTunes Preferences box (Ctrl+comma [⌘comma]), click the Parental Control tab.
A box unfurls with all the media you can limit. For Store material, you can block songs and other items tagged with the Explicit label, restrict movie purchases to a maximum rating (G, PG, PG-13, or R), and choose one of the TV show content ratings geared to kids (TV-Y, TV-Y7, TV-G, TV-PG, TV-14, or TV-MA). Application purchases (including games) are subject to age restrictions of 4+, 9+, 12+, and 17 years and older.
Click the lock to password-protect the settings box so the kids can’t change the setting themselves.
You can also block certain icons from appearing in the iTunes Source list, including those for podcasts, Internet radio, shared libraries, and even the entire iTunes Store itself. You can, however, make an exception for educational content from iTunes U to keep your kids learning.
Adjust Your Store Preferences
The iTunes Store aims to be a one-stop-shopping hub for all your digital entertainment: music, movies, TV shows, audio lectures from major universities on universal themes in the Harry Potter novels, and so on. In fact, some people have even canceled their cable TV subscriptions, preferring instead to go à la carte with iTunes.
If you use iTunes’ Season Pass feature, which lets you buy a whole season of a TV show in advance, or if you preorder an album before it’s released, you may never know when iTunes will decide to jump up and start downloading your prepurchased content. This could be a little inconvenient if, say, your weekly Season Pass episode of Gossip Girl starts downloading on your big computer monitor while iTunes DJs your holiday party.
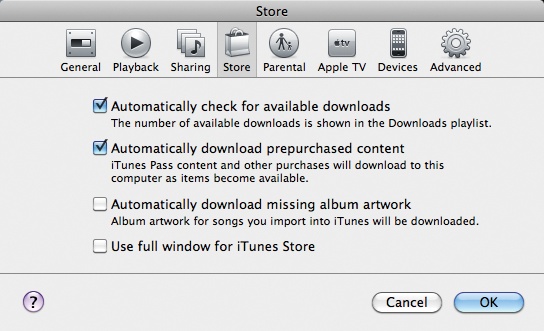
To control how iTunes behaves around your Internet connection, visit the Store tab of the iTunes Preferences box (Ctrl+comma [⌘comma]). Here you can decide if you want iTunes to automatically check for downloads, download prepurchased content, or snag album covers on its own.
While the first three checkboxes concern the program’s online activity, the last checkbox controls your view of the online wares. If you prefer an immersive shopping experience without the clutter of the Source list along the left side of the screen, turn on the checkbox for “Use full window for iTunes Store”.
Note
Music, videos, and other content you download from the iTunes Store lands in its respective Source list library—songs in the Music library, Heroes episodes in TV Shows, and so on. Those paid-for music and videos also live on the Purchased playlist in the Source list, a one-click trip to see where all your spare cash went.
Usage Rights: What You Can Do with Your Purchases
The stuff you buy at the iTunes Store is yours to keep (unless you rented it). Apple doesn’t charge you a monthly fee, and your digitally protected downloads don’t go poof! after a certain amount of time. In April 2009, Apple removed the copy protection and other restrictions from most music tracks. For older purchases, you’re still bound by the iTunes Store usage agreement:
You can play downloaded songs on up to five different iTunes-equipped PCs or Macs (in any combination) and you can burn them onto CDs (seven times for each playlist).
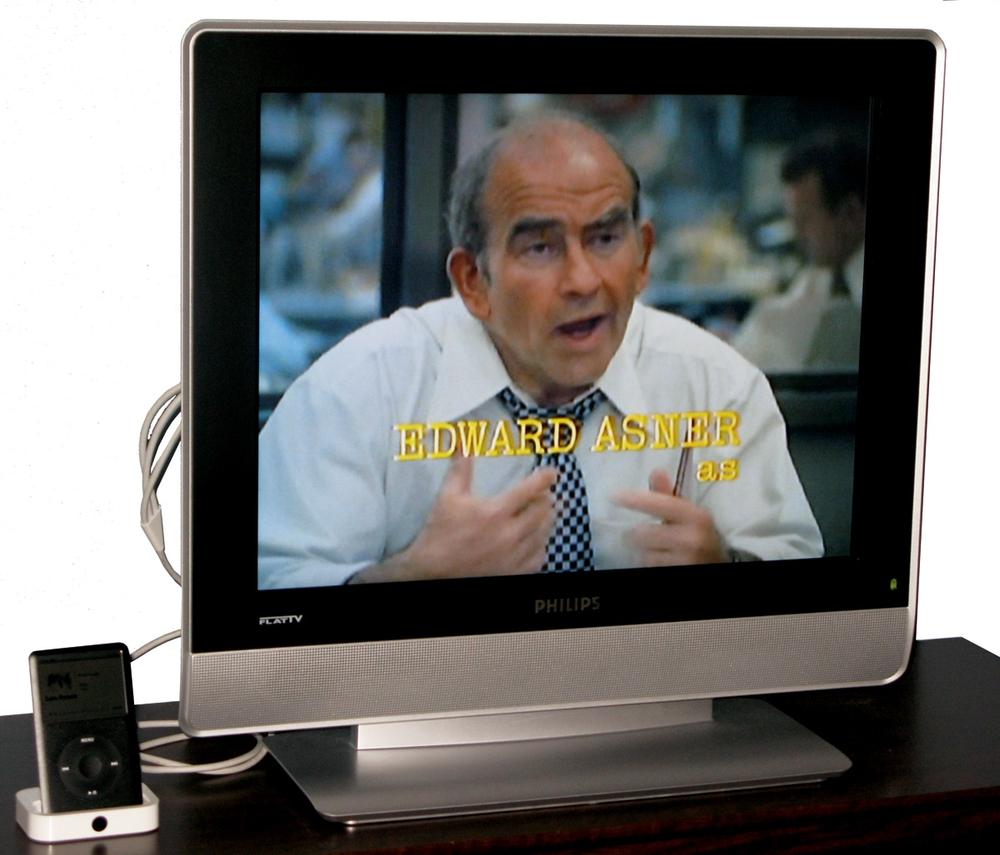
You can watch movies, videos, and TV shows on any five computers, on as many iPods as you own, or piped over to the TV with an AV cable or via an Apple TV box (View Video and Photos with Apple TV).
You can download music to a single iPod from up to five separate iTunes accounts, but the ‘Pod won’t accept files from a sixth account—a restriction designed to prevent someone from filling up their player with copyrighted content from the accounts of, say, their entire sophomore class.
You can burn backup CDs and DVDs of your purchases, but you can’t burn an iTunes movie or TV show to disc and watch it on your DVD player. (On the flip side, some newer DVDs come with an “iTunes Digital Copy” that you can add to your iTunes library; instructions are in the package.)
Authorize iTunes Purchases on Multiple Computers
The Home Sharing feature of iTunes, described in Chapter 5, makes shuttling iTunes purchases among home computers easier than ever before. But not every computer you want to tap into is at home on the same network—maybe you downloaded Season One of Lost on your office’s fast fiber-optic network instead of your pokey residential DSL line.
Here’s one way to move a bunch of song and video files from Computer A on one network to Computer B on another network:
On the computer you used to purchase an iTunes Store item, grab any file you’ve bought from iTunes. You can drag the files right out of your iTunes window onto your desktop. You can also find all the song and video files in your iTunes Media (or iTunes Music) folder: Music→iTunes→iTunes Media (Home→Music→iTunes→iTunes Media). Copy-protected Store files are easily recognizable by their .m4p or .m4v file extensions. Movies are stored in a folder called Movies, and so on.
Move the file to the second computer. Copy the file onto a CD or USB drive, email it to yourself, or use whatever method you prefer for schlepping files between machines.
Deposit the file in the iTunes Media folder on the second computer. Then import the copied file into iTunes on the second computer. To import the file, you can either choose File→Add to Library (and then select and open the file), or just drag the file right into the iTunes window.
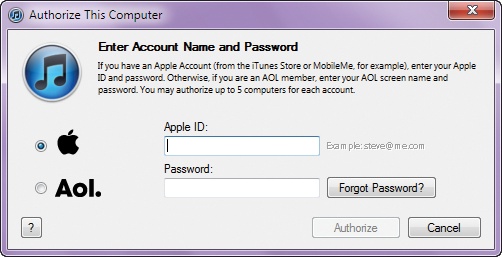
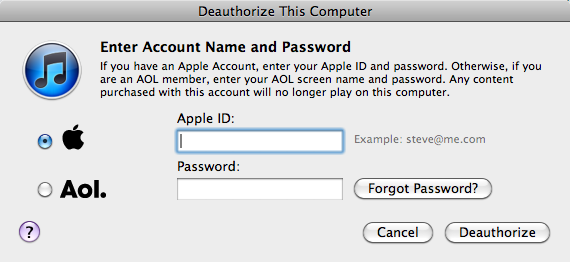
In your iTunes list, select a transferred file, and then click the Play button. For protected content, iTunes asks for your Apple Account user name and password.
Type your Apple ID and password, and then click OK. This second computer is now authorized to play that file—and any other copy-protected songs or files you bought using the same Apple Account.
Apple’s usage agreement lets you play Store purchases on up to five computers: PCs, Macs, or any combination. Although iTunes Plus songs and those sold after April 2009 don’t have password-demanding copy restrictions and usage limits built in, music tracks purchased before 2009 and most videos still do. (Even though iTunes Plus music files lack copy protection, be careful about trading Store purchases around the Internet—the name and email address on your iTunes account are easily visible on the file’s Summary screen; see Change Import Settings for Better Audio Quality).
So, for protected content, you must type in your Apple user name and password on each computer to authorize it to play any songs, videos, or audio books purchased with that account. Each computer must have an Internet connection to relay the information back to iTunes Store headquarters. (Don’t worry, you don’t have to authorize each and every purchase; you authorize the computer once.)
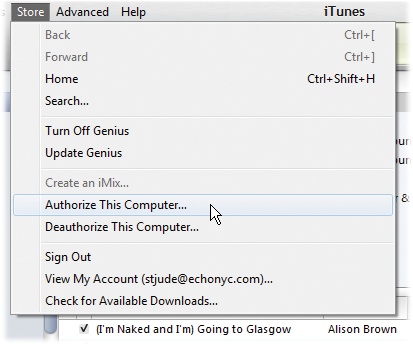
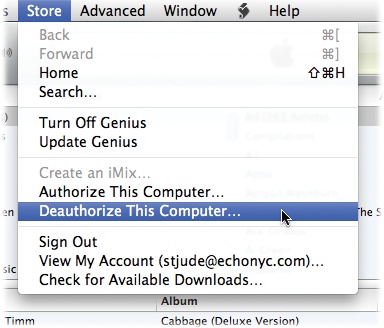
If you’re not actively moving a bucket of files to another computer—but plan to in the near future—you can authorize the other machine ahead of time. Just choose Store→Authorize Computer. Remember, though, that you can authorize only five computers before you have to start deauthorizing machines. Want to get down with deauthorizing? Turn the page.
Tip
If all the iTunes Store goodies you want to copy have been synced to your iPod, you can transfer them right off the portable player to another iTunes-equipped computer. Flip ahead to Use Your iPod to Copy Purchases to Other Computers to get the details.
Deauthorize Your Computer
If you have copy-protected music or videos and you try to play them on a sixth computer, Apple’s authorization system will see five other computers already on its “authorized” list and deny your request. That’s a drag, but copy protection is copy protection.
To play protected files on computer #6, you have to deauthorize another computer. From the computer about to get the boot, choose Store→ Deauthorize Computer and then type in your Apple Account user name and password. The updated information zips back to Apple.
Are you thinking of putting that older computer up for sale? Before wiping the drive clean and sending it on its way, be sure to deauthorize it, so your new machine will be able to play copy-protected files. Erasing a hard drive, by itself, doesn’t deauthorize a computer.
If you forget to deauthorize a machine before getting rid of it, you can still knock it off your List of Five, but you have to reauthorize every machine in your iTunes arsenal all over again. To make it so, in the iTunes Store, click the Account link. On the Apple Account Information page, click the Deauthorize All button.
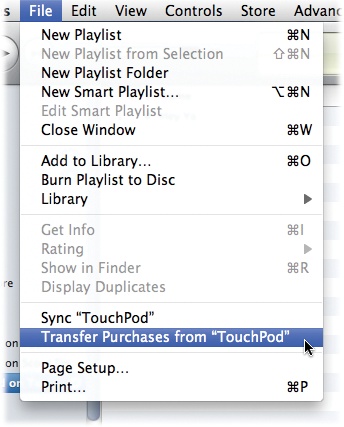
Use Your iPod to Copy Purchases to Other Computers
You may love the convenience of buying music and movies from any Internet-connected PC or Mac—whether it’s your regular computer or not. But what do you do if you buy iTunes Store stuff on one computer (at work, say) and need an easy way to move it to another (say your machine at home)?
Sure, you can move the files as described a few pages earlier, but that’s a hassle. If you have an iPod set to manually manage songs and playlists (Load Songs onto an iPod from More Than One Computer), though, you can use that iPod to ferry Store purchases back to your regular computer. Both computers involved need to be authorized with the same iTunes account, but if you’re just toting tunes around between your work and home PCs, that shouldn’t be a problem. Here’s what you do:
This painless transfer technique works only on Store-bought items, so you can’t use it to, say, copy a player’s mix-and-match library onto another computer.

See Your iTunes Purchase History and Get iTunes Store Help
The iTunes Store keeps track of what you buy and when you buy it. If you think your credit card was wrongly charged, or if you suspect that one of the kids knows your password and is sneaking in forbidden downloads, you can contact the Store or check your account’s purchase history page to see what’s been downloaded in your name.
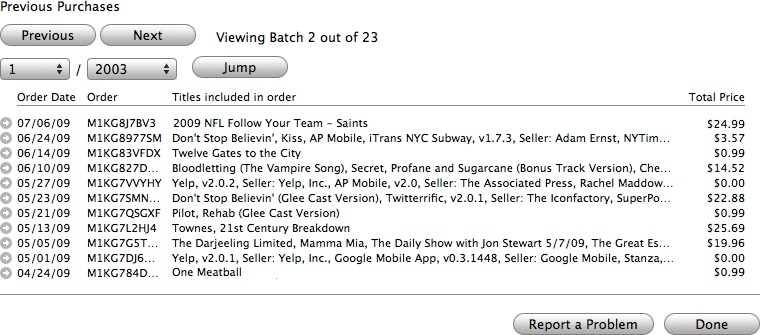
To do the latter, on the iTunes Store’s main page, click the Account link, type in your password, and then click Purchase History. Your latest purchase appears at the top of the page, and you can scroll down to see a list of previous acquisitions. You’ll see everything billed to your account over the months and years, including gift-certificate purchases. If you see something wrong, click the Report a Problem link and say something.
If you have other issues with your account or want to submit a specific query or comment, the online help center awaits. From the iTunes Store’s main page, click the Support link. Your browser presents you with the main iTunes service and support page; click the link that best describes what you want to learn or complain about. For billing or credit card issues, check out the iTunes Account and Billing Support link on that same page.
Note
Want to get way more bang for slightly more buck on your album purchase? Visit the main Music page and click the iTunes LP link. Certain albums, available as iTunes LPs, offer more than just songs—you get extra features like bonus tracks, digital liner notes booklets, artist interviews, video documentaries, and more. An iTunes LP costs about $13 to $15—not that much more for all the extra perks.
Buy Songs from Other Music Stores
There are many online music services out there, and every one of ‘em wants to sell you a song. But due to copy protection, some of these merchants’ songs don’t work on the iPod. Some of them do, though. Thanks to recent moves by many stores to strip out the digital rights management (DRM) protection on song files, their music has been liberated into the friendly MP3 play-anywhere format. Vive la musique!
Buying songs from somewhere other than the iTunes Store is as easy as supplying a credit card number and downloading the file using a web browser. Once you have the file on your computer, use iTunes’ File→Add to Library command to add it to your collection. Here are some of the online music services that now work with the iPod:
Napster. You don’t get the full Napster software and services, but Windows and Mac users can download and save MP3 files to their iTunes folders through the Napster website. (www.napster.com)
eMusic. Geared toward indie bands, eMusic offers several subscription plans based on quantity: For 16 bucks a month, for example, you can download 35 songs of your choice. (www.emusic.com)
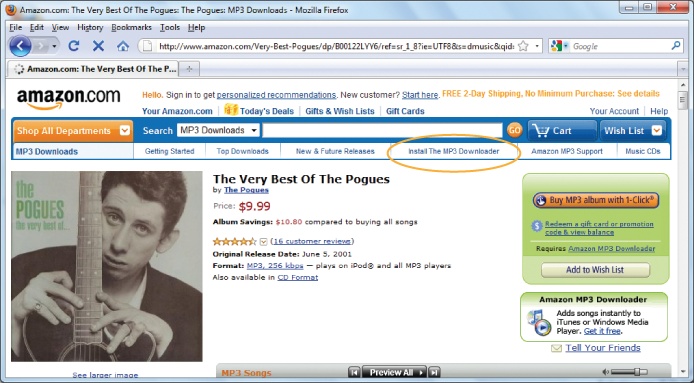
Amazon MP3 Downloads. From the main page, click Digital Downloads and then choose MP3 Downloads. Amazon has a free piece of software called the Amazon MP3 Downloader that takes half a minute to install and automatically tosses your purchases into iTunes for you. Click the link (circled below) at the top of the Amazon MP3 page to snag the Downloader program. (www.amazon.com)