
This recipe describes how to configure a 1:1 NAT rule. A 1:1 NAT rule is used when you want to associate a public IP address with a single internal machine. Everything destined for the public IP will be routed to a single internal machine.
- Browse to Firewall | Virtual IPs.
- On the Virtual IPs tab, click the "plus" button to add a new virtual IP Address.
- Select the Proxy ARP as the Type.
- Select WAN as the Interface.
- Select Single address as the Type of IP Address and specify our external public IP address.
- Add a Description, such as My public IP address:
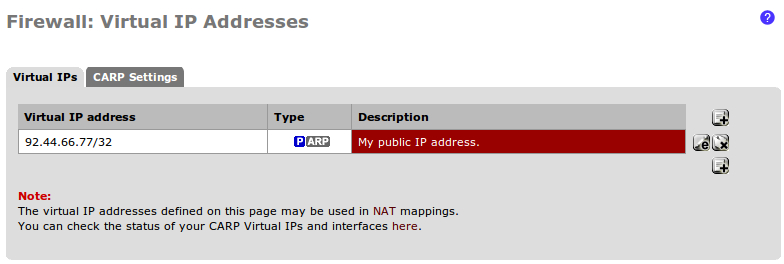
- Save the changes.
- Apply changes, if necessary.
- Browse to Firewall | NAT.
- Select the 1:1 tab.
- Click the "plus" button to add a new 1:1 NAT rule.
- Select an Interface, in this case WAN.
- Specify a Source, in this case any.
- Specify a Destination, we'll specify our internal webserver by alias.
- Specify the External subnet, our public IP address.
- Add a Description, such as Forward all external requests to Webserver1.
- Leave NAT reflection disabled:
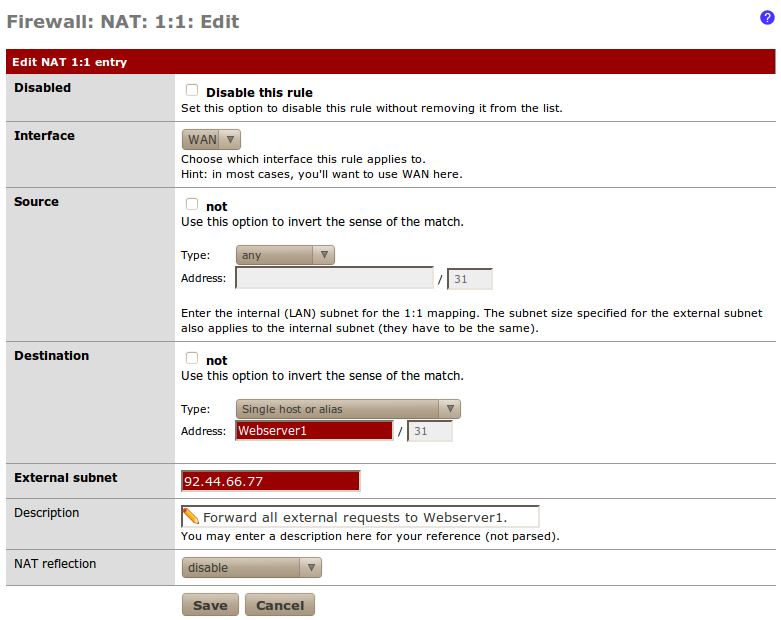
- Save the changes.
- Apply changes, if necessary.
Once a 1:1 NAT relationship is established, all traffic will be forwarded to the internal IP address (or subnet), just as if the internal machine was directly configured with the public IP address. This is much easier than creating port-forward rules if all of your incoming traffic is destined for the same machine.
Like many advanced networking features, 1:1 NAT relationships require the use of Virtual IP Addresses (VIPs).
..................Content has been hidden....................
You can't read the all page of ebook, please click here login for view all page.