


Introduction to Drawing

From simple doodles and geometric patterns to photorealistic renderings, drawing can result in a vast range of styles and degrees of intricacy. But the importance of drawing isn’t about breadth—it’s about what the process cultivates within the artist.
You may have heard the saying, “Drawing is the foundation of all art”; this statement hits the nail on the head. Drawing (most simply described as mark-making on a two-dimensional surface) forces us to concentrate on the most basic of the elements and principles of art as we attempt to represent the world around us. Drawing promotes the study of proportion, form, light, shadow—everything you need to thoroughly grasp before moving on to other forms of visual art, such as painting or sculpture. Essentially, drawing teaches you to see the world as an artist and lay the groundwork as a draftsman.
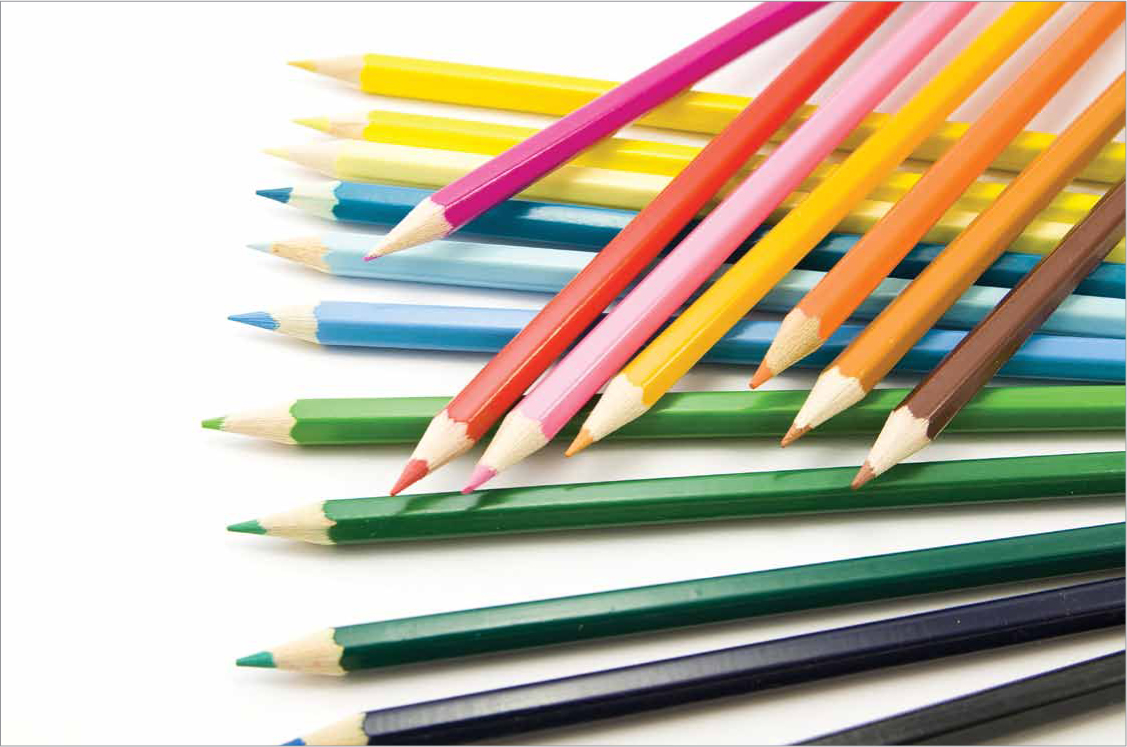
There’s a whole host of drawing media available, from graphite pencil to charcoal, which yields intense, velvety black strokes. Other options include colored pencil, pen and ink, and conte crayon. As exciting and exotic as some of the possibilities sound, begin your drawing journey simply with a set of graphite and a set of colored pencils, as well as a pencil sharpener, a kneaded eraser, a rubber eraser, blending stumps, and, of course, drawing paper.

Drawing Pencils
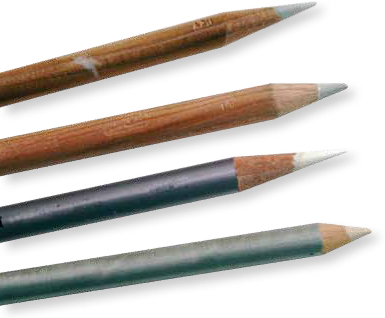
Drawing pencils contain a graphite center. They are sorted by hardness, or grade, from very soft (9B) to very hard (9H). A good starter set includes a 6B, 4B, 2B, HB, B, 2H, 4H, and 6H. Pencil grade is not standardized, so it’s best for your first set of pencils to be the same brand for consistency. The chart at right shows a variety of pencils and the kinds of strokes that are achieved with each one. Practice creating different effects with each one by varying the pressure when you draw. Find tools that you like to work with. The more comfortable you are with your tools, the better your drawings will be!

HB An HB with a sharp point produces crisp lines and offers good control. A round point produces slightly thicker lines and is useful for shading small areas.
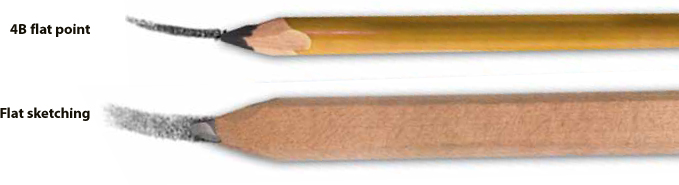
Flat For wider strokes, use a 4B with a flat point. A large, flat sketch pencil is great for shading bigger areas.

Charcoal 4B charcoal is soft and produces dark marks. Natural charcoal vines are even softer and leave a more crumbly residue on the paper. White charcoal pencils are useful for blending and lightening areas.

Conté Crayon or Pencil Conté crayon is made from very fine Kaolin clay and is available in a wide range of colors. It can also be blended with a wet brush or cloth because it’s water soluble.

A Utility Knife can be used to form a variety of points (chiseled, blunt, or flat). Hold the knife at a slight angle to the pencil shaft, and always sharpen away from you, taking off a little wood and graphite at a time.
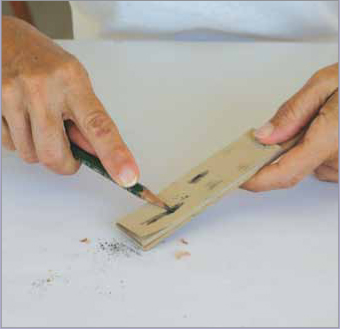
A Sandpaper Block will quickly hone the lead into any shape you wish. The finer the grit of the paper, the more controllable the point. Roll the pencil in your fingers when sharpening to keep its shape even.

Erasers
Graphite is easy to manipulate with erasers. Not only can you correct mistakes, but you also can use them to soften lines, create lighter shading, pull out highlights, and even draw. The process of creating light areas or shapes on a darker graphite background is called “lifting out.” The three basic types of erasers are featured below. Let the effect you want to achieve guide your choice of eraser.

Stick Eraser Hold this eraser as you would a pencil. Trim the tip to a point or a sharp wedge, as shown.

Kneaded Eraser You can mold this puttylike eraser into any shape you need—large or small, pointed or blunt.
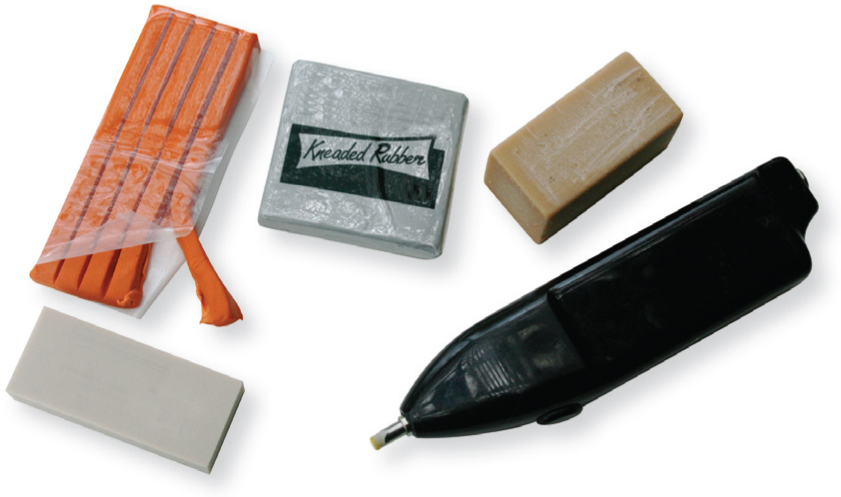
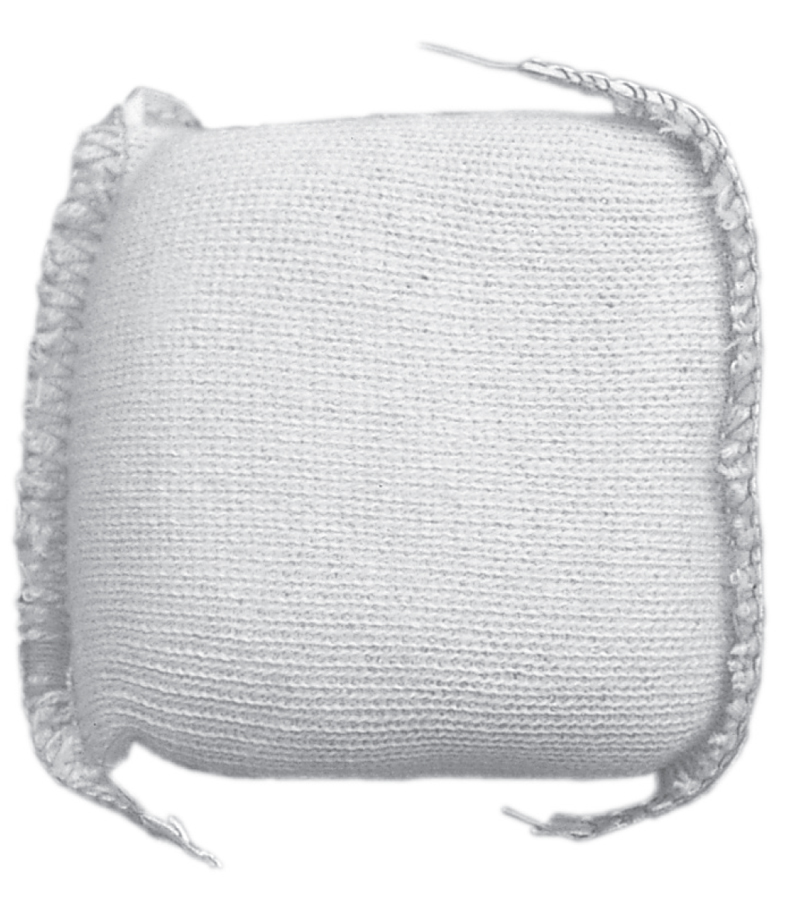
Pillow Eraser This cloth-covered tool is made of tiny pieces of eraser that are released through a loose weave, allowing you to lift out large areas of graphite.
Lifting Out Mold your kneaded eraser into a blunt edge and touch the paper lightly. When you lift up, you’ll leave behind subtle variations of light that are appropriate for soft highlights.
Forming Patterns Roll the kneaded eraser into a sharp tip and dab at the graphite-covered surface in a jabbing motion. This can produce a light, patterned effect.

Pinching Shapes Pinch your kneaded eraser into a wedge shape to create soft, crescentlike areas; this is ideal for lifting out highlights in curly hair or creating subtle folds in fabric.

Drawing Shape a kneaded eraser; then gently press down and lift up and away. Repeat if needed. Then accent your shapes with pencil strokes to make them seem to pop off the paper.
Creating Detail With the sharp point of a stick eraser, stroke or draw into the graphite to reveal the paper underneath for intricate details, such as highlights on water or metal.

Stroking Lines Cut a stick eraser’s tip into a wedge. Use the edge lengthwise and pull to erase long, sharp, crisp lines for objects such as leaves, stems, or twigs.
The spinning point of a battery-powered eraser can create fine details with little effort. “Draw” with this eraser by holding it like a pencil. You quickly can create clear contrasts between light and dark areas, providing sharp edges and areas of focus. Lift out small reflections, produce sparkles on snow, or suggest the shiny texture of metal. Use a metal erasing shield for precise shapes.

Other Tools
There are a number of other supplies you may need before you begin drawing.
Colorless Blenders These tools are basically colored pencils without any pigment, and they are great for creating smooth, shiny blends. After applying two or more layers of different colors, work these pencils on top to blend the colors together. The surface of the paper will become a little slick after using a blender, so any colors you add over the blended layer will glide easily on the page.

Blending Stumps These paper tools can be used to blend and soften pencil strokes in areas where your finger or a cloth is too large. You also can use the side to quickly blend large areas.

Artist’s Tape Use artist’s tape to attach your paper to your drawing surface, such as a table or mounting board. This kind of tape is acid-free and can easily be removed without damaging the paper. Even when using this type of tape, take special care when removing the tape. Pull the tape outward, away from your drawing, so that if a tear does start you won’t damage your work.
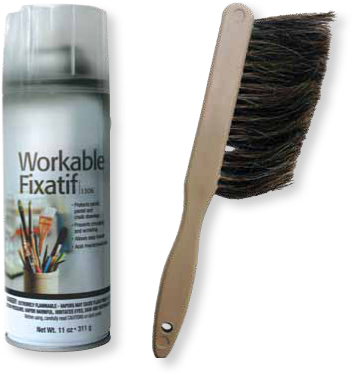
Extras Use a dust brush to gently remove pencil residue from your paper, as your hand can smear the color and blowing on the paper can leave drops of saliva. You might also want to purchase a can of spray fixative to protect your finished work.
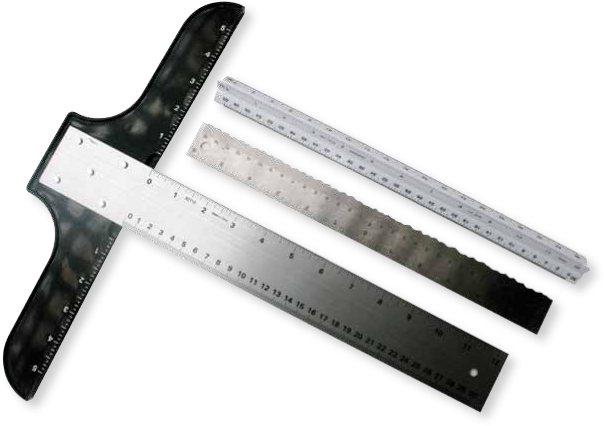
Rulers Use a ruler or T-square to mark the perimeter of your drawing area, ensuring that it is square before taping it to your drawing surface. Never hesitate to use a ruler when drawing to create hard lines that need to be straight, such as the lines of buildings.
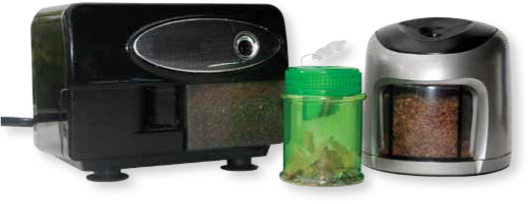
Sharpeners You can achieve various effects depending on how sharp or dull your pencil is, but generally you’ll want to keep your pencils sharp at all times. Hand-held sharpeners, electric sharpeners with auto stop, and battery-powered sharpeners are all useful. Experiment with different sharpeners for varied effects. You can also use a sandpaper pad to refine a pencil point.

Tracing and Transfer Paper Tracing and transfer paper allows you to transfer a drawing to a clean sheet of paper. For more information on tracing and transferring, see “Tracing and Transferring Images," on page 33.

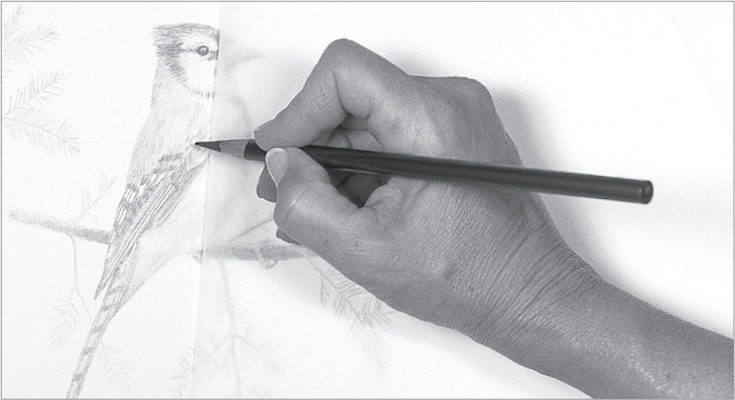
Handling a Pencil
You can create an incredible variety of effects with a pencil. By using various hand positions, you can produce a world of different lines and strokes. If you vary the way you hold your pencil, the mark the pencil makes changes. It’s just as important to notice your pencil point. The point is every bit as essential as the type of lead in the pencil. Experiment with different hand positions and pencil points to see what your pencil can do.
There are two main hand positions for drawing. The writing position is good for very detailed work that requires fine hand control, as well as for texture techniques that require using the point of the pencil. The underhand position allows for a freer stroke with more arm movement—the motion is almost like painting.

Using the Writing Position The writing position is exactly what it sounds like! Hold the pencil as you normally do while writing. Most of your detail work will be done this way, using the point of the pencil.
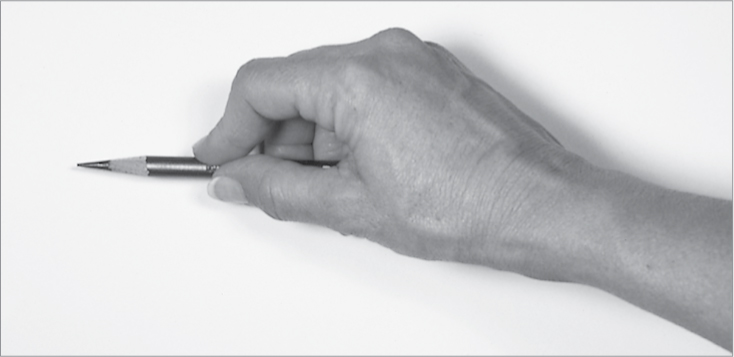
Using the Underhand Position Pick up the pencil with your hand over it, holding the pencil between the thumb and index finger; the remaining fingers can rest alongside the pencil. You can create beautiful shading effects from this position.
Protecting Your Art It’s a good idea to use a piece of tracing paper as a barrier between your hand and your drawing. The tracing paper not only prevents you from smudging your drawing, but it also keep oils from your skin from damaging the art.

Practicing with Your Tools
It’s easy to learn how to draw by experimenting. So gather your materials and get ready to have fun! To get you started, try the exercises shown here. Then use these images as inspiration for your own experiments. Remember that your doodles don’t have to look like the real subjects—just become familiar with the feel of the pencil against the paper. Be sure to play with different grades to see how soft and hard leads respond to the paper. Try different brushing techniques, and use your eraser too.

Try Out Different Pencils Make a scribble-art design and fill it in using different grades of pencil. Making these marks side by side will help you become familiar with the different pencil grades, as well as the pressure you need to apply to create a specific value, which is the relative lightness or darkness of the graphite.

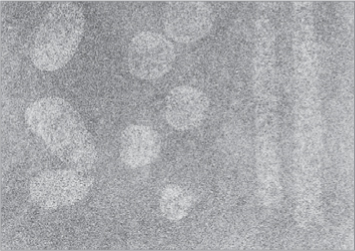
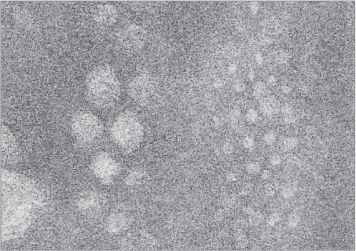
Pull Out Forms Brush a sheet of white paper with loose graphite to create toned paper. Shape a kneaded eraser and pull out the graphite to create a scene; then use a pencil to add darker outlines.
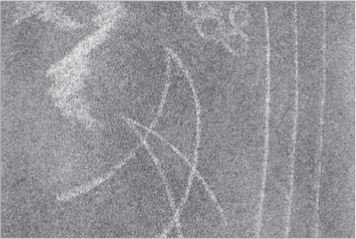
Feel the Pencil Against the Paper Make fluid lines, short lines, zigzagged lines, swirls, dots, and continuous circular lines. Use both the point and side of your pencil. Notice how the pencil feels on the paper as you make different kinds of lines and marks. Let your wrist and arm move freely as your pencil meets the paper, and try out a variety of strokes with different grades of pencils. (The doodles above left were made with a 2H pencil; those above right were made with a 2B pencil.)

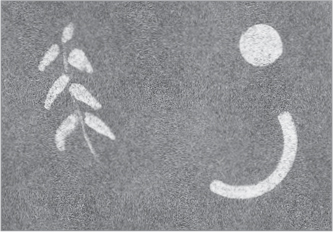
Create and Define Shapes With a brush and loose graphite, make a line of distant trees. Draw some bushes in front by lifting out the tops with a kneaded eraser. Then use a soft pencil to stroke in some trunks and limbs.

Practicing Lines
When drawing lines, it is not necessary to always use a sharp point. In fact, sometimes a blunt point may create a more desirable effect. When using larger lead diameters, the effect of a blunt point is even more evident. Play around with your pencils to familiarize yourself with the different types of lines they can create. Make every kind of stroke you can think of, using both a sharp point and a blunt point. Practice the strokes below to help you loosen up.
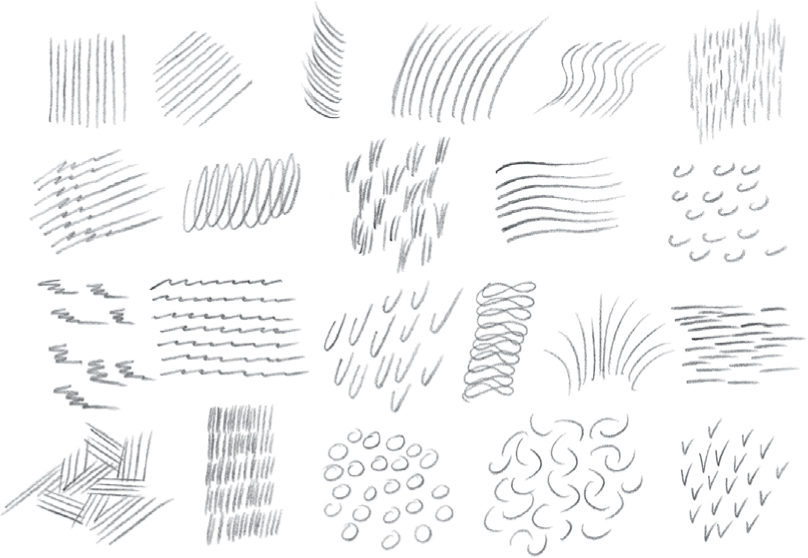
Drawing with a Sharp Point First draw a series of parallel lines. Try them vertically; then angle them. Make some of them curved, trying both short and long strokes. Try some wavy lines at an angle and some with short, vertical strokes. Have fun making a spiral and then try grouping short, curved lines together. Practice varying the weight of the line as you draw. Little Os, Vs, and Us are some great basic shapes.
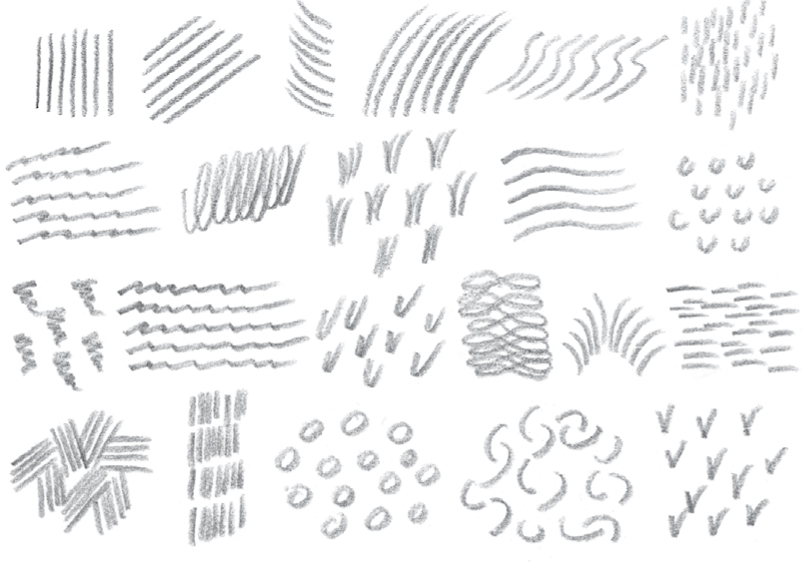
Drawing with a Blunt Point It is good to take the same exercises and try them with a blunt point. Even if you use the same hand positions and strokes, the results will be different when you switch pencils.

Basic Pencil Techniques
You can create an incredible variety of effects with a pencil. By using various hand positions and shading techniques, you can produce a world of different stroke shapes, lengths, widths, and weights. It’s also important to notice your pencil point. The shape of the tip is every bit as essential as the type of lead in the pencil.
Practicing Basic Techniques
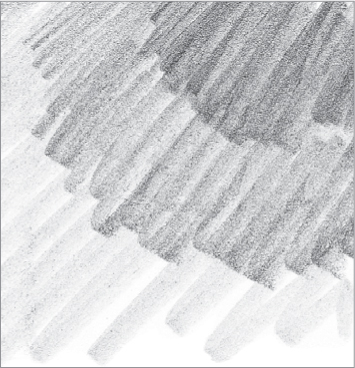
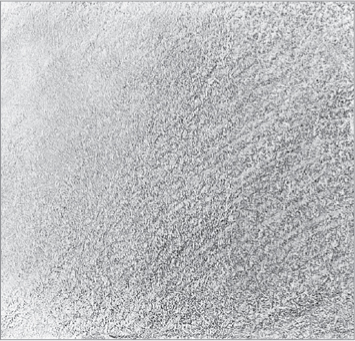
By studying the basic pencil techniques below, you can learn to render a variety of textures. Whatever techniques you use, remember to shade evenly. Shading in a mechanical, side-to-side direction, with each stroke ending below the last, can create unwanted bands of tone throughout the shaded area. Instead, try shading evenly in a back-and-forth motion over the same area, varying the spot where the pencil point changes direction.

Hatching This basic method of shading involves filling an area with a series of parallel strokes. The closer the strokes, the darker the tone will be.

Crosshatching For darker shading, place layers of parallel strokes on top of one another at varying angles. Again, make darker values by placing the strokes closer together.
Gradating To create gradated values (from dark to light), apply heavy pressure with the side of your pencil, gradually lightening the pressure as you stroke.

Shading Darkly By applying heavy pressure to the pencil, you can create dark, linear areas of shading.

Shading with Texture For a mottled texture, use the side of the pencil tip to apply small, uneven strokes.
Blending To smooth out the transitions between strokes, gently rub the lines with a blending tool or tissue.

Creating Form
The first step when creating an object is to establish a line drawing to delineate the flat area that the object takes up. This is known as the “shape” of the object. The four basic shapes—the rectangle, circle, triangle, and square—can appear to be three-dimensional by adding a few carefully placed lines that suggest additional planes. By adding ellipses to the rectangle, circle, and triangle, you’ve given the shapes dimension and have begun to produce a form within space. Now the shapes are a cylinder, sphere, and cone. Add a second square above and to the side of the first square, connect them with parallel lines, and you have a cube.

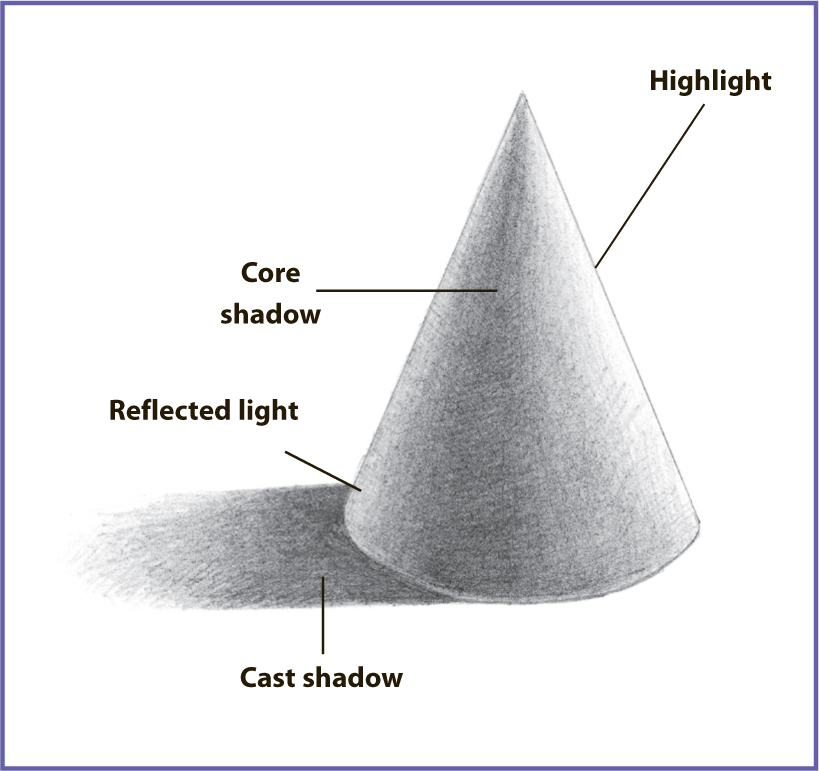
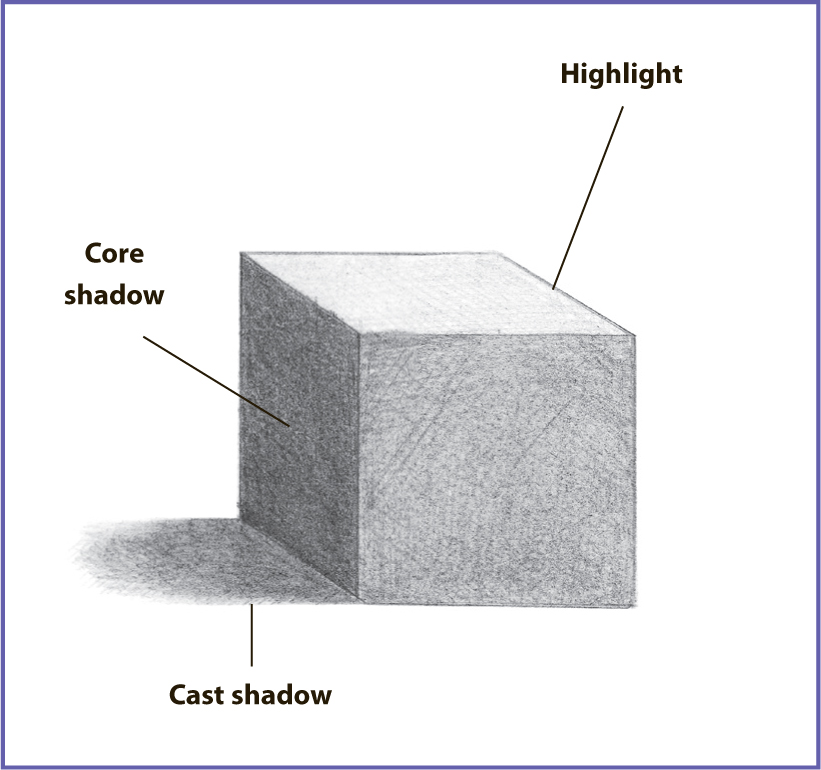
Adding Value to Create Form
A shape can be further defined by showing how light hits the object to create highlights and shadows. First note from which direction the source of light is coming. (In these examples, the light source is beaming from the upper right.) Then add the shadows accordingly, as shown in the examples below. The core shadow is the darkest area on the object and is opposite the light source. The cast shadow is what is thrown onto a nearby surface by the object. The highlight is the lightest area on the object, where the reflection of light is strongest. Reflected light, often overlooked by beginners, is surrounding light that is reflected into the shadowed area of an object.


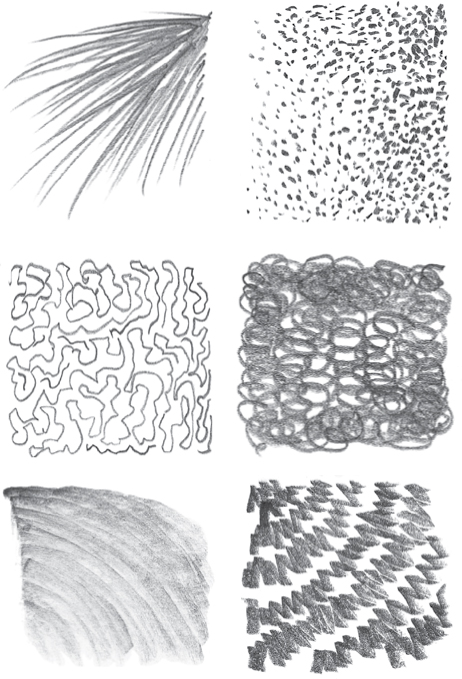
Creating Textures
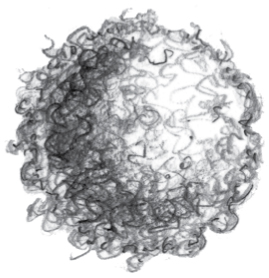
Textures are not entities that exist on their own; they are attached to a form and are subject to the same basic rules as all other forms. A texture should be rendered based on how the light source affects it. Texture shouldn’t be confused with pattern, which is the tone or coloration of the material. Blindly filling an area with texture will not improve a drawing, but using the texture to build a shadow area will give the larger shape its proper weight and form in space. You should think of texture as a series of forms (or lack thereof) on a surface. Here are some examples to help you.

Cloth The texture of cloth will depend on the thickness and stiffness of the material. Thinner materials will have more wrinkles that bunch and conform to shapes more perfectly. As wrinkles move around a form and away from the picture plane, they compress and become more dense.

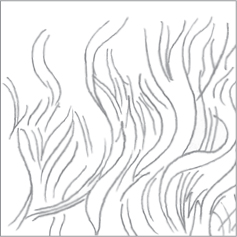
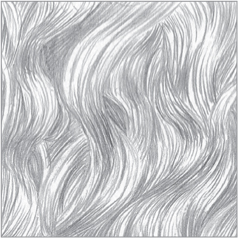
Long Hair Long hair, like cloth, has a direction and a flow to its texture. Its patterns depend on the weight of the strands and stress points. Long hair gathers into smaller forms—simply treat each form as it own sub-form that is part of the larger form. Remember that each form will be influenced by the same global light source.
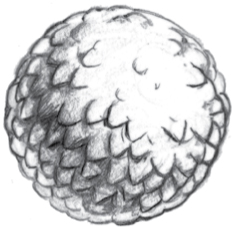
Scales Drawn as a series of interlocking stacked plates, scales will become more compressed as they follow forms that recede from the picture plane.

Wood If left rough and not sanded down, wood is made up of swirling lines. There is a rhythm and direction to the pattern that you need to observe and then feel out in your drawings.

Short, Fine Hair Starting at the point closest to the viewer, the hairs point toward the picture plane and can be indicated as dots. Moving out and into shadowed areas, the marks become longer and more dense.

Metal Polished metal is a mirrored surface and reflects a distorted image of whatever is around it. Metal can range from slightly dull as shown here to incredibly sharp and mirror-like. The shapes reflected will be abstract with hard edges, and the reflected light will be very bright.

Feathers and Leaves As with short hair, stiff feathers or leaves are long and a bit thick. The forms closest to the viewer are compressed, and those farther away from the viewer are longer.
Curly Hair With curly hair, it’s important to follow the pattern of highlights, core shadow, and reflected light. Unruly and wild patterns will increase the impression of dreaded or tangled hair.

Rope The series of braided cords that make up rope create a pattern that compresses as it wraps around a surface and moves away from the picture plane.

Rendering Hair
There are many variations within each basic type of hair, but you should be able to adapt the techniques below to draw any hair type you wish.
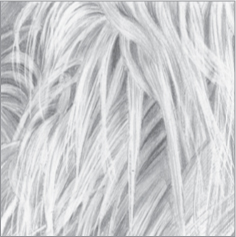
Long, Curly Hair
Detail Method
Step 1 Long, curly hair tends to flow in waves. Begin drawing wavy lines using an HB pencil, roughly following a consistent pattern of curvature while ensuring that the pattern isn’t too rigid and exact. Be sure to overlap some hairs for realism.

Step 2 Darken the areas in between the main clumps of hair using a soft pencil. Then suggest the strands within the clumps of hair nearest the viewer, using long strokes to communicate the length. Leave some areas nearly free of graphite to bring them forward visually.
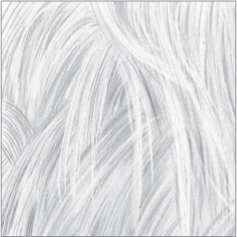
Sketch Method

Step 1 To draw the same hair with a freer, looser style, don’t worry about positioning the hairs or other details; just sketch long, wavy lines, again following a general S-shaped pattern.
Step 2 Now rough in texture using lines. Rather than creating definite areas of highlights and shadows, simply place the lines closer together in shadowed areas and farther apart in lighter areas. When drawing any type of hair, always stroke in the direction of growth.
Long, Straight Hair
Detail Method

Step 1 Long, straight hair doesn’t necessarily lay in perfectly parallel lines. In fact, the longer the hair, the more haphazard it’s likely to be. With this in mind, draw long sections of hair, stroking in different directions and overlapping strokes.
Step 2 Carefully shade the dark areas among the hairs, and apply long, light strokes on top of the sections of hair. Then use tack adhesive to lift out some individual hairs, giving depth to the coat.
Sketch Method

Step 1 Draw light, rough, lines to provide guidelines for the sections of hair. Then use long, wispy strokes to gradually build up the strands along the guidelines. Place lines closer together for dark areas and farther apart for light areas.
Step 2 As with the detailed method, add highlights and depth by lifting out additional hairs using tack adhesive formed to a point.

Colored Pencils
Colored pencil artwork is affordable to create and requires only a few supplies; however, it’s helpful to purchase the best quality materials possible. If you invest in the good stuff, your artwork will last for many years after you create it.
Pencils
You can purchase artist-grade colored pencils individually or in sets at art and hobby stores as well as online. There are three basic types of colored pencils: wax-based, oil-based, and water-soluble.
Wax-based pencils produce creamy, buttery textures and are a joy to work with. Sanford Prismacolors® are one of the most popular brands; they are sold in sets of up to 132 pencils.
Oil-based pencils use oil in their binders rather than wax. This results in fewer pencil crumbs and less sharpening. Faber-Castell® Polychromos (German) pencils and Caran d’Ache Pablo® (Swiss) pencils perform well in this category. Water-soluble pencils are bound with a water-soluble gum. They lend themselves to watercolor effects while still preserving the detail and precision of a pencil.


Colored Pencil Techniques
With colored pencils, you can create everything from soft blends to brilliant highlights to realistic textures. Once you get the basics down, you’ll be able to decide which techniques will capture your subject’s unique qualities.
Pressure
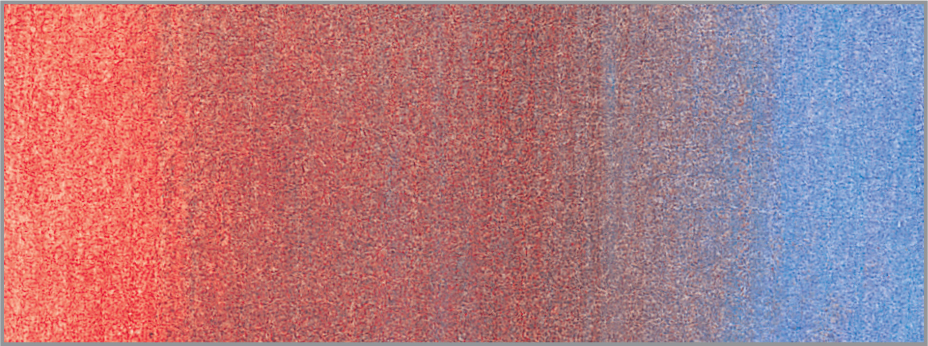
Colored pencil is not like paint: You can’t just add more color to the tip when you want it to be darker. Because of this, your main tool is the amount of pressure you use to apply the color. It is always best to start light so that you maintain the tooth of the paper for as long as you can.

| Light Pressure Here color was applied by just whispering a sharp pencil over the paper’s surface. | Medium Pressure This middle range creates a good foundation for layering. This is also the pressure you might want to use when signing your drawings. | Heavy Pressure Really pushing down on the pencil flattens the paper’s texture, making the color appear almost solid. |
Layering and Blending
With colored pencil, color mixing and blending occurs directly on the paper. With layering, you can build up color or create new hues. To deepen a color, layer more of the same over it; to dull it, use its complement. You can also blend colors by burnishing with a light pencil or using a colorless blender.

Layering Blending involves layering one color directly over another. This can be done with as many colors as necessary to achieve the desired results. Use light pressure, work with a sharp pencil point, and apply each layer smoothly.
Burnishing with a Colorless Blender Burnishing requires heavy pressure to meld two or more colors together for a shiny, smooth look. Using a colorless blender tends to darken the colors, whereas using a white or light pencil lightens the colors.

Burnishing Light Over Dark You can also burnish using light or white pencils. To create an orange hue, apply a layer of red and then burnish over it with yellow. Remember to place the darker color first and try not to press too hard on the underlayers of the area you intend to burnish; if you flatten the tooth of the paper too soon, the resulting blend won’t be as effective.

Optical Mixing Scumble, hatch, stipple, or use circular strokes to apply the color, allowing the individual pencil marks to look like tiny pieces of thread. When viewed together, the lines form a tapestry of color that the eye interprets as a solid mass. This is a very lively and fresh method of blending that will captivate your audience.
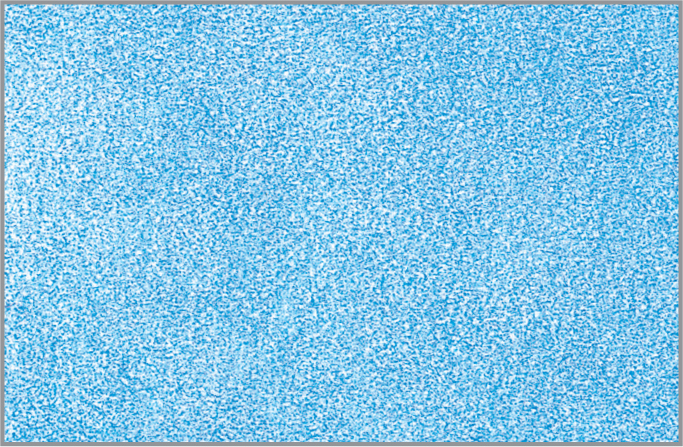
Strokes
Each line you make in colored pencil drawing is important—and the direction, width, and texture of the line you draw will contribute to the effects you create.

Circular Move your pencil in a circular motion, either in a random manner or in patterned rows. For denser coverage, overlap circles. You can also vary the pressure throughout for a more random appearance.
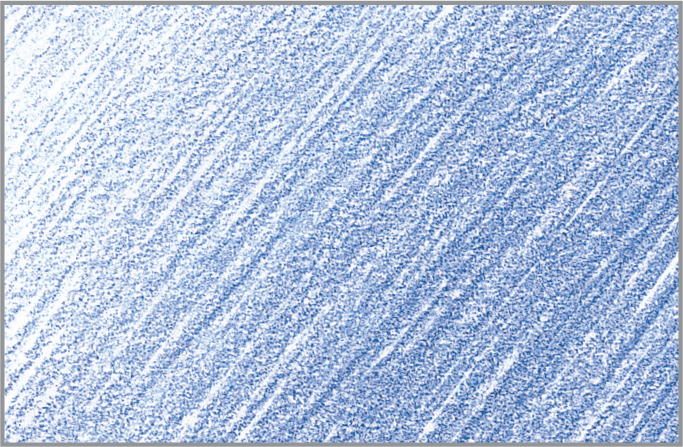
Linear It may be more comfortable for you to work in a linear fashion: vertically, horizontally, or diagonally, depending on your preference. Your strokes can be short and choppy or long and even, depending on the texture desired.

Scumbling This effect is created by scribbling your pencil over the surface of the paper in a random manner, creating an organic mass of color. Changing the pressure and the amount of time you linger over the same area can increase or decrease the value of the color.

Hatching This term refers to creating a series of rough parallel lines. The closer the lines are together, the denser and darker the color. Crosshatching is laying one set of hatched lines over another but in a different direction. You can use both of these strokes to fill in an almost solid area of color, or you can use them to create texture.
Smooth Always strive to control the pencil so that you apply a smooth, even layer of color regardless of the technique you used to apply it.
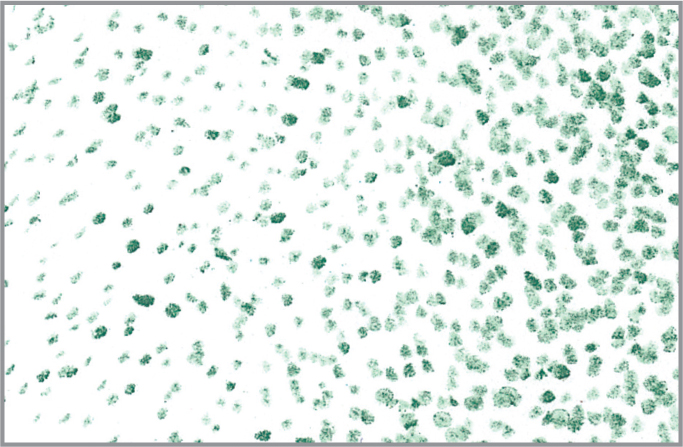
Stippling This is a more mechanical way of applying color, but it creates a very strong texture. Simply sharpen your pencil and create small dots all over the area. Make the dots closer together for denser coverage.

Tracing and Transferring Images
Using a Light Box
A light box is a special desk or inexpensive box with a transparent top and a light inside. The light illuminates papers placed on top and allows dark lines to show through for easy tracing. After photographing and enlarging the line drawing (or sketching it on a piece of scrap paper), tape the sketch to the surface of the light box. Cover the sketch with a sheet of clean drawing paper and flip the switch—the light illuminates the drawing underneath and will help you accurately trace the lines onto the new sheet of paper. You can make your own light box by placing a lamp under a glass table, or you can even tape the sketch and the drawing paper to a glass window and use natural light.
Using Transfer Paper
Another easy method is to trace the image on a sheet of tracing paper and then coat the back of the tracing paper with an even layer of graphite. (Or you can purchase transfer paper, which already has one side coated with graphite.) Then place the tracing paper over a clean sheet of drawing paper, graphite-side down. Tape or hold the papers together and lightly trace your outline. The lines of your sketch will transfer onto the new sheet of drawing paper.
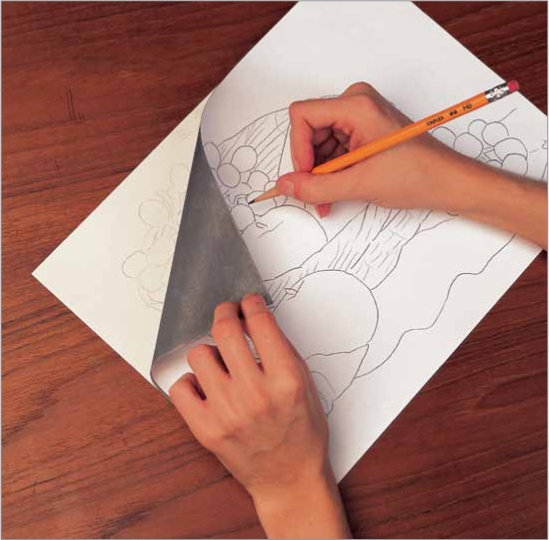
Checking your Lines While tracing the lines of the sketch, occasionally lift the corner of the sketch (and the coated tracing paper) to make sure the lines that have transferred to the drawing paper aren’t too light or too dark.
Using the Grid Method
This method helps you break the subject down into smaller, more manageable segments. First photocopy the line drawing and then draw a grid of squares (about 1") over the photocopied image. Then draw a corresponding grid over your drawing paper. The line drawing and the drawing paper must have the same number of squares. Once you’ve created the grids, simply draw what you see in each square of the line drawing in each square of the drawing paper. Draw in one square at a time until you have filled all the squares.

Making Grids Using the lines of the grid squares as reference points, you can accurately position the features of your subject. Make the grid lines light; you’ll erase them when done.