
To follow along from this point, point your browser to http://www.thingiverse.com/thing:90754.
Now, find Ch10 Scanned Image.jpg, and right-click to save the image:
- Start Blender and, as usual, clear the scene (Ctrl + A + X) and save it to start a project.
- Give it an appropriate name in an appropriate directory, such as
Ch10 Measuring and Drawer Guide.blend. - Change the view to Top Ortho (Numpad 7, Numpad 5).
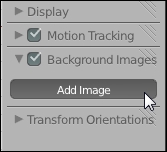
- In the Properties panel (N), locate the Background Images section, check the box next to it, expand it, and click on the Add Image button:
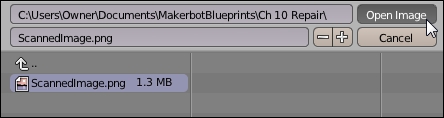
- Click on the Open button and navigate to where the scanned image of the stamped object is stored. Then, open the image to place it in the scene:
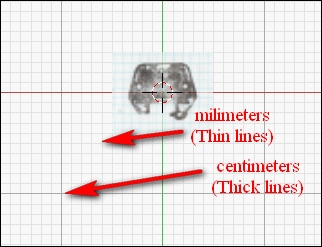
- The first thing to note is that if the previous steps are followed carefully, despite the grid paper in the image being a centimeter grid, at the default zoom, the grid lines seen are in millimeters. There are 10 millimeters per centimeter, so zoom out until the major grid lines start to appear, and then zoom out some more so that the millimeter grid lines disappear:
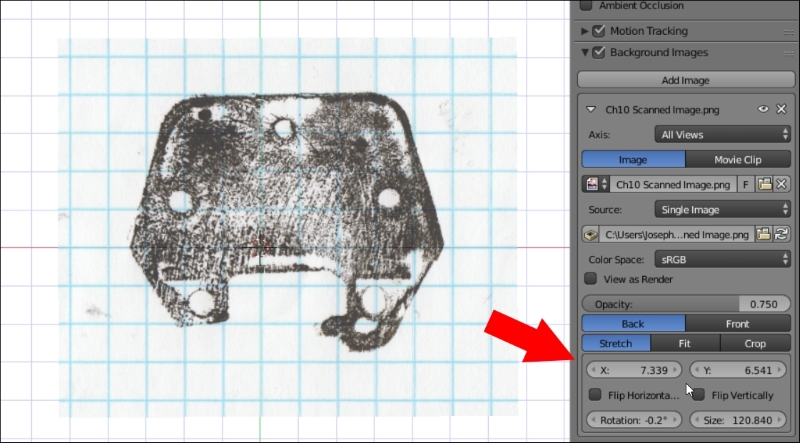
Adjust the settings in the Property panel for the background image until the grid on the paper lines up with the centimeter grid in 3D View. A quick way to determine the necessary size is to count the number of grid lines in the scan, multiply it by 10, and divide by 2 (for the radius, which for some reason the size setting is). In the example, there are 12 grid lines shown, so setting the size to 60 gets the view very close to the right size.
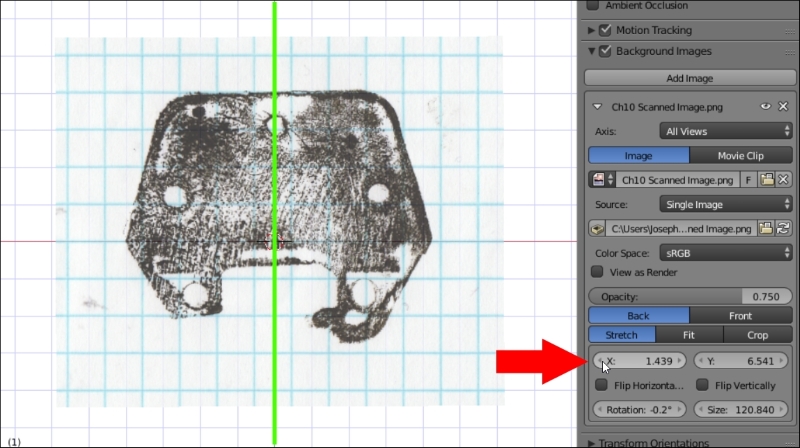
- Continue to adjust the X, Y, Size, and Rotation values as necessary until the grid lines in the image line up with the grid lines in the view properly:
- Since the object is to be symmetrical in this example, it would probably be a good idea to use the Mirror modifier, and to use it properly, it would be easier if the center line of the object were lined up with the world origin. The X value can now be adjusted to make it so. It no longer matters if the X grid lines line up with the image:
Now that the reference image is in Blender and scaled properly, the process of creating a shape in Blender around this reference image is simple and left to you.
- Since the scale of the object was determined by lining up the real-life grid, the printed part should be approximately the same as the original piece:
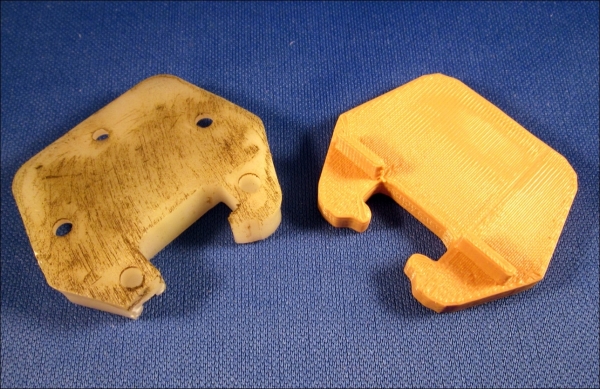
The original is still a little messy after being used as a stamp, but the new one will take its place nicely.
In the background image settings, the pictures can be limited to specific views: top, bottom, front, left-hand side, right-hand side, and so on. Using these settings, multiple reference images can be combined to increase the accuracy of the model. If the shape is such that it's difficult to trace accurately from the side or front, it can be hard to trust the references. In these cases, the other images can be thought of as guidelines to be followed, rather than a reference to be trusted.