
Most tutorials for Blender start with navigating the 3D View. But in Blender, the default scene is kind of boring for this, just a cube that looks the same from every angle. Instead, let's make something more interesting to look at.
First, let's look at how to clear the default scene:
- Select all the objects in the scene by going to the 3D View menu and choosing Select | (De)select all twice or pressing the A key twice. Everything in the scene should have an orange line around it. If not, do it again.
- Delete everything by going to the 3D View menu and choosing Object | Delete or pressing the X key.
Your 3D View should now have nothing but the grid, which can be thought of as the floor of the scene.
To create an object, go to 3D View menu, choose Add or press Shift + A.
In the menu that pops up are all the basic objects that can be inserted into the scene. Blender offers many basic shapes that can serve as a starting point for anything you want to create. Sometimes, a basic object is all you need, and sometimes, the basic object needs to be modified.
In this case, add a Monkey object to the scene:
- In the 3D View menu, choose Add or press Shift + A.
- Select Mesh | Monkey in the menu that appears.
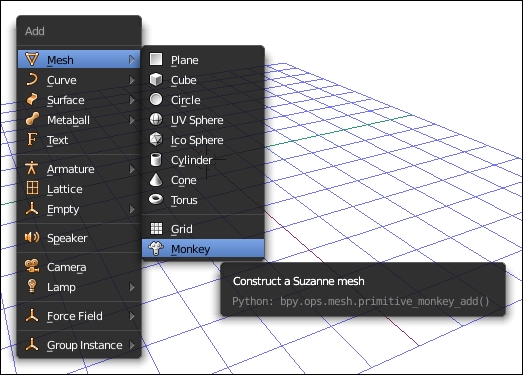
The Monkey object is good when learning to navigate the view because it's easy to see which way it's facing, no matter how the view changes. So, with a monkey object in the scene, it's time to learn how to change your perspective.