
Now that all the measurements have been taken, it is time to go to Blender. Start a new scene and clear all the default elements (A + A + X). Then, save the scene (Ctrl + S) to create a new project in the directory of your choice. Name the project SD Card Ring.blend.
Let's start the modeling with the following steps:
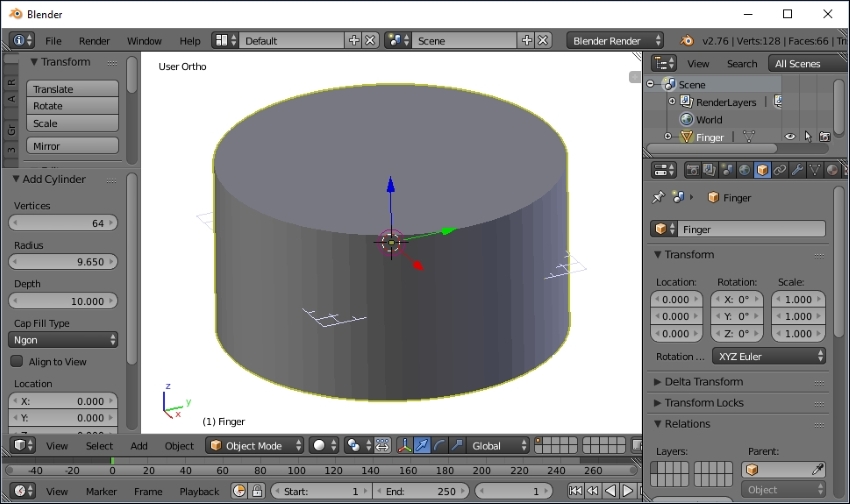
- Add (Shift + A) a Cylinder.
- In the left-hand side bar, change the options for the cylinder. Change the Vertices value to
64so the cylinder is smoother than default. Change the Radius value to half the measured finger diameter. Change the Depth value to10:
- In the properties tab in the right-hand side bar, in the Object tab (orange cube), rename this cylinder to Finger, since it represents the finger in the build space:
- Now, add (Shift + A) another cylinder.
Blender remembers the settings that the previous object was created with, and if another object is created of the same type, those settings will be applied to it. So, the new cylinder is of the same radius, depth, and number of vertices as the Finger cylinder, and is therefore in the same exact place until the settings are changed.
- Add
2to the Radius value of the finger and change the Depth value to4: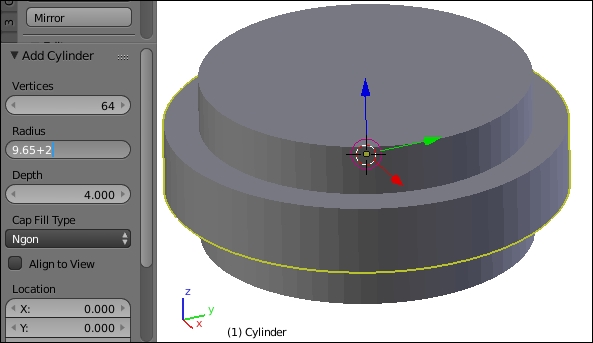
- In the Object tab, rename this cylinder to
Ring.Note
The XY plane is the logical floor of the build space and passes through the origin. Blender places a (small) XY plane in the view space to help with visualization. It is, of course, completely imaginary, and objects can be built through this floor. In fact, by default, new objects are placed somewhat under the XY plane. However, respecting the XY plane can provide a solid base of reference for building objects if need be, especially when multiple objects are to be placed with precision.
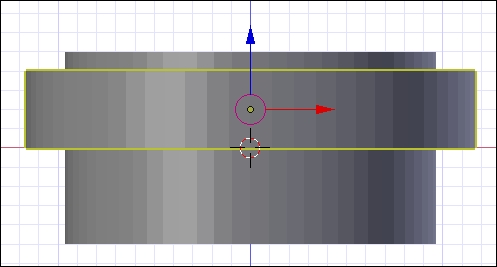
- Now, jump to the front (Numpad 1) orthographic (Numpad 5) view. You will notice that the ring is sitting half above and half below the origin:

By default, objects in Blender are created centered at the origin, meaning a part of them is under the XY plane. The goal of this section will be to place the important objects so they sit on the XY plane without going below it. This way, we always know where the bottom of the object is and can line everything up to this standard. So, with only the ring object selected, begin the grab (G) operation. Press Z to lock the ring's movement along the Z axis. Type 2 to move the ring up half its depth. Finally, press Enter to end the grab operation:
The finger cylinder is at an odd place in relation to the ring. But since the finger cylinder is just there to help us design the ring, and since it's both above and below the ring cylinder, it can just be left where it is.
Perform the following steps to complete the ring:
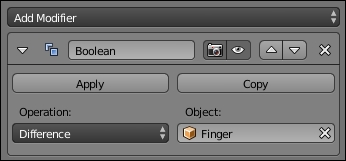
- With the
Ringobject selected, add a Boolean modifier to it:
- Change the the Operation field of the Boolean modifier to Difference and the Object field to Finger:
The Finger object is obscuring the effect of this operation, so it should be hidden. This may take the object out of the 3D View, but it can still be selected in the Outliner panel and modifications can be made that way. Some editing remains impossible, however, until the object is unhidden.
- Select the Finger object and, from the menu at the bottom of the 3D View panel, navigate to Object | Show/Hide | Hide Selected, or press H. Another way is to click the icon that looks like an eye next to the Finger object in the Outliner panel:

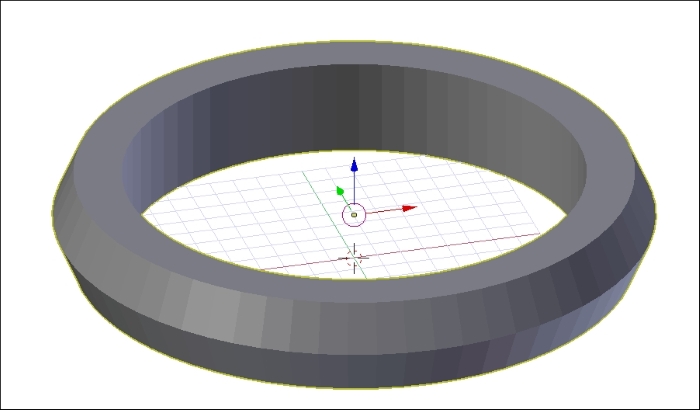
Now, the Finger object is hidden and we can see the effect of the Boolean modifier on the
Ringobject. The Finger object is still in the scene, but not in the 3D View. You can confirm this because the object is still in the Outliner panel, but the eye icon beside it is inactive.The ring is now perfectly serviceable, but there's no harm in making it a little more appealing.
- Enter Edit mode (Tab). For now, loop cut (Ctrl + R) the cylinder around the middle and left-mouse click twice when selecting so that the slice does not slide up or down:

- Scale (S) the newly sliced ring outwards slightly. The scaled ring of points should not extend more than 1 mm (one small grid square in the background) larger than the top and bottom disks of the ring shape.
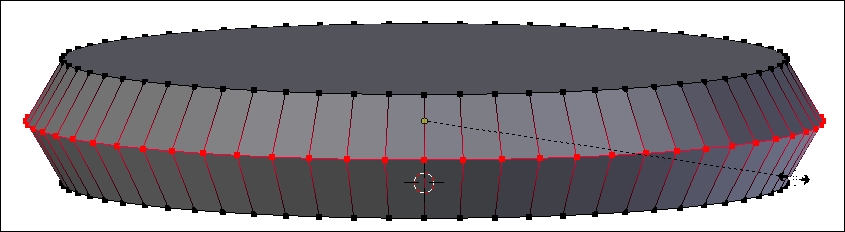
Scaling is an operation for which precise measured adjustments can be difficult to accomplish. This is one of the places where Blender falls a little short as a CAD-precise tool. Then again, this is a change made for aesthetics, so just eyeball the angle. Anything less than
45degrees will be fine. - Now, exit Edit mode (Tab). Notice that the hole is back in the ring:
- Remember to save (Ctrl + S) the project periodically.