8
Implementing a Hybrid File Server Infrastructure
In the previous chapter, we learned about the concepts of Windows Server storage and filesystems.
This chapter covers content from AZ-800 Administering Windows Server Hybrid Core Infrastructure: Implement a hybrid file server infrastructure.
We will learn about the storage services that are available in Azure and look at how they can be implemented to meet use case requirements when deploying workloads into Azure. We will conclude with some hands-on exercises to help you develop your skills even further.
The following topics are included in this chapter:
- Introduction to Azure Storage services
- Implementing Azure Files
- Introduction to Azure File Sync
- Migrating a DFS-R deployment to Azure File Sync
- Hands-on exercises
In addition to the topics listed in this chapter, this chapter’s goal is to take your knowledge beyond the exam objectives to prepare you for a real-world, day-to-day hybrid environment-focused role.
Introduction to Azure Storage services
This section looks at the available Storage services in Azure. We will start this chapter by looking at various definitions and concepts to help set a baseline and foundation of knowledge that you can build from.
Storage types
The following storage types are available in Azure:
- Files: This provides the Server Message Block (SMB) protocol, which provides fully managed, highly available serverless network file shares. These traditional mapped drives can be communicated using port 445 and the SMB 3.x protocol.
- Binary large object (Blob): This provides cost-effective massive scale-out unstructured data storage. The following three blob types are available:
- Table: This provides a data store for non-relational (NoSQL) structured and semi-structured data.
- Queue: This provides a data store for large amounts of asynchronous messages.
Selecting the right data storage that matches your workload type is a key design decision to provide an optimal cost, performance, and operational solution. You may need to implement different storage types in a single solution since no Azure Storage service will meet all your needs.
Storage accounts
These Azure resources are repositories and boundaries where you can store all your data objects. In addition to working as data planes, they can also be considered management plane consoles. Storage accounts can define the settings and configurations that can be applied to the data held in the storage account, such as tiering, redundancy, security, access control, protection, monitoring, and so on.
Storage accounts are automatically encrypted for each storage service. They can be monitored using Azure Storage Analytics and Azure Monitor.
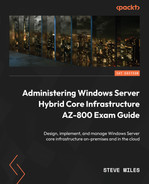
You can create your first storage account using the Azure portal, as shown in the following screenshot:
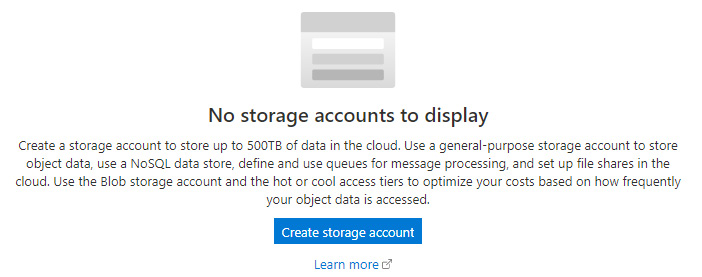
Figure 8.1 – Creating a storage account in Azure
You can also use PowerShell, the Azure CLI, or an Infrastructure as Code (IaC) deployment language such as Terraform, Bicep, or Azure Resource Manager (ARM).
Once created, the storage account can be accessed via HTTP/HTTPS through a globally unique namespace. These are known as endpoints and can be public or private. Information about these, along with Quickstart templates, can be found at https://docs.microsoft.com/en-us/azure/templates/microsoft.storage/storageaccounts?pivots=deployment-language-bicep.
We will look at creating a storage account via the Azure portal method in the Hands-on exercises section of this chapter.
The following types of storage accounts can be created:
- Standard: General-purpose v2
- Premium block blobs
- Premium page blobs
- Premium File shares
These storage account types are represented in the following screenshot:

Figure 8.2 – Storage account types
You cannot change the performance type setting after creating a storage account. This is shown in the following screenshot:
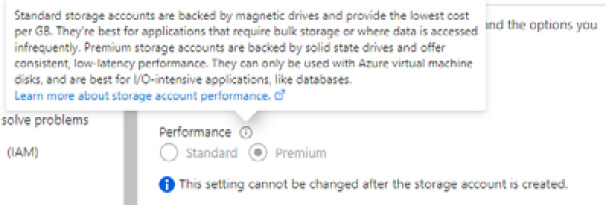
Figure 8.3 – Storage account type setting
You must create a new storage account of the performance type you need and then move the data to the created storage account.
This section looked at storage types, accounts, redundancy, and access. In the next section, we will look at implementing Azure Files.
Implementing Azure Files
The most common use case for Azure Files is to provide a replacement for on-premises file servers in a lift-and-shift manner to an Azure scenario. This will require you to provide access to network file shares via Server Message Block (SMB), Network File System (NFS), and HTTP(S) protocols. Client connections can be made by Windows, Linux, and macOS devices when the appropriate connectivity and access permissions are implemented.
Azure Files can also be used for backup and disaster recovery scenarios for the on-premise locations of file servers . Azure File Sync can be used to replicate file shares from on-premise file servers, providing a cloud tiering capability.
Azure Files is based on a serverless deployment, meaning there are no file servers to manage; this layer has been abstracted so that you can focus on creating shares and managing their access.
Azure Files uses the standard SMB 3.x protocol and can provide granular file permissions with support for NTFS when domain services are used to provide access. Data redundancy, performance tiering, encryption, versioning, backup, malware protection through Microsoft Defender for Storage, public and private endpoint access, and monitoring can all be configured as part of the service.
Azure Files supports a maximum file size of 4 TB and a maximum file share size of 100 TB (at the time of writing).
Access is available from anywhere, with the caveat that you must consider the following:
- Ports and protocol: Although the SMB 3.x protocol is considered safe and secure, many providers and organizations will block port 445, meaning your file shares will not be accessible. Port 445 should be permitted, or connectivity solutions such as ExpressRoute or a VPN will need to be implemented to work around this. You can explore this further here: https://docs.microsoft.com/en-gb/azure/storage/files/storage-files-networking-overview#azure-networking.
- Permissions: Access is another potential hurdle for file shares. Anonymous access isn’t supported. The authentication methods that are supported are access key, shared access signature (SAS), and identity-based. The identity-based method uses Kerberos and will need to be used in conjunction with hybrid identities to provide NTFS permissions.
- Performance: Once we have removed the hurdles surrounding ports, protocols, and permissions, we may find that the throughput and latency are not at the level needed to provide a workable or optimal solution. The optimal performance solution will be where Azure resources access the shared drives within the same region as the Azure Files storage account.
The storage account key will be required to gain full admin control and ownership of a file share using Azure Files; this process and its actions should be tightly controlled and governed.
Storage tiers
Azure Files provides the following storage tiers so that you get the optimal price and performance to match your needs:
- Premium: These file shares use solid-state drives (SSD), which provide low latency and fast and consistent performance.
- Transaction optimized: These file shares use hard disk drives (HDD), where low latency is not required. As the name implies, this tier is intended for workloads that perform transaction-heavy operations. This tier was first introduced as the Standard tier before being renamed transaction optimized.
- Hot: These file shares use HDD and are suitable for general-purpose workloads.
- Cool: These file shares use HDD, are the most cost-effective, and are optimized for online archives.
The chosen tier needs to match how frequently data is accessed and the rate at which data needs to be moved between tiers; the access frequency and retrieval (rehydration) process can negatively impact costs if the incorrect tier is chosen.
Storage redundancy
Several replication options are provided by Microsoft for your data. The following ones can be used with Azure Files:
- Locally redundant storage (LRS): Three copies of your files are stored in a storage cluster in a single physical location in a region. This has the lowest level of availability and durability.
- Zone-redundant storage (ZRS): Three copies of your files are stored per LRS and synchronously replicated across three storage clusters in different availability zones. Each zone is a physical location in the same region with one or more data centers that provide independent services such as network, cooling, and power. Data must be written to all three clusters before the writes can be accepted. This is the highest availability and durability option within a region and has the highest cost.
- Geo-redundant storage (GRS): Three copies of your files are stored per LRS and then asynchronously replicated to a storage cluster in a single location in a different region. These are replicated synchronously as LRS across the cluster in the secondary region.
- Geo-zone-redundant storage (GZRS): Copies are replicated as per ZRS and then asynchronously replicated to a storage cluster in a single location in a different region. These are replicated synchronously as LRS across the cluster in the secondary region as per GRS.
These options are shown in the following screenshot:
Figure 8.4 – Storage redundancy options
Note that premium file share storage accounts only support the LRS and ZRS redundancy options. There is no geo-redundancy option for a secondary region.
In addition, Read Access GRS (RA-GRS) and Read Access GZRS (RA-GZRS) are two other storage types that are available that support read access to the data in the secondary region; this can support a use case where you want to serve a copy of the data in a region closer to users, while the primary region is up. Note that not all storage types are available in all regions.
Storage encryption
Encrypting data at rest in a storage account is provided by all Azure Storage services and is enabled by default. As the data is written, it is automatically encrypted and transparently decrypted when accessed. By default, Microsoft-managed keys (MMK) are used. This can be seen in the following screenshot:
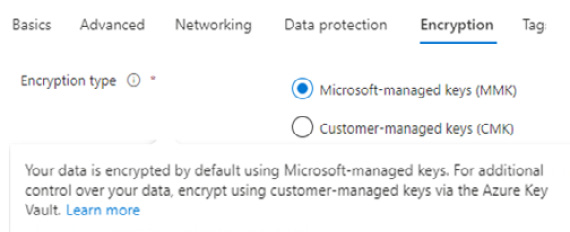
Figure 8.5 – Storage encryption type
As an alternative, customer-managed keys (CMK) can be used to encrypt the data; they can be stored in an Azure Key Vault as the key store. All storage accounts have encryption-in-transit enabled by default, as shown here:
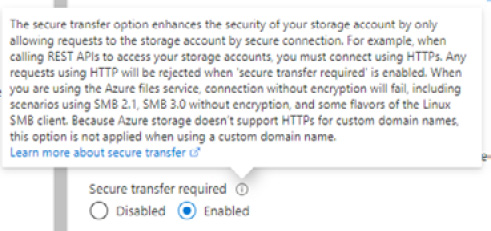
Figure 8.6 – Encryption-in-transit setting
In the default configuration of Secure transfer required being Enabled, HTTP connections are not allowed and will be rejected. Connections will fail if encryption is disabled, even in the case of SMB 3.0.
Storage protection
The following settings are enabled by default when creating a storage account:
- Soft delete for blobs: Retained for 7 days
- Soft delete for containers: Retained for 7 days
- Soft delete for file shares: Retained for 7 days
These options can be seen in the following screenshot:

Figure 8.7 – Storage protection
In addition, snapshots can be taken of file shares for general backup operations. Snapshots are incremental, and a share can contain up to 200.
Storage network access
When a storage account is created, the default networking configuration allows public access from all networks. You can change this to one of the following:
- Enable public access from selected virtual networks and IP addresses
- Disable public access and use private access
These options are shown in the following screenshot:
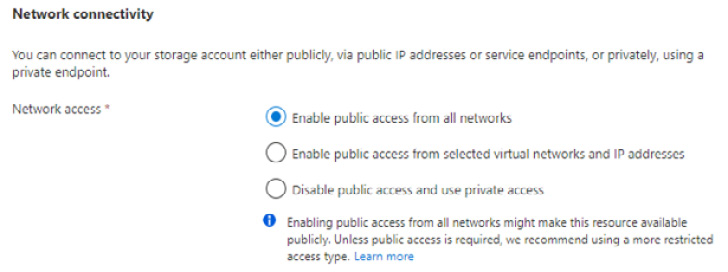
Figure 8.8 – Storage network access options
When you select the Disable public access and use private access option, you will be presented with the option to add a private endpoint. A private endpoint assigns a private IP to the storage account from the VNet. This can be seen in the following screenshot:
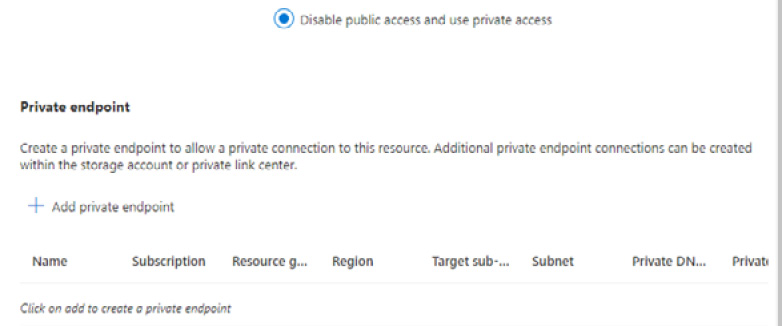
Figure 8.9 – Private endpoint
Once a private endpoint has been added, the endpoint for the storage account is only accessible from the VNet.
Storage authentication
Access to Azure Files must be authenticated; there is no support for anonymous access. The supported authentication methods for Azure Files are identity-based, access key, and shared access signature (SAS).
Identity-based
This access method provides Kerberos authentication using identities from Active Directory, Azure AD Domain Services, and Azure AD Kerberos. These options can be seen in the following screenshot:
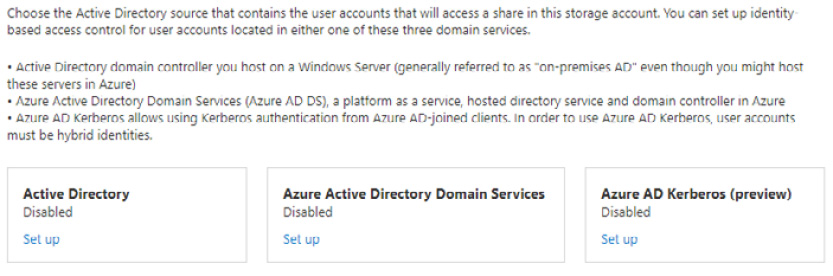
Figure 8.10 – Identity-based access
At the time of writing, cloud-only identities – that is, those that solely exist in Azure AD – are not supported. User accounts must be hybrid identities. Azure AD is a directory service only; it provides no direct domain controller functionality.
Access key
This static authentication method uses a key, not a password. It provides the owner full access to the file shares and bypasses all access control. This can be seen in the following screenshot:

Figure 8.11 – Access keys
This access should be controlled and governed. It shouldn’t be used by users, only by service owners and admins.
Shared access signature (SAS)
SAS provides a Uniform Resource Identifier (URI) that is generated dynamically. It provides access based on the storage key and can restrict access based on IP addresses, allowed protocols, permissions, and a set expiry time. These options can be seen in the following screenshot:
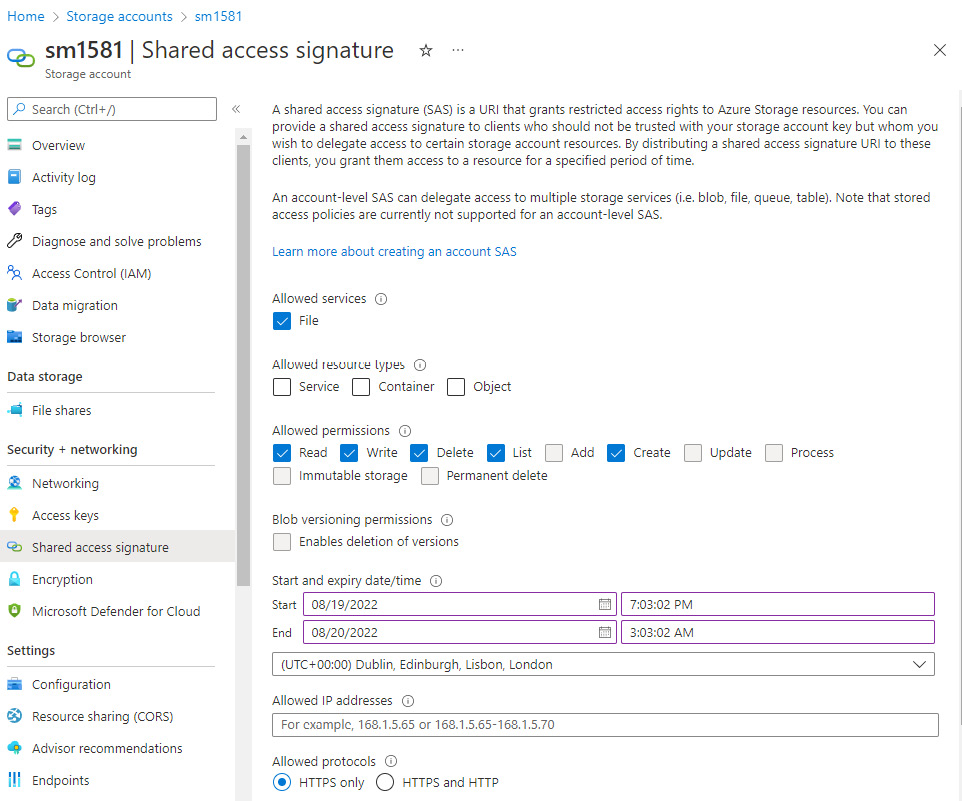
Figure 8.12 – SAS
The SAS method use case is for API access.
File share permissions
Role-based access control (RBAC) can manage file share permissions when configuring identity-based authentication. The following are the Azure File Share-specific built-in roles that can be assigned to users:
- Storage File Data SMB Share Contributor: This role allows users to read, write, and delete access to file shares
- Storage File Data SMB Share Elevated Contributor: This role allows users to read, write, delete, and modify NTFS permissions access for file shares
- Storage File Data SMB Share Reader: This role only gives users read access to file shares
These roles can be seen in the following screenshot:

Figure 8.13 – File share roles
Once users have access to a file share, NTFS permissions control the next level of access to folders and files, the same as any on-premise SMB file share.
In this section, we concluded the topic of implementing Azure Files. In the next section, we will look at implementing Azure File Sync.
Introduction to Azure File Sync
Azure File Sync uses Azure Files to keep file shares centralized in Azure but retains on-premise file servers to maintain existing operations, compatibility, and performance. Azure file shares can also be cached locally to on-premise file servers so that they are closest to the location where they are required. The file share data is still accessible locally via SMB, NFS, and File Transfer Protocol (FTP).
Azure File Sync is comprised of the following components:
- Storage Sync Service: This is the service resource that runs in Azure
- Sync group: A sync group contains endpoints that are to be kept in sync with each other
- Registered server: This is a trust relationship object between the Storage Sync Service and the server to sync to Azure
- Azure File Sync agent: This is a downloadable package that provides the sync process to Azure
- Server endpoint: This represents the folder or volume to sync on Windows Server – that is, the source of the sync
- Cloud endpoint: This represents the Azure file share, which is part of the sync group. It is the target for the sync
The use cases and capabilities of Azure File Sync for on-premise file servers are as follows:
- Multi-site sync: Multi-master replication is used to sync file shares across multiple sites.
- Cloud tiering: A volume-free space policy can be configured for server endpoints to define the amount of free space to preserve and store locally; this is defined as a percentage of the always available free space. You can also define a date policy, which you can configure so that you only locally cache files that have been accessed within a defined set of days. If a file is not accessed through a read or write operation in that period, it is tiered automatically to the Azure file share.
- Cloud backup: A daily backup can be scheduled for Azure file shares or a maximum of four on-demand daily backups. Snapshots are used to create backups of Azure file shares.
- Disaster Recovery: The entire namespace can be pulled to a server endpoint running the sync agent. This allows the folder structure files to be immediately available on the server.
Azure File Sync can be implemented using the Azure portal, PowerShell, or Windows Admin Center. You can follow these steps to implement Azure File Sync using the Azure portal:
- Complete the prerequisites for Azure File Sync.
- Prepare Windows Server so that it can use Azure File Sync.
- Deploy the Storage Sync Service.
- Install the Azure File Sync agent.
- Register Windows Server with the Storage Sync Service.
- Create a sync group and cloud endpoints.
- Create a server endpoint.
- Optional: Configure network settings to secure network access.
We will cover these steps in detail in the Hands-on exercises section.
Migrating a DFS-R deployment to Azure File Sync
DFS-N and DFS-R are compatible with Azure File Sync and can work together. To use them concurrently, File Sync cloud tiering should be disabled on volumes with DFS-R replicated folders, and server endpoints should not be created as DFSR read-only replication folders.
You can use Azure File Sync to migrate from a DFS-R deployment. The steps are as follows:
- Create a sync group for the DFS-R topology that’s being migrated from.
- Install Azure File Sync on the server that contains the full DFS-R dataset.
- Register the server and create a server endpoint on the share.
- Allow Sync to complete a full upload to the cloud endpoint (Azure file share).
- Install an Azure File Sync agent on each server that’s part of the sync group.
- Create new file shares on these servers.
- Create server endpoints on the new file shares. Optionally, set a cloud tiering policy.
- Allow the Azure File Sync agent to perform a full namespace rapid restore without the data. The local disk for the server endpoint will be filled with data based on the cloud tiering policy after the full namespaces sync has been completed.
- Ensure the sync is completed and then test the outcome as required.
- Users and applications can now be directed to the new share.
DFS-R servers in a sync group will require internet connectivity for Azure File Sync; in these cases, you don’t want to migrate those servers’ shares. Instead, you should use DFS-R and Azure File Sync together.
In this section, we introduced Azure File Sync and learned how to implement it. In the next section, we will complete some hands-on exercises to reinforce some of the concepts that were covered in this chapter.
Hands-on exercises
To support your learning with some practical skills, we will utilize the concepts and understanding we gained from this chapter and put them to practical use.
We will look at the following exercises:
- Exercise – creating a storage account
- Exercise – creating a standard performance Azure file share
- Exercise – creating a premium performance Azure file share
Getting started
To get started with this section, you will need access to the Azure portal with an account with Owner or Contributor access to an Azure subscription.
Let’s move on to the exercise for this chapter.
Exercise – creating a storage account
In this exercise, we will create a storage account.
Follow these steps to get started:
- Log into the Azure portal at https://portal.azure.com. Alternatively, you can use the Azure Desktop app: https://portal.azure.com/App/Download.
- In the search bar, type storage account; click on Storage accounts from the list of Services shown:
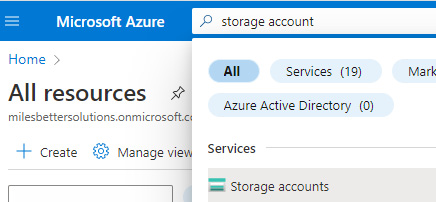
Figure 8.14 – Search storage accounts
- Click on + Create or Create storage account from the Storage account blade:

Figure 8.15 – The Storage accounts screen

Figure 8.16 – Project details
- Enter a globally unique Storage account name; hover your mouse over the information symbol for context-sensitive help choosing a name in the supported format:

Figure 8.17 – Storage accounts screen

Figure 8.18 – Selecting a performance type
Note
For a Premium storage account, you would select Premium, then select the required Premium account type for your scenario.
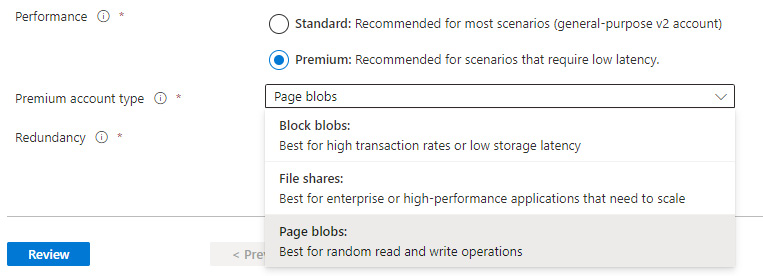
Figure 8.19 – Premium performance type
- Review the options that are available under Redundancy and select LRS:

Figure 8.20 – Redundancy options
- Click Next: Advanced > and review the options on the Advanced tab.
- Click Next: Networking > and review the options on the Networking tab.
- Click Next: Data protection > and review the options on the Data protection tab.
- Click Next: Encryption > and review the options on the Encryption tab.
- Click Next: Tags > and, optionally, add tags on the Tags tab.
- Click Next: Review >. On the Review tab, review your settings; you may go back to the previous tabs and make any edits if required. Once you have confirmed your settings are as needed, you can click Create.
- You will receive a notification that the resource deployment succeeded:
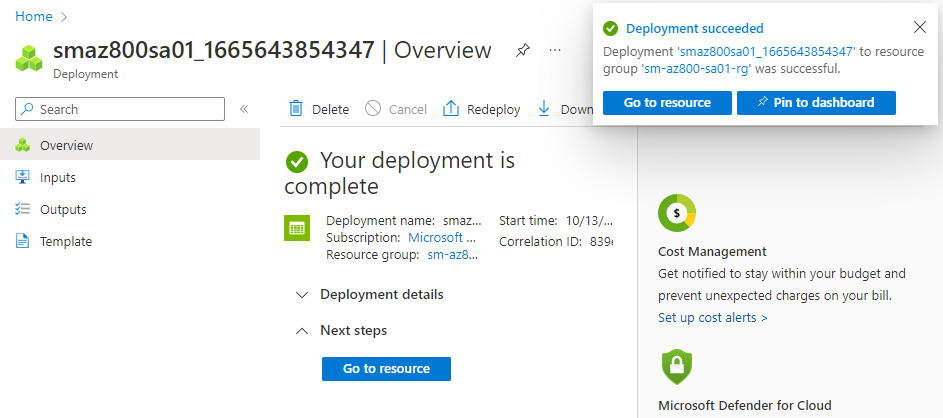
Figure 8.21 – Completed deployment
- Click on Go to resource or navigate to the Storage account blade.
- From the created Storage account blade, review the information from the Overview blade and all the available sections from the left-hand menu:

Figure 8.22 – The Storage account blade
With that, we have completed this exercise. This exercise taught us the skills needed to create a storage account; we covered the option of implementing the standard and performance tiers. In the next exercise, we will implement an Azure Files share.
Exercise – creating a standard performance Azure file share
In this exercise, we will implement an Azure file share using a standard storage account.
Follow these steps to get started:
- Log into the Azure portal at https://portal.azure.com. Alternatively, you can use the Azure Desktop app: https://portal.azure.com/App/Download.
- In the search bar, type storage account; click on Storage accounts from the list of Services shown.
- From the Storage account blade, create a new storage account for this exercise to create a file share, or use the existing storage account from the previous exercise. The storage account’s Performance type must be Standard for this exercise.
- Click on File shares from your standard storage account in the Data storage section:
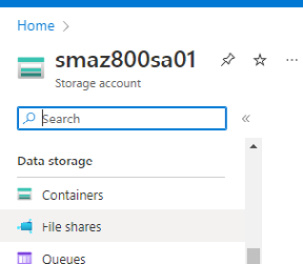
Figure 8.23 – The Storage account blade
- Click on + File share via the top navigation menu:
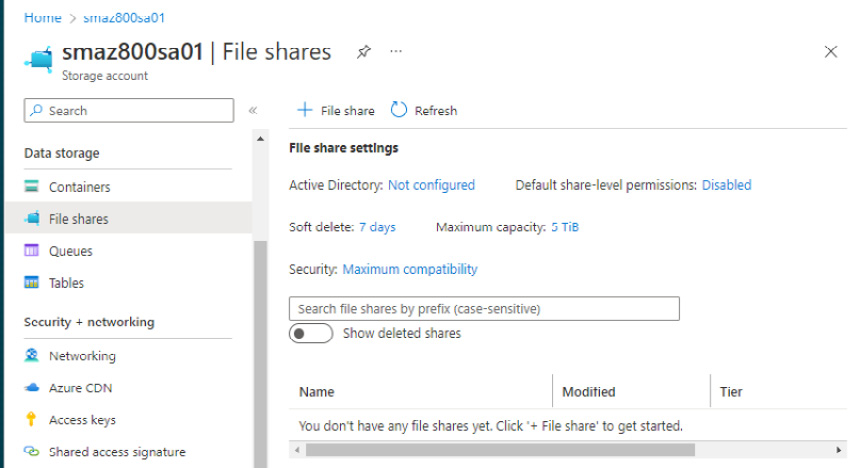
Figure 8.24 – The File shares blade
- From the New file share blade, enter a Name for the file share.
- For the tier, hover your mouse over the information symbol for context-sensitive help in choosing the tier. Leave Tier set to Transaction optimized and review the information presented for that tier:
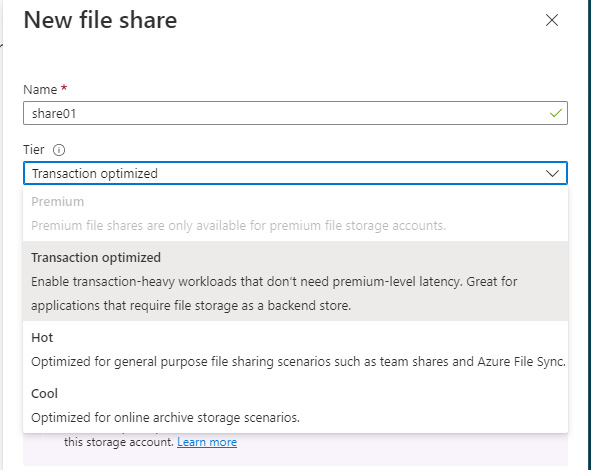
Figure 8.25 – The New file share blade
- Click Create.
- You will receive a message that the file share was successfully created.
- The file share can now be seen in the File shares blade:
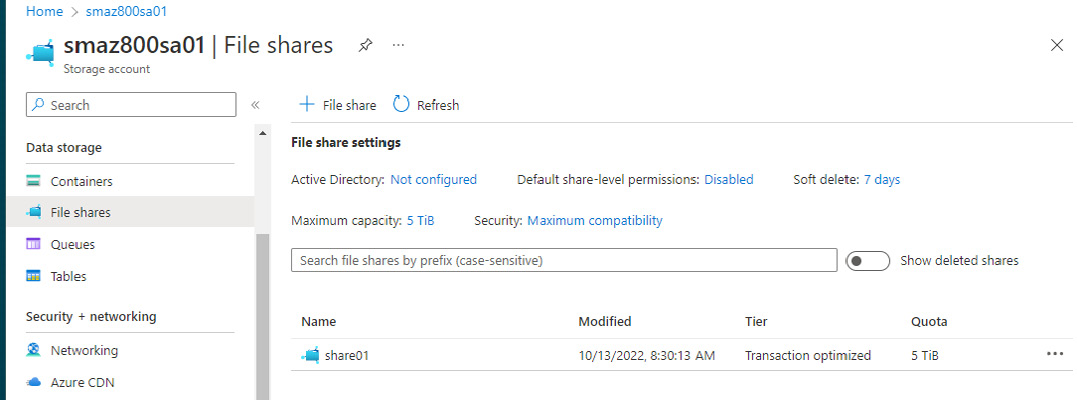
Figure 8.26 – The Files shares blade
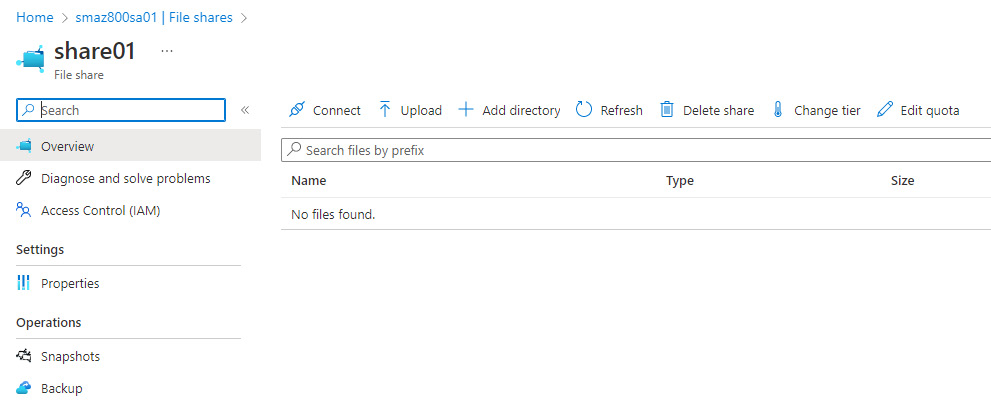
Figure 8.27 – The File shares blade
- Click on Connect to view the connection information:
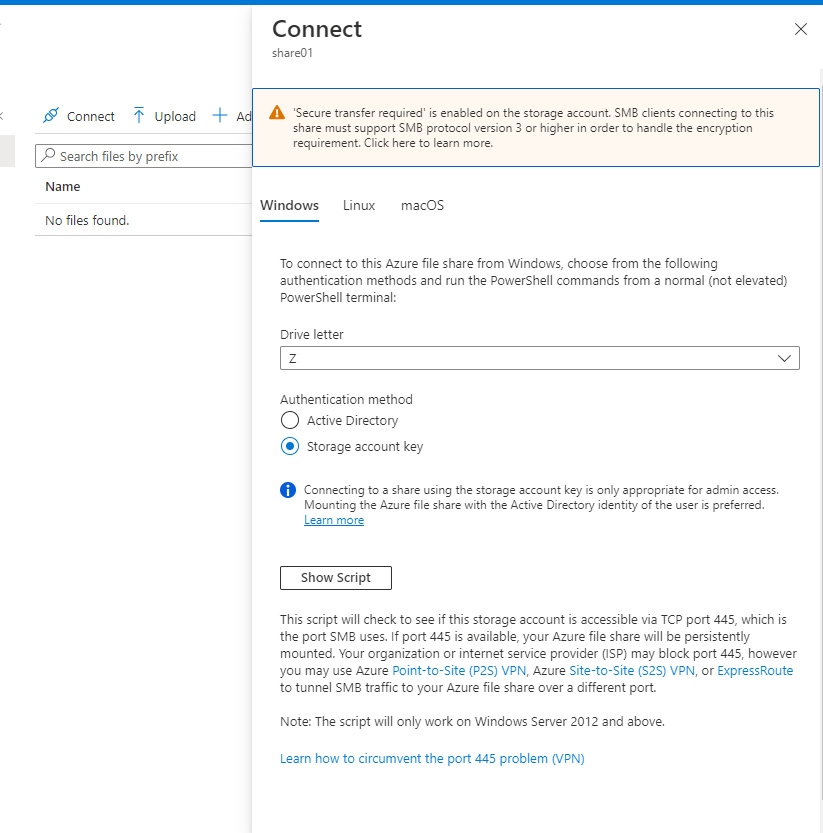
Figure 8.28 – The Connect blade
- Click on Access Control (IAM) to view the information regarding identity-based authentication; click the Learn more hyperlink for further information:
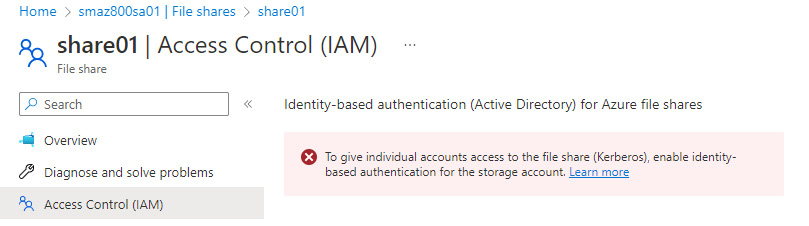
Figure 8.29 – The Access Control (IAM) blade
With that, we have completed this exercise. This exercise taught us the skills to create an Azure file share using standard storage. In the next exercise, we will implement an Azure File share using a premium storage account.
Exercise – creating a premium performance Azure file share
In this exercise, we will implement an Azure file share using a premium storage account.
Follow these steps to get started:
- Log into the Azure portal at https://portal.azure.com. Alternatively, you can use the Azure Desktop app: https://portal.azure.com/App/Download.
- In the search bar, type storage account; click on Storage accounts from the list of Services shown.
- From the Storage account blade, create a new storage account for this exercise. The storage account’s Performance type must be Premium, and the Premium account type must be File Shares, for this exercise.
- Click on File shares from your Premium storage account under the Data storage section:
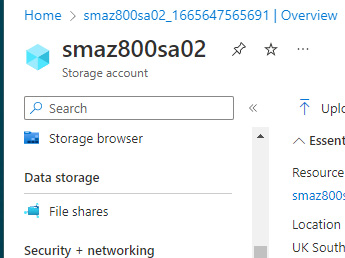
Figure 8.30 – The Storage account screen
- Click on + File share via the top navigation from the File shares blade to create a new file share.
- Enter a Name for the file share.
- Enter a Provisioned capacity.
- Review the Performance information presented.
- Select the SMB or NFS protocol as required:
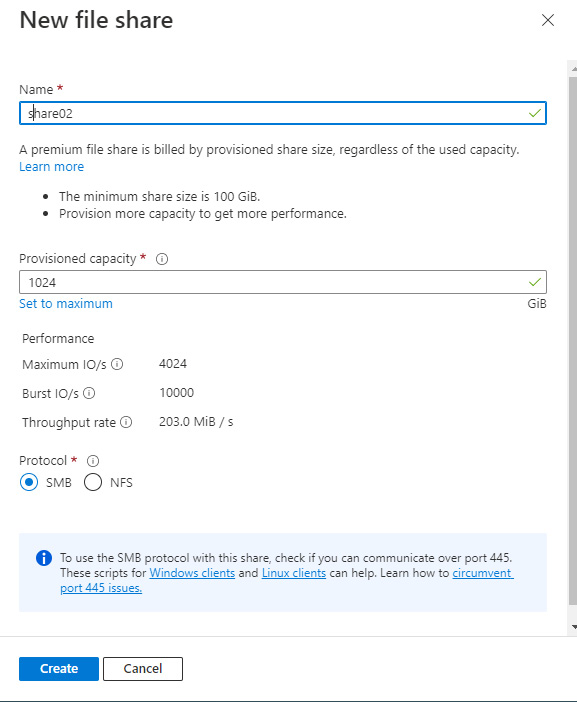
Figure 8.31 – The New file share blade
- Review the communication over port 445 information.
- Click Create.
- You will receive a message that the file share was successfully created.
- The file share can now be seen in the File shares blade:
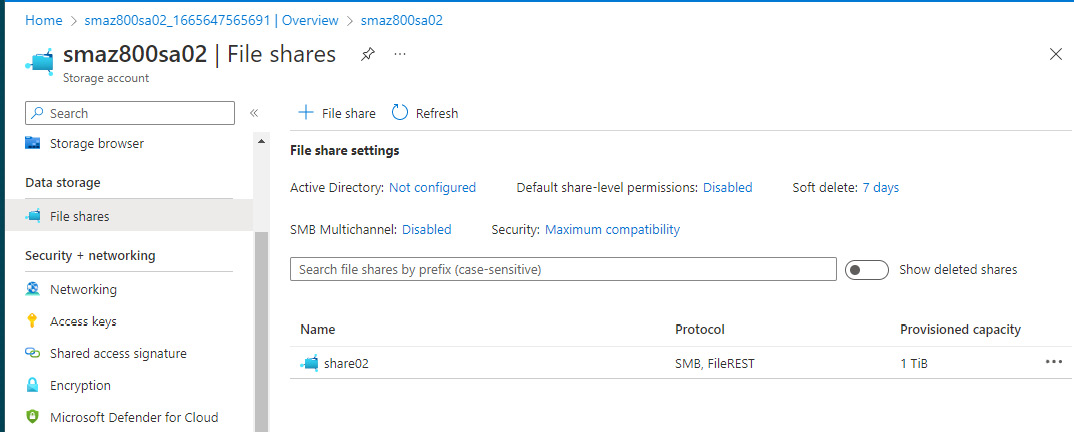
Figure 8.32 – The Files share blade
- Click on the created file share and review the information and settings on the page that opens.
- Click Connect to view the connection information and the port 445 communication problem:
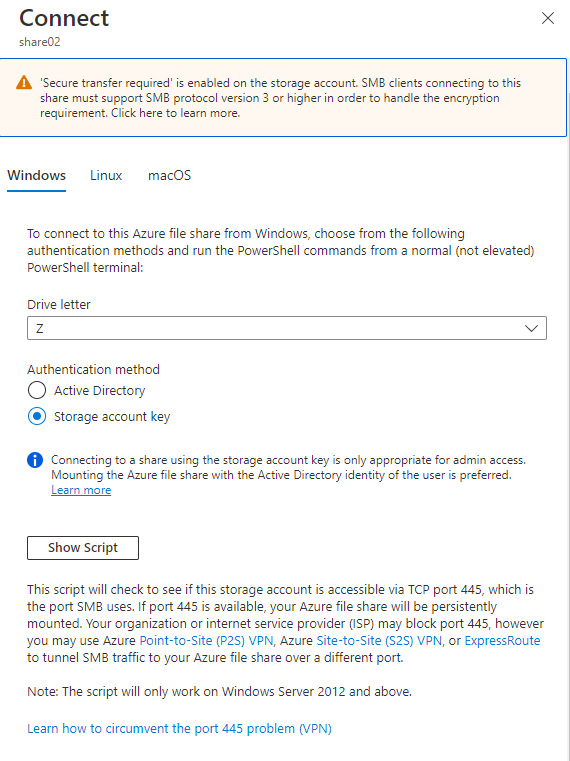
Figure 8.33 – The Connect blade
- Click on Access Control (IAM) to view the information regarding identity-based authentication; click the Learn more hyperlink for further information:
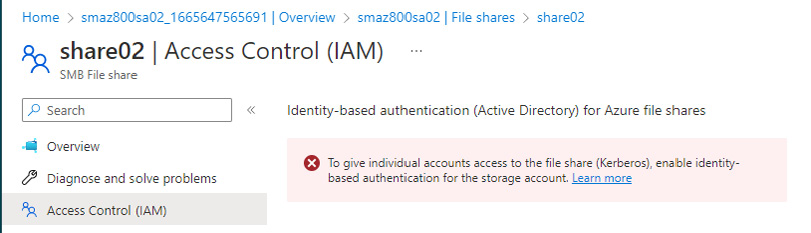
Figure 8.34 – The Access Control (IAM) blade
With that, we have completed this exercise. This exercise taught us the skills to implement an Azure file share using a premium storage account. Now, let’s summarize this chapter.
Summary
We started this chapter by introducing the storage services that are available in Azure, their use cases, and where we may select each one for a real-world scenario. Then, we looked at implementing the Azure Files service and Azure File Sync, and how to migrate the service from DFS-R. We finished this chapter with some hands-on exercises to provide you with valuable practical skills.
We ensured that we provided coverage of AZ-800 Administering Windows Server Hybrid Core Infrastructure: Manage storage and file services.
This chapter aimed to take your knowledge beyond the exam objectives; we added new skills and learning with the content provided. This will help you develop your knowledge and skills for on-premise network infrastructure services and allow you to be prepared for a real-world, day-to-day hybrid environment-focused role.
In the next chapter, you will learn about implementing Hyper-V on Windows Server.
Further reading
This section provides links to additional study references and additional exam information:
- Microsoft Certified: Windows Server Hybrid Administrator Associate: https://docs.microsoft.com/en-us/learn/certifications/windows-server-hybrid-administrator/
- Exam AZ-800: Administering Windows Server Hybrid Core Infrastructure: https://docs.microsoft.com/en-us/learn/certifications/exams/az-800
- Exam AZ-800: Study Guide: https://query.prod.cms.rt.microsoft.com/cms/api/am/binary/RWKI0r
- Microsoft Learn: https://docs.microsoft.com/en-us/learn/modules/implement-hybrid-file-server-infrastructure/
Skills check
Check what you have learned in this chapter by answering the following questions:
- What four storage types are available in Azure?
- What is a storage account?
- What storage account types can be created?
- Can you change the performance type of a storage account?
- What is Azure Files?
- What are some of the use cases for Azure Files?
- What are some of the considerations when implementing Azure Files?
- What are the storage tiers?
- What storage redundancy options are there for Azure Files?
- What encryption is available for Azure Files?
- How is storage protected?
- What storage networking/access options are available?
- What storage authentication options are available?
- What are the file share permissions that can be assigned to users?
- What is Azure File Sync, and what are its use cases?