
13. Working with Online Data
• Create dynamic content based on HTML tables and XML data sets
• Select a server model
• Set up a testing server
• Connect to a data source
By its very nature, the web is a dynamic environment. Get the most out of your website by connecting it to live data using Spry, ASP, ColdFusion, or PHP.
Working with dynamic content
Except for a few interactive Spry components and a little HTML5-compatible animation and video, the pages you have built in this training have been mostly static, like text and pictures on paper. Yet the web is a dynamic environment. The live connection to the Internet makes the delivery of text, pictures, animation, and video only a click away.
Many of the most popular websites today supply content through two-way interactions with their visitors. This “query and response” method of content delivery can’t be accomplished by HTML alone. It requires scripting and a variety of server-based applications that are supported by languages like Ajax, ASP, ColdFusion, JavaScript, and PHP, among others. This technique also requires information stored on the Internet, usually in the form of a table or database.
Until a few years ago, HTML tables were static containers. But now the lowly table has been liberated through the intervention of Asynchronous JavaScript and XML (Ajax). Dreamweaver can easily harness all the power of Ajax through Adobe’s Spry framework and some surprisingly powerful widgets. At the moment, you may lack the ability to develop more sophisticated applications, but there’s no longer any excuse for putting static tables on your website.
If you are starting from scratch in this lesson, see the “Jumpstart” instructions in the “Getting Started” section at the beginning of the book.
Previewing the completed file
To see what Ajax can do for HTML-based tables, let’s preview the completed file.
1. Launch Dreamweaver, if necessary. Open events_finished.html in the lesson13 folder, and examine the Events Calendar and Class Schedule tables.
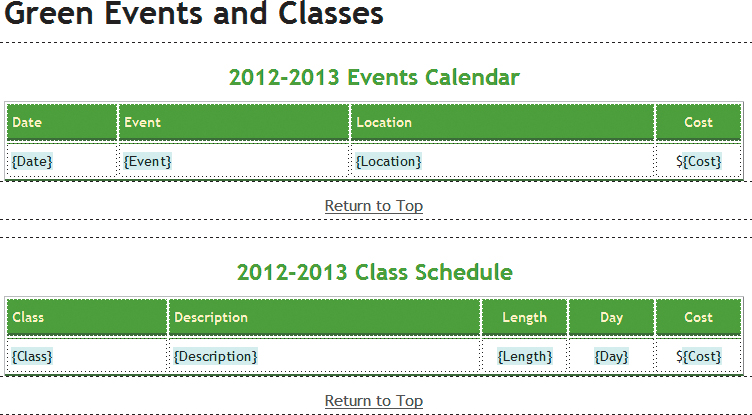
Both tables consist of two rows: a header row and a data row. Note the placeholder text in the second row of each table, such as {Date} and {Event}. These are components of Spry widgets that generate table data dynamically.
2. Preview the page in Live view.
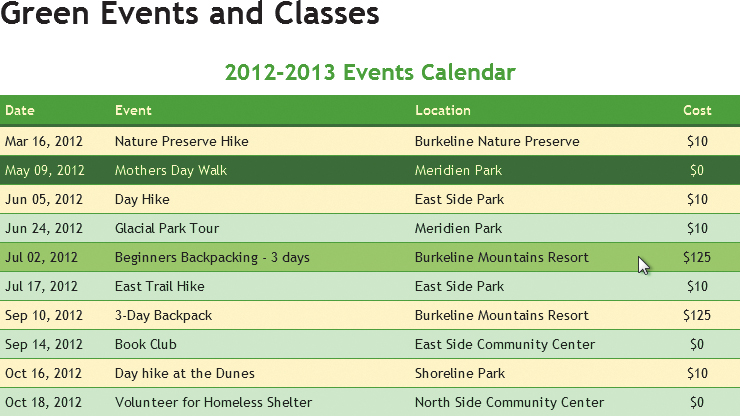
The placeholders are replaced by data from external sources. Additional rows are generated automatically. Note that the text in the Events table is sorted by date.
3. Click the header cell for each column.
The data in the table sorts based on the data in the column.
4. Move the cursor over each row in the table.
As the cursor passes over each row, it changes color momentarily.
5. Click any row in the table, and then move the cursor away from that row.
The selected row changes color completely and remains highlighted as the cursor moves away.
6. Repeat steps 3–5 for the Class table.
The Class table exhibits the same behaviors as the Events table. The functionality for sorting tables interactively and creating the hover and select effects are all produced by Ajax scripting.
In the next exercise, you’ll learn how to tap into the power of Ajax by using Spry to liberate data stored in HTML tables and XML files, and you will produce these same effects.
Using HTML and XML data
Before you can display data on your webpages, you’ll need to establish a proper data source. In years past, this meant working with proprietary programming languages like ASP, ColdFusion, and PHP. These are powerful languages that are still used in thousands of websites today, and you’ll learn more about them later in this lesson. But Ajax has revolutionized the role of data within many sites. As powerful as they are, the traditional languages can display data changes only after they reload the entire page. On the other hand, Ajax can update data in real time.
This capability is enabled through the use of HTML and XML data sets and Java-Script. In HTML, the data is stored in tables. XML (Extensible Markup Language) data is stored in a plain-text file using a standardized specification for marking up text. In the following exercises, you’ll work with both HTML and XML data sets.

HTML (left) and XML (right) store information in different ways, but both are accessible to Dreamweaver.
Working with HTML data
Until the advent of Ajax, data stored in HTML tables was static and unusable by the rest of the website. In other words, the data in a table on page A could not be used by page B unless you copied and pasted part or all of the data onto that page, too. The problem with this workflow is obvious. Once you paste the data onto multiple pages, you have to constantly update every page manually when the data changes, creating a lot more work and possibilities for error. Using the Adobe Spry framework, Dreamweaver can now tap into HTML table-based data in a new, dynamic way.
1. If necessary, launch Dreamweaver and switch to Design view. Open events.html from the site root folder.
This page contains two HTML-based tables filled with data. At the moment, the data is static, but by using Ajax via the Spry framework you’ll be able to tap into this data for a variety of purposes. The first step is to move the table into a separate document.
HTML tables can be created quickly and easily from spreadsheet and database files. See Lesson 7, “Working with Text, Lists and Tables.”
2. Insert the cursor into the Events table and select the <table#calendar> tag selector. Press Ctrl-X/Cmd-X to cut the table.
3. Select File > New. Choose Blank Page > HTML > <none>. Click OK/Create.
A new, blank document is created.
4. If necessary, insert the cursor in the Design view window. Press Ctrl-V/Cmd-V to paste the table. Insert a new, empty paragraph after the table.
Before a table can be used as a Spry data set, it must have a unique ID.
5. Insert the cursor into the table. Examine the tag selectors.
The tag selector displays <table#calendar>.
6. Select the <table#calendar> tag selector and examine the Property inspector.
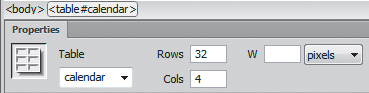
Note that the ID field displays the text calendar. You applied IDs to both tables in Lesson 9, “Working with Navigation,” and the ID was preserved when you copied and pasted the table into this file.
7. Save the file as html-data.html in the site root folder.
There’s no limit to how many tables one file can hold, but don’t go crazy; files containing lots of tables can take longer to download from the Internet and can detract from a user’s overall experience.
You may notice that none of the attached style sheets contain a #calendar rule. Although IDs are frequently used to create styling, no CSS rule has to be created to use the ID for this purpose.
8. Click the events.html document tab to bring it to the front. Repeat step 2 to cut the Class table. Switch to html-data.html. Paste the Class table in the empty paragraph below the Events table.
9. Save and close the file.
10. If necessary, click the tab for events.html to bring that document to the front. Insert the cursor at the end of the Green Events and Classes heading and press Enter/Return to create a new, empty paragraph.
11. Open the Insert panel. Choose Spry from the Category menu. Click the Spry Data Set button.
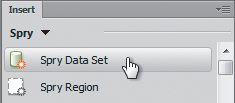
The Spry Data Set dialog box appears.
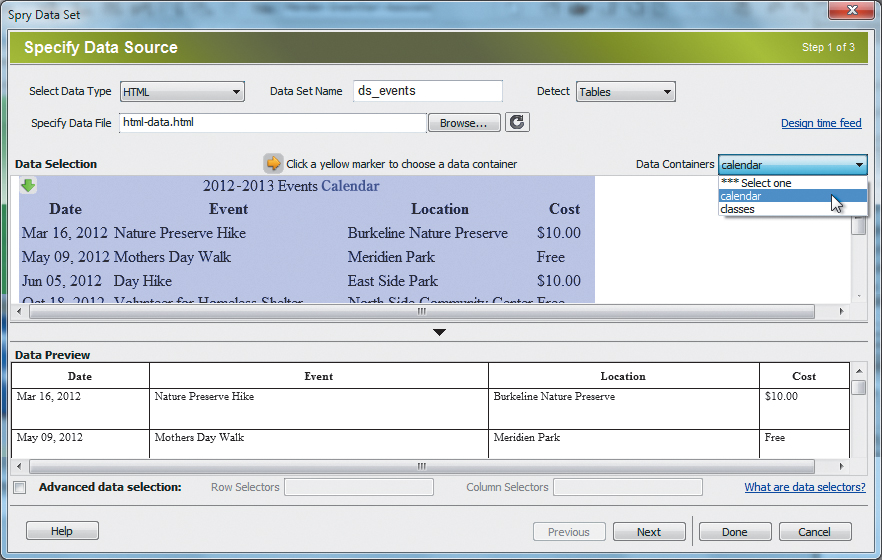
12. In the Select Data Type menu, choose HTML.
In the Data Set Name field, enter ds_events.
In the Detect field menu, choose Tables.
Click Browse and, from the site root folder, select html-data.html. Click Open/Choose.
A preview of the data sources in html-data.html appears in the Data Preview window.
13. In the Data Containers menu in the upper right, choose Calendar. Click the Next button at the bottom of the dialog box.
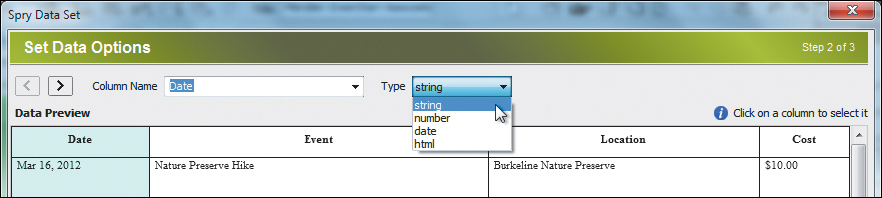
The Spry Data Set dialog box now displays a window to set data options. In this window you can identify specific types of data, such as text (string), numbers, dates, and HTML code. Identifying the data type is important if you want to sort data by certain values, such as by dates or cost, or use the data for other special purposes.
14. In the Column Name menu, choose Date. In the Type menu, choose string.
Note that the Use First Row As Header option is selected. If you use a table that doesn’t contain a header row, this option should be deselected.
15. In the Sort Column field, choose Date. Examine the order of the data in the Data Preview window.
Note that the column sorts incorrectly, based on the spelling of the month. You can correct this problem by changing its data type.
16. Click the first row of the Date column. In the Type menu, choose date.
The column is now sorted correctly, based on the event date.
For Spry applications, dates can be entered in two basic formats: by spelling out the month, day, and year—typically January (or Jan) 1, 2011—or by standard numeric notation, such as 1/1/2011. However, the Spry Data Set dialog box will not recognize dates written like this: 1-1-2011.
17. Click the first row in the Event column. In the Type menu, choose string. Select the Location column. In the Type menu, choose string.
Now it’s time to assign the data type to the Cost column. You may notice that the Cost column of the Events table contains numeric and non-numeric characters. If a field contains characters other than those accepted by that type of data, you should choose string from the Type menu. For this example, you will assign the number type. This will cause an error at first, but you will adjust the data later to compensate.
18. Select the Cost column. In the Type menu, choose number. Click Next.
The Spry Data Set dialog box now displays the insert options for the data set.
19. Click the Set Up button beside the Insert Table option.
The Spry Data Set–Insert Table dialog box appears. This dialog box allows you to specify what data will be displayed and how it will appear. Feel free to experiment by removing or changing the order of the data columns, and by specifying whether they are sortable or not.
Choosing number as the Type for the Cost column will cause an error when the data is rendered, because the column currently contains non-numeric data. Before you can test the file successfully, you will have to remove the dollar sign ($) and any other non-numeric characters.
20. Select the Sort Column When Header Is Clicked check box, if necessary.
In the Odd Row Class field, enter odd.
In the Even Row Class field, enter even.
In the Hover Class field, enter rowhover.
In the Select Class field, enter rowselect. Click OK.

This dialog box assigns CSS classes to style the table interactively, powered by JavaScript. These classes don’t exist yet; if they did, you could select them from the menus. You will create them in the next exercise.
21. Click Done.

A two-row Spry data table placeholder is inserted in the layout. Some of the formatting on the placeholder should match the default table styling you created in Lesson 7, “Working with Text, Lists, and Tables.” The Spry component is nearly complete, but it still needs custom CSS rules for the classes you assigned in step 20.
Styling Spry tables
The odd/even, hover, and select effects are styled using CSS rules invoked by JavaScript. These rules don’t exist yet. You will also have to reapply some of the table styles you created in Lesson 7.
1. In the CSS Styles panel, select the last rule in mygreen_styles.css. Click the New CSS Rule icon in the CSS Styles panel.
The new rule will be inserted at the end of the style sheet.
2. In the Selector Type menu, choose Class. In the Selector Name field, enter odd. Click OK.
3. In Background-color, enter #FFC and click OK.
4. Create a new CSS class for even. Assign it a background color of #CFC.
5. Create a new CSS class for rowhover. Assign it a background color of #9C6.
6. Create a new CSS class for rowselect. In the Type category Color field, enter #FFF. Assign it a background color of #990.
7. Save all files.
A dialog box may appear indicating that files are being added to the SpryAssets folder to enable the Spry functionality. Before you test the Spry functionality, let’s reapply the styling for the Date and Cost columns.
8. If necessary, click OK.
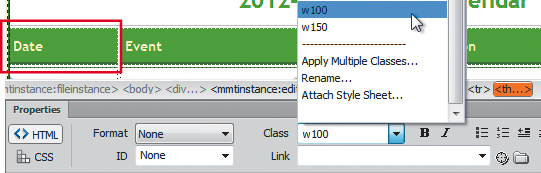
9. Insert the cursor in the header for the Date column. Select the <th> tag selector. From the Class menu in the Property inspector, choose w100.
10. Select the cells in both rows of the Cost column. From the Class menu, choose cost.
In Lesson 9, “Working with Navigation,” you added ID attributes to both tables to create hyperlink destinations. You need to add those attributes to your new Spry tables.
11. Select the <table> tag selector. In the Property inspector ID field, enter calendar and press Enter/Return.
The last step is to re-create the table caption. Tag selectors can help you locate specific markup when you work in Code view.
12. Insert the cursor in the table. Click the <table#calendar> tag selector. Switch to Code view. Insert the cursor directly after the opening table tag. Type <caption>2012-2013 Events Calendar</caption>.
13. Switch to Design view. Save all files.
14. Preview the page in Live view and test the table behaviors.
When you click the header fields, the table sorts based on the data content. When you move the cursor over the rows, they change color. When you click any individual data row, the color of the row changes completely and the text appears in white.
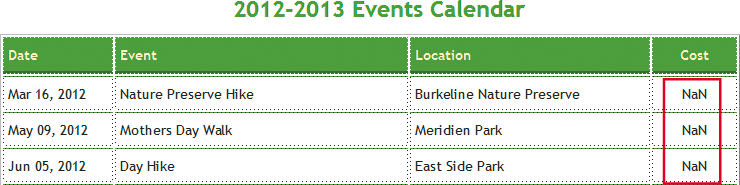
The only problem seems to be coming from the Cost column, which is displaying an error message: NaN, which stands for “Not a Number.” The original table was not designed for this use, and the data contains non-numeric characters. You’ll have to remove these characters from the data table to complete the component.
Updating HTML data
You can correct the data table manually, or you can use Dreamweaver’s Find/Replace command.
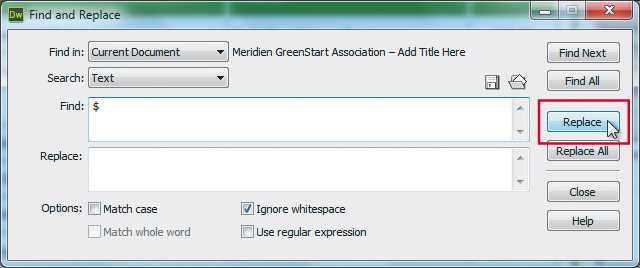
1. Open html-data.html from the site root folder. Select the dollar sign ($) in the first row of the Events table. Press Ctrl-F/Cmd-F.
The Find and Replace dialog box appears. The dollar sign ($) is entered in the Find field automatically.
2. Confirm that the Find In: Current Document and Search: Text options are selected. Leave the Replace field empty and click Replace.
The selected dollar sign is removed and Dreamweaver automatically selects the next dollar sign in the file.
3. Continue to click Replace to remove the dollar signs one at a time, or click Replace All to remove them all at once.
Clicking Replace All will close the Find and Replace dialog box. To perform the next step you will have to press Ctrl-F/Cmd-F to re-open the Find and Replace dialog box.
4. Replace the text Free with the number 0 (zero). Replace the word Donation with the number 0 (zero).
5. Close the Find and Replace dialog box. Save and close html-data.html.
6. Click the tab for events.html to bring it to the front. If necessary, preview the page in Live view.
Now that you have removed the non-numeric characters, the HTML-based data displays properly. But users may be confused by prices appearing without dollar signs. Although the dollar sign is incompatible in the data file, there’s a simple trick that will allow you to use it in the final display.
7. Switch back to Design view. Insert the cursor before the data placeholder {cost}. Type $.
The placeholder now appears as ${cost}.

8. Preview the document in Live view.
By adding the dollar sign before the data placeholder, Dreamweaver clones it automatically for each data row. You can use this method for all sorts of introductory characters and text.
9. Save all files.
Spry data sets can also be based on XML data.
Working with XML data
XML is a markup language closely related to HTML. They both use the same tag-based method for marking up text. The reason XML is called extensible is because you create your own tag names (unlike HTML).
The language was invented directly in response to HTML’s limitations in dealing with data in web applications. The simplest way to explain their different roles is this: HTML was designed to display data; XML was designed to define it.
In XML, data elements are placed between opening and closing tag pairs, like this:
<company>Meridien GreenStart</company>
XML can be written by hand or it can be exported from a number of data applications, such as MS Access, MS Excel, FileMaker Pro, and large-scale databases like Oracle and SQL Server. Non-proprietary databases—such as MySQL—are very popular on the web and are also compatible with XML. You will learn about other types of web-based database applications later in this lesson.
Spry data sets can use XML data and HTML data tables interchangeably.
1. If necessary, open events.html. In Design view, insert a new paragraph after the first Return to Top hyperlink.
The XML-based data set must be inserted outside the <div> element containing the HTML data set. Nested Spry data sets are not allowed in Dreamweaver.
2. In the Insert panel, click the Spry Data Set button.
The Spry Data Set dialog box appears.
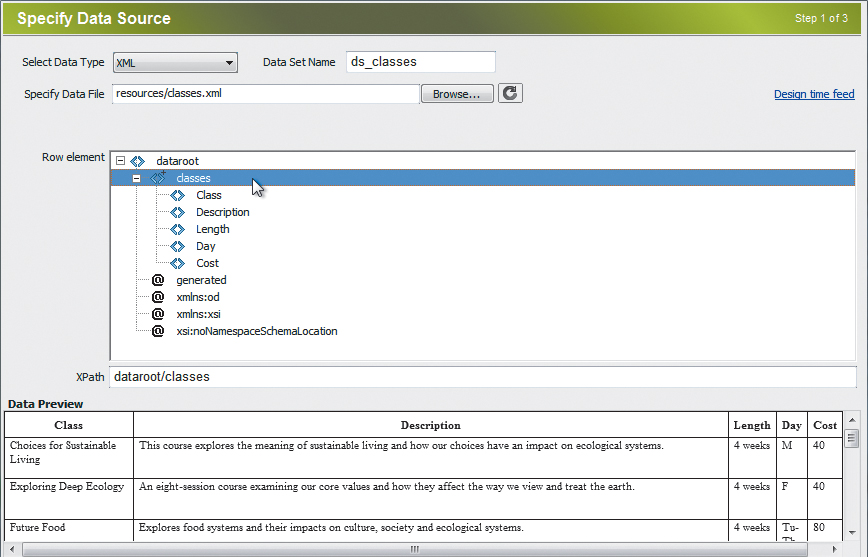
3. From the Select Data Type menu, choose XML. In the Data Set Name field, enter ds_classes. Browse and select classes.xml from the lesson13 > resources folder.
The Specify Data Source dialog box appears displaying the structure of the XML data. The window shows a list of the XML tags, or elements, contained within the file. The first tag is <dataroot>, which is the root, or main parent, element that contains all data. The next element is <classes>, and you can tell from how the other tags are indented that it is the parent of the remaining elements. The plus (+) sign on the element indicates that the file contains two or more classes.
4. Select the classes tag and note the Data Preview window. Click Next.
The Set Data Options screen appears.
5. For the data type for the first four columns, choose string. For the data type for the Cost column, choose number. In the Sort Column menu, choose Class.
This file doesn’t contain date data; the entire contents can be treated as text or numbers.
6. Click Next. For the Insert Table option, click Set Up.
7. Make sure the Sort Column When Header Is Clicked check box is selected.
In the Odd Row Class field, enter or select odd.
In the Even Row Class field, enter or select even.
In the Hover Class field, enter or select rowhover.
In the Select Class field, enter or select rowselect. Click OK.

Selecting the class names from the menus can prevent you from typing the names incorrectly. Since the CSS classes already exist, the new table should be ready to function.
8. Click Done.
The XML-based Spry table is inserted in the page, complete with data placeholders. Before previewing it, let’s add the original caption.
9. Insert the cursor into the XML-based Spry table. Click the <table> tag selector. Switch to Code view and add the following code after the opening <table> tag:
<caption>2012-2013 Class Schedule</caption>
10. Save all files and preview the page in Live view.
Both tables display the appropriate data and behave just like the sample you previewed at the beginning of the lesson.
Spry data sets provide a powerful option for importing and displaying HTML and XML source materials dynamically, but it’s not a perfect solution. Although Ajax makes the data display dynamic, the data files are anything but. For one thing, there’s no native method for updating HTML and XML data that changes quickly, like sports scores and weather forecasts.
Instead, developers store data in traditional databases and then, using custom scripting, generate HTML and XML data files periodically or interactively upon a user request. This type of hybrid system brings together the benefits of both techniques, and many sites are following this model today. Although many sites have switched over to Ajax completely, quite a few are still using ASP, ColdFusion, and PHP. In upcoming exercises, you’ll explore how some of these powerful tools and capabilities work.
Choosing a server model
If you decide to build dynamic web applications, one of the first steps you have to make before you write a single line of code is to choose the server model you’ll use for your site. Many factors go into this decision, including the purpose of the site, the type of applications you wish to develop, the cost of the server model, and even the type of database you wish to use. In some cases, the choice of database will select the server; in others, the reverse will be true.
For example, the MS Access database favors the ASP server model, which runs on Windows Server operating systems. On the other hand, the MySQL database, which is typically combined with either ColdFusion or PHP, runs equally well on all servers. Here’s a quick overview of the major server models that you should keep in mind while you are making your choice:
ASP (Active Server Pages) is a Microsoft technology that runs natively in Windows. Dreamweaver provides server behaviors for ASP in Visual Basic (VBScript) but not in JavaScript. While some think it’s difficult to learn and use, it’s included for free with Microsoft’s Internet Information Services (IIS), which means that all Windows users can immediately create applications with little extra setup. Also available is ASP.NET, the successor to ASP, developed to correct some of ASP’s limitations and increase the speed and power of the resulting web applications. Dreamweaver no longer provides server behaviors for ASP JavaScript and ASP.NET, although you will still be able to hand-code and test these pages in the program.
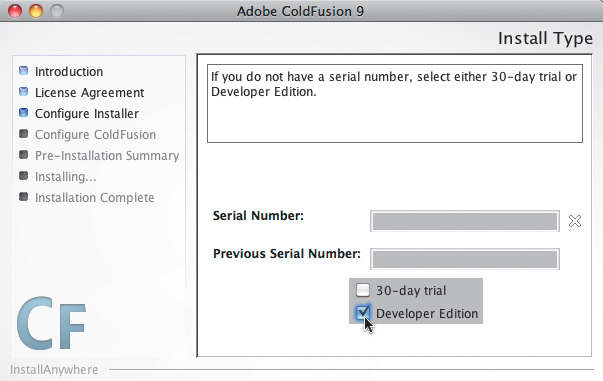
ColdFusion is an Adobe server technology that uses a tag-based syntax that some feel is easier to learn and use than ASP or PHP. For many processes, ColdFusion requires fewer lines of code, which provides advantages during development and deployment of web applications. Unlike the other server technologies described here, ColdFusion is not free, although some feel that the productivity gains are worth the extra cost. ColdFusion can run on Windows, Linux/Unix, and Macintosh servers. To get a head start, you can download and install the free Developer’s Edition of ColdFusion, which enables you to build a fully workable dynamic site locally, before you upload it to the Internet.
PHP (PHP Hypertext Processor), originally known as Personal Home Page, is now one of the most popular languages used on the web. It is free and works well with a variety of databases and other services. It offers a similar level of difficulty as ASP, but because of its popularity there are plenty of resources available to obtain code examples as well as support, which is also free, for the most part.
Configuring a local web server
There are two ways to test dynamic pages. You can upload them to your web host and test them live on the Internet, or you can test the files before you upload them on your own personal computer. While nothing beats the authenticity of the actual Internet servers that will host your site, a local server offers advantages of both speed and security. It also allows you to work offline, without a live connection to the Internet.
Before you can test any of the dynamic webpages that you will build in the next lesson, you must install the applications and components needed for a local web server. This process is tedious and prone to error. It consists of numerous critical steps for loading and configuring all aspects of your chosen environment. As such, it is outside the scope of this book. Luckily, there are many sources both in print and online that can assist you in this endeavor. Here are a few:
In Print:
• Adobe Dreamweaver CS3 with ASP, ColdFusion, and PHP: Training from the Source, Jeffrey Bardzell and Bob Flynn (Adobe Press, 2007)
Online:
• ASP and IIS—tinyurl.com/setup-asp or tinyurl.com/IIS-setup
• ColdFusion—tinyurl.com/setup-ColdFusion
• PHP—tinyurl.com/setup-apachephp
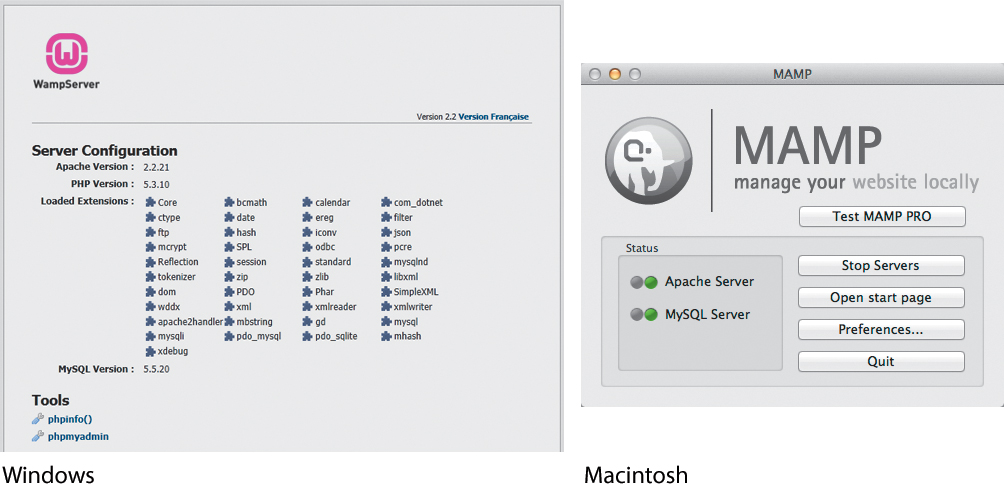
The specific examples shown in the following exercises are based on the Windows/Macintosh Apache MySQL PHP (WAMP/MAMP) web servers, so this may be your obvious choice. Download WAMP at tinyurl.com/WAMP-setup. Download MAMP at tinyurl.com/MAMP-setup. Another Windows-based web server, called XAMPP, is also available and is referenced in several of the links provided in this lesson. To download and try out this server, go to tinyurl.com/XAMPP-server.
Although the exercises were created for the WAMP/MAMP environments, it’s possible to install and use an ASP or ColdFusion server, as well. Unfortunately, there won’t be any help within the exercises to adapt the instructions to those servers. You’ll be on your own.
Setting up a testing server
To preview and test dynamic pages, you need to connect to a testing server in Dreamweaver. “Local web server” and “testing server” sound similar, but they are not the same. A testing server is simply a connection to a web hosting server—either local or on the Internet—where dynamic functions can be “tested.” You can use your own local web server, which you should have installed at this point, or you may use the actual web server where you intend to upload your final website.
Internet-based servers usually require authentication using a user name and password, which you should obtain in advance from your server administrator.
When you choose to test a particular page, Dreamweaver copies the necessary files to the testing server and then loads the document in a browser or in Live view. The testing server is configured in Dreamweaver’s Site Setup dialog box.
1. Select Site > Manage Sites.
2. Select DW-CS6 from the Manage Sites dialog box. Click Edit.
3. Select the Servers category.
The WAMP/MAMP servers are free, easy to set up, and compatible with both Windows and Mac OS X computers.
If you have an existing server configured, you can click the check box under the Testing column in the server list to identify it as your testing server. For the purpose of the following exercises, the instructions assume you have chosen and configured PHP/MySQL as your server model and will use an Apache local web server to test pages on your computer.
4. Click the Add New Server button at the bottom of the server list.
5. Name the server PHP-Test. From the Connect Using menu, choose Local/Network.
6. Click the Browse button to the right of the Server Folder field.
In Windows, navigate to C:wampwww.
In OS X, navigate to Applications/MAMP/htdocs.
Your computer will treat the local web server as if it’s a live web server and all sites located within it as if they’re on the Internet.
7. Create a new folder and name it DWCS6-Test. If necessary, double-click the new folder to open it. Click Select/Choose.
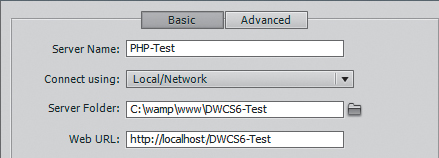
For Windows users, the path will be C:wampwwwDWCS6-Test.
For Mac users, the Server Folder field displays the path Applications/MAMP/htdocs/DWCS6-Test.
If you are using your actual web server as your testing server, enter the URL of your website here. For example, http://www.green-start.org.
Windows servers are not case sensitive, so the capitalization of your file and folder names is not critical. Linux/Unix servers are case sensitive. It’s a good idea to write down file and folder names or use only lowercase characters to prevent server errors when loading test pages and content.
8. Enter the path to the testing site in the Web URL field.
For the WAMP PHP, the default URL will probably be http://localhost/DWCS6-Test.
For the MAMP PHP, the default URL will probably be http://Localhost:8888/DWCS6-Test.
For other types of server models, the URL will be different. Enter the URL appropriate for your server. Without the correct URL, the page will not load correctly in your local server.
In PHP and ColdFusion servers, you may have to include the port number in the URL to enable the connection.
9. Click the Advanced button.
The dialog box displays the Advanced configuration options.
10. From the Server Model menu, choose PHP MySQL.
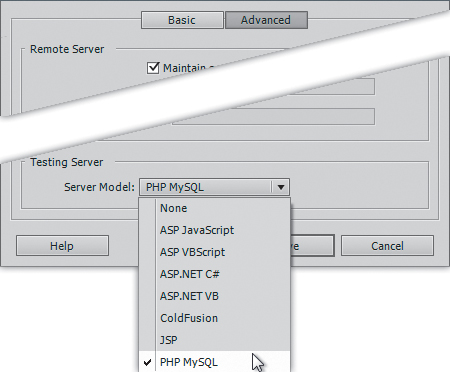
11. Click Save.
12. Select the Testing option in the Servers category to enable the testing server.
While you can define and configure multiple servers in the CS6 Site Setup dialog box, only one testing server and one remote server may be active at a time. You do not have to use the same server for both.
13. Click Save to dismiss the Site Setup dialog box. Dreamweaver will probably prompt you to rebuild the cache. Click OK.
14. Click Done to close the Manage Sites dialog box.
Your testing server for PHP is now configured. Although the server is intended for one specific language, other scripting languages may still be supported, depending on your server setup. As you may have noticed from the menu in step 10, Dreamweaver supports all the major server models. The importance of what server model you select can’t be overstated. Changing server models once you start to build pages would require you to scrap all your work and start over.
Building database applications
One item ties all of these applications together. They all require a database of some sort. Database applications come in two basic categories: stand-alone and server-based. Stand-alone applications like MS Access and Apple FileMaker Pro are usually accessible by one user at a time in a desktop environment. In some cases, multiple users can be allowed to access the data, but the total number of simultaneous users is typically small. Server-based databases—like IBM DB2, Oracle, and SQL Server—are much more robust and can easily host thousands of simultaneous requests for information. But with this power comes a hefty price tag. Between these two tiers exists a popular alternative: MySQL, which offers server-based capabilities at a great price—free. A more robust enterprise version of MySQL is also available, but it’s not free. Check it out at www.mysql.com/products/enterprise/.
For the purposes of creating dynamic applications on the Internet, both types of databases can be used effectively. Which one you will use depends primarily on the type of data, how much of it you need to store, how many users will access the data at any particular time, and cost. If you expect the number of simultaneous users to be from 1 to 1000, then a stand-alone database application may work for you. If you’re trying to build the next Amazon.com, then you need to focus exclusively on server-based applications.
Luckily for the purposes of this lesson, Dreamweaver interfaces with stand-alone and server-based databases in an almost identical fashion.
Database design basics
A database is similar to a spreadsheet. Data is stored in a series of columns and rows called a table, much like the ones you created using HTML and Spry. Spreadsheets typically supply the names of the columns and rows for you, using letters (A, B, C) for the columns and numbers (1, 2, 3) for the rows. Databases differ in this area by requiring you to supply the column, or field, names. Rows, or records, are usually delineated with unique numbers or IDs. Some databases refer to these as unique keys, primary keys, or just keys. The key allows you or your data application to retrieve a specific record or set of records.
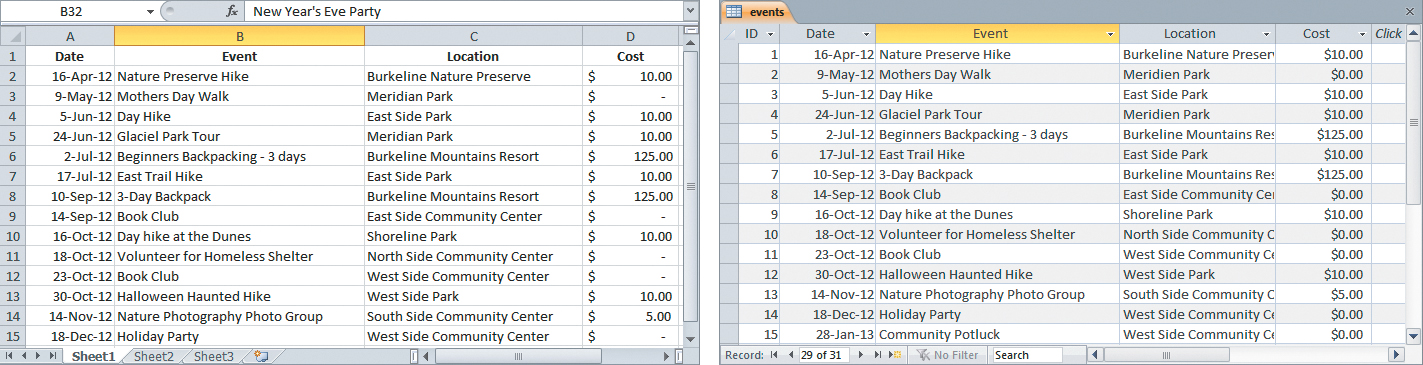
Spreadsheets (left) and databases (right) have common roots and can perform similar tasks.
Simple databases store all the information being gathered in a single table, usually called a flat file. Using a single table for everything often leads to the duplication of data when certain types of information are entered multiple times, as when you take new orders from repeat customers. For example, a customer’s name, address, and phone number must be entered in the same table each time they place an order. This type of redundant data bloats the size of the database unnecessarily and can cause errors over time. For example, an order may be shipped to an address listed in a previous order.
One way to prevent duplication is to separate certain types of data into their own tables and then link the various tables together. This process of linking multiple tables creates what is called a relational database and makes for a much more efficient system.
Relational databases typically store the customer and product information as separate functions, and then bring them together in an orders table that keeps track of what products are ordered by each customer. That way, if any changes need to be made to a customer or product record, it only has to be made in one place, where it will instantly update all other instances. All the popular databases in use today support these types of relationships.
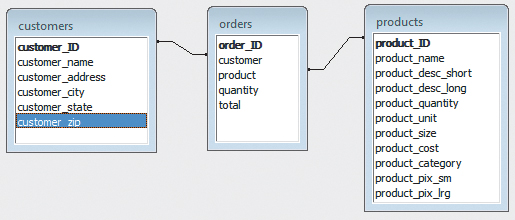
Relational databases store information in separate tables and connect them together in logical relationships. This prevents data duplication and makes the database function more efficiently.
An online database is typically stored within a subfolder of the target website, where it can be accessed by any page on the site. Databases can provide a variety of different types of information—from product descriptions and pricing, to customer names and addresses, to complete site editorial content. While some databases are configured to be read-only, where data is served in only one direction, most online databases are capable of both serving and capturing data, providing the utmost power and flexibility.
The design and construction of a web-compatible database is a complex topic that must consider a host of parameters well beyond the scope of this book. You can obtain much of the information regarding this topic online from a variety of resources. Unfortunately, much of it is written by and for IT or computer professionals and not readily accessible to the average web designer or computer user. If possible, try starting with stand-alone database applications like MS Access or Apple FileMaker Pro to get some valuable experience first. Designing and editing a relational database in these applications is usually straightforward and much easier to learn and do. You will find that there are inexpensive utilities available that can convert database files from the stand-alone applications into fully functional MySQL databases for a lot less time and effort (and frustration) than it would take to build one from scratch.
For the purposes of the upcoming exercises, we have supplied a complete MySQL database containing multiple data tables in the mysql > greendata folder on the disc accompanying this book. You will need to copy the greendata folder to the proper location on your local web server or on your remote host first before you will be able to access this data. For the WAMP server running in Windows, the folder may be something like wamp > bin > mysql5.5.20 > data > mysql. In Mac OS X, the folder may be MAMP > db > mysql. Check the help or support files that are provided with your own server version to obtain the correct location. The database folder must be copied properly or it will simply not function.
In some situations, the database will be stored within your own site. In others, the database may be hosted by the server itself and stored in a location to which you may not have access. Check with your IS/IT manager or your hosting provider for specific details about your configuration.
Connecting to a database
Once your database is created, properly copied/uploaded, and configured, you need to connect each dynamic page to it before the data can be accessed. Each server model features specific methods for connecting to a database. For our exercises, we will concentrate on MySQL/PHP using the WAMP/MAMP environment, as noted earlier.
Connecting to MySQL
In a PHP/MySQL environment, database connections are handled by custom scripts or by configuration files located on your hard drive or on the server. These scripts and configuration files handle the connection and any required user authentication.
There are numerous ways to write the code for these items, depending on the server model and specific database, so it’s best to consult your server administrator or support staff to obtain the proper syntax. Many times, Dreamweaver can help you create the needed files and write the necessary code. In this exercise, you will connect to a MySQL database on a PHP server model.
1. Before attempting to complete this exercise, you first have to install and configure the necessary files and components for a PHP server and MySQL database. The master Lessons folder on the disc that came with this book contains a MySQL folder holding the greendata database intended for the following exercises. Copy this database folder to the testing server as required under your PHP/MySQL server installation. Once they are installed and configured properly, make sure both are launched and running before proceeding to the next step.
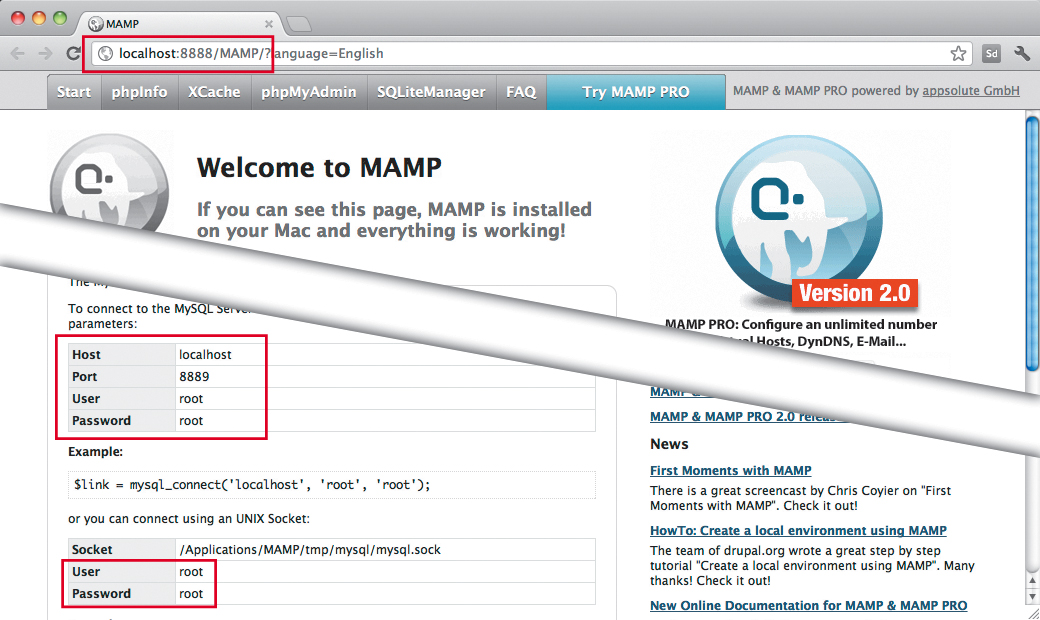
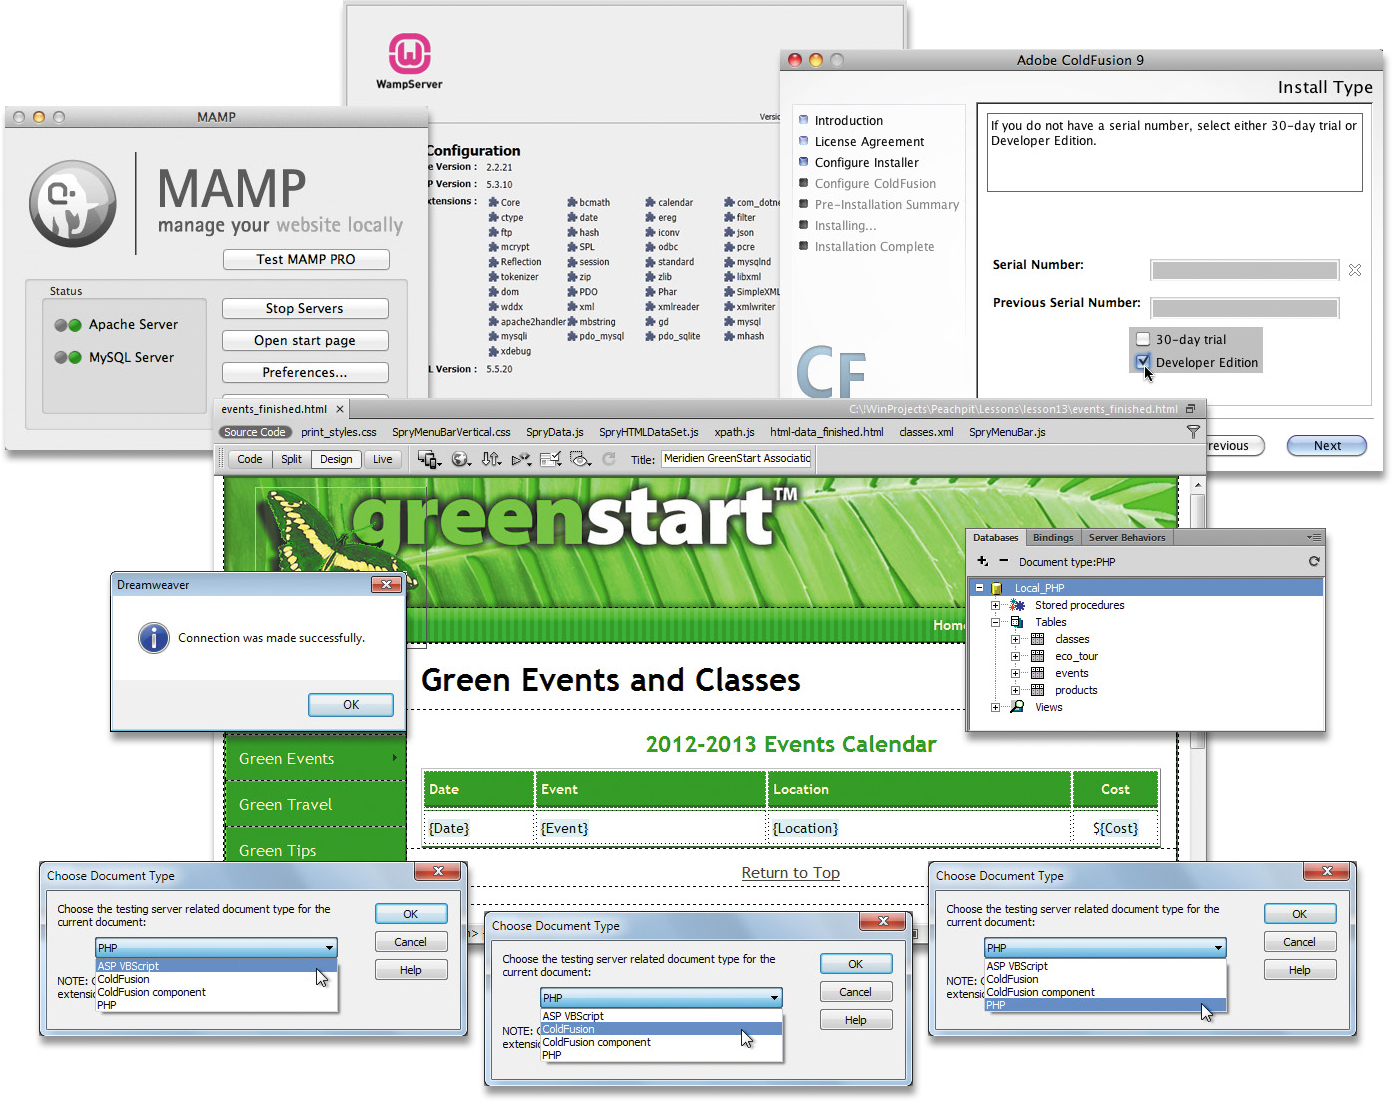
Here is a sample start page for a MAMP installation in Mac OS X. The URL of this start page displays the port for the MAMP Apache server: 8888; the page displays the port for the MySQL database server: 8889. Note the host name, ports, and other configuration settings in your own start page. You will need these specifications to connect to your servers and databases if you’re using Mac OS X.
In Windows, the greendata database folder located on the CD-ROM typically would be copied to the wamp > bin > mysql5.5.20 > data > mysql folder; in OS X, it would be copied to the MAMP > db > mysql folder. However, your installation may be different.
2. If necessary, define and configure a testing server in Dreamweaver for PHP/MySQL as described earlier in this lesson.
The PHP/MySQL configuration should point to the folder on your hard drive that will eventually hold your web content on the testing server. In Windows, it’s typically named www; on the Mac, it’s called htdocs. However, the name on your server may be different.

It’s possible that another local web server may already be installed and running on your computer. In most cases, WAMP and MAMP will not run properly (or at all) until you shut down or uninstall any existing server.
4. Create a new page based on the site template.
MySQL databases can be used by all major server models. In this exercise, you’ll use PHP.
5. Save the page into the root folder as products.php.
6. If necessary, select Window > Databases to open the Databases panel.
In the Databases panel, check to see if the plus (![]() ) icon is selectable or grayed out. If the icon is grayed out, you will not be able to connect this page to the database. Just adding the extension .php to the file name may not be sufficient to allow you to activate the dynamic functionality of the local web server. See the sidebar “Extension tension” in this lesson. Otherwise, proceed to step 7.
) icon is selectable or grayed out. If the icon is grayed out, you will not be able to connect this page to the database. Just adding the extension .php to the file name may not be sufficient to allow you to activate the dynamic functionality of the local web server. See the sidebar “Extension tension” in this lesson. Otherwise, proceed to step 7.
7. Click the plus (![]() ) icon in the Databases panel and choose MySQL Connection.
) icon in the Databases panel and choose MySQL Connection.
The MySQL Connection dialog box opens.
In our example using WAMP in Windows, there is no password. Just dismiss any dialog boxes warning you about the password.
8. In the Connection Name field, enter Local_PHP.
Enter your server name (usually localhost), your user name, and your password.
In Windows, the greendata database should have a user name of root and no password. On the Macintosh under MAMP, the user name will be root and a password of root.
9. If the connection information is correct, you should be able to choose the greendata database by clicking the Select button in the dialog box.
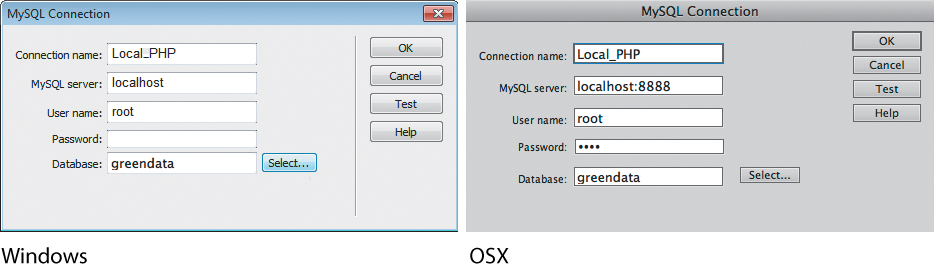
On the Macintosh, you will probably need to include the port number in the MySQL server field, like: localhost:8888 for the connection to work properly.

1. Make sure you have a site definition and a testing server created for the desired server model.
2. Create a new document from the site template.
3. Before you save, open the Server Behaviors panel.
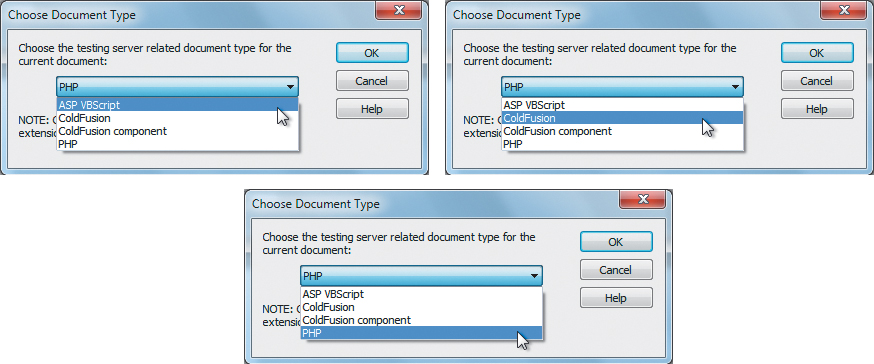
4. Click the document type link that appears in the panel.
5. When the Choose Document Type dialog box opens, choose PHP or other appropriate document type from the pop-up menu and click OK.
6. Select File > Save.

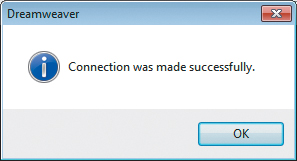
If everything is working properly, Dreamweaver reports a successful connection to the database.
If you receive an error message after this step, check if the WAMP/MAMP server is running. If it is, check that you have the correct user name and password for the database.
11. Click OK. Examine the Databases panel.
The Databases panel displays the name of your database connection.
12. Expand the database listing.
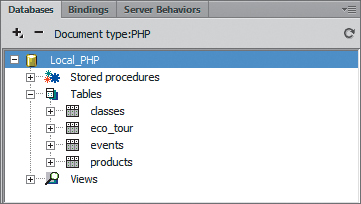
The listing displays the stored procedures, tables, and views contained within the database.
13. Save all files.
In this lesson, you learned how to work with HTML and XML data. Then, you learned about other types of database applications and selected a server model, configured a testing server, and created a database connection. You have developed the foundation for a dynamic website using PHP. In the next lesson, you will use this environment to build dynamic pages. Believe it or not, if you get the local web server and MySQL database installed and running properly, you will have accomplished the hardest part of setting up your dynamic website workflow.
Review questions
1. What advantage does Ajax/Spry have over traditional data applications?
2. True or false: XML is a method for storing data in a plain-text file for use in web applications.
3. What is a server model?
4. What is a testing server?
5. You have a file that is compatible with your server model (.asp, .cfm, or .php), but your database doesn’t appear in the Databases panel. How can you make the connection appear in the panel again?
6. True or false: The MySQL database can be used only on Linux/Unix and Mac OS X server platforms.
Review answers
1. Ajax/Spry applications don’t have to reload an entire page; they can update data in real time.
2. True. XML is similar to HTML and is used to identify data.
3. A server model is the basic environment used to build dynamic web applications. It also encompasses specific programming languages and scripting models, such as ASP, ColdFusion, and PHP.
4. A testing server is where dynamic pages are tested using a compatible server model. It is set up in the Site Setup dialog box.
5. Examine the Databases panel and the displayed steps for connecting to your data source. Complete any steps that are not checked. The data source should then be displayed again.
6. False. MySQL can be used on any web server.