
1. Customizing Your Workspace
• Switch document views
• Work with panels
• Select a workspace layout
• Adjust toolbars
• Personalize preferences
• Create custom keyboard shortcuts
• Use the Property inspector
Dreamweaver offers a customizable and easy-to-use WYSIWYG HTML editor that doesn’t compromise when it comes to power and flexibility. You’d probably need a dozen programs to perform all the tasks that Dreamweaver can do—and none of them would be as fun to use.
Touring the workspace
Dreamweaver is the industry-leading Hypertext Markup Language (HTML) editor, with good reasons for its popularity. The program offers an incredible array of design and code-editing tools. Dreamweaver offers something for everyone.
Coders love the variety of enhancements built into the Code view environment, and developers enjoy the program’s support for ASP, PHP, ColdFusion, and JavaScript, among other programming languages. Designers marvel at seeing their text and graphics appear in an accurate What You See Is What You Get (WYSIWYG) depiction as they work, saving hours of time previewing pages in browsers. Novices certainly appreciate the program’s simple-to-use and power-packed interface. No matter what type of user you are, if you use Dreamweaver you don’t have to compromise.
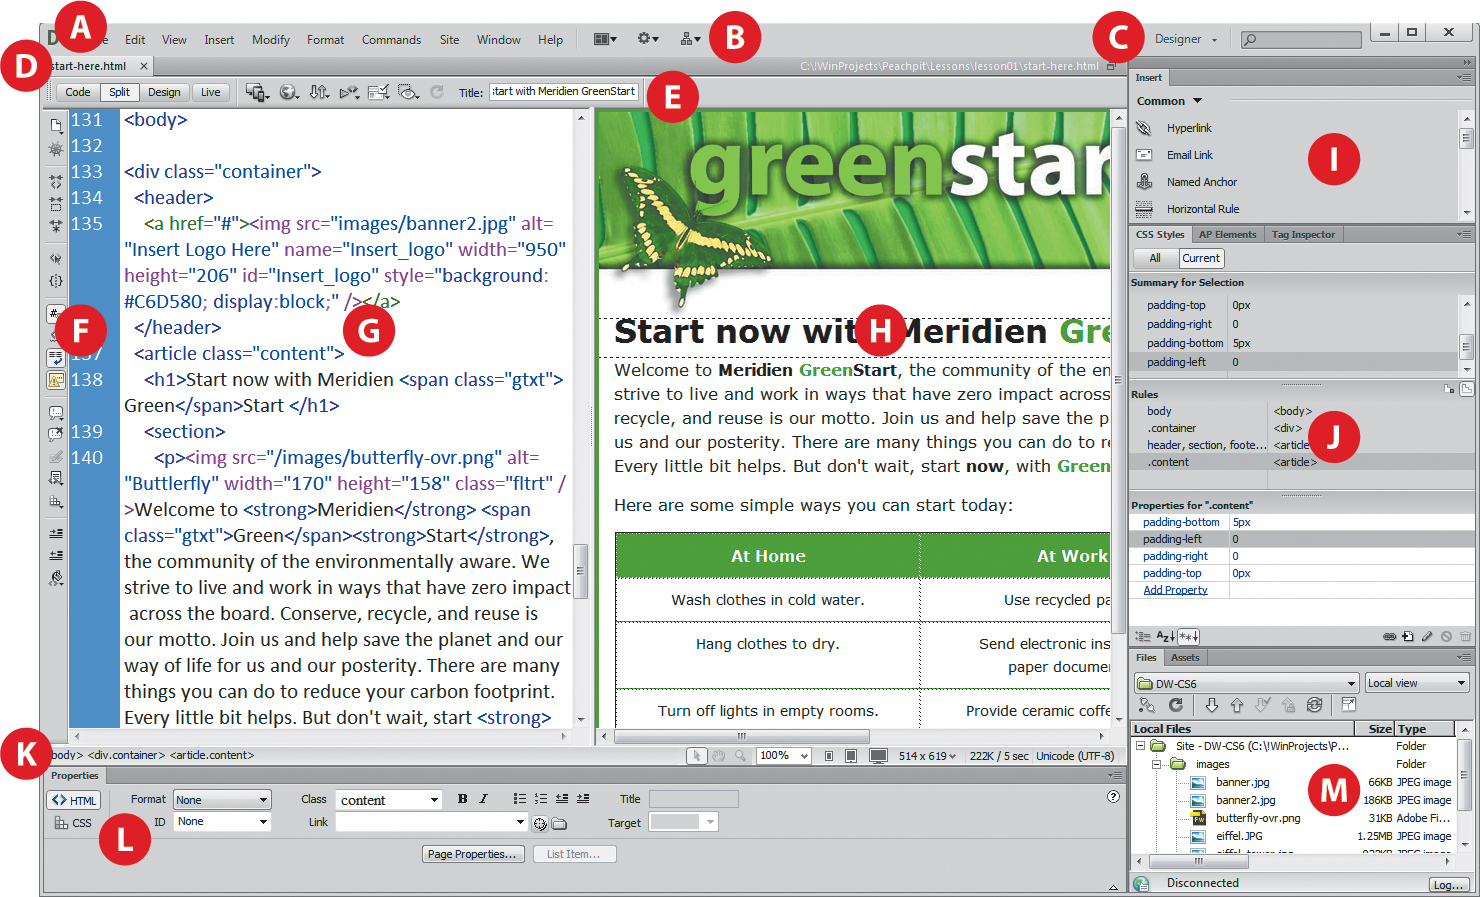
The Dreamweaver interface features a vast array of user-configurable panels and toolbars. Take a moment to familiarize yourself with the names of these components.
A Menu bar
B Application bar
C Workspace menu
D Document tab
E Document toolbar
F Coding toolbar
G Code view
H Design view
I Insert panel
J CSS Styles panel
K Tag selectors
L Property inspector
M Files panel
You’d think a program with this much to offer would be dense, slow, and unwieldy, but you’d be wrong. Dreamweaver provides much of its power via dockable panels and toolbars you can display or hide and arrange in innumerable combinations to create your ideal workspace.
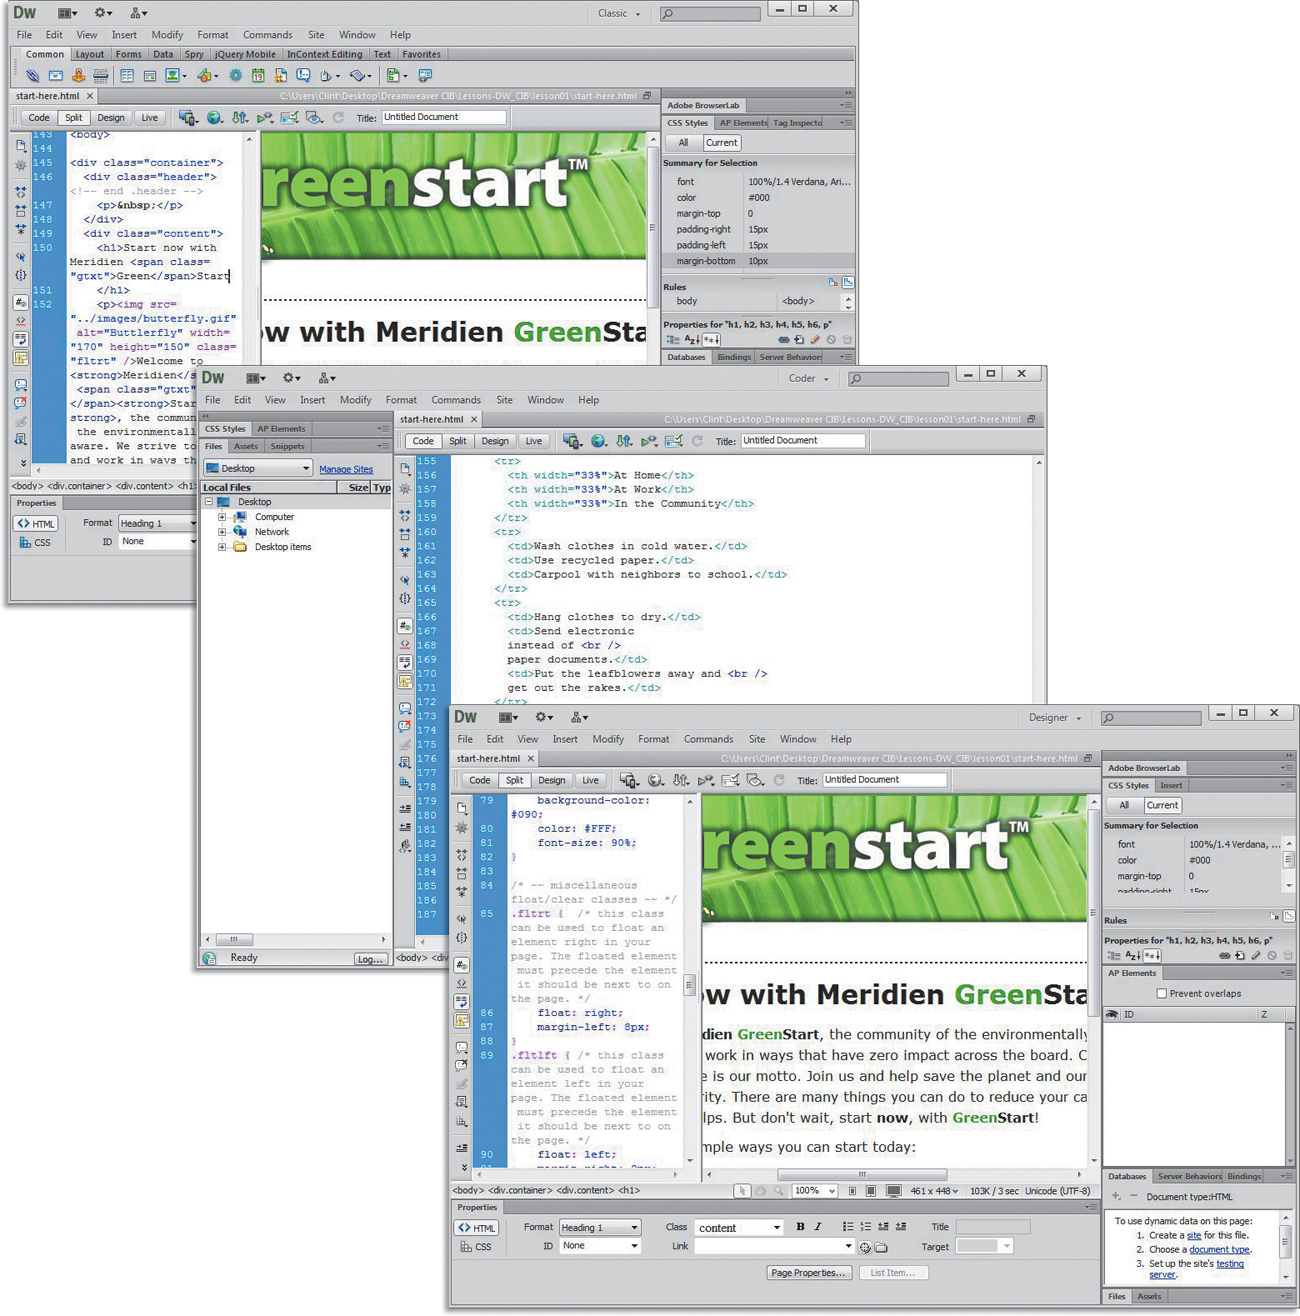
This lesson introduces you to the Dreamweaver interface and gets you in touch with some of the power hiding under the hood. If you want to follow along on the tour, choose File > Open. In the lesson01 folder, choose start-here.html. Click Open.
Switching and splitting views
Dreamweaver offers dedicated environments for coders and designers as well as a composite option that blends both together.
Design view
Design view focuses the Dreamweaver workspace on its WYSIWYG editor, which provides a close, but not perfect, depiction of the webpage as it would appear in a browser. To activate Design view, click the Design view button in the Document toolbar.

Design view
Code view
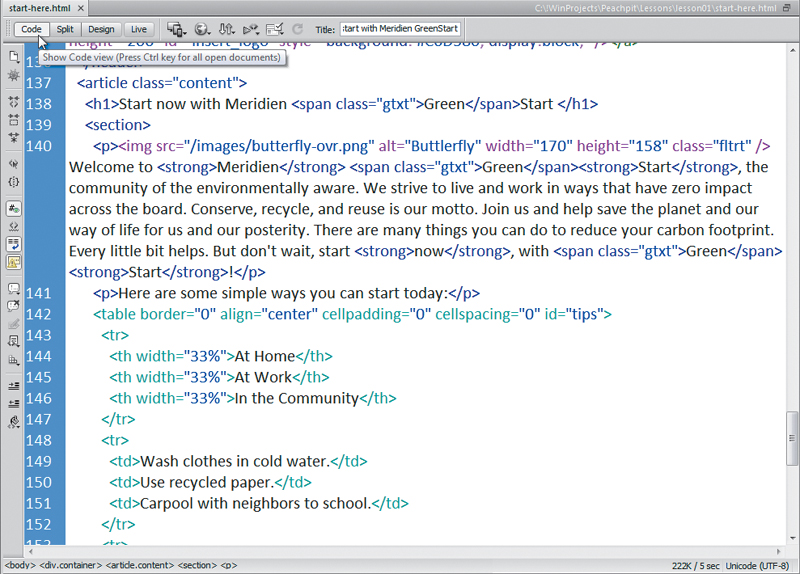
Code view focuses the Dreamweaver workspace exclusively on the HTML code and a variety of code-editing productivity tools. To access Code view, click the Code view button in the Document toolbar.
Code view
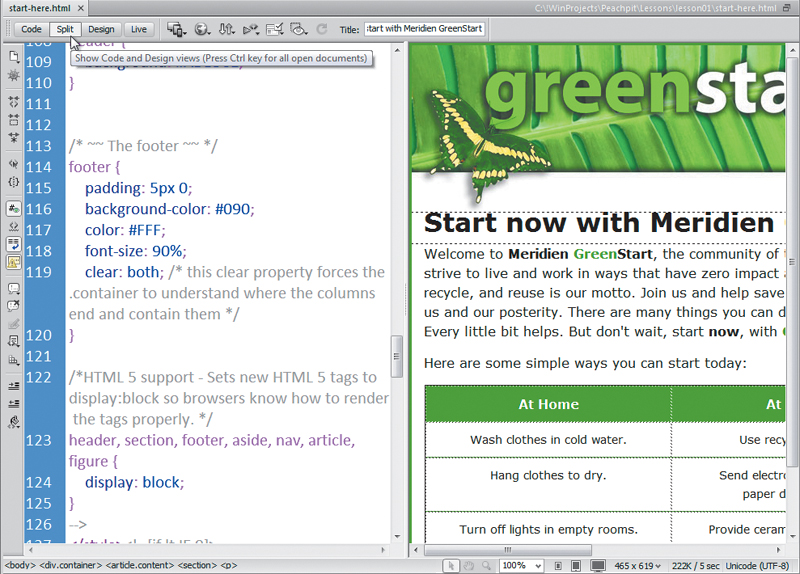
Split view
Split view provides a composite workspace that gives you access to both the design and the code simultaneously. Changes made in either window update in the other instantly. To access Split view, click the Split view button in the Document toolbar. To take advantage of the expanded width of the new flat-panel displays, Dreamweaver splits the workspace vertically, by default.
Split view
You can also split the screen horizontally by disabling the vertical split in the view menu. To disable this feature, choose View > Split Vertically.
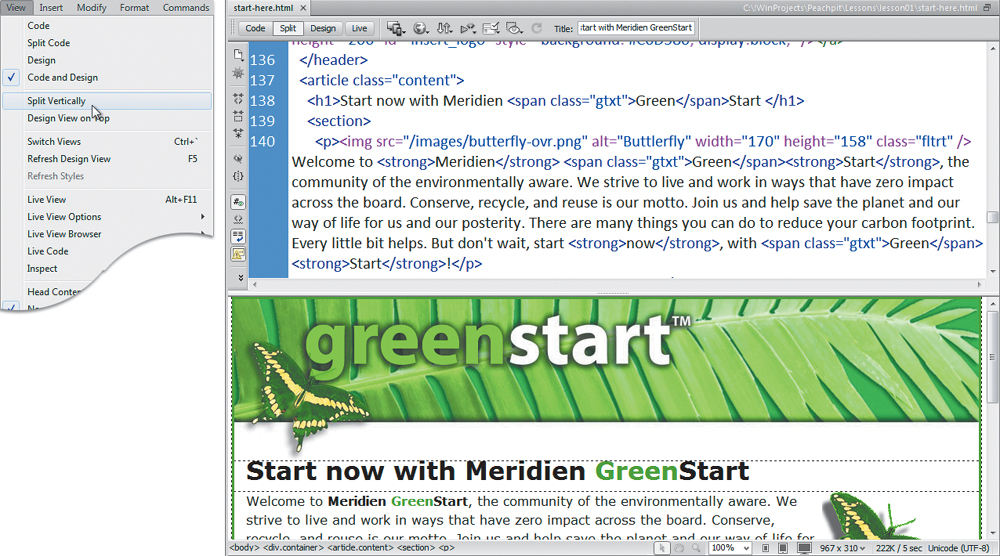
Split view horizontally
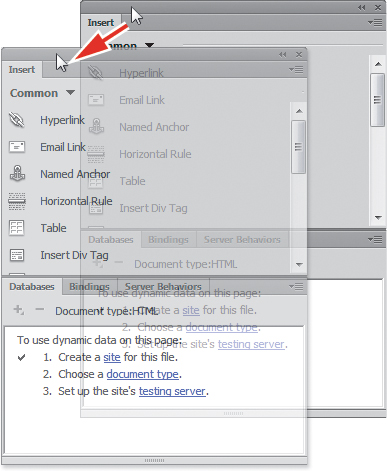
Working with panels
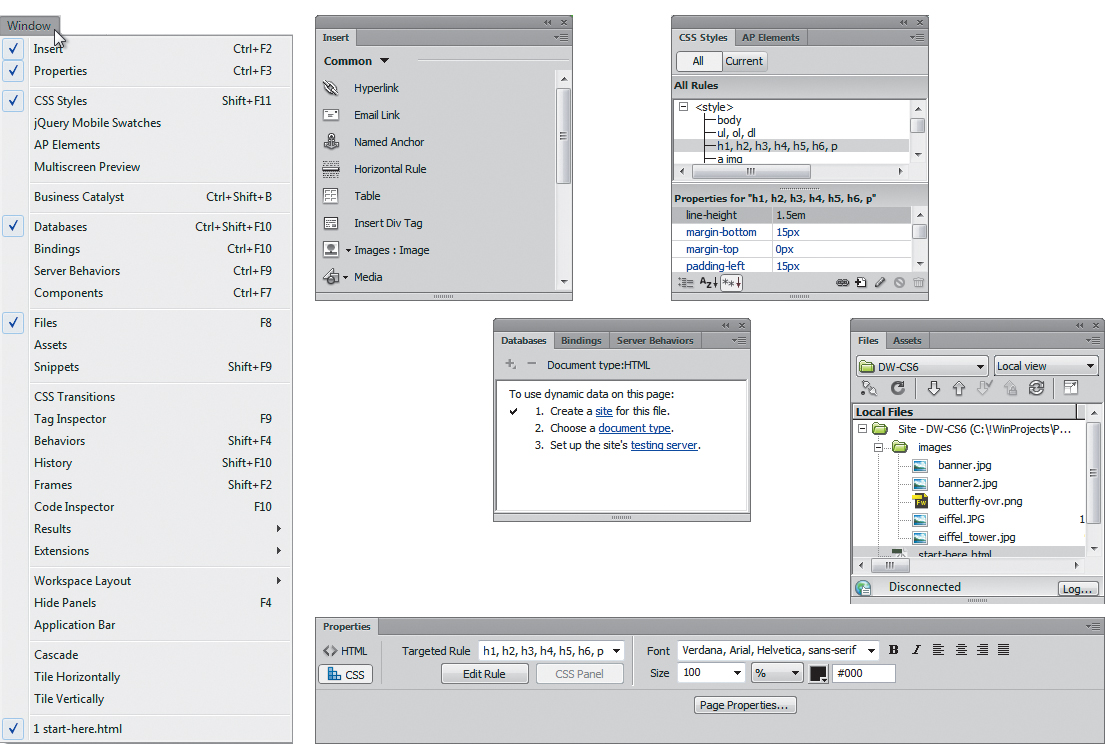
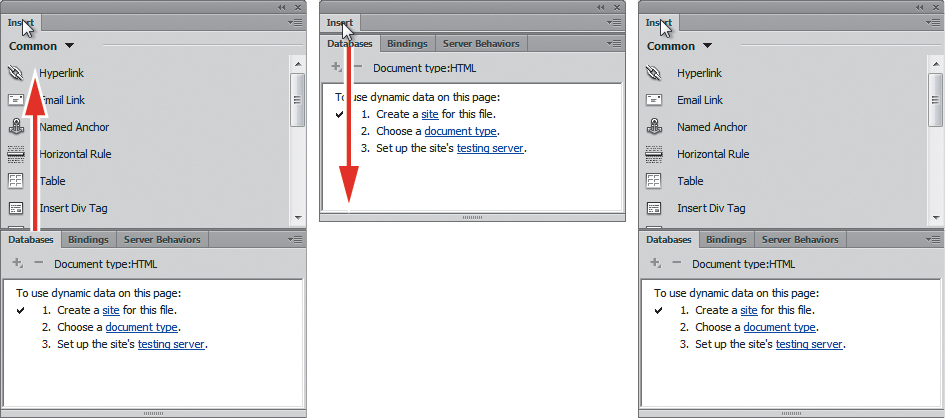
Although you can access most commands from the menus, Dreamweaver scatters much of its power in user-selectable panels and toolbars. You can display, hide, arrange, and dock panels at will around the screen. You can even move them to a second or third video display if you desire.
Standard panel grouping
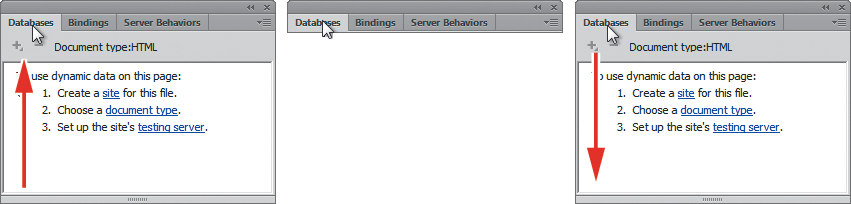
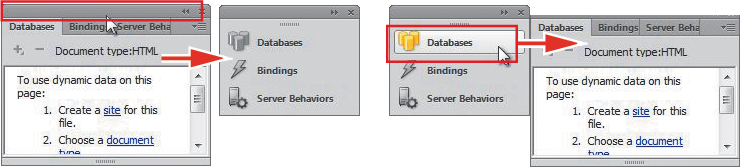
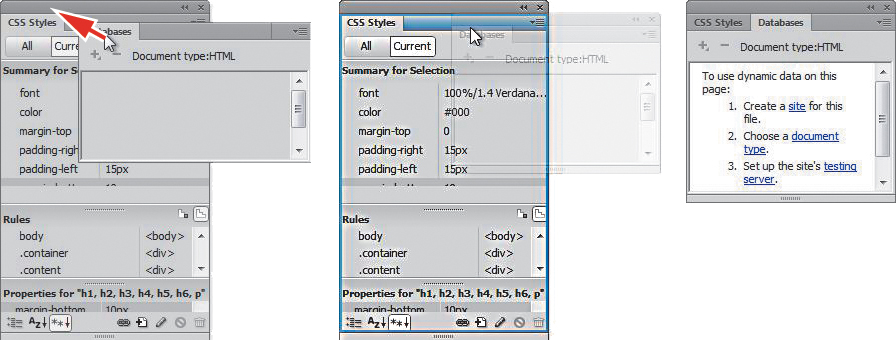
The Window menu lists all the available panels. If you do not see a specific panel on the screen, choose it from the Window menu. A check mark appears in the menu to indicate that the panel is open. Occasionally, one panel may lie behind another on the screen and be difficult to locate. In such situations, simply choose the desired panel in the Window menu and it will rise to the top of the stack.
Minimizing
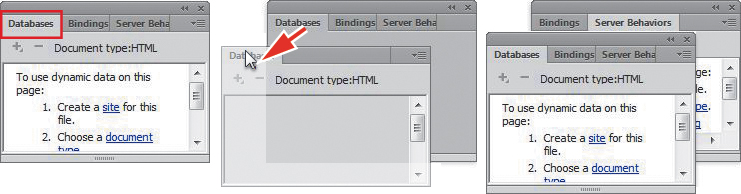
To create room for other panels or to access obscured areas of the workspace, you can minimize or expand individual panels in place. To minimize a panel, double-click the tab containing the panel name. To expand the panel, double-click the tab again.
Minimizing floating panel by double-clicking the tab
You can also minimize or expand one panel within a stack of panels individually by double-clicking its tab.
Minimizing one panel in a stack using its tab
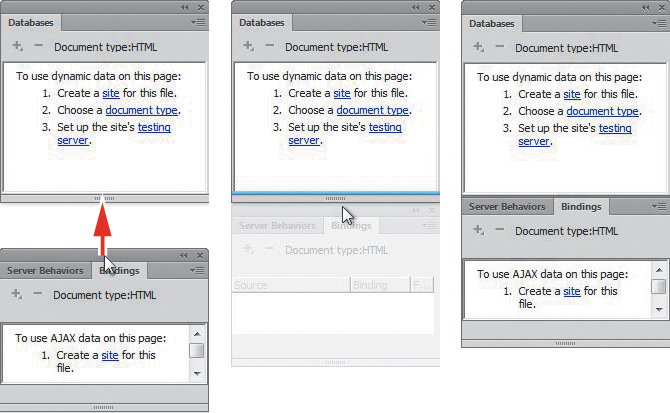
To recover more screen real estate, you can minimize panel groups or stacks down to icons by double-clicking the title bar. You can also minimize the panels to icons by clicking the double arrow (![]() ) icon in the panel title bar. When panels are minimized to icons, you access any of the individual panels by clicking its icon or button. The selected panel will appear on the left or right of your layout wherever room permits.
) icon in the panel title bar. When panels are minimized to icons, you access any of the individual panels by clicking its icon or button. The selected panel will appear on the left or right of your layout wherever room permits.
Minimizing sequence to icons
Floating
A panel grouped with other panels can be floated separately. To float a panel, drag it from the group by its tab.
Pulling a panel out by its tab
Dragging
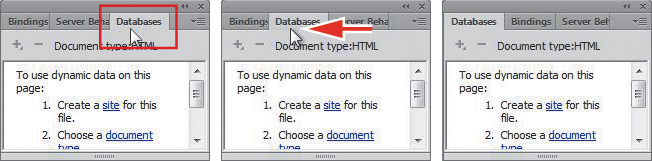
You can reorder a panel tab by dragging it to the desired position within the group.
Dragging a tab to change its position
To reposition panels, groups, and stacks in the workspace, simply drag them by the title bar.
Dragging a whole panel group or stack to a new position
Grouping, stacking, and docking
You can create custom groups by dragging one panel into another. When you’ve moved the panel to the correct position, Dreamweaver highlights the area, called the drop zone, in blue (as shown in the following figure). Release the mouse button to create the new group.
Creating new groups
In some cases, you may want to keep both panels visible simultaneously. To stack panels, drag the desired tab to the top or bottom of another panel. When you see the blue drop zone appear, release the mouse button.
Creating panel stacks
Floating panels can be docked to the right, left, or bottom of the Dreamweaver workspace. To dock a panel, group, or stack, drag its title bar to the edge on which you wish to dock. When you see the blue drop zone appear, release the mouse button.
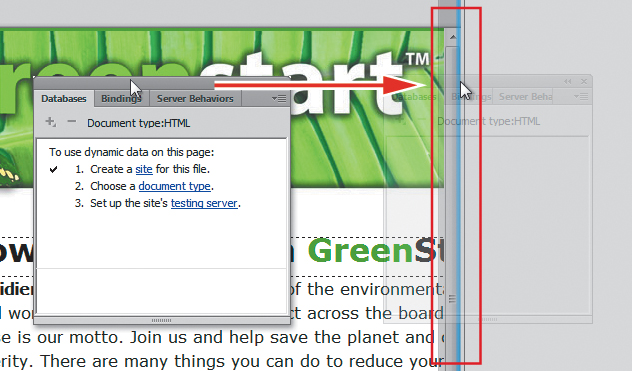
Docking panels
Selecting a workspace layout
A quick way to customize the program environment is to use one of the prebuilt workspaces in Dreamweaver. These workspaces have been optimized by experts to put the tools you need at your fingertips.
Dreamweaver CS6 includes 11 prebuilt workspaces. To access these workspaces, choose them from the Workspace menu located in the Application bar.
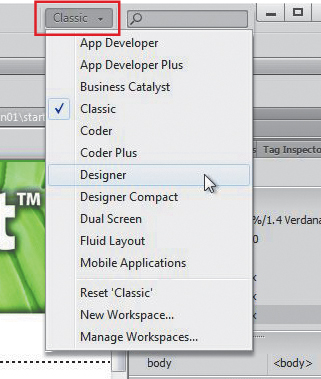
Workspace menu
Longtime users of Dreamweaver may choose the Classic workspace, which displays the panels and toolbars they’re accustomed to seeing and using in previous Dreamweaver versions.
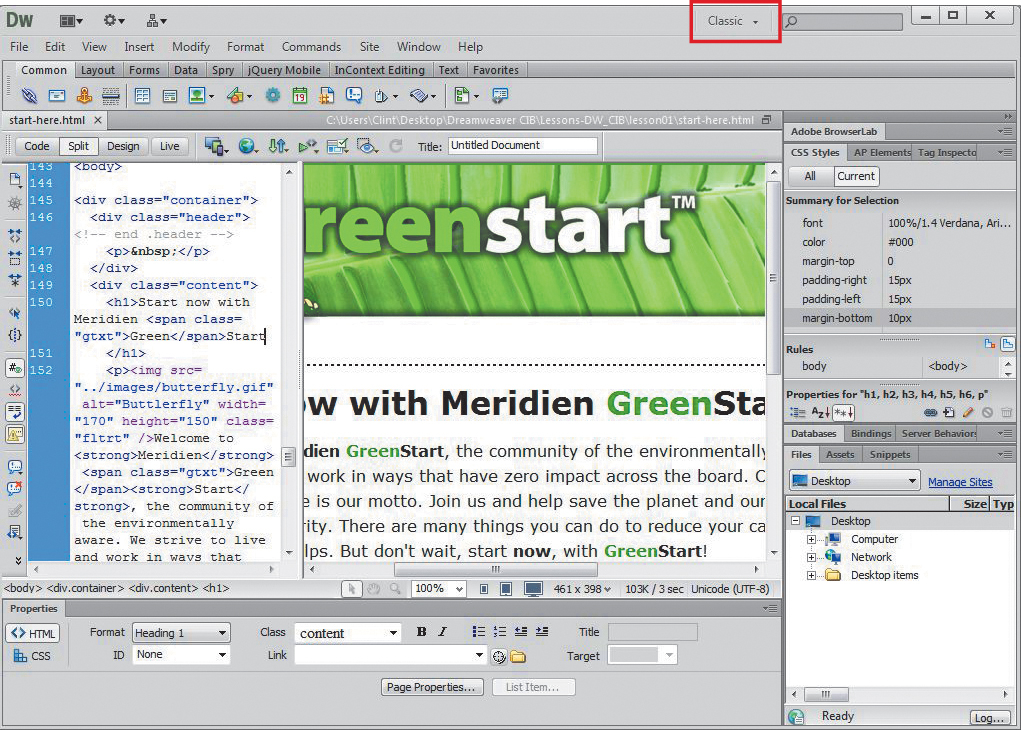
Classic workspace
The Coder workspace produces a workspace that focuses Dreamweaver on the HTML code and its code-editing tools.
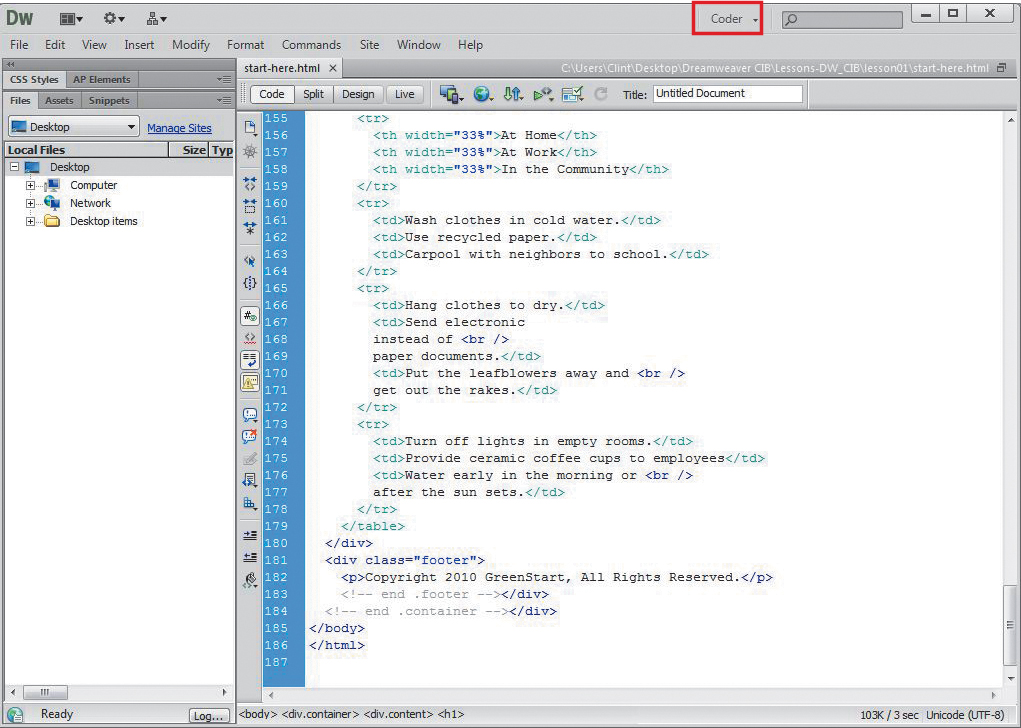
Coder workspace
The Designer workspace provides the optimum environment for visual designers.
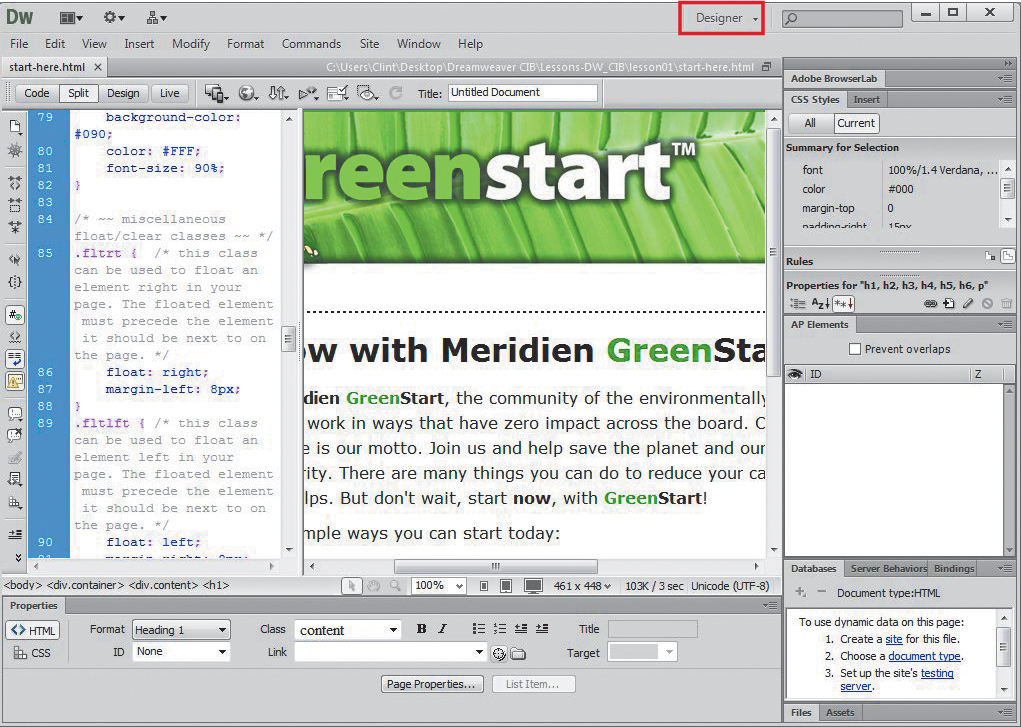
Designer workspace
Adjusting toolbars
Some program features are so handy you may want them available all the time in the form of a toolbar. Three of the toolbars—Style Rendering, Document, and Standard—appear horizontally at the top of the document window. The Coding toolbar, however, appears vertically, but only in the Code view window. You will explore the capabilities of these toolbars in later exercises.
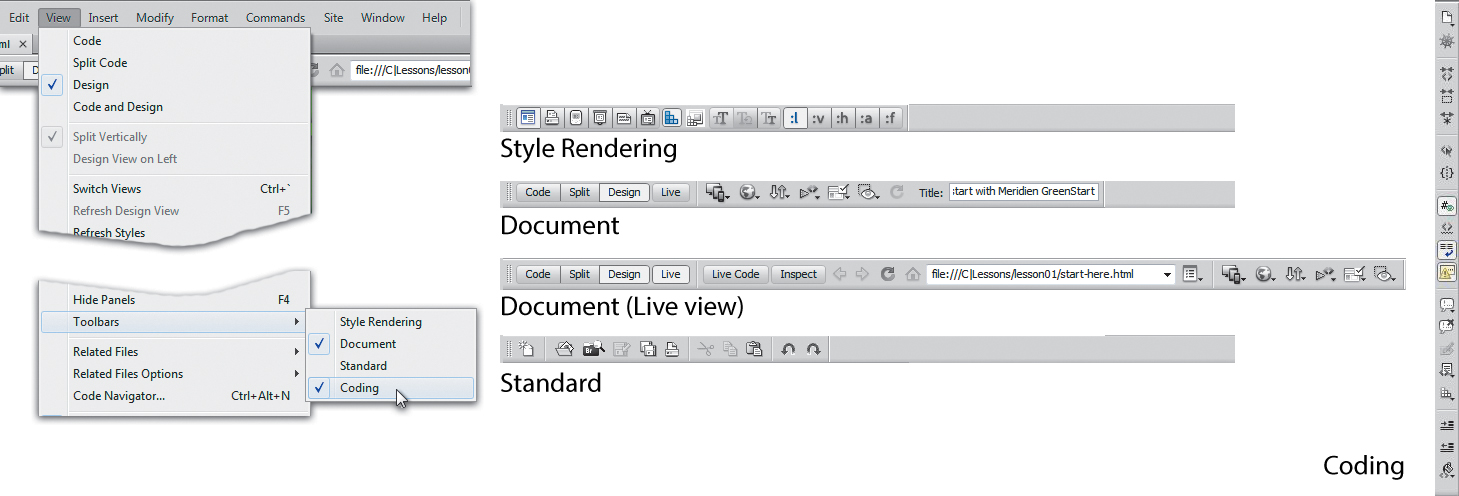
Display the desired toolbar by selecting it from the View menu.
Personalizing preferences
As you continue to work with Dreamweaver, you will devise your own optimal workspace of panels and toolbars for each activity. You can store these configurations in a custom workspace of your own naming.
To save a custom workspace, create your desired configuration, choose New Workspace from the Workspace menu in the Application bar, and then give it a custom name.
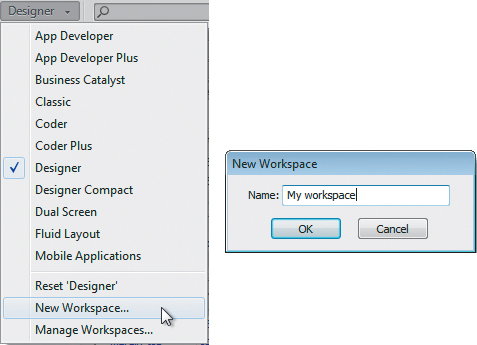
Saving a custom workspace
Creating custom keyboard shortcuts
Another power feature of Dreamweaver is the capability of creating your own keyboard shortcuts as well as editing existing ones. Keyboard shortcuts are loaded and preserved independent of custom workspaces.
Is there a command you can’t live without that doesn’t have a keyboard shortcut? Create it yourself. Try this:
1. Choose Edit > Keyboard Shortcuts/Dreamweaver > Keyboard Shortcuts.
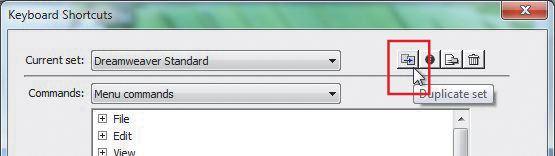
2. Click the Duplicate Set button to create a new set of shortcuts.
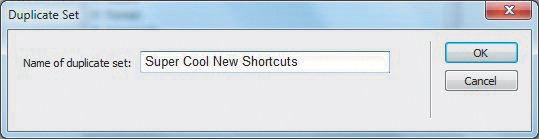
3. Enter a name in the Name Of Duplicate Set field. Click OK.
4. Choose Menu commands from the Commands menu.
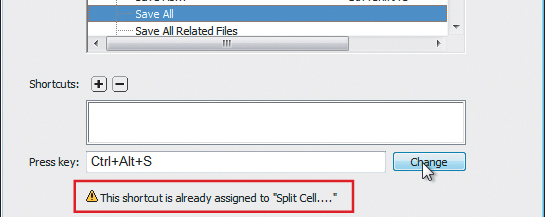
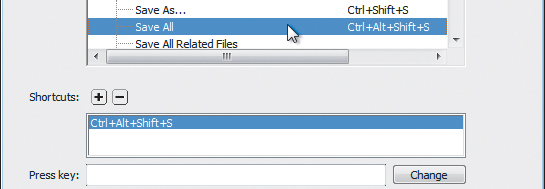
5. Select Save All from the File command list.
Note that the Save All command does not have an existing shortcut, although you will use this command frequently in Dreamweaver.
6. Insert the cursor in the Press Key field. Press Ctrl-Alt-S/Cmd-Opt-S.
Note the error message indicating that the keyboard combination you chose is already assigned to a command. Although we could reassign the combination, let’s choose a different one.
7. Press Ctrl-Alt-Shift-S/Cmd-Ctrl-S.
This combination is not currently being used, so let’s assign it to the Save All command.
8. Click the Change button.
The new shortcut is now assigned to the Save All command.
9. Click OK to save the change.
You have created your own keyboard shortcut—one you will use in upcoming lessons.
Using the Property inspector
One tool that is vital to your workflow is the Property inspector. This panel typically appears at the bottom of the workspace. The Property inspector is context driven and adapts to the type of element you select.
Using the HTML tab
Insert the cursor into any text content on your page, and the Property inspector provides a means to quickly assign some basic HTML codes and formatting. When the HTML button is selected, you can apply heading or paragraph tags, as well as bold, italics, bullets, numbers, and indenting, among other formatting and attributes.
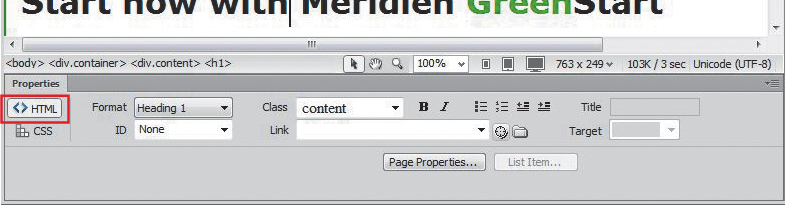
HTML Property inspector
Using the CSS tab
Click the CSS (cascading style sheet) button to quickly access commands to assign or edit CSS formatting.
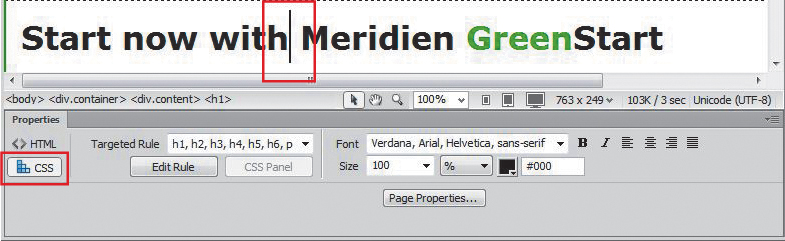
CSS Property inspector
Image properties
Select an image in a webpage to access the image-based attributes and formatting control of the Property inspector.
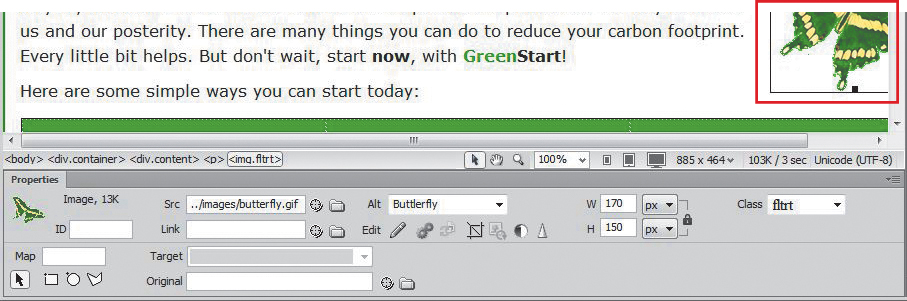
Image Property inspector
Table properties
To access table properties, insert your cursor in a table and then click the table tag selector at the bottom of the document window.
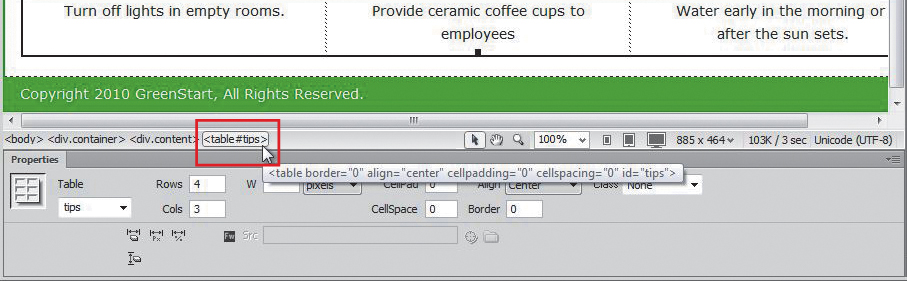
Table Property inspector
Review questions
1. Where can you access the command to display or hide any panel?
2. Where can you find the Code, Design, and Split view buttons?
3. What can be saved in a workspace?
4. Do workspaces also load keyboard shortcuts?
5. What happens in the Property inspector when you insert the cursor into various elements on the webpage?
Review answers
1. All panels are listed in the Window menu.
2. These buttons are components of the Document toolbar.
3. Workspaces can save the configuration of the document window, the open panels, and the panels’ size and position on the screen.
4. No, keyboard shortcuts are loaded and preserved independently of a workspace.
5. The Property inspector adapts to the selected element, displaying pertinent information and formatting commands.