
Rather than starting to develop your own Adobe AIR (Adobe Integrated Runtime) application right out of the box, this first chapter instead covers how to run any AIR application. This knowledge, and some of the initial setup, are required when it’s time to test your own work. More important, these are the steps that any potential user of your program needs to take to see the magic you’ve created.
To begin, I cover how to install the Adobe Integrated Runtime on both Windows and Mac OS X (Linux support for AIR will be added in later versions of the technology). After the runtime has been successfully installed, you’ll see how easy it is to install any AIR application. Finally, you’ll run that application on your computer. Some of the choices you make when developing your own AIR applications will affect the installation and running of it, so pay attention to the details discussed herein.
You can install AIR on the following platforms:
Windows XP with Service Pack 2
Windows Vista Ultimate
Mac OS X 10.4.8 or later (PowerPC)
Mac OS X 10.4.8 or later (Intel)
This is true as of the beta version of AIR, with Linux support expected sometime after the first official release.
I’ll run through the installation process using Windows XP Pro with all the latest patches and services packs, as well as Mac OS X 10.4.9 (Intel). The figures you’ll see are a mix of the two operating systems, but the steps are the same regardless.
Download the AIR installer from Adobe.
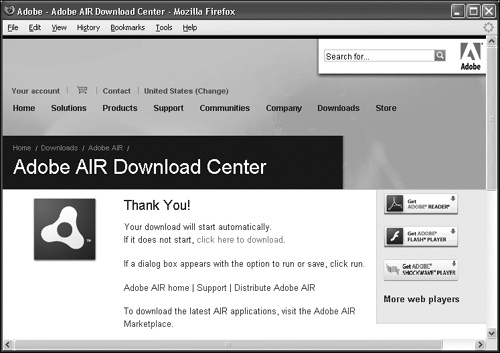
Head to www.adobe.com/go/air/ (Figure 1.1). Click Download Adobe AIR Now, which takes you to the proper download area (Figure 1.2).
Run the downloaded installer (Figure 1.3).
On Windows, the name of the file is
AdobeAIRInstaller.exe. Double-click that to run the installer.On Mac OS X, the name of the downloaded file is
AdobeAIR.dmg. Double-click that to mount the disk image (if it doesn’t mount automatically), and then double-click the installer found within the disk image (Figure 1.3).Read and agree to the license (Figure 1.4).
The license is a legally binding document, so you should read it, have your lawyer look it over, see if it conflicts with any other agreement you’ve entered into, and so on. Or, you can just click I Agree. It’s really up to you.
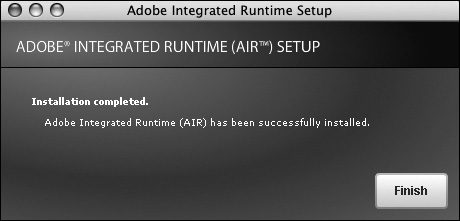
When the installation is complete (Figure 1.5), click Finish.


✓ Tips
As updated versions of the AIR runtime are released, you can install them (to update the version of the runtime on your computer) using these same steps.
Since one of the biggest benefits of AIR applications is their ability to run on multiple operating systems without change, expect Adobe’s support for various operating systems to grow over time.
The AIR runtime gets installed and exists behind the scenes. It’s not a program that is run on its own. You can confirm the successful installation of the AIR runtime by installing an AIR application.
The AIR runtime needs to be installed only once on your computer for you to be able to install any number of AIR applications. Throughout the course of this book you’ll create several AIR apps (which is the point of the book, after all), but many apps are available and can be downloaded from the Internet as well. Along with any number of third-party AIR applications, Adobe provides some of its own, one of which I’ll use in these steps.
Download an application from the Internet.
You can find a handful of applications on Adobe’s Web site (see www.adobe.com/devnet/air/flex/samples.html) and find more by searching the Web. For this example, I’ll install a playful application from Adobe called ScreenBoard. Note that the app file you’ll download is generally not operating-system-specific.
Double-click the downloaded file (Figure 1.6) to begin the installation process.
AIR applications use a
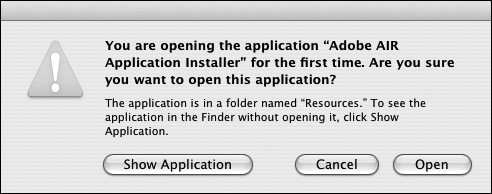
.airextension and display a simple icon (it looks like a cardboard box).When you install the very first AIR application, you’ll get a security warning about opening the Adobe AIR Application Installer for the first time (Figure 1.7). Click Open to proceed with the installation, and you won’t see this message again.
Read and pay attention to everything on the initial screen (Figure 1.8). Then click Install if you still want to install the application.
This installation screen is very important and worth looking at (more so than for most applications you might install). For starters, you’ll see the application’s publisher (the company or person who created it) and the name of the application. In the next chapter you’ll learn how to set these values when making your own program.
The installer also indicates what system access the program will have. It’s very important that AIR application creators, and the people who use the programs, are aware of the associated security issues. Adobe AIR allows Web developers to create desktop applications, which means that an AIR application can do damage to the user’s computer, something that could never happen with a standard Web site (with a few exceptions). The security issues are topics that are repeatedly addressed throughout this book and in Chapter 15, “Security Techniques,” in particular.
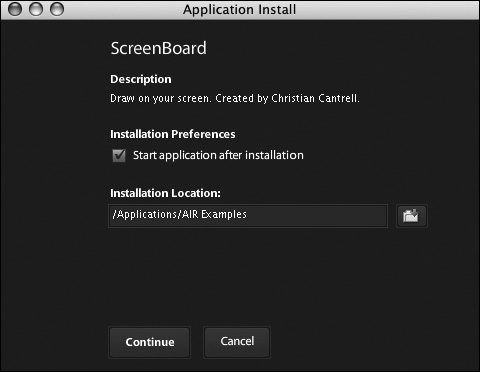
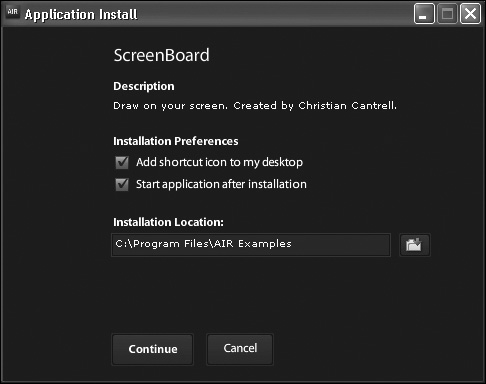
On the next screen (Figure 1.9) decide where the application should be installed and whether it should automatically be started after installation. Click Continue.
On Windows, the default is to install the application within the
Program Filesdirectory, just like any other application. Windows users are also given the option of creating a desktop shortcut to the application (Figure 1.10).On Mac OS X, the default is to install AIR programs within the
Applicationsfolder, just like any other application.Some programs will also indicate where they think they should be installed. With the ScreenBoard example, its default option is to store it within a special
AIR Examplesfolder (within theApplicationsorProgram Filesdirectories).Ta-da! That’s it. No big deal. If you checked the corresponding box in the previous step (Figures 1.9 and 1.10), the application will start when the installation finishes.


✓ Tip
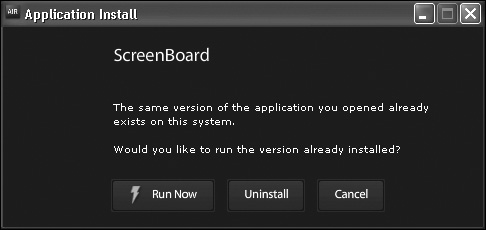
If you attempt to install an AIR application that has already been installed, you will be alerted to the existing installation (Figure 1.11). If you install a newer version, you will be given the option of replacing the original installation with the update.
After you’ve successfully installed an AIR application, you’ll have myriad ways to run it. You could probably figure out all these on your own, but the point is that once you’ve installed the runtime and the application, you’ll see that AIR applications behave just like any other program on your computer.
Check the Start application after installation box during the installation process (Figures 1.9 and 1.10).
On Windows, use the desktop shortcut if one was created (Figure 1.12).
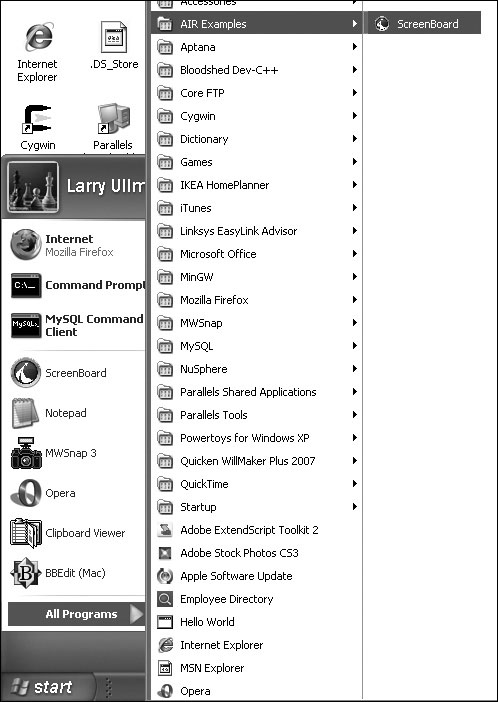
On Windows, use the Start menu (Figure 1.13).
On Mac OS X, double-click the application’s icon (most applications will be installed in the
Applicationsfolder by default) (Figure 1.14).On Mac OS X, add the application to your Dock so it can be launched from there (Figure 1.15).


✓ Tips
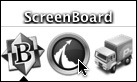
In each of the images, the ScreenBoard icon happens to be the default AIR application icon. You can create custom icons for your AIR applications to be used instead.
The ScreenBoard application lets you draw on your screen, on top of every other program (Figure 1.16). This isn’t the most important use of the AIR technology, but it does allow for some legal, nondestructive graffiti.
If you have created or modified a file called
mms.cfg, which is used by the Flash Player, it can cause problems when running AIR applications. Temporarily remove it from its primary location (e.g.,C:winntsystem32macromediaflashmms.cfgon Windows XP or/Library/Application Support/Macromedia/mms.cfgon Mac OS X) to fix the conflict. This shouldn’t be a problem for most users, however.
