
1. Getting Acquainted
Lesson overview
In this lesson, you’ll learn how to do the following:
Create a new file in Adobe Animate CC
Adjust Stage settings and document properties
Add layers to the Timeline
Understand and manage keyframes in the Timeline
Work with imported images in the Library panel
Move and reposition objects on the Stage
Open and work with panels
Select and use tools in the Tools panel
Preview your animation
Save your file
This lesson will take less than 1 hour to complete. Please log in to your account on peachpit.com to download the lesson files for this chapter, or go to the Getting Started section at the beginning of this book and follow the instructions under “Accessing the Lesson Files and Web Edition.”
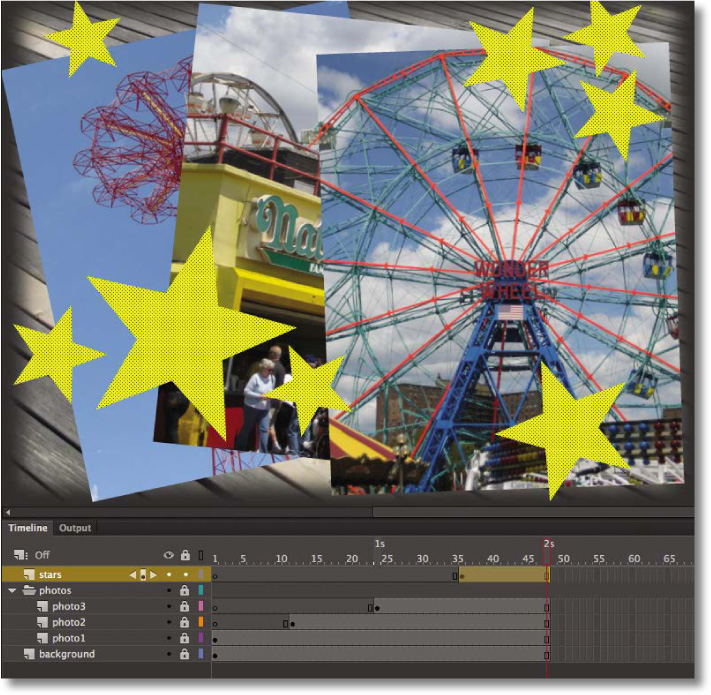
In Animate, the Stage is where you lay out all your visual elements, the Timeline organizes frames and layers, and other panels let you edit and control your creation.
Starting Adobe Animate CC and Opening a File
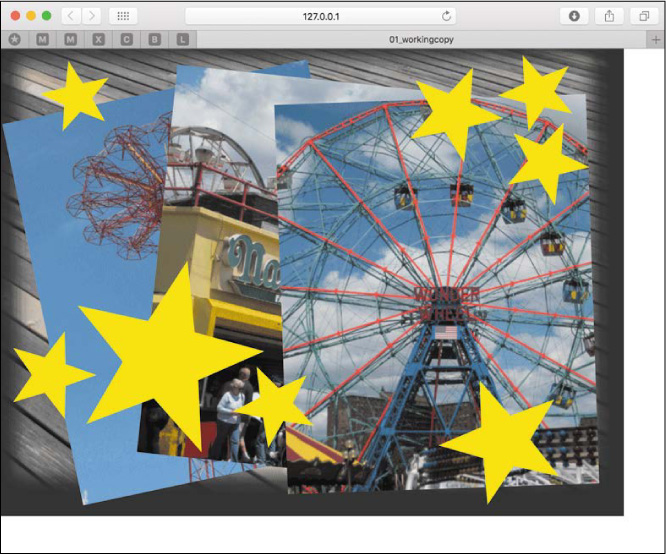
The first time you start Adobe Animate CC you’ll see a Welcome screen with links to standard file templates, tutorials, and other resources. In this lesson, you’ll create a simple slideshow-type animation to showcase a few vacation snapshots. You’ll add a background, photos, and some decorative elements, and in the process you’ll learn about positioning elements on the Stage and placing them along the Timeline so they appear one at a time, in sequence. You’ll begin learning how to use the Stage to organize your visual elements spatially, and how to use the Timeline to organize your elements temporally.
![]() Note
Note
If you have not already downloaded the project files for this lesson to your computer from your Account page on peachpit.com, make sure to do so now. See “Getting Started” at the beginning of the book.
![]() Tip
Tip
You can also start Animate by double-clicking an Animate file (*.fla or *.xfl), such as the 01End.fla file that is provided to show you the completed project.
Start Adobe Animate CC. In Windows, choose Start > Programs > Adobe Animate CC. On a Mac, double-click Adobe Animate CC in the Adobe Animate CC folder in the Applications folder.
Choose File > Open. In the Open dialog box, select the 01End.fla file in the Lesson01/01End folder and click Open to see the final project.
Choose File > Publish.
Animate creates the necessary files to play in the target platform. In this example, the HTML5 Canvas Document creates an HTML file, a JavaScript file, and a folder of images to display the final animation in a browser. The files are saved in the same folder as your Animate document.
 Note
NoteWhen launching Adobe Animate CC for the first time, you may be asked to sync settings with Creative Cloud. Choose Disable Sync Settings. Synchronizing settings with CC enables you to save your application and workspace preferences across multiple computers.
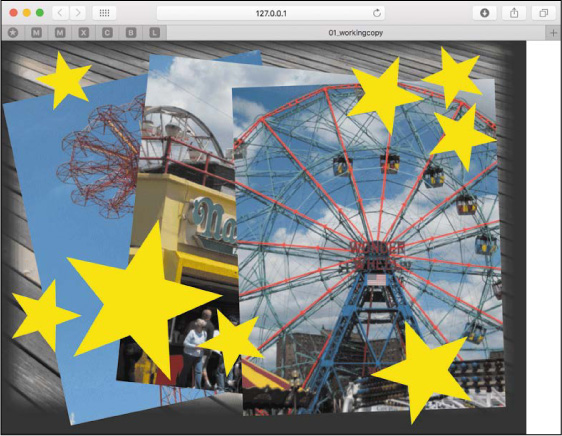
Double-click the HTML file.
An animation plays. During the animation, several overlapping photos appear one by one, with stars appearing at the end.
NoteThe Output panel will display a warning saying that the bitmaps were packed into a spritesheet and that EaselJS is starting frame numbers at 0 instead of 1. You can ignore both warnings. The first is just a notification, and the second is irrelevant because you are playing the Timeline straight from beginning to end.
Close the browser.
Creating a new document
You’ll create the simple animation that you just previewed by starting a new document.
In Animate, choose File > New.
The New Document dialog box opens.
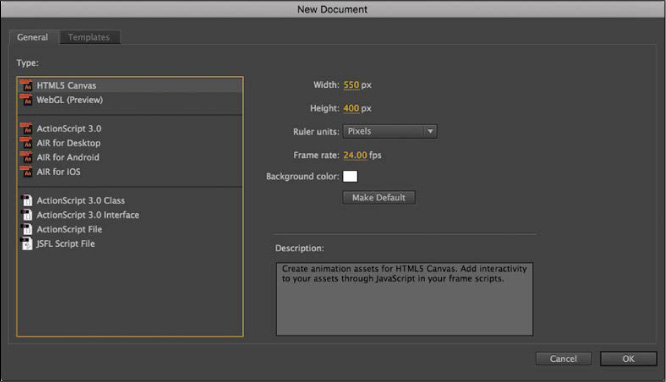
Under the General tab, choose the first option, HTML5 Canvas.
The other options target different playback technologies. For example, WebGL is a document type for animation that takes advantage of hardware-accelerated support for graphics. ActionScript 3.0 is a document type that targets the Flash Player. AIR for Android and AIR for iOS are documents configured to play as apps on an Android or Apple mobile device. AIR for Desktop targets documents for playback as stand-alone programs on Windows or Mac desktop computers.
On the right side of the dialog box, you can choose the dimensions of the Stage by entering new pixel values for the Width and Height. Enter 800 for Width and 600 for Height. Keep the Ruler Units as Pixels.
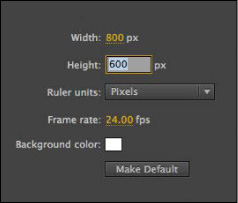
Leave the Frame Rate and Background Color for the Stage at their default settings. You can always edit these document properties, as explained later in this lesson.
Click OK.
Animate creates a new HTML5 Canvas document with all the specified settings.
Choose File > Save. Name the file 01_workingcopy.fla, and from the File Format/Save As Type menu, choose Animate document (*.fla). Although the software application is called Animate, be aware that the file extension is .fla or .xfl, which both preserve echoes of the name of the ancestor of Animate: “Flash.”
Save it in the 01Start folder. Saving your file right away is a good working habit that ensures your work won’t be lost if the application or your computer crashes. You should always save your Animate file with the extension .fla (or .xfl if you save it as an Animate Uncompressed Document) to identify it as the Animate source file.
Understanding Document Types
Adobe Animate CC is an animation and multimedia authoring tool that creates media for multiple platforms and playback technologies. Knowing where your final animation will play determines what type of document you’ll choose as a new file.
![]() Note
Note
Not all features are supported across all document types. For example, WebGL documents don’t support text, and HTML5 Canvas documents don’t support the 3D Rotation or Translation tool. Unsupported tools are grayed out.
Playback environment
The playback, or runtime, environment is the technology that your final, published files use to play. Your animation could play in a browser with the Flash Player, or they could play in a browser with HTML5 and JavaScript. Perhaps your animation will be exported as an HD video to be uploaded to YouTube. Or your project could play as an app on a mobile device. You should make that decision first so you can choose the appropriate document type.
![]() Note
Note
This latest version of Animate CC supports only ActionScript 3.0. If you need ActionScript 1.0 or 2.0, you must work with Flash Professional CS6 or lower.
Regardless of the playback environment and document type, all document types are saved as FLA or XFL (Animate) files. The difference is that each document type is configured to export different, final published files.
Choose HTML5 Canvas to create animated assets that play back in a modern browser using HTML5 and JavaScript. You can add interactivity by inserting JavaScript within Animate CC or adding it to the final published files.
Choose WebGL for pure animated assets to take advantage of hardware-accelerated support of graphics.
Choose ActionScript 3.0 to create animation and interactivity that plays in the Flash Player in a desktop browser. ActionScript 3.0 is the latest version of the native scripting language in Animate, which is similar to JavaScript. Choosing an ActionScript 3.0 document doesn’t mean you have to include ActionScript code. It simply means that your playback target is the Flash Player.
NoteThe ActionScript 3.0 document also supports publishing content as a projector for either Mac or Windows. A projector plays as a stand-alone application on the desktop, without needing a browser.
Be aware that Adobe will no longer back the Flash Player in browsers beyond 2020. Despite this impending end-of-life date for the Flash Player, it’s best to think of an ActionScript 3.0 document as one that supports the widest range of drawing and animation features in Animate from which you can ultimately export animation assets, such as spritesheets or PNG sequences, or finished high-definition video.
Choose AIR for Desktop to create animation and interactivity that plays as an application on Windows or Mac desktops, without needing a browser. You can add interactivity in an AIR document using ActionScript 3.0.
Choose AIR for Android or AIR for iOS to publish an app for an Android or an Apple mobile device. You can add interactivity for your mobile app using ActionScript 3.0.
![]() Tip
Tip
You can easily switch from one document type to another. For example, you can convert an ActionScript 3.0 document into an HTML5 Canvas document if you have an old Flash banner ad animation that you want to update. Use Commands > Convert To Other Document Formats or File > Convert To to choose a new document type. Some functionality and features may be lost in the conversion, however. For example, conversion to an HTML5 Canvas document will comment out ActionScript code.
Getting to Know the Workspace
The Adobe Animate CC work area includes the command menus at the top of the screen and a variety of tools and panels for editing and adding elements to your movie. You can create all the objects for your animation in Animate, or you can import elements you’ve created in Adobe Illustrator, Adobe Photoshop, Adobe After Effects, or other compatible applications.
By default, Animate displays the menu bar, Timeline, Stage, Tools panel, Properties panel, Edit bar, and a few other panels. As you work in Animate, you can open, close, group, ungroup, dock, undock, and move panels around the screen to fit your work style or your screen resolution.

Choosing a new workspace
Animate also provides a few preset panel arrangements (“workspaces”) that may better suit the needs of particular users. Use the Window > Workspaces submenu to choose a different workspace or to save a new one. The same functionality is provided by the workspace switcher at the right end of the Application bar.
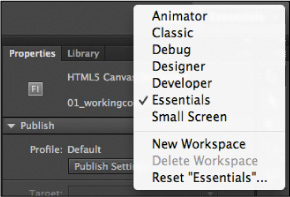
Click the workspace switcher and choose a new workspace.
The various panels are rearranged and resized according to their importance in the chosen workspace. For example, the Animator and Designer workspaces put the Timeline at the top for easy and frequent access.
If you have moved some of the panels around and want to return to one of the prearranged workspaces, choose Window > Workspaces > Reset [preset name] and click OK in the confirmation dialog box.
To return to the default workspace, choose Window > Workspaces > Essentials. In this Classroom in a Book, we’ll be using the Essentials workspace.
Saving your workspace
If you find an arrangement of panels that suits your style of work, you can save it as a custom workspace and return to it at a later date.
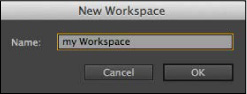
Open the workspace switcher and choose New Workspace.
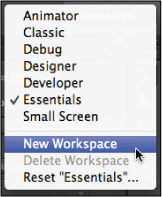
The New Workspace dialog box appears.
Enter a name for your new workspace. Click OK.
Animate saves the current arrangement of panels and adds it to the options in the Workspace menu, which you can access at any time.
![]() Tip
Tip
By default, the Animate interface is dark. However, you can change the interface to a lighter gray if you prefer. Choose Edit > Preferences (Windows) or Animate CC > Preferences (Mac), and in the General preferences category, choose Light from the User Interface menu.
About the Stage
The big white rectangle in the middle of your screen is called the Stage. As with a theater stage, the Stage in Animate is the area that viewers see when a movie is playing. It contains the text, images, and video that appear on the screen. Move elements on and off the Stage to place them in and out of view. You can use the rulers (View > Rulers) or grids (View > Grid > Show Grid) to help you position items on the Stage. Additionally, you can pull guides from the ruler (View > Guides) or use the Align panel and other tools you’ll learn about in later lessons in this book.
By default, you’ll see the gray area off the Stage where you can place elements that won’t be visible to your audience. The gray area is called the pasteboard. To see only the Stage, choose View > Magnification > Clip To Stage to select the option. For now, leave the option to view the pasteboard selected.
You can also click the Clip Content Outside The Stage button to crop the graphic elements that fall beyond the Stage area to see how your audience will view your final project.

Default Stage
Stage with Clip Content Outside The Stage selected
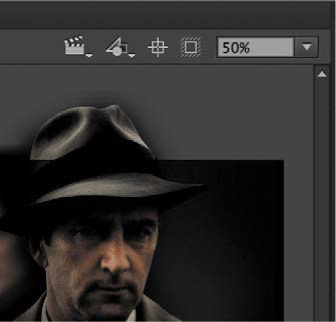
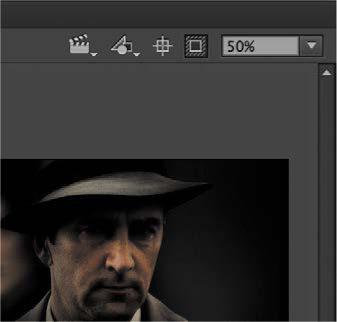
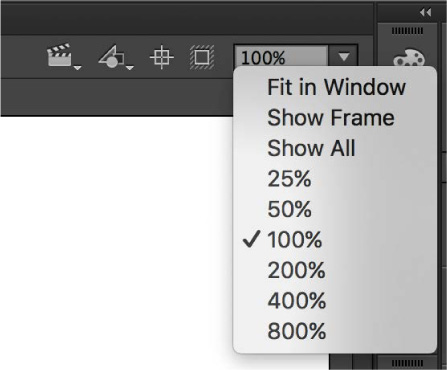
To scale the Stage so that it fits completely in the application window, choose View > Magnification > Fit In Window. You can also choose different magnification view options from the menu just above the Stage.
![]() Tip
Tip
You can view the Stage in full-screen mode without the distraction of the various panels by choosing View > Screen Mode > Full Screen Mode. Use F4 to toggle the panels, and press the Esc key to return to Standard Screen Mode.
Changing the Stage properties
Now you’ll change the color of the Stage. The Stage color, along with document properties such as the Stage dimensions and frame rate, is available in the Properties panel, which is the vertical panel just to the right of the Stage.
In the Properties pane of the Properties panel, note that the dimensions of the current Stage are set at 800 x 600 pixels, which you chose when you created the new document.

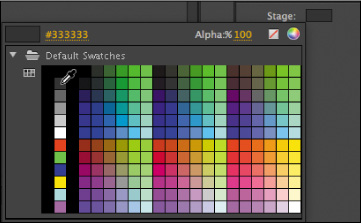
Also in the Properties pane, click the Background Color box next to Stage: and choose a new color from the color palette. Choose dark gray (#333333).
Your Stage is now a different color. You can change the Stage properties at any time.
Working with the Library Panel
The Library panel is accessible from a tab just to the right of the Properties panel. The Library panel is where you store and organize symbols created in Animate, as well as imported files, including bitmaps, graphics, sound files, and certain video clips. Symbols are graphics used frequently for animation and for interactivity.
About the Library panel
The Library panel lets you organize library items in folders, see how often an item is used in a document, and sort items by type. When you import items into Animate, you can import them directly onto the Stage or into the library. However, any item you import onto the Stage is also added to the library, as are any symbols you create. You can then easily access the items to add them to the Stage again, edit them, or see their properties.
To display the Library panel, choose Window > Library, or press Ctrl+L (Windows) or Command+L (Mac).
![]() Tip
Tip
You can also access the assets that you’ve stored in your Creative Cloud account by clicking the CC Libraries icon (Window > CC Libraries).
Importing an item to the Library panel
Often, you’ll create graphics directly with the drawing tools in Animate and save them as symbols, which are stored in the library. Other times you’ll import media such as JPEG images or MP3 sound files, which are also stored in the library. In this lesson, you’ll import several images into the library to be used in the animation.
Choose File > Import > Import To Library. In the Import To Library dialog box, select the background.png file in the Lesson01/01Start folder, and click Open.
Animate imports the selected PNG image and places it in the Library panel.
Continue importing photo1.jpg, photo2.jpg, and photo3.jpg from the 01Start folder.
You can also hold down the Shift key to select multiple files and import all of the images at once.
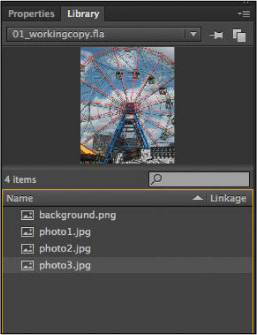
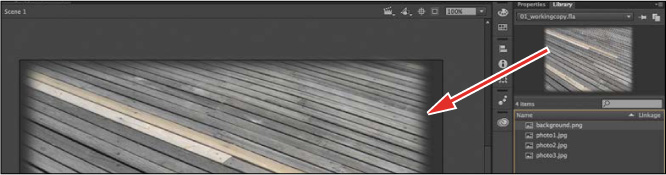
The Library panel displays all the imported images with their filenames and a thumbnail preview. These images are now available to be used in your Animate document.
Adding an item from the Library panel to the Stage
To use an imported image, simply drag it from the Library panel onto the Stage.
Choose Window > Library to open the Library panel if it isn’t already open.
Select the background.png item in the Library panel.
Drag the background.png item onto the Stage and place it approximately in the center of the Stage.
 Tip
TipYou can also choose File > Import > Import To Stage, or press Ctrl+R (Windows) or Command+R (Mac), to import an image file to the library and put it on the Stage all in one step.
Understanding the Timeline
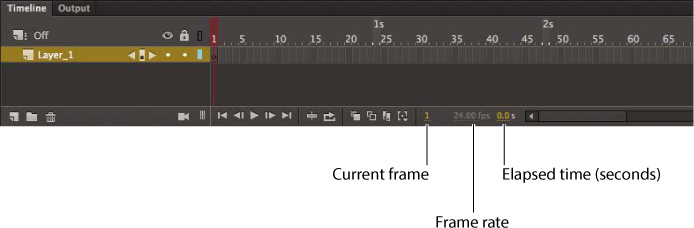
In the default Essentials workspace, the Timeline is located below the Stage. As do films, Animate documents measure time in frames. As the movie plays, the playhead, shown as a red vertical line, advances through the frames in the Timeline. You can change the content on the Stage for different frames. To display a frame’s content on the Stage for any particular time, move the playhead to that frame in the Timeline. The frame number, as well as the time in seconds, is always displayed above the Timeline.
At the bottom of the Timeline, Animate indicates the selected frame number, the current frame rate (how many frames play per second), and the time that has elapsed so far in the movie.
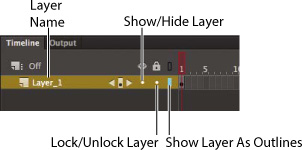
The Timeline also contains layers, which help you organize the artwork in your document. At the moment, your project has only one layer, which is called Layer 1. Think of layers as multiple film strips stacked on top of one another. Each layer can contain a different image that appears on the Stage, and you can draw and edit objects on one layer without affecting objects on another layer. The layers are stacked in the order in which they overlap each other so that objects on the bottom layer in the Timeline are on the bottom of the stack on the Stage. You can hide, lock, or show the contents of layers as outlines by clicking the dots in the layer under the layer option icons.
Changing the appearance of the Timeline
You can adjust the Timeline’s appearance to accommodate your workflow. When you want to see more layers, choose Short from the Frame View menu in the upperright corner of the Timeline. The Short option decreases the height of frame cell rows. The Preview and Preview In Context options display thumbnail versions of the contents of your keyframes in the Timeline.
You can also change the width of the frame cells by choosing Tiny, Small, Normal, Medium, or Large. In this book, we show the Timeline frames in their default size of Normal.
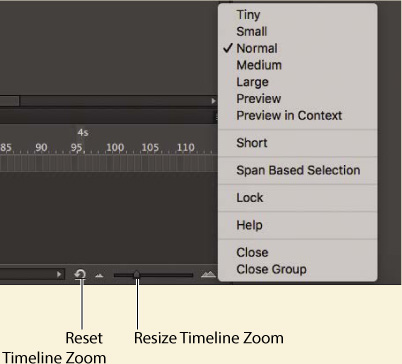
For finer control over the Timeline frame sizes, drag the Resize Timeline View slider. The slider adjusts the size of the frames so you can see more or less of the Timeline. Click the Reset Timeline Zoom To The Default Level button to revert the Timeline view to its Normal size.
Renaming a layer
It’s a good idea to separate your content on different layers and name each layer to indicate its contents so that you can easily find the layer you need later.
Select the existing layer in the Timeline, called Layer 1.
Double-click the name of the layer to rename it, and type background.
Click outside the name box to apply the new name.
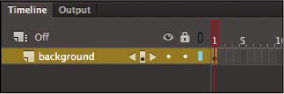
Click the dot below the lock icon to lock the layer. Locking a layer prevents you from accidentally moving or making changes to whatever is inside that layer.
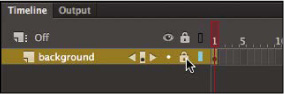
A lock icon appears in the layer. The lock icon indicates that you can’t make edits to the layer because it is locked.
Adding a layer
A new Animate document contains only one layer, but you can add as many layers as you need. Objects in the top layers will overlap objects in the bottom layers.
Select the background layer in the Timeline.
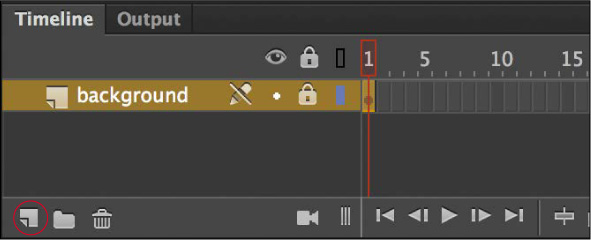
Choose Insert > Timeline > Layer. You can also click the New Layer button below the Timeline. A new layer appears above the background layer.
Double-click the new layer to rename it, and type photo1. Click outside the name box to apply the new name.
Your Timeline now has two layers. The background layer contains the background photo, and the newly created photo1 layer above it is empty.
Select the top layer, called photo1.
Choose Window > Library to open the Library panel if it isn’t already open.
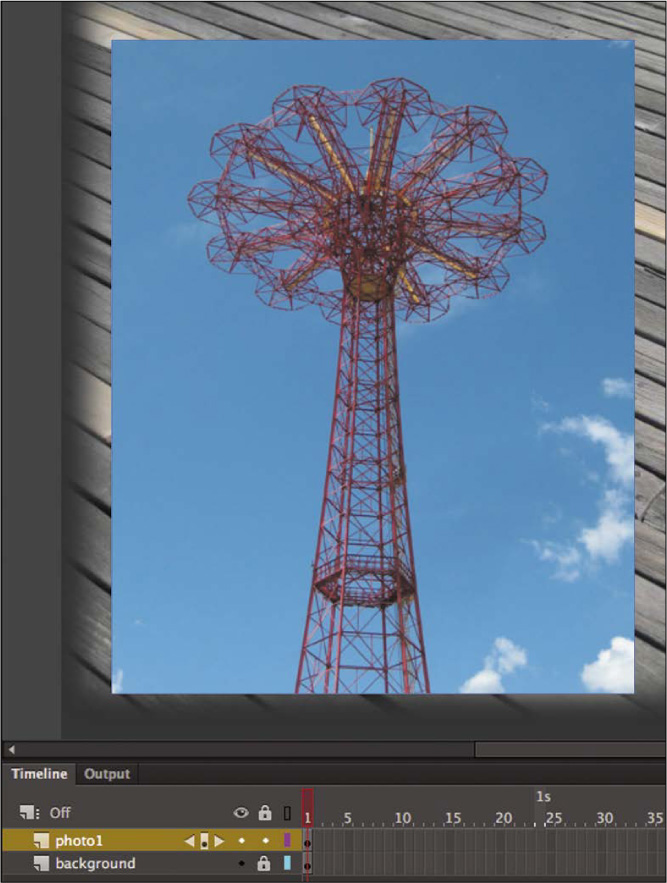
Drag the library item called photo1.jpg from the library onto the Stage.
The photo1 JPEG appears on the Stage and overlaps the background image.
Choose Insert > Timeline > Layer, or click the New Layer button (
 ) below the Timeline, to add a third layer.
Rename the third layer photo2.
NoteAs you add more layers and your overlapping graphics become more complicated, click the dot below the eye icon in your layer to hide the contents of any layer. Alternatively, hold down the Shift key and click the dot below the eye icon to make the layer transparent so you can see what’s below it. Hiding or making a layer transparent affects only how you see your project in Animate—it doesn’t affect your final exported project. Double-click the Layer icon to modify the level of transparency in the Layer Properties dialog box.
Working with layers
If you don’t want a layer, you can easily delete it by selecting it and then clicking the Delete button below the Timeline.

If you want to rearrange your layers and change how your graphics overlap each other, simply drag any layer to move it to a new position in the layer stack.
Inserting frames
So far, you have a background photo and another overlapping photo on the Stage, but your entire animation exists for only a single frame, which is only a fraction of a second. To create more time on the Timeline and make this animation run for a longer duration, you must add additional frames.
Select frame 48 in the background layer. Use the Resize Timeline View slider at the bottom-right corner of the Timeline to expand the Timeline frames to make it easier to identify frame 48.
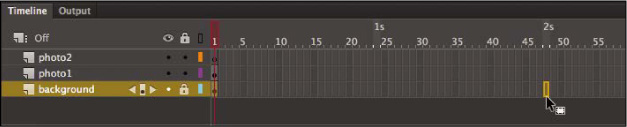
Choose Insert > Timeline > Frame (F5). You can also right-click and choose Insert Frame from the context menu that pops up.
Animate adds frames in the background layer up to the selected frame, frame 48.
Select frame 48 in the photo1 layer.
Choose Insert > Timeline > Frame (F5). You can also right-click and choose Insert Frame from the menu.
Animate adds frames in the photo1 layer up to the selected frame, frame 48.
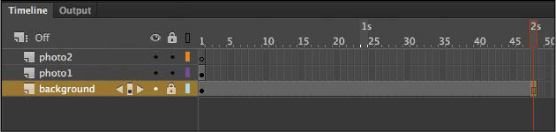
Select frame 48 in the photo2 layer and insert frames on this layer.
You now have three layers, all with 48 frames on the Timeline. Since the frame rate of your Animate document is 24 frames per second, your current animation lasts 2 seconds.
Creating a keyframe
A keyframe indicates a change in content on the Stage. Keyframes are indicated on the Timeline as a circle. An empty circle means there is nothing in that particular layer at that particular time. A filled-in black circle means there is something in that particular layer at that particular time. The background layer, for example, contains a filled keyframe (black circle) in the first frame. The photo1 layer also contains a filled keyframe in its first frame. Both layers contain photos. The photo2 layer, however, contains an empty keyframe in the first frame, indicating that it is currently empty.

You’ll insert a keyframe in the photo2 layer at the point in time when you want the next photo to appear.
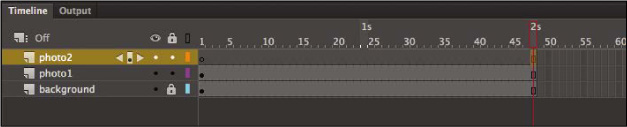
Select frame 24 on the photo2 layer. As you select a frame, Animate displays the frame number beneath the Timeline.

Choose Insert > Timeline > Keyframe (F6).
A new keyframe, indicated by an empty circle, appears in the photo2 layer in frame 24.
Select the new keyframe at frame 24 in the photo2 layer.
Drag photo2.jpg from your library onto the Stage.
The empty circle at frame 24 becomes filled, indicating that there is now content in the photo2 layer. At frame 24, your photo appears on the Stage. You can drag the red playhead from the top of the Timeline to “scrub,” or show what’s happening on the Stage, at any point along the Timeline. You’ll see that the background photo and photo1 remain on the Stage throughout the Timeline, but photo2 appears only at frame 24.

Understanding frames and keyframes is essential for mastering Animate. Be sure you understand how the photo2 layer contains 48 frames with two keyframes—an empty keyframe at frame 1 and a filled keyframe at frame 24.

Moving a keyframe
If you want photo2.jpg to appear later or earlier in time, you need to move the keyframe in which it appears closer to or farther from the right on the Timeline. You can easily move any keyframe along the Timeline by simply selecting it and then dragging it to a new position.
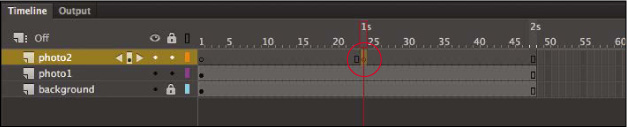
Select the keyframe in frame 24 on the photo2 layer.
Move your mouse cursor slightly, and you’ll see a box icon appear near your cursor indicating that you can reposition the keyframe.
Drag the keyframe to frame 12 in the photo2 layer.

The photo2.jpg file now appears on the Stage much earlier in the animation.

Organizing Layers in a Timeline
At this point, your working Animate file has only three layers: a background layer, a photo1 layer, and a photo2 layer. You’ll be adding additional layers for this project, and as in most other projects, you’ll end up having to manage multiple layers. Layer folders help you group related layers to keep your Timeline organized and manageable, just like you make folders for related documents on your desktop. Although it may take some time to create the folders, you’ll save time later because you’ll know exactly where to look for a specific layer.
Creating layer folders
For this project, you’ll continue to add layers for additional photos, and you’ll place those layers in a layer folder.
Select the photo2 layer and click the New Layer button at the bottom of the Timeline.
Name the layer photo3.
Insert a keyframe at frame 24.
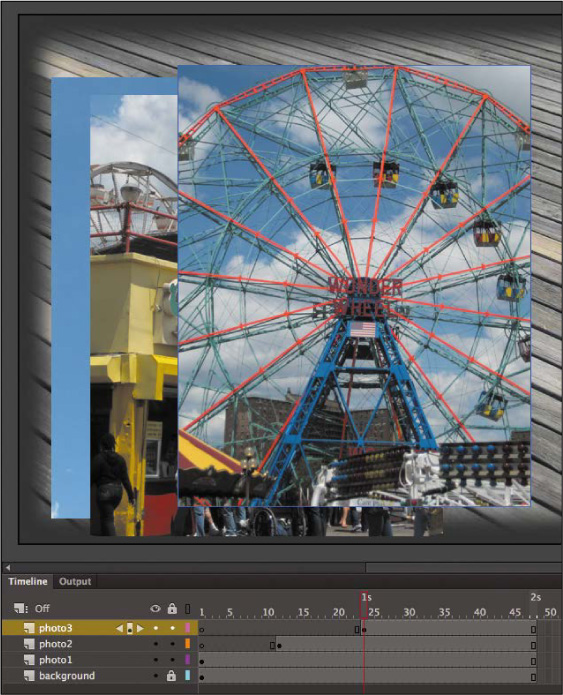
Drag photo3.jpg from the library onto the Stage.
You now have four layers. The top three contain photos of scenes from Coney Island that appear at different keyframes.
Select the photo3 layer and click the New Folder icon at the bottom of the Timeline (
 ).
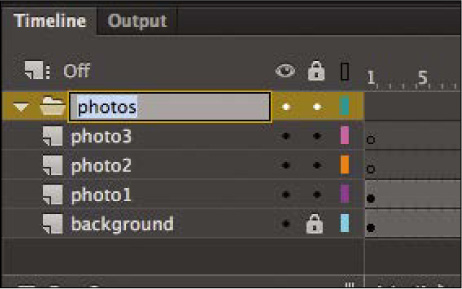
).A new layer folder appears above the photo3 layer.
Name the folder photos.
Adding layers to layer folders
Now you’ll add the photo layers to the photos folder. As you arrange layers, remember that Animate displays the content in the layers in the order in which they appear in the Timeline, with the top layer’s content at the front and the bottom layer’s content at the back.
Drag the photo1 layer into the photos folder.
Notice how the bold line indicates the destination of your layer. When you place a layer inside a folder, Animate indents the layer name.
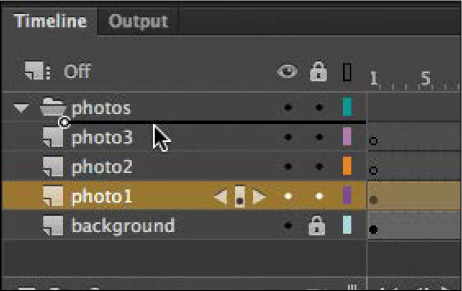
Drag the photo2 layer into the photos folder.
Drag the photo3 layer into the photos folder.
All three photo layers should be in the photos folder, in the same stacking order as they were outside the folder.

You can collapse the folder by clicking the arrow just to the left of the folder name. Expand the folder by clicking the arrow again. Be aware that if you delete a layer folder, you delete all the layers inside that folder as well.
Cut, copy, paste, and duplicate layers
When managing multiple layers and layer folders, you can rely on cut, copy, paste, and duplicate layer commands to make your workflow easier and more efficient. All the properties of the selected layer are copied and pasted, including its frames, its keyframes, any animation, and even the layer name and type. You can also copy and paste layer folders and their contents.
To cut or copy any layer or layer folder, simply select the layer and right-click the layer name. In the menu that appears, choose Cut Layers or Copy Layers.
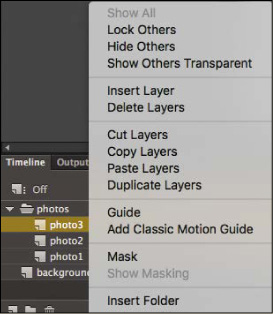
Right-click the Timeline again and choose Paste Layers. The layer or layers that you cut or copied are pasted into the Timeline. Use Duplicate Layers to copy and paste in one operation.
You can also cut, copy, paste, or duplicate layers from the application menu bar. Choose Edit > Timeline, and then choose Cut Layers, Copy Layers, Paste Layers, or Duplicate Layers.
Using the Properties Panel
The Properties panel gives you quick access to the attributes you’re most likely to need. What appears in the Properties panel depends on what you’ve selected. For example, if nothing is selected, the Properties panel includes options for the general Animate document, including changing the Stage color or dimensions. If you’ve selected an object on the Stage, the Properties panel shows its x and y coordinates and its width and height, among other information. You’ll use the Properties panel to move your photos on the Stage.
Positioning an object on the Stage
You’ll begin by moving the photos with the Properties panel. You’ll also use the Transform panel to rotate the photos.
![]() Tip
Tip
If the Properties panel is not open, choose Window > Properties, or press Ctrl+F3 (Windows) or Command+F3 (Mac).
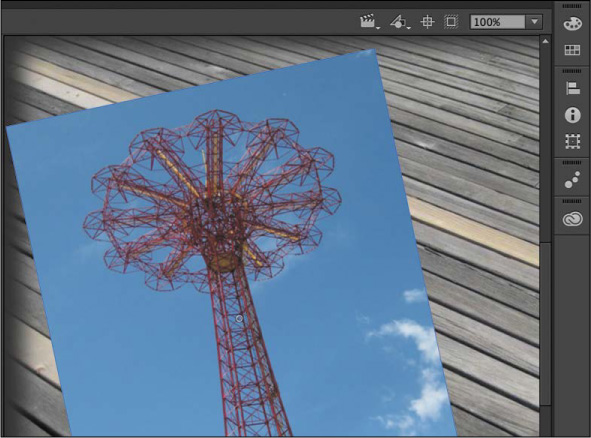
At frame 1 of the Timeline, select the photo1.jpg image that you dragged onto the Stage in the photo1 layer. A blue outline indicates that the object is selected.
In the Properties panel, type 50 for the X value and 50 for the Y value. Press Enter (Windows)/Return (Mac) to apply the values. You can also drag over the X and Y values to change their values. The photo moves to the left side of the Stage.

The X and Y values are measured on the Stage from the top-left corner. X begins at 0 and increases to the right, and Y begins at 0 and increases downward. The registration point (the point from which Animate makes measurements) for imported photos is at the top-left corner.
Choose Window > Transform to open the Transform panel.
In the Transform panel, select Rotate, and type -12 in the Rotate box, or drag over the value to change the rotation. Press Enter (Windows)/Return (Mac) to apply the value.
The selected photo on the Stage rotates 12 degrees counterclockwise.
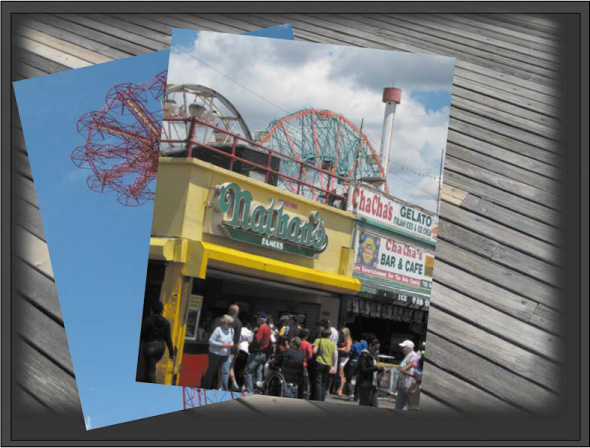
Select frame 12 of the photo2 layer. Now click photo2.jpg on the Stage to select it.
Use the Properties panel and Transform panel to position and rotate the second photo in an interesting way. Use X=200, Y=40, and a Rotate of 6 to give it some contrast with the first photo.
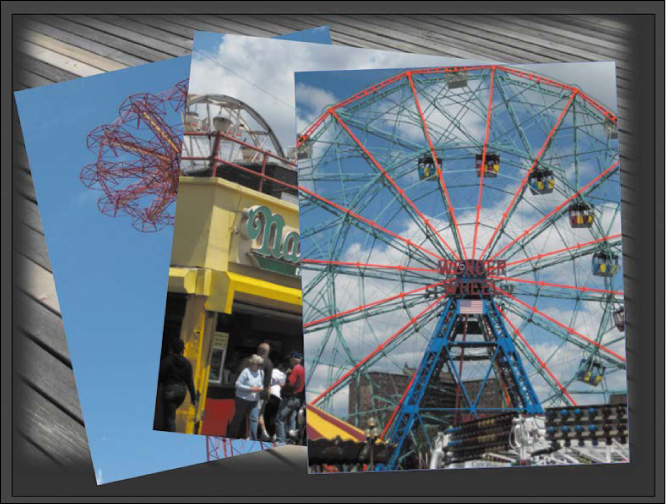
Select frame 24 in the photo3 layer. Now click photo3.jpg on the Stage to select it.
Use the Properties panel and Transform panel to position and rotate the third photo in an interesting way. Use X=360, Y=65, and a Rotate of -2 so that all your photos have visual variety.
![]() Note
Note
When images are scaled or rotated in Animate, they may appear jagged. You can smooth each image by double-clicking the bitmap icon in the Library panel. In the Bitmap Properties dialog box that appears, select the Allow Smoothing option.
Working with panels
Just about everything you do in Animate involves a panel. In this lesson, you use the Library panel, Tools panel, Properties panel, Transform panel, History panel, and the Timeline. In later lessons, you’ll learn to use other panels to control various aspects of your project. Because panels are such an integral part of the Animate workspace, it pays to know how to manage them.
To open any panel in Animate, choose its name from the Window menu.
Individual panels float freely, and they can be combined in docks, groups, or stacks.
A dock is a collection of panels or panel groups in a vertical column. Docks stick to the left or right edges of the user interface.
A group is a collection of panels that can be placed within a dock or can float freely.
A stack is similar to a dock but can be placed anywhere in the interface.
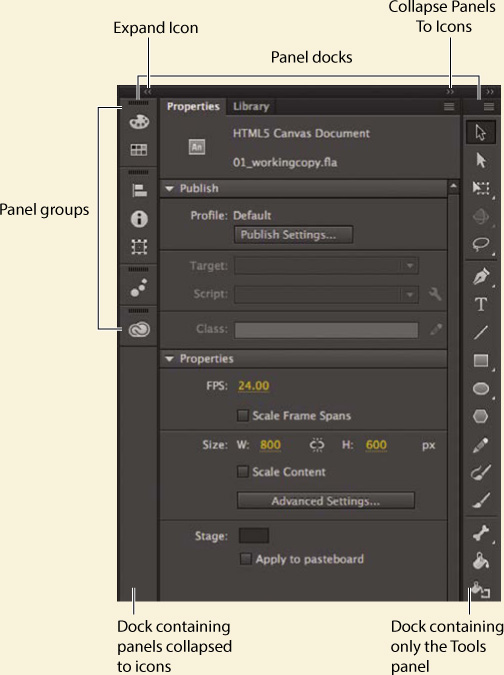
In the default Essentials workspace, most of the panels are organized in three docks on the right side of the screen. The Timeline and Output panels are grouped at the bottom, and the Stage is on the top. However, you can move a panel to any position that is convenient for you.
To move a panel, drag it by its tab to a new location.
To move a panel group or stack, drag it by the area next to the tabs.
As the panel, group, or stack passes over other panels, groups, docks, or stacks, a blue highlighted drop zone will appear. If you release the mouse button while a drop zone is visible, the panel will be added to the group, dock, or stack.
To dock a panel, drag it by its tab into a new position at the left or right edge of the screen. If you drag it over the top or bottom of an existing dock, a horizontal drop zone will show you the panel’s new location. If a vertical drop zone appears, dropping the panel will create a new dock.
To group a panel, drag its tab onto the tab of another panel or the drop zone at the top of an existing group.
To create a stack, drag a group out of a dock or an existing stack so it floats freely. Alternatively, drag one free-floating panel onto the tab of another floating panel.
You also have the option of displaying most of the panels as icons to save space but still maintain quick access. Click the double arrowheads in the top-right corner of a dock or stack to collapse the panels to icons. Click the double arrowheads again to expand the icons into panels.
Using the Tools Panel
The Tools panel—the long, narrow panel on the far right side of the work area—contains selection tools, drawing and type tools, painting and editing tools, navigation tools, and tool options. You’ll use the Tools panel frequently to switch to tools designed for the task at hand. Most often, you’ll use the Selection tool, which is the black arrow tool at the top of the Tools panel, for selecting and clicking items on the Stage or the Timeline. When you select a tool, check the options area at the bottom of the panel for more options and other settings appropriate for your task.
Selecting and using a tool
When you select a tool, the options available at the bottom of the Tools panel and the Properties panel change. For example, when you select the Rectangle tool, the Object Drawing Mode and Snap To Objects options appear. When you select the Zoom tool, the Enlarge and Reduce options appear.
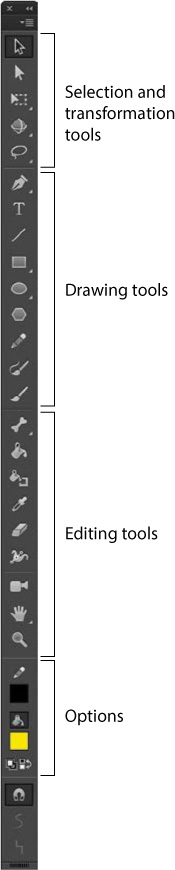
The Tools panel contains too many tools to display all at once. Some tools are arranged in hidden groups in the Tools panel; only the tool you last selected from a group is displayed. A small triangle in the lower-right corner of the tool’s button indicates that there are other tools in the group. Click and hold the icon for the visible tool to see the other tools available, and then select one from the menu.
You’ll use the PolyStar tool to add a little decoration to your short animation.
Select the folder in the Timeline, and then click the New Layer button.
Name the new layer stars.
Lock the other layers below it so you don’t accidentally move anything into them.
In the Timeline, move the playhead to frame 36 and select frame 36 in the stars layer.
Choose Insert > Timeline > Keyframe (F6) to insert a new keyframe at frame 36 in the stars layer.

NoteIf you’re working with a smaller dfig01_043a.jpgisplay, the bottom of the Tools panel may be cut off. That makes some of the tools and buttons invisible. But there’s an easy way to fix the problem: drag the left edge of the Tools panel to widen it so it can show multiple columns of tools.

You will create star shapes to appear at frame 36 in this layer.
In the Tools panel, select the PolyStar tool, which is indicated by the hexagon shape.

In the Properties panel, click the colored square next to the pencil icon, which indicates the color of the outline, or stroke, and choose the red diagonal line.
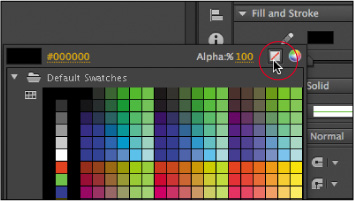
The red diagonal line represents a color of None for the stroke.
Click the colored square next to the paint bucket icon, which indicates the color of the fill, and choose a bright, cheery color such as yellow. You can click the color wheel at the upper right to access the Adobe Color Picker, or you can change the Alpha percentage, which determines the level of transparency, at the upper right.

In the Properties panel, click the Options buttons under Tool Settings.
The Tool Settings dialog box appears.
For Style, choose star. For Number Of Sides, enter 5, and for Star Point Size, enter 0.5. Click OK.
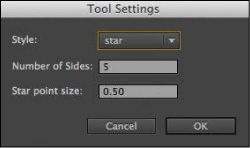
The options determine the shape of your star.
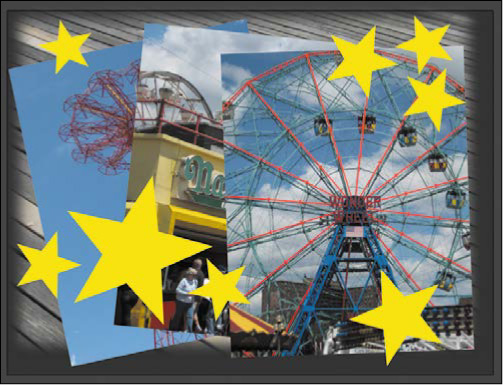
Make sure the empty keyframe in frame 36 of the title layer is selected. Click on the Stage where you want to begin adding a star, and drag to change the width of your star. Move your cursor around the first click to rotate the star. Make multiple stars of different sizes and with different angles of rotation.
Exit the PolyStar tool by selecting the Selection tool.
Use the Properties panel or the Transform panel to reposition or rotate your stars on the Stage, if desired. Or choose the Selection tool and simply click to select a star and drag it to a new position on the Stage. The X and Y values in the Properties panel update as you drag the star around the Stage.
Your animation for this lesson is finished! Compare the Timeline in your file with the Timeline in the final file, 01End.fla.
Undoing Steps in Animate
In a perfect world, everything would go according to plan. But sometimes you need to move back a step or two and start over. You can undo steps in Animate using the Undo command or the History panel.
To undo a single step in Animate, choose Edit > Undo or press Ctrl+Z (Windows)/Command+Z (Mac). To redo a step you’ve undone, choose Edit > Redo.
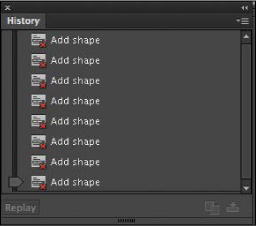
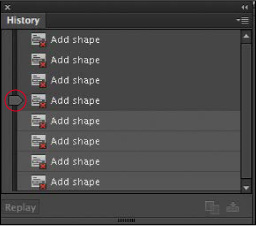
The easiest way to undo multiple steps in Animate is to use the History panel, which displays a list of the last 100 steps you’ve performed. Closing a document clears its history. To access the History panel, choose Window > History.
For example, if you aren’t satisfied with the newly added stars, you can undo your work and return your Animate document to a previous state.
![]() Note
Note
If you remove steps in the History panel and then perform additional steps, the removed steps will no longer be available.
Choose Edit > Undo to undo the last action you made. You can choose the Undo command multiple times to move backward as many steps as are listed in the History panel. You can change the maximum number of Undo commands by selecting Animate > Preferences.
Choose Window > History to open the History panel.
Drag the History panel slider up to the step just before your mistake. Steps below that point are dimmed in the History panel and are removed from the project. To add a step back, move the slider back down.
Previewing Your Movie
As you work on a project, it’s a good idea to preview it frequently to ensure that you’re achieving the desired effect. To quickly see your animation, choose Control > Play, or simply press the Enter/Return key.
To see how an animation or movie will appear to a viewer in its runtime environment, choose Control > Test Movie > In Browser. You can also press Ctrl+Enter (Windows) or Command+Return (Mac) to preview your movie.
Choose Control > Test.
Animate creates the required published files in the same location as your FLA file and opens and plays the animation in your default browser.
Animate automatically loops your movie in this preview mode.
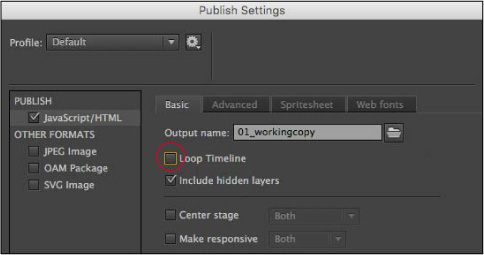
If you don’t want the animation to loop when you test your movie, in Animate choose File > Publish Settings, and deselect the Loop Timeline option.
Close the browser window and return to Animate.
Modifying the Content and Stage
When you first started this lesson, you created a new file with the Stage set at 800 pixels by 600 pixels. However, your client may later tell you that they want the animation in several different sizes to accommodate different layouts. For example, they’d like to create a smaller version with a different aspect ratio for a banner ad. Or they may want to create a version that will run on AIR for Android devices, which has specific dimensions.
Fortunately, you can modify the Stage even after all your content is put in place. When you change the Stage dimensions, Animate provides the option of scaling the content with the Stage, automatically shrinking or enlarging all your content proportionally.
Stage resizing and content scaling
You’ll create another version of this animated project with different Stage dimensions. Choose File > Save to save the work you’ve done so far.
At the bottom of the Properties panel, note that the dimensions of the current Stage are set at 800 x 600 pixels. Click the Advanced Settings button in the Properties section.

The Document Settings dialog box appears.
In the Width and Height boxes, enter new pixel dimensions. Enter 400 for the Width and 300 for the Height.
You can click the link icon between the Width and Height fields to constrain the proportions of the Stage. With the link icon selected, changing one dimension will automatically change the other proportionately.
Select the Scale Content option.
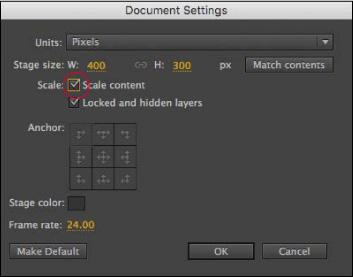
Leave the Anchor option as is.
The Anchor option lets you choose the origin from which your content is resized, if the proportions of the new Stage are different.
Click OK.
Animate modifies the dimensions of the Stage and automatically resizes all the content. If your new dimensions are not proportional to the original size, Animate will resize everything to maximize the content to fit. This means that if your new Stage size is wider than the original, there’ll be extra Stage space to the right. If your new Stage size is taller than the original, there’ll be extra Stage space on the bottom.
Choose File > Save As.
In the Save dialog box choose Animate Document (*.fla) from the File Format menu, and name the file 01_workingcopy_resized.fla.
You now have two Animate files, identical in content but with different Stage dimensions. Close this file and reopen 01_workingcopy.fla to continue this lesson.
Saving Your Movie
A mantra in multimedia production is “Save early, save often.” Applications, operating systems, and hardware crash more often than anyone wants, and at unexpected and inconvenient times. You should always save your movie at regular intervals to ensure that, if a crash does happen, you won’t have lost too much of your time.
Animate can help alleviate much of the worry over lost work. The Auto-Recovery feature creates a backup file in case of a crash.
![]() Note
Note
If you have unsaved changes in your open document, Animate adds an asterisk to the end of its filename at the top of the document window as a friendly reminder.
Using Auto-Recovery for a backup
The Auto-Recovery feature is a preference set for the Animate application for all documents.
The Auto-Recovery feature saves a backup file, so in case of a crash, you have an alternate file to return to.
Choose Edit > Preferences (Windows) or Animate CC > Preferences (Mac).
The Preferences dialog box appears.
Choose the General category from the left column.
Select the Auto-Recovery option, if it’s not already selected, and enter a time (in minutes) for the interval at which Animate creates a backup file.
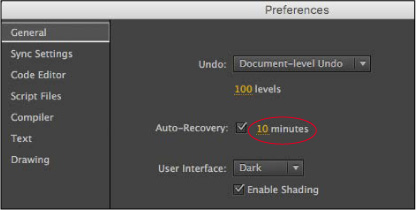
Click OK.
If you make changes to your file but do not save it within the Auto-Recovery interval, Animate creates a new file in the same location as your FLA with RECOVER_ added to the beginning of the filename. The file remains as long as the document is open. When you close the document or when you quit Animate safely, the file is deleted.
NoteTo find out how to keep your copy of Animate CC up to date and to learn about the many sources of help available to you within Animate, see the “Getting Started” section at the beginning of this book.
Review Questions
1 What is the Stage?
2 What’s the difference between a frame and a keyframe?
3 What’s a hidden tool, and how can you access it?
4 Name two methods to undo steps in Animate and describe them.
5 What document type would be best for playing back animation in a modern browser?
Review Answers
1 The Stage is the rectangular area viewers see when a movie is playing. It contains the text, images, and video that appear on the screen. Objects that you store on the pasteboard outside of the Stage do not appear in the movie.
2 A frame is used to measure time on the Timeline. A keyframe is represented on the Timeline with a circle and indicates a change in content on the Stage.
3 Because there are too many tools to display at once in the Tools panel, some tools are grouped, and only one tool in the group is displayed. (The tool you most recently used is the one shown.) Small triangles appear on tool icons to indicate that hidden tools are available. To select a hidden tool, click and hold the tool icon for the tool that is shown, and then select the hidden tool from the menu.
4 You can undo steps in Animate using the Undo command or the History panel. To undo a single step at a time, choose Edit > Undo. To undo multiple steps at once, drag the slider up in the History panel.
5 An HTML5 Canvas document targets modern browsers for playback of animation and interactive content. HTML5 Canvas exports HTML, JavaScript, and all the assets required to play in a browser without requiring the Flash Player.