
5. Working with Shapes, Color, and Images
Lesson overview
• Create and edit shapes
• Apply background images to shapes
• Create 100% width content
• Create and edit color, swatches, and gradients
• Place and transform images
• Wrap text around an image
• Align, group, arrange, and lock content
• Fix missing and modified links
• Add alternative text and a tooltip to images
In this information-packed lesson, you’ll spice up your website design and learn how to create shapes, apply background images to frames, apply fills and strokes, and create gradients. You’ll also place images and easily move, scale, rotate, and more to match your design concept.
Working with shapes
Adobe Muse comes with a single shape tool called the Rectangle tool, but it can be used to create rectangles, rounded rectangles, lines, and circles. In this section, you’ll learn how to work with the Rectangle tool and everyday formatting options. First, you’ll prepare a page:
1. With your site open in Plan mode, double-click the Home-master page to open that master page in Design mode.
2. Choose View > Fit Page In Window, and then press Command+- (Ctrl+-) to zoom out.
This shortcut is for the View > Zoom Out command.
![]() Note
Note
If you have not already downloaded the project files for this lesson to your computer from your Account page, make sure to do so now. See “Getting Started” at the beginning of the book.
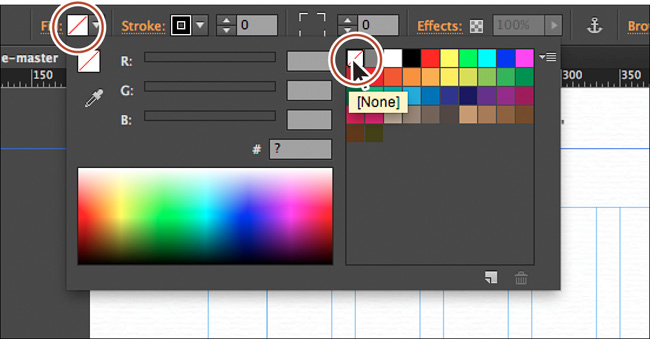
3. Click the fill color in the Control panel and choose None from the Color Picker to remove the fill color of the page.
![]() Note
Note
If you are starting from scratch using the Jumpstart method described in the “Jumpstart” section in “Getting Started,” your workspace may look different than the figures you see in this lesson.
4. Press and hold the spacebar to temporarily access the Hand tool. Click and drag up with the mouse until you see the footer area and below. Release the mouse and then the spacebar.
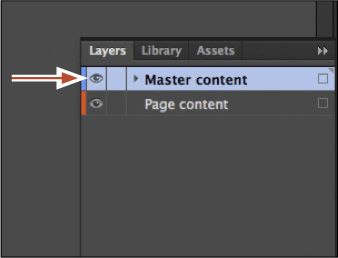
5. In the Layers panel (Window > Layers), make sure that the Master content layer is selected.
Drawing with the Rectangle tool
In the footer of the Home-master page, you’ll first insert a rectangle to give the footer some color.
1. Select the Rectangle tool (![]() ) in the Toolbar.
) in the Toolbar.
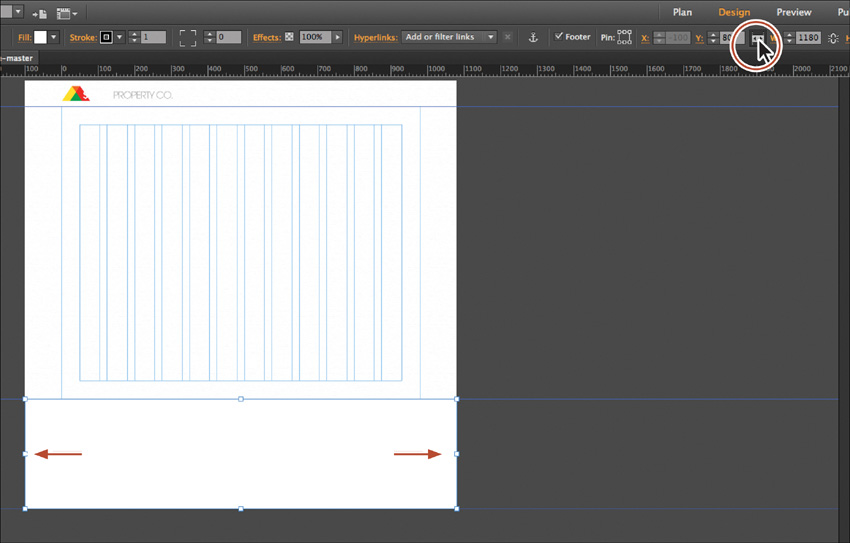
2. Below the Footer page guide, and starting toward the left edge of the page area, click and drag to the right and down to create a rectangle frame. When the rectangle covers most of the footer area (and the logo in that area), release the mouse button.

By default, rectangles you draw have a white fill color and a black, 1-pixel stroke. You’ll learn all about how to change the color fill and stroke of this shape in the “Working with color” section later in this lesson.
![]() Tip
Tip
If you hold down the Shift key before you begin drawing with the Rectangle tool, and then release the mouse button followed by the Shift key, you can create a perfect square. If you hold down the Option (Alt) key and drag to create a rectangle, you’ll draw from the center of the shape.
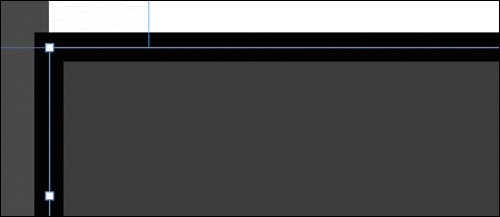
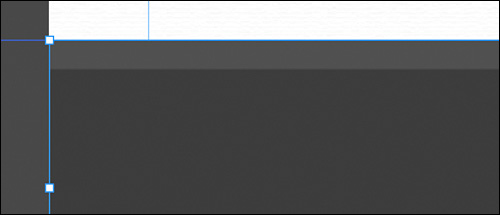
3. Select the Selection tool in the Toolbar, and drag the top, middle bounding point of the frame up until it snaps to the Footer guide. A red line will appear when the pointer touches the guide. Drag the bottom, middle bounding point of the frame down until it snaps to the bottom of the browser guide and a red line appears briefly along the bottom of the page. Leave the rectangle selected.
![]() Tip
Tip
You can also transform content in the Transform options in the Control panel or the Transform panel (Window > Transform). In the Transform panel, the X value specifies where the left edge of the selected object is relative to the left edge of the page area. The Y value indicates where the top of the selected object is relative to the top of the page guide. Changing the X and Y values of selected content positions the upper-left corner of the selected object to those coordinates.
4. Choose File > Save Site.
You can create a variety of shapes with the Rectangle tool. In fact, you can create a line in Muse several ways. The first method is to apply a stroke to a very thin rectangle or other shapes. The trick is to use a very small height for a horizontal line or a very thin width to create a vertical line. Another method is to set the left, bottom, and right side stroke weights to 0, leaving only the top stroke set to 1 or higher. Then the rectangle can be any height and still display a line. Lines can be a great way to separate sidebars and other page areas from each other.
Creating 100% width content
Content you place or create in Muse, like a rectangle frame, has a defined width and height. That means that it won’t change size when displayed at different screen resolutions, and it will center, by default, with the rest of the page content in the browser window.
![]() Tip
Tip
You can also drag the left bounding point to the left until it snaps to the left edge of the browser fill area, and drag the right bounding point to the right until it snaps to the right edge of the browser fill area to achieve the same effect as clicking the 100% Width button.
However, you can create shapes and text frames (not image frames) that stretch to fill the width of the browser window. This is called 100% width content. A rectangle or text frame that you set as 100% width resizes to fill the page no matter the screen resolution or browser window size.
1. With the rectangle still selected, click the 100% Width button (![]() ) in the Control panel to set the width of the rectangle to 100%.
) in the Control panel to set the width of the rectangle to 100%.
2. With the rectangle selected, choose Object > Send To Back.
This sends the rectangle to the bottom of the stack on the layer so it will now display behind the logo in the footer. It’s interesting to note that you can use the Arrange commands (Object > Send To Back, etc.) to organize the content on a layer, but only on that layer. Trying to arrange objects that aren’t on the same layer won’t work. You would need to move the objects between layers, as described in Lesson 4.
Applying a background image to a frame
Text frames, image frames, and any rectangles you draw can all have background images applied to them to add to your designs. Background images in objects like these work just like the background image for the page area and the browser fill, appearing behind the content in the frame and adding more design possibilities.
Next, you’ll add a background image to a rectangle you draw, but first you’ll learn a new way to navigate between pages.
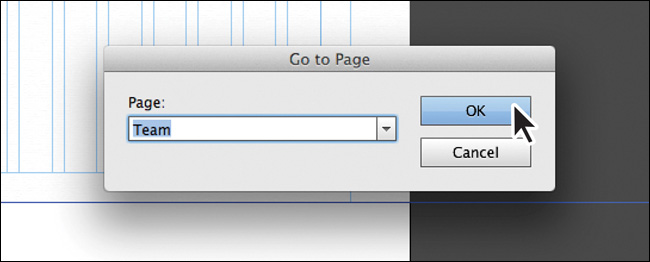
1. Choose Page > Go To Page (Command+J [Ctrl+J]). Click the arrow to the right of the field and choose Team. Click OK. The Team page should open in Design mode.
![]() Tip
Tip
You can also begin typing the name of a page in the Go To Page dialog box to filter the names of the pages.
2. Choose View > Fit Page In Window.
3. In the Layers panel (Window > Layers), select the Page content layer so that all new content is on that layer.
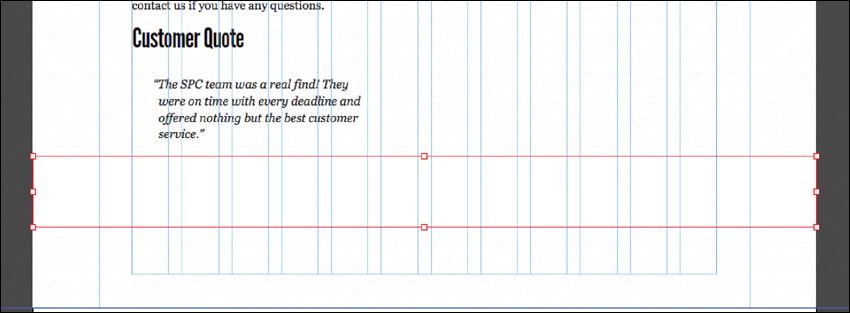
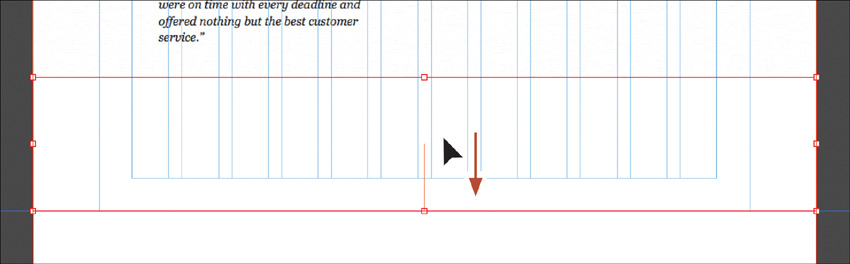
4. Select the Rectangle tool (![]() ) in the Toolbar, and draw a small rectangle with an approximate height of 100px, just below the text on the page and above the footer.
) in the Toolbar, and draw a small rectangle with an approximate height of 100px, just below the text on the page and above the footer.
5. With the rectangle selected, click the 100% Width button (![]() ) in the Control panel to make the rectangle 100% width.
) in the Control panel to make the rectangle 100% width.
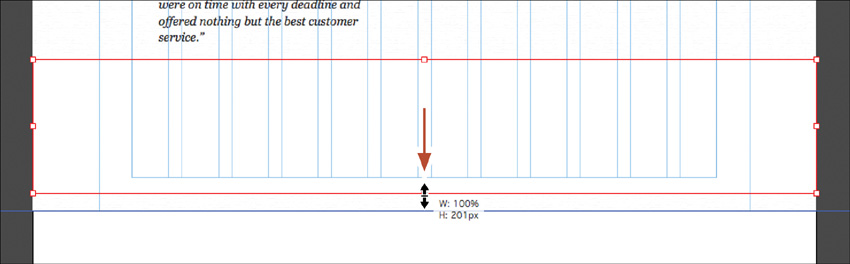
6. Choose View > Smart Guides to turn off the Smart Guides temporarily. That way, when you resize the rectangle, it won’t snap to other objects.
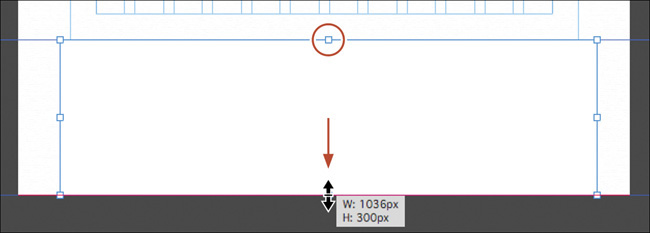
7. Select the Selection tool in the Toolbar. Drag the bottom bounding point of the rectangle down until you see an approximate height of 200px in the measurement label. Don’t worry; it doesn’t have to be exact.
![]() Tip
Tip
You can press the Option (Alt) key and drag a bounding point of a frame to resize opposite sides of a frame at once.
8. Choose View > Smart Guides to turn them back on.
9. Drag the rectangle from the center down until the bottom snaps to the Footer guide beneath it. A red line will appear when it snaps.
![]() Note
Note
If the image is already touching the Footer guide, you can drag the rectangle frame up so that it touches the text, and then drag it back down to snap it to the Footer guide.
10. With the rectangle selected, click the Fill link in the Control panel. With the Fill tab selected (circled in the figure), and the Solid Fill Type selected, click the Fill color and change the color to [None]. Click the Add Image link to select a background image. Navigate to the images folder in the Lessons folder, choose team-page.jpg, and click Open.
![]() Note
Note
You can insert .jpg .gif, .png, or .psd files in Muse as a background image. Muse converts .psd files to a more compact format for the web when you publish or export the site, but it’s best practice to optimize the image and save it in a web format (.jpg, .gif, or .png) in a program like Photoshop before inserting it as a background image.
11. Choose Scale To Fill from the Fitting menu, and make sure that the center point in the position indicator (![]() ) is selected. Click anywhere else on the page to close the Fill menu.
) is selected. Click anywhere else on the page to close the Fill menu.
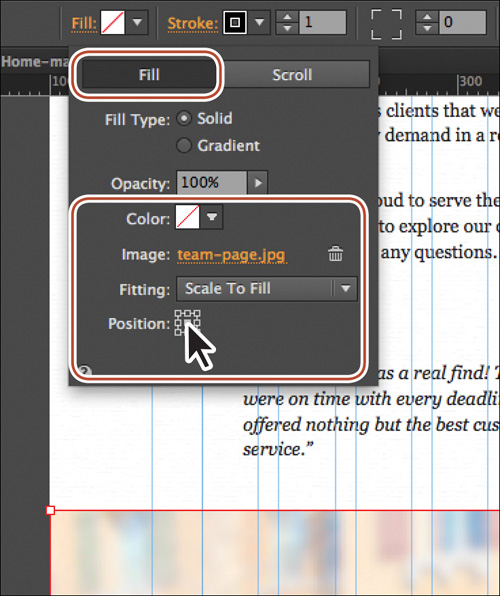
The rectangle is now 100% width, and the image will always fill the rectangle regardless of the size. Make sure when you choose an image that you strike a balance between it looking good on a large screen and not being too large in file size so it loads slowly in the browser. You can best optimize images by choosing File > Save For Web in Adobe Photoshop CC or Adobe Illustrator CC, using Photoshop Generator, or exporting the optimized image files in the image editing program of your choice.
![]() Tip
Tip
You can right-click an object with a background image and choose either Cut Background Image or Copy Background Image. Right-clicking an existing rectangle or frame, you can then choose Paste As Background Image to paste the image as a background.
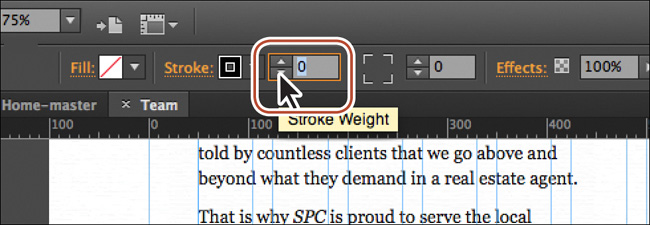
12. Change the Stroke Weight to 0 in the Control panel by clicking the down arrow to the left of the Stroke field.
13. Click the Preview mode link to preview the page and see your changes. Click the Design mode link to return to the Team page in Design mode.
14. Choose File > Save Site.
In the next section, you’ll begin to explore creating and editing color in more detail.
Working with color
Unlike print designs, which can use CMYK colors, Pantone color, or other color libraries, designs for the web use only the RGB color model. All colors and images that you create must be in the RGB color mode. The good news is that when you save an image in .jpg, .gif, .png, or other web format using File > Save For Web, Photoshop converts the colors to RGB mode automatically.
In Muse, you can describe a color with individual red, green, and blue (R, G, and B) values or a single, six-character hexadecimal (hex for short) value. R, G, and B values range from 0 to 255. The values in a hex color value range from 0 to 9 and A to F. For example, the hex value AE1365 describes the same color as R: 174, G: 19, B: 101. The first two characters (AE) correlate to the red value (174), the second pair (13) to the green (19), and the third pair (65) to the blue (101).
Both the hex and RGB values tell the browser which color to display, in this case a dark magenta shade. You can think of RGB and hex values as two different numeric languages you can use to describe the same color; similar to whether you say red or rojo when you’re describing the color of ketchup. Using either system of values you can transfer colors easily into Muse that you created in another application, such as Photoshop. Of course, in Muse, you also can simply create colors by eye using the Color panel, Swatches panel, or Color Picker panel. Whichever method you use to specify a color, you can apply that color to a stroke and fill of a text frame, image frame, or rectangle.
In this exercise, you’ll begin exploring the color options available in Muse.
1. Click the Home-master page tab to show the master page in Design mode.
2. With the Selection tool, click to select the rectangle in the footer (if it isn’t still selected).
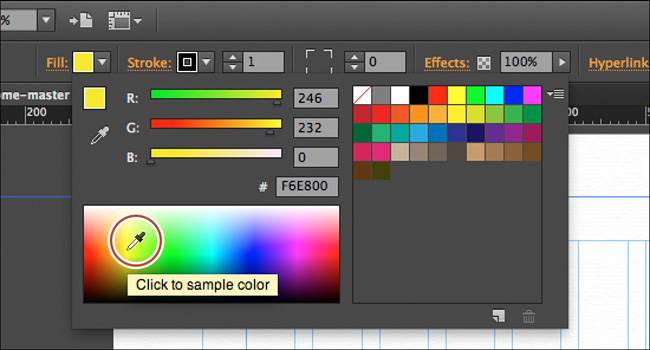
3. Click the Fill color option (![]() ) to the right of the Fill link in the Control panel to see the Color Picker panel, and take a moment to familiarize yourself with the Color Picker’s features:
) to the right of the Fill link in the Control panel to see the Color Picker panel, and take a moment to familiarize yourself with the Color Picker’s features:
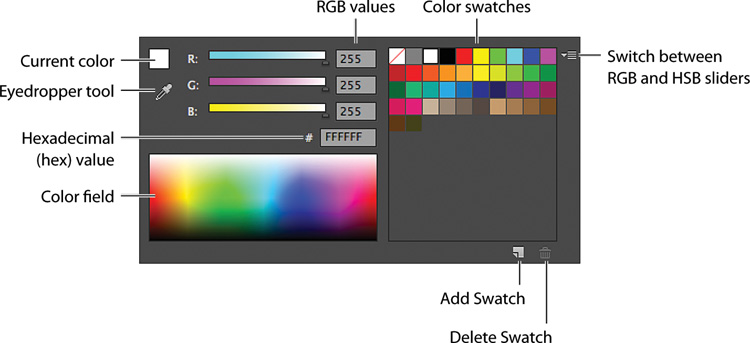
• Current color: Displays the color currently selected and described by the RGB and hex values.
• Eyedropper tool: Enables you to select colors anywhere on your screen—even outside of Muse. Click the eyedropper on the desired color to sample it.
• RGB values: Specifies the values of the Red, Green, and Blue channels of a color. Values range from 0 to 255.
• Hexadecimal (hex) value: Specifies the hexadecimal value of the current color.
• Color field: Enables you to sample and adjust a color.
• Color swatches: Contains saved colors that you can apply, create, or delete in your site.
• Add Swatch: Saves a selected color in the list of color swatches.
• Delete Swatch: Deletes a selected color swatch in the list of color swatches.
• RGB/HSB sliders: Enables you to change between RGB (Red, Green, and Blue) and HSB (Hue, Saturation, and Brightness) sliders in the Color Picker.
For the remainder of the lesson, you’ll experiment with color, learning how to create colors, apply them, and save them as swatches. You’ll also work with color gradients to add some flair to your design.
Creating and applying a color fill
Muse offers many color options that help you easily create and save colors to reuse throughout your site. One of the most common applications is a color fill, which is color that appears inside a shape or frame. To practice, you’ll create a color for the footer rectangle and then save that color so you can use it later. Before you begin, make sure the Team page is open in Design mode.
1. With the frame in the footer selected, click the Fill color option (![]() ) in the Control panel again (if necessary) to show the Color Picker panel.
) in the Control panel again (if necessary) to show the Color Picker panel.
2. Drag in the yellow area of the color field to sample a color. As you drag, you’ll see the color values change in the Color Picker. The color you sample will be applied to the selected frame.
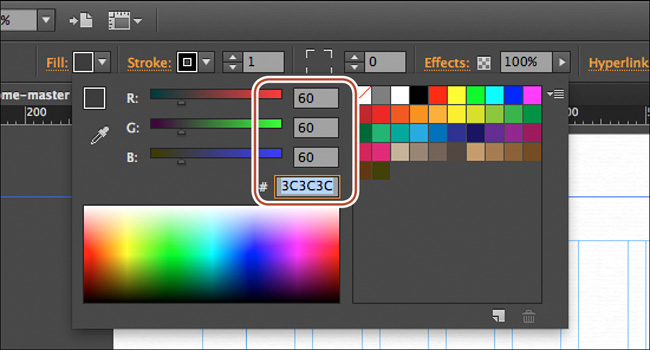
3. Change the RGB values to R: 60, G: 60, and B: 60. Press the Esc key to hide the Color Picker panel.
![]() Note
Note
You can also click away from the Color Picker panel to hide it.
4. Choose File > Save Site.
Saving and editing a swatch
Muse lets you save a color you create or sample as a swatch. This makes your life easier later on if you want to reuse a color or if you decide to use a consistent set of colors throughout your site. You can find saved swatches by clicking the Fill or Stroke colors in the Control panel or in the Swatches panel.
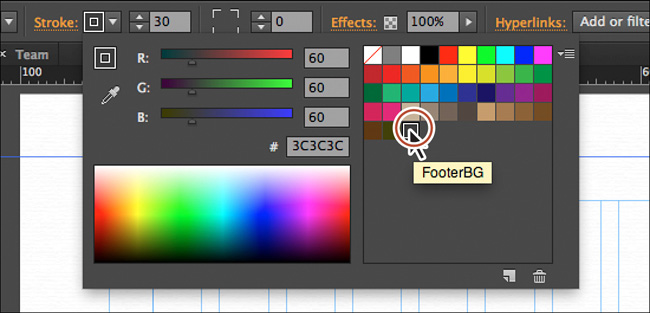
1. With the rectangle in the footer still selected, click the Fill color option in the Control panel to show the Color Picker panel. Click the Add Swatch button (![]() ) at the bottom of the Color Picker panel (circled in the next figure).
) at the bottom of the Color Picker panel (circled in the next figure).
2. In the Swatch Options dialog box that opens, deselect Name With Color Value to add your own name. Change the Swatch name to FooterBG.
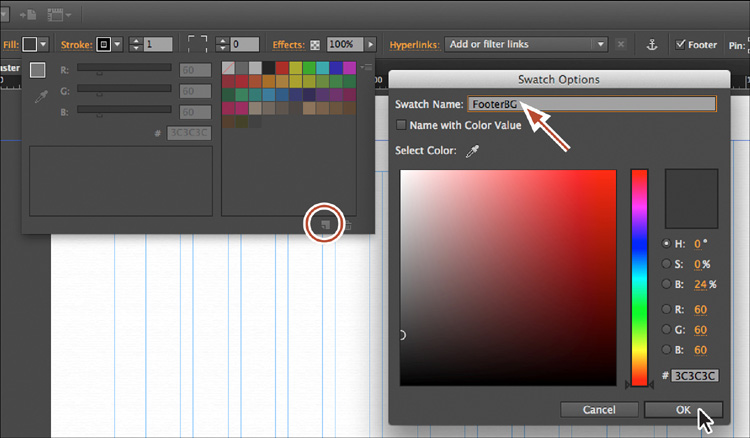
In the Swatch Options dialog box, by default, you’ll see a Saturation/Brightness field and a Hue column for adjusting the selected color. You can select HSB (Hue, Saturation, Brightness), RGB, or HEX to change the color using different values.
Click OK.
![]() Tip
Tip
If you delete a swatch, Muse gives you the option of replacing the swatch with another swatch or with an unnamed swatch (the color remains applied to the object, but the color just won’t be saved as a swatch anymore).
3. Hover the pointer over the new swatch at the end of the list; a yellow tooltip appears showing the FooterBG name of the new swatch.
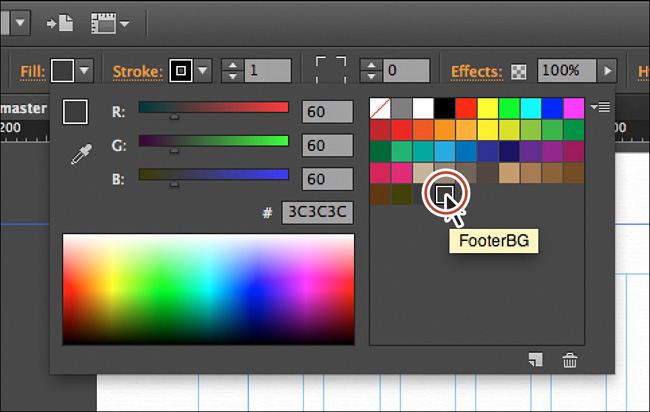
By default, the tooltip displays the RGB color values, but you changed that via the Swatch Options settings. Many designers prefer the tooltips to indicate what a color is to be used for, such as a heading color, for instance.
![]() Note
Note
Any changes that you make in the Swatch Options dialog box change the swatch as well as every object in your site to which you applied the color.
4. Press the Esc key to close the Color Picker panel, and choose File > Save Site. Leave the rectangle in the footer selected for the next section.
You can create and save as many colors as you need. Just remember that you don’t have to save a color as a swatch, but doing so can be very helpful, saving you time later on.
Editing the stroke of an object
As in most other Adobe applications, color strokes, or borders, are very effective tools in Muse, much like fills. Recall that Muse applies black, 1-pixel strokes to rectangles by default. You’ve already learned the basics of changing a stroke’s weight, so this exercise focuses on customizing a stroke’s color and saving that color as a swatch. You’ll also tour the Stroke Options panel, which gives you even more control over a stroke’s appearance.
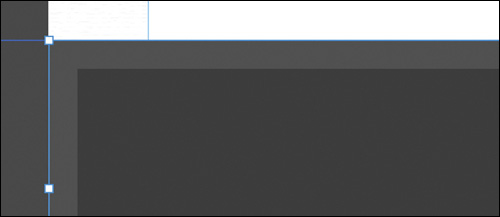
1. With the gray-filled frame in the footer still selected, change the Stroke Weight to 30 in the Control panel to apply a 30-pixel stroke.
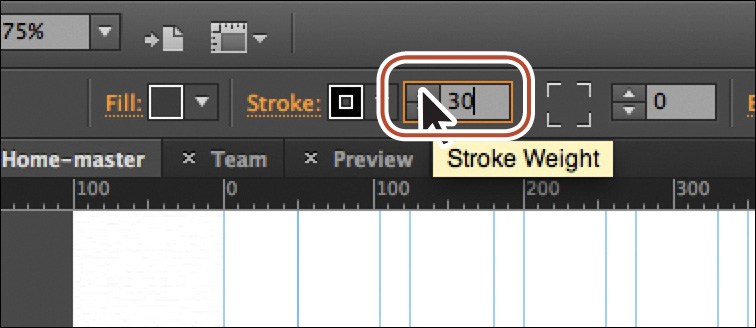
Edit the Stroke of the rectangle in the footer
The stroke on the footer
2. Click the Stroke color (![]() ) in the Control panel to reveal the stroke Color Picker panel. Click the FooterBG color swatch to apply it to the stroke.
) in the Control panel to reveal the stroke Color Picker panel. Click the FooterBG color swatch to apply it to the stroke.
The stroke Color Picker panel is identical to the fill Color Picker panel you worked with in the previous few sections.
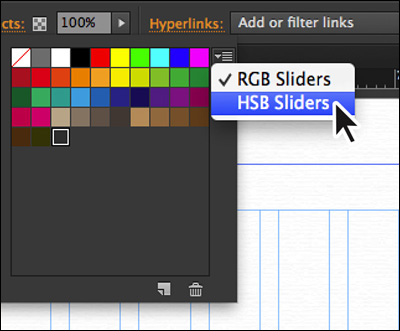
3. Click the Color Picker menu icon in the upper-right corner and choose HSB Sliders.
4. Change the B (Brightness) value to 31 in the Color Picker to apply a lighter gray color to the stroke.

5. Click the Color Picker menu icon and choose RGB Sliders.
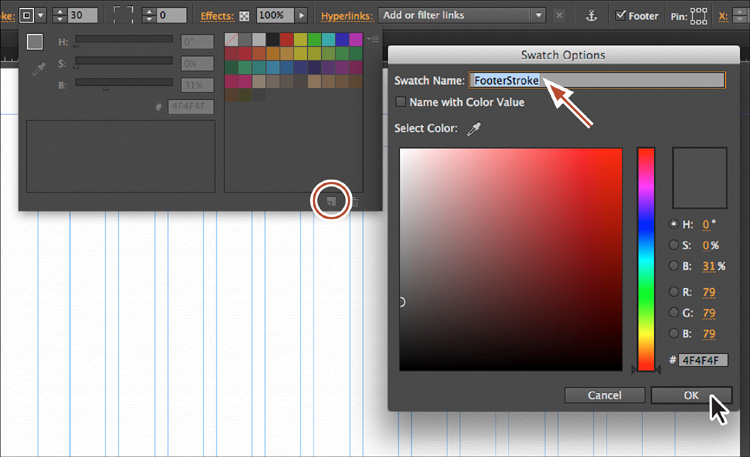
6. Click the Add Swatch button (![]() ) to save the color. In the Swatch Options dialog box, deselect Name With Color Value and change the name to FooterStroke. Click OK. Press the Esc key to hide the stroke Color Picker panel.
) to save the color. In the Swatch Options dialog box, deselect Name With Color Value and change the name to FooterStroke. Click OK. Press the Esc key to hide the stroke Color Picker panel.
7. Click the Stroke link in the Control panel. Click the Align Stroke To Inside button (![]() ) and notice that the lighter gray stroke on the rectangle is now inside the edges of the rectangle.
) and notice that the lighter gray stroke on the rectangle is now inside the edges of the rectangle.
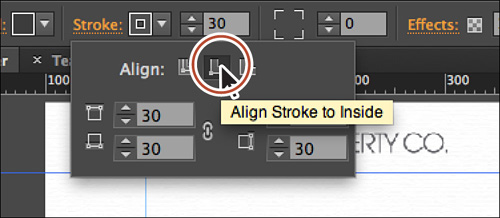
Align the stroke to inside
The stroke applied to the footer rectangle
The Stroke Options panel that appears shows two main options: Stroke Alignment and Individual Stroke Weights. Stroke Alignment lets you align the stroke to the inside, outside, and center of the edge of a frame. The Stroke Weight options allow you to change the stroke weight for each side of a frame independently, if you want.
8. With the Make All Stroke Weight Settings The Same on (it should look like this (![]() ), change the Top Stroke Weight value to 0 and press Return (Enter).
), change the Top Stroke Weight value to 0 and press Return (Enter).
9. Click the Make All Settings The Same icon off so that it looks like this (![]() ). Now you can edit each of the Stroke Weight settings independently. Change the Top Stroke Weight to 30 and press Return (Enter).
). Now you can edit each of the Stroke Weight settings independently. Change the Top Stroke Weight to 30 and press Return (Enter).
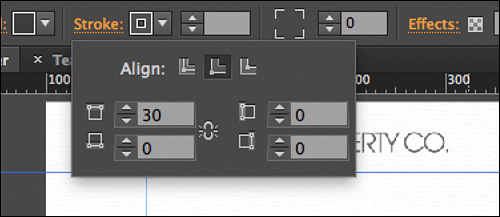
Edit the top storke weight
The stroke applied to the footer rectangle
10. Press the Esc key to hide the Stroke Options panel, and leave the rectangle selected.
The same lighter gray stroke color should be applied to the stroke that now appears on only the top edge of the rectangle.
11. Choose Edit > Deselect All.
12. Click the Preview mode link, and preview the page to see your changes. Click the Home-master page tab to return to it in Design mode.
Sampling color and saving it as a swatch
Sampling color is a great way to either reuse a color that wasn’t saved or create a new color from a color in an image on the page. You can sample color with the Eyedropper tool found in the Color Picker, Color panel, and Swatch Options dialog box when saving a swatch. Next, you’ll sample a color from the logo to use later if you want.
![]() Tip
Tip
You can also right-click in the Swatches panel and choose New Color Swatch.
1. Open the Swatches panel (Window > Swatches). Click the Add Swatch button at the bottom of the panel.
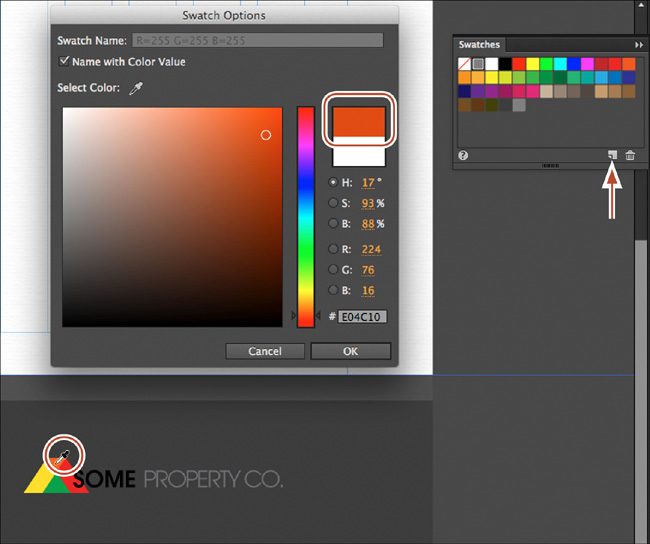
2. In the Swatch Options dialog box, click the Eyedropper tool (![]() ) to sample a color. Position the Eyedropper pointer over the orange color in the logo in the footer and click to sample. When that orange color appears in the Swatch Options dialog box (the color is circled in the following figure), deselect Name With Color Value and change the Swatch Name to LogoOrange (not shown in the figure). Click OK to save the color as a swatch.
) to sample a color. Position the Eyedropper pointer over the orange color in the logo in the footer and click to sample. When that orange color appears in the Swatch Options dialog box (the color is circled in the following figure), deselect Name With Color Value and change the Swatch Name to LogoOrange (not shown in the figure). Click OK to save the color as a swatch.
3. Select the None color swatch in the Swatches panel to remove the orange color from the page fill.
4. Choose File > Save Site.
Working with gradients
You can also apply a color fill using a gradient, which is a blend from one color to another. Muse offers many options to help you make and apply gradients to the fill of all types of frames.
To add some depth to a header rectangle you create, you’ll fill it with a gradient.
1. With the Selection tool, select the gray rectangle in the footer, if it isn’t already selected. Choose Edit > Copy.
2. Choose Page > Go To Page (Command+J [Ctrl+J]). Click the arrow to the right of the field and choose Internal-master. Click OK. The Internal-master page should open in Design mode.
3. In the Layers panel, click the New Layer button at the bottom of the panel to create a new layer. Double-click the new layer name and change the name of the layer to Internal-master. Click OK.
4. Drag the Internal-master layer between the Master content and Page content layers.
We’ll make the header on the Internal-master page look different than the header on the Home-master page. You created a layer so that the gray rectangle you are about to paste in the Internal-master header appears beneath the logo on the Home-master page.

5. With the Internal-master layer selected, choose Edit > Paste to paste the rectangle onto the page.
![]() Tip
Tip
Muse also has a Duplicate command (Edit > Duplicate) that creates a copy of the selected content and positions the copy offset from the original.
6. Deselect Footer in the Control panel (or choose Object > Footer Item) so the pasted rectangle is not associated with the footer.
7. Drag the rectangle up into the header so it snaps to the top of the header area. Click and drag the bottom bounding point up until it snaps to the Header guide. You should see that it winds up being 70px tall in the measurement label that appears.

8. Change the Stroke Weight to 0 in the Control panel by typing in the value or clicking the down arrow until 0 (zero) appears.
![]() Note
Note
When you copy and paste an object with a 100% width, the copy you create will also be set to 100% width.
9. Click the Fill link in the Control panel to show the Fill panel. Select Gradient in the Fill panel, and notice that the Fill panel options change and the frame on the page now has a gradient fill.
With Gradient selected, you can now specify two colors rather than one for a solid fill. By default, when you select Gradient, Muse applies the fill color of the selected object (dark gray in this case) and black as the two colors that the gradient blends between.
![]() Tip
Tip
You can also open the Fill panel by choosing Window > Fill. The Fill panel opens in the workspace and shows the same options as clicking the Fill link in the Control panel. Because it’s a panel, you can leave it showing all the time.
Above each color in the gradient, you’ll also see a percentage value. You can change the opacity of each color if you like.
10. Select Vertical to change the Direction of the gradient.
This changes the direction of the gradient from top to bottom rather than side to side.
![]() Tip
Tip
In the Color Picker, you can easily create and even save a new color while creating a gradient.
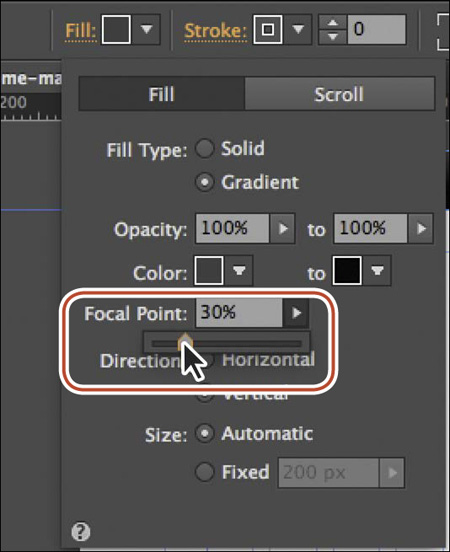
11. Click the arrow to the right of the Focal Point field and drag the slider left and right to see the effect on the gradient in the footer rectangle. Make sure that the value is 30 before moving on to the next step.
The Focal Point is where the transition between the two gradient colors occurs in the shape. For a vertical gradient, the closer the value is to 0, the closer to the top of the shape the transition appears.
12. Select the Fixed Size option. Change the value to the right of the selection to 50 by selecting the value and typing 50. Notice that the distance or blend between the two colors is much shorter. Try other values to see the effect. Be sure to select Automatic when you’re ready to move on. Press the Esc key to hide the Fill color options.
With the Automatic size option enabled, the Size setting of a gradient is automatically determined by the size of the object. By default, Muse sets each of the colors on opposite ends of the color fill to create a blend that spans the width or height of the object, depending on the Direction setting you select. If you select Fixed, you can change the size or length of the object with the gradient applied to achieve the desired effect.
13. Choose File > Save Site, and close all open pages to return to Plan mode.
Now that you’ve worked with frames and color, you’ll jump into working with images.
Web image basics
Images can enhance a website’s visual interest, identity, and attitude. You simply need to choose the right image for the task. As you’ll see, the key to the effective use of images is finding a balance of size and color to achieve the desired optimal quality. Whether you receive images from others or create your own in a program like Adobe Illustrator or Adobe Photoshop, you need to keep these considerations in mind. For example, although you can save images in a multitude of file formats, Muse allows you to place only .gif, .jpg, .png, and native Photoshop (.psd) files on your pages. In addition, Muse automatically converts placed Photoshop files (.psd) to .gif, .jpg, or .png files, because these formats are optimized for use on the web and are compatible with most browsers. Each format, however, has different capabilities and strengths. To understand which is best for your site design, take a closer look at some important factors in the web_images.pdf file in the Lesson05 folder.
Importing images
Muse offers several methods for getting images into your web designs, including placing and pasting. Placing an image into your Muse site using the Place command (File > Place) creates a link to the image file, which means that if you later update the image file, the instances of that file will be updated in Muse as well. Pasting image content into your pages embeds that content into the site, meaning changes to the original image file will not update the embedded image in Muse. To learn more about pasting content into Muse, see the sidebar, “Copy and paste image content into Muse” later in this lesson.
Images in Muse, like text, live in rectangular frames and are referred to as image frames. The frame that contains an image can have a stroke, fill, or other formatting or transformations applied to it. Images that do not have transparency cover the fill color or background image, unless you make the frame larger than the image or make the image smaller than the frame (you’ll learn how to do this later in this lesson).
If you move the frame on the page, the image moves as well. You can resize the frame and image together or separately to create some interesting effects. Unlike in Adobe InDesign, you cannot draw a rectangle first with the Rectangle tool and place the image inside that rectangle in Muse. However, you can use the Fill menu to set background images (tiled or not) as fills of a rectangle, image frame, or text frame.
Before you jump into placing images, gather your images into the same folder as your Muse site file to keep the files neat and organized. Often, designers create a dedicated subfolder named images. Copying all image files used for a site into a single images folder that exists in a folder with the .muse file can make it much easier to later collaborate with other designers on a site project. You can place images (File > Place) from other locations, as well. As long as Muse can find the image files, Muse will collect copies into one folder when you publish or export.
Placing an image
Whether you need to add interest to your pages to sell products, call attention to a promotion, or showcase your latest employee of the month, images can help. In this exercise, you’ll use the Place command (File > Place) to insert a JPEG image on the Home page.
1. In Plan mode, double-click the Home page to open it in Design mode.
2. Choose View > Fit Page In Window, and then choose Window > Reset Panels.
3. In the Layers panel, select the Page content layer so that the new images you place appear on that layer.
4. Choose File > Place. In the Import dialog box, navigate to the images folder in the Lessons folder. Select the image named home-wrap.jpg, and click Open.
![]() Tip
Tip
To remove the image from the Place Gun and cancel the place operation, press the Esc key. If multiple images are placed at once, pressing the Esc key will remove the selected image from the Place Gun.
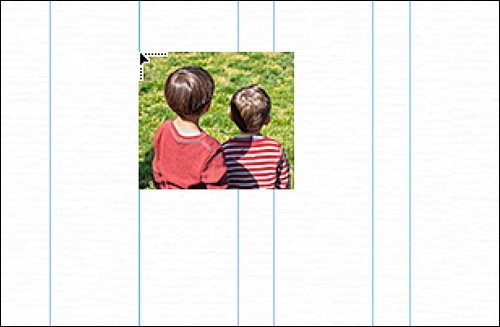
Move the pointer onto the page, and you should now see the Place Gun with a handy thumbnail preview of the image that you are about to place. Remember that the upper-left corner of the image will align with the upper-left corner of the Place Gun when you click on the page to place the image.
5. About halfway down the page, on the left edge of the first column, click and drag to place the image, making sure that the measurement label shows a value of 130%. Its vertical position in the column doesn’t matter right now.

Notice that as you drag you are sizing the image with the frame, and an image thumbnail appears next to the cursor.
6. Choose Edit > Undo Place to remove the image from the page and reattach it to the Place Gun.
7. Position the pointer in the same place in the first column. Click to place the image.
By simply clicking when placing, you create an image frame the same size as the image and place the image in the frame at 100% its original size.
![]() Note
Note
In Muse, it’s best to place images at 100% of their original size. When you enlarge an image, it can become jagged on the edges and blurry, depending on the original resolution of the image. Keep in mind that the image at 100% will still be downloaded when a visitor views your site regardless of how you scale it in Muse.
8. Choose File > Save Site.
Placing a Photoshop file (.psd)
Placing a Photoshop file (.psd) in Muse offers the same linking and updating benefits as placing a .jpg, .gif, or .png file, plus a few extras. If the Photoshop file has content in more than one layer, for example, and you place it in your site via File > Place, Muse lets you choose whether to place the composite image (all layers) or selected layers. This means that, for instance, you can create a complete page design in Photoshop with page-specific content on individual layers, and then place only the layer you need for each page. Alternatively, you could create multiple versions of a button or logo on separate layers, for instance, and place the version you like best.
When you publish, preview, or export the site, Muse converts the Photoshop content to a suitable format for the web but does not publish or export the original .psd file. Don’t let your imagination run wild, though; for all other images that you place, you still need to consider file size, resolution, and color when creating Photoshop content.
To see how the Photoshop-specific options work, you’ll place a .psd file on the Team page.
1. Click the Plan mode link to access the page thumbnails. Double-click the Team page thumbnail to open the page in Design mode.
2. Choose View > Fit Page In Window.
3. Choose File > Place. In the Import dialog box, navigate to the images folder in the Lessons folder and then to the image named team.psd. Click Open.
![]() Note
Note
Choose carefully: If you later want to turn layers on or off in the .psd in Muse, you must place the file again or relink it (more on this later in this lesson).
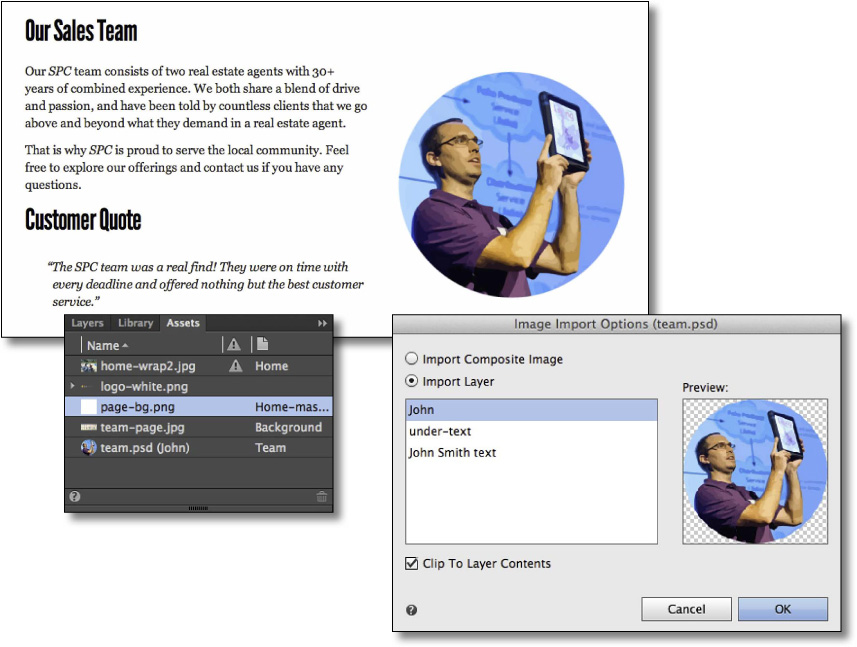
The Image Import Options (team.psd) dialog box opens (see the next figure). You can instruct Muse to place the composite image with all of the layers showing or only selected layers.
![]() Tip
Tip
You can place multiple images at once by selecting those images in the Import dialog box. When you click Open or Select, Muse shows the Place Gun with a number next to the right edge of the image thumbnail, indicating how many images are loaded in the Place Gun. You can press the right and left arrow keys to cycle between the images, stopping when you see the thumbnail of the image you are ready to place. You can then click to place each image. If you come to a thumbnail for an image in the Place Gun that you don’t want to place, press the Esc key to remove it from the Place Gun.
4. Select Import Layer. Make sure that the John layer is selected and Command–click (Ctrl–click) the John Smith text layer to select it as well. Select Clip To Layer Contents, and click OK.
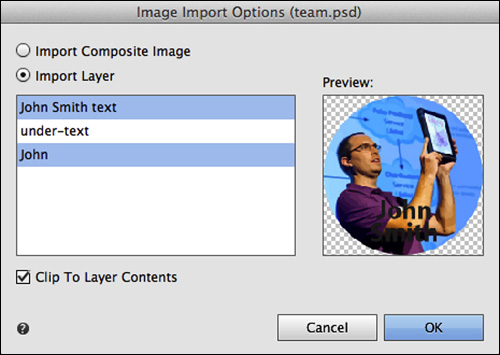
Suppose you designed the entire web page in Photoshop, and you want to place a logo from one of the layers in the .psd into Muse. The logo is only a small part of the larger design. Selecting Clip To Layer Contents crops the placed image to the size of the selected layer(s) content instead of making it the size of the entire design. The original .psd file remains unchanged.
5. Position the Place Gun to the right of the text on the page, and click to place the image. With the image content selected on the page, look at the left end of the Control panel and you’ll see the word Group.
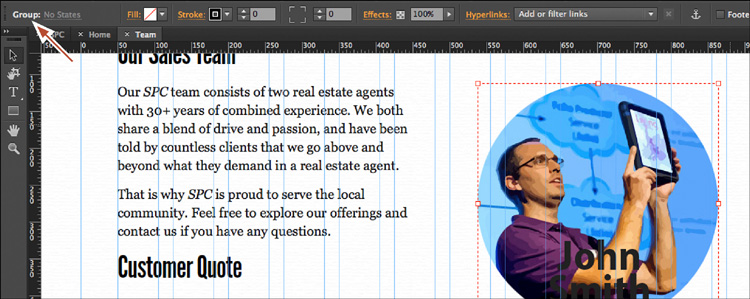
If you choose to place the composite Photoshop file or select a single layer when placing, a single image is placed. If you choose more than one layer, as you did here, the layers are individual images that are grouped together by default and placed in the same relative position and stacking order as the original Photoshop file.
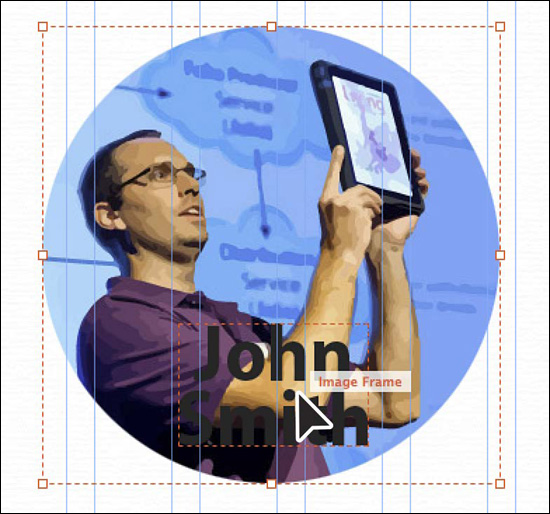
6. With the image selected, choose Object > Ungroup to ungroup the two objects.
![]() Note
Note
After placing an image, Muse switches to the Selection tool automatically, regardless of which tool was selected before.
7. Click somewhere in a blank area of the page to deselect all content. Position the pointer over the images and a Hint label appears with the words “Image Frame,” indicating that you’ll select an image frame if you click. Click to select the John Smith text image. In the Selection Indicator on the left end of the Control panel you should now see Image Frame, indicating that it’s a single image. Delete the image.
8. Choose File > Save Site.
Now that you have some images placed on pages, you’ll transform a few of them using different techniques and tools.
Transforming images
Getting images into your site design is only the first step. Unless you hit perfection on the first try, you may need to adjust the image’s placement, size, rotation, or cropping. Using several tools and methods, you can transform the rectangular frame of the image, the image independently of the frame, or both the image frame and image together.
Scaling an image using the Selection tool
You’ll first focus on exploring image transformation using the Selection tool, which offers many fast, powerful transformations without having to switch tools.
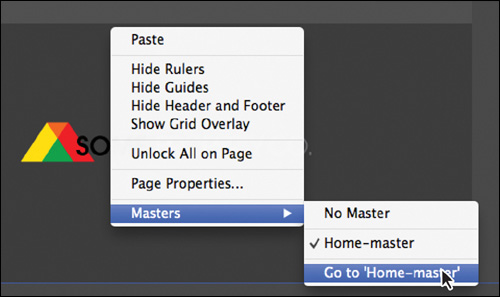
1. Choose Page > Go To ‘Internal-master’ to open the Internal-master page.
The master page assigned to the current page appears in the menu item, so the menu item would display Go To ‘Home-master’ if the Home page were open in Design mode.
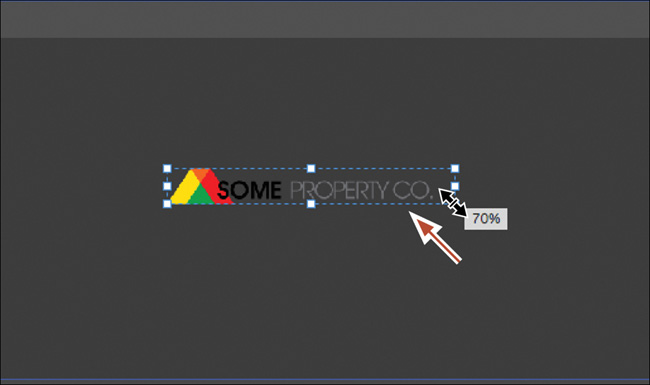
The first type of transformation you’ll perform is to scale the logo in the footer.
2. Scroll down the page until you can see the logo in the footer.
3. With the Selection tool, attempt to select the logo image. You won’t be able to because this content is coming from the Home-master page. Sometimes it can be difficult to remember that master pages can be based on each other. Right-click the footer area and choose Masters > Go To ‘Home-master.’ The master page that the current master page is based on will appear in the menu.
4. On the Home-master page, scroll down to the logo in the footer area. Click and drag the bottom-right point on the image frame in toward the center of the logo until the measurement label shows 70%.
![]() Note
Note
You could also choose Edit > Undo Resize Item to return this image to its previous size.
With the Selection tool, if you drag a point on the frame to resize it, you also resize the image. If you want to return the image to 100%, you can simply drag a corner of the image until 100% appears in the measurement label. No matter how many times you resize an image, you can always get it back to 100%. Later in the lesson, you’ll explore the Assets panel, where you can see if an image has been resized.
Cropping an image using the Selection tool
There may be times when you’ll want to crop out part of an image on your pages as well. You can crop using several methods. In this section, you’ll crop using the Selection tool.
1. Click the Home tab at the top of the Document window to show that page in Design mode.
![]() Note
Note
Cropping an image in Muse does not crop the original image file.
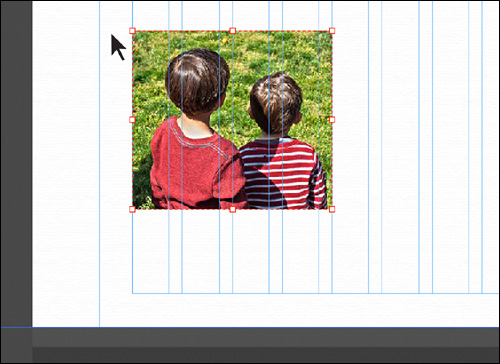
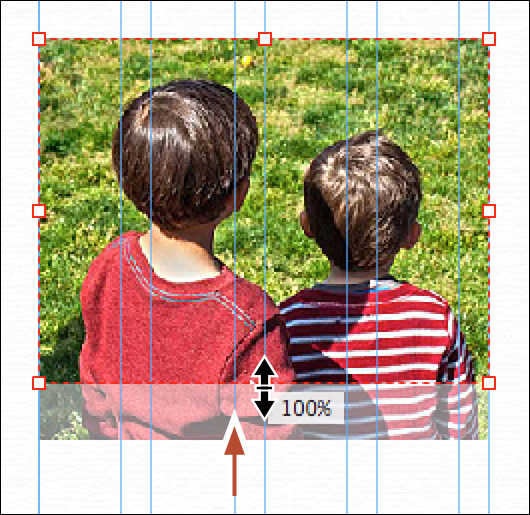
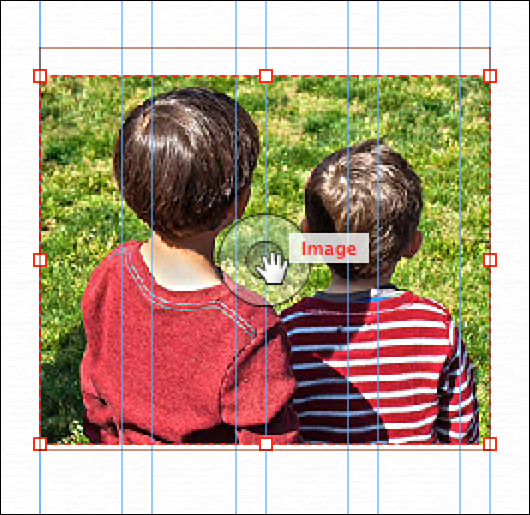
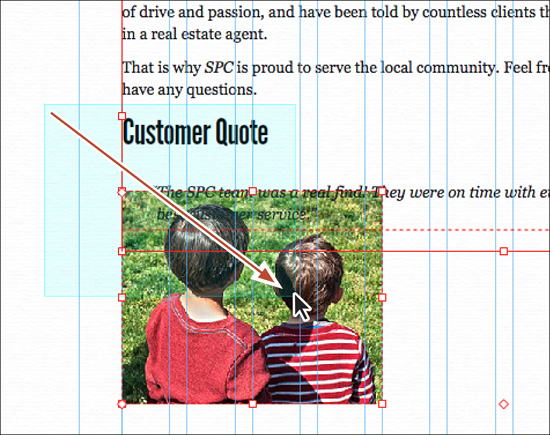
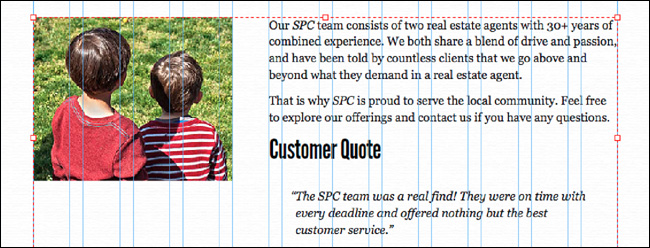
2. Click the image of the boys to select it, if necessary. Press and hold the Command (Ctrl) key, and drag the bottom, middle bounding point of the frame up a bit to crop part of the boys’ shirts.
Rather than resizing the frame and image together, dragging while pressing Command (Ctrl) lets you resize the frame only. In this case, you are cropping a part of the image so that it no longer shows. You could also make the frame larger than the image if you wanted a background color or background image applied to the image frame to create a border effect.
3. Double-click the image with the Selection tool.
Notice that the once red rectangle (because it’s on the Page content layer) with eight bounding points turns into another color rectangle (aqua in this case) with smaller points. Also notice that the pointer has changed from a black arrow to a hand when the pointer is positioned over the image. The aqua frame extends beyond the red image frame and shows the size of the image in the frame. These indicators will help you resize the image within the frame and reposition it.
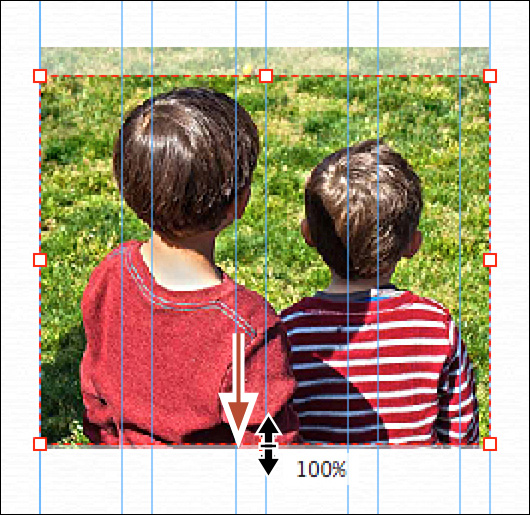
4. While pressing the Shift key, click and drag the image from the center straight up until there is very little grass above the boys’ heads.
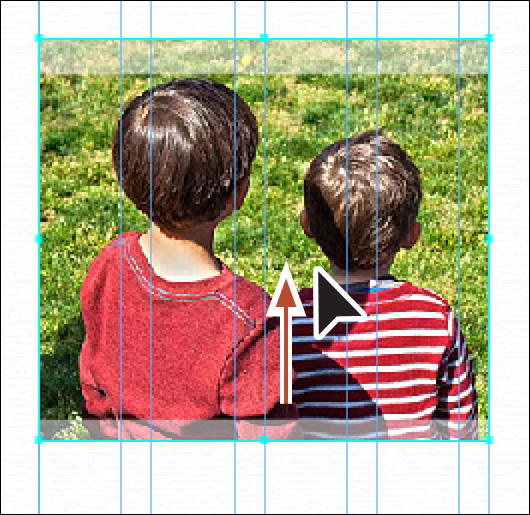
You’ll see that more of the bottom of the image looks lighter or semitransparent. By dragging an image after double-clicking it with the Selection tool, you are moving the image in the frame; you are not editing the frame. If you drag an image far enough in the frame, a fill color or background image you applied to the frame will show. The Shift key constrains the movement of the image inside the image frame to 45 degrees.
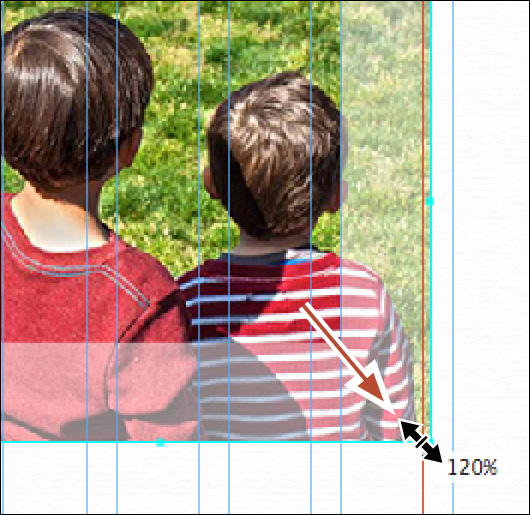
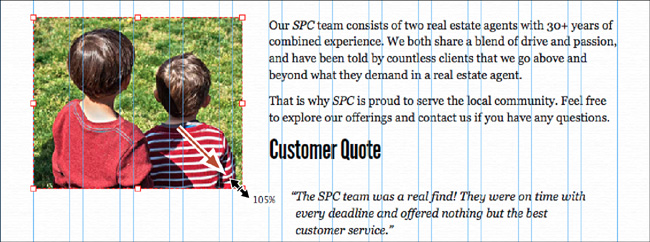
5. Position the pointer over the bottom-right corner point of the image and the pointer changes to a double arrow. Drag away from the center of the image until the measurement label shows 120% to resize the image, not the frame.
![]() Tip
Tip
If you press and hold the Shift key before dragging a point, you can resize the image or frame (depending on what is selected) without maintaining the proportions (you can stretch or squish it).
Resizing an image this way automatically constrains the proportions of the image, preventing you from distorting it.
![]() Note
Note
You can also click away from the image to deselect it, and then click on it again to select the frame, not the image.
6. Press the Esc key to select the frame, not the image.
You can see that the image is cropped within the frame and is now larger than it was. Don’t worry that it’s not in the center; you’ll fix that soon.
Using the Fitting commands
Another way to resize an image is to use the Fitting commands built into Muse. These commands allow you to fill a frame with an image or fit the image to the frame while keeping the image in proportion.
1. With the image frame still selected on the Home page, choose Object > Fitting > Fit Content Proportionally.
This command fits the entire image in the frame and centers it without cropping. Notice the gaps on the right and left of the image frame. Because the frame didn’t have the same proportions as the image, Muse left a gap between the frame and image on two sides.
![]() Tip
Tip
You can also right-click the image frame and choose a fitting command.
2. Choose Object > Fitting > Fill Frame Proportionally.
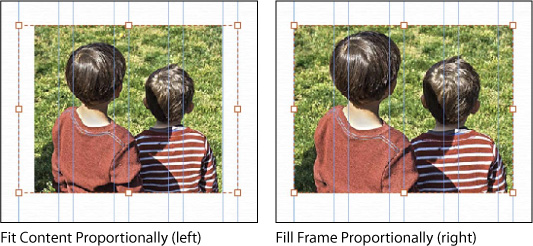
This command ensures that the image fills the frame and is centered with no gaps, but will crop a portion of the image if the proportions of the frame don’t match the image proportions. Know that using a Fitting command may make the image larger than 100%, which can reduce image quality.
Using the Crop tool
You can also crop or resize an image with the Crop tool. Found in the Toolbar, the Crop tool (![]() ) enables you to move, resize, and crop an image and its frame together or separately, much like the Selection tool methods discussed previously.
) enables you to move, resize, and crop an image and its frame together or separately, much like the Selection tool methods discussed previously.
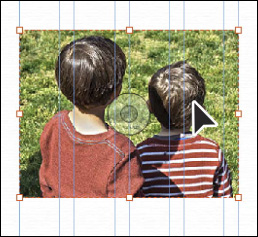
1. Select the Crop tool in the Toolbar, and position the pointer over the image of the boys, away from the image center. Notice that the pointer changes from a crop icon (![]() ) to an arrow, and the Content Grabber appears in the center of the image (the two concentric circles).
) to an arrow, and the Content Grabber appears in the center of the image (the two concentric circles).
![]() Note
Note
To change the image with the Crop tool, you do not need to select the image first because you can select it with the Crop tool.
2. When you see the arrow pointer over the image, drag the image inside the frame, from anywhere other than its center to another part of the page.
3. Choose Edit > Undo Move Item to move it back to where it was.
4. Position the pointer over the bottom, middle bounding point of the image frame, and when the pointer changes to double arrows, drag the point down to see more of the image. Don’t go so far as to go beyond the image edge.
The Crop tool allows you to resize the frame without resizing the image.
5. Position the pointer over the Content Grabber in the center of the image (the two concentric circles, as shown in the figure). When the pointer changes to a hand, click and drag the image down to reveal a little more of the top of the image.
The Content Grabber helps you select the image, not the image frame. The Smart Guides help to align the image as you drag it.
6. Click the Content Grabber in the center of the image to select the image, not the frame.
You can tell that the image (not the frame) is selected when you see the rectangle (aqua in this case) around the image. With the image selected, you can drag the image and reposition it within the frame or resize or rotate it.
7. Press the Esc key to select the image frame and leave the image selected.
8. With the image selected, choose Object > Fitting > Fill Frame Proportionally to ensure that it’s filling the entire frame.
9. Choose File > Save Site.
Rotating content
As you’ve seen so far in this lesson, you can transform frames in multiple ways, including position and size. You can rotate all types of content in Muse using several methods. When it comes to images, you can rotate the frame and image together or just the image in the frame.
1. Click the Team tab to show the page in Design mode.
2. Choose View > Fit Page In Window.
3. With the Selection tool selected, click the round picture of John to select it.
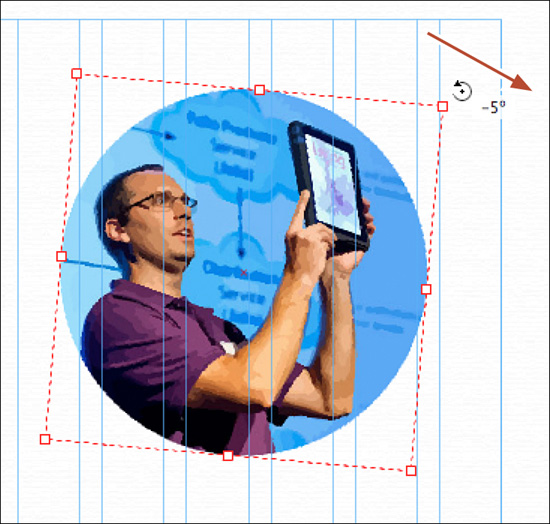
4. Position the pointer just off any of the corner bounding points. When you see the rotate arrow (![]() ), click and drag clockwise. When the measurement label shows a value of –5° (minus 5 degrees), stop dragging and release the mouse button.
), click and drag clockwise. When the measurement label shows a value of –5° (minus 5 degrees), stop dragging and release the mouse button.
![]() Note
Note
If you don’t see the Rotation Angle value in the Control panel, you can also click the Transform link in the Control panel or choose Window > Transform to open the Transform panel.
![]() Tip
Tip
Pressing and holding the Shift key constrains the movement of content to 45 degrees as you rotate it.
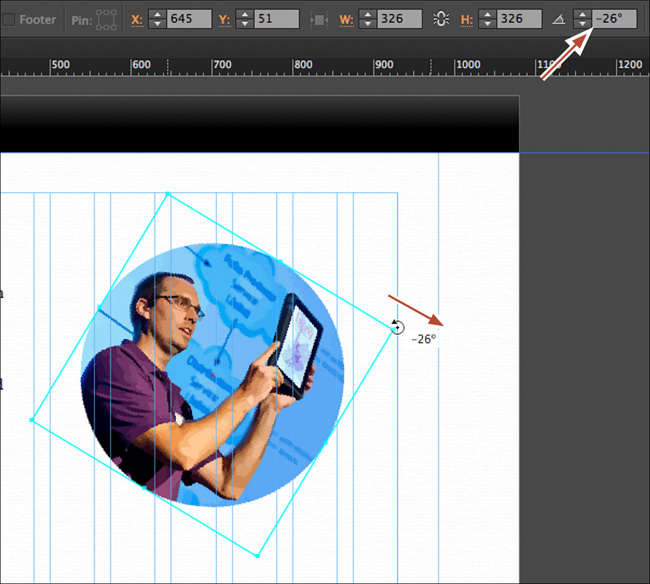
In the Control panel, depending on your screen’s resolution and whether you have maximized the Muse workspace, you may see the Rotation Angle option with a value of –5°. You can change the angle of rotation by typing in a positive or negative value, or by clicking the up or down arrows. To reset the angle to its original rotation, you would make the value 0 (zero).
If the image has been cropped or a Bevel or Inner Glow effect has been applied, the best practice in Muse is to rotate the image before placing it. You will learn more about the Bevel and Inner Glow effects in Lesson 8, “Applying Effects and Graphic Styles.”
5. Double-click the image frame to select the image inside.
6. Position the pointer off any of the image corner bounding points. When you see the rotate arrow (![]() ), click and drag clockwise a bit. Release the mouse, and then press the Esc key to select the frame.
), click and drag clockwise a bit. Release the mouse, and then press the Esc key to select the frame.
7. Choose Edit > Undo Rotate Item.
8. Position the pointer away from the content, and click to deselect the image.
9. Choose File > Save Site.
Wrapping text around content
Muse allows you to wrap text around text frames, image frames, or rectangles. This can be a great way to insert an image into a story, which is common on news sites, or a way to create a large first letter for text, which is called a drop cap. You’ll find lots of uses for wrapping text around frames.
Wrapping text involves using the Wrap panel (Window > Wrap) and requires you to paste the rectangle that the text will wrap around into the text. In this exercise, you’ll wrap the story from the Team page around the round picture of John. First, you’ll copy the text frame to the Home page for later use.
1. With the Selection tool, on the Team page click the larger text frame and drag the right bounding point to the right, snapping it the right edge of the last column. The text frame should be as wide as all of the columns now.
2. Choose Edit > Copy.
3. Press Command+J (Ctrl+J) to open the Go To Page dialog box. Begin typing ho. When “Home” appears in the menu, select it, and then click OK to open the Home page in Design mode.
![]() Tip
Tip
You can also use the arrow keys (up or down) to cycle through the menu options and press Return (Enter) instead of clicking OK.
4. Choose View > Fit Page In Window.
5. Choose Edit > Paste In Place.
![]() Note
Note
Ensure that the frame you pasted is the same width as on the Team page (see the figure). You can drag the bounding points to ensure that it is.
6. Click the Team tab at the top of the Document window to open the page in Design mode.
Now you’ll wrap the text on the Team page around the image.
7. On the Team page, with the Selection tool selected, click to select the round picture of John.
8. Choose Edit > Cut.
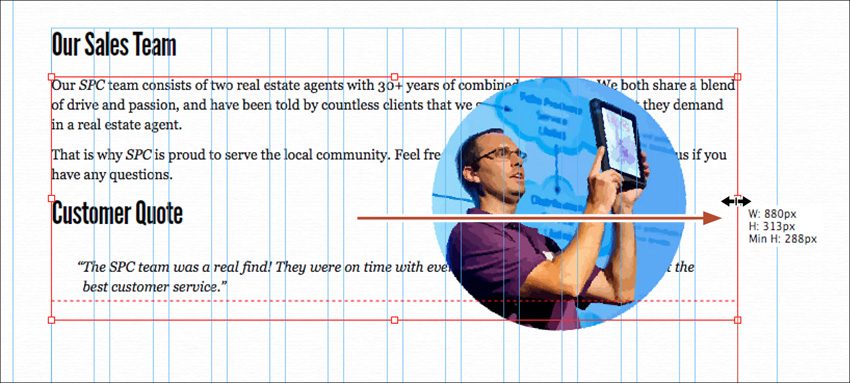
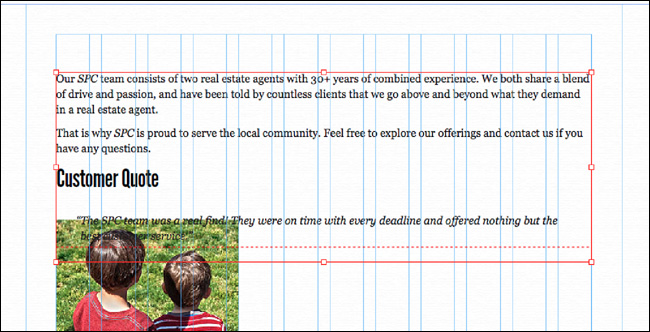
9. Select the Text tool and insert the cursor in front of the text that begins “Our SPC team consists of....”
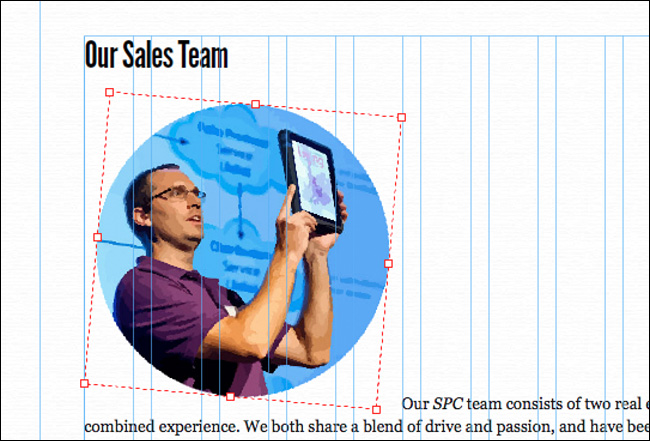
Muse pastes the image inline with the text. That means that the pasted element just flows with the text. If you tried to move the image with the Selection tool right now, you could only move it vertically because it is inline. You can paste content like an image frame or image into a text frame. This is called inline content. One advantage of pasting content into a text frame instead of just placing it on top of the text frame is that if the text size increases or shrinks in the browser or the frame moves, the inline content will move as well. It’s also easier to manage and update text content, in the event you might need to add or delete some of the text. Wrapped text in a single text frame is easier to work with than a collection of grouped objects.
With the image selected, the word Inline displays in the Selection Indicator at the left end of the Control panel.
![]() Note
Note
Where you paste an object matters. If you paste an object in the middle of a paragraph and then assign a left or right wrap, the top of the object aligns with the top of the line of text into which you pasted it.
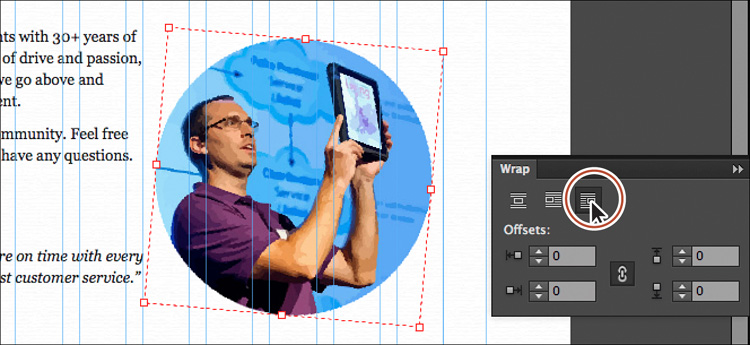
11. Choose Window > Wrap to open the Wrap panel. In the Wrap panel, click the Position Object To The Right Of Text button (![]() ).
).
![]() Tip
Tip
Any objects that you paste into a text frame to apply a wrap can have fills, strokes, and other effects applied.
The Wrap panel offers three options for positioning the image: inline, position left, and position right. The default position is inline, and that’s what you see when you first paste the image into the text. Positioning the image to the right aligns it to the right and wraps the text around the left side of the image. Positioning the image to the left aligns it to the left and wraps the text around the right side of the image. You can try clicking each of the buttons to see the effect it has on the image and text, making sure that you click the Position Object To The Right Of Text button last.
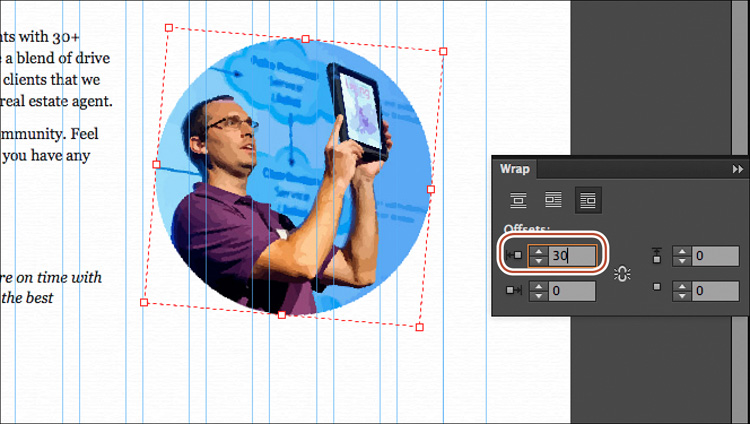
Once you choose the correct image wrap option, you can also push the text away from the various edges of the image by using Offset in the Wrap panel.
12. In the Wrap panel, click the Make All Offsets The Same button so you can edit the offsets separately. Change Left Offset to 20. Now change Left Offset to −150. A negative value may allow the text to appear over the image, which can create some interesting effects. Change Left Offset to 30, and leave the image selected for the next section.
![]() Note
Note
If you attempt to select the image with the text wrap in the text frame by clicking with the Selection tool, you’ll select the text frame instead. Click once more on the image to select it. You can use the Selection Indicator to determine which element is selected: Text Frame means the text frame is selected, and Inline means the image pasted in the text frame is selected. With the inline element selected, you can press the Esc key to jump up a level and select the outer text frame container.
13. Choose File > Save Site.
Aligning content
So far in the lessons you’ve used the Smart Guides to align all of the content. Muse also has an Align panel, which is similar to other Adobe applications, that allows you to align content in different ways.
1. Click the Home page tab above the Document window to open the page in Design mode.
2. With the Selection tool, drag across the image of the boys and the text frame so that both objects are now selected.
3. Click the Align link in the Control panel to reveal the Align panel (you can also choose Window > Align to open the Align panel in the workspace like we did). Ensure that Align To Selection is chosen from the Align To menu in the lower-right corner of the Align panel. Click the Align Top Edges button (![]() ) to align the two objects to each other.
) to align the two objects to each other.
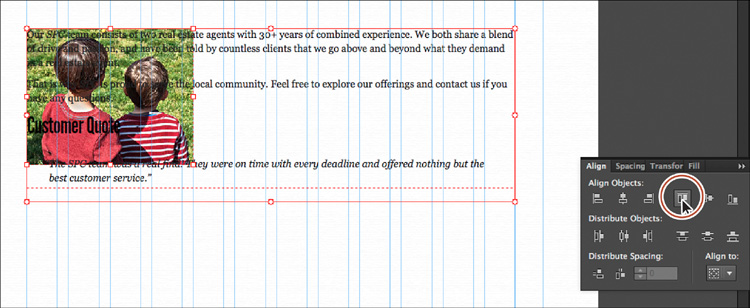
Notice how the image moved to align to the top of the text frame. When aligning top, right, bottom, or left, all selected objects align to the topmost, rightmost, bottommost, or leftmost object, respectively. The Align panel also allows you to distribute objects along the axis you specify and distribute the spacing between objects. You can use either the object edges or anchor points as the reference point, and you can align to a selection, the content area (page), or a key object.
4. Choose Edit > Undo Align Objects to return them to their original positions.
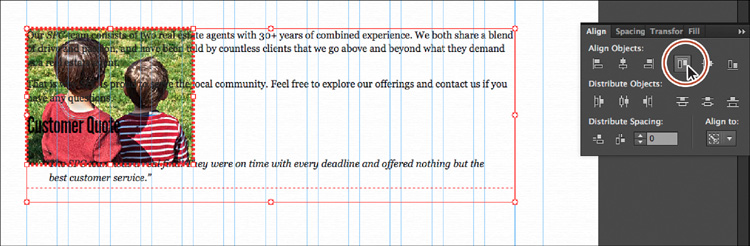
5. With both objects still selected, click once more on the image. This might be tricky because the text frame is covering part of it! Notice the bolder dotted border, indicating that the image is the key object. A key object is one specific object in a selection of multiple objects that other content aligns to.
6. Click the Align link in the Control panel to reveal the Align panel (or choose Window > Align). In the Align To menu, Align To Key Object will already be chosen for you. Click the Align Top Edges button (![]() ) to align the text frame to the image.
) to align the text frame to the image.
7. Click away from the objects to deselect them, and then click the text frame to select it. Drag the leftmost bounding point of the frame to the left, so that the image and the text frame have a small gap between them.
8. Choose File > Save Site.
Grouping and locking content
As you work, Muse lets you lock and unlock content to prevent you from inadvertently selecting and editing it. You can also combine several objects into a group so that the objects are treated as a single unit. You can then move or transform a number of objects without affecting their attributes or relative positions.
1. With the text frame still selected, press and hold the Shift key and click to select the image. The text frame and image are now both selected.
The Shift key allows you to select multiple objects. If multiple objects are selected, holding the Shift key while clicking one of the objects allows you to deselect it.
![]() Tip
Tip
Another way to select multiple objects with the Selection tool is to drag a selection marquee across the objects on a page in Design mode.
2. Choose Object > Group to group the selected content.
A dotted box appears around the group. You now can move, rotate, and even resize the group as a single object.
3. With the group still selected, click once more on the text frame to select only that frame. If you see a Min Height dotted line in the text frame, drag the middle, bottom bounding point down to make it disappear.
![]() Note
Note
To edit the objects within the group, you can also select the group and choose Object > Ungroup.
4. Click the image to select it and drag a corner point away from the center of the image to make the image a bit larger than 100%. Press the Esc key to select the group.
![]() Note
Note
Resizing a group resizes the images within the group but does not change the size of text in the group.
You cannot select locked content, which can be useful when you need to work on other content around the image. You’ll unlock the content shortly to modify the image in the group.
6. Choose File > Save Site.
Now that you’ve seen most of the ways to transform images, you’ll begin to work with the Assets panel and asset linking.
Understanding the Assets panel
As you know, Muse links the images that you place (File > Place) on a page to their original image files. The Assets panel (Window > Assets) shows a listing of these files as well as all the other assets used in your entire site regardless of which page is open in the Document window. The Assets panel also provides important information about each asset and gives you menu commands with which you can ensure that the images are all linked properly.
1. Choose Window > Assets to show the panel.
2. Press Command+J (Ctrl+J) and choose Team from the menu; then click OK to open the page in Design mode.
3. With the Selection tool, click once on the text frame that contains the round image to select it, if it’s not already selected. Click once more on the image to select only that image. In the Assets panel list the selected image is now highlighted.

Assets listed in the Assets panel are listed alphabetically. You can click the column Name to sort them in descending rather than ascending order. Some assets listed have a disclosure triangle to the left of their name in the list, which indicates that there is more than one iteration of that asset in the pages of the site. Clicking the arrow to the left of an asset expands the listing to detail every use of the image and the pages in the site where they appear. Muse calls an image on a page an instance of the original linked image file. As many times as a placed image appears in your site, every instance still links to the original image file. For example, if you placed the team.psd image on the Home page as well as the Team page, the expanded Assets panel would provide page details on both instances. Clicking a disclosure triangle again collapses the expanded listing and shows only the asset’s name.
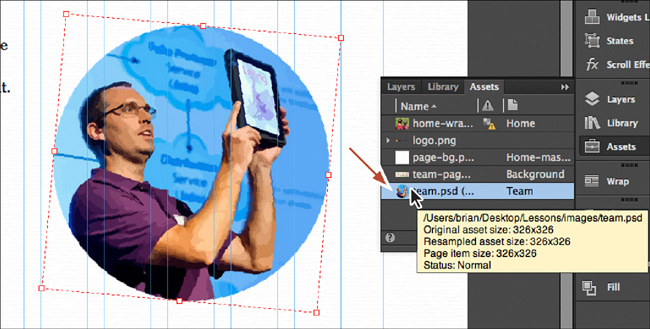
4. Position the pointer over the team.psd image name in the assets list, and Muse provides a yellow tooltip with the path to the image, among other information.
5. Scroll up in the Assets panel, if necessary, and find the image named home-wrap.jpg.
You’ll most likely see an icon (![]() ) in the status column that indicates that the asset is being upsampled and may look pixelated. The reason is that we transformed the image and set it to fill the frame. Notice “Home” to the right of that icon in the Location column. This tells you that the image is on the Home page.
) in the status column that indicates that the asset is being upsampled and may look pixelated. The reason is that we transformed the image and set it to fill the frame. Notice “Home” to the right of that icon in the Location column. This tells you that the image is on the Home page.
6. Right-click the home-wrap.jpg image in the Assets panel, and choose Go To Asset to show the image on the Home page.
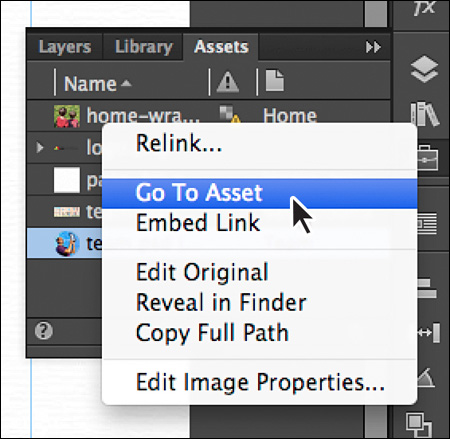
The Assets panel not only lists the assets that are linked and embedded, but it also gives you a lot of functionality found in context menus—from editing images to relinking images and more.
Next, you’ll replace the image on the Home page by linking the image to another image.
Replacing images
After you place an image into Muse, circumstances sometimes may require you to replace that image (a different product becomes the monthly special, say) or link a different version of the original file to the instances on your pages (you recrop a photo to better highlight your office location). In the Assets panel, you can choose to relink an image, which replaces that image on a page.
![]() Tip
Tip
If you place the same asset on multiple pages, you can easily relink every instance of the image throughout the site. For example, right-click the parent listing (with the arrow to the left of it) in the Assets panel and choose Relink All Instances Of “image name.”
On the Home page, you’ll replace the home-wrap.jpg image that you wrapped the text around.
1. Choose Object > Unlock All On Page.
2. With the Selection tool, click twice on the image to the left of the text to select just the image. This also highlights the image in the Assets panel.
3. In the Assets panel, right-click the home-wrap.jpg listing, and choose Relink.
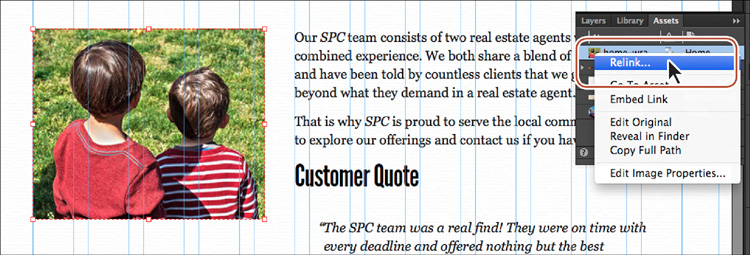
4. In the Relink dialog box, navigate to the images folder in the Lessons folder, then select home-wrap2.jpg, and click Open.
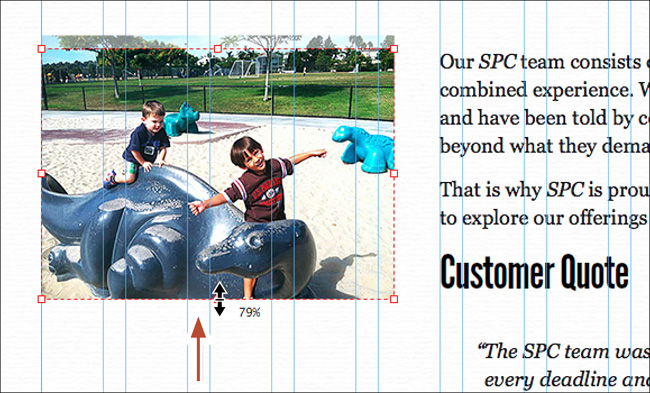
The new image replaces the old image in the frame, fitting proportionally in the frame.
![]() Note
Note
When you relink an image that is not the same dimensions, Muse fits the new image proportionally and centers it in the image frame. That can lead to a small image being made much larger or vice versa. It’s best to replace an image with an image of the same dimensions. You can also replace the image and scale the new image close to 100% using the Selection or Crop tools.
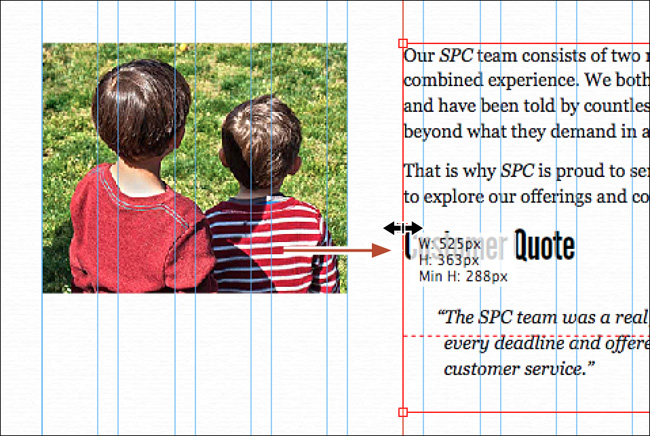
5. With the Selection tool, Command-drag (Ctrl-drag) the bottom bounding point of the frame up to the bottom edge of the image. If you want to get a little practice, you can try resizing and moving the image in the frame.
Now you’ll replace a logo in the header of the master page so it’s more readable.
6. Press Command+J (Ctrl+J) and choose Home-master from the menu, and then click OK to open the page in Design mode. Press Command+– (Ctrl+–) to zoom out a few times to see the logo in the header and the footer.
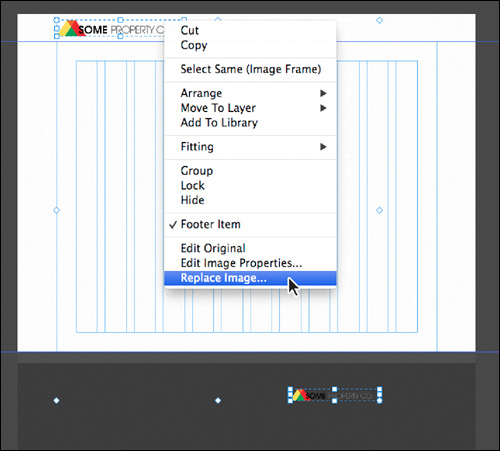
7. Click the logo in the header and choose Edit > Select Same (Image Frame).
The Select Same command can be used to select all objects of the same type on the current page.
8. Right-click one of the logos and choose Replace Image. In the Relink dialog box, navigate to the images folder in the Lessons folder, then to logo-white.png, and click Open. The logos have both been replaced.
![]() Note
Note
In the Relink dialog box, if you want to relink to a Photoshop file, you need to choose Photoshop Images from the Enable menu first.
9. Choose File > Close Page, and then choose File > Save Site.
Editing original
From within Muse, you can use the Edit Original command to open a placed image in an image-editing program like Photoshop, make changes, save the file, and return to Muse to see it updated in your design. The Edit Original command is only available for placed assets that are linked.
![]() Note
Note
To perform this exercise, you need Adobe Photoshop on your machine.
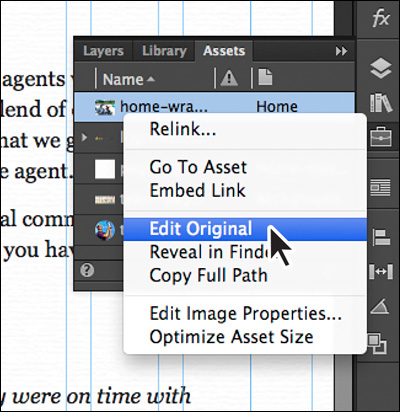
1. In the Assets panel, locate the home-wrap2.jpg image. Right-click the home-wrap2.jpg image in the list, and choose Go To Asset to open the Home page if it isn’t already showing. Right-click home-wrap2.jpg in the Assets panel list again and choose Edit Original. The image will most likely open in Photoshop.
![]() Note
Note
The program that the images open in is based on your Operating System file association settings. If you can’t get an image to open in an image-editing program, you can always go to your image-editing application (preferably Photoshop for this exercise) and open the file directly. You’ll most likely need to update the modified link in Muse, which you’ll learn about in the next section.
2. With the image open in Photoshop, notice that there is only one layer in the Layers panel (Window > Layers).
![]() Note
Note
The Edit Original command is not available for embedded content that was pasted from another program like Photoshop.
3. Choose Image > Adjustments > Equalize to make the image look a little better.
4. Choose File > Save. Click OK in the JPEG Options dialog box.
![]() Note
Note
Using Edit Original can be helpful when you’re working with .psd, .gif, and .png file formats, but you need to be careful with .jpg images. Every time you save a .jpg file, it’s further compressed and the image quality may begin to suffer eventually.
5. Choose File > Close to close the home-wrap2.jpg file, and then close Photoshop if you like (you don’t have to), returning to Muse.
The image should automatically update on the page. If the image hasn’t updated, you can always go to the image name in the Assets panel, right-click, and choose Update Asset. The Assets panel displays a triangle icon with an exclamation point next to the asset’s name in this case, indicating that the asset needs to be updated.
6. Choose File > Save Site and leave the site and Home page open for the next section.
Fixing broken and modified links
When you place images in Muse, as was mentioned previously, a link is created between the asset and the Muse site file (.muse). If the Muse site file cannot find a linked image because it has moved from its original location, the asset will be considered missing. If images are missing when the site file is opened, a warning dialog box will not appear when you open the site. However, if you place an Adobe Edge Animate file (.oam) or an upload asset, Muse will display a warning dialog box if the file is missing when the site is opened.
![]() Note
Note
If the warning dialog box you see indicates more than one modified image, fix all of them in the Assets panel.
When images are placed in Muse, an optimized version of the asset is embedded in the Muse site file (.muse). Image links are important for Muse to optimize the assets when exporting or publishing or for updating the image in Muse when it has been edited in another application, like Photoshop. If image assets are considered missing, the site can still be exported or published, but the images that are missing may not be optimized to look their best or be the smallest file size if they’ve been altered in Muse. For all missing assets, a missing icon (red circle with a white question mark) will appear in the status column of the Assets panel next to the asset name.
![]() Tip
Tip
It is a best practice to save all site assets in a single folder on your computer, alongside the .muse project file. This makes it easier to share files when collaborating and reduces the likelihood of missing assets.
You can fix missing and modified links easily in Muse, as you’ll see in this exercise.
1. Choose Window > Reset Panels.
2. Choose File > Open Site. In the Open dialog box, navigate to the Lessons > Lesson05 > FixLinks folder. Select the Muse site named FixLinks.muse, and click Open.
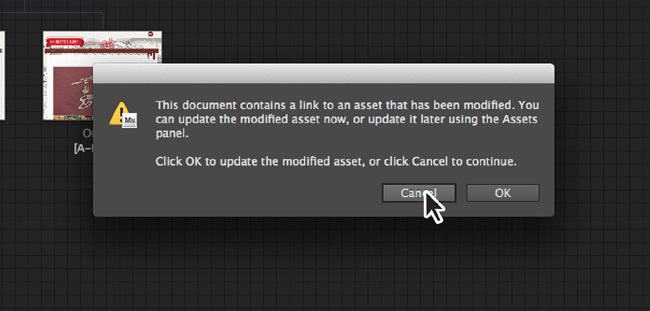
When you open a site that has a missing Edge Animate file (.oam) or upload asset and modified links, a warning dialog box appears. Clicking OK instructs Muse to update any modified assets in the site. You then need to go to the Assets panel to fix the missing links. Clicking Cancel opens the site but does not fix a thing. Be careful when you click OK, because you may not know what has been modified.
3. Click Cancel in the warning dialog box.
4. In Plan mode, double-click the Home page thumbnail to open the page in Design mode. Choose View > Fit Page In Window.
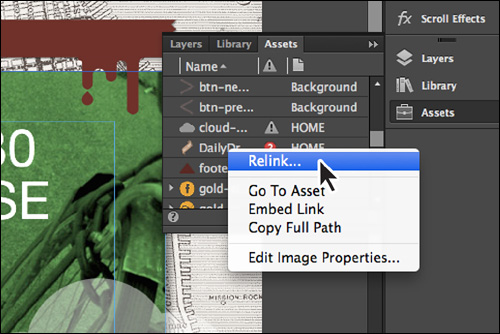
5. With the Assets panel showing (Window > Assets), scroll down in the panel until you see a red stop sign to the right of the DailyDrip.png listing.
6. Right-click the name and choose Relink.
7. In the Relink dialog box, navigate to the Lessons > Lesson05 folder. Select the image named DailyDrip.png, which is sitting loose in the Lesson05 folder, and click Open.
If the image had changed in dimensions, it would be fit proportionally in the frame.
8. In the Assets panel, right-click the image named cloud-1.png, and choose Update Asset.
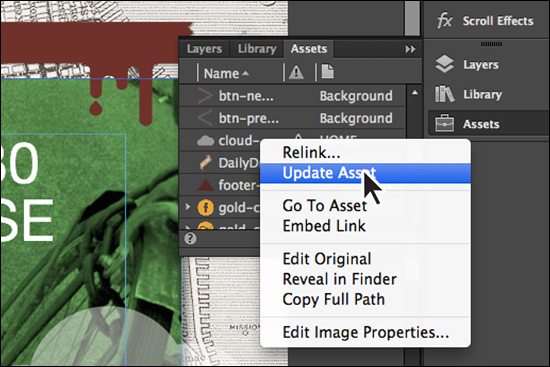
Update Asset forces Muse to go look at the image again and update what you see on the page to match the changes made in the linked cloud-1.png image.
9. Choose File > Close Site. You don’t need to save this site.
Editing image properties
In Muse, you can add information such as alternative text and a tooltip to your images. Alternative text is useful for several reasons, including for search engine optimization (SEO) purposes (depending on the search engine), for accessibility (to be read aloud by screen readers), and to show when an image link is broken or a user choses not to display images in their browser. Alternative text is intended to state the purpose of the image, but in addition to a sentence that describes the picture’s function you can include some relevant targeted keywords. Likewise, a tooltip is a way to provide additional information about the image to search engines and visitors. Keep tooltips relevant, short, and descriptive. The image tooltip actually appears as a tooltip in some browsers when a visitor hovers the cursor over the image. Setting alternative text or a tooltip is typically done on an image-by-image basis. If you have an image that appears multiple times throughout your site, it’s best to add alternative text and a tooltip based on the context of the image. In this exercise, you’ll add a tooltip and alternative text.
1. On the Home page in the SPC site, with the Selection tool, click the home-wrap2.jpg image (the one with text wrapped around it) twice to select the image, not the text frame.
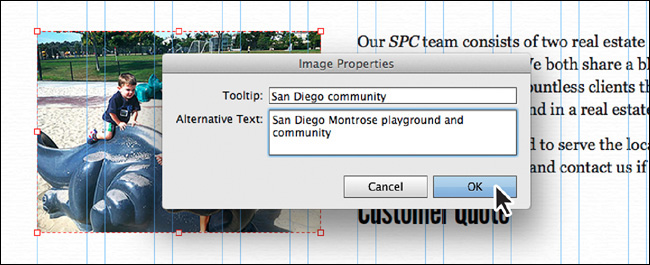
2. Right-click the image, and choose Edit Image Properties.
3. In the Image Properties dialog box, enter San Diego community in the Tooltip field.
![]() Tip
Tip
You can also edit the tooltip or alternative text for an image by right-clicking the image filename in the Assets panel and choosing Edit Image Properties.
4. In the Alternative Text field, enter San Diego Montrose playground and community and click OK.
5. Choose File > Save Site, and close all open pages.
In Lesson 6, “Working with Links and Buttons,” you’ll learn how to add links to other pages within your site and other sites, create email links, add interactive buttons, create navigation links to jump down to sections in a long page, and much more.
Review questions
1. From what content can you sample color?
2. What does hexadecimal refer to?
3. Which image file formats can you place into Muse?
4. Briefly describe the significance of an image link.
5. What options are available when placing a layered Photoshop file?
6. What is the workflow for wrapping text around an image or rectangle?
7. What are alternative text and an image tooltip used for on the web?
Review answers
1. You can sample color from content within Muse and outside of Muse (any pixels displayed on your screen).
2. Hexadecimal values, such as 330011, are one way to tell a browser exactly which RGB color you want to display.
3. You can place .jpg, .gif, .png, and .psd (Photoshop) files by choosing File > Place in Muse.
4. When you place (File > Place) an image, Muse creates an image link between the instance of the image on the page and that image’s original file. If you later update the original file, Muse updates all instances of that image in your website as well.
5. When you place layered Photoshop files, the Image Import Options dialog box allows you to place a composite image (all visible layers showing) or selected layers. You can also crop the placed image to the bounds of the selected layer(s) content.
6. To wrap text around content, like an image, you must either cut or copy the image from its original location, insert the cursor in the text with the Text tool, and paste the image in the text frame. Then you can use the Wrap panel to set the wrapping options.
7. Alternative text is useful for several reasons, including for SEO purposes (depending on the search engine), for accessibility (to be read aloud by screen readers), and to appear when image links are broken. Adding a tooltip to an image provides additional information about the image to search engines and visitors. Alternative text and image titles should be short, relevant, and descriptive.