
4. Adding and Styling Text
Lesson overview
• Work with layers
• Type and place text
• Change text attributes
• Work with fonts
• Create and edit paragraph styles
• Create and edit character styles
• Work with Dynamic Spelling and dictionaries
Adobe Muse provides numerous tools for creating, editing, and formatting text, whether it’s created within the program or imported from another source.
Setting up layers
Now that you’ve set up your master pages, you can begin to design your pages. As you add content within Adobe Muse, each new object is stacked on top of the previous object in what is referred to as a stacking order. As with most design applications, Muse content has a stacking order on the page. All of the content you add to your page is stacked one object on another; the first object you create on the page is on the bottom of that stack.
![]() Note
Note
If you have not already downloaded the project files for this lesson to your computer from your Account page, make sure to do so now. See “Getting Started” at the beginning of the book.
To structure your page elements and make your site designs easier to edit later, you can organize content using layers in Muse. Think of layers as transparent sheets of paper stacked on top of each other that contain different content. If you are familiar with layers in Adobe InDesign or Adobe Illustrator, you’ll be able to jump right into working with layers in Muse. Each new Muse site starts with one default layer called Layer 1, which all content is on, and the layers in the Layers panel are shared across all pages (including masters) and layouts.
You don’t have to work with layers, but they can make your life easier in the future when you’re making edits or attempting to arrange your content’s stacking order. Next, you’ll begin setting up layers to more easily organize master page content and your page design content.
1. Open the SPC.muse site file if it’s not still open from the previous lesson. With Plan mode showing, double-click the Home-master page thumbnail to open the page in Design mode.
2. Choose Window > Reset Panels, and then choose Window > Layers to show the Layers panel.
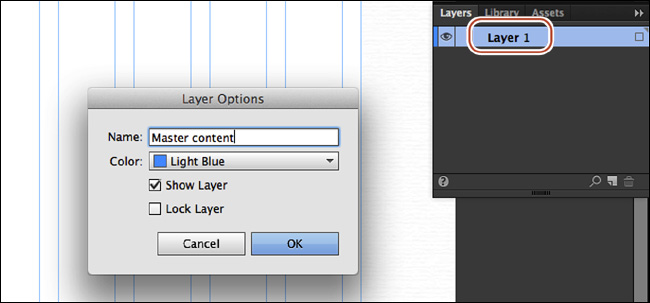
3. Double-click the Layer 1 name in the Layers panel and change the name to Master content in the Layer Options dialog box. This layer already contains the master page content. Leave the other options at their default settings and click OK.
Now you’ll make a new layer for the page content, like text, that you’ll start adding in this lesson.
4. Click the New Layer button (![]() ) at the bottom of the Layers panel to add a new layer named Layer 2 above the existing layer. We’ll discuss the importance of layer ordering shortly.
) at the bottom of the Layers panel to add a new layer named Layer 2 above the existing layer. We’ll discuss the importance of layer ordering shortly.
Every new layer that you create, by default, will have no content on it. Also, objects on master pages appear at the bottom of each layer. Master elements can appear in front of document page objects if the master elements are placed on a higher layer, but by default they are located on the bottom of the stacking order.
![]() Tip
Tip
To delete a layer, you can select it in the Layers panel and either click the Delete Selected Layer button (![]() ), drag the layer(s) to the Delete Selected Layer button, or right-click the layer and choose Delete Layer. Deleting a layer will delete all content on the layer.
), drag the layer(s) to the Delete Selected Layer button, or right-click the layer and choose Delete Layer. Deleting a layer will delete all content on the layer.
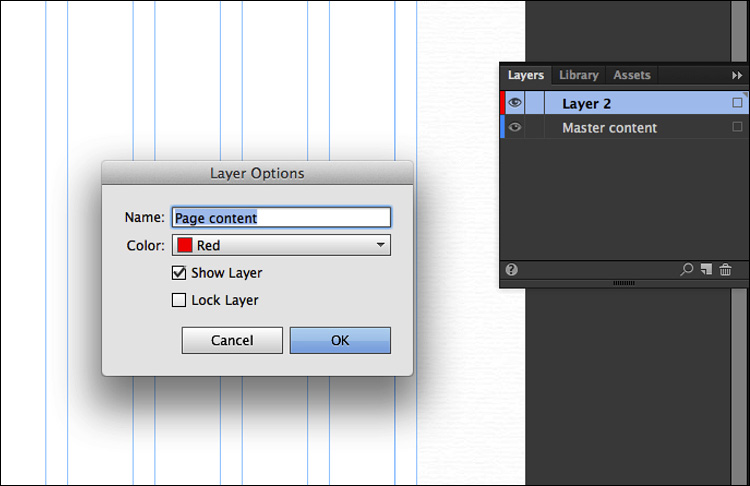
5. In the Layers panel, double-click the name Layer 2 (your layer name may be different) to open the Layer Options dialog box. Change the following options in the dialog box:
• Name: Page content
• Color: Red (the default setting)
• Show Layer: Selected (the default setting)
• Lock Layer: Deselected (the default setting)
![]() Tip
Tip
You can also press Option (Alt) and click the New Layer button to create a new layer, and then open the Layer Options dialog box in one step. You can also right-click a layer name, choose Layer Options, and then choose other layer options, such as duplicating layers or deleting layers.
Notice the other options in the Layer Options dialog box. You can assign a color to each layer. When content is selected on the pages, the color of the bounding box will match the color of the layer it’s on. You can also lock a layer and hide a layer, but that can also be done directly within the Layers panel.
Click OK.
Right now, as stated previously, all content is on the Master content layer because that was the default layer. To ensure that the header and footer content appear on top of the page content for this site, you’ll change the ordering of the layers in the Layers panel.
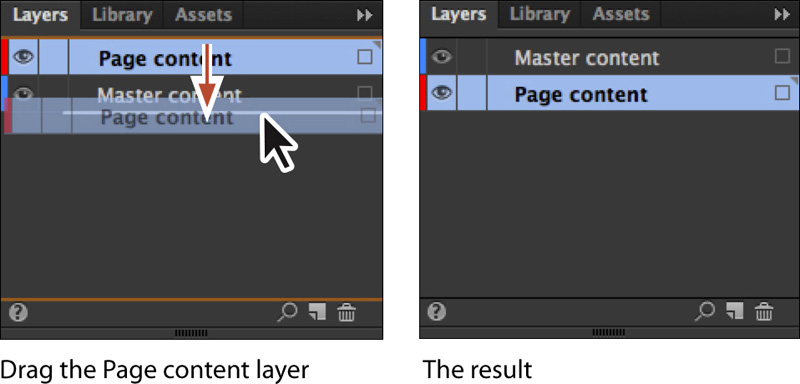
6. In the Layers panel, drag the Page content layer beneath the Master content layer. When a line appears beneath the Master content layer, release the mouse button. Everything on the Master content layer will now appear above everything on the Page content layer.
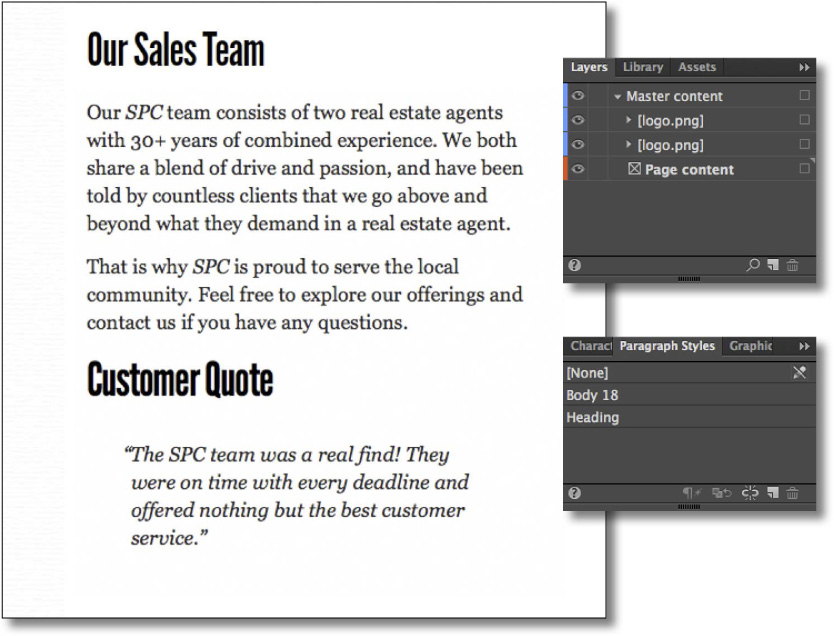
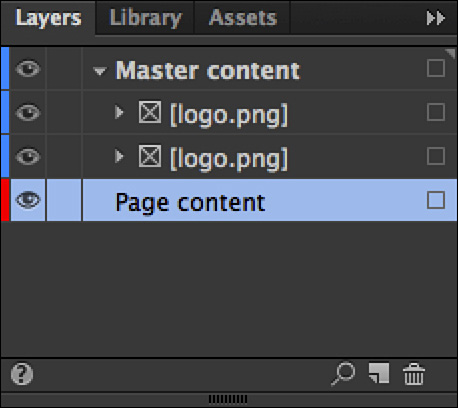
7. With the Selection tool (![]() ) selected, click the logo in the header. Click the arrow to the left of the Master content layer name in the Layers panel to show the contents of the layer. The Layers panel reveals the two logo.png images currently on the page.
) selected, click the logo in the header. Click the arrow to the left of the Master content layer name in the Layers panel to show the contents of the layer. The Layers panel reveals the two logo.png images currently on the page.
![]() Tip
Tip
A fast way to locate content in the Layers panel is to select the content on the page, and then click the Locate Object button at the bottom of the Layers panel.
Similar to layers in InDesign and Illustrator, Muse shows each object in your design in the Layers panel. Each layer that has content on it has a disclosure triangle to the left of the layer name. When collapsed, you can click the disclosure triangle to expand the contents of the layer and see the list of objects and their stacking order on that layer for the active page. Groups, widgets, and certain widget parts also have disclosure triangles that you can click to expand the set and display their contained objects. You can reorder these objects, lock and unlock them, and add or remove them from groups.
8. Click the eye icon to the left of the Master content layer name in the Layers panel to hide the master content (the logos).
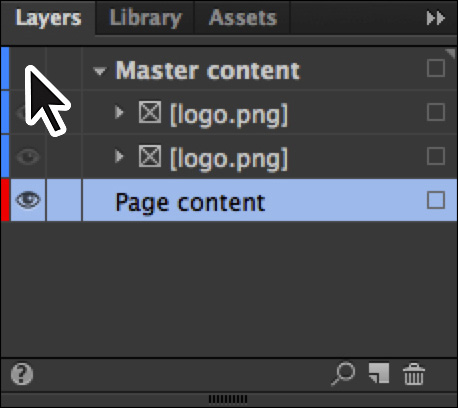
9. Click the now blank area where the eye icon was to show the master content again.
As you work in Muse, it can be helpful to hide entire layers or selected content on layers to focus on or more easily select the design content at hand.
10. Choose File > Close Page to return to Plan mode, and then choose File > Save Site.
As you progress through this and later lessons, you’ll continue to work with layers and discover other useful layer features.
Adding text
With a few base layers set, you’ll now turn your attention to adding some text to your pages. Muse offers several ways to add text to your web pages. From typing text directly on your page to placing or pasting text from other applications, adding text to your design is simple.
![]() Note
Note
If you are starting from scratch using the Jumpstart method described in the “Jumpstart” section of “Getting Started,” your workspace may look different from the figures you see in this lesson.
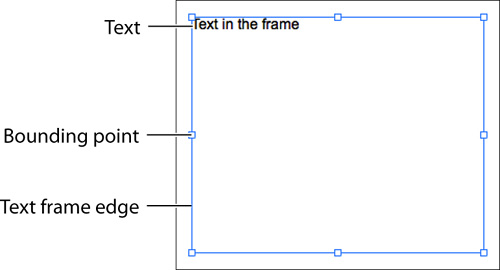
As in InDesign, text that you insert into your pages in Muse is contained within a text frame. You can resize, reposition, rotate, and transform those text frames and their content (which can include text, images, and rectangle shapes) almost any way you like.
In this first section, you’ll insert text in various ways, and then move on to formatting that same text.
Typing text
The first method you’ll use to insert text into your pages is to create a text frame and type a page heading into it.
1. In Plan mode, double-click the Team page thumbnail to open it in Design mode.
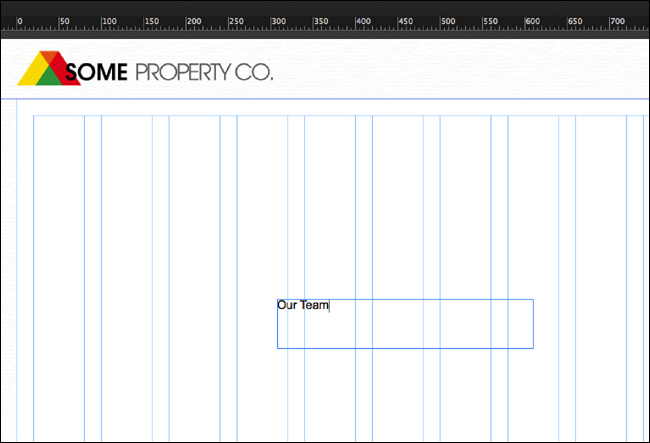
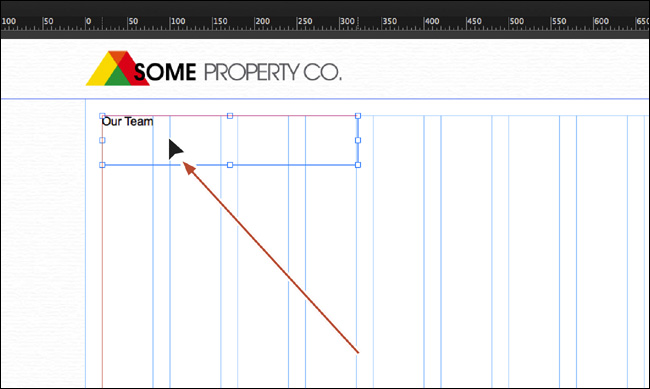
2. Select the Text tool in the Toolbar. Position the pointer near the center of the page, click and drag down and to the right. When the measurement label next to the pointer roughly shows a width of 300px and a height of 60px (it doesn’t have to be exact), release the mouse button. A blinking cursor will appear within the text frame. Type Our Team in the text frame.
![]() Note
Note
The exercises in this lesson, require that you have the necessary fonts installed. If you have not already downloaded the fonts for this lesson to your computer from your Account page, make sure to do so now. See “Getting Started” at the beginning of the book.
Notice that as you create the text frame it snaps to guides and red lines, and other visual aids display, depending on where you drag the frame and what its edges touch. The snapping feature and visual aids are part of Smart Guides and are turned on by default. In a later lesson, you’ll turn them off to reposition content when you don’t want it to snap to guides or other content.
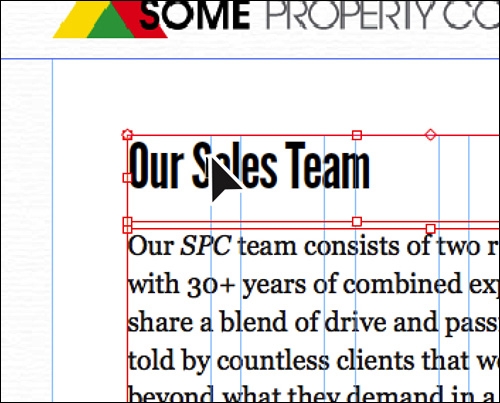
3. Select the Selection tool in the Toolbar, and click and drag the text frame from the center into the upper-left corner of the first column guides. You can tell when the top and left edges of the frame are snapped into the guides when red lines appear. See the figure for placement help.
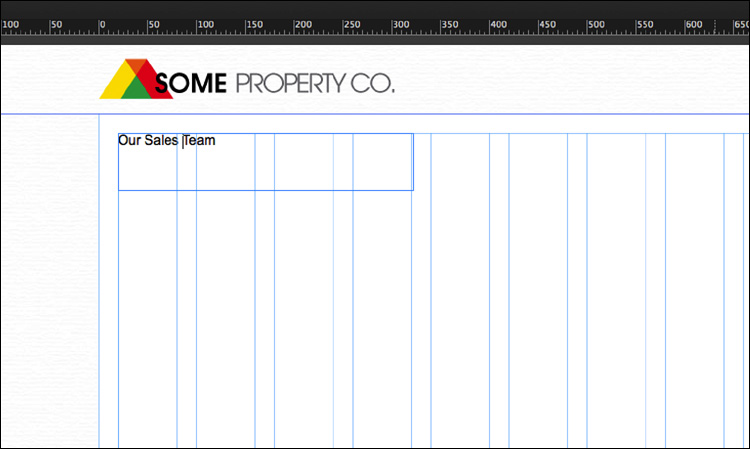
4. With the Selection tool, double-click the text frame to select the Text tool in the Toolbar and enable text editing.
5. Insert the cursor before the word Team, and type Sales and then a space.
![]() Note
Note
You may want to zoom in to see the text more clearly.
6. Select the Selection tool in the Toolbar, and click away from the text frame to deselect it.
7. Choose File > Save Site.
Placing text
In Muse, you can also place text (File > Place) from a file that was created in another application, provided it was saved as a .txt file. Because .txt files typically do not contain formatting, Muse applies default formatting to the text when you place the file.
1. Choose File > Place. Navigate to the Lessons > Text folder. Select the file named team.txt, and click Open.
You see the Place Gun cursor, which indicates that you can either click to create a text frame and place the text in it or you can click and drag to draw the frame to the proportions you want.
![]() Note
Note
You cannot place (File > Place) text into an existing text frame in Muse.
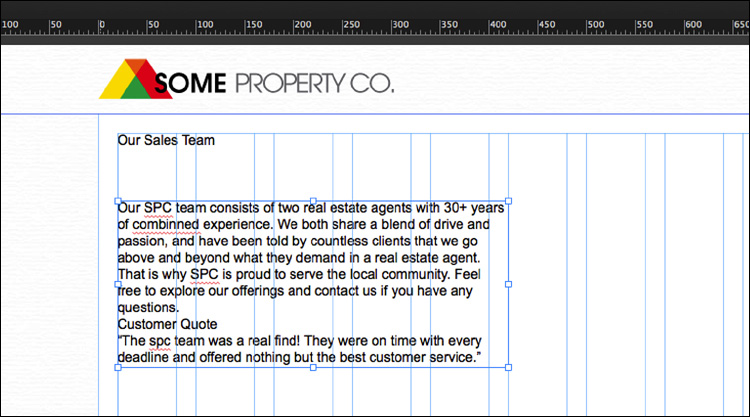
2. Position the Place Gun below the heading you just created and click. A text frame is created and the text is placed within.
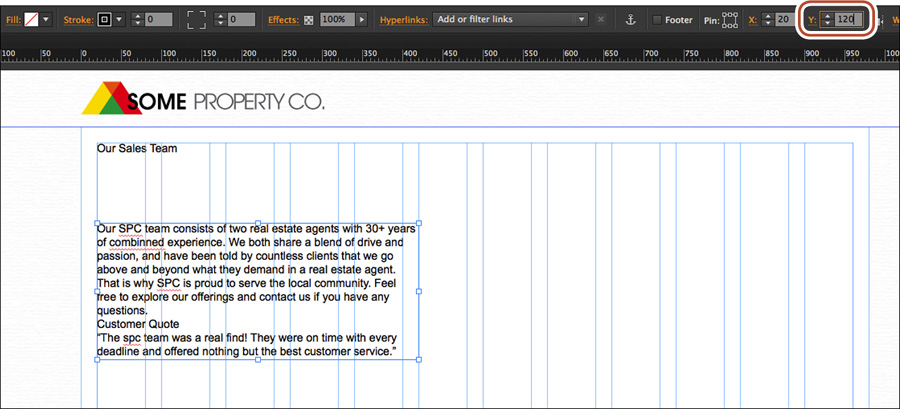
3. With the text frame selected, change the Y value to 120 in the Control panel and press Return (Enter) to accept it.
![]() Note
Note
If your screen resolution doesn’t show the Y value, you may only see a Transform link in the Control panel. You can either click that to reveal the Transform panel and change the Y value or choose Window > Transform to open the Transform panel.
Instead of resizing or dragging a text frame using the Selection tool, you can be more precise by using the transform options.
4. Choose Edit > Deselect All and then choose File > Save Site.
Now that you have text on the page, you’ll make sure that it is on the correct layer, and then begin to format it using the text formatting options available in Muse.
Move content between layers
When you create layers, it’s important to continue working with them. Otherwise, everything you create will wind up on the last selected layer and do you no good. Next, you’ll move the text content you just created to the correct layer.
![]() Tip
Tip
You can also drag the Selection tool across multiple objects to select them all at once.
1. With the Selection tool selected, Shift-click the two text frames you created to select them both.
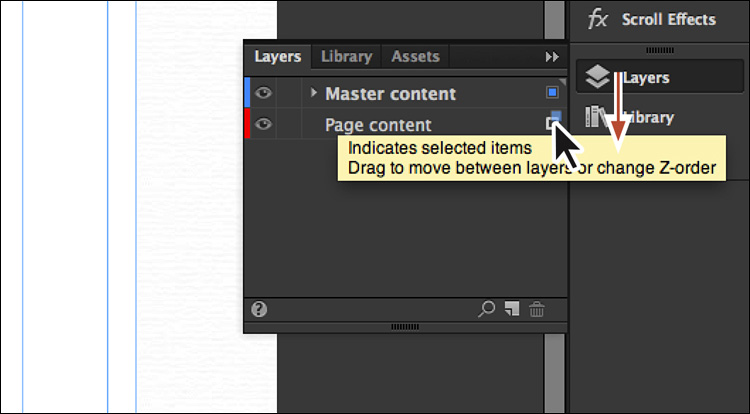
Notice that the colored edges of the bounding boxes are blue, indicating that they are on the Master content layer. Also, in the Layers panel you’ll see a small blue square to the right of the Master content layer name. This square is another way to see which layer the selected content is on and also a way to select that content on the page from within the Layers panel.
2. Drag the little blue box on the Master content layer straight down to the hollow box on the Page content layer. When the hollow box highlights, release the mouse button. You just moved the text from the Master content layer to the Page content layer.
![]() Tip
Tip
You can also select content on the page and choose Object > Move To Layer > Page content to move the selected text frames to the Page content layer. You can also right-click the selected content and chose Move To Layer > Page content.
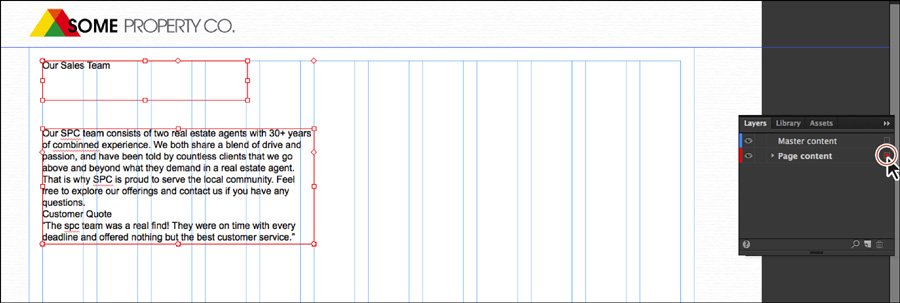
Notice that the colored edges of the selected text frames on the page changed from blue to red. You can use the color of a layer you set in the Layer Options dialog box to determine which layer selected content is on, which also may make it easier to see the bounding boxes for transforming artwork.
![]() Note
Note
Currently, you cannot select content on the Master content layer because it is on a master page and cannot be selected unless the master page is showing in Design mode.
3. Choose Edit > Deselect All.
4. Click the empty box to the far right of the Page content layer to select all of the content on the layer.
As with other functions, Muse CC offers several ways to select your page content.
5. Choose Edit > Deselect All, and then choose File > Save Site.
Formatting text
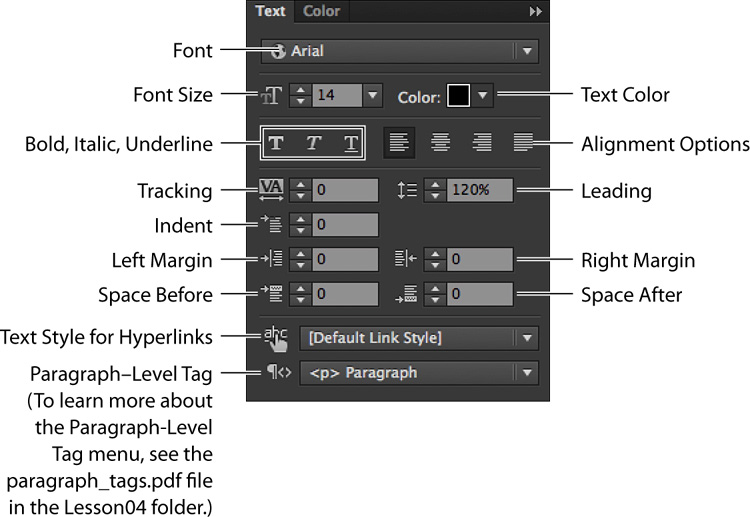
In this section, you’ll learn a wide range of text formatting options available to you in Muse, from changing font size to adjusting paragraph spacing. You can find these formatting options in the Control panel (Window > Control) and Text panel (Window > Text).
![]() Note
Note
Some of the features will be dimmed in the panel you see unless a text frame or text is selected.
The Text panel contains more formatting options than the Control panel, but sometimes the Control panel can be more convenient because it’s always showing (by default).
Open the Text panel by choosing Window > Text, and take a look at some of the formatting features available.
The first formatting you’ll address is font size. Muse uses Arial as the default font and 14 pixels as the default font size, whether you type or place your text onto your pages.
Adjusting font size
In print work, most of us use the unit points to set the size of our text. In Muse, the font size unit used is pixel to correspond with web standards.
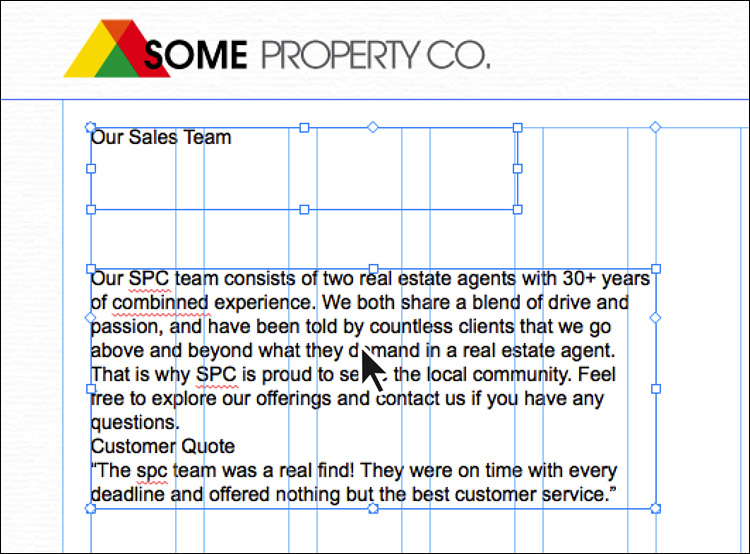
1. Select the Text tool in the Toolbar, and insert the cursor in the text frame that begins with the text “Our SPC team consists of two...” Choose Edit > Select All.
![]() Note
Note
Clicking text twice with the Text tool selects a word, clicking three times selects the paragraph, and clicking four times selects all of the text within a frame.
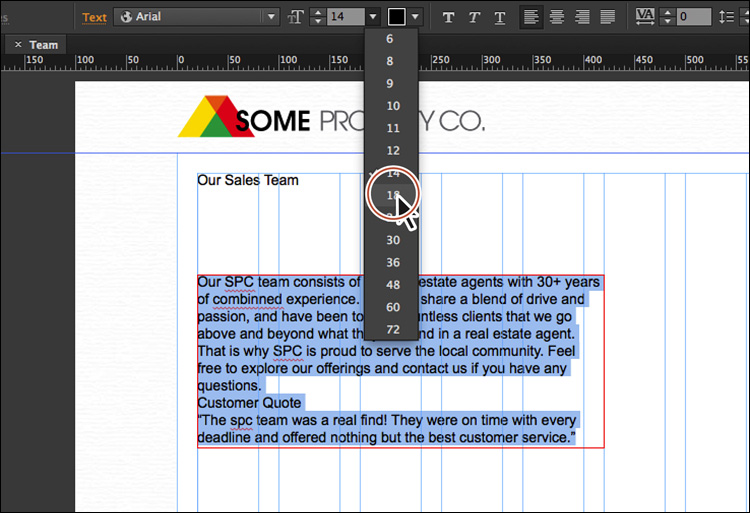
2. Choose 18 from the Font Size menu in the Control panel. Notice that the text frame expands to fit the resized text.
![]() Tip
Tip
You can dynamically change the font size of selected text using keyboard shortcuts. To increase the font size in increments of two pixels, press Command+Shift+> (Ctrl+Shift+>). To reduce the font size, press Command+Shift+< (Ctrl+Shift+<).
3. With the Text tool selected, position the cursor over the “Our Sales Team” text. Click three times to select the text.
![]() Tip
Tip
To change the font size by one-pixel increments, you can also click the arrows to the left of the Font Size field in the Control panel or Text panel.
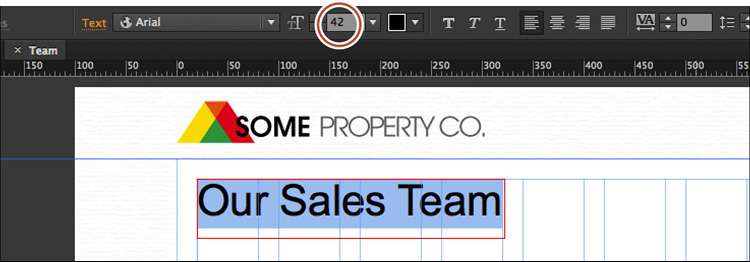
4. In the Font Size menu in the Control panel, select the value 14 and type 42. Press Return (Enter) to accept the change. If the text is wrapping in the text frame, you can select the Selection tool and drag the right, middle point to the right until all of the text fits on one line.
![]() Tip
Tip
If you have a text frame to which you want to apply all the same text formatting, you can select the text frame with the Selection tool rather than using the Text tool to select the text and edit the formatting.
5. Select the Selection tool in the Toolbar and click the larger text frame. Drag the bottom, middle bounding point up until a dotted line appears. You won’t have to drag far.
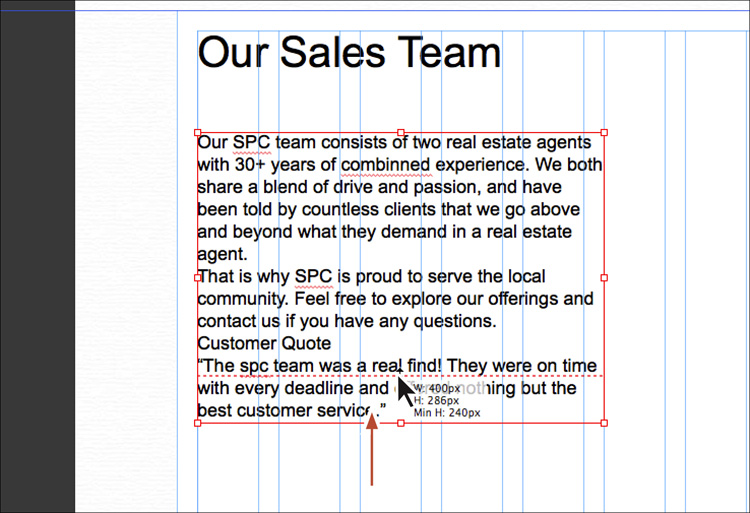
The dotted line across the frame near the bottom indicates a minimum height for the text frame. When you drag the frame shorter than the text and the dotted line appears, Muse inserts a style property called min-height in the code. This tells the browser that the frame must be at least that tall and can expand in height if the content dictates it.
6. Drag the same bottom, middle bounding point down until the dotted line disappears.
7. Choose File > Save Site.
Selecting a font
For years, web designers and developers had to rely strictly on “web safe” fonts, which generally came installed on Mac OS and Windows machines, for their web designs. The reason for using web safe fonts was that any font you used in your web pages needed to be installed on the machine of the visitor viewing your website in order for the text to render correctly.
Fortunately, times have changed! In fact, Muse supports three categories of fonts you can use:
• Web safe fonts: Most systems or devices have these fonts installed, which increases the likelihood of them displaying correctly on your visitors’ machines.
• System fonts: These fonts are those located on your machine. If you apply one of these to text on your pages, Muse converts that text to an image when your site is previewed, published, or exported.
• Web fonts: The newest category of font on the web, these are fonts hosted by a company, sometimes for a fee. When a hosted font is viewed, your site visitor’s browser downloads the font from that company’s server, so the font appears on your web page regardless of whether that site visitor owns the specific font. Using Muse, you get access to hundreds of free fonts hosted by Adobe Typekit.
Apply a web safe font
The first category of font you’ll use is a web safe font that you’ll apply to the placed text on the ABOUT page.
1. Double-click the placed text frame to switch to the Text tool. Insert the cursor in the text, and choose Edit > Select All.
2. Click the Font menu in the Control panel.
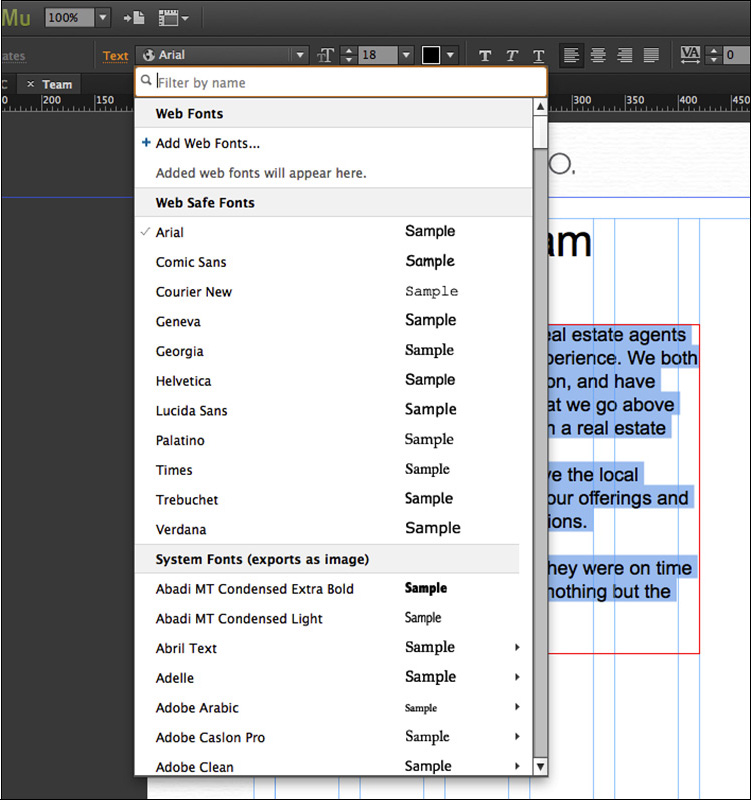
In the Font menu that appears, you’ll see a single sectioned list with shortcuts to scroll to each of the three font categories available: Web Fonts, Web Safe Fonts, and System Fonts (exports as image). At the top of the menu is a search field you can use to search for fonts by entering a font name or partial font name.
3. In the menu, click the Web Safe Fonts category shortcut to scroll to those fonts. Position the pointer over the Georgia font in the list that appears.
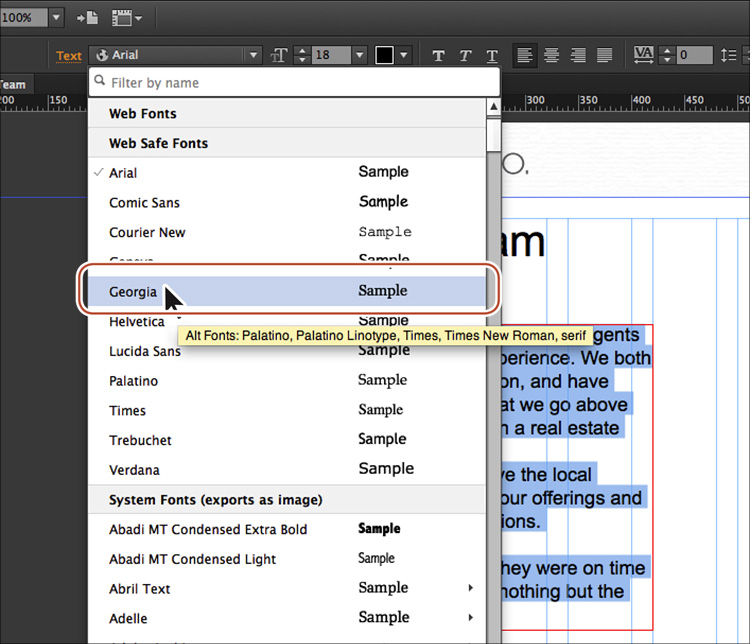
A yellow tooltip appears. In the tooltip, you’ll see the words “Alt Fonts:” and a listing of fonts. On the web, just because you choose a web safe font doesn’t guarantee it will work, because visitors need to have the font (Georgia in this example) on their machines. The alt fonts are second, third, and subsequent choices the browser will use if Georgia isn’t available. You cannot change alt fonts in Muse. Just know that Muse selects alternate (fallback) fonts that are similar to your first choice font.
4. Click the Georgia font to apply it to the text.
Apply a system font
The next category of font you’ll use is a system font. Applying this type of font converts the text into an image when the site is previewed, published, or exported.
1. With the Text tool still selected, select the heading text “Our Sales Team.”
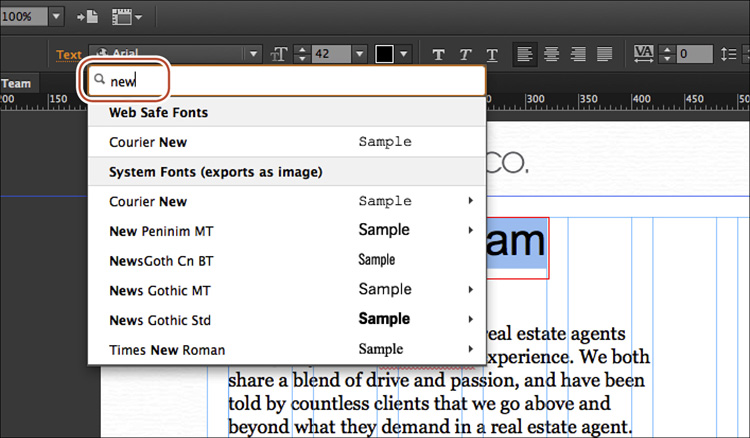
2. Click the Font menu in the Control panel, and notice that the Font menu displays an automatically generated list of recently used fonts at the top of the menu. In the search field at the top of the menu, type new. Muse filters the list of fonts to show the fonts with the word “new” in their name.
![]() Note
Note
You can filter the font list by font family (e.g., Myriad Pro), weight or style (e.g., Bold Italic), a combination of these (e.g., Myriad Pro Bold Italic),or use partial names in any order (e.g., It Bold Myr Pro).
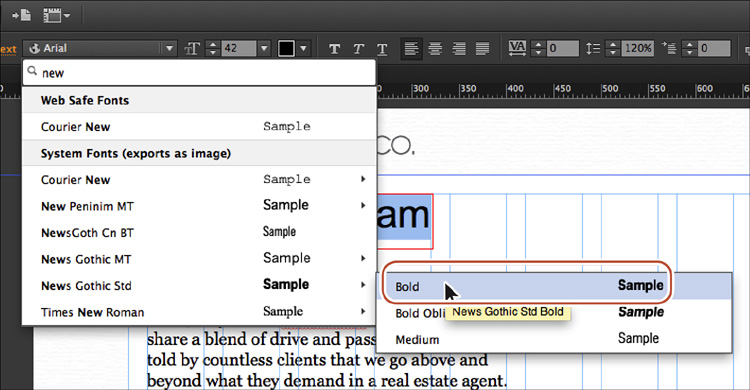
3. Position the pointer over the News Gothic Std font name and choose Bold from the menu that appears. If News Gothic Std doesn’t appear, try choosing another font. Applying this font may cause the text to wrap in the text frame, but we’ll fix it shortly. Leave the text selected for the next section.
![]() Tip
Tip
You can configure the number of recently used fonts to display, and you can clear the list by choosing Adobe Muse CC > Preferences (Edit > Preferences) and clicking Clear Recent Fonts.
Web fonts and system fonts are grouped by font family; individual weights and styles (e.g., Bold, Italic, Bold Italic, etc.) of multiface font families appear in submenus.
After selecting the system font, you’ll see a small T with an image icon appear in the lower-right corner of the text frame. That icon indicates that the text will become an image when you preview, publish, or export the site.
Apply a web font
The next type of font that you’ll apply to text is a web font. You’ll need an Internet connection to choose a web font the first time. Choosing a web font in Muse will download a local version of the font so that you can preview it in Muse when you’re working on a site. The code for your page will contain a link to the Typekit servers to view the font in the browser. Even if you decide to export the site content and host the site elsewhere, you can still use the web fonts that you apply to your design content within Muse.
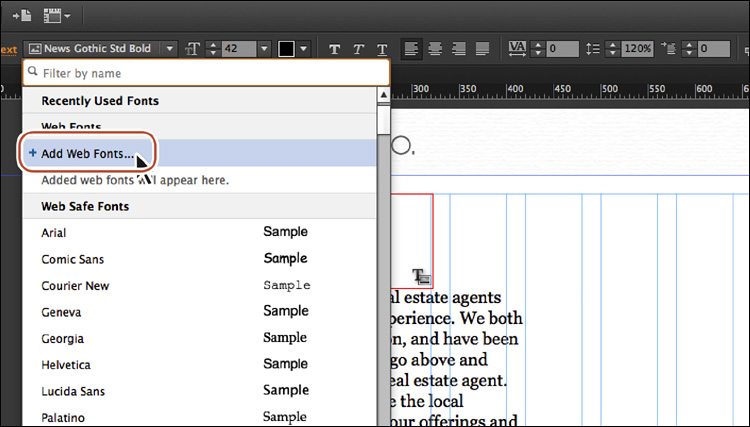
1. With the heading text “Our Sales Team” still selected, click the Font menu in the Control panel. In the Font menu, click the Web Fonts category to see the options. Click the +Add Web Fonts option that appears to open the Add Web Fonts dialog box.
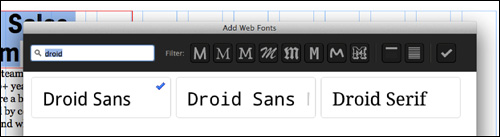
2. In the Add Web Fonts dialog box, type Droid in the Filter By Name field in the upper-left corner of the dialog box. Click to select the first Droid Sans font in the list and a blue check mark appears next to the font name indicating that it will download and appear in your web fonts list when you’re finished.
![]() Note
Note
Because the Typekit library is constantly being updated, it may have changed since we wrote this lesson; the fonts we ask you to choose may not be available. Feel free to choose other fonts if you like. Just know that you’ll need to substitute your font when you see any references to the selected fonts later in the lessons.
3. Clear the word Droid from the search field by selecting and deleting it.
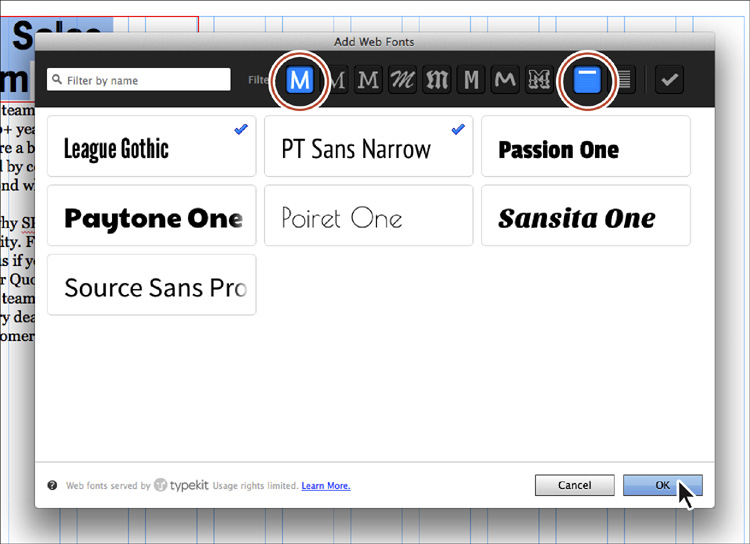
4. Click the Sans Serif button in the Filter options. Click the Recommended For Headings button to the right of the Filter options.
Filtering allows you to see only specific font types, such as serif or sans serif. To stop filtering, you simply click the filter button again.
5. Click the PT Sans Narrow font, and then click the League Gothic font to select them both. Both fonts will show a blue check mark. Click OK.
![]() Tip
Tip
You can add web fonts to the Font menu without selecting text. Choose File > Add/Remove Web Fonts to access the Add Web Fonts dialog box.
6. When the Web Fonts Notification dialog box appears, click OK.
The Web Fonts Notification dialog box indicates that the fonts you’ve chosen have been downloaded and added to the Font menu. The fonts will appear in the Font menu no matter what site file is open, allowing you to apply them to any site.
![]() Note
Note
For each font you choose, the entire font family is downloaded. This means that if there are any font styles, such as bold or black, those font styles are downloaded as well.
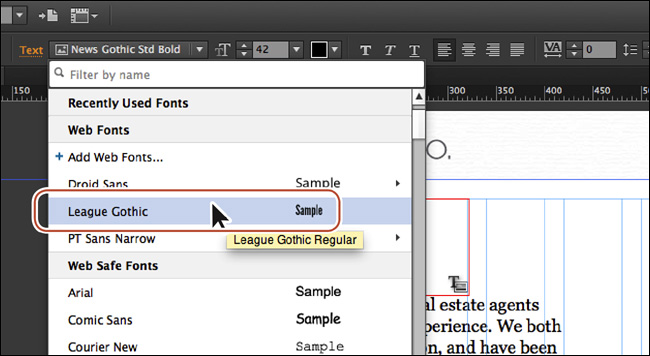
7. With the header text still selected, click the Font menu in the Control panel, and then click the Web Fonts option. Choose League Gothic (or the font you selected) from the menu that appears.
Next, you’ll remove one of the fonts you downloaded so that it no longer appears in the font list.
8. With the header text still selected, click the Font menu in the Control panel, and click +Add Web Fonts in the Web Fonts category.
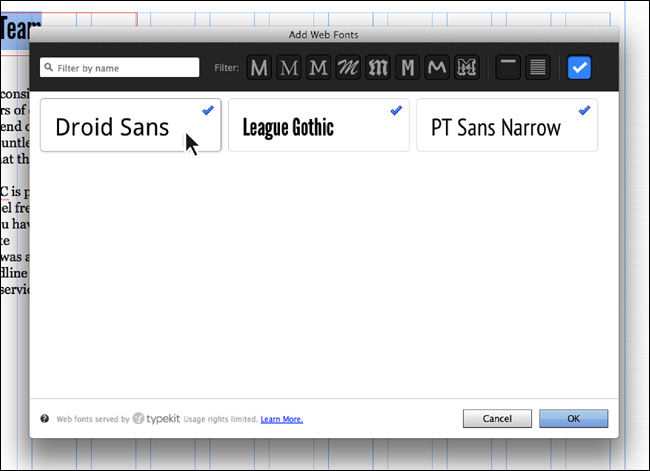
9. Click the Show Selected Fonts button (the check mark) in the upper-right corner of the dialog box.
This shows a listing of all of the web fonts that you’ve downloaded.
10. Click Droid Sans to deselect it and remove that font family from the Web Fonts menu. Click OK.
![]() Note
Note
Any font styles in a family, like Bold, that are applied to text when you remove them in the Add Web Fonts dialog box will remain in the Web Fonts section of the Font list. Also, if you remove fonts that are used in a site file that is not currently open, when you open that site after removing the font, it will be downloaded again automatically.
11. Click OK in the Web Fonts Notification dialog box.
12. Click the Preview mode link in the upper-right corner, and view the fonts. Return to Design mode, and choose Edit > Deselect All.
Changing leading, alignment, and tracking
With the main formatting complete, you can begin to fine-tune some of the text to better suit your design. As mentioned earlier, you can change the formatting options in either the Text panel or the Control panel, depending on what tool or content is selected in Muse and the resolution of your screen. For this part of the lesson, we’ll refer to the Text panel.
1. Open the Text panel by choosing Window > Text or clicking the word Text in the docked panels on the right side of the workspace.
We dragged the Text panel from the dock closer to the text to make it easier to see in context with the text.
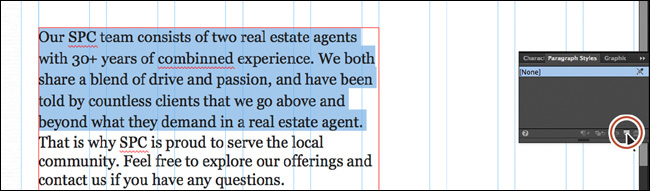
2. Insert the cursor into the first paragraph of the text that begins with “Our SPC team consists of two...” Click three times to select the first paragraph (only).
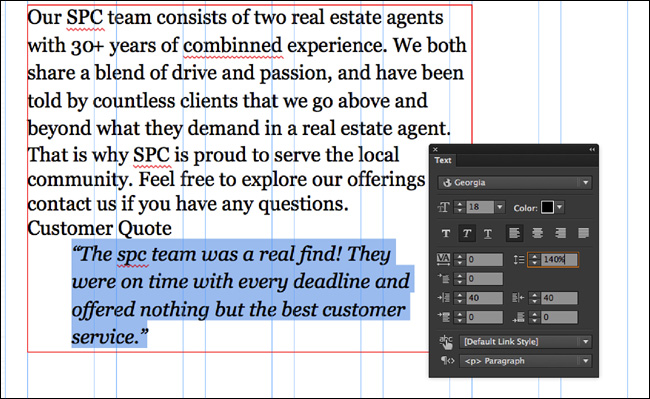
In the Text panel, notice that the Leading value (![]() ) is 120%. That means that the distance between the lines of text is 120% of the font size of the text.
) is 120%. That means that the distance between the lines of text is 120% of the font size of the text.
3. Change the Leading value to 140% in the Text panel.
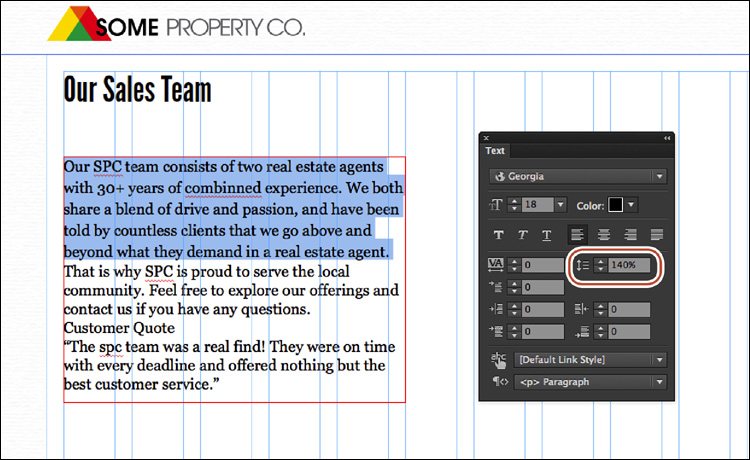
You do not have to type the percent sign because Muse will assume that the unit is percent. You can also enter a value for the leading with px (for pixel), like 32px, instead of a percent, and Muse will keep it as a pixel value in the code that is generated.
Now you’ll align the quote in the text to center.
4. With the Text tool selected, insert the cursor into the paragraph that starts with, “The spc team was a real find...” In the Text panel, click the Align Center button (![]() ) to align the text to the center of the text frame.
) to align the text to the center of the text frame.
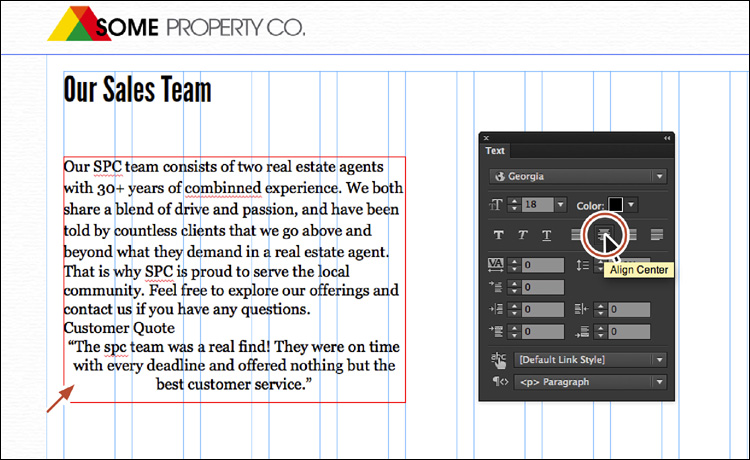
Muse offers four alignment options: Left, Center, Right, and Align Justify. The Align Justify option justifies the entire paragraph (makes it look like a block of text) except for the last line of text in the paragraph.
Next, you’ll adjust the spacing between letters in the heading.
5. Select the Selection tool in the Toolbar and click to select the text frame that contains the “Our Sales Team” text. Drag the bottom-middle bounding point of the text frame so that the frame is smaller. In the Text panel, change the Tracking option (![]() ) to –1 (minus one).
) to –1 (minus one).
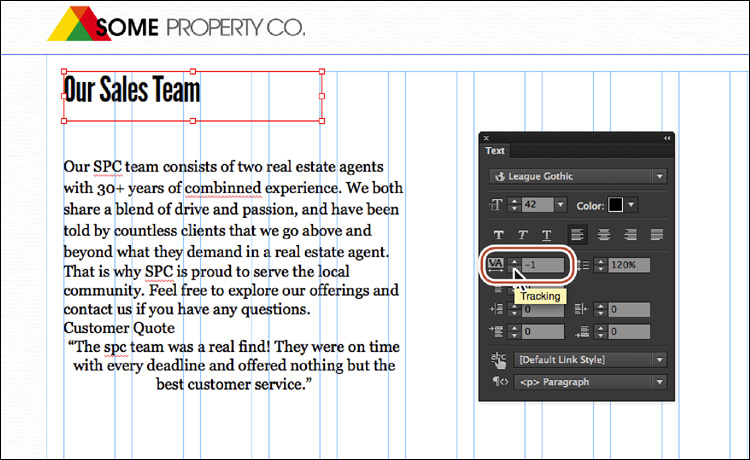
In Muse, tracking is the distance between characters (not just letters). When you select the entire text frame, Muse changes the spacing between all letters in the text frame. If you come from the print world, tracking in Muse is the web equivalent of tracking and kerning. Muse tracking uses pixel values rather than the typical print unit of points. On the web, we typically use this for text like headlines, not entire stretches of body copy. Just keep in mind that every small kerning adjustment adds code to the HTML pages that Muse creates for you when you preview, publish, or export as HTML, which can ultimately increase download times for your pages.
6. Select the Text tool in the Toolbar and insert the cursor between the 30 and the + (plus) in the first paragraph of the larger text frame.
7. Press Command+= (Ctrl+=) a few times to zoom into the cursor position. (This is the shortcut for the View > Zoom In command.)
8. In the Text panel change the Tracking to –2.
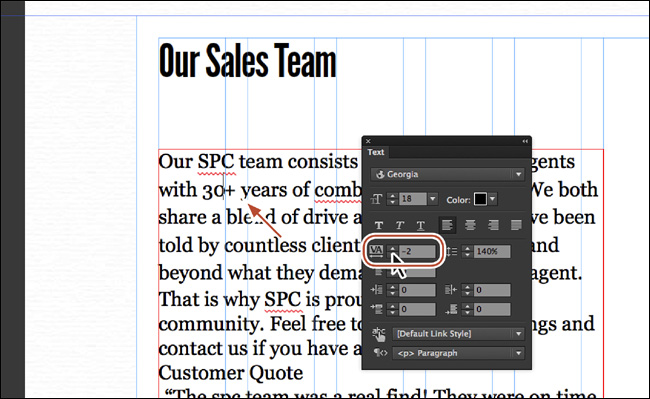
When you insert the cursor between characters, it controls the spacing between only those two characters.
9. With the Text tool, click back in the text, and then choose Edit > Select All.
Look in the Text panel. The Tracking value is blank, which means that there is more than one Tracking value applied to the selected text.
![]() Note
Note
You could enter a new value in the blank Tracking field to apply a single tracking value to the selected text.
10. Choose File > Save Site.
Adjusting paragraph indents, margins, and spacing
Let’s continue with text formatting, as we step into working with indents, margins, and spacing.
1. Select the Selection tool in the Toolbar. If you see a dotted line toward the bottom of the larger text frame, drag the bottom, middle bounding point of the text frame down a bit until the dotted line disappears.
You can also tell when the dotted line will disappear by the measurement label that appears as you drag the bounding point. When the H and Min H values are the same, the dotted line no longer appears.
2. Select the Text tool in the Toolbar, and select the quote text that begins with “The spc team was a real find...” Click the Italic button (![]() ) in the Text panel.
) in the Text panel.

If you are familiar with a program like InDesign, you may be used to choosing a separate bold or italic font style. On the web, assigning bold or italic is perfectly acceptable for web safe or system fonts. But be careful if you apply bold, italic, or underline to text with a web font applied. You may see a warning when previewing, exporting, or publishing, which indicates that the formatting is unsupported and will need to be simulated.
3. In the Text panel, click the Align Left button (![]() ) to remove the centering from the quote text.
) to remove the centering from the quote text.
4. Change the Left Margin (![]() ) to 40 and the Right Margin (
) to 40 and the Right Margin (![]() ) to 40 as well. Change the Leading value to 140% or whatever you think looks good.
) to 40 as well. Change the Leading value to 140% or whatever you think looks good.
![]() Tip
Tip
The Left and Right Margin values can also be negative values. Using this negative value, you can pull the left and/or right side of a paragraph outside of the text frame in Muse to create some interesting type effects.
5. Change the Space Before (![]() ) to 30 and the Space After (
) to 30 and the Space After (![]() ) to 30.
) to 30.
![]() Tip
Tip
You can press the Tab key to move the cursor forward between fields or press Shift+Tab to move the cursor backward through the fields in the panels.
6. Change the Indent to 10 in the Text panel, and you’ll see that only the first line of the quote is indented. Change the Indent to –7 and you can achieve an outdent or hanging indent.
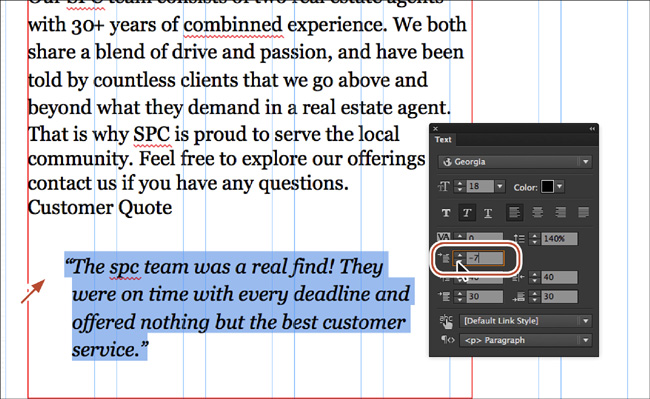
Changing the Indent to –7 moves the first line left, to the left edge of the paragraph.
At this point, using the formatting you’ve learned so far, you could also adjust the tracking between the quotation mark (“) and the text, and much more.
![]() Note
Note
In the Text panel, you’ll see the Paragraph-Level Tag menu. To learn more about the Paragraph-Level Tag menu, see the paragraph_tags.pdf file in the Lesson04 folder.
Keep in mind, however, that changing the font size of the first quotation mark (“) also changes the spacing of your paragraph. If you want a big first quote mark, you can create a separate text frame or even place an image to the left of the quote text or paste it into the text frame. You’ll learn more about working with graphics in Lesson 5, “Working with Shapes, Color, and Images.”
Changing the color and case of text
The last bit of text formatting you’ll learn about is changing the text color and changing the text case from lowercase to uppercase and vice versa.
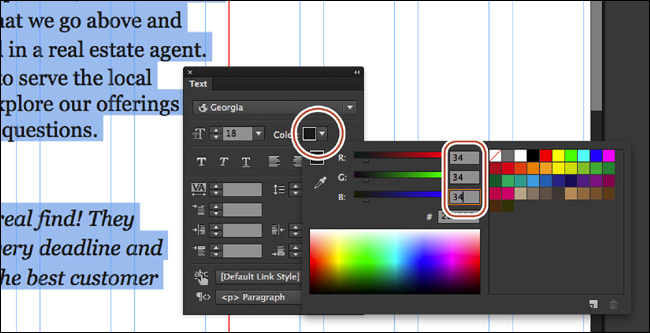
1. With the Text tool and the cursor still in the quote text frame, choose Edit > Select All to select the text.
2. Click the Color option in the Text panel (or Control panel) and change the RGB values to R: 34, G: 34, B: 34 to change the color of the text.
3. Select the “spc” text in the quote. Choose Edit > Change Case > UPPERCASE to capitalize the selected text.
4. Choose File > Save Site.
![]() Tip
Tip
You could also right-click on the text and choose Change Case > UPPERCASE.
Now that you’ve explored the text formatting options in Muse, you’ll learn how to work faster and with more consistency using paragraph and character styles.
Creating Type Styles
Using styles in Muse, you can quickly apply consistent formatting to text and make global changes across multiple pages in your site. After you create a style, you can update all of the text throughout your site that uses that particular style simply by editing the saved style. This is very similar to how styles in InDesign and Illustrator work. You can access Paragraph Styles in the Paragraph Styles panel (Window > Paragraph Styles) of Design mode.
When you publish your site for the world to see, Muse automatically converts your styles to CSS (Cascading Style Sheets) rules and applies them throughout your website.
Muse supports two types of styles:
• Paragraph styles retain text and paragraph attributes; apply them to an entire paragraph.
• Character styles retain text attributes only; apply them to selected text, such as a single character or word.
In addition, when you create a new site in Muse, a style named [None] appears by default in the Paragraph Styles panel. You can use this style to remove formatting from text to which you applied a paragraph style. As a best practice, apply text formatting using paragraph and character styles; doing so requires less effort in Muse and also makes a site that has the potential to download faster on the web. Also, text styles are shared between layouts and can be very useful when you’re editing layouts for smartphones and/or tablets. You’ll learn more about phone and tablet layouts in Lesson 10, “Designing for Mobile Devices.”
Creating and applying paragraph styles
Paragraph styles apply formatting to an entire paragraph and encompass all of the formatting options found in the Text panel, including font size, alignments, indents, and more.
Next, you’ll create a paragraph style to save the formatting for the heading text and another style for the main body text on the Team page so that you can apply that formatting elsewhere easily. Remember, after you create a style, it appears in the Paragraph Styles panel, no matter which page of the site is open.
1. Choose Window > Reset Panels.
2. Choose Window > Paragraph Styles to open the Paragraph Styles panel.
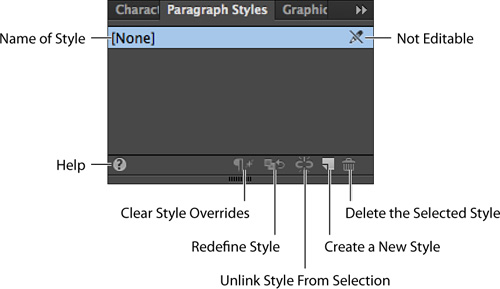
Take a minute to become familiar with the options in the Paragraph Styles panel. As you progress through this exercise, you’ll learn about each of these options.
3. With the Text tool, click three times in the first paragraph that begins with “Our SPC team consists of two ...” to select it.
![]() Note
Note
You do not have to select a paragraph to create a paragraph style. You can simply insert the cursor in the text, and then click the Create A New Style button.
4. Click the Create A New Style button (![]() ) at the bottom of the Paragraph Styles panel.
) at the bottom of the Paragraph Styles panel.
![]() Note
Note
Uppercase cannot be saved in a paragraph style.
Muse saves the formatting from the selected text as a paragraph style and adds it to the Paragraph Styles panel. By default, Muse names the new style Paragraph Style, but you can, and should, rename it.
5. In the Paragraph Styles panel, double-click the style named Paragraph Style to open the Paragraph Style Options dialog box.
![]() Note
Note
The order of text attributes in the Style Setting field may be different than what you see in the figure, and that’s OK.
6. Change the Style Name to Body.
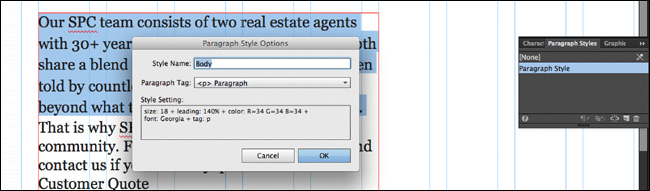
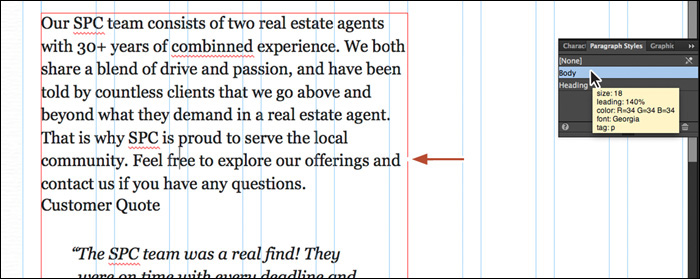
In the Paragraph Style Options dialog box, notice that the formatting options that were saved from the paragraph text appear. Also, you’ll see the Paragraph Tag menu. To learn more about the Paragraph Tag menu, see the paragraph_tags.pdf file in the Lesson04 folder.
7. Click OK.
When you create a new style from selected text, Muse does not automatically apply the style to that text; edits to the style would not affect the paragraph on which you originally based the style. To apply the new style to its paragraph of origin, you must apply the style after you make it. Double-clicking to name the style does that for you as well as lets you assign a more meaningful name to the style.
You can always tell which style is applied to text by selecting that text or inserting the cursor in it and looking in the Paragraph Styles panel where the applied style’s name will be highlighted.
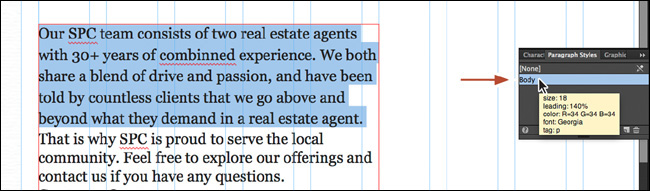
8. Position the cursor over the Body style in the list. A yellow tooltip appears, listing the style settings, which can help you to differentiate between styles with similar names.
![]() Note
Note
The order of your settings in the tooltip may be different, and that’s OK.
9. With the Text tool selected, select the header text “Our Sales Team.” Repeat steps 3 to 5, creating a new paragraph style named Heading. Make sure that in the Paragraph Style Options dialog box you choose <h1> Headline from the Paragraph Tag menu.
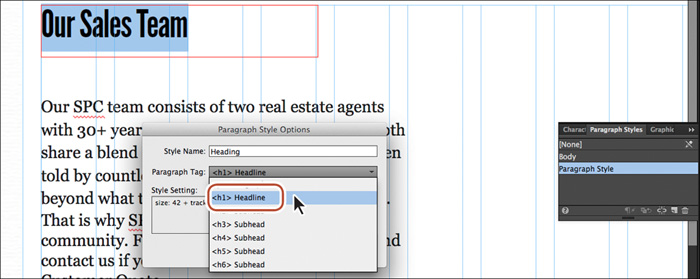
Choosing <h1> Headline from the Paragraph Tag menu means that in the HTML code that Muse generates, the HTML tag for the text with the Heading style applied will be an <h1> tag (called a heading 1). That can be very useful for search engine optimization because an <h1> tag carries more importance than a <p> (paragraph) tag, which is set by default. It can also be useful for organizing your page content to make it easier for screen readers and other assistive devices to navigate the content. You are not required to choose <h1> Headline to make your site work.
10. Insert the cursor into the paragraph that begins “That is why SPC is proud...” In the Paragraph Styles panel, click the Body style to apply it to the text.
![]() Note
Note
If the resolution of your screen allows it, you may also see the Paragraph Style menu in the Control panel. This is another way to apply paragraph styles to your text.
![]() Tip
Tip
You can remove formatting from text by applying the None paragraph style to it.
You can either simply insert the cursor in text or select the entire paragraph (or more) to apply paragraph styles.
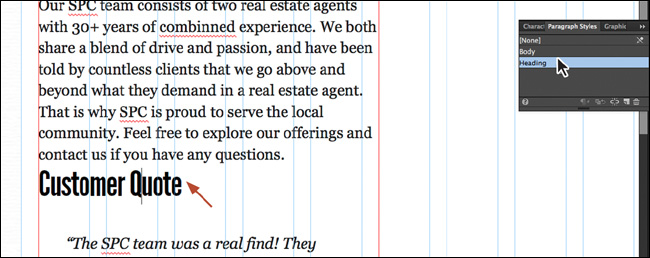
11. Insert the cursor into the paragraph that contains the “Customer Quote” text. In the Paragraph Styles panel, click the Heading style to apply it to the text.
After you create a paragraph style and begin working in your pages, you may change your mind later on and want to change the settings in the style. In Muse, when you change style settings, every paragraph that has that paragraph style applied will update.
Editing paragraph styles
In Muse, in order to change a paragraph style you need to redefine the style. To redefine a style, you edit the formatting for text that has the paragraph style applied. Then you redefine the style based on the changes. This makes the paragraph style match the new settings, and all other paragraphs with that style applied automatically update to match.
1. With the Text tool, select the heading text “Our Sales Team.” In the Control panel, change the Font Size to 48.
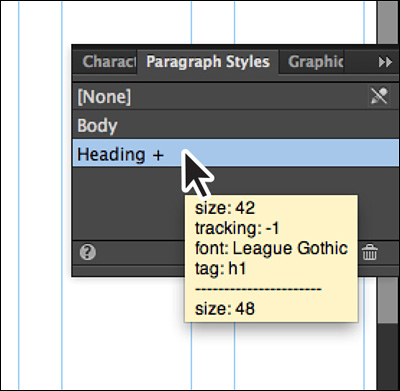
Look in the Paragraph Styles panel. You can tell that the style named Heading is applied because it is highlighted, but you’ll also now see a plus (+) to the right of the name. The plus indicates local formatting on the selected text. Local formatting means that there is formatting on the selected text that is different from the paragraph style applied to it.
2. Position the pointer over Heading+ in the Paragraph Styles panel. A yellow tooltip appears displaying the style settings, a dashed line (-----), and then size: 48. Settings listed below the dashed line indicate formatting on the selected text that is not a part of the applied paragraph style.
3. Click the Clear Style Overrides button (![]() ) at the bottom of the Paragraph Styles panel to remove the font size applied to the heading text.
) at the bottom of the Paragraph Styles panel to remove the font size applied to the heading text.
This strips the formatting from the selected text and reapplies the currently applied paragraph style. The plus (+) sign that was displayed to the right of the paragraph style’s name disappears once you click the Clear Style Overrides button.
![]() Tip
Tip
To clear the overrides on selected text, you can also right-click the style name in the Paragraph Styles panel and choose Clear Overrides.
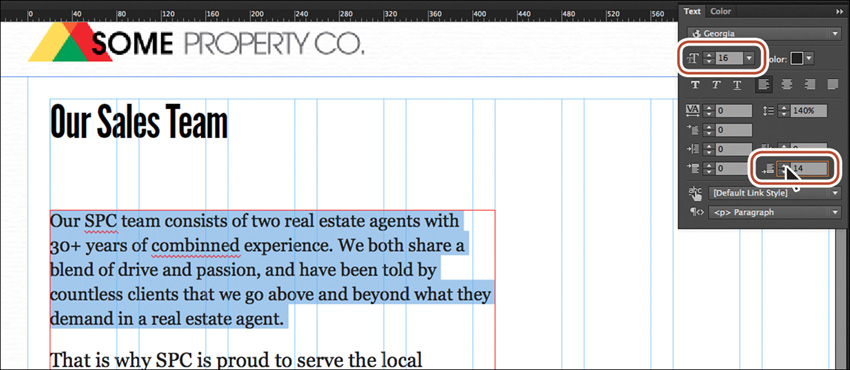
4. With the Text tool, select the entire first paragraph that starts with the text “Our SPC team consists of two ...” and ends with the text “...what they demand in a real estate agent.” In the Text panel, change the Font Size to 16 and the Space After to 14.
![]() Tip
Tip
For any value in a field that you want to change, you can select the value in the field (like the 140% in the Leading field) and press the up or down arrow to change the value. You can also press and hold the Shift key while pressing the up or down arrows to change the value in larger increments. Additionally, while a field is selected, you can press the up or down arrow keys on your keyboard, or Shift-click the up and down arrow keys to increase/decrease the value by 10.
Look in the Paragraph Styles panel and you’ll see a plus appear next to the style named Body. Instead of clearing the overrides (removing the extra formatting), you’ll change the style to match the formatting of the selected paragraph.
5. Click the Redefine Selected Style button (![]() ) at the bottom of the Paragraph Styles panel.
) at the bottom of the Paragraph Styles panel.
Notice that the plus is gone from the right of the Body style name and that the paragraph below the selected paragraph has updated to reflect the new formatting. The last paragraph, below the “Customer Quote” heading, will not change, though. It doesn’t have the paragraph style applied and that’s okay.
![]() Tip
Tip
To redefine a style, instead of clicking the Redefine Selected Style button, you can right-click the style name and choose Redefine Style.
6. Choose File > Save Site and leave the first paragraph selected for the next section.
Duplicating and deleting paragraph styles
In Muse, you may wind up creating multiple paragraph styles that are very similar to each other. For instance, you may want to create two versions of the Body style with the only difference being the font size for different layouts. In that case, instead of creating a whole new style to closely match another, you can duplicate an existing style and adjust the formatting as necessary.
1. In the Paragraph Styles panel, right-click the style named Body, and choose Duplicate Style to create an exact copy of the style. Muse names it, not surprisingly, “Body copy.”
2. Right-click the new style (Body copy) and choose Rename Style. Change the name of the style to Body 18, and press Return (Enter).
Renaming a style this way does not apply the new style to any selected text.
To change the Body 18 style, you’ll redefine the style. First, you need to apply the style to some text.

3. Click Body 18 in the Paragraph Styles panel to apply it to the selected first paragraph. The paragraph will not change in appearance because the style is just a duplicate with the same attributes.
4. Change the Font Size in the Control panel to 18 by typing 18 and pressing Return (Enter).
5. Click the Redefine Selected Style button at the bottom of the Paragraph Styles panel to update the Body 18 style to match the selected text.
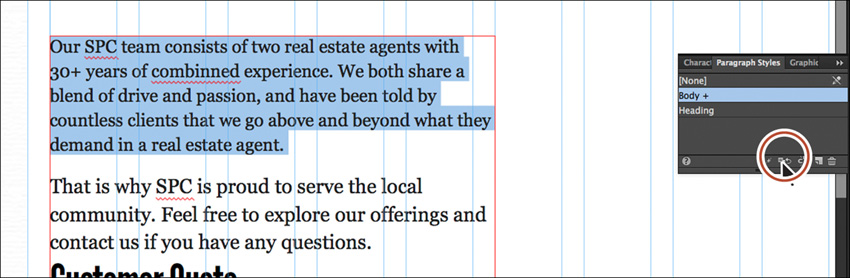
Now you’ll use the new Body 18 style in place of the Body style. To do so, you can simply apply the new style to selected text and keep the original Body style, or you can delete the original Body style (if you no longer need it), and Muse allows you to choose a style to replace it with. You will do the latter.
6. Choose Edit > Deselect All in preparation for deleting the style.
7. In the Paragraph Styles panel, select the Body style. Click the Delete The Selected Style button (![]() ) at the bottom of the panel.
) at the bottom of the panel.
![]() Tip
Tip
To delete a style, you can also right-click the style name and choose Delete Style.
8. In the dialog box that appears, choose Body 18 and click Replace.
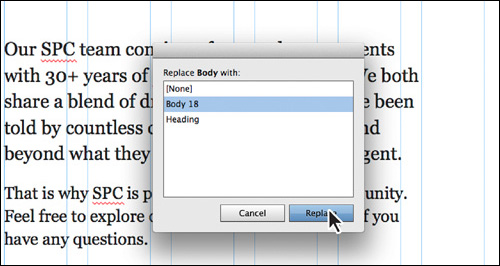
The Body style is now gone and the first two paragraphs have the Body 18 style applied. Notice that the text now displays using the specified font size.
9. Choose View > Hide Guides to temporarily hide the guides and get a better sense of what the text looks like on the page.
10. Choose View > Show Guides to show the guides again.
![]() Tip
Tip
If you start to lose track of which of your many styles are actually in use in your site, Muse offers a quick solution. Right-click a style name in the Paragraph Styles panel or the Character Styles panel, and choose Delete Unused Styles to delete all the styles that you are not using. Bear in mind that you’ll need to clean out the Paragraph Styles and Character Styles panels separately.
![]() Tip
Tip
You can also unlink a paragraph style by selecting text that has a paragraph style applied and then clicking the Unlink Style From Selection button (![]() ) at the bottom of the Paragraph Styles panel. Unlinking a style from text can be helpful when you want to apply the styling to the text but later don’t want the text to update if the style updates, for example.
) at the bottom of the Paragraph Styles panel. Unlinking a style from text can be helpful when you want to apply the styling to the text but later don’t want the text to update if the style updates, for example.
Creating and applying a character style
Paragraph styles apply attributes to an entire paragraph, but you can only apply character styles to selected text. Character styles can include only the following formatting options: font, font size, color, styles (italic, bold, underline), and tracking. You access character styles from the Character Styles panel (Window > Character Styles).
Next, you’ll format the company name, SPC, and apply that formatting throughout the page using a character style. As with paragraph styles, once you create character styles, they appear in the Character Styles panel if any page in any layout in the site is open.
1. Click the Character Styles panel tab on the right side of the workspace (or choose Window > Character Styles).
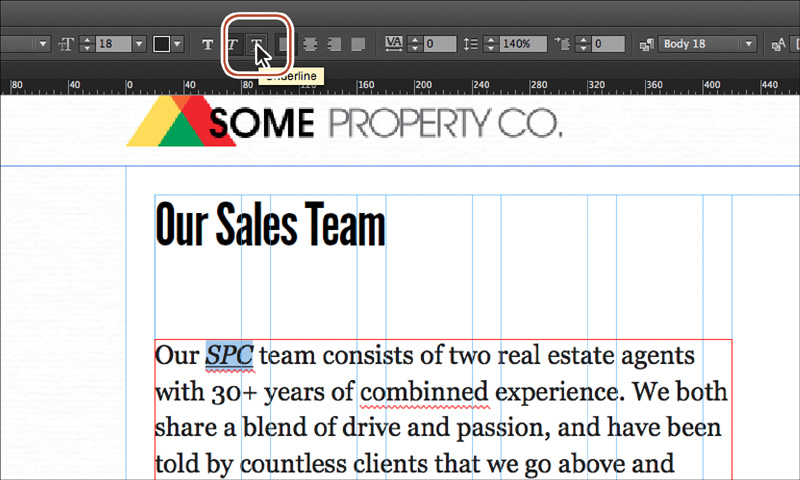
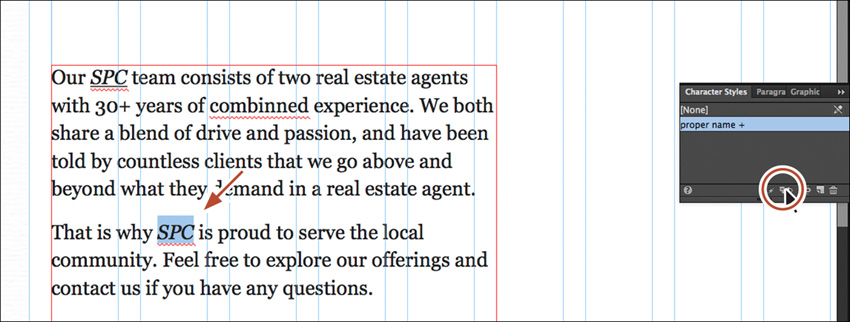
2. With the Text tool selected, select the text “SPC” in the first paragraph that begins with “Our SPC team consists of....”
3. Click the Italic button (![]() ), and then click the Underline button (
), and then click the Underline button (![]() ) in the Control panel.
) in the Control panel.
4. With the text “SPC” still selected, click the Create A New Style button (![]() ) at the bottom of the Character Styles panel.
) at the bottom of the Character Styles panel.
Position the pointer over the new style named Character Style, and you’ll see the saved formatting appear in a yellow tooltip, just like in a paragraph style.
5. Double-click the new style named Character Style. In the Style Options dialog box, change the Style Name to proper name and click OK.
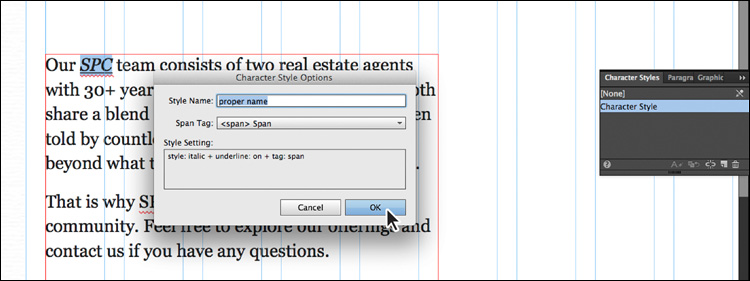
As with a paragraph style, by double-clicking the name of the new character style right away, you also apply it to the selected text from which the style was made.
![]() Tip
Tip
You may also see the Character Style menu in the Control panel. This is another way you can apply a character style.
6. Select the text “SPC” in the next paragraph.
7. Click the style named “proper name” in the Character Styles panel to apply that formatting to the text.
8. Choose File > Save Site, and leave the SPC text selected.
Editing a character style
Editing a character style and the rest of the options in the Character Styles panel work identically to the Paragraph Styles panel.
1. With the “SPC” text still selected, remove the underline on the text by clicking the Underline button (![]() ) in the Control panel.
) in the Control panel.
2. Click the Redefine Selected Style button (![]() ) at the bottom of the panel.
) at the bottom of the panel.
Notice that the plus is gone from the right of the proper name style name and that the other SPC text has updated to reflect the new formatting.
3. With the Selection tool, drag the larger text frame up so that it is closer to the Our Sales Team heading above it. See the figure for placement help.

4. Click the Preview mode link to see the page in Preview mode.
5. Click the Design mode link to return to the page.
6. Choose File > Save Site and leave the Team page open for the final section of this lesson.
Working with the spell checker
Muse comes with the ability to check spelling, which is enabled by default. Words that are not recognized by the default dictionaries display a red underline. Muse comes with two main dictionaries: a Global dictionary and a language-based dictionary. Next, you’ll explore spell check using the Team page text.
1. With the Team page still open in Design mode, choose Edit > Spelling and make sure that Dynamic Spelling has a check mark next to it, indicating that it’s on.
You should see that several words on the page have red underlines, which means they are not recognized by the Muse dictionary, as mentioned earlier.
2. With the Text tool, right-click the red underlined word “combinned” in the first paragraph of text. (You may need to insert the cursor in the word first.) A context menu appears that shows replacement suggestions as well as options to add the word to one of two dictionaries. Choose “combined” to correct the spelling.
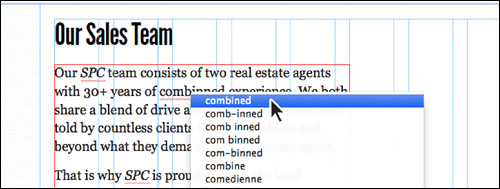
The word should now be spelled correctly and the red underline should disappear.
Now you’ll add “SPC” to the Global dictionary so that Muse will recognize it in the future. As mentioned at the beginning of this section, Muse includes a Global and a language-based dictionary. The Global dictionary applies to all content across all sites you create regardless of language.
![]() Tip
Tip
When the context menu appears after right-clicking a word with the red underline, you can also press the down arrow key to select the suggested word you want to use, and then press Return (Enter) to apply it.
3. In the first sentence in the first paragraph, right-click the “SPC” text with the red underline and choose Add “SPC” To Global Dictionary.
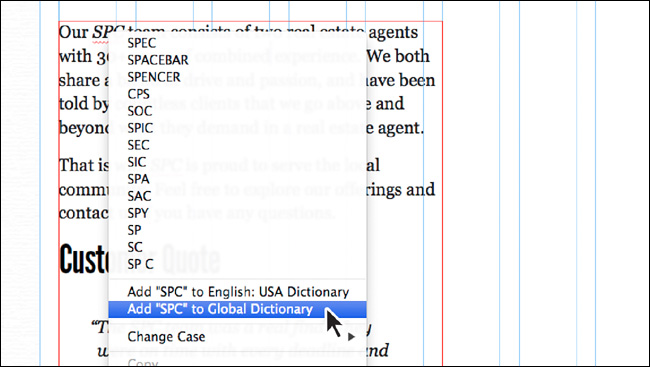
Once the word is added to the Global dictionary, the red underlines should disappear from all occurrences of the word SPC.
![]() Note
Note
Words you add to the dictionary are case sensitive, so lowercase “spc” would still have a red underline.
Words added to either the Global or language dictionaries can be manually added or even removed from the dictionary using several methods.
4. Right-click the “SPC” text and in the context menu you’ll see Remove “SPC” From Global Dictionary.” Don’t choose it.
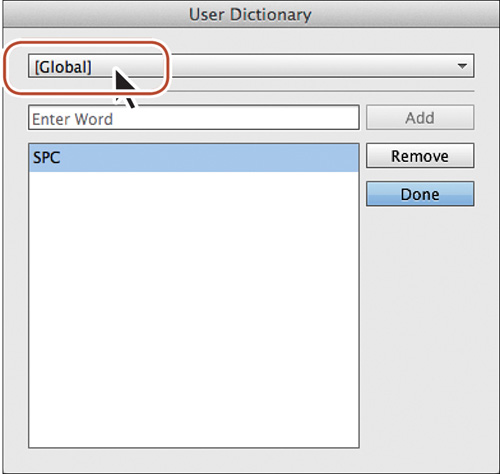
5. Choose Edit > Spelling > User Dictionary. The default language dictionary will appear in the top menu. Choose [Global] from that same menu to see the “SPC” word added to the dictionary.
![]() Note
Note
“SPC” will be in your dictionary from now on, so you may actually want to remove it now (or later) by clicking Remove, because we used it purely as a demonstration.
In the User Dictionary dialog box, you can add or remove words to dictionaries by typing in the word and clicking Add, or selecting a word in the list and clicking Remove.
You can change the dictionary language (which in turn sets the language dictionary) for the program, for an entire site, and for individual text frames. So, suppose that most of the content within a site is English, but you have some content in another language. You can set the main dictionary language in the Site Properties to English, and then select the text frame(s) that the other language appears in and set a different dictionary language for those.
7. Choose Adobe Muse CC > Preferences (Edit > Preferences). In the Preferences dialog box, you’ll see a setting for Language. This is the dictionary language that sets the language for all new Adobe Muse sites. Click Cancel.
8. Choose File > Site Properties. In the Site Properties dialog box, click the Content tab, and you’ll see another Language option. This dictionary language setting controls the dictionary for the active site only. Click Cancel.
You can also set the language for a text frame.
9. Right-click the text frame that contains “SPC.” If you wanted to use a different language dictionary for the text frame, you could choose Language > (choose a language). Only that text frame will use the selected dictionary.
The last step you will take is to edit the margins on the master page. Looking at the text, it seems too close to the edge of the page.
10. Click the Plan mode link to return to Plan mode.
11. Right-click the Home-master page and choose Page Properties. In the Page Properties dialog box, change the Margin for Top, Bottom, Left, and Right to 50. Click OK.
12. Click the Team document tab at the top of the Document window.
13. With the Selection tool, Shift-click the text frames on the page to select them both and drag them so that they snap into the reposition margin guides (see the figure).
14. Choose File > Save, and then choose File > Close Page to return to Plan mode.
In the next lesson, you’ll explore how to create and edit shapes as well as create and edit color in Muse.
Review questions
1. Describe how layers can be useful in your Muse site.
2. Name four ways that you can add text to your pages in Muse.
3. Explain the purpose of Smart Guides.
4. What are the three categories of fonts that you can use in Muse?
5. What is the difference between a character and a paragraph style?
Review answers
1. Layers allow you to organize content and make your projects easier to update. You can create and edit specific areas or kinds of content on the page without affecting other areas or accidentally changing other content. You can also place content that rarely updates in one layer while keeping content that you’ll update frequently on a different layer of the same page. Using layers also allows you to set the stacking order to arrange elements to display above or behind each other.
2. In Muse, you can type text directly into your pages after creating a text frame using the Text tool; you can paste text from almost any other application (the formatting will be lost); you can choose File > Place to place a .txt file; or you can copy text from another Muse site and paste the text into the site, retaining the formatting (and styles) of the text content.
3. Smart Guides are temporary snap-to guides and visual aids that appear when you create or manipulate objects. They help you align, edit, and transform objects relative to other objects, page guides, or both by snap-aligning and sometimes displaying gap measurements to help evenly space multiple objects.
4. The three categories of fonts that you can use in Muse are web fonts, web safe fonts, and system fonts.
5. Paragraph styles apply attributes to an entire paragraph, but character styles can be applied to selected text only. Character styles can include only the following formatting options: font, font size, color, styles (italic, bold, underline), and tracking.