
5. Using Illustrator Artwork in Indesign
Lesson overview
In this lesson, you’ll learn how to do the following:
Correctly set up Illustrator layers and artboards for placing into InDesign.
Override Illustrator layers from InDesign.
Place one or more Illustrator artboards in InDesign.
Choose between layers or artboards in Illustrator.
Paste Illustrator artwork into InDesign.

This lesson will take about 75 minutes to complete. Please log in to your account on adobepress.com/DesignCIB to download the files for this lesson, or go to the “Getting Started” section at the beginning of this book and follow the instructions under “Accessing the lesson files and Web Edition.” Store the files on your computer in a convenient location.
Your Account page is also where you’ll find any updates to the lesson files. Look on the Lesson & Update Files tab to access the most current content.

This lesson teaches you how to master the process of bringing vector artwork from Illustrator into InDesign. You’ll learn the differences between placing and pasting artwork, and the importance of artboards and layers.
Using Illustrator layers in InDesign
In the following exercise you’ll learn how to override Illustrator layers in InDesign. You’ll notice that this workflow is similar to the one you learned in Lesson 3, “Using layered Photoshop files in InDesign,” but there are important differences.
Getting started
You’ll start the lesson by viewing an image of the final composition and placed artwork.
Start Photoshop, and choose Photoshop > Preferences > General (macOS) or Edit > Preferences > General (Windows).
The Photoshop Preferences dialog box opens.
Click Reset Preferences On Quit and click OK in the confirmation dialog box. Then restart Photoshop.
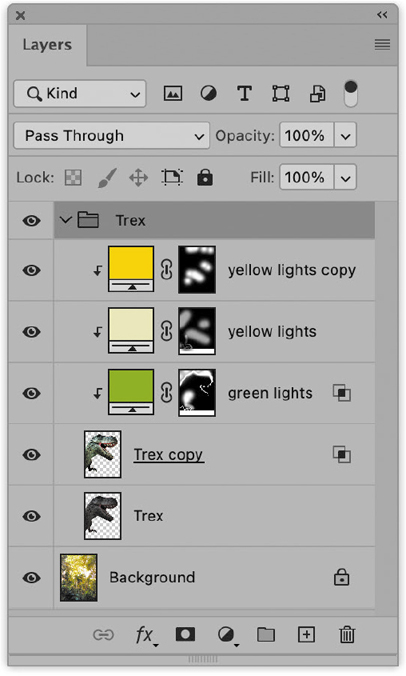
From the Lesson05/Imports folder, open trex.psd.
Note that all the layers that make up the T-rex are grouped separately from the Background layer.
Close the file without saving.
Start Illustrator, and choose Illustrator > Preferences > General (macOS) or Edit > Preferences > General (Windows).
The Preferences dialog box opens.
Click Reset Preferences, then click OK to close the dialog box.
Click Restart Now in the confirmation dialog box to restart Illustrator and reset preferences.
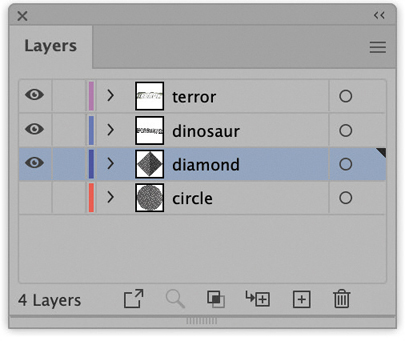
From the Lesson05/Imports folder, open dino-logo.ai.
Choose Window > Layers to display the Layers panel.
Notice that there is a hidden layer, which we’ll use to display an alternative version of the logo in InDesign.
Close the file without saving.
Start InDesign, and then press Control+Option+Shift+Command (macOS) or Alt+Shift+Ctrl (Windows) to restore the default preferences.
When prompted, click Yes to delete the Adobe InDesign Settings file.
From the Lesson05 folder, open L05-dino-ad-end.indd.
This dinosaur ad features the placed trex.psd document and the dino-logo.ai Illustrator logo. Note that the dinosaur partially overlaps the logo. To achieve this, we’ll use the same technique as in Lesson 3 (the alpaca magazine cover project), which uses layer overrides.
Close L05-dino-ad-end.indd without saving.

About Illustrator layers
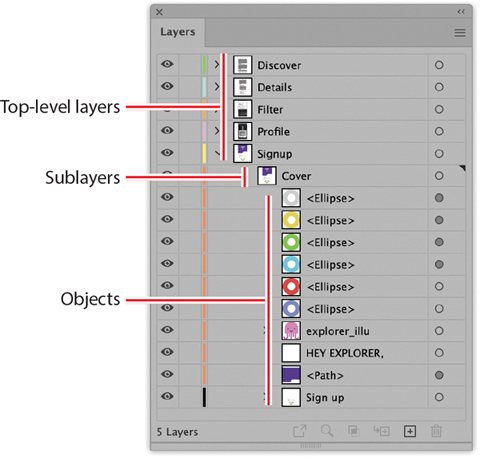
Adobe Illustrator’s layer system works differently from that of Photoshop. In a nutshell, Illustrator uses a hierarchy that consists of three “levels.” And it’s important to understand how this works in order to properly override Illustrator layers from within InDesign.
Top-level layer: This is the highest level in the layer hierarchy in a document. Each layer comes with its own color and name, as well as other options, which can be set by double-clicking the layer name. A layer can be viewed as a sort of folder that can hold the elements you draw in Illustrator, and it can even hold other layers (sublayers) that each hold their respective objects.
Sublayer: This is a layer that was dragged into an existing layer in order to create a second level. Using sublayers allows you to place a set of objects into another group of objects. This is not to be confused with the Group command in the Object menu. Because a sublayer is merely a normal layer that was dragged down one level (or created directly using the Layers panel), you can still double-click it in order to set specific layer options.
Object: Every object you draw or place in Illustrator is listed in a layer or sublayer and is enclosed with < > characters by default.
If you want to override Illustrator layers from within InDesign, make sure that all objects you want to show or hide are located on a top-level layer (not a sublayer), since sublayers can’t be overridden in InDesign.
Placing the Illustrator logo
Return to InDesign and open L05-dino-ad-start.indd from the Lesson05 folder.
Choose File > Save As, and save the file as L05-dino-adWorking.indd.
Choose Window > Layers to view the Layers panel.
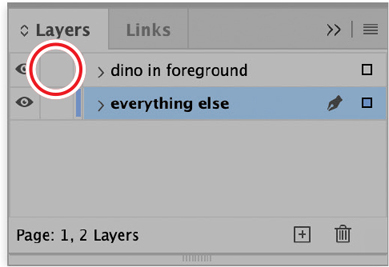
Notice there are two layers, one of which is locked. The locked layer (dino in foreground) holds a graphics frame that holds the T-rex Photoshop composition (trex.psd). If you look closely you can see the diagonal red frame edge running across the page. The bottom layer (everything else) holds the same dinosaur PSD file, plus an additional text frame.

Make sure the bottom layer (everything else) is selected in the Layers panel.
Choose File > Place.
Navigate to the Lessson05/Imports folder and select dino-logo.ai.
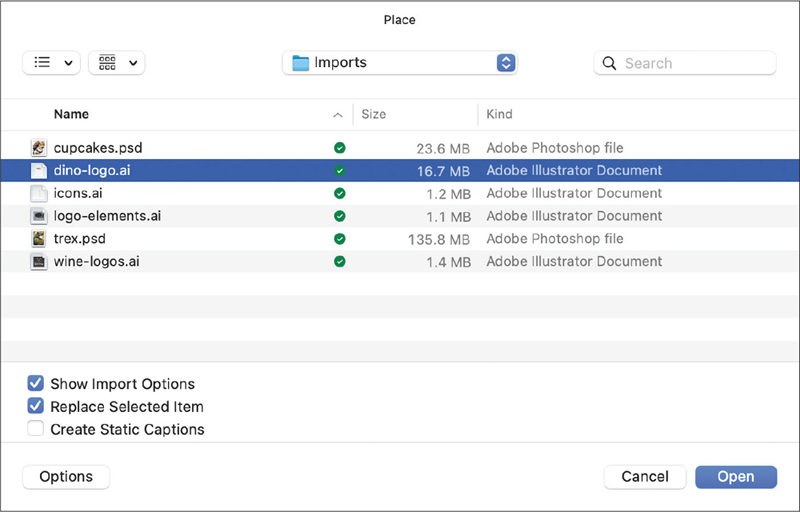
Make sure Show Import Options is selected at the bottom of the dialog box, and click Open.
In the Place PDF dialog box, make sure Transparent Background is selected. This will ensure no white background appears behind the artwork.
Click OK to continue placing the logo.
With the loaded cursor, drag to place the logo at approximately 140% of its original size onto the page.

The logo is partially overlapped by the duplicate T-rex composition, which is located in the locked layer. We now need to hide the background of that placed PSD file in order to have only the T-rex itself overlap with the logo. This will create a sense of depth, just like we did with the alpaca magazine cover in Lesson 3.
In the Layers panel, click the lock icon of the top-most layer to unlock it.
Use the Selection tool
 to select the overlapping T-rex image, and choose Object > Object Layer Options.
In the Object Layer Options dialog box, click the eye icon next to the layer named Background in order to hide it.
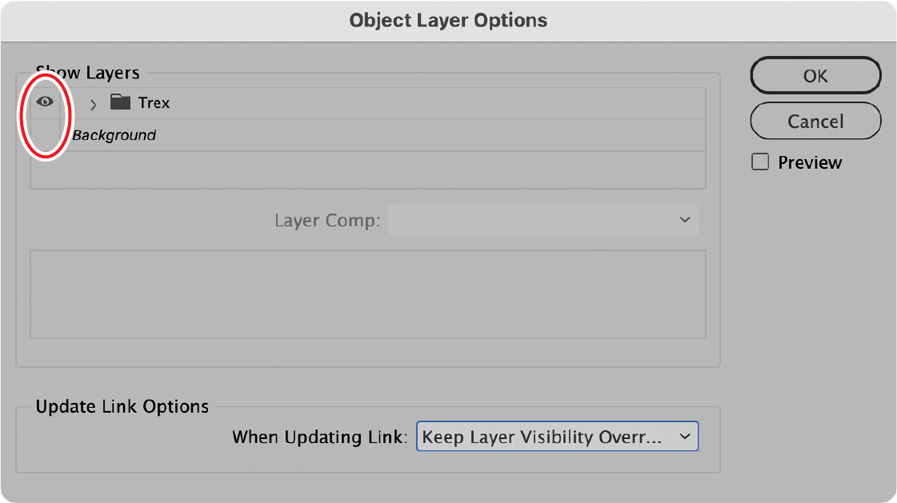
Click OK to close the dialog box.
Using the Layers panel, lock the top layer again.
With the background hidden, we can see that only the T-rex is left and is overlapping with the logo.
Use the Selection tool
to move and center the logo on the page.
Overriding Illustrator layers
Now you’ll change the look of the Illustrator logo by overriding the layers from InDesign.
Select the placed logo using the Selection tool
.Choose Object > Object Layer Options.
From the Object Layer Options dialog box, deactivate the diamond layer and activate the circle layer.
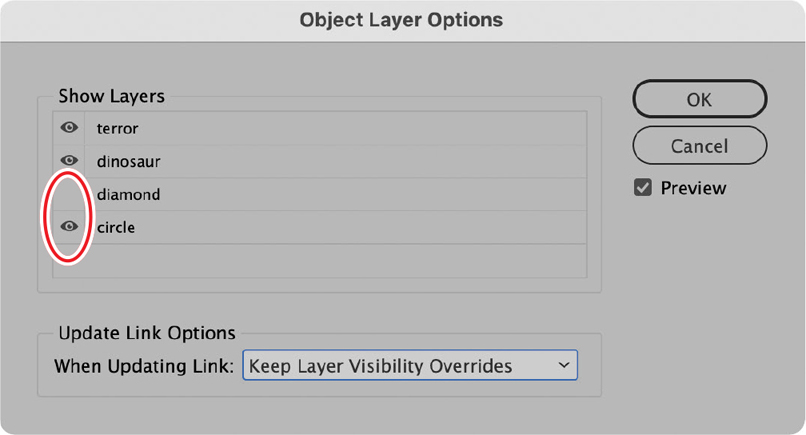
Click OK to close the dialog box.
We now have a different version of the logo in InDesign, while the original linked Illustrator document remains unaltered.

Changing InDesign File Handling preferences
As described in Lesson 3, there is a risk of InDesign undoing your layer overrides if you alter the layer structure of the Illustrator file after placing. The specific actions that we need to be careful of when altering the original file are:
Adding or removing layers
Renaming layers
Changing the order of existing layers
Changing the visibility of existing layers
![]() Note
Note
This preference applies to placed Illustrator, InDesign, and PDF documents. It doesn’t apply to placed Photoshop documents.
Fortunately, an option in InDesign Preferences allows us to partially bypass InDesign’s default behavior of resetting a placed file to its default layer visibility. To set this option:
In macOS: Choose InDesign > Preferences > File Handling.
In Windows: Choose Edit > Preferences > File Handling.
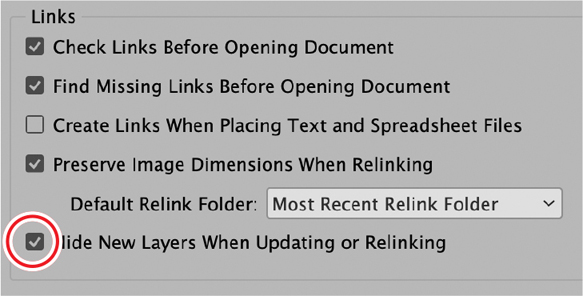
In the File Handling pane of the Preferences dialog box, select Hide New Layers When Updating Or Relinking and click OK to close the dialog box.
When this option is selected, adding new layers to an already placed and overridden Illustrator document will no longer result in an error that causes the overridden layers to be reset. But keep in mind that all other actions described above will still result in a layer reset in InDesign.
Creating an additional version
Now that we’ve changed InDesign’s preferences, we can go ahead and add an additional layer to the Illustrator logo without accidentally resetting the layer visibility in InDesign.
In Illustrator, open dino-logo.ai from the Lesson05/Imports folder.
Choose Window > Layers to view the Layers panel.
Drag the terror layer onto the New Layer button in the Layers panel to duplicate it.
Click the eye icon of the original terror layer to hide it.
Double-click the newly duplicated layer name and rename it island; press Return/Enter to confirm.

Using the Selection tool
 , double-click the text element to edit the text. Remove the word TERROR and replace it with ISLAND.
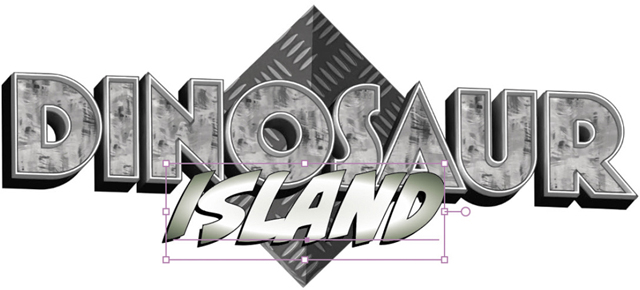
Save and close the file.
Return to InDesign.
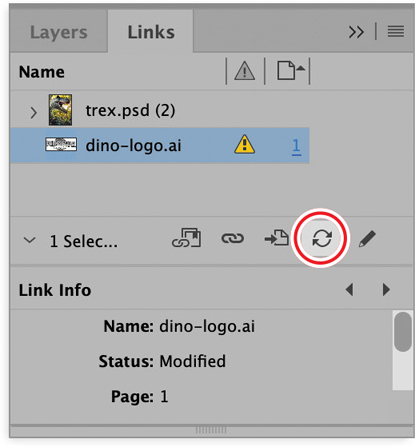
In the Links panel, click the Update Link button to update the outdated Illustrator file.
The logo still displays TERROR, as it did before relinking, because InDesign will honor layer overrides and we haven’t instructed InDesign to hide the terror layer yet.

 Tip
TipA quick alternative way of updating an out-of-date graphic is to use the Selection tool to click the triangle icon in the corner of the graphics frame on the page.
Select the logo in the layout.
Right-click the selected logo and choose Object Layer Options.
Notice that the newly created island layer is listed and hidden. Unhide the island layer and hide the terror layer.
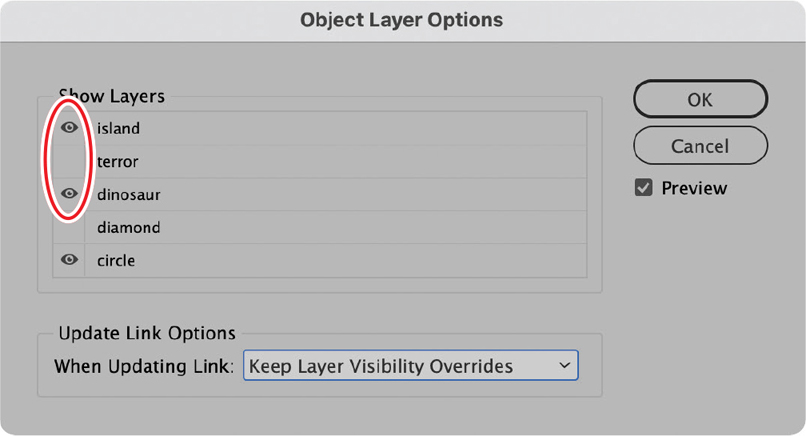
Click OK to close the dialog box.

Save your work and close the file.
TipSee Lesson 3 to learn how to spot layer overrides in InDesign by using the Links panel or by creating a custom preflight profile.
Because we added an additional layer to the placed logo in Illustrator, we’d normally receive an error message in InDesign telling us all overridden layers will be reset to their defaults if we choose to update the file. But the new File Handling preference setting avoided this behavior. Also notice that the island layer was hidden when we accessed the Object Layer Options, while the layer was still visible in the original Illustrator file.
Using Illustrator artboards in InDesign
![]() Note
Note
This book assumes that InDesign and Illustrator are using their default settings. If you are unsure of how to return to the default settings, review the steps in the section “Linking a Photoshop document in Illustrator” in Lesson 2, “Enriching Illustrator Artwork with Photoshop Content.”
In this exercise you’ll create a flyer by placing artwork from Illustrator artboards in InDesign, and you’ll see that this can be a great alternative to overriding Illustrator layers.
Getting started
You’ll start the lesson by viewing an image of the final composition and placed artwork.
From Illustrator, open wine-logos.ai from the Lesson05/Imports folder.
Reset the Illustrator workspace by choosing Window > Workspace > Essentials, followed by Window > Workspace > Reset Essentials.
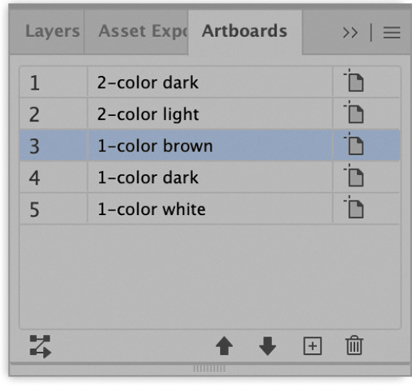
Choose Window > Artboards to display the Artboards panel. Notice that all artboards have been uniquely named.
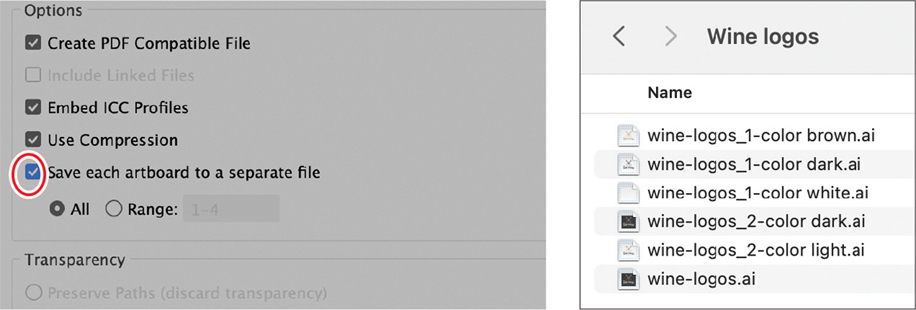
This Illustrator document contains five different versions of the same logo, each on a separate artboard. When you place this document in InDesign, you can choose which version of the logo to use depending on the situation.
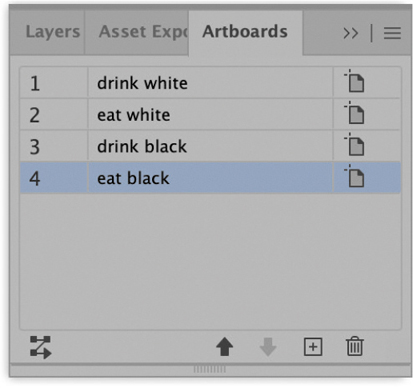
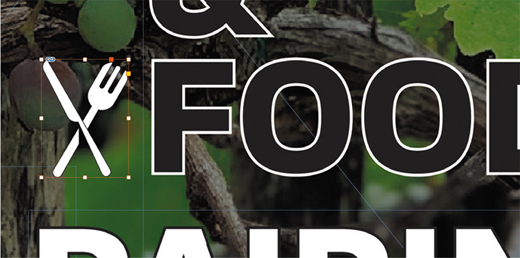
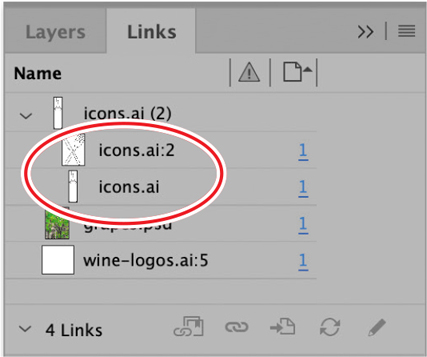
Open icons.ai from the Lesson05/Imports folder.
This document has four artboards with white and black icons.
Close the file.
In InDesign, open L05-wine-food-end.indd from the Lesson05 folder.
Reset the InDesign Workspace by choosing Window > Workspace > Essentials and then choosing Window > Workspace > Reset Essentials.
The InDesign document uses one of the five logos from wine-logos.ai and the white icons from icons.ai.

Close the file.
Placing an artboard in InDesign
As you learned in Lesson 1, “Workflows and File Formats,” when you place an AI file in InDesign you’re placing a PDF version of that Illustrator document. That’s why the title of the Import Options dialog box in InDesign reads Place PDF when you place an Illustrator file. This also means the options in the dialog box are PDF-specific; the options most relevant to an Illustrator file are:
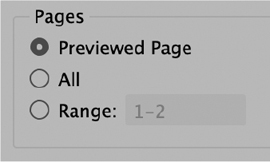
Pages: Use the Pages option to specify the artboard or artboards in the AI file that you want to place in the InDesign document.
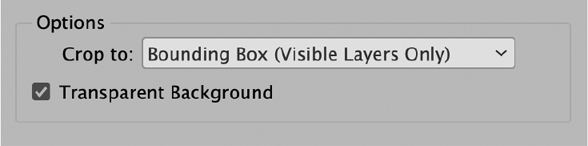
Cropping: The Crop To option allows you to choose a PDF page box setting. This is a predefined zone within the file reserved for print-specific purposes. For example, Bleed refers to the PDF BleedBox, which defines the region of the entire page, including the bleed area. The more familiar you are with printing and prepress-specific options when working with PDF, the higher the chance that this sounds familiar to you.
Here is a quick rundown of how to use cropping options to your advantage when placing Illustrator documents: choosing Bounding Box will place the objects in visible (or all) layers, Trim will place the entire artboard, and Bleed will place the entire artboard—including the document bleed. The other crop options won’t have a different effect when placing Illustrator documents, as the regions they refer to can’t be set in Illustrator.
Now that we’re familiar with the basics, let’s take a look at how you can place or update artboards in InDesign.
From InDesign, open L05-wine-food-start.indd from the Lesson05 folder.
Choose File > Save As and save your file as L05-wine-foodWorking.indd.
Choose Window > Layers to display the Layers panel.
Click the top (red) layer to highlight it.
We need to place the company logo on the flyer and have five different logo versions to choose from. We’ll choose the brown version first and see if it’s a good match with the design.
Choose File > Place, navigate to the Lesson05/Imports folder, and select wine-logos.ai.
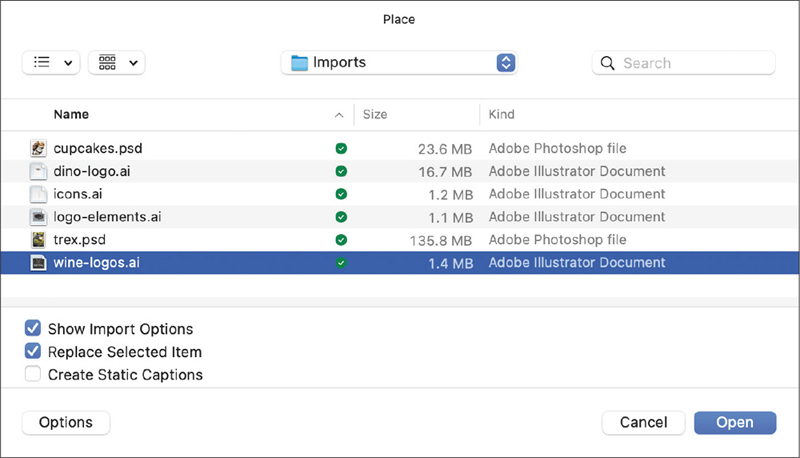
Make sure Show Import Options is selected, then click Open.
In the Place PDF dialog box, use the navigation arrows below the Preview window to navigate to page 3, which is the brown logo.
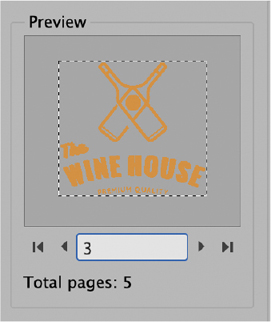
Make sure Show Preview is selected under the Pages option and that Transparent Background is also selected.
Because we want to place only the logo artwork without the artboard, it’s important to leave the Crop To option at its default setting: Bounding Box (Visible Layers Only).
Click OK to confirm.
With the loaded cursor, drag to place the logo on the page at roughly 50% of its original size (the cursor preview will show its size during dragging).
Using the Selection tool
, move the logo to the right side of the vertical white line, aligning its left side with the word PAIRING. Then deselect.
Changing to a different artboard
Unfortunately, there is no menu, hidden panel, or other option in InDesign that will change to a different Illustrator artboard after its initial import. The only method available for switching between artboards is to relink the placed Illustrator file with itself while triggering the Import Options dialog box again. We could use the Place command again, but this time we’ll use the Links panel instead.
As we continue the current exercise, notice that the brown logo isn’t as legible against the dark background as we’d hoped. So we need to change the brown logo to the white logo.
Use the Selection tool
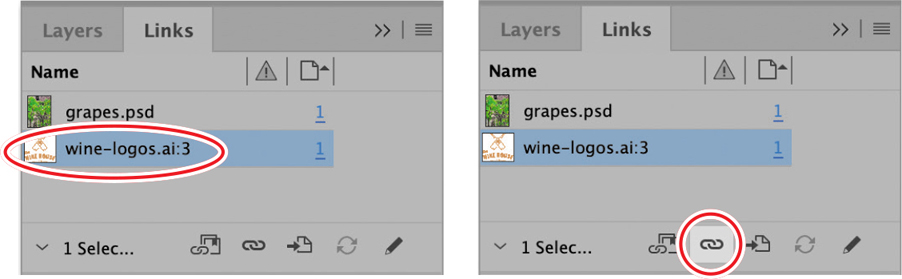
to select the placed logo.Choose Window > Links to display the Links panel.
Note that the selected logo is highlighted in the Links panel, and its name reads wine-logos.ai:3. The number at the end of the filename represents the number of the placed artboard. Unfortunately, it’s not possible to also display the name of the artboard.
In the Links panel, click the Relink button.
 Note
NoteIf you can’t see the Show Import Options checkbox, click the Options button.
Navigate to the Lesson05/Imports folder and select wine-logos.ai. Make sure Show Import Options is selected.
Click Open.
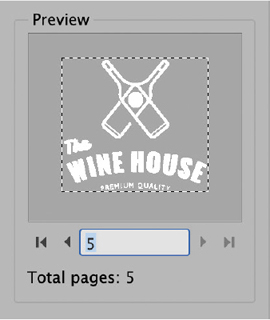
In the Place PDF dialog box, select the last page (that is, the last artboard) of the file and click OK to replace the brown logo with the white logo.
Deselect the logo and keep the file open.
Placing multiple artboards
Next we’ll place multiple artboards at once—in this case, two icons from a different Illustrator document.
Choose File > Place.
In the Lesson05/Imports folder, select icons.ai.
Make sure Show Import Options is selected, then click Open.
In the Place PDF dialog box, cycle through the different pages using the Preview option.
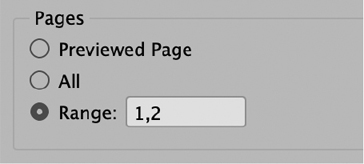
Note that there are two white icons and two black icons. For this exercise we need to use the white icons, which are on pages 1 and 2.
In the Pages area, click Range and enter 1,2.
Leave all other options at their default settings.
Click OK.
Drag in the InDesign document with the loaded cursor to place the first icon. Its size should not be larger than the height of the word WINE on the page.

Now do the same for the second icon, giving it approximately the same size.
Position the bottle icon to the left of the word WINE and position the food icon to the left of the word FOOD.
Select both icons, and click the Align Horizontal Centers button in the Properties panel to center both icons.
Revisit the Links panel and note that the two placed icons are listed under the same placed file, but each with different previews and artboard page references.
NoteWhen you package an InDesign document that holds a multi-artboard Illustrator file, the entire Illustrator file—not only the placed artboards—will be included in the package.
Save and close the file.
Converting artboards to files
There will be occasions when you need to step away from creating multiple artboards in a single Illustrator file and instead save every artboard in separate Illustrator files. For example, imagine you have a file that holds 15 different icons, all positioned on separate artboards. An external party requests that all the icons be delivered to them as separate Illustrator files for processing or distribution purposes.
We need to avoid having to manually select the icons one by one and paste them into 15 new Illustrator files. Luckily for us, Illustrator makes it easy for us to split artboards into separate files:
In Ilustrator, open Lesson05/Imports open wine-logos.ai if it isn’t already open.
Choose File > Save As.
Navigate to your desktop and create a new folder called Wine logos.
Leave the file format as Adobe Illustrator AI, and click Save.
In the Illustrator Options dialog box, select Save Each Artboard To A Separate File.
Click OK.
Illustrator exports all artboards to separate AI files. Each file takes its name from the source file, with the artboard name appended to it.
Close the file.
Should you use layer overrides or artboards?
Now that you’ve learned how to override Illustrator layers and place Illustrator artboards in InDesign it’s time to evaluate some of the arguments for and against both techniques.
But before we get into that it’s important to realize that it is not always necessary to make that choice, because the techniques are not mutually exclusive. This means that you can choose to place one of multiple Illustrator artboards that themselves contain artwork that consists of multiple layers, and these can also be overridden in InDesign.
To take one example, imagine you’re working on an illustration of a world map in Illustrator for an international client. Your Illustrator file is quite complex, with many paths, map icons, and even a placed Photoshop file. Your design needs to be delivered to the prepress department, where it will be placed in InDesign as part of a larger poster campaign. And because of the international nature of the campaign, you have one Illustrator artboard that shows the North American continent and another that shows the European continent.
Because you chose to create both artboards in the same file, you were able to:
Synchronize symbols, swatches, graphic styles, text styles, and effects across both artboards
Share the same layer structure between both artboards
See both designs next to each other to verify that their visual styles match
Synchronize last-minute changes across both designs
Deliver a single file to the prepress department
And because you built a proper layer structure and used separate artboards (instead of separate files), the prepress department is able to:
Choose which artboard to place in InDesign (or Photoshop for, for example, creating web graphics)
Override layers from InDesign for showing or hiding details like the map icons and other elements
Package the entire campaign when the project is over
Ask yourself the following questions
It’s not always easy choosing between the two techniques. In some cases it might be best to use layer overrides; in other cases it would be better to use artboards. Here are a few questions you can ask yourself to help you make up your mind.
How often are artwork updates required?
As explained in this book, overriding layers in InDesign comes with certain risks. This means that the more updates and design changes are required within Illustrator, the higher the risk of running into a layer reset in InDesign. Because of this, it’s often a lot safer to place artboards instead of overriding layers when you will need heavy design changes later on. If you’re expecting only small changes, you’re free to choose the technique you like best.
Do I need to name my design to identify it?
One disadvantage of using placed artboards is the fact that we can’t see the name of the artboard prior to placing it in InDesign, whereas it is possible to view the name of a layer in InDesign while overriding it. If it’s difficult to visually distinguish one Illustrator artboard from another, it might be easier to instead use named layers when placing in InDesign. For example, imagine you have a file that has a Pantone version of a logo and a CMYK version of a logo, each on separate artboards. You might not be able to distinguish the Pantone version from the CMYK version during placing in InDesign, whereas placing the logos on named layers will offer you certainty because the layers would be named accordingly.
Do I need to link my file into Photoshop?
As you’ll learn in Lesson 6, “Using Illustrator Artwork in Photoshop,” it is also possible to place and link an Illustrator file in Photoshop. And while you do so, Photoshop will ask you which artboard you want to place (if multiple artboards are present in the AI file). This means you have control over the design or version you import (and link) into Photoshop. But unfortunately, Photoshop doesn’t offer a way to override layers once they’re placed, which means you can only rely on artboards for creating separate versions you want to have available in Photoshop. So if you also expect to use the same Illustrator file in InDesign, it’s best to choose a solution that works for all applications in your workflow.
Will I need to save every version as a separate file?
As explained earlier in this lesson, Illustrator offers an easy way to save every artboard to a separate Illustrator file, which adds to the flexibility of artboards in Illustrator. But if the versions you created in Illustrator are based on layer visibility instead of on artboards, you’d need to manually copy and resave every file when someone requests separate file versions. This could be a heavy argument against using layer-based versions.
Conclusion
The above questions are merely guidelines, as there is no official wrong or right way of placing artwork. But taking this advice into consideration will result in flexibility and time gains.
Pasting Illustrator artwork into InDesign
![]() Note
Note
This book assumes that InDesign and Illustrator are using their default settings. If you are unsure of how to return to the default settings, review the steps in the “Getting started” section at the beginning of this lesson.
The last exercise in this lesson focuses on copying and pasting artwork from Illustrator into InDesign. And although every computer user grew up with the concept of copy and paste, it’s important to realize that many things can go wrong if you decide to paste rather than place Illustrator artwork into InDesign.
Things to know before you start
Before we start to copy and paste artwork from Illustrator into InDesign it’s important to know more about the background process of it all. After all, Illustrator files can get very complex and can include effects, patterns, rasterized images, art brushes, masks, and many other things. This means that we’re not even certain whether our artwork will survive the trip when pasting to InDesign and still look exactly the way it looked in Illustrator. Additionally, we need to make sure our actions don’t have a negative effect on our InDesign document.
Setting Illustrator preferences
Illustrator offers us a variety of settings that determine how data is saved to the clipboard. Not knowing which options to choose before copying artwork into other applications might cause radically different results, depending on these settings. And these settings don’t apply to InDesign alone, because we can copy artwork from Illustrator into many third-party apps as well. You might even find that some combinations of settings render a certain result in InDesign while rendering different results when used in combination with third-party apps.
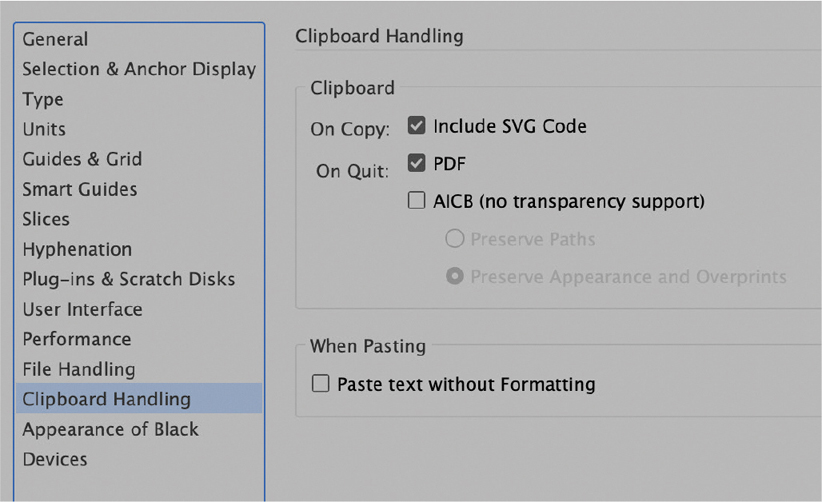
In macOS: Choose Illustrator > Preferences > Clipboard Handling.
In Windows: Choose Edit > Preferences > Clipboard Handling.
The main question you have to ask yourself is, “Are there any transparent objects in my document, or have I applied any transparent effects to my artwork?” If you haven’t, then changing these settings will not make a difference. But if you do have transparent objects, it’s important to pay attention.
![]() Note
Note
Consult the Illustrator help pages to learn more about the different options available in the Preferences dialog box.
It is impossible to copy Illustrator objects that use transparency and paste them into InDesign while retaining the live transparency and keeping the object editable.
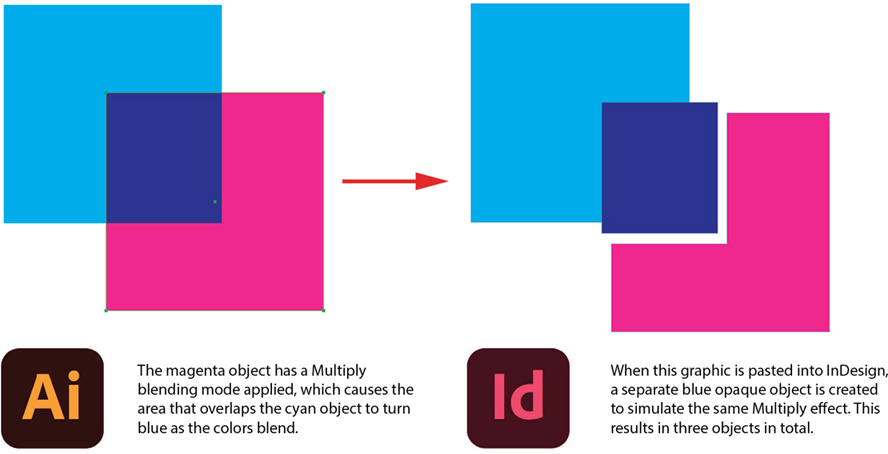
For example, if you take a simple Illustrator shape with a 100% magenta color applied, lower its opacity to 50%, and then paste that object into InDesign, you will end up with a shape with 100% opacity and a 50% magenta tint applied to visually mimic the transparency effect. And what’s even worse is that rasterized Illustrator effects—for example, a Drop Shadow effect—will be pasted as an opaque image that isn’t listed in the Links panel.
A simple rule
There are a few recommendations when dealing with such a situation:
If your artwork has no transparent objects or effects applied, copy and paste the artwork from Illustrator into InDesign using Illustrator’s default settings. However, be on the lookout for other complications. (See “Other potential problems” later in this lesson.)
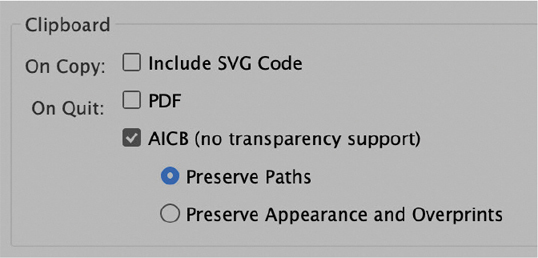
If your artwork has transparency options applied to objects, verify that the same transparency options are also available in InDesign (for example, opacity and blending modes). That way, you can reapply the same effects in InDesign once the artwork is pasted. To achieve this, ensure that the Include SVG Code and PDF options are unselected in Illustrator Preferences and that AICB Preserve Paths is selected.
Alternatively, you can select the last option, Preserve Appearance And Overprints, which will replicate the transparent effects by altering the original shapes and adding additional ones if needed.
NoteBe sure to change the preferences before you use the Copy command. After you change the preferences, you will need to choose the Copy command again for the changes to take effect in the clipboard.
If your artwork has transparency options applied that are not available in InDesign, or if you are using any effects, then you can choose to paste the artwork into InDesign as a transparent PDF. To achieve this, you need to first set an additional preference in InDesign before pasting:
In macOS: Choose InDesign > Preferences > Clipboard Handling.
In Windows: Choose Edit > Preferences > Clipboard Handling.
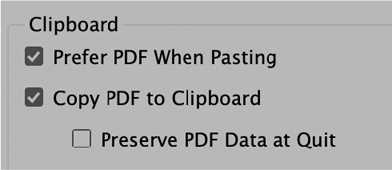
Select Prefer PDF When Pasting to paste all artwork while keeping transparency intact, but without the ability to change the vectors in InDesign.
Other potential problems
Unfortunately, we’re not out of the woods yet. When copying artwork from Illustrator, keep an eye out for the following dangers:
If your Illustrator and InDesign documents use different color modes or profiles, you might see unexpected color shifts in your design. Pay special attention to black because RGB black can cause problems when converted to CMYK and vice versa. There is also the risk of accidentally bringing in spot colors.
Pasted radial and linear gradients from Illustrator are supported in InDesign, but other gradient types—for example, freeform gradients or gradient mesh—will be rasterized at low resolution when pasted into InDesign and will not be listed in the Links panel.
Depending on their complexity, pasting Illustrator patterns can cause a mess in InDesign because it can potentially import hundreds of vector objects, grouped and clipped within one another.
Pasted text from Illustrator will be converted to outlines in InDesign and will no longer be editable. To keep the text editable in InDesign, it needs to be copied using the Type tool in Illustrator and pasted into a text frame in InDesign. However, keep in mind that none of your original Illustrator text formatting will be preserved after pasting in InDesign.
Rasterized images from Illustrator—for example, pasted JPEG files and other placed content—will not be listed in the InDesign Links panel.
When pasting artwork into InDesign you run the risk of accidentally recoloring the artwork when you update an InDesign swatch. And there is a chance you might scale it nonproportionally without any way of verifying its original scale and proportions. It is recommended that you not paste certain artwork, such as logos, into InDesign at all; use the Place command instead.
Illustrator features like masks, brushes, graphic styles, and others can lead to unexpected results. Thoroughly inspect the artwork in InDesign.
If you think you might run into any of the problems described in this lesson, it is highly recommended that you place the Illustrator file into InDesign instead of copying and pasting. A placed Illustrator document in InDesign supports transparency, layers, and artboards; is listed in the Links panel; and allows you to update the original document and see its changes reflected in InDesign.
When to paste
Despite all the warnings in this lesson, there are still many use cases for which pasting artwork from Illustrator offers a clear advantage. Overall, it is safe to paste into InDesign objects that are not too complex and that don’t use transparency. A few examples are:
Pasting a decorative element that you want to use as a text frame or graphics frame in InDesign
Using an Illustrator graphic as a bullet character in InDesign
Using an Illustrator vector shape to wrap text around in InDesign
Pasting a die-cut or other technical outline into InDesign
Pasting special arrows, or other difficult-to-create objects, for which you need to change the stroke or fill color in InDesign
Putting it into practice
The following exercise will provide you with a good example of importing Illustrator artwork into InDesign by pasting. Before you start, make sure the Clipboard Handling preferences are still at their default settings.
Getting started
This project explains the basics of copying and pasting artwork from Illustrator into InDesign. You’ll start the lesson by viewing an image of the final composition and pasted artwork.
In Illustrator, open logo-elements.ai from the Lesson05/Imports folder.
Reset the Illustrator Workspace by choosing Window > Workspace > Essentials, followed by Window > Workspace > Reset Essentials.
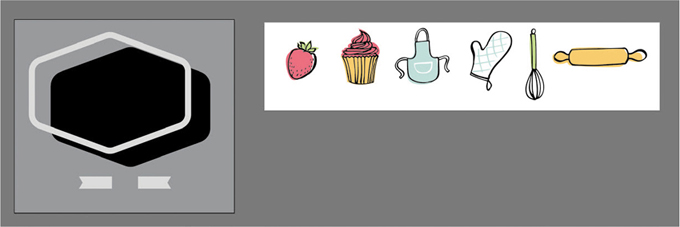
This document has two artboards, each containing vector shapes that we’ll copy from Illustrator and paste into InDesign.
Leave the file open.
In InDesign, open L05-baking-end.indd from the Lesson05 folder.
Reset the InDesign Workspace by choosing Window > Workspace > Essentials, followed by Window > Workspace > Reset Essentials.
This document represents the finished version of a sticker design to advertise baking classes. Notice how the Illustrator shapes have been used in various ways. The frame has several InDesign effects applied, and there is even an image placed into the Illustrator artwork. All other illustrations have their colors slightly altered and are used as decoration.

Close the file.
Importing the main frame
Go to Illustrator and open logo-elements.ai from the Lesson05/Imports folder.
In the first artboard, use the Selection tool
to select the light gray frame.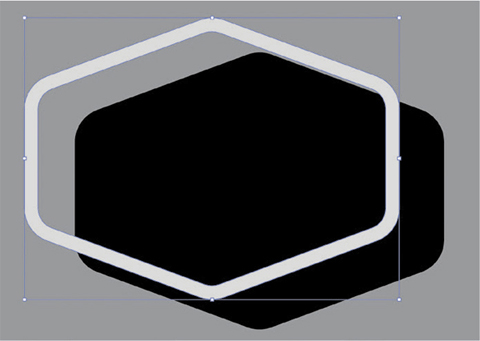
Choose Edit > Copy.
Go to InDesign and open L05-baking-start.indd from the Lesson05 folder.
Choose File > Save As and save your file as L05-bakingWorking.indd.
Before we continue, we need to change one of InDesign’s default preferences so that we can select locked objects and change their Fill and Stroke properties.
In macOS, choose InDesign > Preferences > General.
In Windows, choose Edit > Preferences > General.
Deselect Prevent Selection Of Locked Objects, and click OK to close.

Choose Edit > Paste.
In the Properties panel, make sure the W and H properties are linked by clicking the Constrain Proportions button (if necessary). This will ensure that the shape scales proportionally.
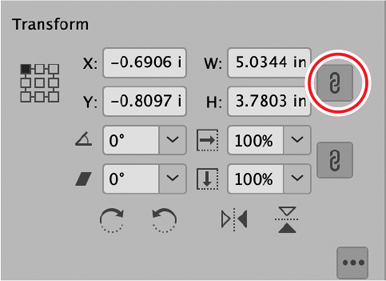
In the Properties panel, change the width to 3.5 in and press Return/Enter.
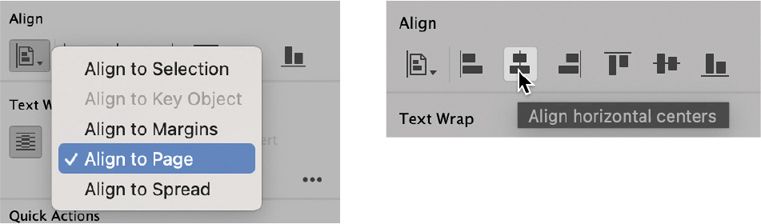
In the Properties panel, click the first icon in the Align options to change the alignment from To Selection to To Page. Then click the Align Horizontal Centers button to center the shape horizontally.
Make sure the reference point is set to the top left. Then enter 0.04 in in the Y field.
Deselect the shape.
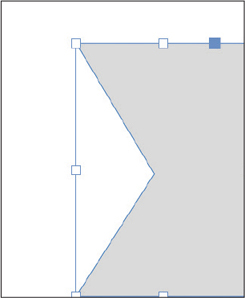
Select the Direct Selection tool
 from the Tools panel, and marquee-drag over the bottom half of the shape to select the anchor points in the bottom half of the shape.
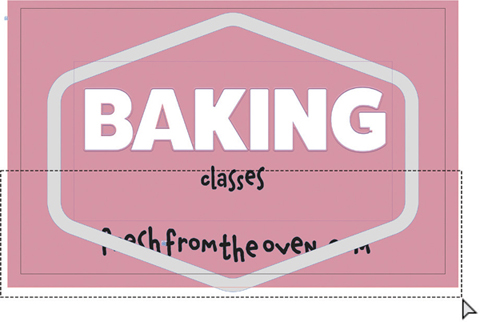
Hold down the Shift key and press the Up Arrow key four times to shrink the height of the shape. Then deselect the shape.

Choose Window > Layers to display the Layers panel. Then click the arrow next to the layer name (Layer 1) to expand the layer structure.
Notice there is only one object in the stack that is not locked: <compound path>, the object we just pasted from Illustrator. We need to rename the shape in order to make it easily identifiable.
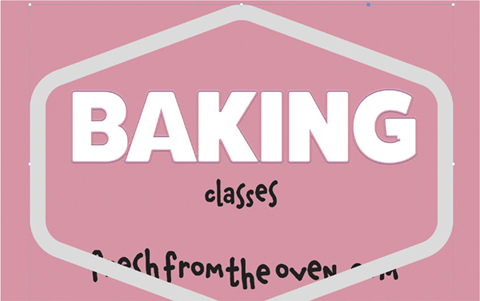
Click the name of the <compound path> object in the Layers panel to highlight it. Click once again to select it and change its name to frame, and then press Return/Enter to confirm the change.
With the frame selected, open the Swatches panel and apply the [Paper] swatch to the object’s fill.
In the Layers panel, click the square area to the left of the object name to lock it. Then save your file.

Return to Illustrator.
Copy the black shape from Illustrator and paste it into InDesign.
Scale the object down and move it on top of the white frame until its top, left, and right edges overlap with the frame edges.

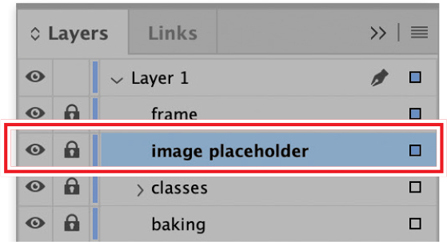
In the Layers panel, rename the object image placeholder.
Drag the object below the frame object in the layer stack.
Use the Direct Selection tool
to select the bottom portion of the frame and move the points up until it disappears behind the white frame.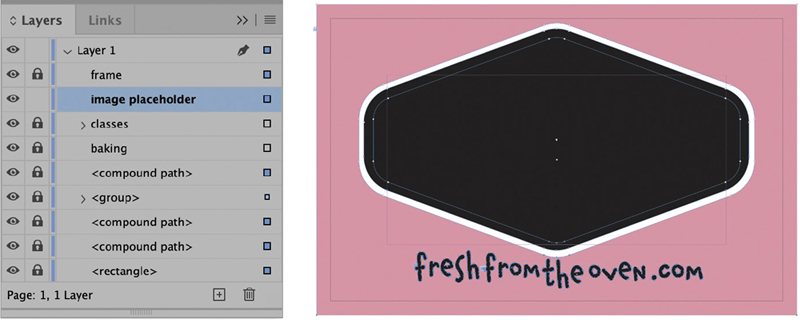
Deselect the object.
In the Layers panel, lock the image placeholder object.
Importing the banners
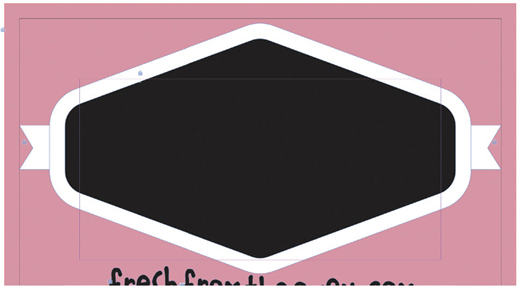
Continuing to work in Illustrator and in logo-elements.ai, select the left banner object at the bottom of the artboard and copy it.
Return to InDesign and paste the banner object.
Using the Layers panel, name the object left banner.
Use the Direct Selection tool
to select the two points on the right side of the shape.Drag the two corner points to the left to shrink the shape until the object width is approximately 0.25 in.
Use the Selection tool
to move the banner to the left side of the frame object, keeping it horizontally centered with the frame.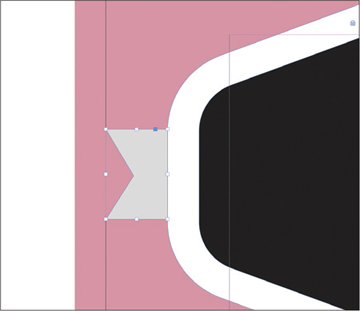
Apply the [Paper] swatch to the object’s fill.
Choose Edit > Duplicate to duplicate the banner.
Use the Layers panel to rename the duplicate right banner.
Choose Object > Transform > Flip Horizontal to make the banner face the opposite direction.

Position the banner on the right side of the frame, horizontally centered with the left banner.
Deselect all objects.
Use the Layers panel to lock the left and right banners.
Adding effects
Now we’ll add a bit of depth to the pasted vector shapes by adding effects.
Use the Selection tool
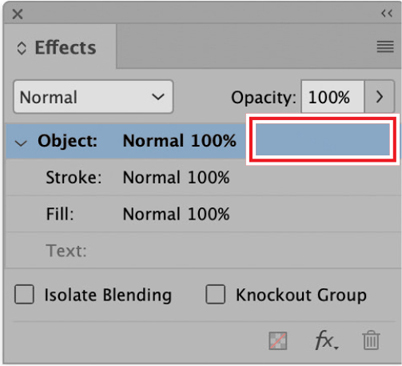
to select the frame object.Choose Window > Effects to display the Effects panel.
In the Effects panel, double-click the text Object: Normal 100% to open the Effects dialog box.
Select Preview in the bottom left of the dialog box.
Click the words Bevel And Emboss (not the checkbox beside them) to apply the effect and display its options.
Change the Technique setting to Chisel Hard.
Set the Size to 0.125 in.
Enter 90 for Angle and 45 for Altitude.
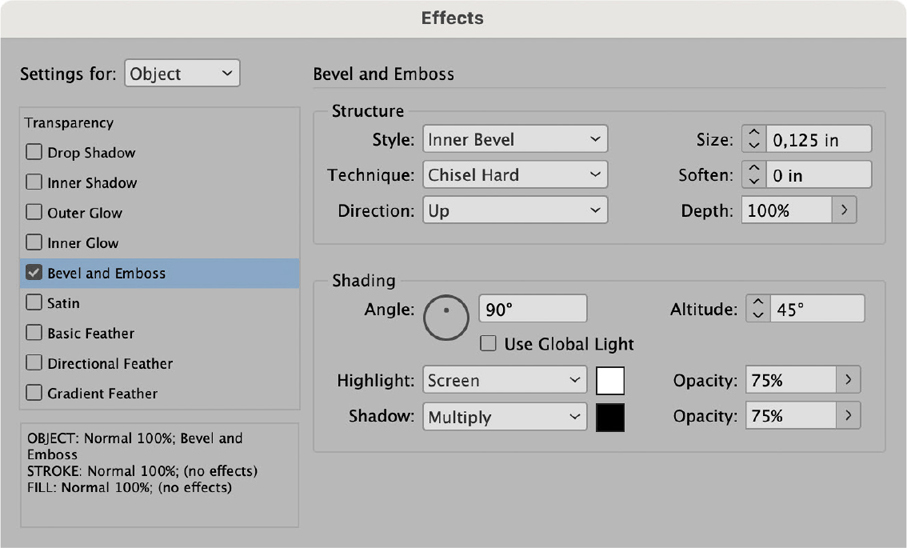
We chose an angle of 90° so that the effect highlight will be applied vertically to the object. Next, we’ll finish the effect by changing the shadow color and adding a drop shadow at the same angle.
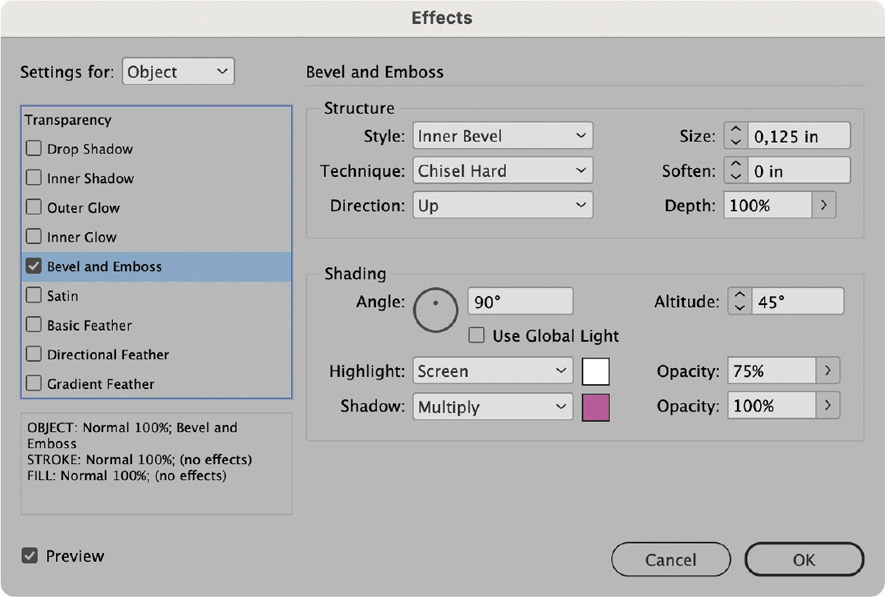
Set the Opacity for Shadow to 100%.
Click the Shadow color box, click to select the darker pink swatch in the Effect Color dialog box, and then click OK.
Click the Drop Shadow effect to apply it and view its options.
NoteThe applied effects might seem as if they are low resolution, but they will be rendered at high resolution once exported.
Click the Set Shadow Color button (next to the Blending Mode menu) to change the shadow’s color in the Effect Color dialog box. Select the darker pink swatch. Click OK to close.
For Angle, enter 90 (the same value we used for the Bevel And Emboss effect).
Change Y Offset value to 0.0625 in, and notice that this also changes the Distance value.

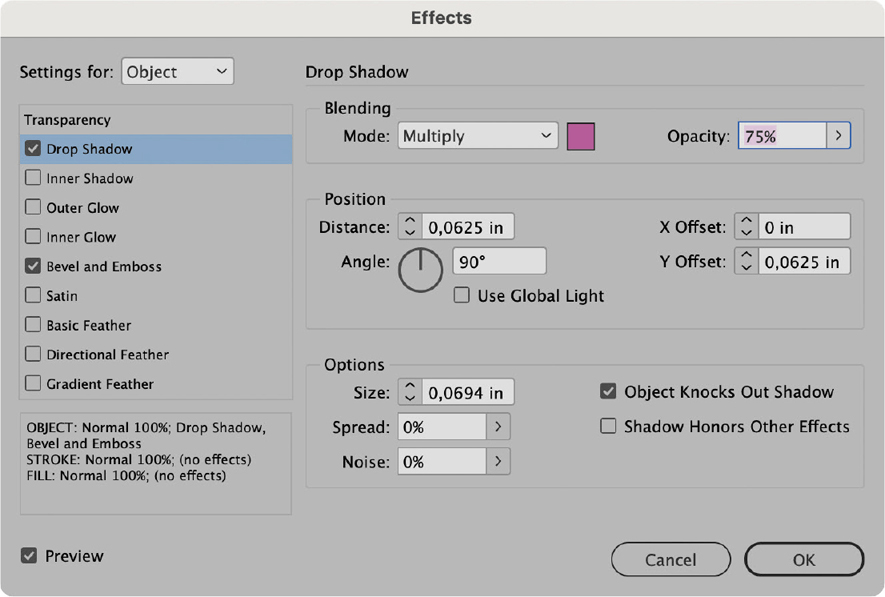
Click OK to close the Effects dialog box. Keep the object selected.
Duplicating effects and adding an image
Now we’ll take the effects we just created and duplicate them on the left and right banner objects.
With the frame object selected, look at the Effects panel and note the fx icon next to Object: Normal 100% in the panel. This icon represents all effects currently applied to the object.
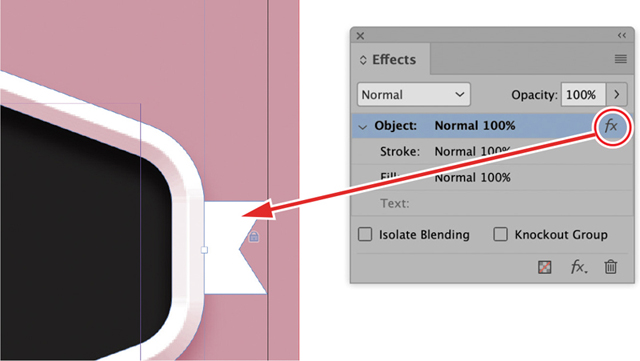
Drag the fx icon from the Effects panel onto the right banner object in the layout (not in the Layers panel).

This duplicates all effects and applies them to the banner object.
Do the same for the left banner object.
In the Layers panel, drag the frame object to the top of the stack.
Next, we’ll place an image in the image placeholder frame.
Using the Selection tool
, select the image placeholder object.Choose File > Place.
Navigate to the Lesson05/Imports folder and select cupcakes.psd. Make sure Show Import Options is unselected.
Click Open to place the image.

With the active selection, click the first button in the Frame Fitting category of the Properties panel (Fill Frame Proportionally) to fit the image in the frame. Notice there is still an empty area on the right side of the image.
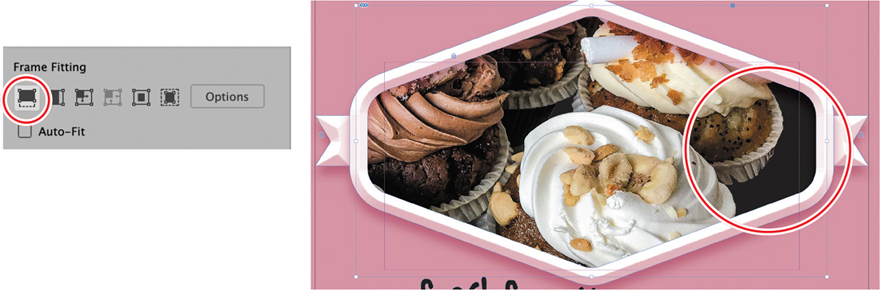
Click the center of the image to select the Content Grabber. This will select the image within the graphics frame.
NoteYou might need to zoom out a little bit in order to see the corner.
Shift-drag the lower-right corner outward to scale the image up. Do this until the cupcakes fill the empty area on the right.

Deselect the image.
In the Layers panel, drag the baking and classes objects to the top of the stack.

Importing the illustrations
To finish the design we need to bring in the cooking illustrations from Illustrator one by one.
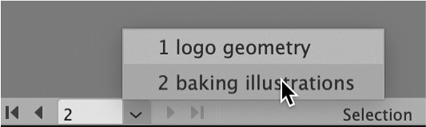
Return to Illustrator and choose 2 baking illustrations from the Artboard Navigator menu, located at the bottom of the Illustrator window. This artboard holds all illustrations.
Use the Selection tool
to select the strawberry. Then choose Edit > Copy.Return to InDesign and choose Edit > Paste to paste it on the design.
Scale the object down a little bit and place it in the upper-left corner of the page.
Return to Illustrator and do the same with the cupcake object, but place it in the upper-right corner of the page in InDesign.

Repeat the process for the apron, placing it in the lower-left corner in InDesign.
Do the same with the oven mitt and whisk, copying them individually and placing them on the bottom right in InDesign.
Scaling and positioning these illustrations is not an exact science. So feel free to play around with the object position, scale, and rotation until you find a composition you like. Alternatively, you can use the Layers panel to change the stacking order of the objects, making some illustrations appear behind the frame and image.

Return to Illustrator and copy the rolling pin; paste it into the InDesign document.
Scale the rolling pin down until it’s just large enough to fit between the baking text and the bottom edge of the frame. Don’t deselect it.
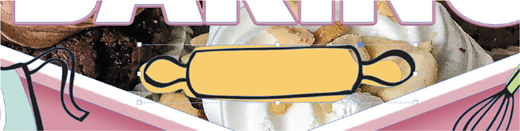
Look at the Layers panel and notice that the rolling pin is the top-most object in the stack. Now drag it down the stack until it is just under the object named classes.
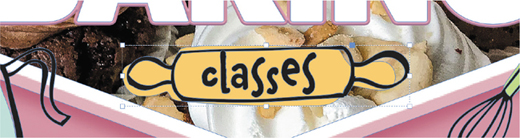
To make it seem as if the word classes is written on the rolling pin, use the arrow keys on the keyboard to nudge the text around the rolling pin until the text is nicely centered.
Updating swatches
Let’s take a look at how the pasted objects changed our list of swatches in InDesign.
Open the Swatches panel.
Notice that various swatches were added to the Swatches panel. All these colors were brought into InDesign by pasting objects from Illustrator. Also notice there is no additional black or white swatch added to the Swatches panel, despite many objects using these colors in Illustrator. This is because InDesign is automatically applying its own black and white swatch to these objects.
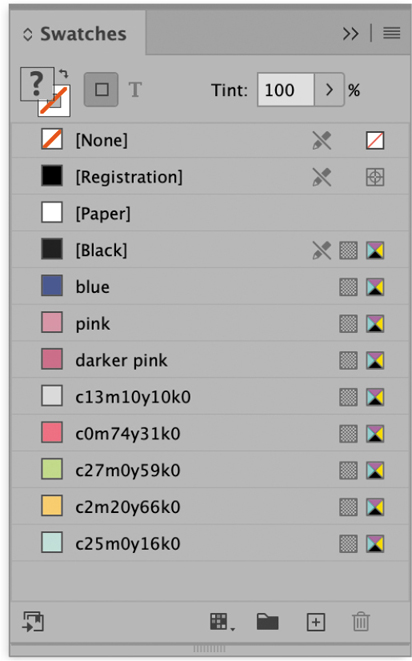
In the Swatches panel, double-click the light blue swatch, named c25m0y16k0, to edit it.
In the Swatch Options dialog box, increase the Cyan value to 50%, and then click OK to close the dialog box.
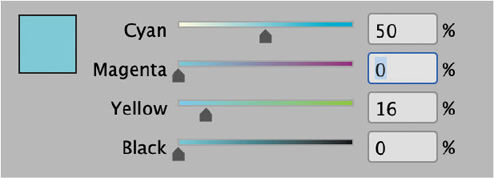
Make sure nothing is selected. Then from the Swatches panel, double-click the light green swatch, named c27m0y59k0, to edit it.
Increase Cyan to 50% and Yellow to 100%, and then click OK to close the dialog box.

We’ve just updated the blue and green colors in the illustrations by simply editing their imported swatches in InDesign.
Make sure nothing is selected. Then, in the Swatches panel, click the swatch named c13m10y10k0 to highlight it.
Shift-click the last swatch in the list to select all the imported colors.
Double-click any of the selected swatch color thumbnails to open the Swatch Options dialog box.
Select the Name With Color Value checkbox, then click OK to close the dialog box.
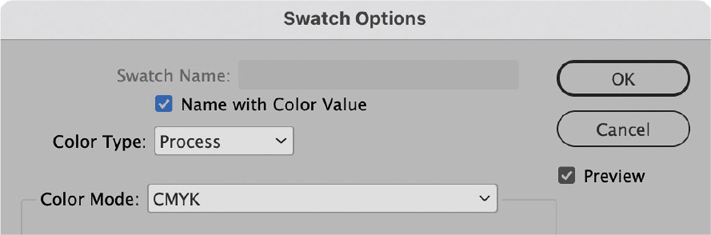
The color values in the original swatch names no longer represent their actual color values; selecting Name With Color Value ensures that all swatch names will update accordingly when you change their values in the future.
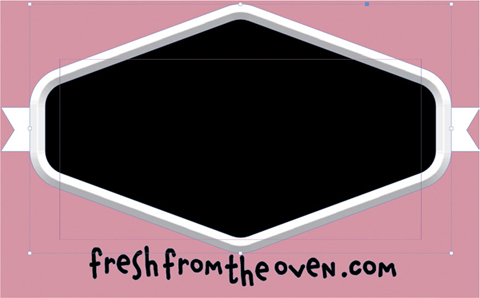
Use the Selection tool
to select the word fresh, and apply the light blue swatch.Select the text from the and apply the [Paper] swatch.
Select the text oven and apply the yellow swatch.
Select the text .com and apply the light blue swatch again.

Deselect everything and save your work.
Close the file.
Review questions
1 When placing an Illustrator file in InDesign, which layer types can be overridden?
2 What does the option Hide New Layers When Updating Or Relinking, found in the File Handling section of InDesign Preferences, do?
3 How can you save multiple artboards within a single Illustrator file as separate Illustrator files?
4 After placing an Illustrator artboard in InDesign, how can you change the placed artboard to a different artboard within the same file from InDesign?
5 Name three potential problems when pasting Illustrator artwork into InDesign.
Review answers
1 It is only possible to override top-level layers from placed Illustrator documents in InDesign. Sublayers are not accessible.
2 When an Illustrator or PDF file has overridden layers in InDesign, selecting Hide New Layers When Updating Or Relinking avoids a layer override reset when adding new layers to the placed file.
3 To save Illustrator artboards as separate Illustrator files, choose File > Save As, click Save, and select Save Each Artboard To A Separate File in the Illustrator Options dialog box.
4 First select the placed file using the Selection tool. Then choose File > Place and reselect the same Illustrator document. Select Show Import Options and click Place. From the Place PDF dialog box, choose the artboard you want and click OK to confirm.
5 First, not all Illustrator objects and effects are supported by InDesign. Examples include freeform gradients, art brushes, transparent effects, and many others. Second, unexpected color conversions might occur when Illustrator and InDesign use different color modes. Third, because pasted artwork is converted into native InDesign artwork, you might accidentally transform artwork nonproportionally. If you don’t need to directly edit the pasted artwork in InDesign, it is recommended to import the Illustrator artwork using the Place command.