
3. Using Layered Photoshop Files in Indesign
Lesson overview
In this lesson, you’ll learn how to do the following:
Change the layer visibility of placed Adobe Photoshop documents in Adobe InDesign to achieve various effects.
Learn techniques for discovering layer overrides in a document.
Build layer comps in Photoshop.
Update layer comps.
Use Layer comps for creating multiple versions of the same document in InDesign.

This lesson will take about 45 minutes to complete. Please log in to your account on adobepress.com/DesignCIB to download the files for this lesson, or go to the “Getting Started” section at the beginning of this book and follow the instructions under “Accessing the lesson files and Web Edition.” Store the files on your computer in a convenient location.
Your Account page is also where you’ll find any updates to the lesson files. Look on the Lesson & Update Files tab to access the most current content.

Photoshop layer comps let you create variations of an image within a single Photoshop document. This feature gains extra power when you place these documents in InDesign. The ability to control the visibility of Photoshop layers in InDesign lets you create layouts that incorporate the variants you set up in Photoshop.
Managing Photoshop layer visibility in InDesign
In the previous lesson you learned that layers play an essential role in Adobe Photoshop documents and are part of the DNA of that document. Showing or hiding a single layer in the layer stack can dramatically change the look and feel of a design. While the ability to show and hide layers in Photoshop adds flexibility when designing a document, it can also work to your disadvantage in some situations.
Version control
I’m sure we’ve all been there before. You are working on a design in Photoshop that needs to be placed in InDesign and you can’t decide which version of your design you like best. Do you go for a version full of special effects and extra detail, or for an alternate version in which all those special layers are hidden? Although it’s easy to quickly show or hide the special effects layers while working in Photoshop, it can be challenging to make that switch within InDesign.
So how do we solve this? One method would be to duplicate the Photoshop document and save both versions as separate documents. That way, your client can choose to place version A or version B in InDesign. And there is nothing wrong with that. However, this comes with a few disadvantages:
Duplicating your Photoshop document means you must manage two files for a single design.
Photoshop documents can take up a lot of storage space, so this scenario would double the amount of space needed to store the project.
Because both versions also have layers in common with one another, it can be challenging to update both Photoshop designs when a change is required to one of these shared layers.
Replacing version A with version B from within InDesign can require multiple steps, depending on the complexity of your InDesign document.
The InDesign approach
The solution to this problem lies within Adobe InDesign, which gives you the unique ability to decide which layers of a placed document should remain visible or hidden, without altering the original document. This is what we call a local layer override. And InDesign allows you to apply layer overrides when placing Photoshop documents, Illustrator documents, PDF documents, or other InDesign documents. The latter is what we sometimes refer to as document nesting, and you can learn more about it in Lesson 7, “Nesting Documents.”
![]() Tip
Tip
When you override layers in InDesign, you’ll notice that the original Photoshop document looks unaltered when it’s opened in Photoshop.
The advantage of creating layer overrides is that it allows you to create different versions of your placed document by showing or hiding specific layers from that document without altering the original.
While all this seems amazing, there are a few risks you need to look out for. We’ll discuss them in depth throughout this lesson.
Creating different versions using adjustment layers
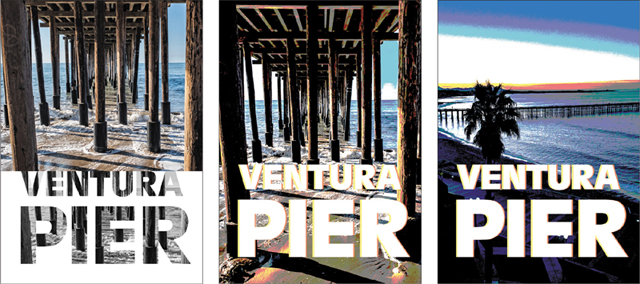
In this first exercise you’ll learn how to radically change the look and feel of a Photoshop document in InDesign by showing or hiding adjustment layers. This technique allows us to create alternative versions of the same design using only a single Photoshop document.
Inspecting the Photoshop document
Start Photoshop, and choose Photoshop > Preferences > General (macOS) or Edit > Preferences > General (Windows).
The Preferences dialog box opens.
Click Reset Preferences On Quit and click OK in the confirmation dialog box. Then restart Photoshop.
Open pier.psd from the Lesson03/Imports folder.
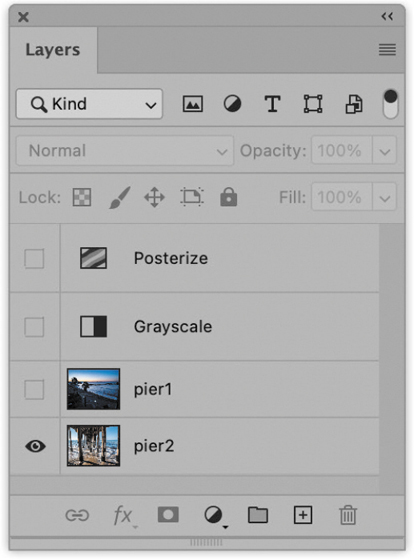
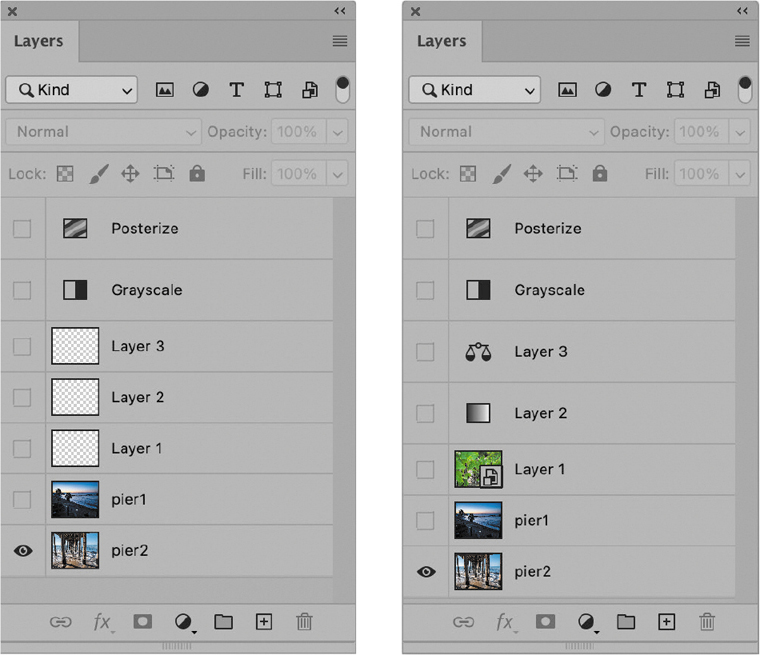
Inspect the Layers panel and notice there are four layers in total:
An image layer named pier1
An image layer named pier2
An adjustment layer named Grayscale that converts all layers underneath it to black and white
An adjustment layer named Posterize that applies the Posterize effect to all layers underneath it
 Note
NoteBoth adjustment layers are currently hidden (or deactivated). This lets us choose which adjustment layer we want to use with which image layer after the document is placed into InDesign.
Placing the Photoshop document and overriding layers
Start InDesign, and then press Control+Option+Shift+Command/Alt+Shift+Ctrl to restore the default preferences.
When prompted, click Yes to delete the Adobe InDesign Settings file.
From the Lesson03 folder, open L03-postcard-start.indd.
Choose File > Save As, and save the file as L03-postcardWorking.indd.
Using the Selection tool
 , select the gray graphics frame on the page.
Choose File > Place, and navigate to the Imports subfolder within the Lesson03 folder. Select the file pier.psd and, if necessary, deselect Show Import Options at the bottom of the dialog box. Click Open to place the file.

Using the Selection tool
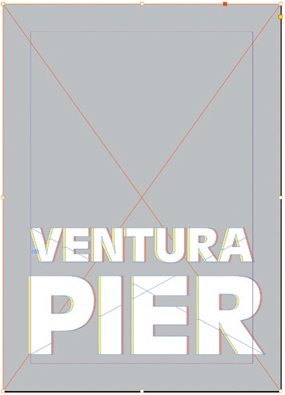
, select the Ventura Pier text object. Note that the text has been converted to a graphics frame containing the text converted to outlines.With the selection active, Choose File > Place.
 Tip
TipText that has been converted to outlines is converted to vector shapes and will no longer be editable as live text.
Select pier.psd again, but this time, select Show Import Options before clicking Open.
 Tip
TipYou can also temporarily activate the Import Options by holding down the Shift key while choosing Open.
Click Open to display the Image Import Options dialog box.
In the Image Import Options dialog box, click the Layers tab to display the document layers.
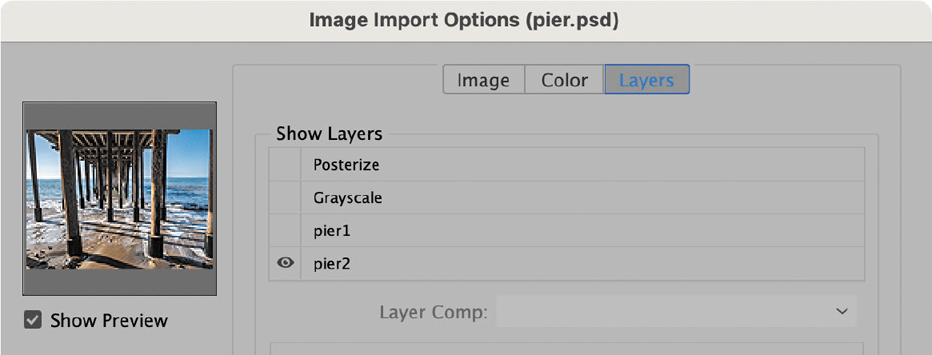
Click the empty area to the left of the Grayscale layer to make it visible. An eye icon appears and the preview window updates accordingly, showing a grayscale version of the image.
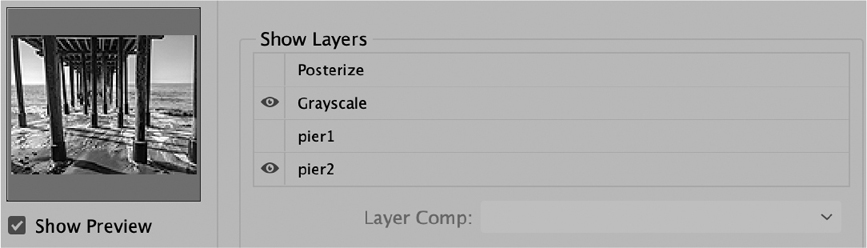
Click OK to place the alternate version of the photo in the text object. Keep the file open.

Overriding Photoshop layers after placing
Continue with the previous exercise and navigate to page two of L03-postcardWorking.indd.
Select the gray graphics frame.
Choose File > Place.
Deselect Show Import Options.
Select pier.psd and click Open to place the file into the selected frame.
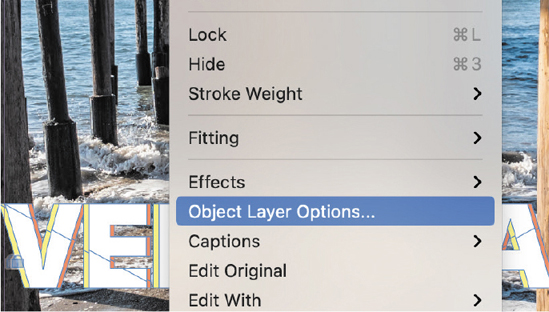
With the placed image selected, choose Object > Object Layer Options.
 Note
NoteMake sure Preview is selected.
Click the empty column to the left of the pier1 layer to make it visible. Notice that the composition updates by showing an alternative image.
Click the empty column to the left of the Posterize layer to activate it.
The Posterize adjustment layer changes the appearance of the file.
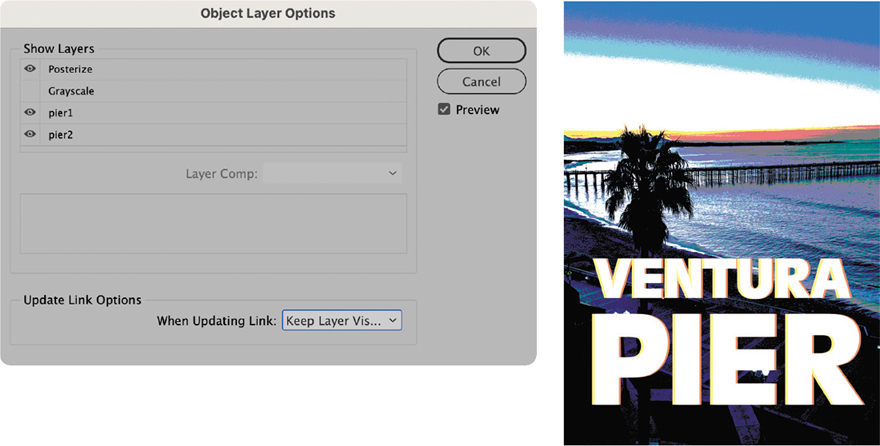
Click OK to close the Object Layer Options dialog box, and keep the document open.
NoteWhat is quite remarkable is that this specific combination of active and inactive layers is unique to this InDesign composition. And InDesign will properly render any layer, adjustment layer, or blending mode combination directly on the page. If you like, experiment by activating and deactivating specific layer combinations.
How can overriding layers go wrong?
As you’ve learned from this example (and as you’ll see in the examples still to come in this and future lessons), overriding layers adds a lot of flexibility to your workflow. And it provides great value when placing native Photoshop documents in InDesign. But there is one big caveat that you need to be aware of: InDesign might undo all your layer overrides if you’re not careful.
When you place a Photoshop document in InDesign, InDesign will take notice of the current layer structure of the placed file. This means it will inspect and remember:
The total number of layers in the source application (in this case, Photoshop)
The order of the layers
The layer names
Because of this, it is of paramount importance that we keep the original layer structure intact in the source document when working with layer overrides. This means we need to avoid:
Adding or removing layers
Renaming layers
Changing the order of existing layers
Changing the visibility of existing layers
Doing any of these things means that the updated Photoshop document will have a different layer structure compared to the version you placed originally in InDesign. This will confuse InDesign and cause it to reset all layer overrides and revert to the most recently saved version of your placed document. There is no way to avoid this behavior for Photoshop documents, and if you want to recover your work, you’d need to reapply the layer overrides in InDesign.
![]() Tip
Tip
There is a way to partially avoid this behavior when overriding layers from placed Illustrator documents, PDFs, and InDesign documents. Learn more about it in Lesson 5, “Using Illustrator Artwork in InDesign.”
A few tips to help you get organized
There is a workaround that will help you avoid unwelcome layer override resets in InDesign. One of the main reasons why InDesign’s reset behavior is a problem is because we often want to add additional layers to our Photoshop composition after we’ve placed (and overridden) the document in InDesign.
It is important to understand that while InDesign is sensitive to the layer structure itself—that is, layer name, order, visibility, and so on—it is not looking at the contents or types of layers in the stack. This means you can still go ahead and make updates to existing layers by:
Changing layer transparency
Changing blending modes
Adding, removing, or updating layer styles of existing layers
Changing adjustment layer settings, masks, fill layers, and other types of layers
This means that anything goes as long as you keep the original layer structure intact. So you can make your Photoshop composition future-proof by adding empty placeholder layers in your document to anticipate potential layer additions. For example, if you believe you might add a layer or three to your composition in the future, you can add three empty (or hidden) layers to your current composition and give them generic names like Layer 1, Layer 2, and Layer 3. Then you can later use these “placeholder layers” to add your additional content. For example, you could import an image into Layer 1, add a fill layer that you then name Layer 2, and add an adjustment layer that you rename Layer 3.
Again, InDesign doesn’t care about the contents of the layer or the layer type. As long as you have a Layer 1, Layer 2, and Layer 3, InDesign will not reset your overrides, because the original layer structure never changed. It’s not a perfect workaround, but it does allow for a degree of flexibility.
How to detect layer overrides in a document
To better prepare you for unpleasant surprises in InDesign when updating placed Photoshop documents, we need to have some sort of early warning system that tells us when layers of a placed file have been overridden. This isn’t a problem for the previous exercise because we clearly set the layer overrides ourselves. But we might be confronted with documents created by teammates, freelancers, or ourselves a long time ago. And in those cases, we might not know (or remember) the history or build-up of those documents. So how can InDesign assist us in these situations?
Viewing layer overrides in the Links panel
The Links panel in InDesign is a highly configurable panel and offers the ability to present you with link information that is hidden by default. Let’s set up the Links panel so it can show us which linked files have layer overrides in the document.
![]() Tip
Tip
If you hold down Option/Alt and click the link icon of a placed graphic (in the top left corner of the object), InDesign will automatically open the Links panel and select the link in the panel.
Choose Window > Links.
Open the panel menu and choose Panel Options.
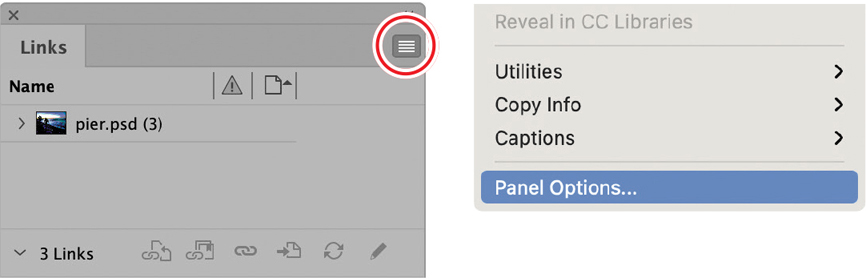
At the top of the Panel Options dialog box, choose Large Rows from the Row Size menu to see larger thumbnails in the Links panel.
In the Show Column list, select Layer Overrides.
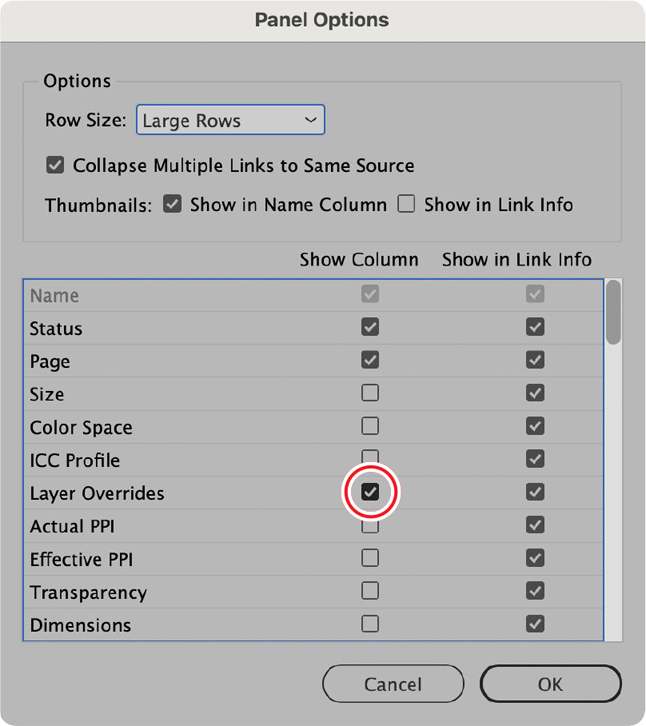
Click OK to close the dialog box.
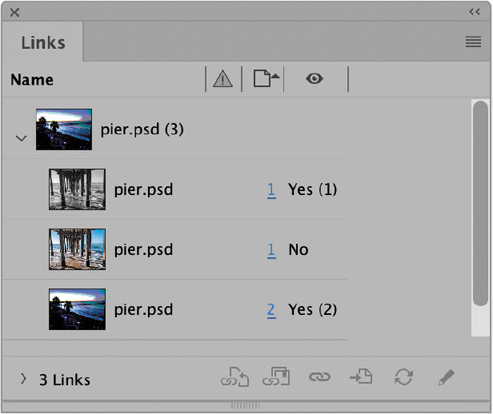
If necessary, expand the Links panel to view the newly added Layer Overrides column.
The Layer Overrides column is represented by an eye icon. In this example we see the following information:
![]() Tip
Tip
Double-click the Yes or No in the Layer Overrides column to open the Object Layer Options dialog box for that image.
If you look closely, you can see that the thumbnails of pier.psd all look different, because each one represents a different version of the placed image.
Placed links that have overridden layers have a Yes in the column; ones whose visible layers match those of the linked document have a No in the column.
The number in parentheses next to the word Yes represents the number of layers that have been overridden.
Using the Preflight panel for detecting layer overrides
The Preflight panel allows you to set up automatic alerts based on set criteria when using text, setting document properties, managing colors, or working with images. It’s a sometimes overlooked feature within InDesign that can work to your advantage if you give it a little attention. In this scenario, we’ll configure the Preflight panel to alert us when layer overrides have been detected in the document. Unfortunately, the Preflight panel was built for detecting errors in a document that might prevent us from going to print—for example, image resolution that is too low, fonts that are too small, missing document bleed, and so on. This means that detected layer overrides will be listed as an error, whereas we only want a “heads up” when viewing documents, especially when opening documents we didn’t create ourselves. So take this “error message” in the Preflight panel with a grain of salt.
![]() Tip
Tip
Alternatively, you can open the Preflight panel by double-clicking the message at the bottom of your screen listing the number of preflight errors.
Choose Window > Output > Preflight.
Open the panel menu and choose Define Profiles.
Note the [Basic] profile in the left column, which is currently selected. This profile can’t be edited, so we need to make a copy of it first.
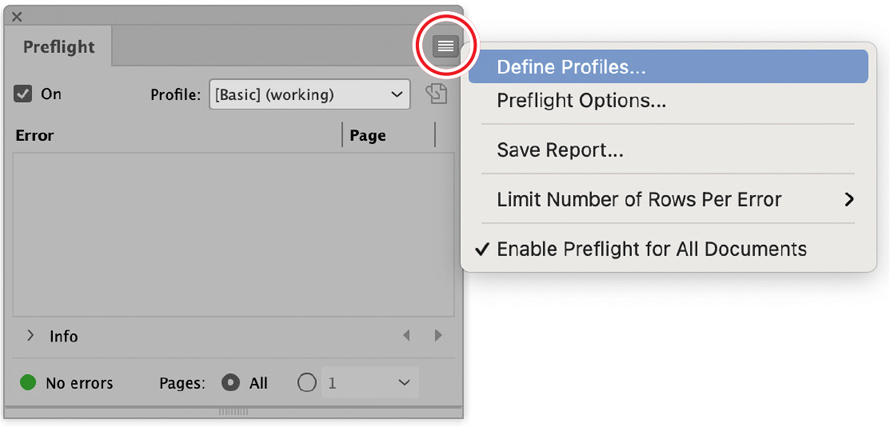
Click the plus icon at the bottom of the window to create a new profile, and name it layer overrides.
Click the arrowhead to the left of the IMAGES And OBJECTS category to display the available settings. Select Layer Visibility Overrides from the list.
You can set additional options, but doing so is beyond the scope of this book.
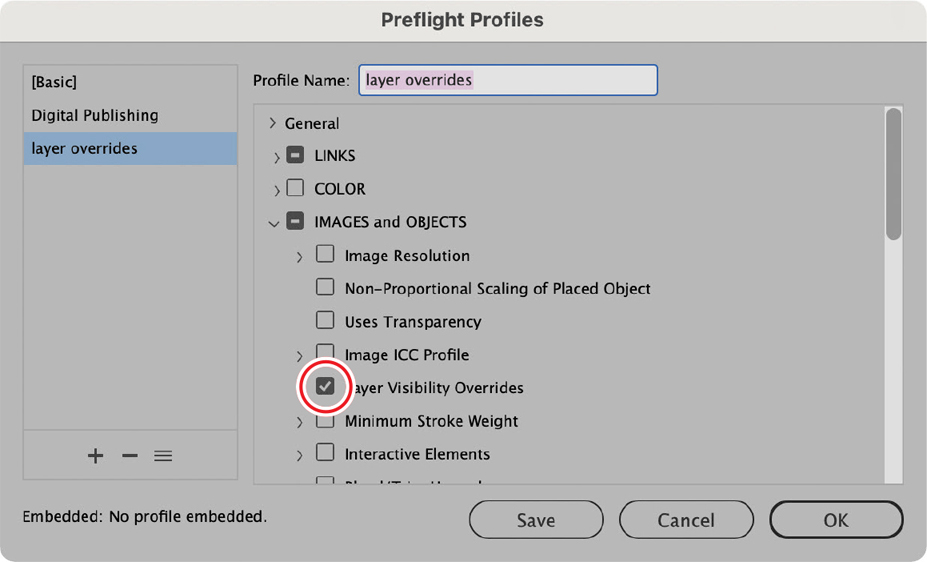
Click OK to close the dialog box.
Activate the newly created profile by choosing it from the Profile menu. Notice it has found two errors.
NoteThe Preflight panel will make live updates while you work in InDesign. This means that it will automatically add or remove errors as you work.
In the Error list, double-click the IMAGES And OBJECTS category and double-click Layer Visibility Override (2) to open the results of the search.
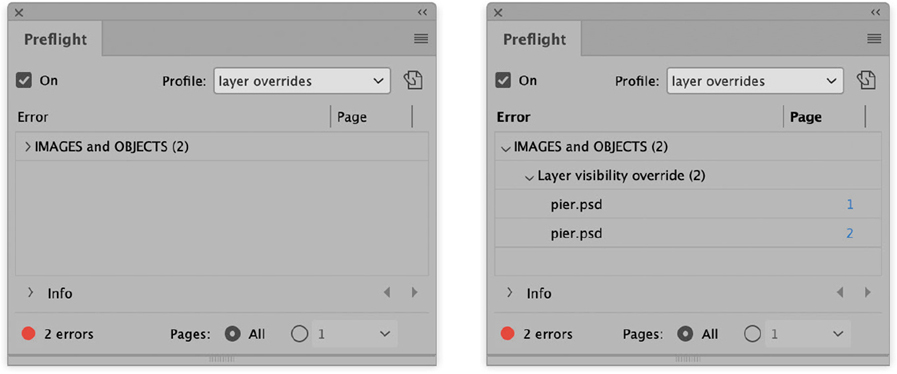
Double-click the first pier.psd item in the list of errors to navigate to the image in the document. Repeat this process for the second listing of pier.psd.
TipIt is good practice to create a preflight profile that helps you quickly analyze, and build a report on, documents that you receive from other InDesign users—for example, a profile that detects small font sizes, low resolution graphics, overset text, spot colors, layer overrides, and so on. Afterward, you can always switch to a proper prepress profile or deactivate the Preflight panel altogether.
Using layer transparency to your advantage
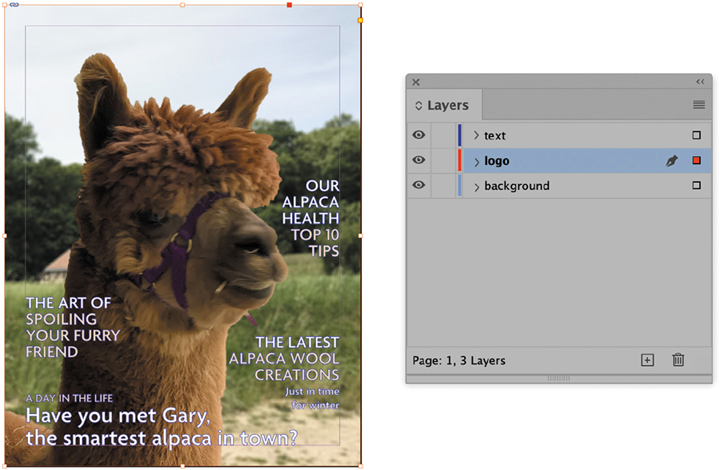
In this exercise you’ll learn how to create a classic magazine cover on which the top of the main subject overlaps with the title and text of the magazine. Achieving this requires a simple layer override in InDesign.
Inspecting the Photoshop document
Launch Photoshop and open alpaca.psd from the Lesson03/Imports folder.
Inspect the Layers panel and notice there are two layers in total:
The Background layer
A layer containing an alpaca on a transparent background

Placing and overriding the document in InDesign
Switch to InDesign and open L03-alpaca-cover-start.indd from the Lesson03 folder.
Choose File > Save As, and save the file as L03-alpaca-coverWorking.indd.
Notice the document has a total of three layers: text, logo, and background.
NoteIf you can’t see the Layers panel, choose Window > Layers.
Select the background frame.

Choose File > Place.
Navigate to the Imports folder and select alpaca.psd. There is no need to view the Import Options at this time.
Click Open to place the file.
The alpaca image has now filled the graphics frame on the background layer. In the next few steps you’ll place a copy of the background image on the logo layer, making it overlap with the logo. And you’ll finish off by hiding the alpaca’s background using InDesign layer options.
With the image selection still active, press Command+C/Ctrl+C to copy the image.
In the Layers panel, select the logo layer.
Choose Edit > Paste In Place to paste a copy of the alpaca image on the logo layer. This copy of the image will hide the magazine’s logo but not the rest of the text on the cover (because that text is placed on a different layer).
While the image is still selected, right-click the image and choose Object Layer Options.
In the Object Layer Options dialog box, make sure that Preview is selected and hide the Background layer by clicking its eye icon.
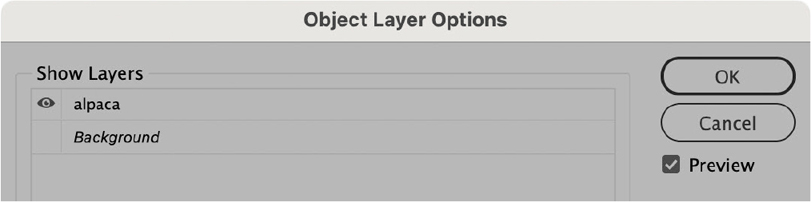
Click OK to close the dialog box.
Placing a duplicate of the alpaca (on its otherwise transparent layer) above the logo at exactly the same location as the original image gives the impression of depth and creates an easy and popular effect.

Photoshop layer comps
In the previous exercises you learned that layer overrides are nothing more than showing or hiding Photoshop layers from InDesign. And while this does create opportunities, we are often hungry for more control and creativity. And that is exactly where Photoshop layer comps come in.
What is the purpose of a layer comp?
Layer comps (short for “compositions”) allow you to build preset combinations of Photoshop layers that go beyond basic layer visibility. You can use layer comps when placing Photoshop documents in InDesign or Illustrator or when nesting other Photoshop documents.
Layer comps are an ideal solution when:
You want to save a layer in different positions on the canvas—for example, a version in which a layer is positioned in the upper-left corner and another version in which that layer is in the lower-right corner—without having to duplicate the layer.
You want to experiment using different layer styles to create various effects.
You want to avoid confusion and errors when you need to manage the visibility of many layers at the same time for various versions of the image.
NoteIf you want to learn more about nesting, consult Lesson 7, “Nesting Documents.”
You want to switch to a different nested Smart Object when using nested Photoshop documents.
Using Photoshop layer comps in InDesign
In this exercise you will learn how to create and save a layer comp in Photoshop and how to take advantage of it in InDesign.
Inspecting the Photoshop document
Launch Photoshop and open donuts.psd from the Lesson03/Imports folder.
This is a fairly complex Photoshop document that holds a combination of different layers. The design will be used in InDesign to create multiple versions of a poster campaign promoting different flavors of donuts.
The current combination of layers shows the blueberry-flavored donut with colored sprinkles. Depending on the combination of layers used we can create a chocolate version with white sprinkles, a strawberry version, or an apple version. All of this will be achieved using layer comps.
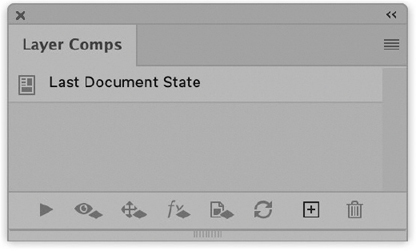
Choose Window > Layer Comps.
The Layer Comps panel shows only a layer comp named Last Document State. This is the default setting when no custom layer comps are created. We’ll start out by creating the apple version first.
Creating the first two layer comps
In the Layers panel in Photoshop, hide the blueberry layer and make the apple layer visible.
In the Layer Comps panel, click the plus icon in the lower-right corner to create a new layer comp.
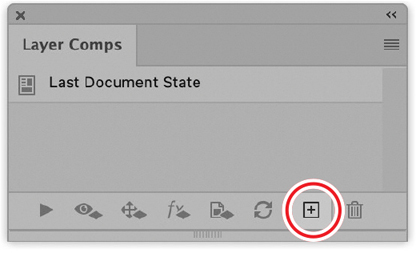
Name the new layer comp apple.
Next, we need to choose which layer features we want to capture or ignore in the layer comp for this specific combination of layers.
The layer comp captures the status of all layers in the document, not just the currently selected layer.
In the New Layer Comp dialog box, make sure that Visibility and Appearance (Layer Style) are selected and that Position and Layer Comp Selection For Smart Objects are unselected.
In the Comment field, enter apple donut - colored sprinkles.
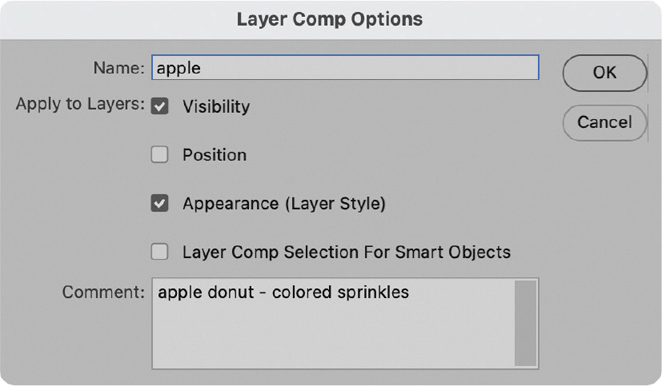
Click OK to save the layer comp.
In the Layers panel, hide the apple layer to reveal the strawberry layer underneath.
Create another layer comp by clicking the plus icon in the Layer Comps panel.
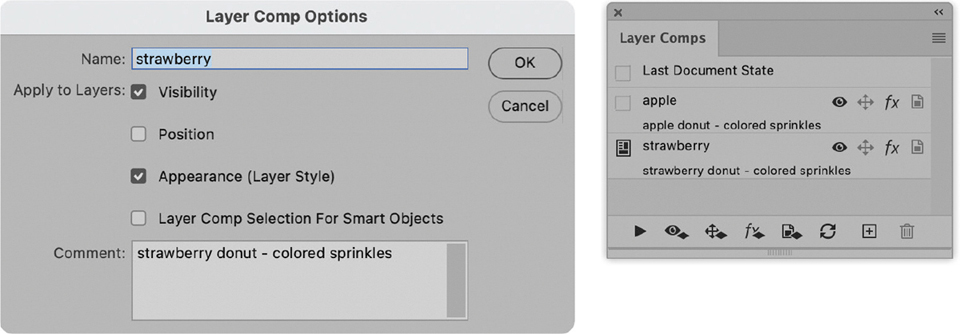
Name the new layer comp strawberry.
In the dialog box, make sure that Visibility and Appearance (Layer Style) are selected and that Position and Layer Comp Selection For Smart Objects are unselected, and enter strawberry donut - colored sprinkles in the Comment field. Then click OK to save the second layer comp, and leave the document open.
Creating the last layer comp
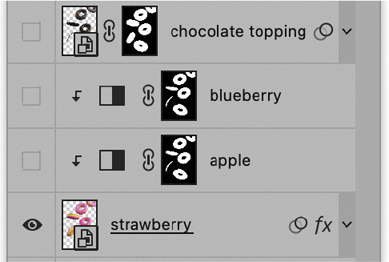
In the Layers panel in Photoshop, show the chocolate topping layer.
Show the brown bg layer to change the background.
Hide the mixed sprinkles layer, and view the white sprinkles layer.
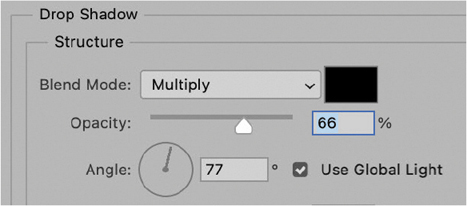
Note that the drop shadow of the donuts doesn’t look right on some parts of the brown background. This is because the drop shadow—which is applied to the strawberry layer (which acts as the base layer)—is set to a blending mode that worked better on a colored background. We need to update the layer style applied to that layer.

Click the arrow to the right of the fx icon to display the layer effects on the layer style applied to the strawberry layer.
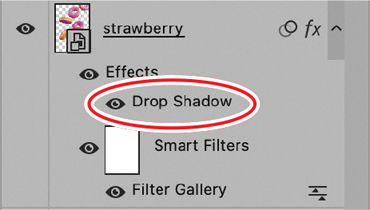
Double-click the name of the Drop Shadow effect to open the Layer Style dialog box.
In the Layer Style dialog box, change the Blend Mode setting from Overlay to Multiply to better blend the shadow with the background. Click OK to close the dialog box.
Create a new layer comp by clicking the plus icon in the Layer Comps panel.
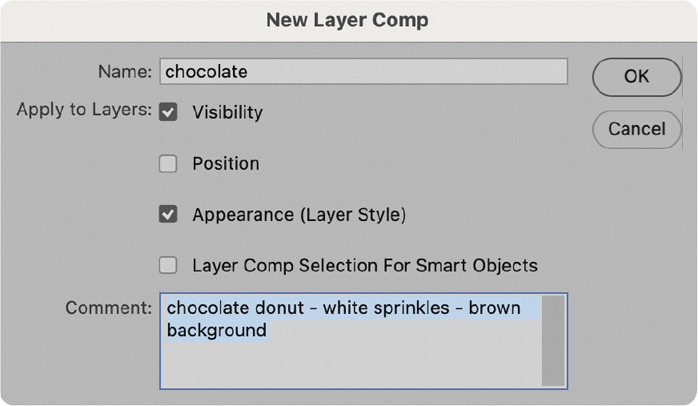
Name the new layer comp chocolate. Make sure Visibility and Appearance (Layer Style) are selected (since we altered their settings, we need to make sure they will be recorded into the layer comp). Position and Layer Comp Selection For Smart Objects should remain unselected.
In the Comment field, enter chocolate donut - white sprinkles - brown background and click OK to close the dialog box.
Try out your three different layer comps by clicking the box to the left of the name of each layer comp, very similar to the eye icon of regular layers.
NoteIt doesn’t matter which layer comp is active when you save the document in Photoshop.
Choose File > Save As, and save your document as donuts-layercomps.psd.
Keep the file open.
Using Photoshop layer comps in InDesign
Launch InDesign and open L03-poster-start.indd from the Lesson03 folder.
Choose File > Save As, and save the file as L03-posterWorking.indd.
Select the gray graphics frame using the Selection tool
.Choose File > Place.
Navigate to your newly saved donuts-layercomps.psd and select it.
NoteYour version of the dialog box might look slightly different depending on the layer comp that was active when you saved the PSD file.
Select Show Import Options at the bottom of the dialog box.
Click Open.
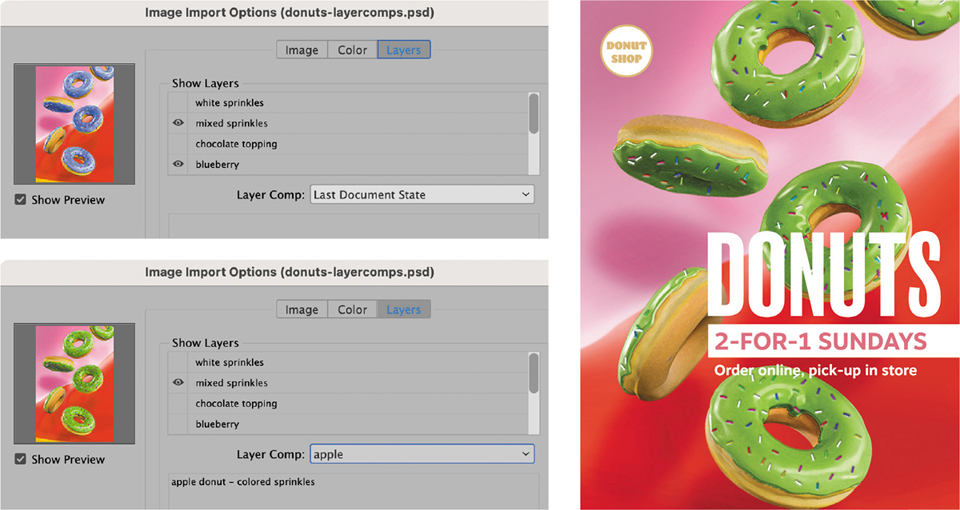
In the Image Import Options dialog box, click the Layers tab.
From the Layer Comp menu, choose apple. Notice that the comments we entered in Photoshop are also shown in InDesign to help us identify the chosen version.
Click OK to place the file.
Switching to a different layer comp in InDesign
Next, we’ll create an alternative version for the poster design.
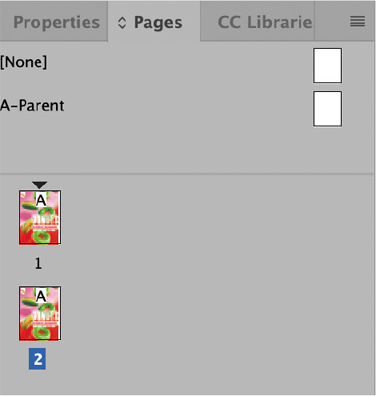
In InDesign, choose Window > Pages to view the Pages panel.
Click the page 1 thumbnail to select it, then right-click the thumbnail and choose Duplicate Spread to create a copy of it. This second page will hold the alternative poster design.
Navigate to page 2 by double-clicking its thumbnail in the Pages panel.
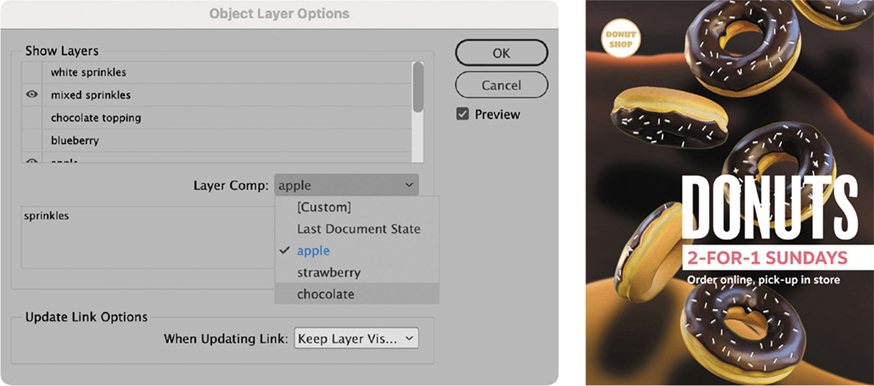
Select the donut image, then right-click and choose Object Layer Options.
From the Layer Comp menu, choose chocolate and click OK.
NoteWhen choosing a layer comp in the Object Layer Options dialog box, it is still possible to manually show or hide specific Photoshop layers from the list. That lets you use layer comps as starting points for other versions.
Updating a layer comp in Photoshop
The following steps explain how to update an existing layer comp in Photoshop. In this scenario we want to update the existing apple donut to a blueberry version.
Return to Photoshop and open donuts-layercomps.psd.
In the Layer Comps panel, apply the apple layer comp.
In the Layers panel, hide the apple layer and show the blueberry layer.
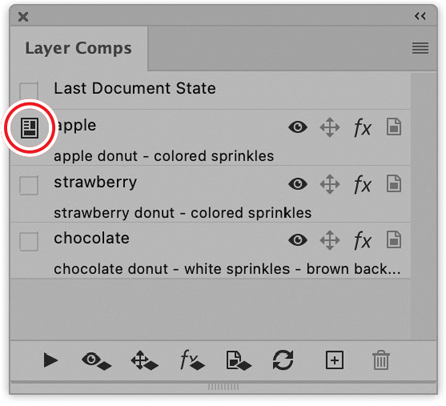
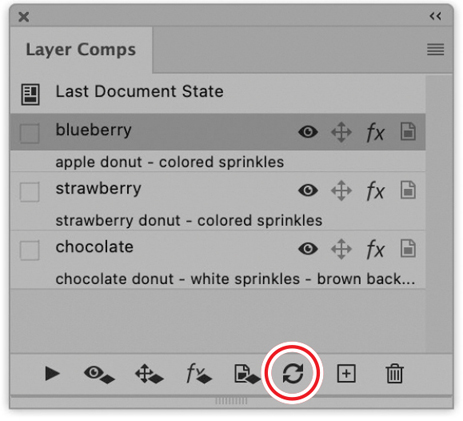
Notice that making changes to an active layer comp will make that layer comp icon jump to the Last Document State position, because the layer combination no longer matches what was originally saved.
In the Layer Comps panel, double-click the apple layer comp to see its options.
In the Layer Comp Options dialog box change the name of the layer comp to blueberry. In the Comment field, replace the word “apple” with blueberry.
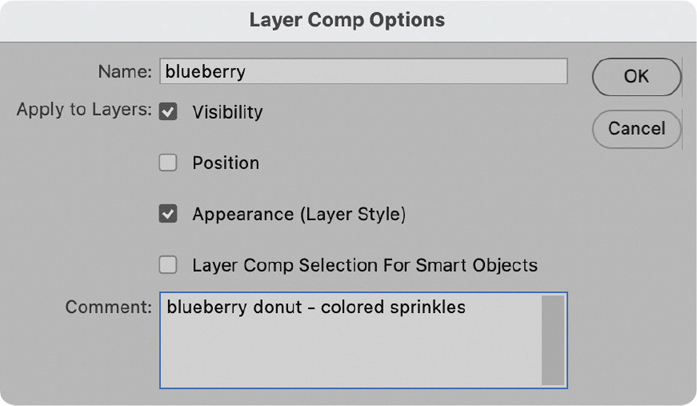
Click OK to close the Layer Comp Options dialog box.
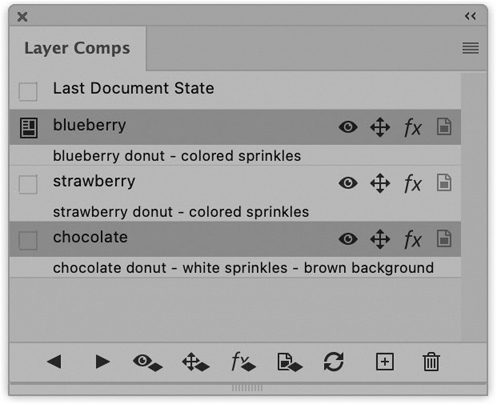
In the Layer Comps panel, click the Update Layer Comp button at the bottom of the panel to refresh the currently selected layer comp with the current layer settings. Note that the active layer comp icon moves to the blueberry layer comp.
Save your document.
Return to InDesign.
Updating a layer comp within a placed PSD file in InDesign might update your InDesign document, depending on which layer comp is visible within the InDesign document.
Update the links of all placed images by Option-clicking/Alt-clicking the Update Link button in the Links panel.
TipIf you want to practice a bit more, create additional layer comps by combining different donuts with different sprinkles, creating additional flavors, or changing the position of the layers.
Converting layer comps to Photoshop documents
When you find that a specific layer comp is satisfactory, it’s likely that you’ll want to export that version in a separate Photoshop document.
In Photoshop, open donuts-layercomps.psd.
In the Layer Comps panel, select the layer comp(s) you want to export.
 Tip
TipYou can select more than one layer comp by Shift- or Command/Ctrl-clicking.
Choose File > Export > Layer Comps To Files.
In the Layer Comps To Files dialog box, select Selected Layer Comps Only to export only your selected layer comps rather than all of them.
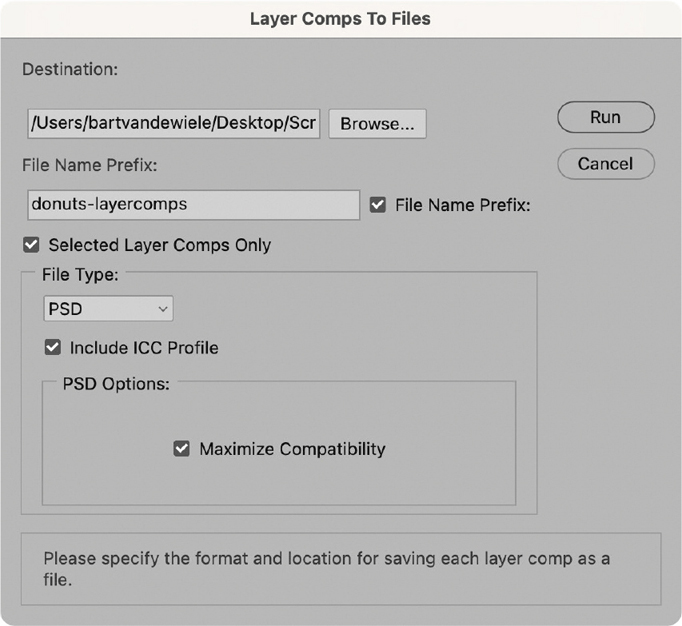
Choose a destination folder and click Run.

Embedding placed documents into InDesign
InDesign also supports the ability to embed placed images into a document, but this practice is usually not recommended since you risk bloating the InDesign file size, resulting in lowered performance. There are a few exceptions where embedding a link might be beneficial:
When using placed images that have a relatively small file size.
TipWhen you embed a Photoshop document that has layer overrides or is using a layer comp, the document will be embedded using that configuration.
When you feel it’s just not worth maintaining a link to the original file. Embedding the link could then simplify your document because everything would then be embedded.
When you fear the link to the placed file might be broken by someone else moving, renaming, or deleting the original document.
Keep in mind that when you embed a Photoshop document, it will no longer be possible to access its layers from InDesign. This means that it will no longer be possible to apply layer overrides or change layer comps.
How to embed a placed graphic
To embed a placed (linked) graphic, follow these steps.
In InDesign, choose Window > Links to display the Links panel.
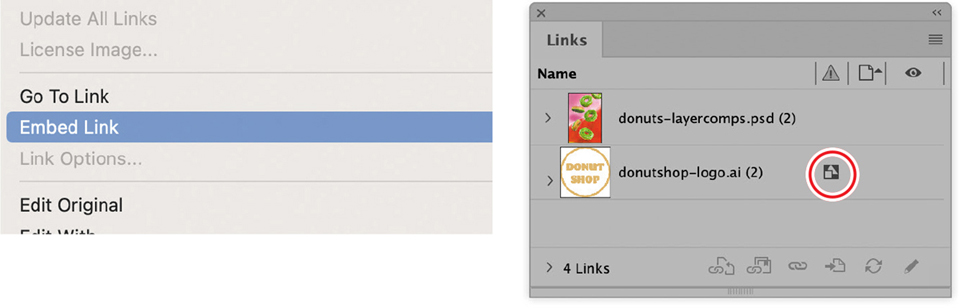
Select donutshop-logo in the Links panel.
NoteIf the link you want to embed has multiple instances, the command will read Embed All Instances Of [your link].
Click the panel menu and choose Embed Link.
The Links panel adds an Embedded icon next to the name of the link, signifying it is now included in the InDesign document.
How to unembed a placed graphic
It is possible to unembed a file from an InDesign document. This action extracts the embedded document, places it in a specified location, and then creates a link between the file and the InDesign document.
Select donutshop-logo.ai again in the Links panel.
Open the Links panel menu and choose Unembed Link.
NoteIf the link you want to unembed has multiple instances, the command will read Unembed All Instances Of [your link].
InDesign asks whether you want to link to the original file or to a file that it extracts from the InDesign document and places in a folder.
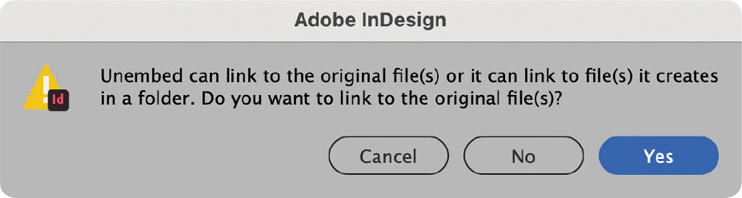
Let’s pretend we don’t have the original available; click No.
Use the dialog box to navigate to a location where you want to place the extracted link, and click Choose.
Packaging the project
When you place content in InDesign, a relationship is created between InDesign and the placed Photoshop document. When you finish your project, it is recommended that you package all the linked assets together to create a project backup or archive. When you create a package, the following actions are performed:
A folder is created that holds:
A duplicate of your project file
A subfolder that holds a copy of all linked content
A subfolder that has a copy of all the local fonts used in the document
All links in the duplicate project (in this case, the InDesign document) are relinked to the copied links in the newly created subfolder.
![]() Note
Note
For legal reasons, fonts synchronized via Adobe Fonts are never included in a package, only local fonts are.
![]() Note
Note
Since embedded graphics are already included in the InDesign document, you will not find them in a separate folder. Only linked content is collected.
The main advantage of packaging your work is that it creates a standalone version of your project with its own version of the linked files. This means that accidental changes to linked artwork will not affect your main project.
From the Lesson03 folder open L03-poster-end.indd.
Choose File > Package.
Optionally, review all information to verify what will be included in the package.
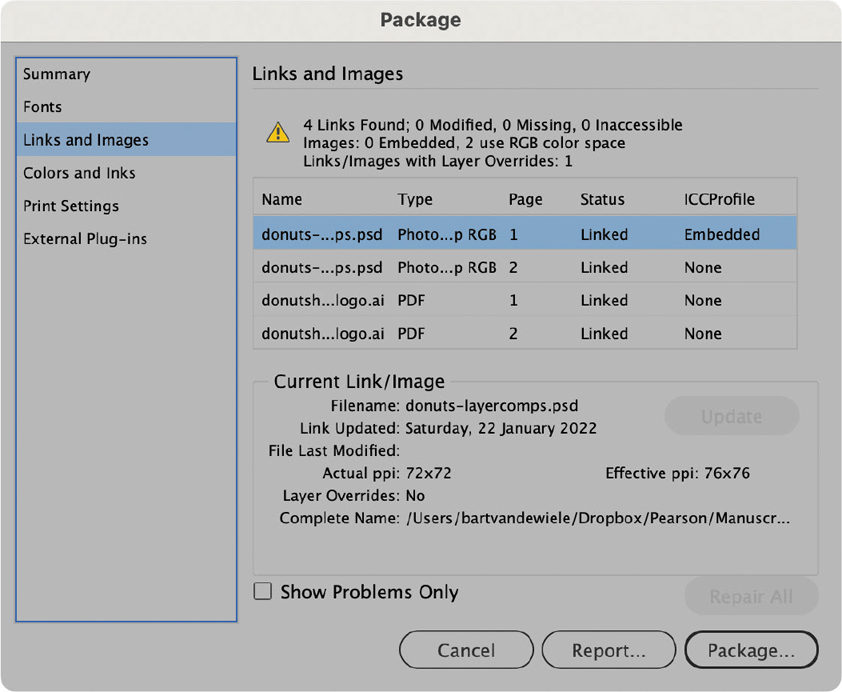
Click Package. If a dialog box opens asking you to save your file, click Save.
In the Create Package Folder dialog box, name the folder poster-package.
If you want, add a PDF version of the document and/or an IDML version by selecting the appropriate options. IDML documents can be opened by those who are using an older version of InDesign.

Click Package to create the package.
Review questions
1 After you’ve placed a Photoshop document in InDesign, what can go wrong when overriding the visibility of Photoshop layers, and which actions might trigger this?
2 Which two methods can you use in InDesign to detect overridden layers of a placed document?
3 Which two layer comp properties did we use while creating a Photoshop layer comp?
4 How can you convert a Photoshop layer comp into a separate Photoshop document?
5 Why is it not recommended to embed placed images into an InDesign document?
Review answers
1 Adding or deleting layers in Photoshop, renaming layers, changing the layer stacking order, or changing the layer visibility of a placed Photoshop document in InDesign that has its layers overridden can unintentionally revert all Photoshop layers to their original visibility.
2 You can either create a custom preflight profile using the Preflight panel or activate the Layer Overrides option from the Links panel options.
3 The layer comp properties used in the exercise included the Visibility and Appearance (Layer Style). Additionally, you can choose Position and Layer Comp Selection For Smart Objects.
4 Choose File > Export > Layer Comps To Files.
5 Embedding placed images into an InDesign document makes the InDesign file heavier, makes it impossible to edit the original file in Photoshop or Illustrator, and makes it more difficult to share the placed image with others.