10 Painting with the Mixer Brush
Lesson overview
In this lesson, you’ll learn how to do the following:
Customize brush settings.
Clean the brush.
Mix colors.
Create a custom brush preset.
Use wet and dry brushes to blend color.
This lesson will take about an hour to complete. To get the lesson files used in this chapter, download them from the web page for this book at www.adobepress.com/PhotoshopCIB2020. For more information, see “Accessing the lesson files and Web Edition” in the Getting Started section at the beginning of this book.
As you work on this lesson, you’ll preserve the start files. If you need to restore the start files, download them from your Account page.

PROJECT: DIGITAL PAINTING
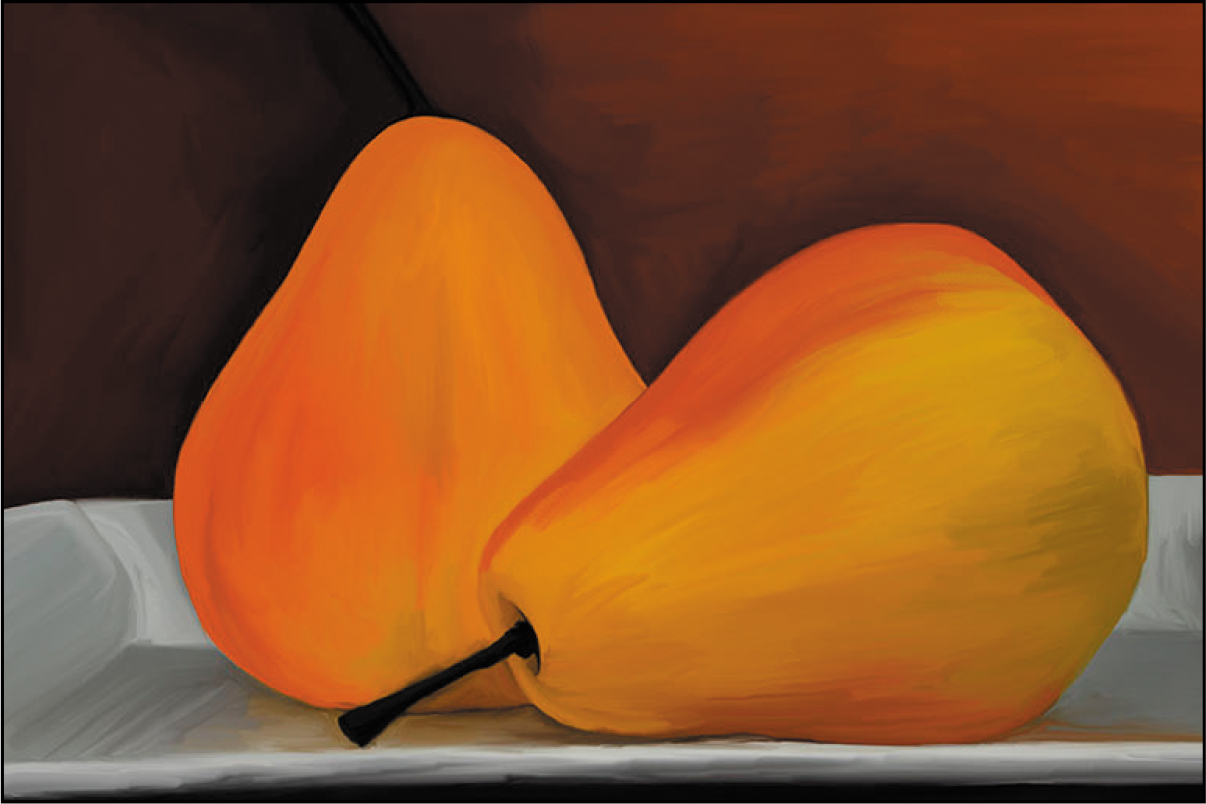
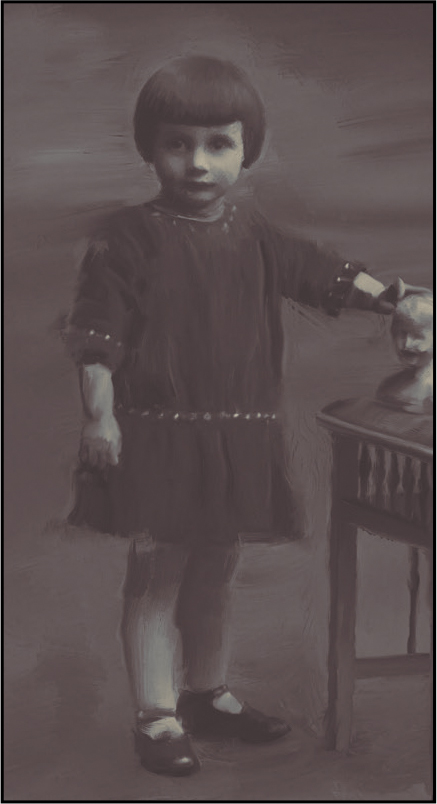
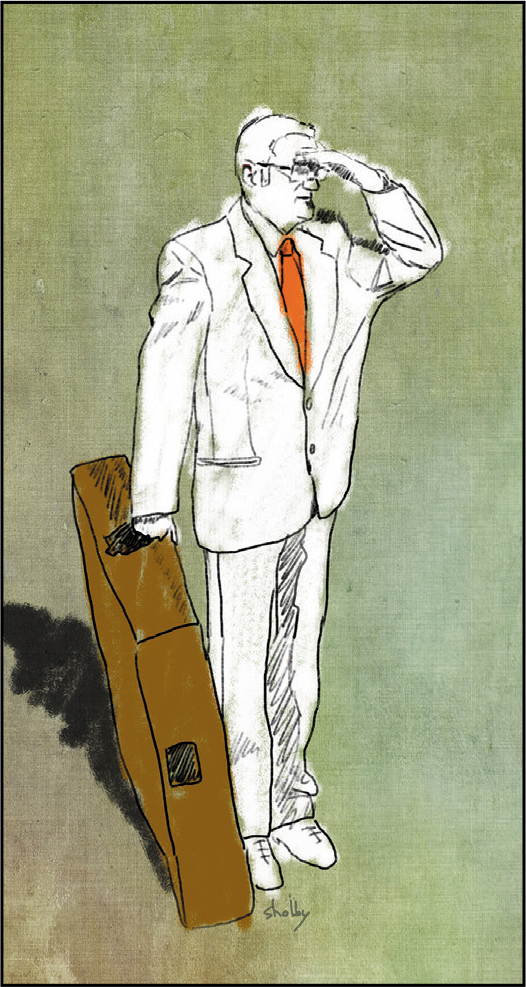
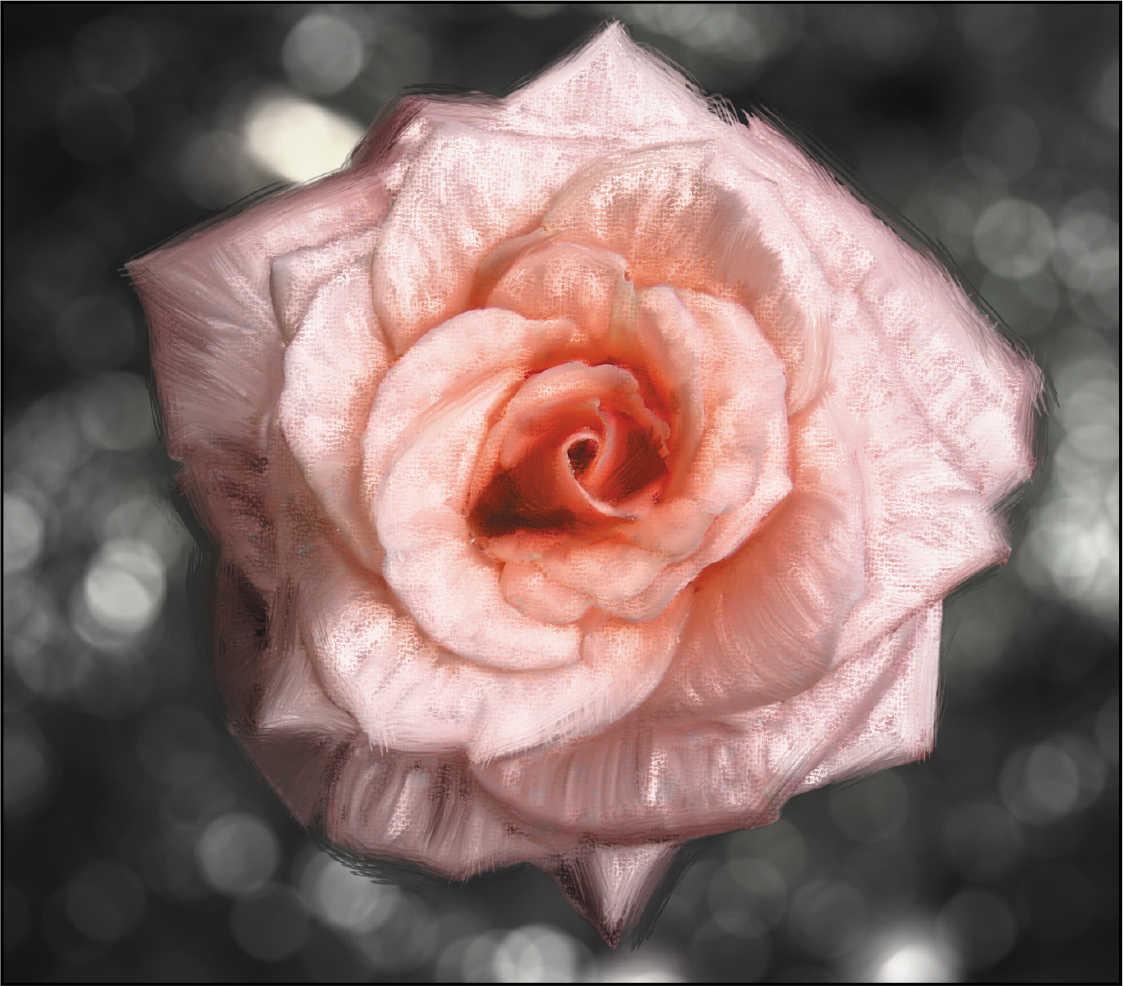
The Mixer Brush tool gives you flexibility, color-mixing abilities, and brush strokes as if you were painting on a physical canvas.
About the Mixer Brush
In previous lessons, you’ve used brushes in Photoshop to perform various tasks. The Mixer Brush is unlike other brushes in that it lets you mix colors with each other. You can change the wetness of the brush and how it mixes the brush color with the color already on the canvas.
Some Photoshop brush types can have realistic bristles, so you can add textures that resemble those in paintings you might create in the physical world. While this is a great feature in general, it’s particularly useful when you’re using the Mixer Brush. Combining different bristle settings and brush tips with different wetness, paint-load, and paint-mixing settings gives you opportunities to create exactly the look you want.
Getting started
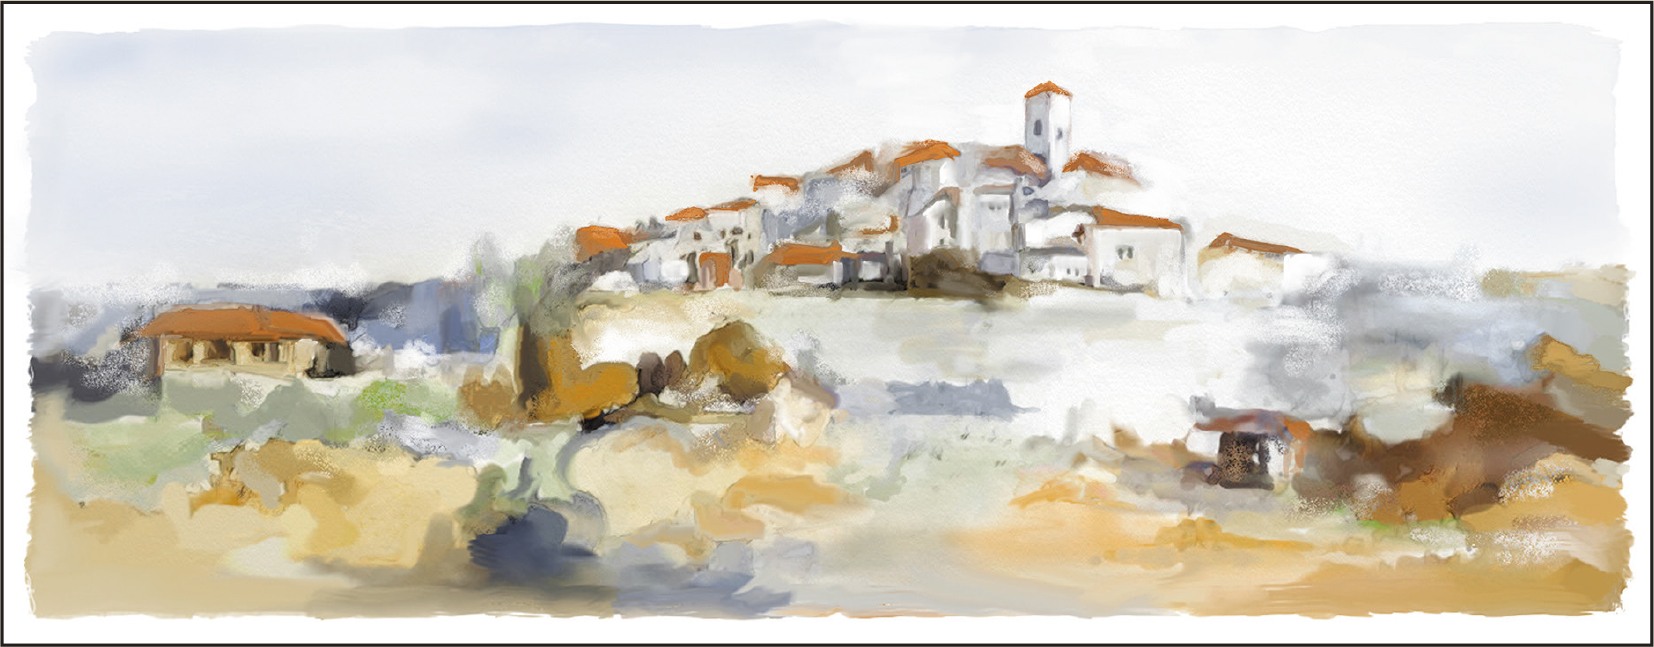
In this lesson, you’ll get acquainted with the Mixer Brush as well as the brush tip and bristle options available in Photoshop. Start by taking a look at the final projects you’ll create.
Start Photoshop, and then immediately hold down Ctrl+Alt+Shift (Windows) or Command+Option+Shift (Mac) to restore the default preferences. (See “Restoring Default Preferences” on page 5.)
When prompted, click Yes to delete the Adobe Photoshop Settings file.
 Note
NoteIf Bridge isn’t installed, the File > Browse in Bridge command in Photoshop will start the Creative Cloud desktop app, which will download and install Bridge. After installation completes, you can start Bridge.
Choose File > Browse In Bridge to open Adobe Bridge.
In Bridge, click Lessons in the Favorites panel. Double-click the Lesson10 folder in the Content panel.
Preview the Lesson10 end files.
You’ll use the palette image to explore brush options and learn to mix colors. You’ll then apply what you’ve learned to transform the landscape image into a painting.
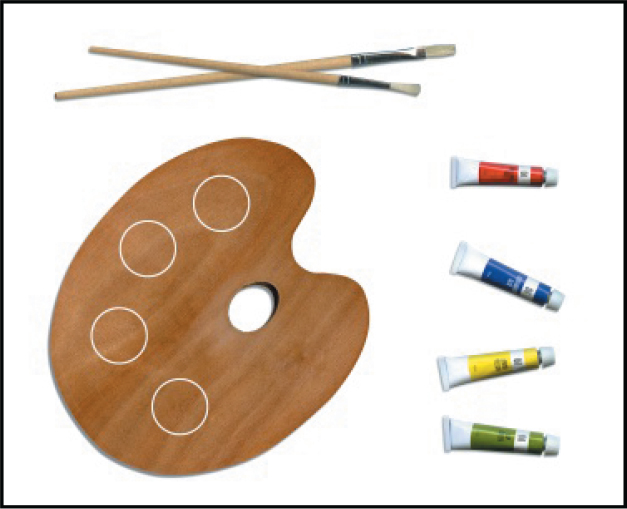
Double-click 10Palette_Start.psd to open the file in Photoshop.
Choose File > Save As, and name the file 10Palette_Working.psd. Click OK if the Photoshop Format Options dialog box appears.
 Note
NoteIf Photoshop displays a dialog box telling you about the difference between saving to Cloud Documents and Your Computer, click Your Computer. You can also select Don’t Show Again, but that setting will deselect after you reset Photoshop preferences.
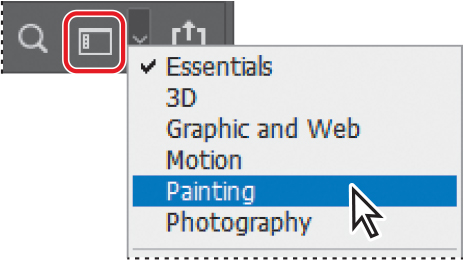
Click the Choose a Workspace icon at the top right corner of the application frame, and choose the Painting workspace.
![]() Note
Note
If you use Photoshop for digital painting, consider using a graphics tablet with a pressure-sensitive stylus, such as a Wacom Intuos. If your stylus transmits information such as pressure, angle, and rotation, Photoshop can apply that data to your brush as you paint.
Selecting brush settings
The practice image includes a palette and four tubes of color, which you’ll use to sample the colors you’re working with. You’ll change settings as you paint different colors, exploring brush tip settings and wetness options.
Select the Zoom tool (
 ), and zoom in to see the tubes of paint.
Select the Eyedropper tool (
 ), and click the red tube to sample its color.
The foreground color changes to red.
![]() Note
Note
When you hold down the Eyedropper tool on the image, Photoshop displays a sampling ring that previews the color you’re selecting. The sampling ring is available if Photoshop can use the graphics processor on your computer (see the Performance panel in Photoshop preferences).
Select the Mixer Brush tool (
 ) in the Tools panel. (When another workspace is selected, you may find the Mixer Brush hidden under the Brush tool [
 ].)
].)
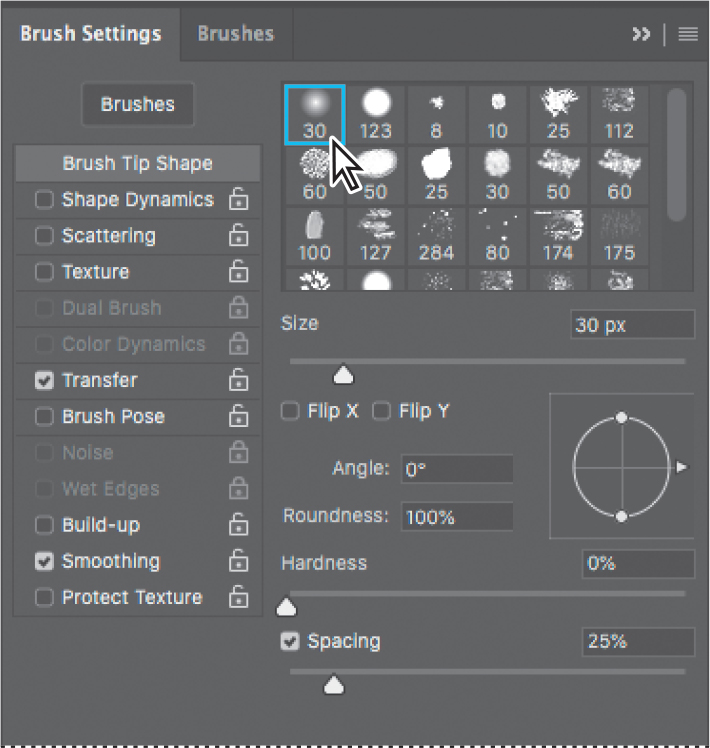
Choose Window > Brush Settings to open the Brush Settings panel. Select the first brush.
![]() Tip
Tip
Looking for a specific brush name in the Brush Settings panel? Hover the pointer over a brush thumbnail, and its name will pop up in a tool tip.
The Brush Settings panel contains brush presets and several options for customizing brushes.
Experimenting with wetness options and brushes
The effect of the brush is determined by the Wet, Load, and Mix fields in the options bar. Wet controls how much paint the brush picks up from the canvas. Load controls how much paint the brush holds when you begin painting (as with a physical brush, it runs out of paint as you paint with it). Mix controls the ratio of paint from the canvas and paint from the brush.
You can change these settings separately. However, it’s faster to select a standard combination from the pop-up menu.
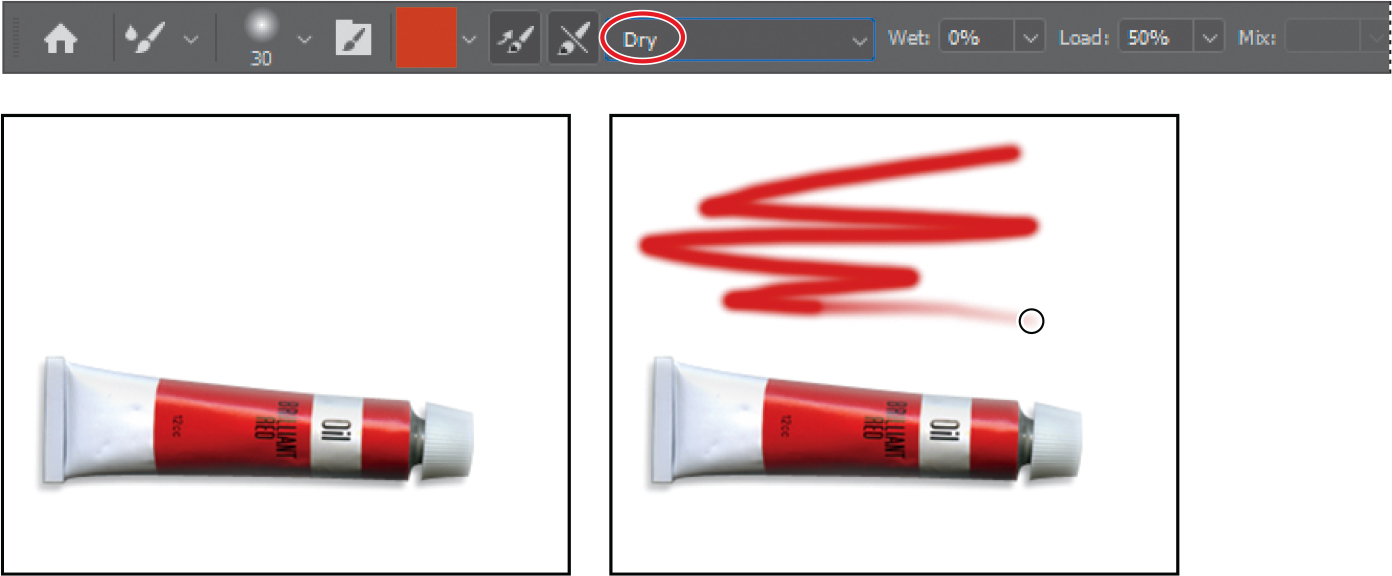
In the options bar, choose Dry from the pop-up menu of blending brush combinations.
When you select Dry, Wet is set to 0%, Load to 50%, and Mix is not applicable. With the Dry preset, you paint opaque color; you cannot mix colors on a dry canvas.
Paint in the area above the red tube. Solid red appears. As you continue painting without releasing the mouse, the paint eventually fades and runs out.
With the Eyedropper tool, sample the blue color from the blue tube of paint.
 Note
NoteYou can also sample paint by Alt-clicking or Option-clicking the Mixer Brush tool. This samples the area within the brush size as an image, unless you selected Load Solid Colors Only in the Current Brush Load menu in the options bar.
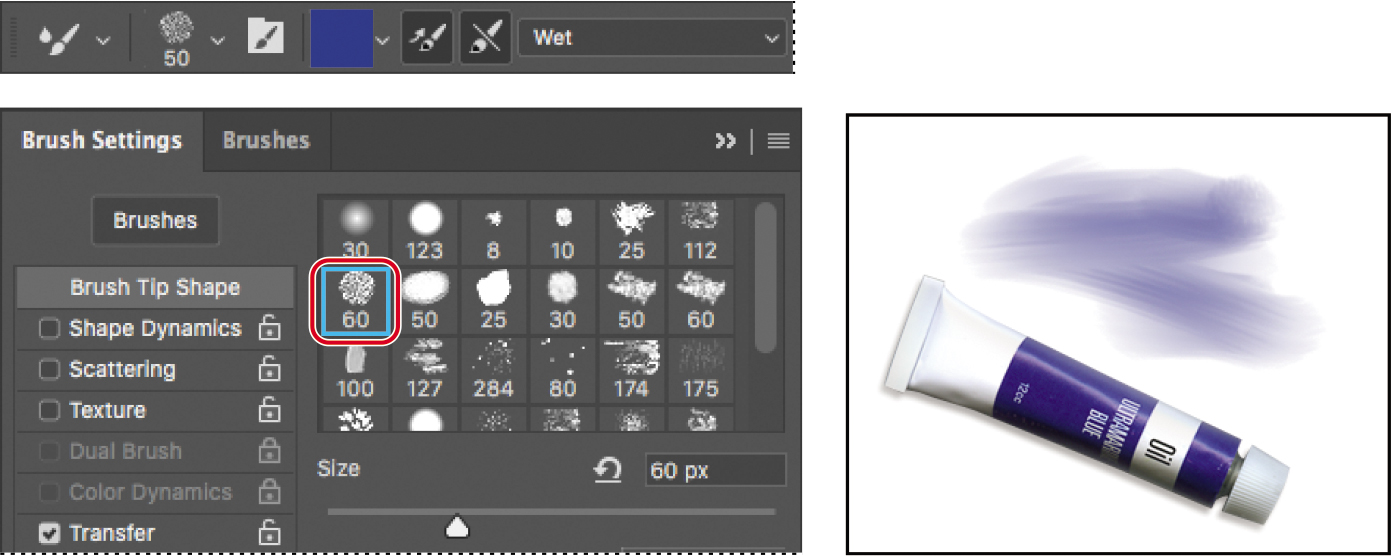
Select the Mixer Brush. For the blue paint, in the Brush Settings panel we chose the Round Sketch Ballpoint Pen brush (the first brush in the second row). Choose Wet from the pop-up menu in the options bar.
If the brush you select doesn’t match the one shown here, resize the Brush Settings panel so that the brush thumbnails display six columns across.
![]() Note
Note
If you aren’t getting the same results from the brushes, make sure the Background layer is selected in the Layers panel.
Paint above the blue tube. The paint mixes with the white background.
Choose Dry from the menu in the options bar, and then paint again above the blue tube. A much darker, more opaque blue appears, and doesn’t mix with the white background.
 Note
NoteIf the brushes in your Brush Settings panel don’t match the ones shown in this chapter, open the Brushes panel, Shift-select all brushes and brush folders in the list, click the Delete Brush button (
 ), click OK to confirm, and then choose Restore Default Brushes from the Brushes panel menu.
Sample the yellow color from the yellow paint tube, and then select the Mixer brush. For the yellow paint, in the Brush Settings panel we chose the Pencil KTW 1 brush (the fourth brush in the second row). Choose Dry from the menu in the options bar, and then paint in the area over the yellow paint tube.
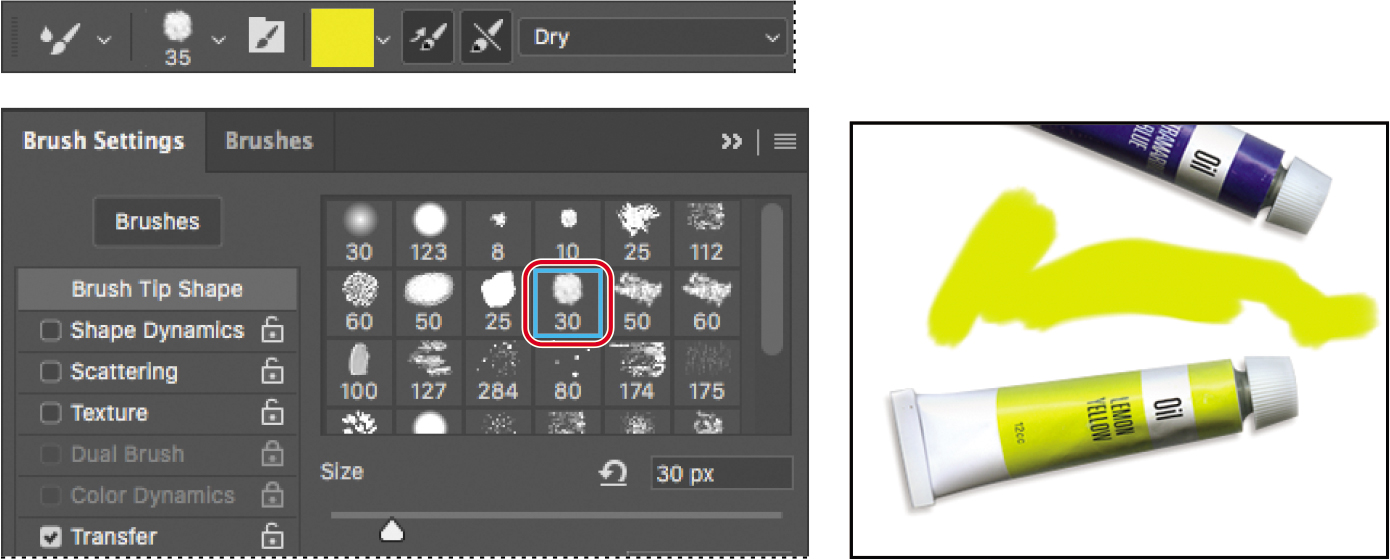
Choose Very Wet from the menu in the options bar, and then paint some more. Now the yellow mixes with the white background.
Sample the green color from the green paint tube, and then select the Mixer brush. For the green paint, in the Brush Settings panel we chose the Hard Round 30 brush (the sixth brush in the fifth row). Choose Dry from the menu in the options bar.
Draw a zigzag line above the green paint tube.
Mixing colors
You’ve used wet and dry brushes, changed brush settings, and mixed the paint with the background color. Now, you’ll focus more on mixing colors with each other as you add paint to the painter’s palette.
![]() Note
Note
Depending on the complexity of your project and the performance of your computer, you may need to be patient. Mixing colors can be an intensive process.
Zoom out just enough to see the full palette and the paint tubes.
Select the Paint mix layer in the Layers panel, so the color you paint won’t blend with the brown palette on the Background layer.
![]() Tip
Tip
If the paint tubes are covered by the Brush Settings panel, feel free to rearrange your workspace to make room. For example, collapse or close panels you aren’t using. But make sure you can still see the Layers panel.
The Mixer Brush tool mixes colors only on the active layer unless you select Sample All Layers in the options bar.
Use the Eyedropper tool to sample the red color from the red paint tube, and then select the Mixer brush. In the Brush Settings panel, select the Soft Round 30 brush (the first brush in the first row). Then choose Wet from the pop-up menu in the options bar, and paint in the top circle on the palette.
Click the Clean The Brush After Each Stroke icon (
 ) in the options bar to deselect it.
Use the Eyedropper tool to sample the blue color from the blue paint tube, and then use the Mixer Brush tool to paint in the same circle, mixing the red with the blue until the color becomes purple.
 Tip
TipYou can use the Eyedropper tool to sample a color even if the layer that contains the color isn’t selected.

Use the Eyedropper tool to sample the purple color from the circle you just painted, and then paint in the next circle.
 Tip
TipUse the Eyedropper tool to sample the color, since it’s on a different layer.

In the options bar, choose Clean Brush from the Current Brush Load pop-up menu. The preview changes to indicate transparency, meaning the brush has no paint loaded.

To remove the paint load from a brush, you can choose Clean Brush in the options bar. To replace the paint load in a brush, sample a different color.
If you want Photoshop to clean the brush after each stroke, select the Clean The Brush After Each Stroke icon (![]() ) in the options bar. To load the brush with the foreground color after each stroke, select the Load The Brush After Each Stroke icon (
) in the options bar. To load the brush with the foreground color after each stroke, select the Load The Brush After Each Stroke icon (![]() ) in the options bar. By default, both of these options are selected.
) in the options bar. By default, both of these options are selected.
Use the Eyedropper tool to sample the blue color from the blue paint tube, and then use the Mixer Brush to paint blue in half of the next circle.
Sample the yellow color from the yellow paint tube, and slowly paint over the blue with a wet brush to mix the two colors.

Fill the last circle with yellow and red paint, mixing the two with a wet brush to create an orange color.

Hide the Circles layer in the Layers panel to remove the outlines on the palette. You’ve mixed paint colors on a digital palette!

Choose File > Save, and close the document.
Mixing colors with a photograph
When you come up with a great brush, you probably want to save all of its settings so that you can use that brush again in a later project. While Photoshop already has a Tool Preset feature that lets you save tool settings, brushes have more options than most tools. For this reason, Photoshop has convenient Brush Presets that can remember everything about a brush.
![]() Tip
Tip
If you’ve used earlier versions of Photoshop, you’ll find that the Brush Presets in Photoshop CC 2018 or later are simpler and more powerful than in previous versions.
Earlier, you mixed colors with a white background and with each other. Now, you’ll use a photograph as your canvas. You’ll add colors and mix them with each other and with the background colors to transform a photograph of a landscape into a painting.
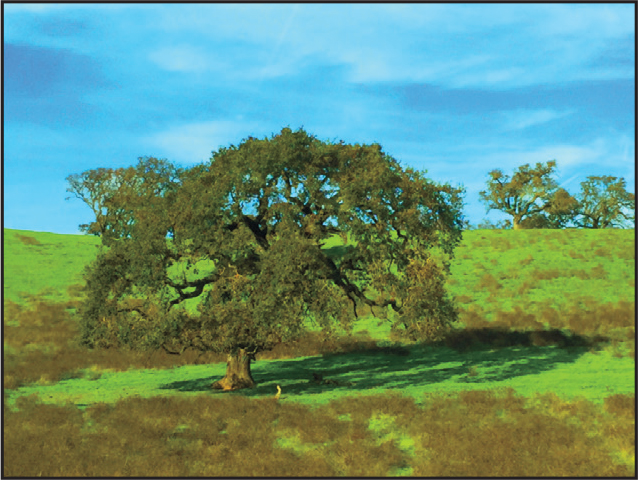
Choose File > Open. Double-click the 10Landscape_Start.jpg file in the Lesson10 folder to open it.
Choose File > Save As. Rename the file 10Landscape_Working.jpg, and click Save. Click OK in the JPEG Options dialog box.
Photoshop includes numerous brush presets, which are very handy. But if you need a different brush for your project, you might find it easier to create your own brush preset or download brush presets that another artist has created and shared online. In the following exercises, you’ll load, edit, and save custom brush presets.
Loading custom brush presets
The Brushes panel displays visual samples of the strokes created by different brushes. If you already know the name of the brush you want to use, it can be easier to display the brushes by name. You’ll list them by name now, so you can find your preset for the next exercise.

![]() Tip
Tip
If you have enough space on your screen, you can see more brushes at once by making the Brushes panel wider or taller.
In the Brushes panel (choose Window > Brushes if it’s not open), expand one of the brush preset groups to see how the brushes are organized.
Now you’ll load brush presets that you’ll use for this exercise. Loading brush presets is how you use brush presets that you’ve downloaded or purchased.
Click the Brushes panel menu, and choose Import Brushes.
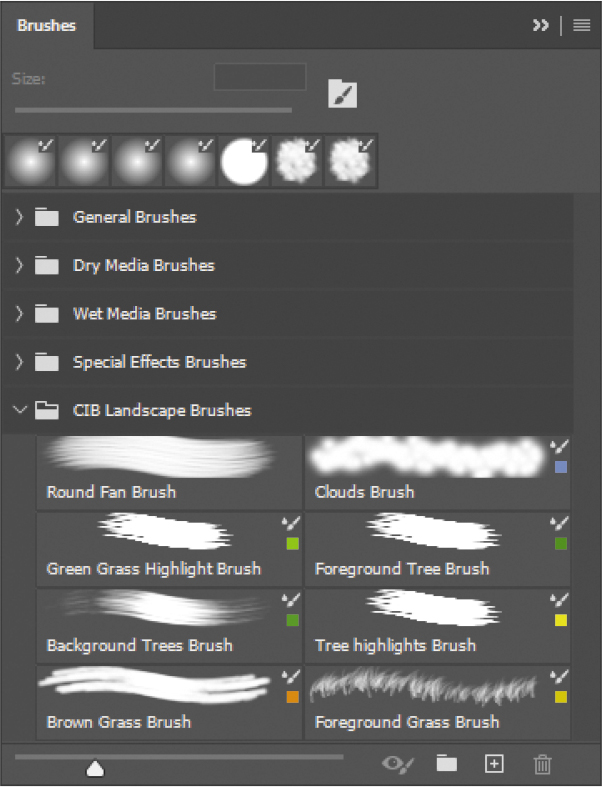
Navigate to the Lesson10 folder, select CIB Landscape Brushes.abr, and click Open or Load. The CIB Landscape Brushes group appears at the end of the Brushes panel list.
 Tip
TipIf you want to share your custom brushes with others or back them up, select the brushes or brush groups, and choose Export Selected Brushes from the Brushes panel menu.
Click to expand the CIB Landscape Brushes group, revealing the brushes it contains.
Some of the presets contain not only a stroke preview and a name, but also a color swatch. That’s because a color can be part of a brush preset.
Creating a custom brush preset
For the next exercise, you’ll create and save a variation on a brush preset that exists in the CIB Landscape Brushes you just imported.
![]() Tip
Tip
In the Brush Settings panel, the Brush Tip Shape options include the Angle setting, which simulates the rotation angle at which you hold the brush handle. Some graphics tablets can use a stylus that lets you rotate the brush tip as you paint, by rotating the stylus. If you don’t have such a stylus, you can rotate the brush tip angle by one degree as you paint, by pressing the Left Arrow or Right Arrow keys. Add the Shift key to rotate in 15-degree increments.
Select the Mixer Brush, and then, in the CIB Landscape Brushes group in the Brushes panel, select the Round Fan Brush. You’ll use this brush preset as the starting point for the brush preset you’ll create.
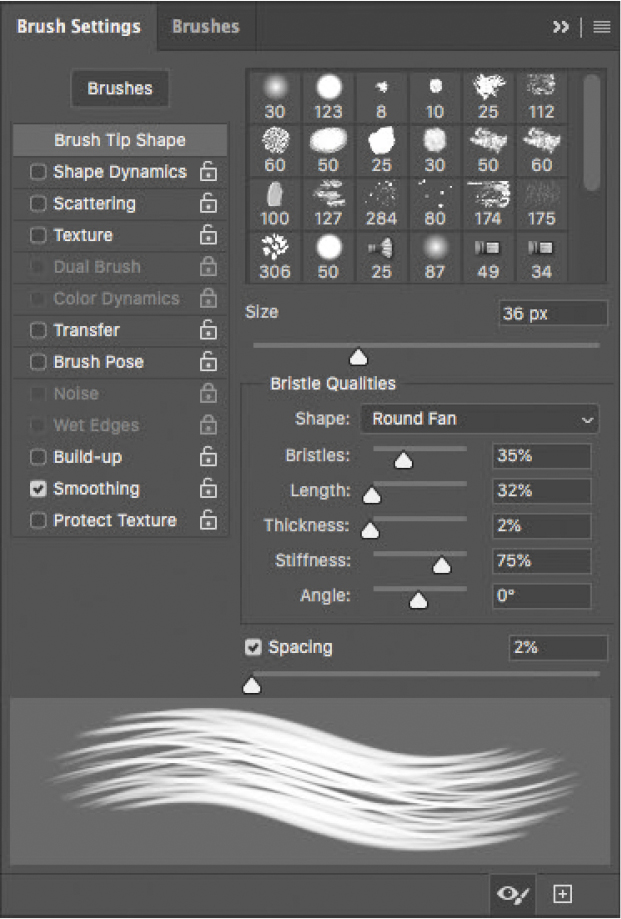
Change the following settings in the Brush Settings panel:
Size: 36 px
Shape: Round Fan
Bristles: 35%
Length: 32%
Thickness: 2%
Stiffness: 75%
Angle: 0°
Spacing: 2%
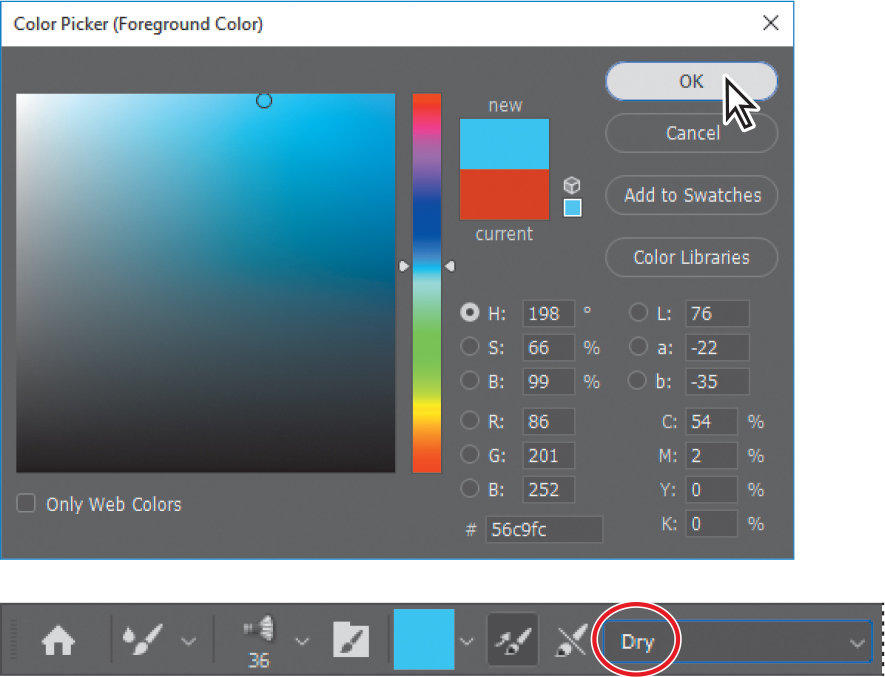
Click the Foreground color swatch in the Tools panel. Select a medium-light blue color (we chose R=86, G=201, B=252).
Choose Dry from the pop-up menu in the options bar.
Now it’s time to save the settings as a brush preset.
Choose New Brush Preset from the Brush Settings panel menu.
 Tip
TipThe options in the New Brush dialog box make it possible to save the brush size, the tool settings, and the brush color in the preset.
Name the brush Sky Brush, select all of the options in the New Brush dialog box, and then click OK.

Your new brush is saved in the CIB Landscape Brushes group because it was based on a brush preset from that group. Feel free to reorganize your brush presets any way you like by dragging and dropping presets into brush preset groups within the Brushes panel. You can create a brush preset group by clicking the Create a New Group button ( ![]() ) at the bottom of the Brushes panel. You can change the order of the Brushes panel list and organize brush preset groups into subgroups.
) at the bottom of the Brushes panel. You can change the order of the Brushes panel list and organize brush preset groups into subgroups.
Painting and mixing colors with brush presets
You’ll paint the sky first, using the brush preset you just created.
Select the Sky Brush from the Brushes panel.
Presets are saved on your system, so they’re available when you work with any image.
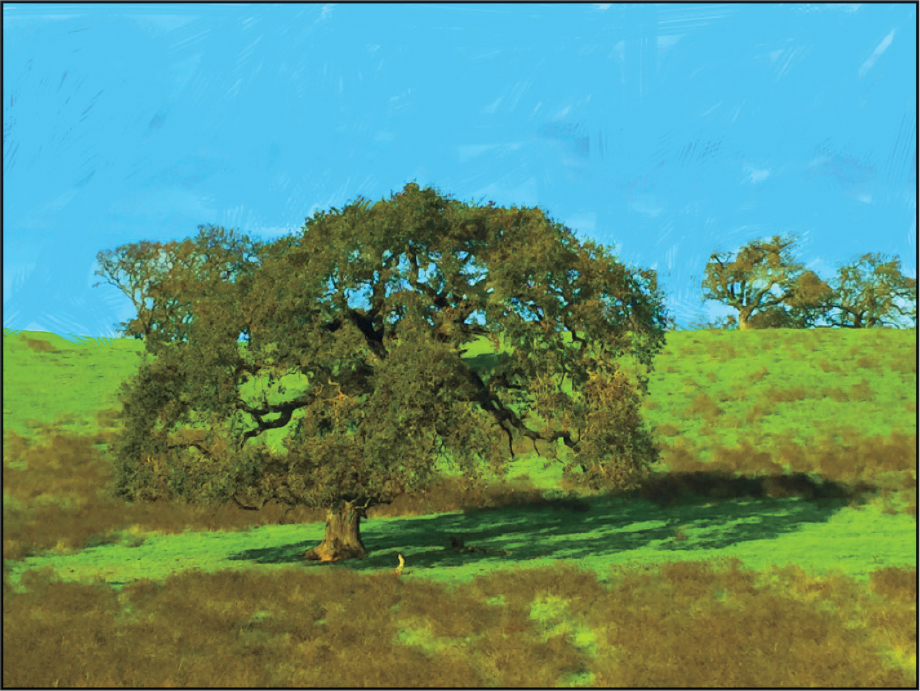
Paint over the sky, moving in close to the trees. Because you’re using a dry brush, the blue paint isn’t mixing with the colors beneath it.
Select the Clouds Brush.
Use this brush to scrub diagonally in the upper right corner of the sky, blending the two colors with the background color.
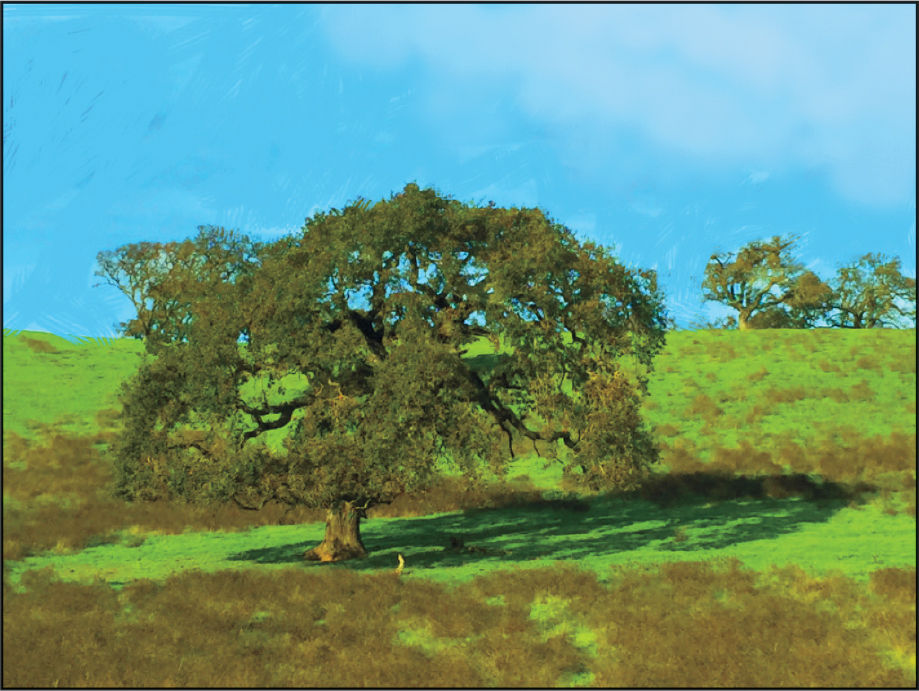
When you’re satisfied with the sky, move on to the grass and trees.
Select the Green Grass Highlight Brush. Then paint short vertical strokes over the darker grass areas so that they become bright green grass.
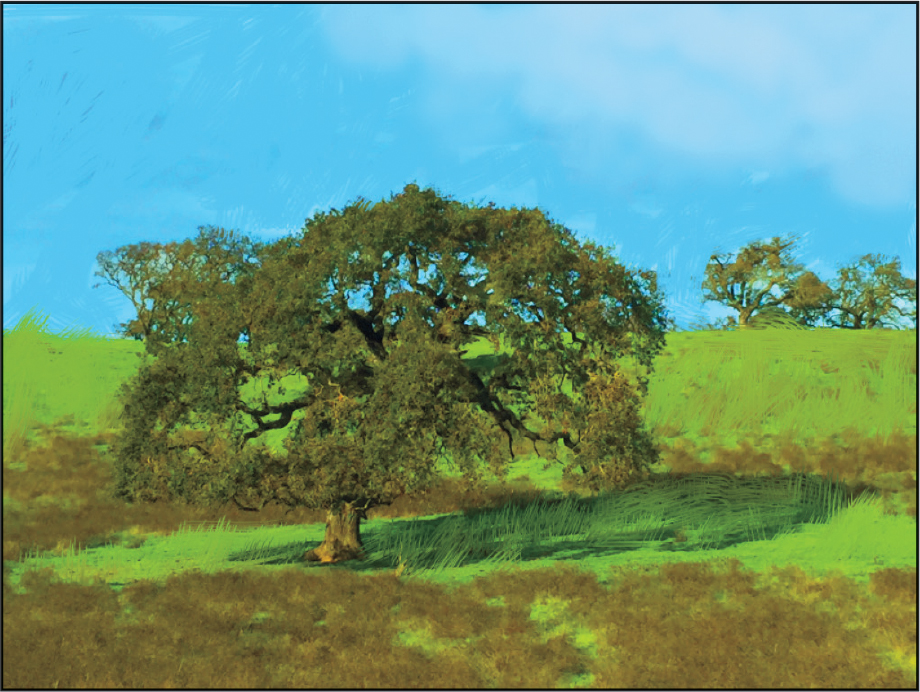
Select the Foreground Tree Brush, and then paint the darker areas of the tree. Then select the Background Trees Brush, and paint the two smaller trees on the right side of the painting. Select the Tree Highlights Brush, and paint the lighter areas of the trees. These are Wet brushes so that you can blend colors.
 Tip
TipIf you want to create less jittery strokes with the Mixer Brush, like near the edges of the trees, try increasing the Set Smoothing for Stroke percentage in the options bar.
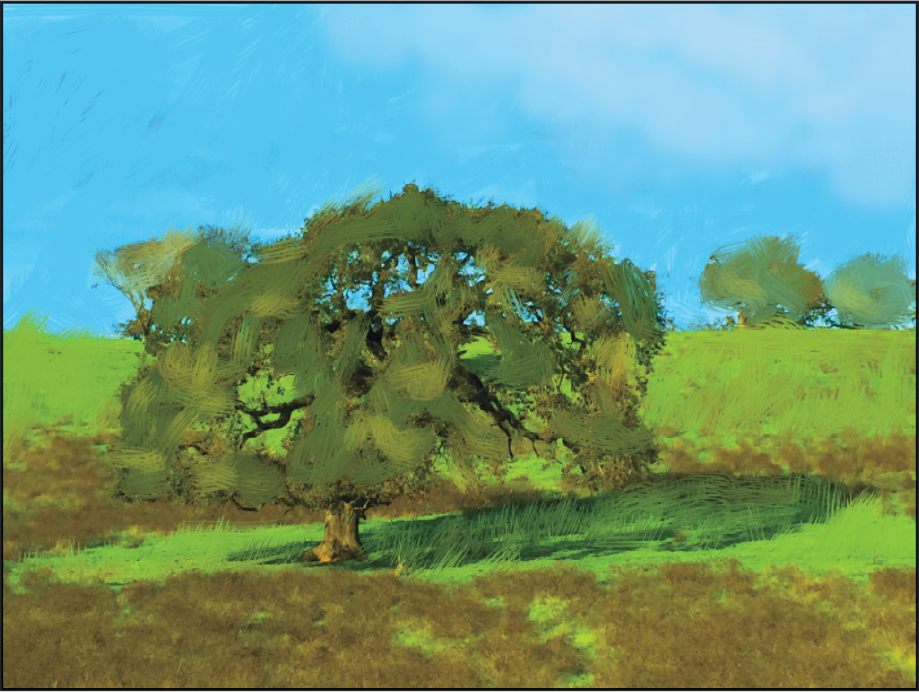
So far, so good. The brown grasses are all that remain to be painted.
![]() Tip
Tip
For different effects, paint in different directions or customize the brush size or other settings. With the Mixer Brush tool, you can go wherever your artistic instincts lead you.
Select the Brown Grass Brush. Paint along the brown grass with up-and-down strokes for the look of a field. Use the same brush to paint the trunk of the tree.
Select the Foreground Grass Brush. Then paint using diagonal strokes to blend the colors in the grass.
Choose File > Save, and close the document.

Voilà! You’ve created a masterpiece with your paints and brushes, and there’s no mess to clean up.
Review questions
1 What does the Mixer Brush do that other brushes don’t?
2 How do you load a mixer brush with color?
3 How do you clean a brush?
4 What is the name of the panel that you use to manage brush presets?
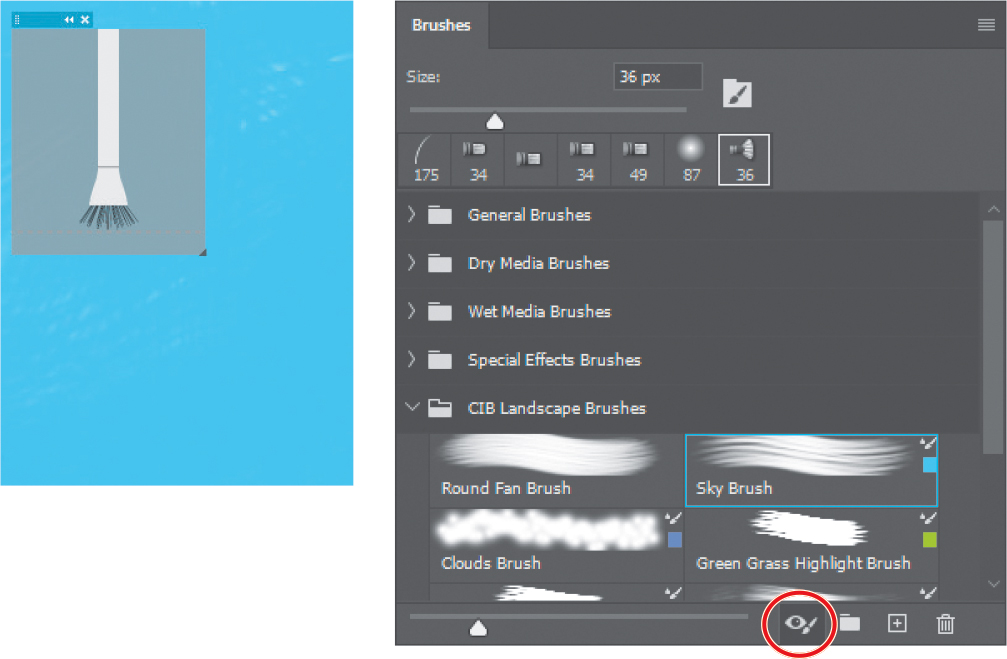
5 What is the Live Tip Brush Preview, and how can you hide it?
Review answers
1 The Mixer Brush mixes the current brush color with colors on the canvas.
2 You can load color on a mixer brush by sampling a color, either by using the Eyedropper tool or keyboard shortcuts (Alt-click or Option-click). Or, you can choose Load Brush from the pop-up menu in the options bar to load the brush with the foreground color.
3 To clean a brush, choose Clean Brush from the pop-up menu in the options bar.
4 You manage brush presets in the Brushes panel.
5 The Live Tip Brush Preview shows you the direction the brush strokes are moving. To hide or show the Live Tip Brush Preview, click the Toggle The Live Tip Brush Preview icon at the bottom of the Brushes panel or the Brush Settings panel.


