Understanding Flash Photography
Getting the Best Results from a Flash
Having a Speedlight or a built-in flash means that you always have a light source with you. Except for the top-of-the-line D2, D3, and D4 camera lines, all of the other Nikon DSLRs come with a built-in flash. Now, I am not a big fan of using that pop-up flash. I would much prefer to use a Speedlight such as the SB-700 or SB-910 on the camera simply because the flash head can be adjusted so that the light isn’t just blasting straight from the camera right at the subject. Nikon created the CLS to make photos taken with a flash look more natural, but knowing some basics will help you get the best results.
Basic Flash
It is always better to use a Nikon Speedlight than the built-in flash on your camera. The problem is the light created by the pop-up flash just doesn’t look natural. It looks as if you used an on-camera flash. In the past, when you saw a photo lit by the pop-up flash or even a Speedlight on the camera, you could easily recognize it—and it usually looked pretty bad. The CLS has done a lot to change that, but you can do even better by getting the flash off the camera (covered later in the book).
Following are some basics on how to get a better-looking image with the flash on the camera. These techniques require a Speedlight that you can rotate and change the angle of the flash head. The general idea is to take that small, hard light and turn it into a larger, softer light. The first thing to do is add a diffusion dome over the head of the flash and angle the flash over the subject instead of right at the subject.
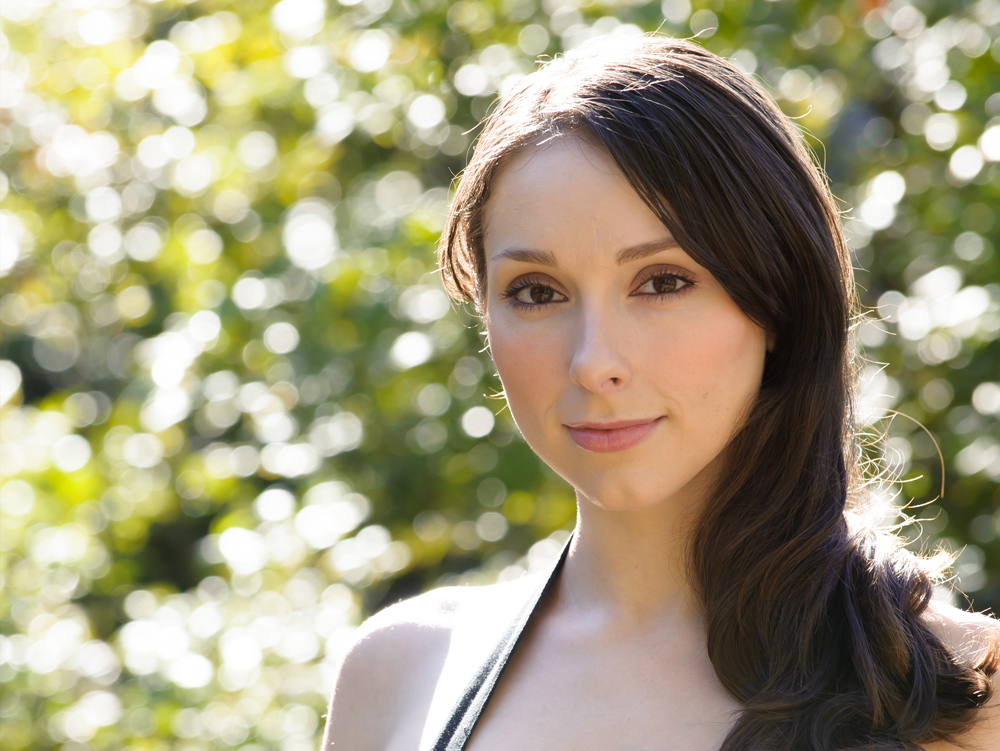
I shot this photo with an SB-700 mounted on the camera hot shoe and pointed directly at the subject. The automatic TTL BL setting created a well-exposed shot, but the light isn’t very flattering.
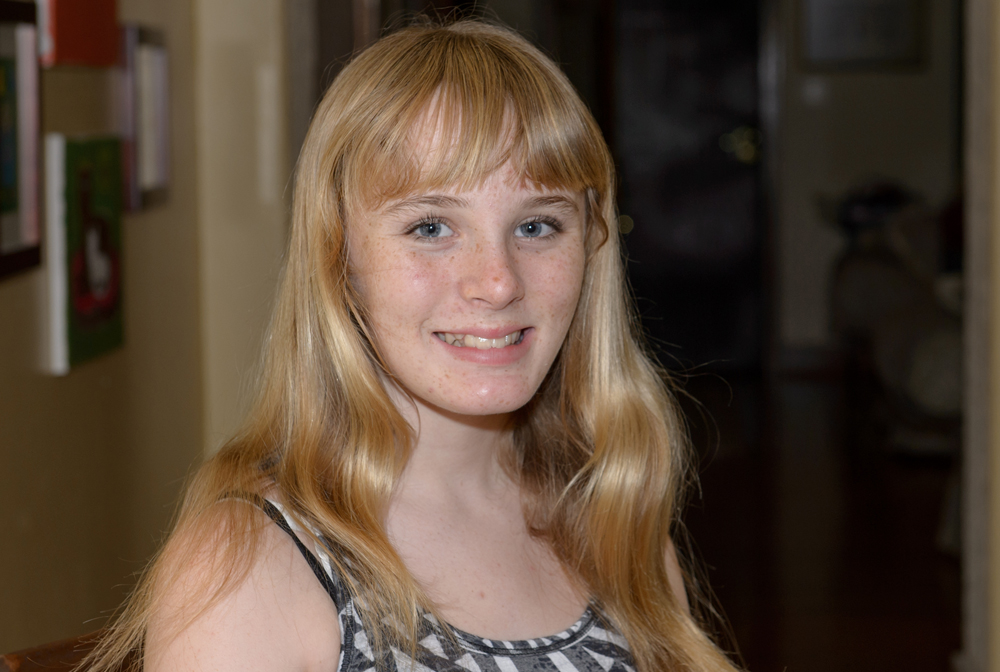
To create a more flattering light, I shot the same scene but aimed the flash at the ceiling with the diffusion dome attached. This created a much softer light by bouncing it off the ceiling and down at the subject.
As you can see in the second image, just a small adjustment can make a pretty big difference in how the subject looks. Another method of changing the light while it is still attached to the camera is to bounce the light off a nearby surface. This works great if your subject is close to a white wall or ceiling; you can aim the flash at the white surface instead of directly at the subject.
Fill Flash
The idea behind fill flash is that you use the flash on your camera to add just a little light to help fill in the shadows with a little light. Fill flash is usually used outdoors when the subject is backlit or under harsh sunlight. The fill flash adds enough light to reduce the contrast in the image.
The key to making fill flash work is for the light to be natural-looking so that your viewers don’t notice the added light. You want to match the light coming from the camera with the light that already exists in the scene so that it all looks natural. The good news is that the Nikon cameras and flashes use the TTL BL setting. This tries to create the proper lighting by balancing the amount of light from the flash with the light in the scene. This works for both Speedlights and built-in flashes.
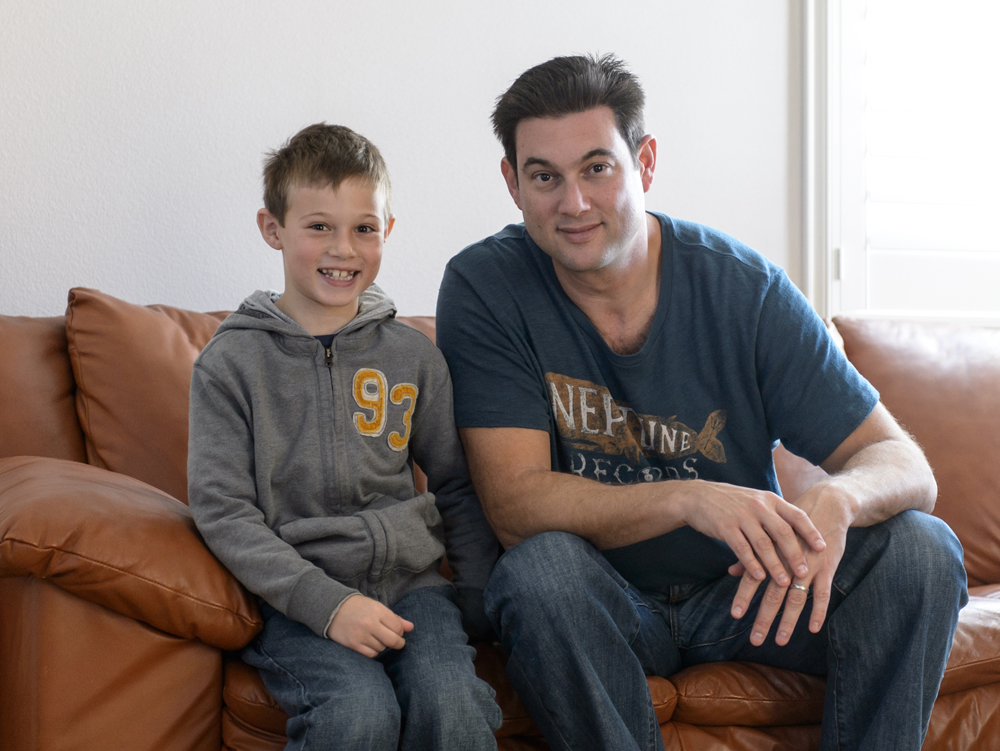
I shot this photo of my brother and nephew using the light coming in from the window behind them and an SB-800 aimed at the ceiling with –3EV dialed in to add just a little light to balance out the scene.
I shot this portrait with the SB-900 on the camera to add just a little light to the face. The camera took care of setting the power of the flash to match the rest of the light in the scene (ISO 400, f/3.2 and 1/250 sec).
One of the jobs that I do every year is to take photos in the pressrooms at events like the San Diego Comic Con. These pressrooms are usually lit with a mix of natural light coming through windows and doors and fluorescent and incandescent bulbs. It is a necessity to use a flash on the camera in these situations. To create a more balanced, softer light I use a Rogue FlashBender on the flash and let the camera and flash do all the work.
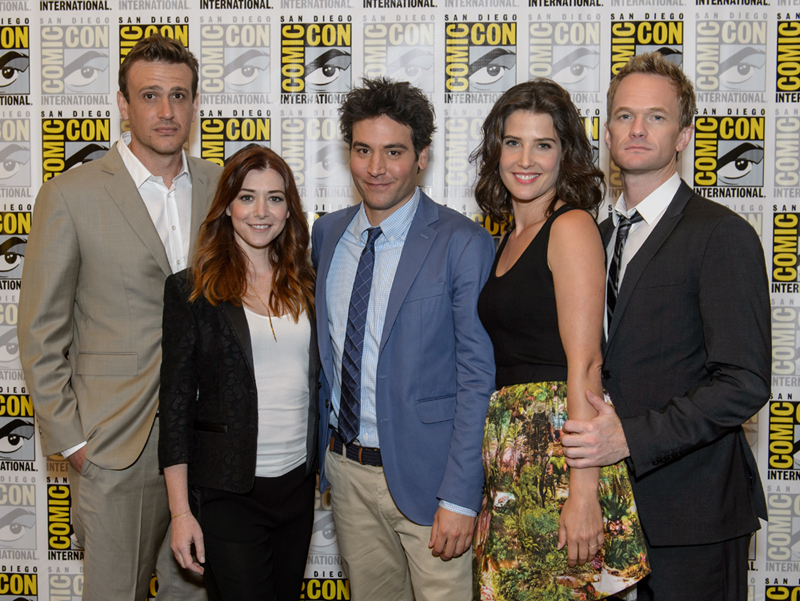
Using TTL technology, the flash and the camera read the light in the scene and added as much light as needed for a proper exposure.

With the proper use of a flash, you can even shoot in pretty dark places. In this case, I angled the SB-900 over the head of the subject and attached the diffusion dome to make the small flash head into a large light source that softens the light to create a more pleasing image.
Sync Modes
The sync mode determines when the flash fires during the exposure. When you use relatively fast shutter speeds, such as 1/125 or 1/250 second, it doesn’t make much difference. But when you use slower shutter speeds, it can really affect the entire image. To quickly recap, when you press the shutter release button to take a photo, the front curtain moves out of the way; at the end of the exposure, the rear curtain closes. The amount of time between the front curtain opening and the rear curtain closing is the shutter speed. The flash can be set to fire right after the front curtain opens (front curtain sync) or right before the rear curtain closes (rear curtain sync). The sync modes can show motion in the image.
Front Curtain Sync
The front curtain sync is when the flash fires right after the first curtain opens at the beginning of the exposure. This is usually the default mode on the camera and flash, and it usually results in a pretty good image. You don’t have to change any settings to fire the flash in this mode.
When you use the Front Curtain Sync setting, the flash freezes the action right at the beginning of the exposure. Any movement of the subject for the rest of the exposure is then recorded, which usually creates an unnatural look.
Rear Curtain Sync
The Rear Curtain Sync setting fires the flash right before the rear curtain closes at the very end of the exposure. This doesn’t make much difference at shorter shutter speeds, but it can make a huge difference when using longer shutter speeds.
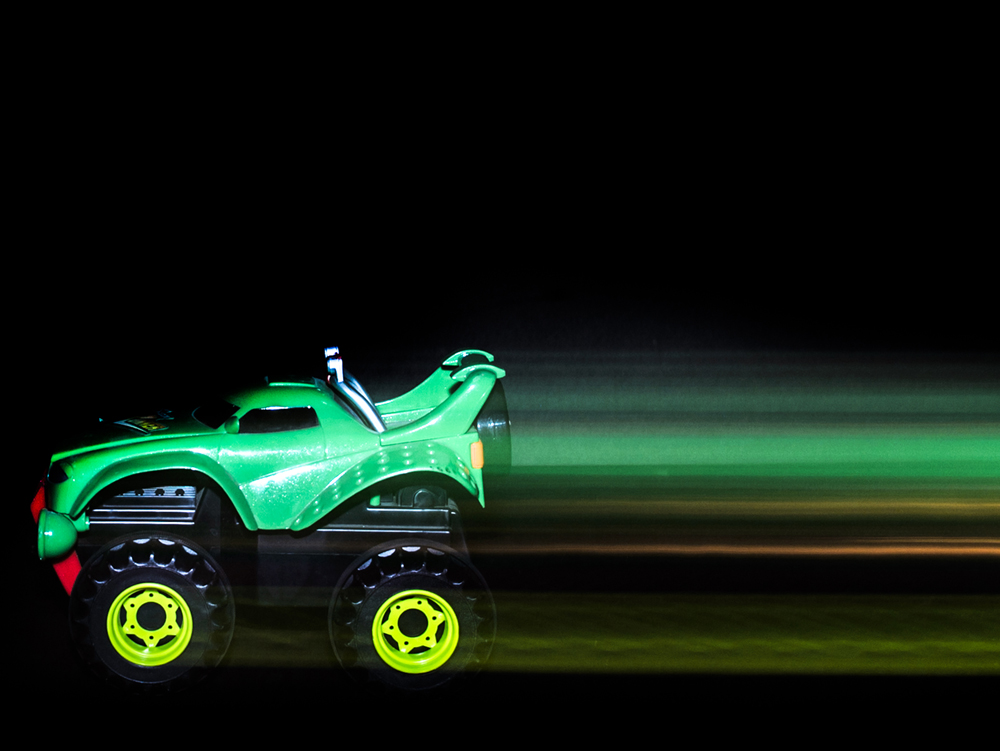
When you use the Rear Curtain Sync setting, the action is frozen by the flash at the end of the exposure. This makes any motion captured look a lot more natural. Keep in mind that you set the sync on the camera.
High-Speed Sync
The high-speed sync comes into play when using shutter speeds higher than the normal sync speed of the camera, usually 1/200 or 1/250 second. The high-speed sync allows you to use shutter speeds up to 1/8000 second on those cameras that support it.
To understand exactly how this works and why it’s useful, it’s important to know how the flash works. The length of the light burst when the flash fires is very fast. It is much faster than the usual sync speed of 1/200 or 1/250 second (the fastest shutter speed where the whole sensor is exposed to the light). When the shutter speed is increased to shutter speeds higher than the regular sync, the flash needs to fire during the entire exposure.
The high-speed sync uses more power per exposure so two things happen: the flash power and battery life are both greatly reduced. The faster the shutter speed, the lower the power output from the flash. So if you are using 1/8000 second shutter speed, the flash will only reach about 4 feet. So what is the use of the high-speed sync? It works really well when taking portraits in bright sunlight where you need a fast shutter speed to overcome the ambient sunlight.

High Speed Sync mode lets you use faster shutter speeds in bright sunlight.
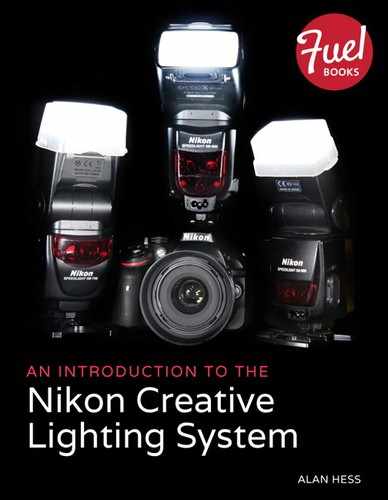
I shot this profile image in bright sunlight, but I really needed to use a shallow depth of field to make the background nice and blurry. This meant using a shutter speed of 1/1250 with an f/2.8 aperture setting. The flash (an SB-900) fired and helped create a more balanced photo. The best part was that I didn’t have to worry about the camera and flash settings—the CLS took care of it all for me.