Using Advanced Flash Setups
Controlling Different Groups of Flashes
The Nikon CLS allows you to control an unlimited number of remote flashes, and it gives you control over these flashes in three different groups. As you start adding multiple flashes and groups, the lighting can become a lot more complicated. The basics of triggering the lights remains the same—there are just more lights to deal with. The number of groups you can trigger depends on what you are using as a Master unit.
Having a Plan
When you start adding multiple remote flash units, it can get pretty complicated pretty fast. To keep it all under control, your best bet is to have a plan going in. You will need to set up which groups the remote flashes are in. This works best if you set the lights that are illuminating the same area to the same group so they can be controlled together. For example:
• Group A: Main lights
• Group B: Side light or hair lights
• Group C: Background lights
There is one very important item to keep in mind: Depending on what you are using as a Master controller, you might be limited to two groups of lights (A and B). In that case, you might use Group A for the main lights and Group B for the background lights.
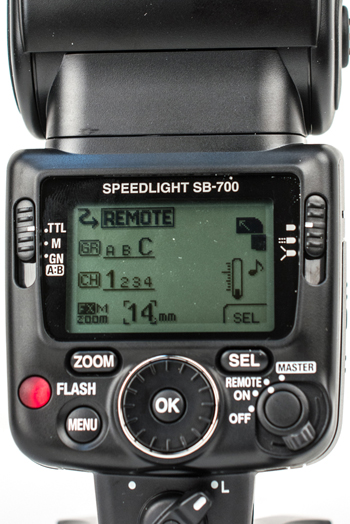
The group setting on the SB-700 with the flash set to Group C and Channel 1.
Setting Up Groups
You set up the groups when you set up the remote Speedlights. All of the Speedlights need to be on the same channel, but you can set the group to A, B, or C.
To keep track of which group each Speedlight is in, I mark them with a little tape. Because I only have a few Speedlights, I often have to change the tape, so I like to use small pieces of bright electrical tape. They are easy to see and allow me to set up all the flashes, then place them where I need them. Even better, if there is ever a question about what light is in what group, a quick look at the tape on the flash clears it up. In my system, the main light has red tape, the hair or fill lights have yellow tape, and the background lights have white tape. It’s just a system that works for me.

You can easily identify these flashes by the color of the tape.
Setting the Master
You set up the Master flash the same way you do for multiple flashes described previously, except that now you need to control the B and C groups as well. It is exactly the same as working with one group except that you need to add a mode and power adjustment for all the groups you have remotes in.
When setting the Master, stick to your plan. For me, Group A is always my main light, Group B is the hair light, and group C is the background. If I only have two groups, then I combine Groups B and C. This gives me the most control over the front of the scene and the rear of the scene.
Note
Remember that not all Speedlights and cameras are created equal. Some can only control two groups rather than three, and some do not allow you to mix the modes of the remote flashes (instead, they all need to be the same).
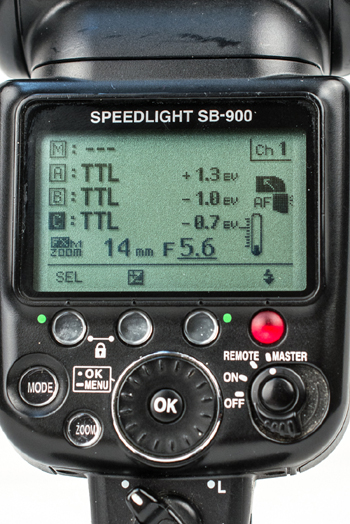
All three groups are set to TTL with varying degrees of EV on this flash.
Examples
I shot the following images with multiple remote flashes set to different groups so the light could be tailored to the scene. Keep in mind that as you add light to a scene, you might need to make adjustments to all the groups as light from one can influence other parts of the scene.
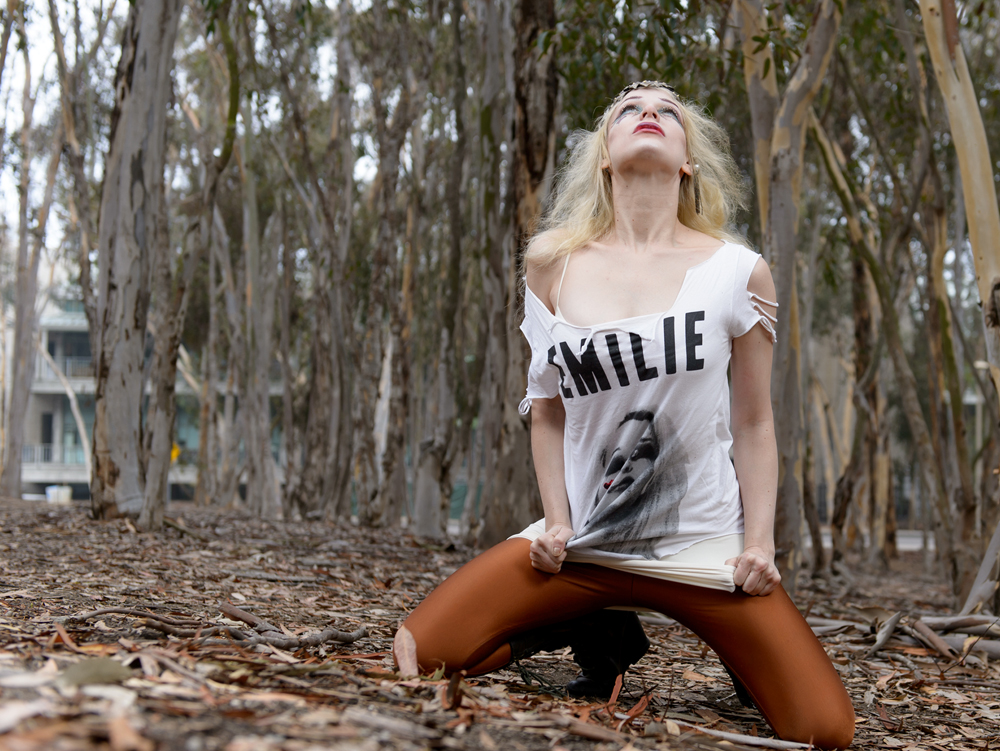
Emilie
I photographed Emilie before her show in San Diego, in a very limited time frame and with few options on location. I used two sets of off-camera Speedlights, one on either side of the camera. This gave me enough light to illuminate Emilie and at the same time counteract the sunlight. I then used the same lights in a wider setup to help even out the available light.

I took this photograph of Emilie with two off-camera SB-800 Speedlights. I placed the lights very close to Emilie but set the TTL in different groups. This allowed me to add slightly more light from the left.
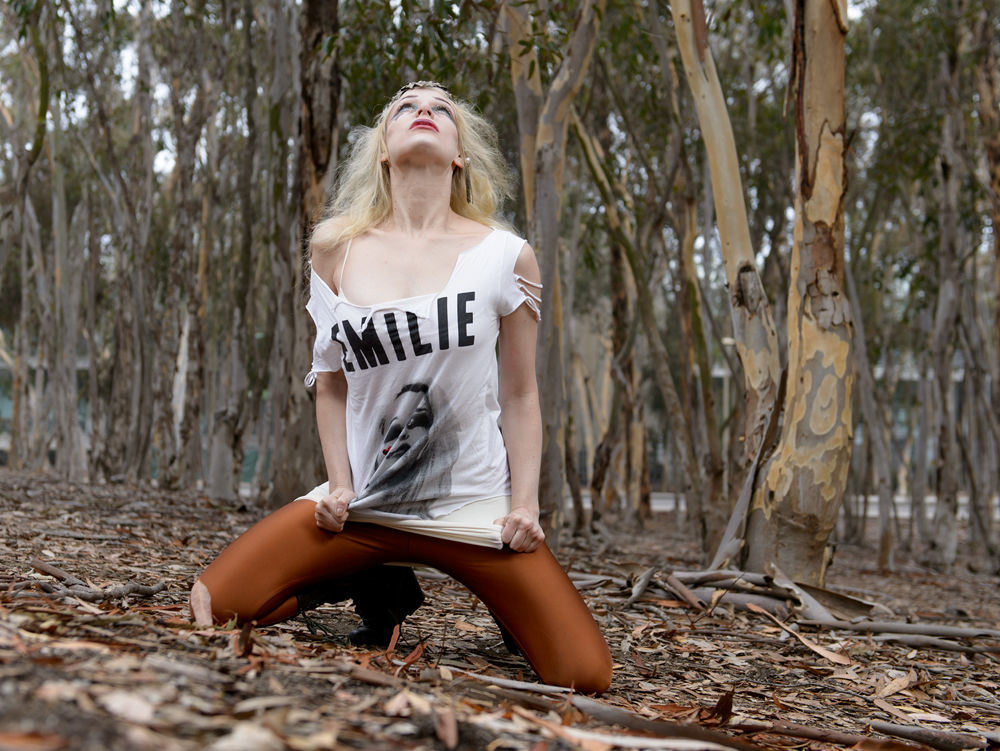
In the same location, I moved the lights farther apart and added a little extra fill light from the flash on the camera. Both remote flashes had umbrellas to really spread the light around.
With the ability to change the settings on the remote flashes right from the camera, I was able to quickly change the lighting without having to go and change the settings on the individual lights every time. This speed and convenience allowed me to spend more time photographing Emilie and less time dealing with gear.

For the second image setup, I placed Emilie between the two lights and adjusted the power from the camera.
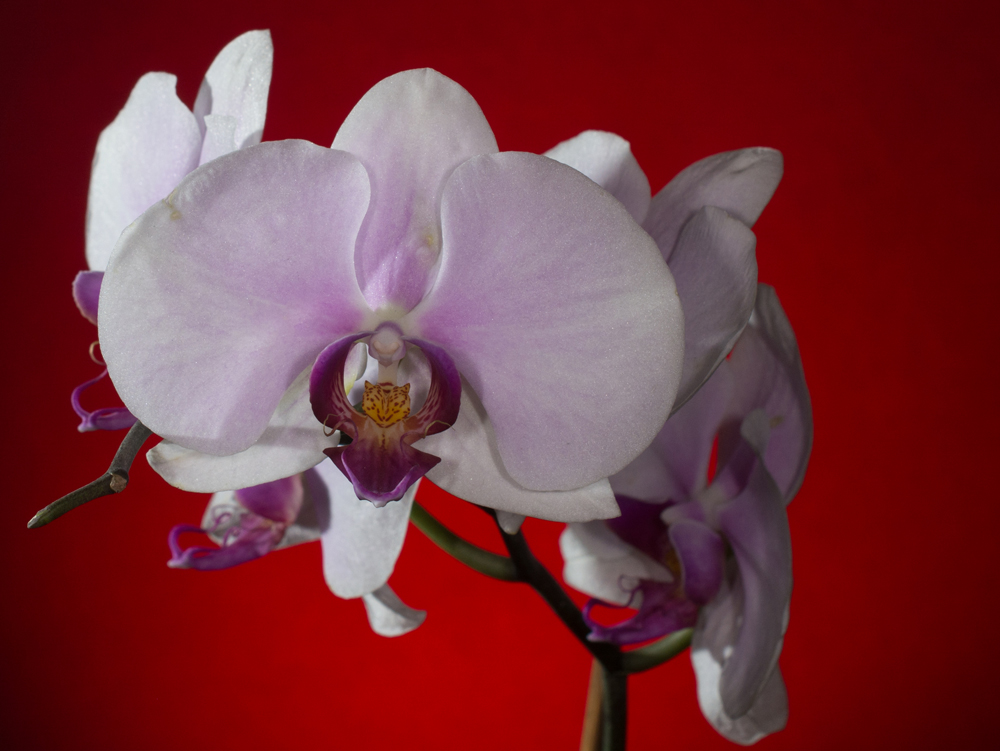
Orchid
I used four different Speedlights to shoot this orchid: two SB-R200s attached to the front of the lens, one SB-700 with a grid to color the background, and one SB-900 to add some fill above the camera. I built up the lights starting with the foreground, which was lit by the two SB-R200 speed lights in Group A set to TTL +.3 EV. I then added the light from the SB-900 in Group B using TTL –.1. In the first photograph, you can see the results before I added Group C.

I shot this orchid at ISO 200, f/11, and 1/200 second with a 40mm macro lens.
I then added a third group, Group C, for the background. This consisted of an SB-700 with a Rogue Grid and red gel, which created a red background for the image. Group C was set to TTL –.7.

This orchid is lit with all the lights, including a background light with a red gel.
In the same scene with the background group on and Group B turned off, you can see the difference the fill light makes to the whole scene.
Turning groups of lights on and off from the camera allowed me to build the scene without having to keep going to each light and adjusting it individually.
Hobbes
I took the same idea as photographing the orchid and applied it to photographing my dog, Hobbes. It is not easy to get a dog to sit still for a portrait, so being able to adjust the lights from the camera is key. You can fine-tune the image without disrupting the scene.
I set up these photos with one light on camera right (Group A), one light way off to camera left (Group B), and one for the background (Group C). The light from the Group A flash (SB-900) was shot through a LumiQuest softbox, the light from Group B had a diffuser dome and a Rogue FlashBender, and Group C (the background) consisted of an SB-700 with a Rogue Grid and a purple gel.
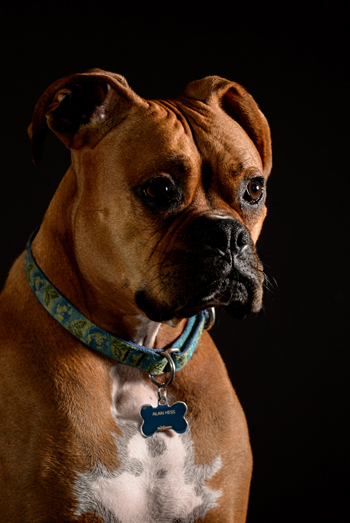
I took this photo of Hobbes with just the light on camera right (Group A) firing.
To build the scene, I first turned off all the lights except for Group A. I took a photo and, as you can see in the first photo of Hobbes, the only light is coming from off to the right. I then added Group B and finally Group C to add a hint of purple to the background. I set all three groups to TTL and made only minor adjustments.

I took this photo of Hobbes with all the groups firing.
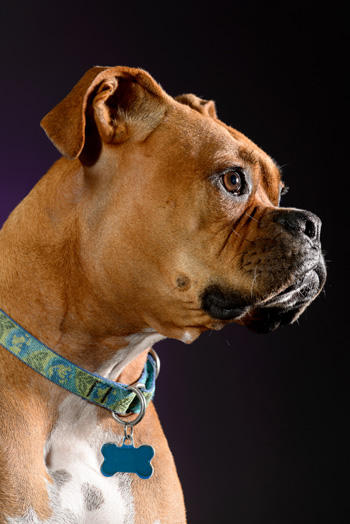
To get the look I was going for, I took this photo with all the groups firing and some camera adjustments: The Group C background light was dialed down and I changed the shooting angle.
Note
If you’re interested in photographing pets, see my Fuel book entitled Pet Portraits That Stand Out. For that book, I used manual power on a flash and triggered it using pocket wizards.
Conclusion
The Nikon Creative Lighting System is simple to use and really powerful. It makes using an off-camera flash really easy and by allowing the camera and flash to use the TTL function, proper exposures are calculated for you.
The system isn’t perfect and there are times when you will get results that will have you scratching your head. When that happens, just take another quick photo. Sometimes the TTL metering gets a little off, but usually gets right back on track on the next exposure. It is also useful to read the manual that came with your flash and camera, since it will show you where all the menus and settings are located. Go out, experiment, and have some fun.