Working with the PreferenceActivity Class
The PreferenceActivity shows a hierarchy of preferences on the screen according to a preferences file defined in XML — such as the one you just created. The preferences can span multiple screens (if multiple PreferenceScreen objects are present and nested). These preferences automatically save to SharedPreferences. As an added bonus, the preferences shown automatically follow the visual style of the system preferences, which allows your application to have a consistent user experience in conjunction with the default Android platform.
To inflate and display the PreferenceScreen you just built, add an activity that derives from PreferenceActivity to your application. I am going to name mine TaskPreferences. Please add this file to the src/ directory of your project. The code for this file is shown in Listing 17-2.
Listing 17-2: The TaskPreferences File
public class TaskPreferences extends PreferenceActivity {                      →1
        @Override
        protected void onCreate(Bundle savedInstanceState) {
            super.onCreate(savedInstanceState);
            addPreferencesFromResource(R.xml.task_preferences);                →5

            EditTextPreference timeDefault = (EditTextPreference)
    findPreference(getString(R.string.pref_default_time_from_now_key));        →8
 timeDefault.getEditText().setKeyListener(DigitsKeyListener.getInstance());    →9
  }
}
Yes, that's it! That's all the code that is needed to display, edit, and persist preferences in Android! Each numbered line of code is explained as follows:
At this point, the activity is ready to be used. This PreferenceActivity allows users to edit and save their preferences. As you can see, this implementation required very little code. The next step is getting the preference screen to show up by adding a menu item for it.
 Don't forget! You also need to add your new PreferenceActivity to your AndroidManifest.xml file with the following line of code:
<activity android:name=“.TaskPreferences” android:label=“@string/app_name” />
Opening the PreferenceActivity class
To open this new activity, you need to add a menu item to the ReminderListActivity. To add a new menu item, you need to add a new menu definition to the list_menu.xml file located in the res/menu directory. Updating this file updates the menu on the ReminderListActivity. The updated list_menu.xml file is shown as follows with the new entry bolded:
<?xml version=“1.0” encoding=“utf-8”?>
<menu
    xmlns:android=“http://schemas.android.com/apk/res/android”>
    <item android:id=“@+id/menu_insert”
        android:icon=“@android:drawable/ic_menu_add”
        android:title=“@string/menu_insert” />
        <item android:id=“@+id/menu_settings”
            android:icon=“@android:drawable/ic_menu_preferences”
            android:title=“@string/menu_settings” />
</menu>
The last item adds a menu item for settings, which uses the built-in Android settings icon and a string resource called menu_settings. You need to add a new string resource called menu_settings with a value of Settings in your string resources.
Handling menu selections
Now that you have your menu updated, you need to be able to respond to when the menu item is tapped. To do so, you need to add code to the onMenuItemSelected() method in the ReminderListActivity. The code to handle the settings menu selection is bolded:
@Override
public boolean onMenuItemSelected(int featureId, MenuItem item) {
        switch(item.getItemId()) {
            case R.id.menu_insert:
                createReminder();
                return true;
            case R.id.menu_settings:
                Intent i = new Intent(this, TaskPreferences.class);
                startActivity(i);
                return true;
            }
        return super.onMenuItemSelected(featureId, item);
}
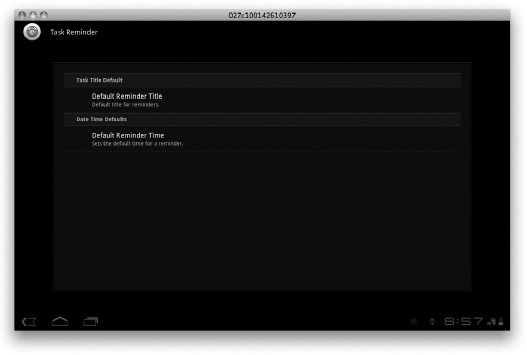
The bolded code here simply creates a new Intent object with a destination class of TaskPreferences. When the user selects the Settings menu item, he is now shown the preferences screen, where he can edit the preferences. If you start the app and select Settings, you should see a preferences screen similar to the one in Figure 17-3.
Figure 17-3: The preferences screen.