
Creating Your First Menu
You can create a menu through code or you can create it through an XML file that is provided in the res/menu directory. The preferred method of creating menus is to define menus through XML and then inflate them into a programmable object with which you can interact. (Inflate here refers to the Android process of turning an XML file into a Java object.) This helps separate the menu definition from the actual application code.
Defining the XML file
To define an XML menu, follow these steps:
- Create a menu folder in the res directory.
- Add a file by the name of list_menu.xml to the menu directory.
- Type the code from Listing 12-1 into the list_menu.xml file.
Listing 12-1: Menu for the ReminderListActivity
<?xml version=“1.0” encoding=“utf-8”?>
<menu xmlns:android=“http://schemas.android.com/apk/res/android”>
  <item android:id=“@+id/menu_insert”
        android:icon=“@android:drawable/ic_menu_add”            →4
        android:title=“@string/menu_insert” />                  →5
</menu>
Notice that a new string resource is included in line 5. You need to create that (which you do in Step 4). The android:icon value in line 4 is a built-in Android icon. You do not have to provide this bitmap in your drawable resources. The ldpi, mdpi, and hdpi versions of this icon are all built into the Android platform. To view other resources available to you, view the android.R.drawable documentation here: http://developer.android.com/reference/android/R.drawable.html.
All resources in the android.R class are available for you to use in your application and are recommended because they give your application a common and consistent user interface and user experience with the Android platform.
- Create a new string resource with the name menu_insert with the value of “Add Reminder” in the strings.xml resource file.
- Open the ReminderListActivity class and type the following code into the file:
@Override
public boolean onCreateOptionsMenu(Menu menu) {
    super.onCreateOptionsMenu(menu);
    MenuInflater mi = getMenuInflater();            →4
    mi.inflate(R.menu.list_menu, menu);
    return true;
}
On line 4, I obtain a MenuInflater capable of inflating menus from XML resources. After the inflater is obtained, the menu is inflated into an actual menu object on line 5. The existing menu is the menu object that is passed into the onCreateOptionsMenu() method.
- Install the application in the emulator and click the Menu button.
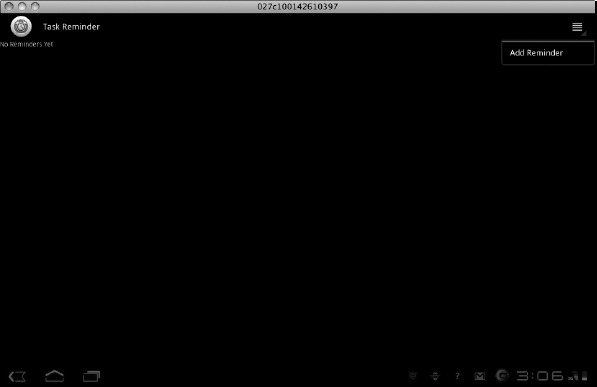
You should see what's shown in Figure 12-1. Notice how there is no menu item? The next step shows you how to get the icon to appear in the action bar.
Figure 12-1: The Add Reminder menu.
- Open the list_menu.xml file and type the following code into the file on line 6.
<?xml version,=“1.,0” encoding=“utf-8”?>
<menu xmlns:android=“http://schemas.android.com/apk/res/android,”>
  <item android:id=“@+id/menu_insert”
        android:icon=“@android:drawable/ic_menu_add”
        android:title=“@string/menu_insert”
        android:showAsAction=“ifRoom|withText” />               →6
     </menu>
Because adding a new reminder is a common action within this application, you want this menu to be placed in the action bar. Adding the code in this step does this.
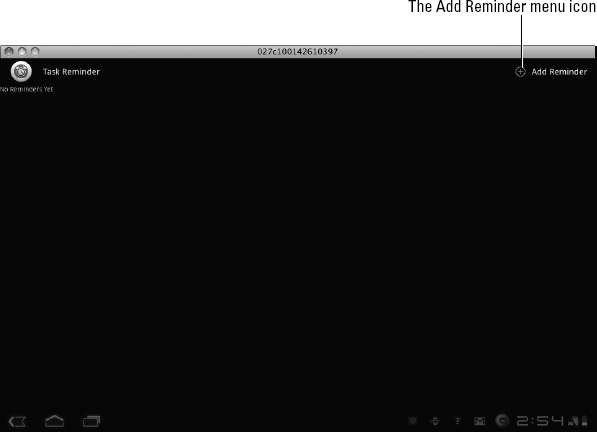
- Install the application in the emulator, and the menu item appears in the action bar, as shown in Figure 12-1.
Figure 12-2: The Add Reminder menu icon in the action bar.
Handling user actions
The menu has been created, and now you'd like to perform some type of action when it is clicked. To do this, type the following code at the end of the ReminderListActivity class file:
@Override
public boolean onMenuItemSelected(int featureId, MenuItem item) {    →2
    switch(item.getItemId()) {                                       →3
        case R.id.menu_insert:                                       →4
                createReminder();                                    →5
                return true;                                         →6
    }

    return super.onMenuItemSelected(featureId, item);
}
The lines of code are explained in detail here:
| →2 | This method is called when a menu item is selected. The featureId parameter identifies the panel on which the menu is located. The item parameter identifies which menu item was clicked. |
| →3 | To determine which item you're working with, compare the ID of the menu items with the known menu items you have. Therefore, a switch statement is used to check each possible valid case. You obtain the menu's ID through the MenuItem method getItemId(). |
| →4 | In this line you use the ID of the menu item defined in Listing 12-1 to see whether that menu item was clicked. |
| →5 | If the Add Reminder menu item was clicked, the application is instructed to create a reminder through the createReminder() method (defined in the next section). |
| →6 | This line returns true to inform the onMenuItemSelected() method that a menu selection was handled. |
You may receive compilation errors at this time, but don't worry! You resolve those errors in the next section.
Creating a reminder task
The createReminder() method is used to allow the user to navigate to the ReminderEditActivity to create a new task with a reminder. Type the following method at the bottom of your ReminderListActivity class file:
private static final int ACTIVITY_CREATE=0;
private void createReminder() {
    Intent i = new Intent(this, ReminderEditActivity.class);
    startActivityForResult(i, ACTIVITY_CREATE);                      →4
}
This code creates a new intent that starts the ReminderEditActivity. The startActivityForResult() call on line 4 is used when you would like to know when the called activity is completed. You may want to know when an activity has been returned so that you can perform some type of action. In the case of the Task Reminder application, you would want to know when the ReminderEditActivity has returned to repopulate the task list with the newly added reminder. This call contains the following two parameters:
- Intent i: This intent starts the ReminderEditActivity.
- ACTIVITY_CREATE: This request code is returned to your activity through a call to onActivityResult(). The request code in this is a classwide constant, defined at the top of the ReminderListActivity as such:
private static final int ACTIVITY_CREATE=0;
Completing the activity
The final call is the onActivityResult() call. When the ReminderEditActivity completes, the onActivityResult() method is called with a request code, a result code, and an intent that can contain data back to the original calling activity. Type the following code into the bottom of the ReminderListActivity class file:
@Override
protected void onActivityResult(int requestCode, int resultCode, Intent intent)
{
    super.onActivityResult(requestCode, resultCode, intent);
    // Reload the list here
}
At this point, this call does nothing, but it will be used in Chapter 14 when you need to reload the tasks from the SQLite database. These parameters are as follows:
- requestCode: The integer request code that was provided in the original startActivityForResult() call. If your activity starts various other child activities with various request codes, this allows you to differentiate each returning call through a switch statement — very similar to the onMenuItemSelected() item switch statement mechanism.
- resultCode: The integer result code returned by the child activity through its setResult() call. The result code allows you to determine whether your requested action was completed, canceled, or terminated for any other reason. These codes are provided by you to determine what happened between activity calls.
- intent: An intent that the child activity can create to return result data to the caller (various data can be attached to intent “extras”). In the example shown, this intent instance is the same one that is passed into the onActivityResult() method.
The superclass is called to take care of any extra processing that may need to take place by the Android system as it builds the menu.