Getting the Total Eclipse
Now that you have the SDK, you need an integrated development environment (IDE) to use it. It's time to download Eclipse!
Choosing the right Eclipse version
 Downloading the correct version of Eclipse is very important. At this writing, Android supports Eclipse versions Galileo and above. Check the Android System Requirements page at http://developer.android.com/sdk/requirements.html. If you're still unsure, download Eclipse Galileo (version 3.5), that's the version I'm currently using. When you download the file, you'll probably need to find the Older Versions link on the download page and select the latest Galileo version.
To download the correct version, navigate to the Eclipse downloads page (www.eclipse.org/downloads), select Eclipse IDE for Java Developers. Eclipse IDE for JAVA EE Developers works as well.
Installing Eclipse
Eclipse is a self-contained executable file; after you unzip it, the program is installed. Even though you could stop here, I suggest pinning a shortcut to your Start menu if you're on Windows so that Eclipse is easy to find when you need it.
To install Eclipse, you need to extract the contents of the Eclipse .zip file to the location of your choice. For this example, I use C:Program FilesEclipse when on Windows. For OS X users, unzip the .gz file and simply drag the application into your applications folder.
To install Eclipse on Windows, follow these steps:
- Double-click the shortcut that you just created to run Eclipse.
If you're running a recent version of Windows, the first time you run Eclipse, a Security Warning dialog box may appear. This dialog box tells you that the publisher has not been verified and asks whether you still want to run the software. Clear the Always Ask Before Opening This File check box, and click the Run button.
- Set your workspace.
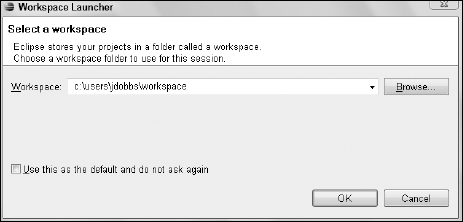
When Eclipse starts, the first thing you see is the Workspace Launcher dialog box, as shown in Figure 4-5. Here, you can modify your workspace if you want, but for this book, I stick with the default:
c:users<username>workspace
Leave the Use This as the Default and Do Not Ask Again check box deselected, and click the OK button.
Figure 4-5: Set your workspace.
 If you plan to develop multiple applications, I recommend using a separate workspace for each project. If you store multiple projects in one workspace, it gets difficult to keep things organized, and it's easy to change a similarly named file in a different project. Keeping projects in their own workspaces makes it easier to find the project when you have to go back to it to fix bugs.
When Eclipse finishes loading, you see the Eclipse welcome screen, shown in Figure 4-6.
Figure 4-6: The Eclipse welcome screen.
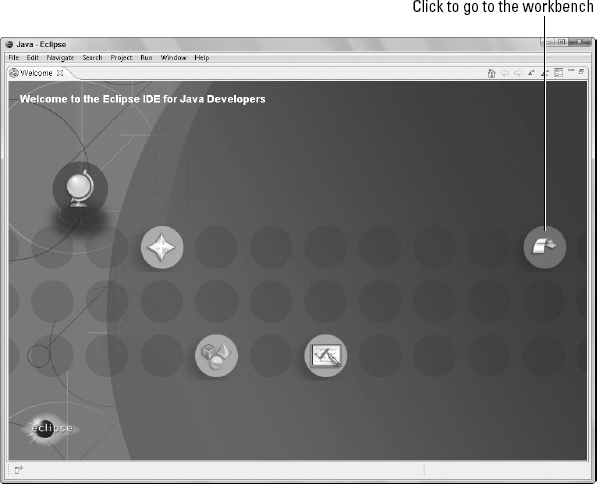
- Click the curved-arrow icon on the right side of the screen to go to the workbench.
Eclipse is installed and easily accessible. I show you how to add the Android Development Tools in the next section.
Configuring Eclipse
Android Development Tools (ADT) adds functionality to Eclipse to do a lot of the work for you. The ADT allows you to create new Android projects easily; it creates all the necessary base files so that you can start coding your application quickly. The ADT also allows you to debug your application by using the Android SDK tools. Finally, the ADT enables you to export a signed application file, known as an Android Package (APK), right from Eclipse, eliminating the need for some command-line tools. In the beginning, I had to use various command-line utilities to build an APK. Although that wasn't hard, it was tedious and sometimes frustrating. The ADT eliminates this frustrating process by guiding you through it, in “wizard format,” from within Eclipse. I show you how to export a signed APK in Chapter 10.
Setting up Eclipse with the ADT
To set up Eclipse with the ADT (install ADT into Eclipse), follow these steps:
- Start Eclipse, if it's not already running.
- Choose Help
 nstall New Software.
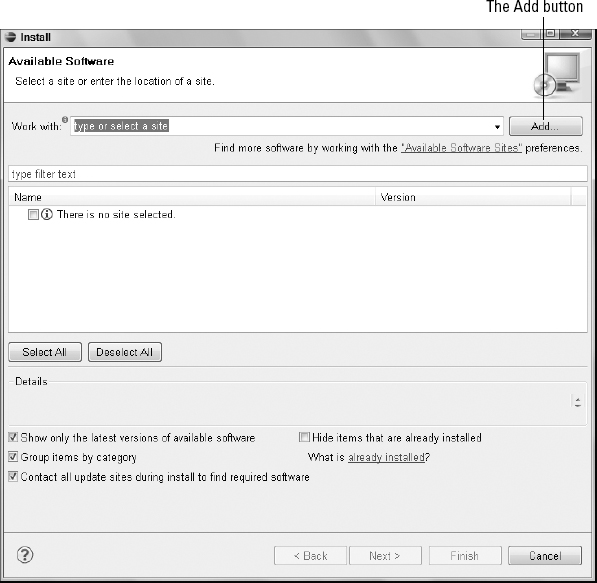
The Install window pops up (see Figure 4-7). This window lets you install new plug-ins in Eclipse.
- Click the Add button to add a new site
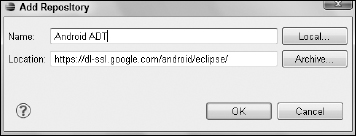
The Add Repository window appears (see Figure 4-8).
 Sites are the Web addresses where the software is hosted on the Internet. Adding a site to Eclipse makes it easier for you to update the software after a new version is released.
 - Type a name in the Name field.
I recommend using Android ADT, but you can choose any name you like.
- Type https://dl-ssl.google.com/android/eclipse/ in the Location field.
- Click the OK button.
Android ADT is selected in the Work With drop-down menu, and the available options are displayed in the Name and Version window of the Install Details dialog box.
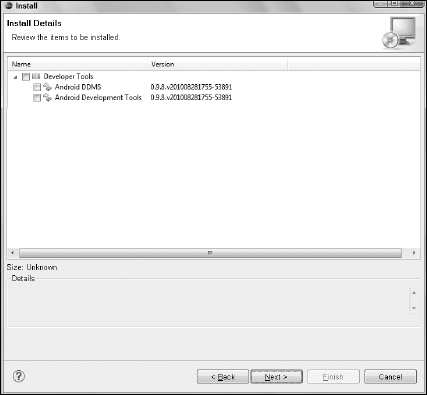
- In the Install Details dialog box, select the check box next to Developer Tools and click the Next button.
The screen should look similar to Figure 4-9, but with different version numbers.
Figure 4-7: Click the Add button to add a new site.
Figure 4-8: Enter the name and location of the site.
The Install Details dialog box should list both the Android Dalvik Debug Monitor Server (DDMS; see “Get physical with a real Android device,” later in this chapter) and the ADT. Again, the version numbers will be different when you do this.
- Click the Next button to review the software licenses.
- Click the Finish button.
- When you're prompted to do so, click the Restart Now button to restart Eclipse.
The ADT plug-in is installed.
Setting the location of the Android SDK
In this section, I guide you through the Android SDK config6uration process. I know that this seems like a lot to do, but you're almost done, and you have to do this work only once. Follow these steps:
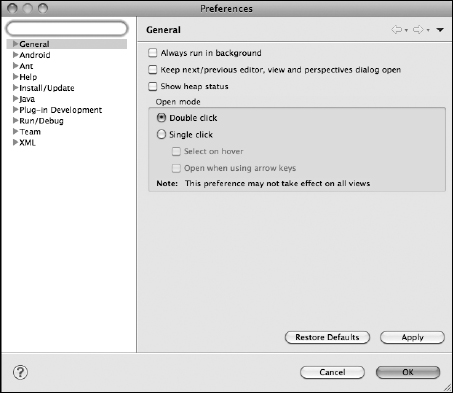
- Choose WindowPreferences for Windows and EclipsePreferences.
The Preferences dialog box opens (see Figure 4-10).
- Select Android in the left pane.
- For Windows, set the SDK Location to C:androidandroid-sdk-windows. For OS X, set the SDK Location to /Library/android.
- Click OK.
Eclipse is configured, and you're ready to start developing Android apps.
If you're having difficulty downloading the tools from https://dl-ssl.google.com/android/eclipse, try removing the s from https://, as follows: http://dl-ssl.google.com/android/eclipse.
Figure 4-10: Specify the location of the SDK in the Preferences dialog box.