
The Apache installation can be done using various methods, based on the requirement of the infrastructure. For example, if you want to run multiple Apache instances on a single machine, then the Source installation will be used. There are mainly three types of installations done in various web environments:
Note
Source is preferred by web administrators, as it can be customized based on system requirements.
In this topic, we will discuss the installation of the Apache HTTP as a service. The installation of the Apache HTTP server on the Windows platform is quite simple. Following are the steps to be performed:
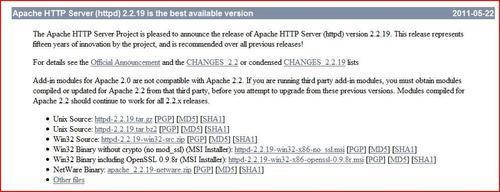
- The Apache HTTP server can be downloaded from various different sites, but it is always recommended to download it from its official site http://httpd.apache.org/download.cgi. On this site, you can find the stable and beta release details. Download the latest Win32 Binary without crypto (no mod_ssl) (MSI Installer) given in the website. Click on httpd-2.2.X-win32-x86-no_ssl.msi to begin the download. Here 2.2 is the major version and X is the minor version, which changes almost every month. The following screenshot shows the different versions available for the download:
- Once you have downloaded the required
exefile. (http-2.2.X-win32-x86-no_ssl.exe), double-click on theexeand you will see a welcome screen as a pop-up. Click Next, as shown in the following screenshot:
- The next screen shows the License Agreement. Click on I accept, as shown in the following screenshot, it will show the server information screen:

- As shown in the following screenshot, you have to enter the following details
- Server Domain
- Server name: In a real-time environment, server name is the host name of the machine.
- Administrator e-mail ID: It is the SMTP address on the local server.

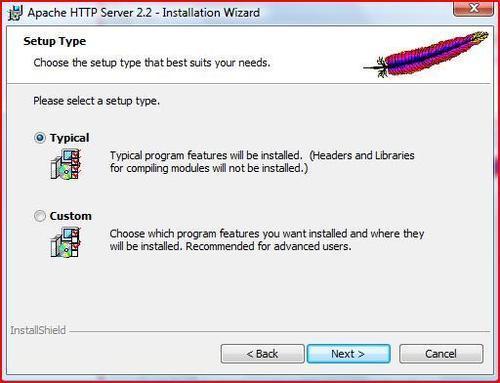
- Once you fill in the details shown in the previous screenshot, click on Next. It takes you to the installation screen. Choose Typical, as shown in the following screenshot:
Note
In a Typical installation, entire libraries and modules, which are required for installation of Tomcat 7 in Windows, are installed automatically. Also, a Typical installation contains predefined modules, which are necessary for the web server to perform their functionality. This method is recommended for beginners and intermediate users. In a Custom installation, we have the freedom to choose the modules, which are necessary for the application to perform their function properly, the rest of the module can be ignored, hence, taking less space and memory. This method is recommended for those who have a good knowledge of Apache.
- In the next screen, the installation directory of the HTTP server is displayed:
Note
It is recommended to use D drive for critical websites. The reason being that if the server crashes, Apache can still be recovered without any issue.

- After clicking on Next, the installation process starts, as shown in the following screenshot:

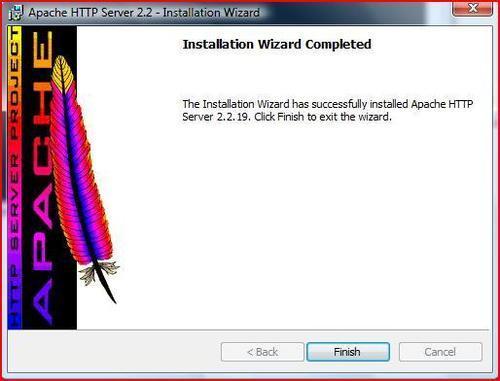
- Then a screen comes up indicating that it's completed, as shown in the following screenshot:
Once Apache is installed, you can start and stop the services in two ways:
- Apache monitoring service
- services.msc
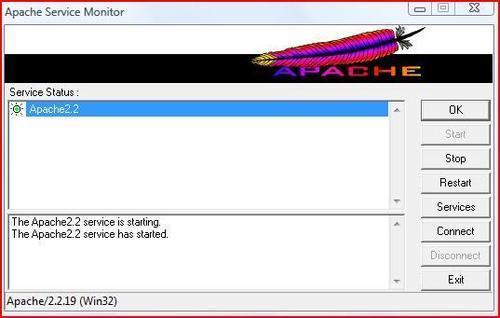
By default, Apache comes with a tool called Apache Monitor, through which Apache systems can be monitored. The following screenshot shows the Apache services status as green. It means the server is running. If you want to restart the services, you can use the Restart button to do the same.
Another way of recycling Apache is through the services.msc, which can be accessed by clicking Start | Run | services.msc
The services console will open. Click on Apache2.2 services, a services properties console window is displayed. It shows the Start and Stop prompt, and the current status of the server instance, as shown in the following screenshot:

The Apache HTTP installation in a non-DOS environment is different, as compared to a Windows environment. In the previous section, Installation of the Apache HTTP, we have discussed about binary files. In this installation, we will discuss the Source installation. Following are the steps involved in Source installation:
- Download the Apache httpd server from the Apache official site. http://httpd.apache.org/download.cgi. The following screenshot shows the file to be downloaded (httpd-2.2.X.tar.gz where 2.2 is the major version and X is the minor version):

- Once the download is complete, the source file is stored in the home directory of the user (in our case it's
/root). The source file comes in the form oftar.gz. Run the following command to unzip the source. First create a folderhttpdand then extract the content in thehttpddirectory.tar -zxvf httpd-2.2.X.tar.gz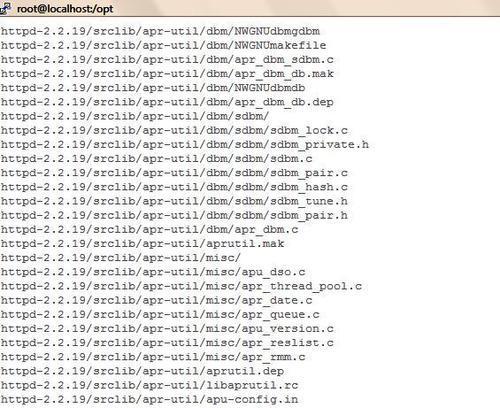
- You can check the directory using the following command. The result displayed is similar to the following screenshot:
ls -ltrh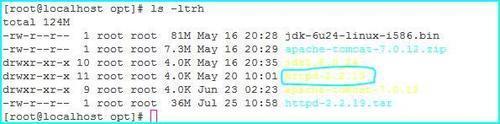
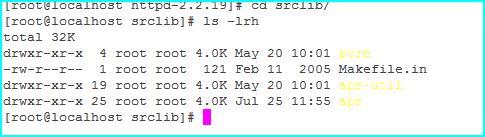
- Then access the extracted directory using the following command. The result is similar to the following screenshot:
cd httpd-2.2.19
ls -ltrh
- After the verification of the directory, it's time to install the Apache HTTP server on Linux. By default, the execution permission is not set to
trueon the source folder. For that, we have to run thechowncommand to make ittrue.[root@localhost httpd-2.2.19]# chown 0755 configure
By default Apache Portable Runtime (APR) is not installed in the 2.2 version, we have to install it. Let's discuss APR and its utilities in detail.
Apache Portable Runtime is an open source project, which is supported by the Apache Foundation software. The main goal of this project is to provide the developer with an API, through which they can code and predict the identical behavior, regardless of different platforms. It eliminates the requirement of additional code dependency for different operating systems. For more information on this project, please visit http://apr.apache.org/.
Tomcat 7 uses APR to provide the capability of scalability, performance, and best collaboration with native technologies.
The Apache Portable Runtime project is again divided into three subprojects, to enhance and simplify the capability of this project. The following figure shows the different subprojects for APR:

APR is a portable runtime library, through which Apache integrates with other native technologies. It is also helpful in resolving the problem of threads and processes. For more information on APR, please visit http://apr.apache.org/docs/apr/trunk/index.html.
Apache Portable Runtime Utility (APR-util) is a companion library for APR. To install this utility, the GCC++ package should be installed to the OS (http://apr.apache.org/docs/apr-util/trunk/).
APR-iconv is a portable implementation of the iconv() library (http://apr.apache.org/docs/apr-iconv/trunk/).
APR/APR-util comes with the source of the Apache package, and they can be found in the following directories as shown in the following screenshot:
- APR:
Installdir/srclib/apr - APR-util:
Instaldir/srclib/apr-util
As we have extracted the source in /opt/httpd-2.2.19, the source directory is also found in the same directory.
Let's start with the installation of APR, followed by the installation of APR-util.
The APR installation can be done in three steps using three commands. The steps are as follows:
- Enter the source directory of
aprandapr-util, then configure the code using the following commands:[root@localhost srclib]# cd /opt/httpd-2.2.19/srclib/apr [root@localhost apr]# ./configure --prefix=/opt/httpd/apr-httpd/ [root@localhost apr-util]# /configure --prefix=/usr/local/apr-util-httpd/ --with-apr=/usr/local/apr-httpd/ Make Make install - You can configure Apache using the following command. The following screenshot shows the output of the command when executed:
[root@localhost httpd-2.2.19]#./configure --with-included-apr --prefix=/opt/apache-2.2.19

- The previous screenshot describes the progress of the
configurecommand. Once the command is executed, it will get the return code0otherwise you will see an error on the screen. Then, run themakecommand on the server to compile the code. The following figure shows the output of themakecommand:[root@localhost httpd-2.2.X]#make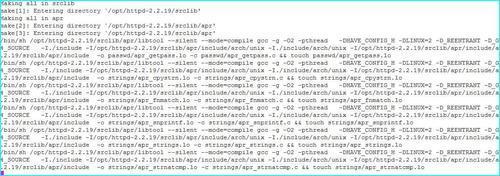
Tip
It is very important to check the output of the
makecommand, as it gives an error most of the times.
- The previous and the following screenshots show the completion without any error. To proceed with the installation of
make, we have to run the following command:[root@localhost httpd-2.2.X]#make install
- The previous command installs the Apache HTTP on the server, as shown in the following screenshot. It shows the completion on the server. If you view the previous screenshot, you will find that it creates the directory structure, files, manpage and
htdocs, as shown in the next screenshot:
- After the
makeinstall is complete, the directory structure of the Apache HTTP server is created in the current path of the installation. Let's quickly see how the directory looks. The following screenshot shows the directory structure of the Apache HTTP server. In 90 percent of cases, Apache administrators work on theconf, modules, andhtdocsdirectories for performing day-to-day operations.
- Before we end the installation, it is necessary to start the services of HTTP to verify the instance is properly installed. The best way to check the configuration is by running the
configtestscript. This script comes by default with Apache httpd, only in a non-DOS environment. The script can be found inAPACHE_HOME/bin.
[root@localhost bin]# ./apachectl configtest
Syntax OK
- Then restart Apache using the following command:
[root@root@localhost bin]# ./apachectl start
- Once you start Apache, it's very important to verify the instance status. You can verify the system using the
pscommand:
ps -ef |grep httpd

The previous screenshot shows the status of the HTTP process, this means the HTTP server is running properly.
Note
We can directly install the Apache package in Debain Linux (Ubuntu), using the apt-get command. The following command shows the syntax for the installation:
sudo apt-get install apache2
Also, you can install the Apache using the yum utility. This utility is used mainly in CentOS using the command:
yum -y install httpd