In Chapter 1, Getting Started with Arduino and LEDs, you learned about the "Hello World" of physical computing. Now, as you have basic knowledge of Arduino and its IDE, we can go ahead with some cool stuff to do with controlling LEDs. The following topics will be covered in this chapter:
- Introduction to breadboard
- Controlling multiple LEDs
- LED fading
- Creating a mood lamp
- Developing an LED night lamp
By the end of this chapter, you will be able to control different LEDs in an artistic approach.
Prototyping is the process of testing out an idea by creating a preliminary model from which other products can be developed or formed. The breadboard is one of the most fundamental pieces for prototyping electronics circuits. As it does not require any soldering, it is also referred to as a "solderless board".
Almost all modern breadboards are made up of plastic. A modern breadboard consists of a perforated block of plastic with numerous metal clips under the perforations. The breadboard has strips of metal underneath the board and holes on top of the board. In the following image, you can see the structure of the breadboard:
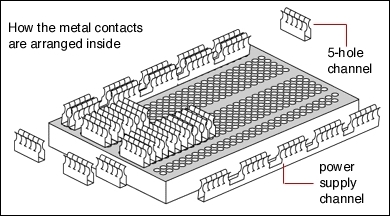
The main structure of the breadboard is made up of a main central area, which is a block of two sets of columns, where each column is made up of many rows. All of these rows are connected on a row-by-row basis.
The breadboard has many strips of copper beneath the board that connects the holes as shown (short circuited or same potential). The upper blue lines are not connected with the lower ones. In the case of electronic circuits, a power supply is required at various pins. So instead of making many connections with a power supply, one can give a power supply to one of the holes on the breadboard and can get a power supply from its outer holes:
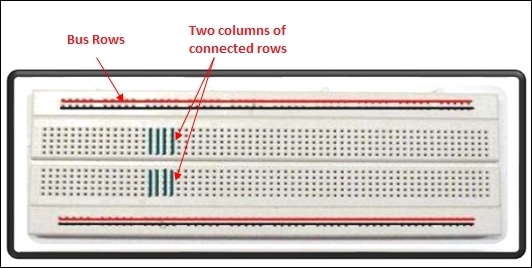
Multiple breadboards can be connected together to form larger prototyping board experimenting areas. If you want to use any chip/IC (integrated circuit), you can place it with one side on the upper block and the other side on the lower block of the breadboard. It will be very easy for us to understand the breadboard, as we will be using the breadboard extensively for all our projects.