
8
Exploring the Filesystem
In the previous chapter, we worked with push buttons, slide switches, buzzers, and stepper motors. We used them with the Micro:bit and MicroPython. This chapter is a little bit of a detour from the hardware components we have been exploring.
This chapter focuses on the filesystem of Micro:bit. We will fully explore all the functionality and use cases pertaining to the filesystem. Here is a list of the topics we will cover in this chapter:
- Creating and reading files
- Appending a file
- Creating our own library
- The OS module
- Working with MicroFS
Let’s explore working with files with MicroPython and Micro:bit.
Technical requirements
We just need the usual setup of a Micro:bit connected to a computer with internet connectivity.
Creating and reading files
Micro:bit has a persistent filesystem. This means that the files remain intact even when we power it off. Micro:bit stores all the files in the flash memory. We can use approximately 30 KB of flash memory to store our own files. One of the constraints of the Micro:bit filesystem is that it provides a flat filesystem. This means that we cannot create directories (folders) and subdirectories. It won’t allow us to create a hierarchy of directories and files as commonly found in operating systems such as Windows, Unix, FreeBSD, and Linux. The stored files will remain intact until we delete them either manually or programmatically. Also, re-flashing the Micro:bit deletes a file(s).
We can create and store files with any extension on Micro:bit. We can use the built-in open() function to create a file in various modes. We have to specify whether we wish to read or write the file in the arguments. The 'w' argument stands for write mode. Here is a simple example:
with open('HenryV.txt', 'w') as file_handle:
    file_handle.write("We few, we happy few, we band of brothers;")
    file_handle.write("
For he to-day that sheds his blood with me")
    file_handle.write("
Shall be my brother; be he ne'er so vile,")
    file_handle.write("
This day shall gentle his condition;")
    file_handle.write("
And gentlemen in England now a-bed")
    file_handle.write("
Shall think themselves accurs'd they were not here,")
    file_handle.write("
And hold their manhoods cheap whiles any speaks")
    file_handle.write("
That fought with us upon Saint Crispin's day.")
Run the code in Thonny and go to the main menu of the IDE. Click on View and the Files option under that menu. Check the following screenshot for guidance:
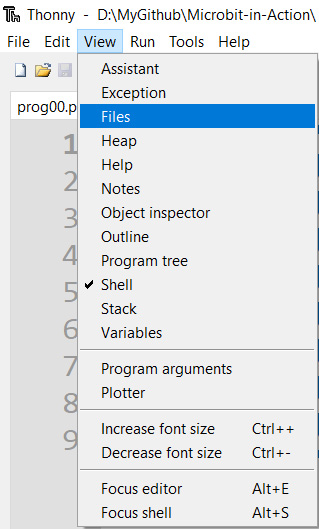
Figure 8.1 – Opening Files view
It opens a view, as shown in the following screenshot:
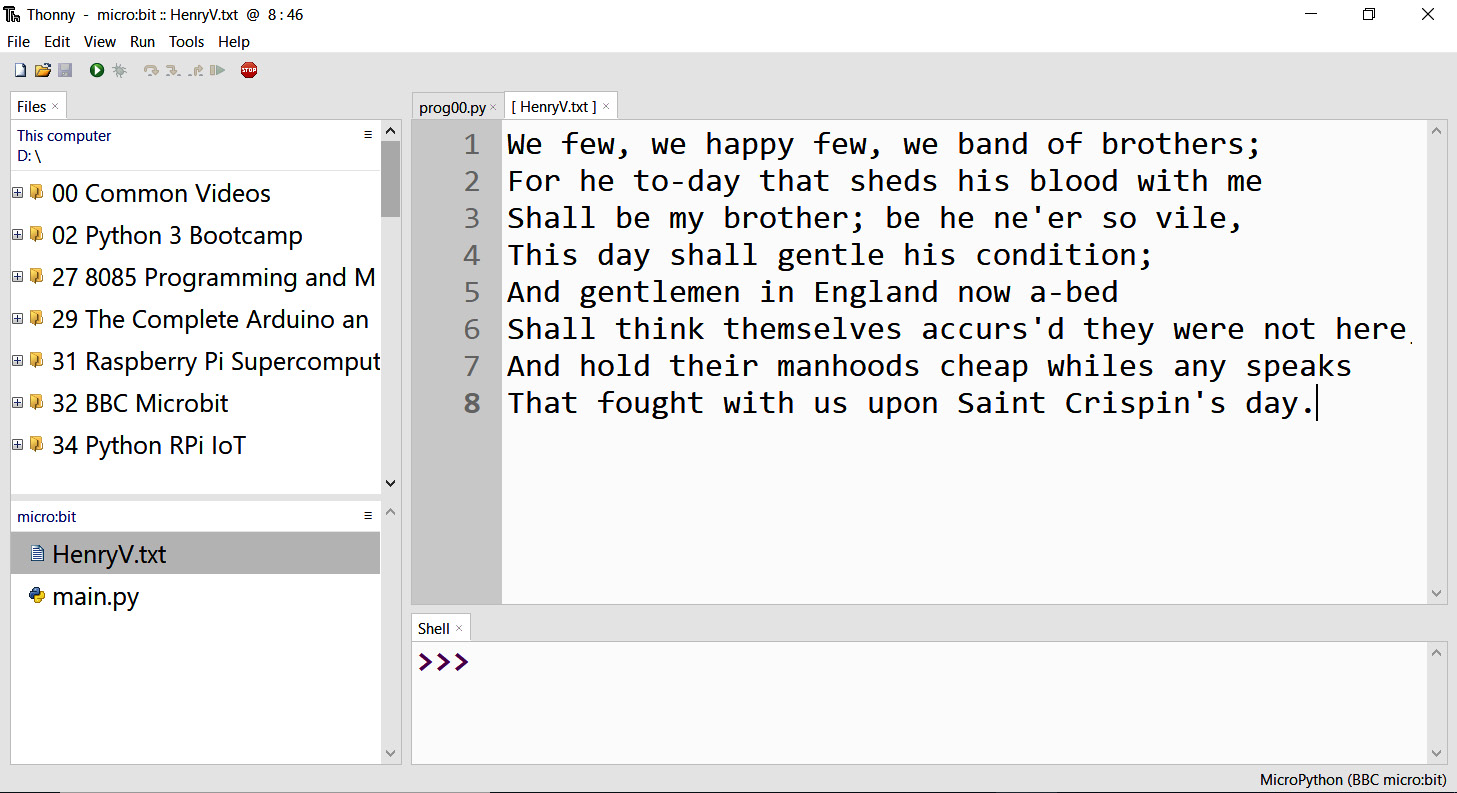
Figure 8.2 – The Files view
In Figure 8.2, we can see the filesystem of our computer in the top-left panel. We can browse files here. Following that is the filesystem of the Micro:bit. We can see the main.py file. When we flash any Python file to Micro:bit using the Mu editor, it saves the code in this file. We have to save our code with this filename manually while using the Thonny editor. If we wish the Micro:bit to run a program at power-up or reboot, then we need to either flash the program using the Mu editor (which will automatically write the program to the main.py file on the Micro:bit) or use the Thonny IDE to save the program manually on the Micro:bit with the filename as main.py. I have opened the HenryV.txt file by double-clicking it. We can see the text in the editor. We can even delete the files on the Micro:bit by right-clicking the file and choosing the appropriate options. Explore this interface yourself further as an exercise.
The constraint with the Files view is that it does not work when a program is under execution. The files on the Micro:bit are not visible when a program is running, as shown in the following screenshot:

Figure 8.3 – The Files view when a program is executing in Thonny
Stopping the program under execution will show the files currently on the Micro:bit.
The Mu editor also has a Files view. We can invoke the view using the Files button in the menu. The following screenshot shows the Files view:
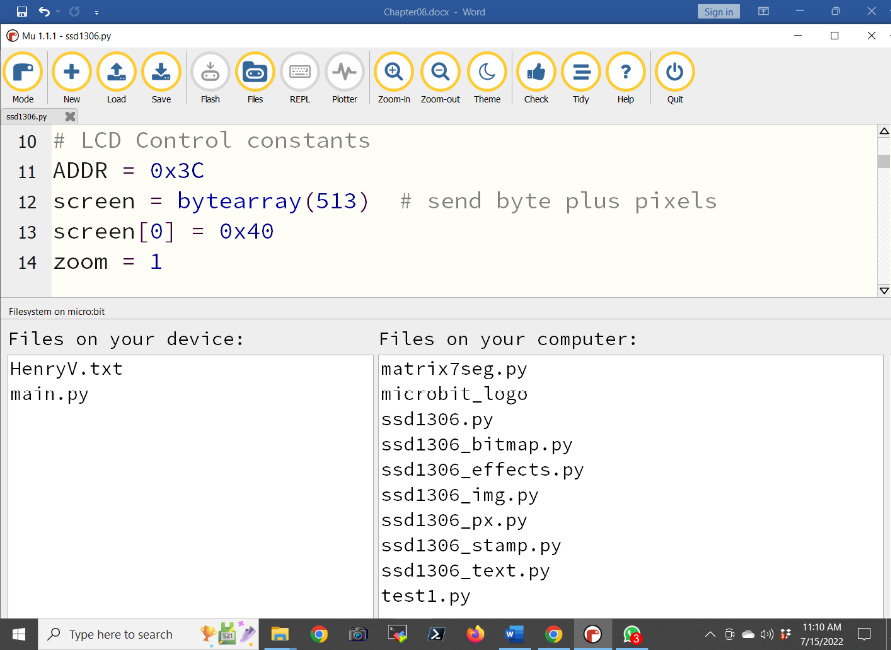
Figure 8.4 – The Files view when a program is executing in the Mu editor
The panels in the lower half show the files on the device (Micro:bit, in this case) and on your computer. However, there is a catch. Unlike the Thonny IDE, the Mu editor Files view cannot browse the files on your computer. The Mu editor creates a directory in the home directory of the user of your operating system. The directory is named mu_code. Currently, I am using MS Windows, and the directory for the Mu editor is located at C:UsersAshwinmu_code. The Mu editor shows only the files in this directory. We can drag and drop files to copy files between our computer and the Micro:bit. We can even delete files on the Micro:bit.
I prefer to use the Thonny IDE. However, we can use any editor for exploring files and programming the Micro:bit. I like the Thonny IDE as we can run a program on the Micro:bit’s main memory directly from the IDE without flashing it to the main.py file on the Micro:bit. The Mu editor does not have this facility.
Let’s programmatically read the data stored in this file. Here is the code:
with open('HenryV.txt', 'r') as file_handle:
    print(file_handle.read())
The open() function opens any file by default in read mode, so the 'r' argument is optional. We can write the preceding example, as follows:
with open('HenryV.txt') as file_handle:
    print(file_handle.read())
Both the preceding examples read the contents of the file passed as an argument and show it in the REPL.
This is how we can create and read files with MicroPython and BBC Micro:bit.
Appending a file
The standard Python implementation (CPython) has the provision for appending a file. If we open a file again in write mode and add some information, earlier information is erased, and new information is overwritten. However, MicroPython does not have this functionality. We can, however, append a file with a clever trick. We first open the file to be appended in read mode and save the contents to the variable. Then, we add another string to that variable and write the variable to the file to be appended. This will append the file. The following program demonstrates that:
with open('HenryV.txt') as file_handle:
    file_data = file_handle.read()
file_data = file_data + '
Henry V, William Shakespeare'
with open('HenryV.txt', 'w') as file_handle:
    file_handle.write(file_data)
with open('HenryV.txt') as file_handle:
    print(file_handle.read())
Creating our own library
We can create our own library. Its functionality can be used in other Python programs and in the REPL tool. Let’s try that. Save the following program with the name mylib.py on your local computer:
def message():
    print("Then out spake brave Horatius,")
    print("The Captain of the Gate:")
    print(""To every man upon this earth")
    print("Death cometh soon or late.")
    print("And how can man die better")
    print("Than facing fearful odds,")
    print("For the ashes of his fathers,")
    print("And the temples of his Gods."")
if __name__ == '__main__':
    message()
The if condition here is to check if we care about running the program directly or calling it with an external module. If we run the program directly, it runs the code enclosed under that. This is useful for writing the test code for our program. A Python program is also known as a module. Run the preceding program/module and check for any errors. Once we verify the program, we have to save it on the Micro:bit with the same name, mylib.py. Now, write the following statements in the REPL:
>>> import mylib
>>> message()
It will print all the output of the print() statements in the REPL. You can also save these statements as a Python file.
This is the simplest way we can create and use our own library.
The OS module
We can perform many operations on files and get a lot of information about the system using the OS module. Let’s use the REPL to check the functionality offered by the OS module. Let’s import it:
>>> import os
We can retrieve the properties, as follows:
>>> os.uname()
(sysname='microbit', nodename='microbit', release='2.0.0', version='Micro:bit v2.0.0+b51a405 on 2021-06-30; MicroPython v1.15-64-g1e2f0d280 on 2021-06-30', machine='Micro:bit with nRF52833')
We can retrieve a list of current files on the Micro:bit’s flash memory:
>>> os.listdir()
['HenryV.txt', 'mylib.py', 'main.py']
We can remove a file, as follows:
>>> os.remove('HenryV.txt')
>>> os.listdir()
['mylib.py', 'main.py']
We can see the size, as follows:
>>> os.size('mylib.py')
399
We can check the statistics of a file:
>>> os.stat('mylib.py')
(32768, 0, 0, 0, 0, 0, 399, 0, 0, 0)
Readers are encouraged to check the Micro:bit MicroPython documentation for all the functions used in these examples for more details. This is how we can work with the built-in OS module in Micro:bit. Let’s see how to work with files using MicroFS in the next section.
Working with MicroFS
MicroFS is a simple command-line tool to interact from your computer with the filesystem of Micro:bit. It works with the command line interpreter program of your computer’s operating system (MS Windows, Linux, FreeBSD, and macOS). We must download it first from https://www.python.org/downloads/ and then install it. While installing, check all the options, as shown in the following screenshot:
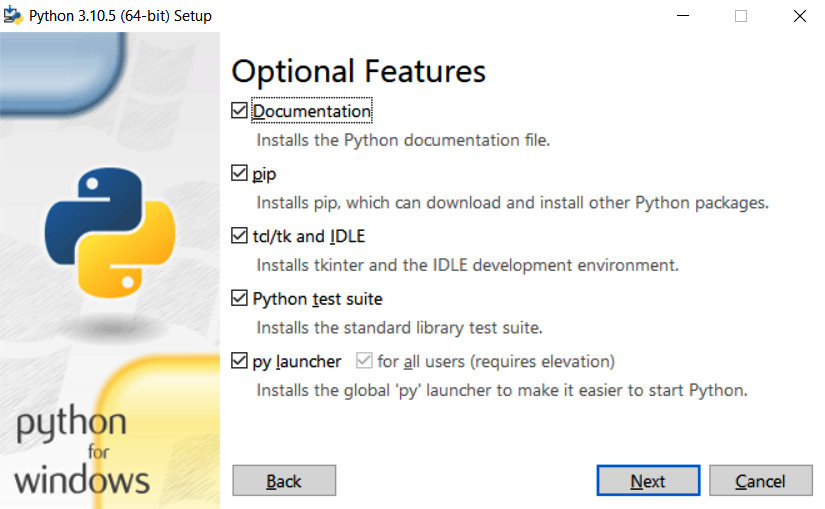
Figure 8.5 – Installing Python, pip, and IDLE
You also need to check all the options on the next screen of the installation wizard, as shown in the following screenshot:
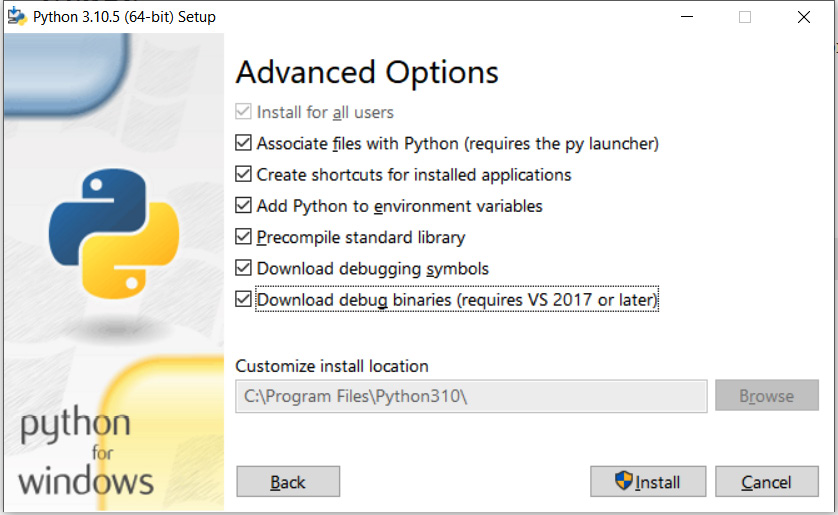
Figure 8.6 – Advanced Options
This will install Python, pip (pip installs Python; it’s a recursive acronym, a technical pun), and Integrated Development and Learning Environment (IDLE). pip is a package manager for Python. It will also add Python and pip to the list of environment variables, enabling us to launch it directly from any command line tool (such as CMD or PowerShell). We can run the following command on the command line interpreter (NOT the Python shell or the MicroPython REPL) of your computer’s operating system to install MicroFS with pip:
pip3 install microfs
This will install the MicroFS command-line utility and Python library to your computer (NOT Micro:bit). Let’s see a demonstration of the utility. Open the command line interpreter on your computer as an administrator (I am using MS Windows PowerShell as an administrator) and run the following command to see a list of files on the Micro:bit connected to your computers:
PS C:UsersAshwin> ufs ls
It shows the current files, as follows:
mylib.py main.py
We can copy a file from the Micro:bit to the current directory of the command line interpreter, as follows:
PS C:UsersAshwin> ufs get mylib.py
We can now see the file in the current directory of the command line interpreter as follows (using the ls command if your command line interpreter program supports it—for example, PowerShell and Bash terminal):
PS C:UsersAshwin> ls mylib.py
    Directory: C:UsersAshwin
Mode                 LastWriteTime         Length Name
----                 -------------         ------ ----
-a---           7/15/2022  4:29 PM            399 mylib.py
We can also copy a local file to the Micro:bit, as follows:
PS C:UsersAshwin> ufs put test.txt
We can use the following command again to see the files of the Micro:bit:
PS C:UsersAshwin> ufs ls
mylib.py main.py test.txt
We can remove a specific file from the Micro:bit, as follows:
PS C:UsersAshwin> ufs rm test.txt
PS C:UsersAshwin> ufs ls
mylib.py main.py
We can also write a Python program using the installed MicroFS module and execute it using IDLE on the local computer (NOT MicroPython on the Micro:bit). Here is the code for the program:
import microfs as ufs
print(ufs.ls())
try:
    ufs.get('mylib.py')
    print("File is copied to the local computer successfully!")
except Exception:
    print("No such file exists on the connected Micro:bit device!")
try:
    ufs.put('prog06.py')
    print("File is copied to the Micro:bit successfully!")
except Exception:
    print("No such file exists on the local computer!")
print(ufs.ls())
try:
    ufs.rm('prog06.py')
    print("File is deleted from the Micro:bit successfully!")
except Exception:
    print("No such file exists on the connected Micro:bit device!")
print(ufs.ls())
Run the program on IDLE on your local computer while the Micro:bit is connected to it, and it shows the following output:
['mylib.py', 'main.py']
File is copied to the local computer successfully!
File is copied to the Micro:bit successfully!
['mylib.py', 'main.py', 'prog06.py']
File is deleted from the Micro:bit successfully!
['mylib.py', 'main.py']
This is how we can work with the filesystem of Micro:bit with the MicroFS module installed on our local computer.
Summary
In this chapter, we learned how to work with the limited filesystem of Micro:bit powered by MicroPython. We learned how to create, delete, read, and alter the contents of files on Micro:bit using MicroPython programs. We also learned how to work with the OS module in MicroPython and the MicroFS module of Python on our computer. We will use this knowledge in the upcoming chapters of the book when we need to install and work with external libraries for external hardware modules.
In the next chapter, we will explore the concepts of analog input and pulse-width modulation (PWM). Using these concepts, we will program a potentiometer, photoresistor, servo motor, red, blue, and green light-emitting diode (RGB LED), and joystick with microPython on Micro:bit.
Further reading
- You can find more information about filesystems and MicroPython programming at https://microbit-micropython.readthedocs.io/en/v1.0.1/tutorials/storage.html.
- You can find more information about the Micro:bit-specific OS module of MicroPython at https://microbit-micropython.readthedocs.io/en/v1.0.1/os.html.
- You can explore more information about MicroFS at the GitHub page of the project at https://github.com/ntoll/microfs.