
Chapter 8
Working with Files and Images
What you will learn in this chapter:
- How to create and modify files and folders
- Generating a Google sitemap
- How to use the WebImage helper
In the last chapter, you learned how to save text files that your users choose to upload to your site. There is a lot more to learn about files within ASP.NET Web Pages, which is why the topic deserves a chapter of its own. You can, for example, generate your own text files, or modify existing files. You can copy them and delete them. You will learn how to do this in the next few pages. You will also learn about other types of files that you can work with, and a number of ways to deliver those to your users. You will specifically learn how to create one type of XML file — a Google sitemap. Then, in the second part of the chapter, you will work in more detail with image files by using a helper specifically created to simplify these kinds of tasks.
There are three primary classes that help you work with files and folders. You met one in the previous chapter — the Path class. The others are the File class and the Directory class, which, like the Path class, are used to house a number of related utility methods. None of the classes is intended to be instantiated directly. All of the methods exposed by these classes are static methods.
There are a huge number of file types that you might want to work with when developing your Web Pages application. Any text-based file can be managed easily with the File class. Other file types may require additional libraries. For example, there is nothing within the .NET Framework that helps you work with Portable Document Format (PDF) files. There are third-party libraries available from the Package Manager. Select Default - All as your source option and search for PDF. The latest Microsoft Office documents are based on the OpenXML format, and although it may not be the easiest API to work with, Microsoft has produced a Software Developers Kit (SDK) for dealing with OpenXML. These APIs and libraries are not the focus of this chapter. You will look instead at working with text-based files.
There are a number of ways to create a text file using methods from the File class. The easiest way is to use the File.Create method:
File.Create("C:file.txt");
This will create or overwrite a file at the specified location with the specified name. Generally, however, you would generate a file only if you wanted to add some content to it. There are a couple of methods that will create a file, if one doesn’t already exist, and then add text to it: File.WriteAllText and File.AppendAllText. The main difference between the two is that AppendAllText will add text to an existing file each time it is called, whereas WriteAllText will overwrite the file, if it already exists. In the following exercise, you will see how these two methods differ in practice.
TRY IT OUT: Creating Files
1. Start by creating a new site based on the Empty Site template, and name the site chapter8.
2. Add a folder to the site called Files, and then add a new CSHTML file to the site — in the root folder — and name it WriteFile.cshtml.
3. Add the following HTML to the <body> element:
<form method="post" action="">
    <div>Enter a name:</div>
    <div><input type="text" name="name" /></div>
    <div><input type="submit" value="Submit" /></div>
</form>
4. Add the following code block to the top of the file:
@{
    var location = Server.MapPath("/Files");
    var filename =  "form.txt";
    var path = Path.Combine(location, filename);
    if(IsPost){
        File.WriteAllText(path, Request["name"] + Environment.NewLine);
    }
}
5. Run the page in the browser and enter several names into the textbox, submitting the form after each one. Then have a look at the Files folder in your site and open the form.txt file that was created. You may need to right-click on the site name and click Refresh to see the newly created file. You should see only the most recent name that you submitted via the form appear in the text file.
6. Modify the code in the code block at the top so that it looks like:
@{
    var location = Server.MapPath("/Files");
    var filename =  "form2.txt";
    var path = Path.Combine(location, filename);
    if(IsPost){
        File.AppendAllText(path, Request["name"] + Environment.NewLine);
    }
}
7. Run the page in the browser and enter a number of names again. Once you have entered several names, check the Files folder again for the new form2.txt file. You should see this time that each name you entered has been written to the file on a separate line.
How It Works
The form you created should be self-explanatory by now, so the focus will be on the code block you added in Step 4. One of the first things to note is the use of a utility method from the Path class that you have not seen yet — Path.Combine. This is a very handy method that generates valid paths from strings according to the platform that the code is being run on. It will also throw an error if you attempt to include invalid path characters as part of any of the strings you want to combine into a path.
In the first example, you used the File.WriteAllText method, which as you learned earlier, overwrites a file if it already exists. This is why — regardless of how many names you entered into the form — you only saw the last one you entered in the file. Each time you submitted the form, the previous submission was overwritten. When you changed the code to make use of the File.AppendAllText method in Step 6, you saw how each name that you submitted via the form was added to the previous names.
The Directory class contains utility methods for working with folders, including methods to create, delete, move, and copy folders. In the next exercise, you will create a new folder for each name that you enter into the form and create a text file for each folder.
TRY IT OUT: Creating Folders
1. Add a new folder to the site you created in the previous exercise and name it Folders.
2. Add a new file to the site. Name the file CreateFolder.cshtml.
3. Add the following to a code block at the top of the file:
@{
    var location = Server.MapPath("/Folders/");
    var foldername =  Guid.NewGuid().ToString();
    var path = Path.Combine(location, foldername);
    if(IsPost){
        if(!Request["name"].IsEmpty()){
            Directory.CreateDirectory(path);
            var file = Path.Combine(path, Request["name"] + ".txt");
            var text = Request["name"] + ": " + DateTime.Now;
            File.AppendAllText(file, text);
        }
    }
}
4. Add the same form to the <body> element as you added to CreateFile.cshtml in the previous exercise:
<form method="post" action="">
    <div>Enter a name:</div>
    <div><input type="text" name="name" /></div>
    <div><input type="submit" value="Submit" /></div>
</form>
5. Run the page in the browser and enter a number of names into the form, one at a time as in the last exercise, submitting the form with each name. Check the contents of the Folders directory in your site after you have run through a few names. It should contain a number of new folders similar to the ones visible in Figure 8-1.

6. Make the following alteration to the code block at the top of the CreateFolder.cshtml file, adding the extra line at the end:
@{
    var location = Server.MapPath("/Folders/");
    var foldername =  Guid.NewGuid().ToString();
    var path = Path.Combine(location, foldername);
    if(IsPost){
        if(!Request["name"].IsEmpty()){
            Directory.CreateDirectory(path);
            var file = Path.Combine(path, Request["name"] + ".txt");
            var text = Request["name"] + ": " + DateTime.Now;
            File.AppendAllText(file, text);
        }
    }
    var folders = new DirectoryInfo(location);
}
7. Add the following code just after the form and before the closing </body> tag:
@foreach(var folder in folders.GetDirectories()){
    @:Folder: <strong>@folder.Name</strong><br />
    foreach(var file in folder.GetFiles()){
        @:File: <a href="/Folders/@folder.Name/@file.Name">
                <em>@file.Name</em></a><br />
    }
}
8. Run the page again in the browser, and you should see the list of folders appear together with links to the files that have been created in them like in Figure 8-2.

How It Works
Your new code block is responsible for creating a new folder every time that a value has been submitted via the form. You can see one of the static methods of the Directory class being used — the CreateDirectory method. The folder’s name is generated from a Globally Unique Identifier (GUID). GUIDs are great for generating unique names for files or folders when you don’t want to run the risk of overwriting an existing one by accidentally picking a name for a file or folder that already exists at that location. Together with the folder, the code generates a file named after whatever was submitted via the form, and commits the same name together with the current date and time to the contents of the file.
You then amended the code to make use of a new class — the DirectoryInfo class. DirectoryInfo has a sibling class called FileInfo, which shares a similar relationship as that enjoyed by the Directory and File classes. DirectoryInfo and FileInfo expose many similar methods to their static counterparts — Directory and File — but the outcome of some of the methods can differ. For example, if you just want to the name of a folder using the Directory class, you have a method called GetDirectories, but it returns the entire path as well as the folder name. DirectoryInfo and FileInfo expose some properties as well as methods, which allows you to easily hone in on the folder name, or filename if you want it.
In the body of the page, you obtained a collection that holds the created folders details, and then iterated their files. As you did this, you built a hyperlink to the individual file. You built this link using the Name properties of the DirectoryInfo class and the FileInfo class. If you click on the hyperlink, you will see the content of the file displayed in the browser as plaintext.
Copying and Moving Files and Folders
You can copy and move files in a couple of ways. If you use the File class, the respective methods are Copy and Move:
//Copies the file example.txt in folder1 to folder2
var original = "@C:folder1example.txt";
var copy = "@C:folder2example.txt";
File.Copy(original, copy);

//Moves the file example.txt from folder1 to folder2
var source = "@C:folder1example.txt";
var destination = "@C:folder2example.txt";
File.Move(source, destination);
The FileInfo class has slightly different methods — CopyTo and MoveTo — which are illustrated here:
//Copies the file example.txt in folder1 to folder2
var original = new FileInfo("@C:folder1example.txt");
var copy = "@C:folder2example.txt";
original.CopyTo(copy);

//Moves the file example.txt from folder1 to folder2
var source = new FileInfo("@C:folder1example.txt");
var destination = "@C:folder2example.txt";
source.MoveTo(destination);
You can’t actually copy whole folders or directories. You need to use Directory.CreateDirectory or the DirectoryInfo.Create methods to create a new directory wherever you want it, and then copy the individual files from the original to the new directory:
//Copies all folders and their files at folderlocation1 to folderlocation2
var source = "@C:folderlocation1";
var destination = "@C:folderlocation2";

DirectoryInfo folders = new DirectoryInfo(source);
foreach(var folder in folders.EnumerateDirectories()){
    Directory.CreateDirectory(Path.Combine(destination, folder.Name));
    foreach(var file in folder.GetFiles()){
        file.CopyTo(Path.Combine(destination, folder.Name, file.Name));
    }
}
You can delete folders and files quite easily with the Directory.Delete and File.Delete static methods:
var location = "@C:folderlocation";
foreach(var folder in Directory.EnumerateDirectories(location)){
    foreach(var file in Directory.EnumerateFiles(folder)){
        File.Delete(file);
        }
    Directory.Delete(folder);
}
Plaintext files are not the only type of file that you can work with. XML is a popular file format for data exchange, and is the format used for RSS feeds and sitemaps. The .NET Framework includes a relatively new set of APIs for working with XML known as LINQ to XML. LINQ — or Language Integrated Query, to give it its full name — was added to the .NET Framework to provide a way to query data using C# (or VB). What kind of data can you query? Well, in the LINQ world, any sequence can be queried — or indeed created. A sequence is another term for a collection.
XML is represented by an XDocument object, which at its most basic is a collection or sequence of XElement objects. One of the great things about LINQ is that it isn’t used just for querying existing sequences; you can use it to create totally new ones as well. What this means is that using LINQ to XML, you can create an XDocument object in memory, populate it with XElement objects, and then serialize the result to file or a stream. A stream is a sequence of bytes. Serializing something means converting it to a format that can be stored and passed around.
A sitemap is a collection of URLs that search engines can use to locate content on your site for indexing. The protocol that most leading search engines support is Sitemap 0.9, which is detailed and maintained at www.sitemaps.org/protocol. The XML structure is not complicated, and provides the ideal example to illustrate how LINQ to XML can be used to generate a sitemap. Here’s an example that shows two URLs being included in the sitemap — the home page and an about page:
<?xml version="1.0" encoding="UTF-8"?>
<urlset xmlns="http://www.sitemaps.org/schemas/sitemap/0.9">
   <url>
      <loc>http://www.domain.com/</loc>
      <lastmod>2011-04-12</lastmod>
      <changefreq>daily</changefreq>
      <priority>0.5</priority>
   </url>
   <url>
      <loc>http://www.domain.com/about</loc>
      <lastmod>2011-04-12</lastmod>
      <changefreq>monthly</changefreq>
      <priority>0.5</priority>
   </url>
</urlset>
The top line declares that the content of the file is XML. The second line points to a namespace, which references the current protocol standard. It also declares an element called urlset, which houses the rest of the content. Each entry appears in a url element, which has up to four additional elements — loc (the URL), lastmod (the date in W3C date format that the item was last modified), changefreq (how often the item is modified), and priority (how important you rank this item relative to others on the site on a scale of 0 to 1). The last three of these are optional according to the protocol. You can learn more from the documentation at the sitemaps.org site. What is of more interest here is how to construct this file structure from code.
Most of the time, a lot of the pages you would want to appear in your sitemap are generated from content stored in a database — whether they are items for sale, blog articles, news stories, or what have you. Consequently, their URLs are also generated dynamically, or at least stored in a database. Given the absence of an actual site or database at the moment, the URLs for the example code will be generated dynamically from a List<string>. Here’s the sample code to generate the sitemap together with an explanation as to what’s going on:
@using System.Xml.Linq;
@{
    var urls = new List<string>{
                "home",
                "about",
                "contact",
                "company",
                "customers",
                "corporate",
                "products",
                "services",
                "locations",
                "terms"
            };
    XNamespace ns = "http://www.sitemaps.org/schemas/sitemap/0.9";
    var baseurl = "http://www.domain.com/{0}";
    var sitemap = new XDocument(
        new XDeclaration("1.0", "utf-8", "yes"),
            new XElement(ns + "urlset",
                from url in urls select
                new XElement("url",
                    new XElement("loc", string.Format(baseurl, url)),
                    new XElement("lastmod",
                                 String.Format("{0:yyyy-MM-dd}",
                                 DateTime.Now)
                                 ),
                    new XElement("changefreq", "monthly"),
                    new XElement("priority", "0.5")
                    )
                )
            );
    Response.ContentType = "text/xml";
    sitemap.Save(Response.Output);
}
The first line of code imports the System.Xml.Linq namespace, which makes the XDocument, XElement, and other relevant classes available to the code. Then a List<string> is instantiated and populated with various page titles for a fictional company website.
An XNamespace object is instantiated to hold the value of the namespace that was introduced earlier, and string is also set up to hold the base URL for the site, to which all the titles will be appended to generate full URLs to specific items in the sitemap. The sitemap is created as an XDocument object (in memory at this point); and an XDeclaration object is used to specify the version and encoding of the document, as well as to indicate whether the document can “stand alone” (not rely on an external set of rules or default values for attributes to make sense).
From that point, XElement objects are added. The first is the urlset element, which encloses all other elements and includes the XNamespace object. Then the LINQ query obtains all of the items in the List<string> sequence:
from url in urls select…
As you will see when you reach Chapter 10, this looks very similar to the database query language known as SQL (Structured Query Language), but it is in fact C# code. What it does is extract each item from the urls collection and project it into a new form — an XElement object with the name of url, and child elements containing values for loc, lastmod, changefreq, and priority.
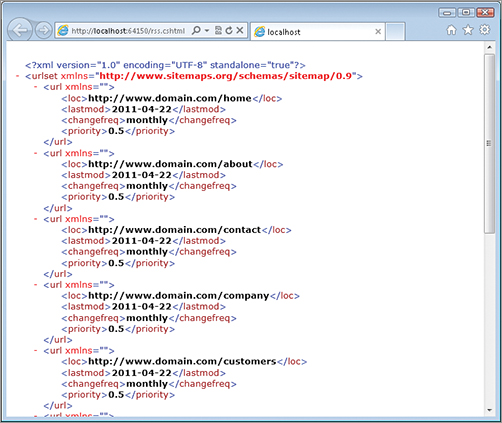
The last part of the code sets the correct content type for the HTTP response, and then serializes the XDocument object to a stream. In other words, the sitemap is converted to a binary format, the browser or requesting agent is notified that the MIME type for this particular format is text/xml, and then the bytes are written to the HTTP response (See Figure 8-3).
LINQ to XML is well worth getting to know for working with XML — both for querying and generating XML files. Just like JSON (discussed in Chapter 6), XML is a very popular format for data exchange, and you will be working with it if you want to expose data as RSS feeds, ATOM feeds, or sitemaps, as well as for a number of other purposes.
Images give your web pages life. You may include images as part of the “furniture,” which establishes a brand for your site. You might also allow your users to upload images to be used as avatars, or to illustrate an item they want to sell, or allow them to share memorable moments caught on camera. Images that you generate for your own use will be custom designed and sized, so no extra work should be needed to incorporate them into your site, but images coming from your users will invariably come in a variety of formats and sizes. They may be uploaded as .png, .bmp, .tif, or .jpg files, or something else entirely. They will need to be managed through your code regardless.
The WebImage helper has been put together specifically to help you easily manage and manipulate images. The helper enables you to grab images from uploads, copy them, crop them, resize them, rotate and flip them… and do much more funky stuff. Prior to the helper, this kind of work required a lot of code. Table 8-1 lists the main methods offered by the WebImage helper, which gives the best indication of the scope of its abilities.
Table 8-1: The WebImage Helper Methods
| Method | Description |
| AddImageWatermark | Adds a watermark image to the image. |
| AddTextWatermark | Adds watermark text to the image. |
| Clone | Creates a copy of the WebImage object. |
| Crop | Crops an image. |
| FlipHorizontal | Flips an image horizontally. |
| FlipVertical | Flips an image vertically. |
| GetBytes | Returns the image as a byte array. |
| GetImageFromRequest | Returns an image that has been uploaded using the browser. |
| Resize | Resizes an image. |
| RotateLeft | Rotates an image counter-clockwise. |
| RotateRight | Rotates an image clockwise. |
| Save | Saves an image. |
| Write | Renders an image to the browser. |
The best way to explore these features in depth is to try some of them in an exercise. Over the next few pages, you will build a small application that allows users to upload images into a gallery. You will create thumbnails (smaller versions of the original) of each image and display them using a jQuery plug-in designed specifically for managing galleries of images.
TRY IT OUT: Building an Image Gallery
1. Create a new website based on the Empty Site Template, and name it Gallery.
2. Add a new file to the site and call it Default.cshtml.
3. Since you will work with the FileUpload helper, you need to download the ASP.NET Web Helpers package, which you obtained in the previous chapter. While you are installing that package, change the source to Default - All, and search for jQuery. Install the most recent version available to you. At the time of writing, it was 1.6.2.
4. Now it’s time to start adding some code to Default.cshtml. First, add the following to the <body> element:
<h1>Upload Images</h1>
<div>@message</div>
@FileUpload.GetHtml(allowMoreFilesToBeAdded:false)
5. Add the following to a code block at the top of the page:
@{
    var folderName = "";
    var path = "";
    var message = "Choose an image to upload:";

    if(Request.Cookies["folder"] != null){
        folderName = Request.Cookies["folder"].Value;
    }
    else{
        folderName = Guid.NewGuid().ToString();
    }

    path = Path.Combine(Server.MapPath("/Uploads/"), folderName);

    if(!Directory.Exists(path)){
        Directory.CreateDirectory(path);
        Response.Cookies["folder"].Value = folderName;
        Response.Cookies["folder"].Expires = DateTime.Now.AddYears(1);
    }

    if(Request.Files.Count > 0){
        WebImage image = WebImage.GetImageFromRequest();
        if(image != null){
            var imageFileName = Path.GetFileName(image.FileName);
            var imageGuid = Guid.NewGuid().ToString();
            var fileName = imageGuid + "_" + imageFileName;
            var location = Path.Combine(path, fileName);
            image.Save(location, "jpg");
        }else{
            message = "You may only upload image files: .jpg, .gif, .png, .bmp, .tif";
        }
    }
}
6. Add a new folder called Uploads to the root of the site. Now it’s time to test the code as it is up to this point. To do this, run the page and select a variety of files — not just image files — and note what happens as each one is uploaded.
How It Works
When you first run the page, it initializes a number of variables. One of these is a variable called folderName. This variable acquires its value from one of two places. The first place that is checked is the Request.Cookies collection. You haven’t met this collection before, but a cookie is a text file that is placed on the user’s machine, and can be used to store arbitrary values. In this particular case, the value is the name of the user’s personal upload folder. Each time the browser makes a request to the web server, it passes any cookies along with the request. This following line of code checks to see whether a cookie with the name folder exists:
if(Request.Cookies["folder"] != null)
If it does exist, the value that the cookie contains is used to identify the user’s current folder. But how did a cookie with that value get there? If you follow the logic of the code from the previous line, you can see that if the cookie does not exist (that is, it hasn’t been set yet), a folder name is generated from the GUID, and a folder is created using that name. Then a cookie is generated using Response
.Cookies:
Response.Cookies["folder"].Value = folderName;
Its expiry date is set for one year from today. This makes it a persistent cookie. If no expiry date was set, the cookie would be removed from the browser when the browser is closed by the user. Note that cookies are browser specific. They are available only to the browser that they were set with.
This example isn’t the greatest use of cookies, but serves to illustrate how they work. Cookies can be deleted by users, or they can set their browser to refuse them. If either of those things happened in this application, the link between the user and their folder would be lost. It would also be lost if the user accessed the application using a different browser to the one they used before, or if they used a different machine altogether. In a real world application, you would implement something a lot more robust, such as some kind of membership backed up by a database, but we haven’t got to that point yet in this book.
Now you have the folder set and its name stored in a cookie. What’s needed next is some code to manage uploaded files. If there is at least one file in the Request.Files collection, an attempt to establish that it is a valid image file is made with the WebImage.GetImageFromRequest method. If you tested earlier by uploading a non-image file, such as a word processing document or a text file, for example, you would have generated the message that says only valid image files may be uploaded. If the WebImage
.GetImageFromRequest method detects that the uploaded file is not a valid image type, the result is that the WebImage object is null. If the test was successful, the resulting image file is saved with a new filename, by prepending the actual filename with a GUID. There is one other thing to note here, and that is that the file type will also be converted to a .jpg. This is achieved by passing in a value for the imageFormat argument to the WebImage.Save() method call:
image.Save(location, "jpg");
This ensures that all image files are converted to JPG format before being saved. The WebImage helper will accept a range of image formats when you call the GetImageFromRequest method. It will happily retrieve .bmp and .tif files, for example, from the Request.Files collection. However, not all browsers can be relied upon to display images in these formats. Consequently, the images are saved in a format that can reliably be displayed in all known browsers.
At this stage, there is still some work to do. The images that your users upload are not constrained in any way, except to ensure that they are valid file types and they do not exceed 4MB in file size. However, any reasonable image gallery should control the size of images on display so that visitors do not have to scroll horizontally and vertically to be able to see the whole image. In the next step, you will amend the existing code to create two versions of the uploaded image. The first version will be a thumbnail version, not exceeding 200 pixels in height or width, and the second will ensure that the main image does not exceed 600 pixels in either height or width. In addition, the thumbnails will have a watermark applied to them, indicating the date that the image was added to the gallery.
Once the thumbnails are created, you need to produce a page to display them so that visitors can choose which images they would like to study more closely.
TRY IT OUT: Resizing Uploaded Images
1. Continuing with the site you were working with in the last exercise, alter the code block in Default.cshtml so that it looks like this:
@{
    var folderName = "";
    var path = "";
    var message = "Choose an image to upload:";

    if(Request.Cookies["folder"] != null){
        folderName = Request.Cookies["folder"].Value;
    }
    else{
        folderName = Guid.NewGuid().ToString();
    }

    path = Path.Combine(Server.MapPath("/Uploads/"), folderName);

    if(!Directory.Exists(path)){
        Directory.CreateDirectory(path);
        Response.Cookies["folder"].Value = folderName;
        Response.Cookies["folder"].Expires = DateTime.Now.AddYears(1);
    }

    if(Request.Files.Count > 0){
        WebImage image = WebImage.GetImageFromRequest();
        if(image != null){
            var imageFileName = Path.GetFileName(image.FileName);
            var imageGuid = Guid.NewGuid().ToString();
            var fileName = imageGuid + "_" + imageFileName;
            var thumbFileName = imageGuid + "_thumb_" + imageFileName;
            var location = Path.Combine(path, fileName);
            image.Resize(600, 600, preventEnlarge: true);
            image.Save(location, "jpg");
            image.Resize(200, 200, preventEnlarge: true);
            location = Path.Combine(path, thumbFileName);
            var watermark = DateTime.Now.ToShortDateString();
            image.AddTextWatermark(watermark, fontColor: "White", fontSize: 8);
            image.Save(location, "jpg");
        }else{
            message = "You may only upload image files: .jpg, .gif, .png, .bmp, .tif";
        }
    }
}
2. Download Tiny Carousel from the jQuery plug-in site at http://plugins.jquery.com/project/tinycarousel. Add the JavaScript file to a folder called Scripts, which was created when you downloaded jQuery from the Package Manager.
3. Create a new folder called Content and add a .css file to it. Change the filename to tinycarousel.css. Add the following style declarations to tinycarousel.css:
#slider-code {
    height: 160px;
    overflow:hidden;
}
#slider-code .viewport {
    float: left;
    width: 220px;
    height: 220px;
    overflow: hidden;
    position: relative;
}
#slider-code .buttons {
    background:url("/Images/buttons.png") no-repeat scroll 0 0 transparent;
    display: block;
    margin: 30px 10px 0 0;
    background-position: 0 -38px;
    text-indent: -999em;
    float: left; width: 39px;
    height: 37px;
    overflow: hidden;
    position: relative;
}
#slider-code .next {
    background-position: 0 0;
    margin: 30px 0 0 10px;
}
#slider-code .disable {
    visibility: hidden;
}
#slider-code .overview {
    list-style: none;
    position: absolute;
    padding: 0;
    margin: 0;
    left: 0;
    top: 0;
}
#slider-code .overview li{
    float: left;
    margin: 0 20px 0 0;
    padding: 1px;
    height: 161px;
    border: none;
    width: 256px;
}
4. You might notice that the style declaration includes a reference to an image file called buttons.png. You can create your own image file, or simply borrow the one that comes with the download for this book. I suggest the second option, as the positioning in the style sheet is calculated to work with the buttons.png. Create a folder called Images to house the buttons.png file.
5. Download jQuery FancyBox from http://fancybox.net/home. You should get a .zip file containing demonstration code, as well as the JavaScript and .css files. At the time of writing, the latest version was 1.3.4, and the filenames reflect that. If a newer version has been released by the time you read this, the filenames that follow may well have changed along with the newer version number. Copy the jquery.fancybox-1.3.4.css file to your Content folder, the jquery.fancybox-1.3.4.pack.js file to your Scripts folder, and the images to your newly created Images folder.
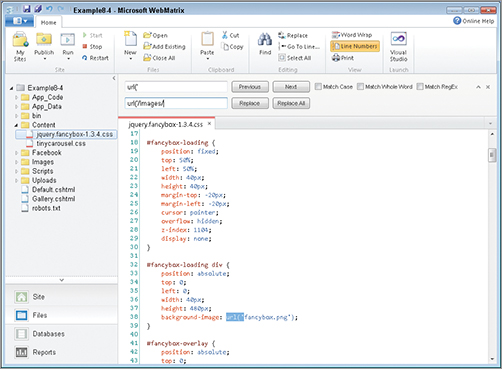
6. At this stage, you also need to update the jquery.fancybox-1.3.4.css file to point to the correct location for the images you have just downloaded. Open the file in WebMatrix and locate the first instance of a background image reference. It should be pointed to the same folder as the jquery.fancybox-1.3.4.css file. You need to change that, and all other references to point to the Images folder. With the file open and its tab selected, press Alt, then H, then E. If all worked well, you should now have the Find and Replace dialogs visible, as shown in Figure 8-4.
You can also achieve the same result by clicking the Replace icon in the Editing menu. Once you have that, type url(' into the Find In File box, and url('/Images/ into Replace With, and then click Replace All. Now all the image references have been adjusted. There is another change you have to make, and that is to the location of some images for the older versions of Internet Explorer. Enter src='fancybox/ into the Find In File box, and then src='/Images/ into Replace With. Then click Replace All.
7. Add a new file and name it Gallery.cshtml. Add the following code to the <head> element:
<head>
<meta charset="utf-8" />
<title>Gallery</title>

<link rel="stylesheet" href="@Href("~/Content/tinycarousel.css")" type="text/css" />
<link rel="stylesheet" href="@Href("~/Content/jquery.fancybox-1.3.4.css")"
      type="text/css" />
<script type="text/javascript" src="@Href("~/Scripts/jquery-1.6.2.min.js")">
</script>
<script type="text/javascript" src="@Href("~/Scripts/jquery.tinycarousel.min.js")">
</script>
<script type="text/javascript" src="@Href("~/Scripts/jquery.fancybox-1.3.4.pack.js")">
</script>
<script type="text/javascript">
    $(document).ready(function(){
        $('#slider-code').tinycarousel();
        $('.thumb').fancybox();
    });
</script>
</head>
8. Then add the following code to the body:
<h3>Gallery</h3>
<div id="slider-code">
    <a class="buttons prev" href="#">left</a>
    <div class="viewport">
        <ul class="overview">
            @foreach(var file in files){
            <li>
            <a class="thumb" href="Uploads/@folderName/@file.Replace("_thumb", "")">
            <img src="Uploads/@folderName/@file" alt=""/>
            </a>
            </li>
            }
          </ul>
      </div>
      <a class="buttons next" href="#">right</a>
</div>
9. Finally, add the following code to the top of the file in a code block:
@{
    var folderName = "";
    var path = "";
    var files = new List<string>();
    if(Request.Cookies["folder"] != null){
        folderName = Request.Cookies["folder"].Value;
        path = Path.Combine(Server.MapPath("/Uploads/"), folderName);
        foreach(var file in  Directory.GetFiles(path)){
            if(Path.GetFileName(file).Contains("_thumb_")){
                files.Add(Path.GetFileName(file));
            }
        }
    }
}
10. That’s it. Now, assuming that you have uploaded some image files already, you should see a gallery similar to the one in Figure 8-5.

And if you click on one of the thumbnail images, the larger version should appear in the FancyBox, as in Figure 8-6.

How It Works
The first change you made was to the code that managed the uploaded file. You used the WebImage
.Resize method to make two resized versions of the uploaded file. In the first version, you specified the width and height parameter values were both 600 pixels. This does not mean that your resulting image will be 600 by 600 pixels. By default, another parameter — preserveAspectRatio - is set to true. This value ensures that the proportions of the image are maintained while it is being resized. I used the sample images that come with the Windows operating system to test the code, and that is what you see in Figure 8-5. You can usually find these in C:UsersPublicPicturesSample Pictures in Windows 7. All of the images there are 1024 by 768 pixels. When you set the width and height to 600 pixels, and specified that the width/height ratio should be maintained, you actually told the WebImage helper that neither the width nor the height should exceed 600 pixels. The result (assuming the starting image is 1024 by 768) will be an image that is 600 pixels wide, but (preserving the aspect ratio) 450 pixels wide. Perhaps these parameters should be named maxwidth and maxheight, as that is really what they control when setting the preserveAspectRatio value to true. If you had specified that the parameter value be false, the image would have been resized to 600 by 600, and would also have been distorted as a result of being stretched to fit its new aspect ratio. You also applied the value true to preventEnlarge. This ensures that if an image’s width and height both fall below the resize values, the image is not increased in size to meet the (max) width or (max) height values. Increasing or enlarging images will almost always lead to a loss of quality.
The second version is saved with a maximum width and height of 200 pixels. Before it is saved, however, you generated a string with the value of today’s date, and then you used the AddTextWatermark method to apply that string to the image as a watermark. You specified the font color (the default is black) and the font size (the default is 12 points). You left the other parameter values to their defaults, which are a normal style font, using Microsoft Sans Serif, and placed in the bottom-right corner with five pixels of padding.
Both versions of the file used the same GUID value as part of their filename. The large version had a filename constructed as before, but the change you made to this iteration ensured that the word “thumb” became part of the filename. Keeping the GUID the same for both versions makes it a lot easier to match a thumbnail to its parent.
I chose both Tiny Carousel and FancyBox for the same reason — they both offered a limited set of functionality and had easy documentation. I did not have to waste any time at all getting either of them to work. And they both work fine for this example. They may not be suitable for other projects that you work on, so you should explore other options as well. You might even want to use this little project as a basis for testing alternatives, and there are countless alternative carousel-type plug-ins available in particular.
Notice in particular the order in which the JavaScript files have been referenced in the Gallery.cshtml file: jQuery core first, followed by any plug-ins. Because all plug-ins depend on jQuery, this order is essential. The <script> block targets two groups of elements: It uses an ID selector to apply carousel effects to the element with an ID of "slider-code". That ID was kept over from the demo code provided as part of the download. If you want to change it to something else, you will need to update the StyleSheet.css rules accordingly. This might be a useful exercise for you at some stage — make changes to the CSS one at a time, and see what breaks. It is sometimes a very useful learning exercise.
Back to the current exercise, the second group of elements are targeted using a class selector — all elements with a class of “thumb”, which are actually hyperlinks. These have the FancyBox effects applied to them. But what do those hyperlinks contain? The code block at the top of the page is crucial with regards to the content of the hyperlinks. In it, you first attempt to read a cookie to see if the folder name has been set for the current user. If it has, your code uses Directory.GetFiles, which you saw in the previous exercise, to grab an array of all filenames in that folder. You also construct a List<string>, and as you iterate the array of files in the folder, you add any that have the string "_thumb_" in their name to the List<string>. Consequently, your List<string> will contain a nice list of all the thumbnail image filenames, and nothing else.
Once you have that collection, you iterate it in the HTML markup to generate the gallery. The hyperlink points to the large version of the image, which has the same filename as the thumbnail, except that it doesn’t include “_thumb” as part of the name. Therefore, replacing “_thumb” with nothing (an empty string, in fact) gives the large version’s filename. That’s why the same GUID was used for both versions. The thumbnail images themselves act as the link.
This chapter showed you how to work with files in your Web Pages application. You learned about the Path, File, and Directory utility classes and a number of their methods that help when working with both folders and files. At the beginning of the chapter, you learned the basics of file manipulation and how to create and amend text files. Then you learned how to create folders, and copy and move files.
In the next section, other file types were explored, beginning with XML. You learned that XML is really just a text-based file, and it can be generated quite easily using LINQ to XML. You saw how this relatively new .NET technology helps when it comes to constructing a valid sitemap document that search engines will understand and use as a guide to what to index on your site.
In the final section, you learned about image file types in particular, and about the WebImage helper, which is provided to make working with images easy and pain-free. You used your new knowledge on the creation and management of directories to lay the foundation of a gallery application. You also saw how the WebImage helper provides a number of very useful methods that allow you to retrieve image files from uploads, rename them, resize them, watermark them, and save them. You also learned a bonus topic in this section — all about cookies and how to read values from them and set them.
In the last exercise, you experienced first-hand how combining a couple of jQuery plugins with the WebImage helper can help you create a working thumbnail-based image gallery with the minimum amount of effort and code.
EXERCISES
1. Name at least two classes containing static methods that you are likely to use for manipulating files and folders. Explain what the classes you choose are responsible for.
2. What is LINQ to XML?
3. What is the purpose of the preserveAspectRatio parameter in the WebImage helper’s Resize method? What is its default value and how are the image and height values affected by the default value?
Answers to the Exercises can be found in the Appendix.
What You Learned in This Chapter
| Topic | Key Concepts |
| File Class | A class containing static utility methods for working with files. |
| Path Class | A class containing static utility methods for working with file paths. |
| Directory Class | A class containing static utility methods for working with folders. |
| GUID | Globally Unique Identifier — A value that has an extremely small chance of being duplicated. |
| DirectoryInfo | A class containing a range of instance methods for working with folders. |
| FileInfo | A class containing a range of instance methods for working with files. |
| LINQ to XML | An API for working with XML. |
| Xdocument | A representation of an XML document that LINQ to XML understands. |
| Xelement | An element within an Xdocument. |
| WebImage Helper | A helper for manipulating image files. |
| Cookie | A text file written to the browser, which can be persisted and stored as values. |