Ted Hagos1, Mario Zechner2, J. F. DiMarzio3 and Robert Green4
(1)
Makati, Philippines
(2)
Graz, Steiermark, Austria
(3)
Kissimmee, FL, USA
(4)
Portland, OR, USA
The best way to learn game programming is to start coding one. In this chapter, we’ll build a simple card game, Crazy Eights. Crazy Eights is a popular game, both the actual card game and its electronic counterparts. If you search Google Play for Crazy Eights, it’ll turn up quite a few selections.
We’ll walk through the process of how to build a simple turn-based card game like Crazy Eights. The rules of this game are simple, and it doesn’t involve a lot of moving parts; that’s not to say it won’t be challenging to build. There are plenty of challenges ahead, especially if this is the first time you’ll build a game. In this chapter, we’ll discuss the following:
How to use Custom Views
How to build a splash screen
Drawing graphics
Handling screen orientation
Going full screen
Drawing buttons from graphics
Handling touch events
Mechanics of the Crazy Eights game
All the logic required for the Crazy Eights game
Throughout the chapter, I’ll show the code snippets necessary to build the game and what the program looks like at specific stages of development. The best way to understand and learn the programming techniques in this chapter is to download the source code for the game and keep it open in Android Studio as you read through the chapter sections. If you want to follow along and build the project yourself, it’s best to keep the source code for the chapter handy, so you can copy and paste particular snippets as necessary.
Basic Gameplay
Crazy Eights can be played by two up to five players with a deck of 52 cards; in our case, there will only be two players—a human player and a computer player. Of course, you can build this game to accommodate more players, but limiting the players to one human player makes the programming a lot simpler.
Seven cards are dealt to both players one card at a time; the top card of the remaining deck is placed face up to start the discard pile.
The object of the game is to be the first player to get rid of their cards. Cards with a matching suit or number can be played into the middle. Conventionally, the player to the left of the dealer goes first, but in our case, the human player will simply start. So, the human player (us) looks at our cards, and if we have a card that matches either the suit or the number of the top card in the discard pile, we can play that card. If we’re unable to play any card, we will draw from the remaining deck (up to three cards); if we’re still unable to play, we pass. In case we draw a card that can be played, that will be played. The eights (any suit) are wild, and it can be played on any card. The player of an eight will state or choose a suit, and the next player will have to play a card in the suit that was chosen. When one of the players is able to play the last card into the middle, the round is finished. The round can also finish if none of the players can play a hand.
The score is calculated by awarding players the point value of cards left in their hands at the end of the round; for example, if the computer bested us in the round, and we were left with the 9 of hearts and 3 of spades, our score will be 12.
The game ends when one of the players hits 100 or more points. The player with the lowest score wins.
Key Parts of the Program
To build the game, the key things to figure out are the following:
How to draw cards—Android doesn’t have a built-in View object that can display cards; we have to draw it for ourselves.
How to handle events—There will be some parts of the program where we can use the traditional event handling of Android where we only have to attach a listener to the View object, but there will also be parts where we need to figure out if the user action falls on the region where we drew the button.
Make the game full screen.
There are other technical challenges, but the preceding list is a good starting point.
We’ll build the game app with mainly two Activities and two Views, two custom Views, to be precise. To illustrate the individual cards, the card deck, and the discard pile, we need to do 2D drawings. The Android SDK doesn’t have a ready-made View object that will suit our needs. It’s not like we can drag and drop a Card object from the palette and go from there; so, we have to build our own custom View object. The android.view.View is the basic class for drawing and handling input; we will use this class to draw the cards, the deck, and other things we need for the game, like the scoreboard. We could use the SurfaceView class as our base class for our 2D drawings, and it would have been a better choice because of the performance benefits (it has to do with the way SurfaceView handles threads), but the SurfaceView requires a bit more effort in programming. So, let’s go with the simpler View object. Our game doesn’t need to go crazy on the animation anyway. We should be just fine with our choice.
Custom Views and Activities
In our past projects, you may recall that an Activity component is used to show the UI and that it has two parts—a Java program in code-behind and an XML file, which is essentially where the UI is structured as nested arrangements of the View object defined in XML. That was fine for apps, but we need to render custom drawings from image files, so that technique won’t work. What we’ll do is to create a Custom View object where we will draw everything we need, then we will set the content view of the Activity to that custom view. We can create the custom View by creating a Java class that extends android.view.View.
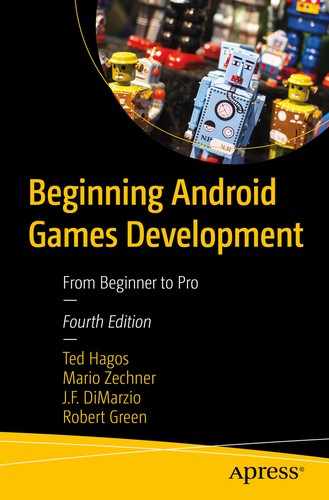
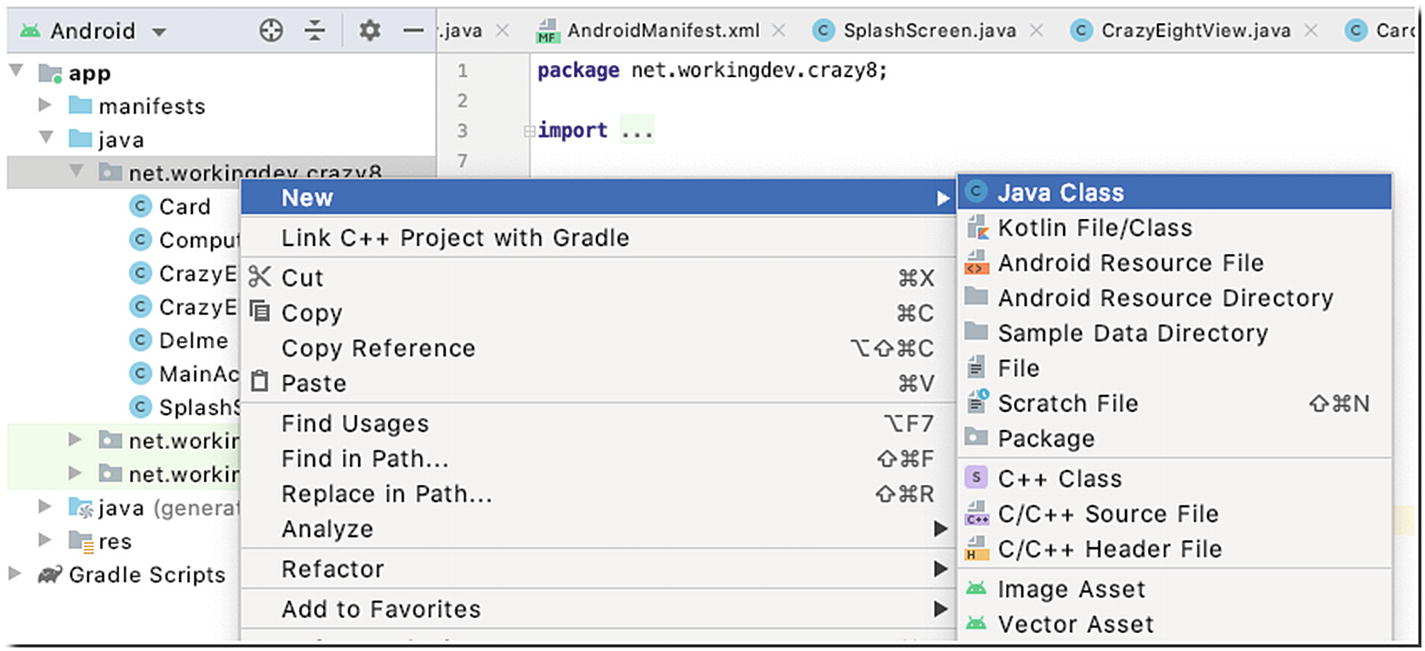
Assuming you’ve already created a project with an empty Activity, like how we did it in the previous chapters, you can add a class to your project by using the context menu in the Project tool window. Right-click the package name, then click New ➤ Java, as shown in Figure 6-1.
Figure 6-1
Add a class to the project
Type the name of the class, then hit ENTER. I named the class SplashScreen, and its contents are shown in Listing 6-1.
import android.content.Context;
import android.view.View;
public class SplashScreen extends View {
public SplashScreen(Context context) {
super(context);
}
}
Listing 6-1
SplashScreen.java
This is the starting point on how to create a custom View object. We can associate this View to our MainActivity by setting the MainActivity’s View to SplashScreen, as shown in Listing 6-2.
import androidx.appcompat.app.AppCompatActivity;
import android.os.Bundle;
public class MainActivity extends AppCompatActivity {
To draw on the screen, we can override the onDraw() method of the View object. Let’s modify the SplashScreen class to draw a simple circle on the screen. The code is shown in Listing 6-3.
import android.content.Context;
import android.graphics.Canvas;
import android.graphics.Paint;
import android.view.View;
import android.graphics.Color;
public class SplashScreen extends View {
private Paint paint;
private int cx;
private int cy;
private float radius;
public SplashScreen(Context context) {
super(context);
paint = new Paint(); ❶
paint.setColor(Color.GREEN);
paint.setAntiAlias(true);
cx = 200; cy = 200; radius = 50; ❷❸❹
}
@Override
protected void onDraw(Canvas canvas) { ❺
super.onDraw(canvas);
canvas.drawCircle(cx,cy,radius,paint); ❻
}
}
Listing 6-3
Drawing on the screen
❶
The Paint object determines how the circle will look like on the canvas.
❷❸❹
cx, cy, and radius variables hold the size and location where we’ll paint the circle.
❺
When the Android runtime calls the onDraw method, a Canvas object is passed to the method, which we can use to draw something on the screen.
❻
The drawCircle is one of the drawing methods available from the Canvas object.
The important takeaway here is to remember that if you want to draw something on the screen, you need to do that on the onDraw() method of the View object. The parameter to onDraw() is a Canvas object that the View can use to draw itself. The Canvas defines methods for drawing lines, bitmaps, circles (as in our example here), and many other graphic primitives. Overriding the onDraw() is the key to creating a custom user interface.
You can run the example at this point. I won’t take a screen capture anymore since it’s just an unassuming circle.
Handling Events
The touchscreen is the most common type of input for game apps, so that’s what we’ll use. To handle touch events, we will override the onTouchEvent() callback of our SplashScreen class. Listing 6-4 shows the basic structure and a typical code for handling touch events. You can put the onTouchEvent() callback anywhere inside the SplashScreen program.
public boolean onTouchEvent(MotionEvent evt) { ❶
int action = evt.getAction(); ❷
switch(action) { ❸
case MotionEvent.ACTION_DOWN:
Log.d(TAG, "Down"); ❹
break;
case MotionEvent.ACTION_UP:
Log.d(TAG, "Up");
break;
case MotionEvent.ACTION_MOVE:
Log.d(TAG, "Move");
cx = (int) evt.getX(); ❺
cy = (int) evt.getY(); ❻
break;
}
invalidate(); ❼
return true;
}
Listing 6-4
Handling touch events
❶
The Android runtime calls the onTouchEvent method when the screen is touched, dragged, or swiped.
❷
evt.getAction() returns an int value which tells us the action taken by the user, whether it was a swipe down, up, or just a touch. In our case, we’re just watching for any movement.
❸
We can use a simple switch construct on the action to route the program logic.
❹
We don’t need to handle the down action for now, but I’m logging it.
❺
This gets the x coordinate of where the touch happened.
❻
And this gets the y coordinate. We’re updating the values of our cx and cy variables (the location of the circle).
❼
This will cause the Android runtime to call the onDraw method.
In Listing 6-4, all we did was capture the location where the touch happened. Once we extracted the x and y coordinates of the touch, we assigned those coordinates to our cx and cy member variables, then we called invalidate(), which forced a redraw of the View class. Each time a redraw is forced, the runtime will call the onDraw() method, which then draws the circle (again), but this time using the updated location of cx and cy (variables that hold the location of our small circle drawing). Listing 6-5 shows the completed code for SplashScreen.java.
import android.content.Context;
import android.graphics.Canvas;
import android.graphics.Paint;
import android.util.Log;
import android.view.MotionEvent;
import android.view.View;
import android.graphics.Color;
public class SplashScreen extends View {
private Paint paint;
private int cx;
private int cy;
private float radius;
private String TAG = getContext().getClass().getName();
public SplashScreen(Context context) {
super(context);
paint = new Paint();
paint.setColor(Color.GREEN);
paint.setAntiAlias(true);
cx = 200;
cy = 200;
radius = 50;
}
@Override
protected void onDraw(Canvas canvas) {
super.onDraw(canvas);
cx = cx + 50;
cy = cy + 25;
canvas.drawCircle(cx,cy,radius,paint);
}
public boolean onTouchEvent(MotionEvent evt) {
int action = evt.getAction();
switch(action) {
case MotionEvent.ACTION_DOWN:
Log.d(TAG, "Down");
break;
case MotionEvent.ACTION_UP:
Log.d(TAG, "Up");
break;
case MotionEvent.ACTION_MOVE:
Log.d(TAG, "Move");
cx = (int) evt.getX();
cy = (int) evt.getY();
break;
}
invalidate();
return true;
}
}
Listing 6-5
SplashScreen completed code
If you run this code, all it will do is draw a small green circle on the screen, waiting for you to touch the screen. Every time you touch the screen, the circle will move to the location where you touched it.
This isn’t part of our game. This is some sort of practice code so we can warm up to the actual game code. Now that we have some idea on how to paint something to the screen and how to handle basic touch event, let’s proceed with the game code.
SplashScreen with a Title Graphic
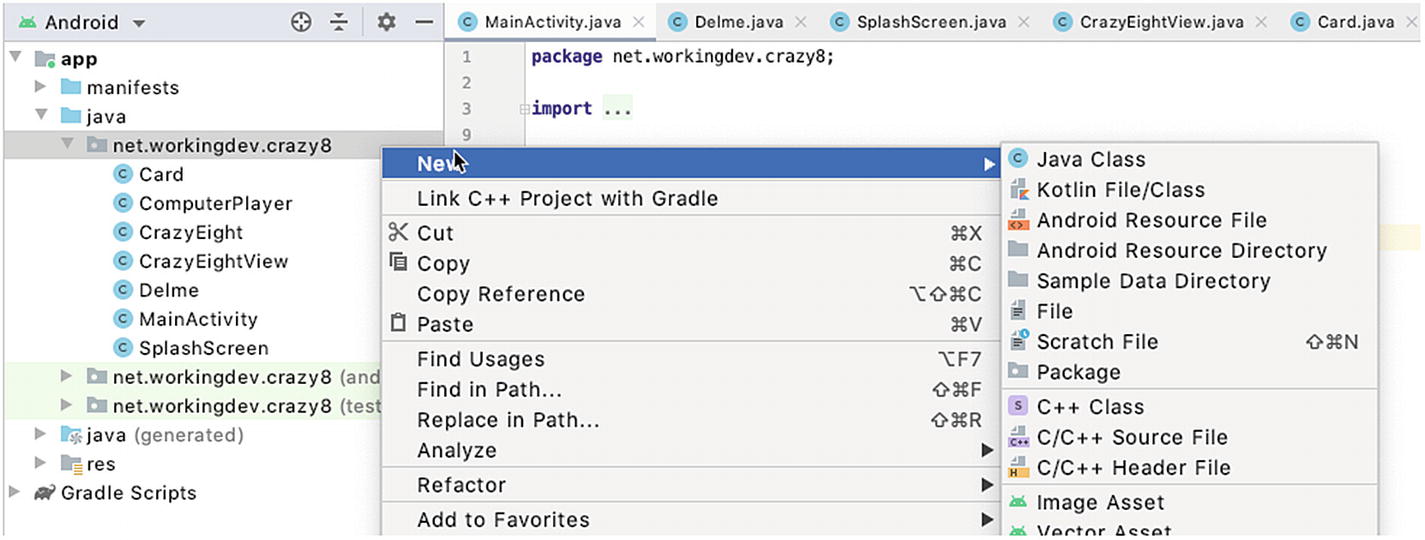
We don’t want to show just a small dot to the user when the game is launched; instead, we want to display some title graphic. Some games probably will show credits and some other info, but we’ll keep ours simple. We’ll display the title of the game using a simple bitmap. Before you can do this, you need to put the graphic file in the app/res/drawable folder of the project. A simple way to do that is to use the context menu; right-click the app/res/drawable ➤ Reveal in Finder (on macOS); if you’re on Windows, this will read Show in Explorer. The dialog window in macOS is shown in Figure 6-2.
Figure 6-2
res ➤ drawable ➤ Reveal in Finder
When you launch the file manager, you can place the graphic file in there. The drawable folder is where graphical assets are usually stored.
Use the BitmapFactory to decode the graphical resource from the drawable folder. This loads the bitmap onto memory which we will use later to draw the graphic onto the screen.
❷
The drawBitmap method of Canvas draws the bitmap to the screen.
The screen doesn’t look bad, but it’s skewed to the left. That’s because we hardcoded the drawing coordinates for the bitmap. We’ll fix that in a little while; first, let’s take care of that application title and the other widgets on top of the screen. Let’s maximize the screen space for our game. Open MainActivity.java and make the changes shown in Listing 6-7.
public class MainActivity extends AppCompatActivity {
Create a new method where we can put the necessary code to make the app full screen.
❷
Call the setFullScreen method on the onResume callback. onResume() is called just before the UI is visible to the user; so, this is a good place to put our fullscreen code. This lifecycle method may be called several times during the life of the app.
The setSystemUiVisibilitymethod of the View object is the key to display a more immersive screen experience to your users. There are many combinations you can try for the system UI flags. You can read more about them on the documentation page here: https://bit.ly/androidfullscreen.
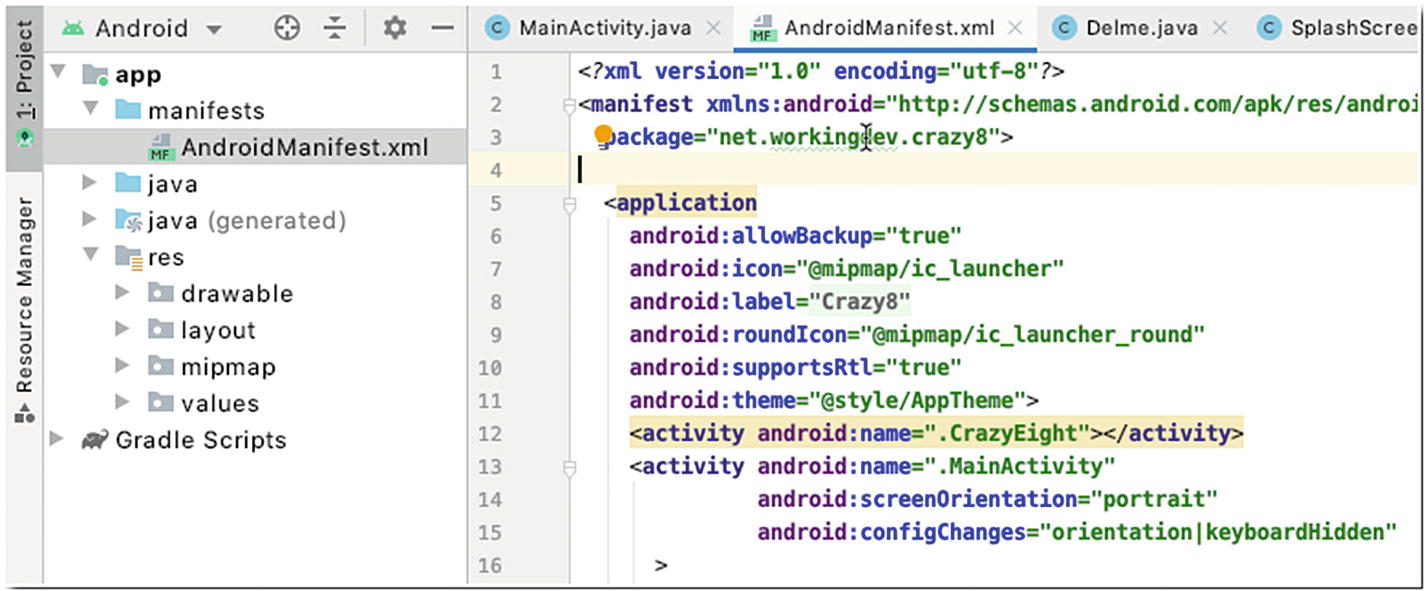
Next, we take care of the orientation. We can choose to let users play the game either in portrait or landscape mode, but that means we need to write more code to handle the orientation change; we won’t do that here. Instead, we will fix our game in portrait mode. This can be done in the AndroidManifest file. You need to edit the manifest file to reflect the modifications shown in Listing 6-8. To open the manifest file, double-click the file from the Project tool window, as shown in Figure 6-4.
This line prevents screen orientation changes when the software keyboard is toggled.
Now that we have the orientation fixed and full screen sorted out, we can work on centering the graphic.
To center the title graphic, we need the actual width of the screen and the actual width of the title graphic. The width of the screen minus the width of the title graphic divided by two should give us the location where we can start drawing the title graphic such that it’s centered on the screen. Listing 6-9 shows the changes we need to make in SplashScreen to make all these happen.
Let’s declare some variables to hold the dimensions of the screen.
❷
As soon as the Android runtime is able to calculate the actual dimensions of the screen, the onSizeChanged() method is called. We can grab the actual width and height of the screen from here and assign them to our member variables which will hold screen-height and screen-width values.
❸
The title.getWidth() gets, well, the width of our title graphic, subtracts it from the screen width (which we grabbed during onSizeChanged), and divides it by two. That should center the graphic.
❹
Now we can draw the graphic with proper centering.
We will add a button to the splash screen so that we have a way for the user to actually start the game. We’ll add just a “Play” button; we won’t add a “Quit” button. We could add a Quit button, but we’re not doing this because it’s not consistent with Android app conventions. Our game is still, after all, an Android app. It needs to behave like most Android apps, and most Android apps don’t have a Quit button. An app is typically launched, used, paused, and killed, and the Android OS already has a way to kill apps.
We can’t drag and drop a Button View object from the Palette because we’re using a custom view. We have to draw the button just like how we drew the title graphic. So, in the SplashScreen class, add the declaration statement for the button and then initialize it by loading the image using the BitmapFactory somewhere in the constructor of SplashScreen.
I prepared two graphics for the button; one graphic shows the regular appearance of the button while it’s not pressed, and the other graphic shows the image of the button while it’s depressed. It’s just a small visual cue to the user so that when they click the button, something actually happens. This also means we need to handle the button state. Drawing the actual image of the button will happen in the onDraw() method; we need a way to route the program logic whether to draw the regular state or the depressed state of the button.
Another task we need to manage is detecting the button click. Our button isn’t the regular button; it’s a drawn bitmap on the screen. We cannot use findViewbyId then bind the reference to an event listener. Instead, we need to detect if a touch happens within the bounds of the drawn button and write the appropriate code. Listing 6-10 shows the annotated code for loading, drawing, and managing the state of the Play button. The other code related to the display and centering of the title graphic has been removed, so only the code relevant for the button is displayed.
It defines the variables to hold the bitmap for the button images.
❷
We’ll use the btnPressed boolean variable as a switch; if this is false, it means the button isn’t pressed, and we’ll display the regular button graphic. If it’s true, we’ll display the button graphic for the depressed state.
❸
Let’s load up the button bitmap from the graphical file, just like how we did it for the title graphic.
❹
The variables btnLeft, btnTop, btnBottom, and btnRight are screen coordinates for the bounds of the button.
❺
If the X and Y coordinates of the touch action are within the button bounds, this expression will return true.
❻
If the button is within the bounds, we set the btnPressed variable to true.
❼
During onDraw, we can display the appropriate button graphic depending on the value of the btnPressed variable.
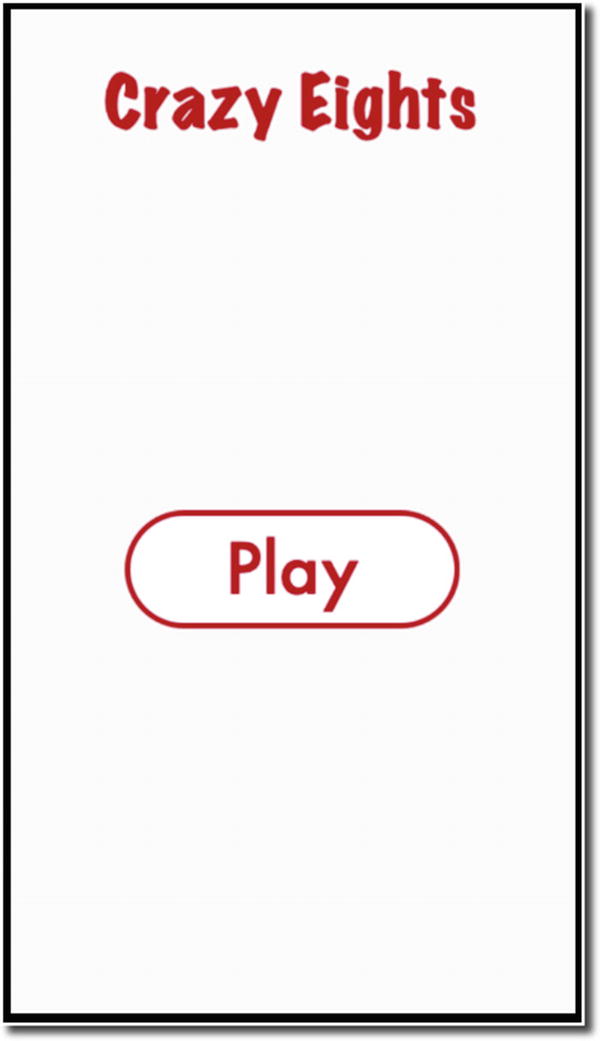
Figure 6-6 shows our app with the centered title graphic and Play button.
Figure 6-6
Splash screen with the Play button
The play button is centered vertically on the screen; if you want to adjust the vertical location of the button, you can change it in the onDraw method; it’s the third parameter of the drawBitmap method, as shown in the following snippet.
The expression (int) (scrH *0.5) means to get the value of the midpoint of the detected screen height; multiplying the screen height by 50% gets you the midpoint.
Launching the Game Screen
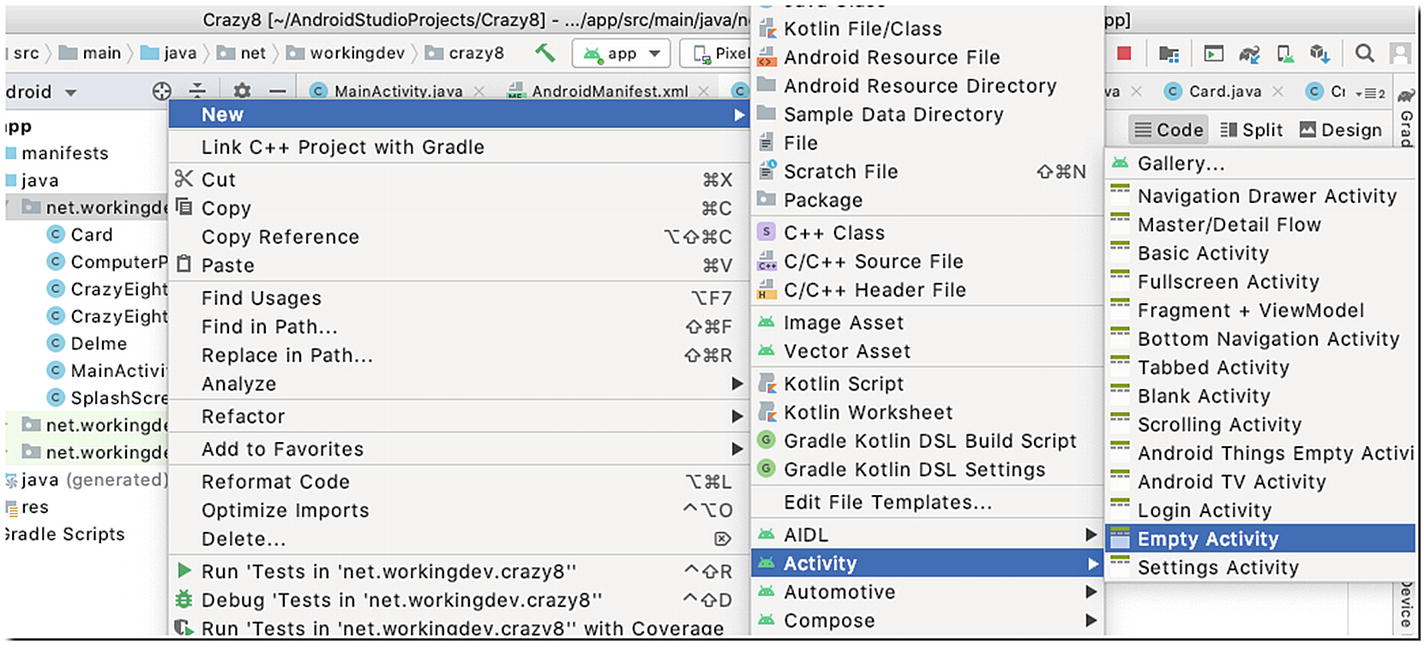
We will launch the game screen as another Activity, which means we need to create another Activity and another View class.
To add another Activity, right-click the package name in the Project tool window, then click New ➤ Activity ➤ Empty Activity, as shown in Figure 6-7.
Figure 6-7
New Empty Activity
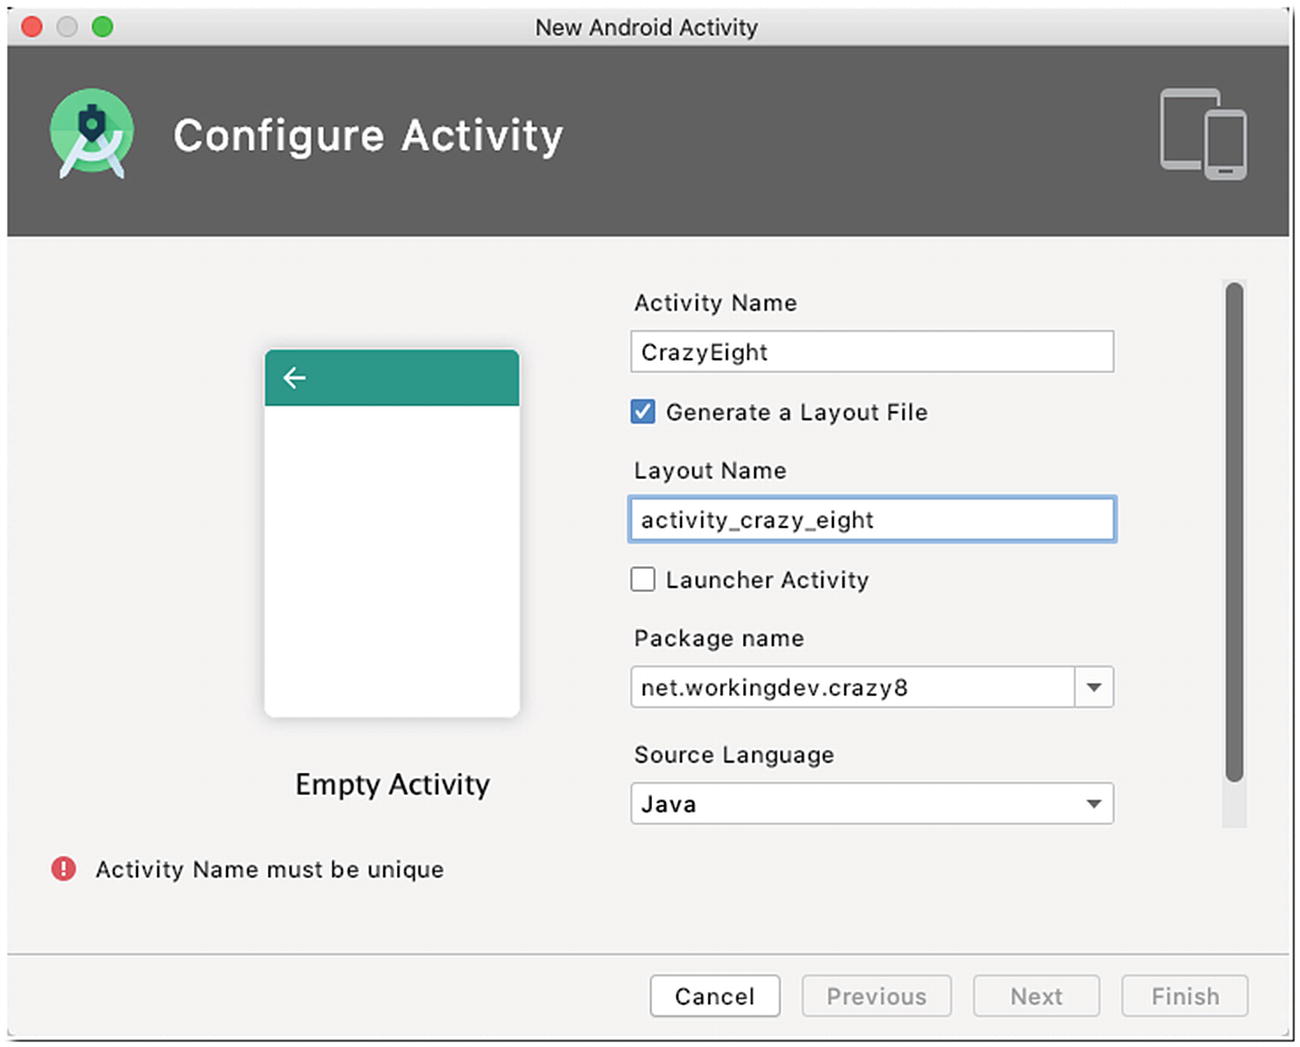
Then, fill up the Activity name, as shown in Figure 6-8.
Figure 6-8
Configure Activity
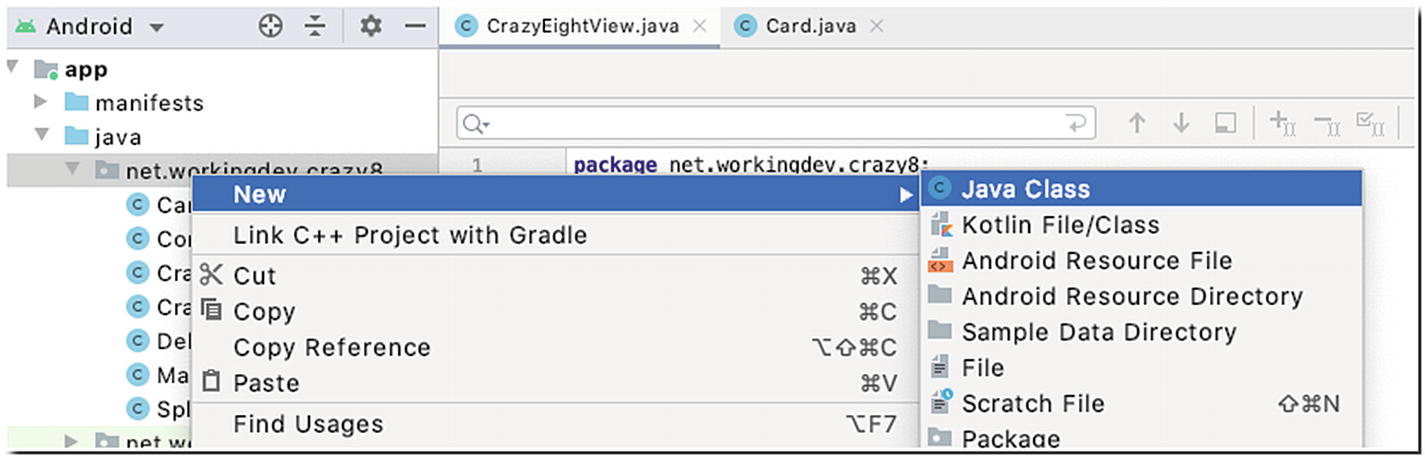
Next, add a new class to the project. You can do this by right-clicking the package name and choosing New ➤ Java Class, as shown in Figure 6-9.
Figure 6-9
New Java Class
Name the class CrazyEightView, edit it, and make it extend the View class, just like our SplashScreen class. Listing 6-11 shows the code for CrazyEightView.
import android.content.Context;
import android.graphics.Canvas;
import android.view.View;
public class CrazyEightView extends View {
public CrazyEightView(Context context) {
super(context);
}
protected void onDraw(Canvas canvas) {
super.onDraw(canvas);
}
}
Listing 6-11
CrazyEightView.java
Next, we fix the second Activity class (CrazyEight class) to occupy the whole screen, much like our MainActivity class. Listing 6-12 shows the code for CrazyEightActivity.
public class CrazyEight extends AppCompatActivity {
Create an instance of the CrazyEightView class and pass the current context.
❷
Set the View of this Activity to our custom view (CrazyEightView).
❸
Here comes our code for getting the whole View to occupy the entire screen, same as we did before.
❹
We call the setFullScreen within the onResume callback because we want it to run just before the screen is visible to the user.
Now that we’ve got an Activity where the actual game will be played, we can put in the code in SplashScreen that will launch our second Activity (CrazyEight).
Android uses Intent objects for component Activation, and launching an Activity requires component Activation. There are many other uses for Intents, but we won’t cover them here. We’ll just put in the necessary code to launch our CrazyEight Activity.
Go back to SplashScreen’s onTouchEvent, specifically the MotionEvent.ACTION_UP branch. In Listing 6-10, find the code where we made the comment // Launch main game screen, as shown in the snippet in Listing 6-13.
case MotionEvent.ACTION_UP:
if (playBtnPressed) {
// Launch main game screen
}
playBtnPressed = false;
break;
Listing 6-13
Code snippet MotionEvent.ACTION_UP
We will replace that comment with the code that will actually launch the CrazyEight Activity, but first, we’ll need to add a member variable to SplashScreen that will hold the current Context object. Just add a variable to the SplashScreen class like this:
private Context ctx;
Then, in SplashScreen’s constructor, add this line:
ctx = context;
We need a reference to the current Context because we need to pass it as an argument to the Intent object.
Now, write the Intent code inside the ACTION_UP branch of SplashScreen’s onTouchEvent handler so that it reads like Listing 6-14.
case MotionEvent.ACTION_UP:
if (playBtnPressed) {
Intent gameIntent = new Intent(ctx, CrazyEight.class);
ctx.startActivity(gameIntent);
}
playBtnPressed = false;
break;
Listing 6-14
Intent to launch CrazyEight Activity
Starting the Game
The game starts by shuffling a deck of cards, dealing seven cards to our opponent (the computer) and the user. After that, we place the top card of the remaining deck face up to start a discard pile.
To these things, we need something to represent a single card (we’ll use a class for this); we need to represent the collection of cards in the human player’s hand and in the computer’s hand; we also need to represent the discard pile.
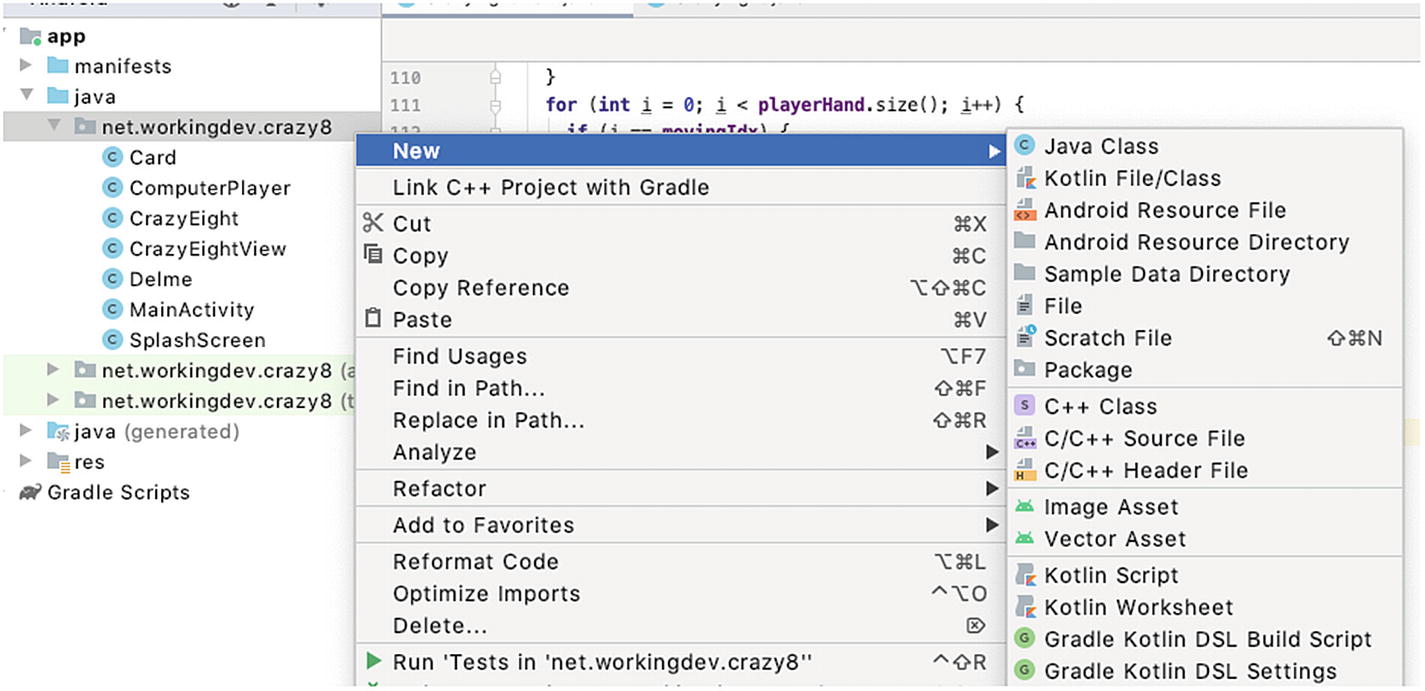
To represent a single card, let’s create a new class and add it to the project. Right-click the project’s package name in the Project tool window, as shown in Figure 6-10.
Figure 6-10
Add a new class
Name the new class “Card” and modify the contents, as shown in Listing 6-15.
import android.graphics.Bitmap;
public class Card {
private int id;
private int suit;
private int rank;
private Bitmap bmp;
private int scoreValue;
public Card(int newId) {
id = newId;
}
public void setBitmap(Bitmap newBitmap) {
bmp = newBitmap;
}
public Bitmap getBitmap() {
return bmp;
}
public int getId() {
return id;
}
}
Listing 6-15
Card class
Our Card class is a basic POJO. It’s meant to represent a single card in the deck. The constructor takes an int parameter, which represents a unique id for the card. We’ve assigned an id to all the cards, from the deuce of Diamonds to the Ace of Spades. The four suits (Diamonds, Clubs, Hearts, and Spades) are given base values, as follows:
Diamonds (100)
Clubs (200)
Hearts (300)
Spades (400)
Each card in the suit has a rank, which is the number value of the card. The lowest rank is 2 (the deuce), and the highest rank is 14 (the Ace). The id of a Card object will be calculated as the base value of the suit plus the rank of the card; so, the 2 of Diamonds is 102, the 3 of Clubs is 203, and so on and so forth.
You can get your card images from a variety of places like www.shutterstock.com and www.acbl.mybigcommerce.com (American Contract Bridge League) or even create the images yourself if you’re up to it. No matter where you get your card image files, you have to name them according to how we’re assigning base values and rank. So, the 2 of Diamonds is “card102”, Ace of Diamonds is “card114”, and the Ace of Spades is “card414”.
The Card class also has get() and set() methods for the image files so we can get and set the bitmap image for a particular card.
Now that we have a POJO for the Card, we need to build a deck of 52 cards; to do this, let’s create a new method in the CrazyEightView class and call it initializeDeck(); the annotated code is shown in Listing 6-16.
We loop through the suits (Diamonds, Clubs, Hearts, and Spades).
❷
Then, we loop through each rank in the current suit.
❸
Let’s get a unique id. This id will now be what the current value of j + the current value of i multiplied by 100. Since we named our card images card102.png up until card413.png, we should be able to walk through all the image files using the j + (i * 100) expression.
❹
We create an instance of a Card object, passing in a unique id as an argument. This unique id is consistent with our naming convention for the card image files.
❺
Let’s create a resource id for an image based on tempId.
❻
We’re scaling the width of the card to 1/8th of the screen width so we can fit seven cards horizontally. The variables scaledCW and scaledCH should be declared as member variables in the Card class.
❼
Now, we add the Card object to the dec object, which is an ArrayList object that should be declared as a member variable. You can add a declaration for the deck like this: List<Card> deck = new ArrayList<Card>();
Now that we have a deck, we need to find a way to deal the cards to the players. We need to represent the hand of the human player and the hand of the computer player. Since we already used an ArrayList to represent the card deck, let’s use ArrayLists as well to represent both hands (human player and the computer). We will also use an ArrayList to represent the discard pile.
Add the following member variable declarations to the CrazyEightView class:
private List<Card> playerHand = new ArrayList<>();
private List<Card> computerHand = new ArrayList<>();
private List<Card> discardPile = new ArrayList<>();
Now let’s add the method to deal the cards to the human player and the computer player; Listing 6-17 shows the code for the method dealCards().
private void dealCards() {
Collections.shuffle(deck,new Random());
for (int i = 0; i < 7; i++) {
drawCard(playerHand);
drawCard(computerHand);
}
}
Listing 6-17
Deal the cards to both players
The first statement in the method is a Java utility function to randomize the order of elements in a List; this should satisfy our card shuffling requirement.
The for-loop comes around seven times (we want to give each hand seven cards), and inside the loop, we call the drawCard() method twice, once for each of the players; the code for this method is shown in Listing 6-18.
private void drawCard(List<Card> hand) { ❶
hand.add(0, deck.get(0)); ❷
deck.remove(0); ❸
if (deck.isEmpty()) { ❹
for (int i = discardPile.size()-1; i > 0 ; i--) {
deck.add(discardPile.get(i));
discardPile.remove(i);
Collections.shuffle(deck,new Random());
}
}
}
Listing 6-18
drawCard() method
❶
The drawCard() method is called for both the human player and the computer. To call the method, we pass a List object as an argument; this argument represents which hand should we deal the card to.
❷
We get the card at the top of the deck and add it to the hand object.
❸
Next, getting the card at the top of the card doesn’t automatically remove it; so, we remove it from the deck. When a card is dealt with a player, it should be removed from the deck.
❹
When the deck is empty, we bring cards from the discard pile back to the deck, and we give a fresh shuffle.
The methods for initializing the deck and dealing the cards should be placed inside the onSizeChanged()method. This method is called once the screen dimensions have been calculated by the runtime, and it may be called subsequently if, for some reason, the dimensions of the screen change. The orientation of the screen always starts as portrait, and since we made changes to the manifest file to always keep the orientation as portrait, there is a good chance that the onSizeChanged() method will be called only once (in the lifetime of the app at least). So, this seems like a good place to put game initialization methods like initializeDeck() and drawCard().
Displaying the Cards
Our next tasks are to display the cards in the game, namely:
The cards in our hand
The computer’s hand
Discard pile
Face up card
The scores
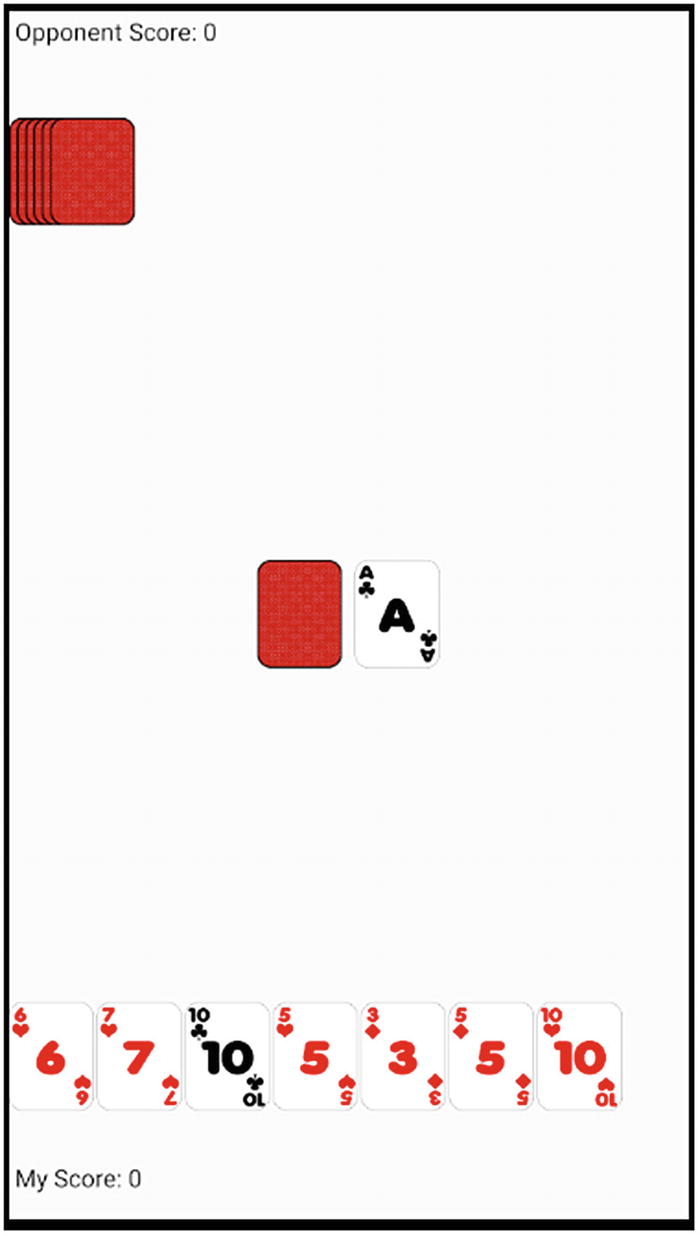
Figure 6-11 shows the layout of cards in the game.
Figure 6-11
How the game should look
The computer’s hand is faced down; we’re not supposed to see them; so, all we need to do is to draw the back of the cards. We can do that by iterating through the computer’s hand, and for each item in the List, we draw the back of the card. We have a graphic file for the back of the card. We’ll simply draw this the same way we’ve drawn other graphics.
Before we do any further drawing, we’ll need to establish some scale and get the density of the device’s screen. We can do that with the following code:
We’ll put that in the constructor of the CrazyEightView class. We need to define the scale as a member variable as well. So, somewhere in the top level of the class, define the scale as a variable, like this:
private float scale;
We will use the scale variable as a scaling factor for our drawings; this way, if the density of the mobile devices changes, our card graphics will still be in proportion.
Now we can draw the computer’s hand. Listing 6-19 shows that code.
public void onSizeChanged (int w, int h, int oldw, int oldh){
We won’t use the actual size of card graphics; we want to draw them in proportion to the screen’s density. The variables scaledCW and scaledCH (scaled Card height and width) will be used for drawing the scaled bitmaps. These are defined as member variables, because we need access to them outside the onSizeChanged() method.
❷
We’d like the scaled height to be 1.28 times longer than the scaled Card width.
❸
Load the bitmap like how we loaded bitmaps before.
❹
Now we create a scaled bitmap from the tempBitmap we’ve loaded.
❺
We’re drawing all the cards in the computer’s hand one graphic at a time and 5 pixels apart (horizontally) so that they overlap; we’re also drawing the cards 50 scaling factors from the top of the screen plus the default text size of the Paint object.
In bullet number ❺, we referred to a Paint object. This variable is defined as a member variable, so if you’re following, you need to add this variable right now, like this:
private Paint paint;
Then, somewhere in the constructor, add this statement:
paint = new Paint();
That should get us caught up already. We use the Paint object not only for determining sizes of the default text but also we use it (later) for writing some text to the screen.
Next, we draw the human player’s hand. Listing 6-20 shows the annotated code.
Then, we draw the bitmap using the scaled card height and width variables. The cards are drawn 5 pixels apart, and its Y position subtracts the (1) height of the card, (2) the text height (which we will use later for drawing the scores), and (3) 50 scaled pixels from the bottom of the screen.
Next, we show the draw pile; add the code in Listing 6-21 to the onDraw method so we can show the draw pile.
The draw pile is represented by a single back of the card graphics. It’s drawn approximately centered on the screen.
Next, we draw the discard pile. Remember that the discard pile is started as by getting the top card of what remains in the deck after the cards have been dealt with the players; so, before we draw them, we need to check if it’s empty or not. Listing 6-22 shows the code for showing the discard pile.
if (!discardPile.isEmpty()) {
canvas.drawBitmap(discardPile.get(0).getBitmap(),
(scrW /2)+10,
(scrH /2)-(cardBack.getHeight()/2),
null);
}
Listing 6-22
Discard pile
Handling Turns
Crazy Eights is a turn-based game. We need to route the program logic based on whose turn it is, whether it’s the computer or the human player. We can facilitate this by adding a boolean variable as a member of the CrazyEightView class, like this:
private boolean myTurn;
Throughout our code, we will enable or disable certain logic based on whose turn it is. In the onSizeChanged method, we add the following code:
myTurn = new Random().nextBoolean();
if (!myTurn) {
computerPlay();
}
That should randomly choose who goes first. Naturally, the myTurn variable needs to be toggled every time either player plays a valid card, and also we need to add the computerPlay()method to our class; we’ll do that in a little while.
Playing a Card
A valid play in Crazy Eights requires that a player matches the top card of the discard pile, which means we now need a way to get the rank and suit from a Card object. Let’s modify the Card class to do just that. Listing 6-23 shows the revised Card class.
public class Card {
private int id;
private int suit;
private int rank;
private Bitmap bmp;
private int scoreValue;
public Card(int newId) {
id = newId;
suit = Math.round((id/100) * 100);
rank = id - suit;
}
public int getScoreValue() {
return scoreValue;
}
public void setBitmap(Bitmap newBitmap) {
bmp = newBitmap;
}
public Bitmap getBitmap() {
return bmp;
}
public int getId() {
return id;
}
public int getSuit() {
return suit;
}
public int getRank() {
return rank;
}
}
Listing 6-23
Revised Card class with rank and suit calculation
We added the suit and rank variables to hold the values of the suit and rank, respectively. We also added the logic necessary to calculate both values.
The suit variable is calculated by rounding it up to the nearest hundred; for example, if the id is 102 (2 of Diamonds), the suit value will be 100. The rank variable is calculated by subtracting the suit from the id; if the id is 102, we subtract 100 from 102; hence, we get 2 as the value of the rank.
Finally, we add a getSuit() and getRank()methods to provide getters for the suit and rank values, respectively.
Having a way to get the rank and the suit of the card, we can start writing the code for when it’s the computer’s turn to play. The code for computerPlay(), which must be added to the CrazyEightView class, is shown in Listing 6-24.
The computerPlay variable should be a member variable; we haven’t created the class for the ComputerPlayer yet, but we will shortly. For now, just imagine that the playCard() method should return a valid play. The playCard method should go through all the cards in the computer’s hand if it has a valid play that will be returned to the tempPlay variable.
❷
If the computer doesn’t have a play, it needs to draw a card from the deck.
Now, let’s build the ComputerPlayer class. Add another class to the project and name it ComputerPlayer.java, as shown in Figure 6-12.
Figure 6-12
Add another class to the project
Code for ComputerPlayer.java is shown in Listing 6-25.
import java.util.List;
public class ComputerPlayer {
public int playCard(List<Card> hand, int suit, int rank) {
The playCard method needs to go through all the cards in the computer’s hand to see if we have a valid play.
❷
This gets the id of the current card.
❸
Let’s get the rank of the current card.
❹
Let’s also get the suit.
❺
If the top card is not an eight, let’s see if we can match either the top card’s rank or suit.
❻
After going through all our cards, we cannot match the top card; that’s why play variable still equals to zero.
❼
Let’s cycle through all our cards again and see if we have an eight.
Now we’ve got some simple logic for the opponent. Let’s go back to the human player.
A play is made by dragging a valid card to the top card. We need to show some animation that the card is being dragged. We can do this on onTouchEvent. Listing 6-26 shows a snippet on how we can start doing exactly that.
public boolean onTouchEvent(MotionEvent event) {
int eventaction = event.getAction();
int X = (int)event.getX();
int Y = (int)event.getY();
switch (eventaction ) {
case MotionEvent.ACTION_DOWN:
if (myTurn) { ❶
for (int i = 0; i < 7; i++) { ❷
if (X > i*(scaledCW +5) && X < i*(scaledCW +5) + scaledCW &&
Y > scrH - scaledCH - paint.getTextSize()-(50*scale)) {
movingIdx = i;
movingX = X;
movingY = Y;
}
}
}
break;
case MotionEvent.ACTION_MOVE:
movingX = X; ❸
movingY = Y;
break;
case MotionEvent.ACTION_UP:
movingIdx = -1; ❹
break;
}
invalidate();
return true;
}
Listing 6-26
Moving cards
❶
The human player can only move a card when it’s their turn. The computer opponent plays very quickly, so this shouldn’t be an issue. The game actually feels that it’s always the human’s turn.
❷
Loop through all the cards in the human player’s hand to see if they have touched on the area of the screen where any of the cards are drawn. If they have, we assign the index of that card to the movingIdx variable; this is the card that was moved by the player.
❸
As the player drags the card through the screen, we monitor the X and Y coordinates; we will use this to draw the card as it’s being dragged across the screen.
❹
When the player lets up, we reset the value of movingIdx. A value of –1 means no card is being moved.
The next thing we need to do is to reflect all these movements in the onDrawmethod. Listing 6-27 shows the annotated code for drawing the card as it’s dragged across the screen.
@Override
protected void onDraw(Canvas canvas) {
// some other statements
for (int i = 0; i < playerHand.size(); i++) {
if (i == movingIdx) { ❶
canvas.drawBitmap(playerHand.get(i).getBitmap(),
movingX,
movingY,
null);
} else { ❷
if (i < 7) {
canvas.drawBitmap(playerHand.get(i).getBitmap(),
i*(scaledCW +5),
scrH - scaledCH - paint.getTextSize()-(50*scale),
null);
}
}
}
invalidate();
setToFullScreen();
}
Listing 6-27
Show the moving card
❶
Let’s see if the current card matches the value of the movingIdx variable (the card being dragged by the user); if it’s the right card, we draw it using the updated X and Y coordinates.
❷
If none of the cards are moving, we simply draw all the cards as we did before.
When you test the code as it stands now, you might notice that the position where the card is drawn (as you drag a card across the screen) isn’t right. The card might be obscured by your finger. We can fix this by drawing the card with some offset values. Listing 6-28 shows the code.
public boolean onTouchEvent(MotionEvent event) {
int eventaction = event.getAction();
int X = (int)event.getX();
int Y = (int)event.getY();
switch (eventaction ) {
case MotionEvent.ACTION_DOWN:
if (myTurn) {
for (int i = 0; i < 7; i++) {
if (X > i*(scaledCW +5) && X < i*(scaledCW +5) + scaledCW &&
Y > scrH - scaledCH - paint.getTextSize()-(50*scale)) {
movingIdx = i;
movingX = X-(int)(30*scale);
movingY = Y-(int)(70*scale);
}
}
}
break;
case MotionEvent.ACTION_MOVE:
movingX = X-(int)(30*scale);
movingY = Y-(int)(70*scale);
break;
invalidate();
return true;
}
Listing 6-28
Adding some offsets to X and Y coordinates
The highlighted lines are the only changes we need; instead of following the original X and Y coordinates as it’s passed to us by the event, we draw it 30 more pixels to the right and 70 more pixels offset up. This way, when the card is dragged, the player can see it.
Now that we can drag the card across the screen, we need to ensure that what’s being dragged is a valid card for play. A valid card for play matches the top card either in rank or in suit; now, we need to keep track of the suit and rank of the top card. Listing 6-29 shows the onSizeChanged() method in the CrazyEightView class. The variables validSuit and validRank are added.
@Override
public void onSizeChanged (int w, int h, int oldw, int oldh){
When we draw a card from the deck and add it to the discard pile, the top card of the discard pile determines the suit and rank for a valid card.
So, when the human player tries to drag a card into the discard pile, we can determine if that card is a valid play; if it is, we add it to the discard pile; if not, we return it to the player’s hand. With that, let’s check for valid plays. Listing 6-30 shows the updated and annotated ACTION_UP of the onTouchEvent.
These lines take care of the drop area, and we’re basically dropping the card in the middle of the screen. There’s no need to be precise on location.
❸
Let’s check if it has a valid rank.
❹
Let’s check if the card being dragged has a valid suit.
❺
If the play is valid, we update the value of validRank and validSuit. The card being offered by the player is now the card with valid suit and rank.
❻
We add the new card to the discard pile.
❼
We remove the card from the player’s hand.
Next thing to handle is when the human player plays an eight. Remember that eights are wild; they’re always playable. When an eight card is played (by the human player, let’s handle that first; the computer can also play an eight, remember?), we need a way for the player to choose the suit for the next valid play.
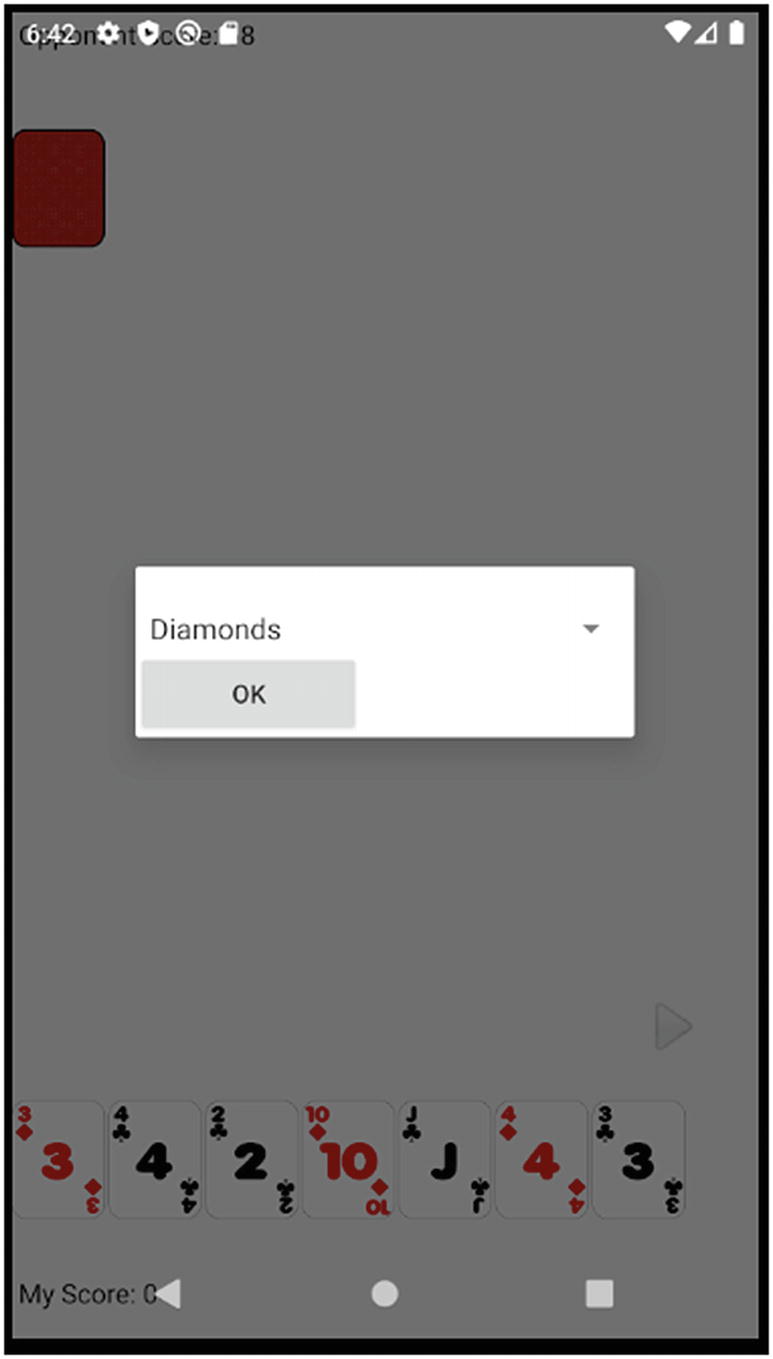
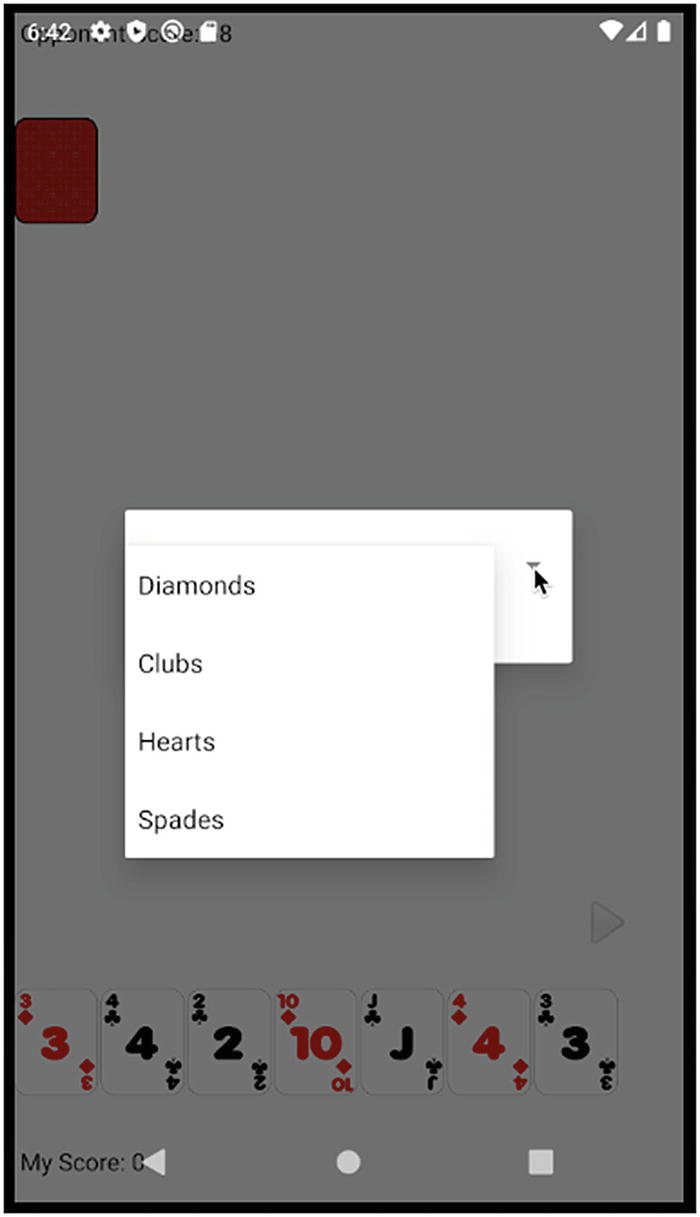
To choose the next suit when an eight is played, we need a way to show some options to the user. A dialog box is usually used for such tasks. We can draw the dialog box just like we did the Play button, or we can use Android’s built-in dialogs. Figures 6-13 and 6-14 show the dialog in action.
Figure 6-13
Choose suit dialog
Figure 6-14
Choose suit dialog, drop down
To start building this dialog box, we need an array resource to the project. We can do this by adding an XML file to the folder app/res/values. Currently, there are already three XML files in that folder (colors, strings, and styles); these files were created for us when we created the project. Android uses these files as resources for application labels and color scheming. We will add another file to this folder.
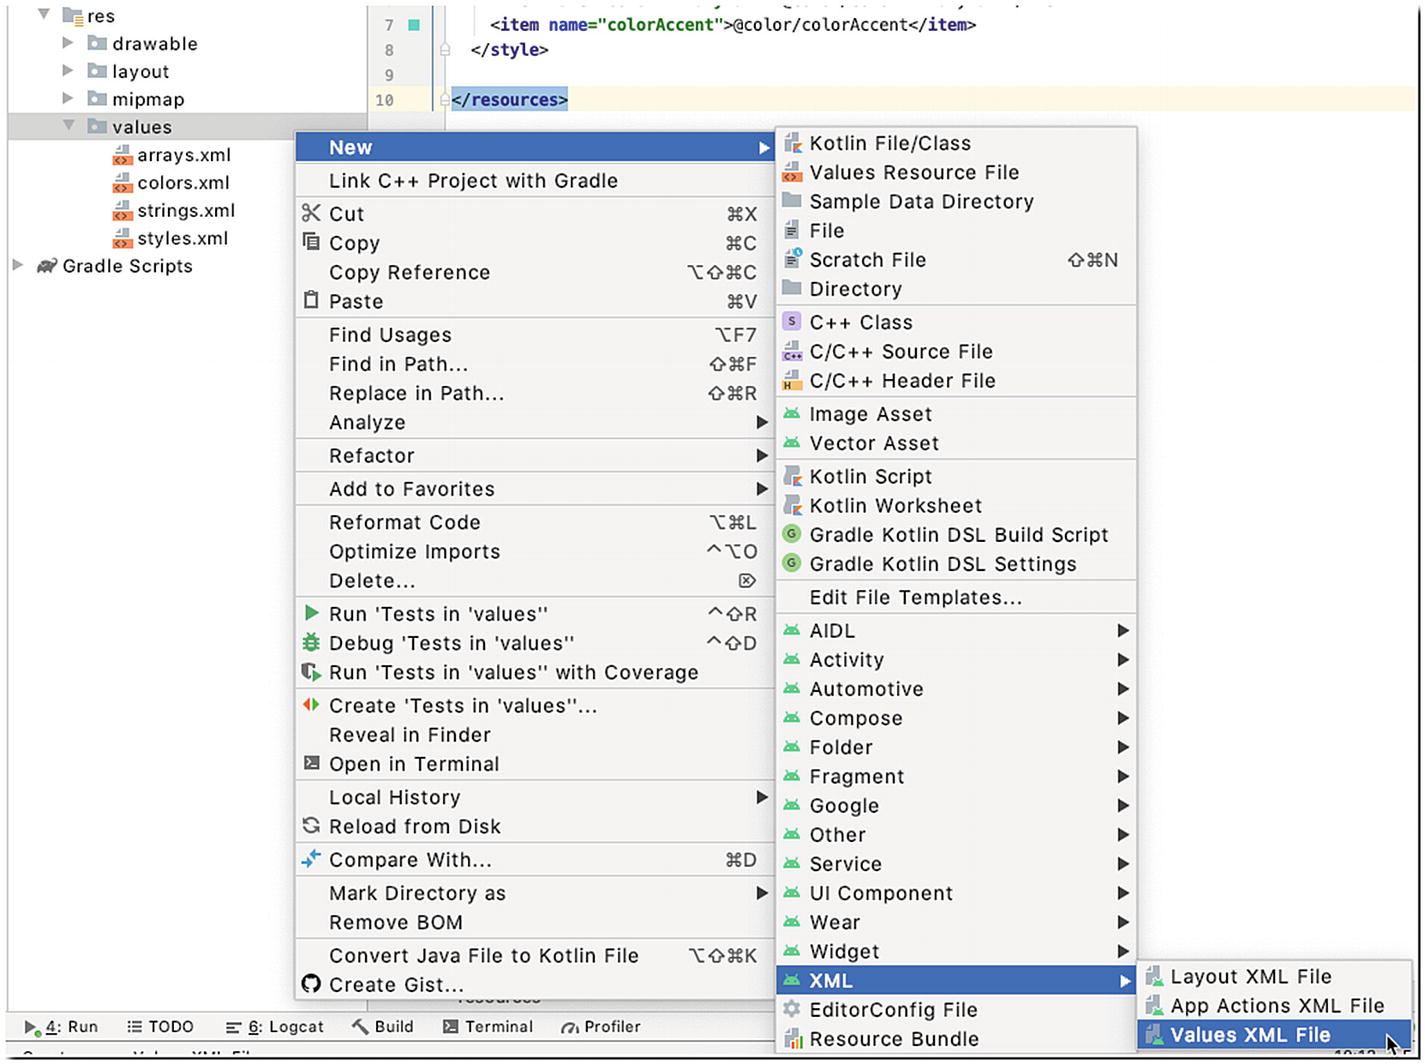
Right-click the app/res/values folder as shown in Figure 6-15, then choose New ➤ XML ➤ Values XML File.
Figure 6-15
Add Values XML File
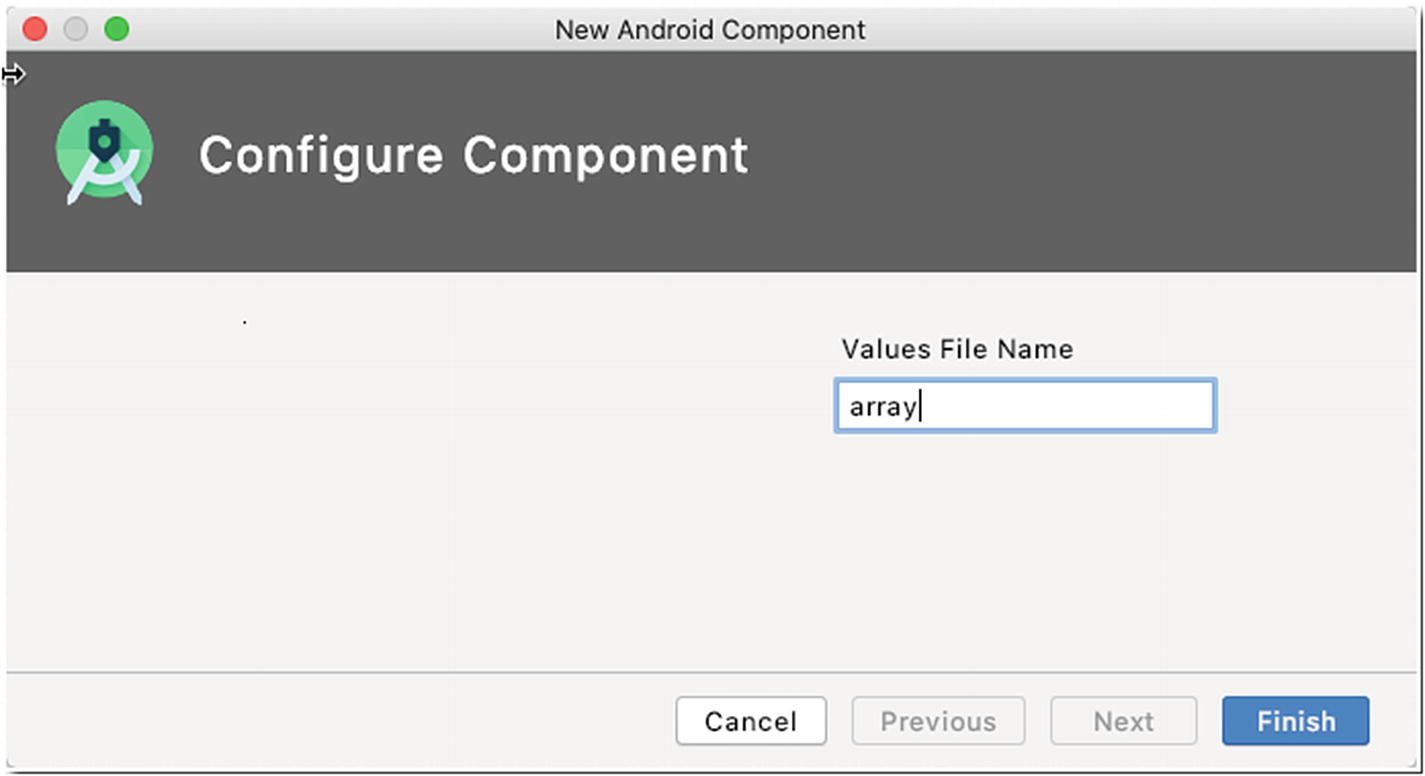
The next dialog window will ask for the name of the new resource file. Type arrays, as shown in Figure 6-16.
Figure 6-16
Name the new values file as arrays
Click Finish. Android Studio will try to update the Gradle file and other parts of the project; it could take a while. When it’s done, Android Studio will open the XML file in the main editor. Modify arrays.xml to match the contents of Listing 6-31.
<?xml version="1.0" encoding="utf-8"?>
<resources>
<string-array name="suits">
<item>Diamonds</item>
<item>Clubs</item>
<item>Hearts</item>
<item>Spades</item>
</string-array>
</resources>
Listing 6-31
arrays.xml
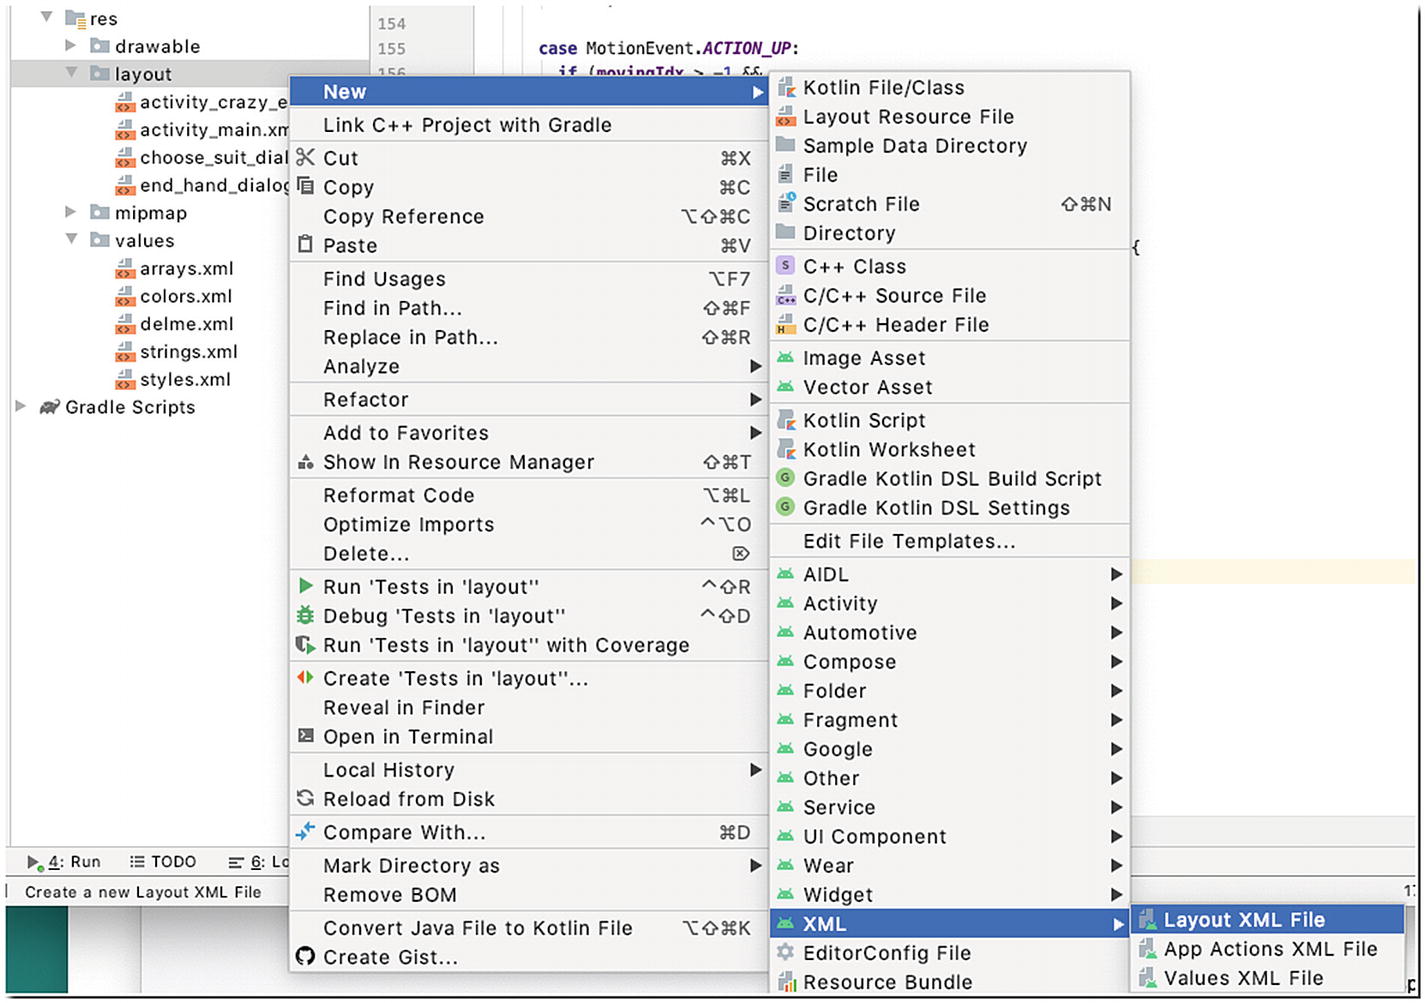
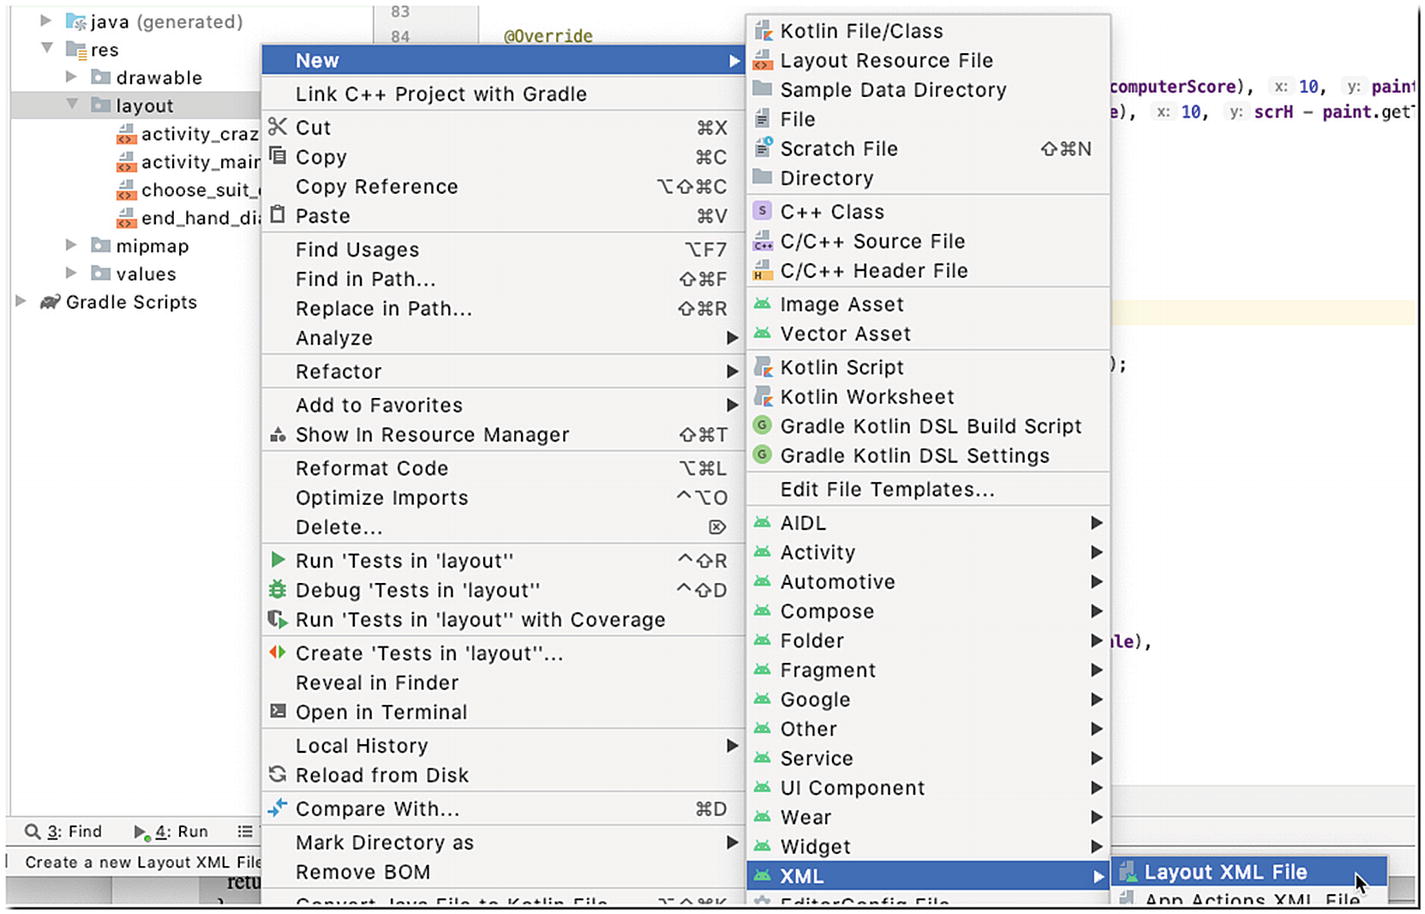
We will use this array to load the option for our dialog. Next, let’s create a layout file for the actual dialog. The layout file is also an XML file; to create it, right-click app/res/layout from the Project tool window, then choose New ➤ XML ➤ Layout XML File, as shown in Figure 6-17.
Figure 6-17
Create a new Layout XML File
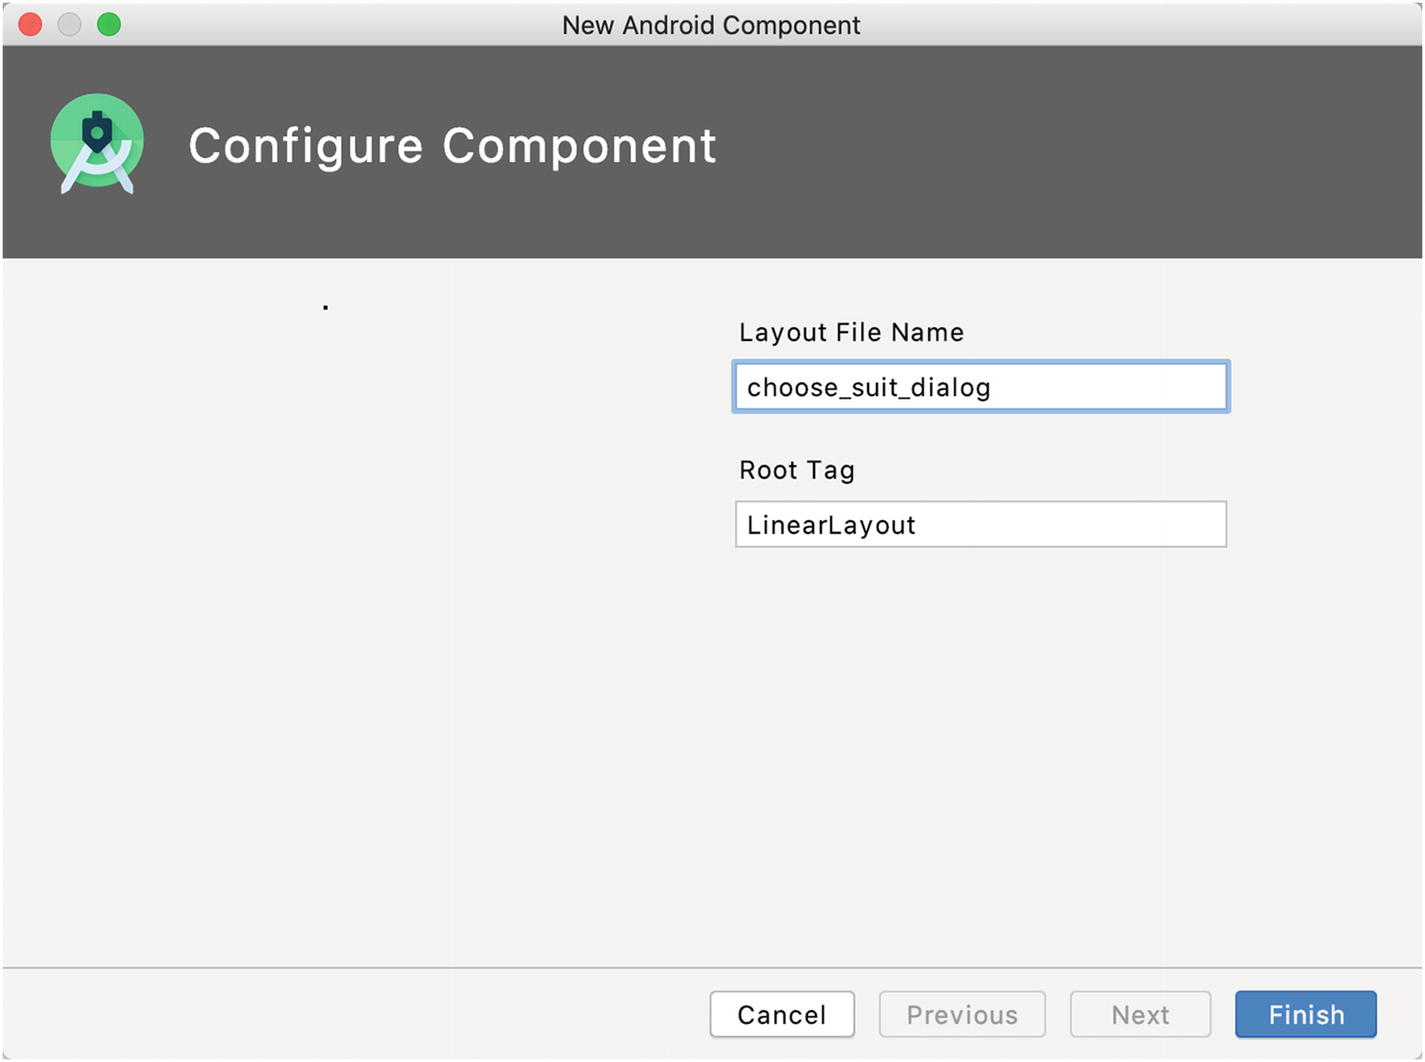
Next, provide the layout file name, then type choose_suit_dialog (shown in Figure 6-18).
Figure 6-18
Create the choose_suit_dialog XML File
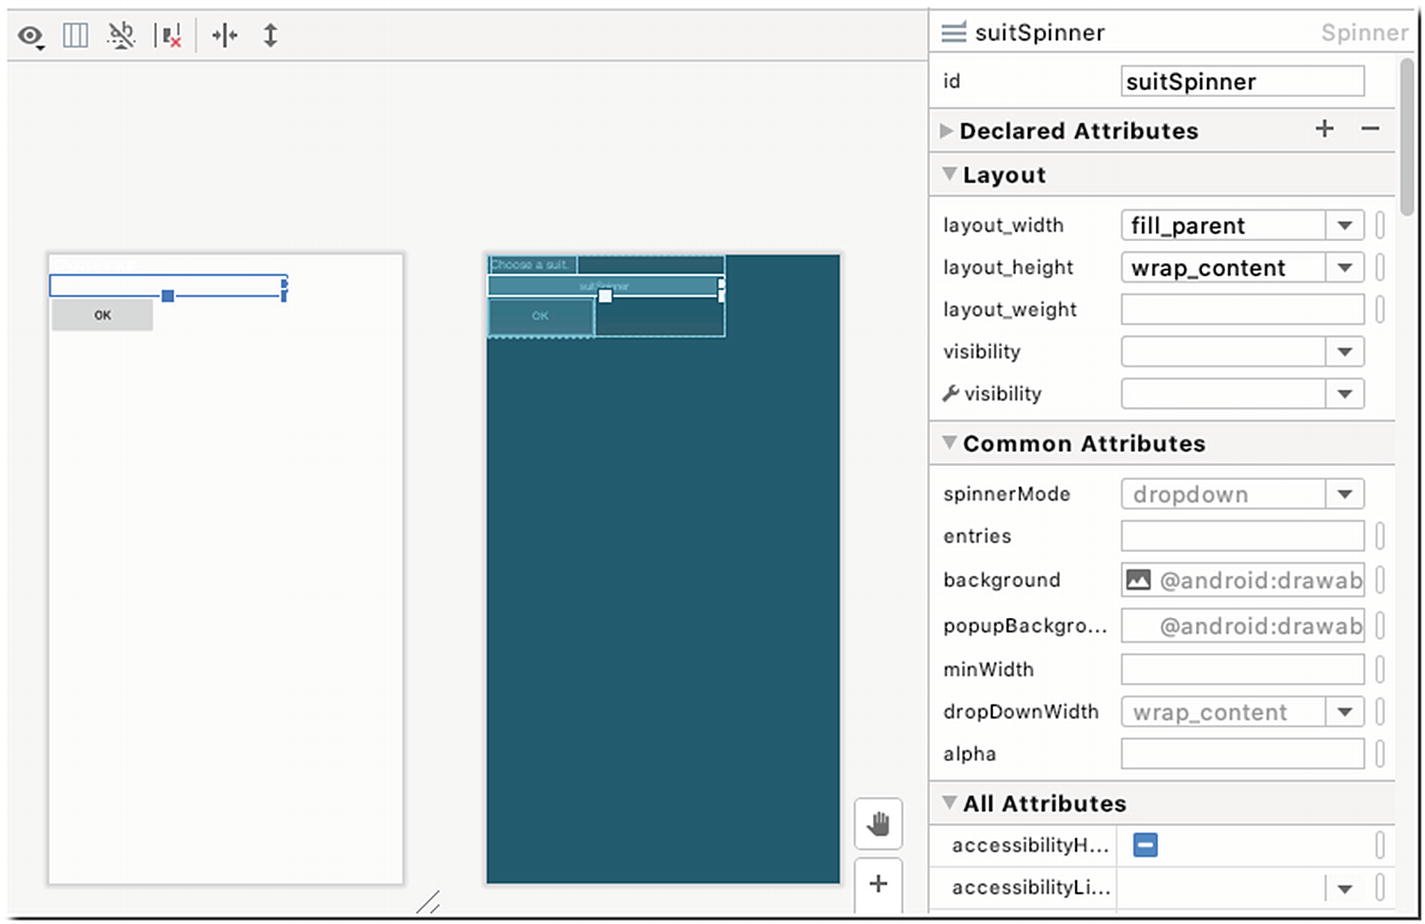
Figure 6-19
choose_suit_dialog in Design mode
You can build the dialog in WYSIWYG style using the Palette, or you can go directly to the code. When Android Studio launches the newly created layout file, it might open it in Design mode. Switch to Text or Code mode, and modify the contents of choose_suit_dialog.xml to match the contents of Listing 6-32.
Figure 6-19 shows the dialog layout file in Design mode. You can click each constituent View object of the dialog file and inspect the individual properties in the properties window.
The layout file has three View objects as UI elements—a TextView, a Spinner, and a Button. The LinearLayout arranges these elements in a linear fashion (a straight line). The vertical orientation lays out the elements from top to bottom.
In the future, you can opt not to use the built-in View objects of Android to make the UI more visually appealing; but as you might have surmised from this chapter, drawing your own screen elements requires a lot of work.
The TextView, Spinner, and Button all have ids. We will refer to them later using these ids.
Now that we have the dialog sorted out, we can build the code to show the dialog. When the human player plays an eight for a card, we will show this dialog. Let’s add a method to the CrazyEightView class and call this method changeSuit(). The contents of the changeSuit method are shown in Listing 6-33.
This line creates a Dialog object; we pass the current context to its constructor.
❷
Remove the title of the dialog box. We’d like it as plain as possible.
❸
Then we set the contentView of the Dialog object to the layout resource file we created earlier.
❹
This line creates the Spinner object.
❺
The ArrayAdapter supplies data to the View and determines its format. This creates the ArrayAdapter using the arrays.xml we created earlier.
❻
Get a programmatic reference to the Button object using its id.
❼
Create an event handler for the Button. We use the onClickListener object here to handle the click event. Overriding the onClick method of this handler lets us code the logic necessary when the Button is clicked.
❽
A Toast is a small message displayed on the screen, like a tooltip. It’s visible only for a few seconds. We use Toast here as feedback to show the user what suit was chosen.
The changeSuit() method must be called only when the human player plays an eight. We need to put this logic into the ACTION_UP branch of the onTouchEvent method. Listing 6-34 shows the annotated ACTION_UP branch.
When the human player plays an eight, we call the changeSuit method, which lets the player choose the suit. At this point, it’s still the turn of the human player; presumably, they play another card.
When there is no Valid Play
It is possible to run out of valid cards to play. When that happens, the human player must draw a card from the pile; and they must continue to do so until there is a card to play. This means a player may have more than seven cards. Remember in the onDraw method that we scaled the cards on the player deck to display just seven? We may exceed that number now.
To solve this, we can draw an arrow icon to signify to the user that there are more than seven cards on their deck. By clicking the arrow icon, we should be able to pan the player’s View of the cards. To do this, we need to draw the arrow.
Add the following Bitmap object to the member variables of the CrazyEightView class.
private Bitmap nextCardBtn;
We can load the Bitmap on the onSizeChanged method, just like the other Bitmaps we drew earlier.
Determine if the player has more than seven cards.
❷
If it’s more than seven, draw the next arrow.
Drawing the arrow is simply groundwork for our next task. Of course, before we allow the player to draw a card from the pile, we need to determine if they truly need to draw a card. If the player has a valid card to play (if they have cards with matching suit and rank or they’ve got an eight), then we should not let them draw. We need to provide that logic; so, we add another method to the CrazyEightView class named isValidDraw(). This method goes through all the cards in the player’s deck and checks if there are cards with matching suit or rank (or if there’s an eight card). Listing 6-36 shows the code for isValidDraw().
private boolean isValidDraw() {
boolean canDraw = true;
for (int i = 0; i < playerHand.size(); i++) {
int tempId = playerHand.get(i).getId();
int tempRank = playerHand.get(i).getRank();
int tempSuit = playerHand.get(i).getSuit();
if (validSuit == tempSuit || validRank == tempRank ||
We loop through all the cards; check if we can match either the suit or the rank or if there’s an eight among the cards; if there is, we return false (because the player has a valid play); otherwise, we return true.
When the human player tries to draw a card from the deck despite having a valid play, let’s display a Toast message to remind them that they can’t draw a card because they’ve got a valid play. This can be done on the ACTION_UP branch of the onTouchEventmethod (code shown in Listing 6-37).
if (movingIdx == -1 && myTurn &&
X > (scrW /2)-(100*scale) &&
X < (scrW /2)+(100*scale) &&
Y > (scrH /2)-(100*scale) &&
Y < (scrH /2)+(100*scale)) {
if (isValidDraw()) { ❶
drawCard(playerHand); ❷
} else {
Toast.makeText(ctx, "You have a valid play.",
Toast.LENGTH_SHORT).show(); ❸
}
}
Listing 6-37
Toast message when the player has a valid play
❶
Before we allow them to draw a card from the deck, check if the player has a valid play. If they have, isValidDraw() will return false.
❷
Otherwise, let the player draw a card.
❸
If the player has a valid play, display a Toast message.
When it’s the Computer’s Turn
Earlier in the chapter, we created a method named computerPlay(); this method is invoked when the human player finishes their turn; we only coded the stub of that method. Now, we need to put the additional logic so that we can have a really playable opponent.
Let’s modify the computerPlay() method in the CrazyEightView class to reflect the code in Listing 6-38.
tempPlay variable holds the id of the played card.
❷
A value of zero means there is no valid play for the computer’s hand. When we call the playCard() method of the ComputerPlayer class, it will return the id of the card that is a valid play. If the computer’s hand doesn’t have a valid play, let the computer draw a card from the pile; keep drawing until there is a valid card for play.
❸
If the computer chooses to play an eight, we need to change the suit; we’ve done this already for the human player, but we haven’t done it yet for the computer player. We will now. The chooseSuit() method doesn’t exist yet, and we will implement it shortly. For now, just imagine that the chooseSuit() method will return an integer value which will let us set the new validSuit for the next play.
❹
If the computer doesn’t play an eight, we simply reset the validRank and validSuit to whatever the played cards’ value were.
❺
We loop through the computer’s hand, adding the played card to the discard pile.
❻
Finally, the human will take the next turn.
Ending a Hand
When either the computer or the human player plays the last card, the hand ends. When this happens, we need to
1.
Display a dialog to signify that the current hand has ended
2.
Show and update the scores for both the human and the computer player
3.
Start a new hand
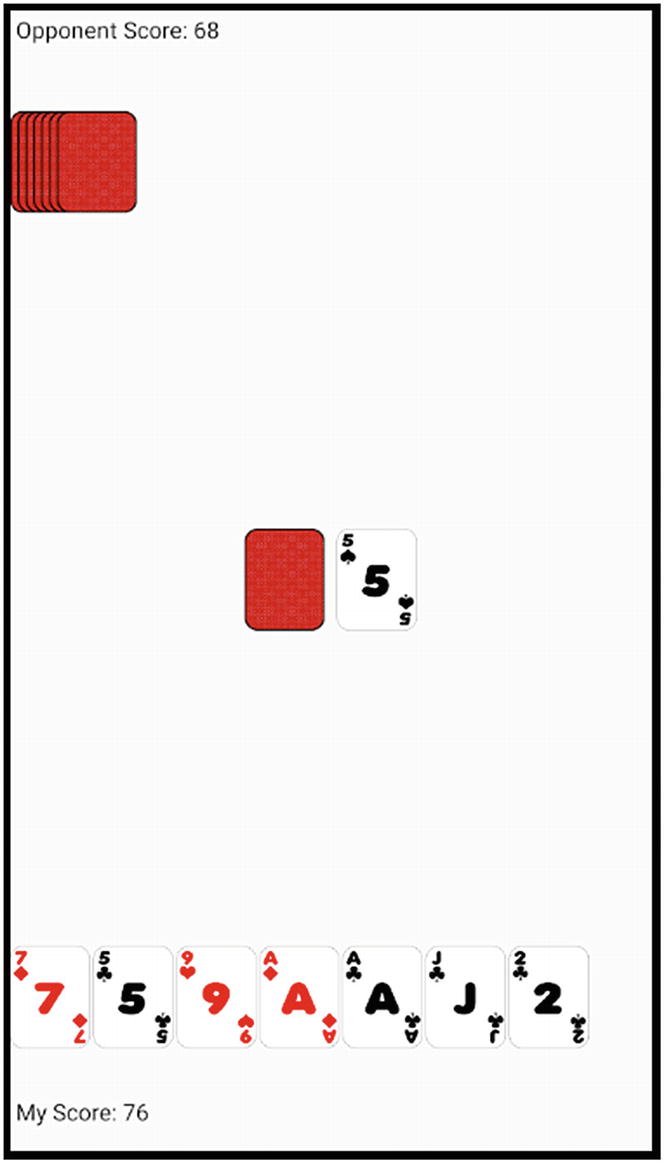
We’ll display the scores on the top and bottom parts of the screen, as shown in Figure 6-20.
Figure 6-20
Displaying the scores
To display the scores, we first need to calculate it. When a hand ends, all the remaining cards (either the computer’s or the human player’s) must be totaled. To facilitate this, we need to update the Card class. Listing 6-39 shows the updated Card class.
public class Card {
private int id;
private int suit;
private int rank;
private Bitmap bmp;
private int scoreValue; ❶
public Card(int newId) {
id = newId;
suit = Math.round((id/100) * 100);
rank = id - suit;
if (rank == 8) { ❷
scoreValue = 50;
} else if (rank == 14) {
scoreValue = 1;
} else if (rank > 9 && rank < 14) {
scoreValue = 10;
} else {
scoreValue = rank;
}
}
public int getScoreValue() {
return scoreValue;
}
public void setBitmap(Bitmap newBitmap) {
bmp = newBitmap;
}
public Bitmap getBitmap() {
return bmp;
}
public int getId() {
return id;
}
public int getSuit() {
return suit;
}
public int getRank() {
return rank;
}
}
Listing 6-39
Card.java
❶
Create a variable to hold the score for the card.
❷
Check the rank of the card and assign a score value. If an eight card is left on the player’s hand, it’s worth 50 points to the opponent. Face cards are worth 10 points, aces 1 point, and the rest of the cards are worth their face values.
Next, we need a method to update the scores of both the computer and the human player. Let’s add a new method to CrazyEightView named updateScores(); the code for this method is shown in Listing 6-40.
The variables currScore, computerScore, and myScore need to be declared as member variables in CrazyEightView.
If the computer’s hand is empty, we go through all the cards in the human player’s hand, sum it up, and credit it to the computer’s score. If the human player’s hand is empty, we go through all the remaining cards in the computer’s hand, sum it up, and credit that score to the human player.
Now that the scores are calculated, we can display them.
To display the scores, we will use the Paint object we defined earlier in the chapter. We need to set some attributes of the Paint object before we can draw some text with it. Listing 6-41 shows the constructor of CrazyEightView, which contains the code we need for the Paint object.
Next, we need to take care of the dialog for starting a new hand. This will be similar to the change suit dialog. This is a new dialog, so we need to create it. Right-click the res/layout folder in the Project tool window, as shown in Figure 6-21.
Figure 6-21
New Layout XML File
In the next window, enter end_hand_dialog for the layout file name. When Android Studio opens the newly created layout file in the main editor window, modify it to reflect the code, as shown in Listing 6-43.
Same as the previous dialog we created. Create an instance of a Dialog and make sure it doesn’t display any titles. Then set the content view to the layout file we created.
❷
When a hand ends, we call the updateScore() methods to display the score information.
❸
Get a programmatic reference to the TextView object, and in the statements that follow, depending on who ran out of cards, we display how many points were earned.
❹
Get a programmatic reference to the Button.
❺
Let’s check if the game is already over. When one of the players reaches 300 points, the game is over. If it is, we change the text on the Button to read “New Game” instead of “New Hand.”
❻
Create a listener object for the Button to handle the click event. In the onClick method of the click handler, we call the initNewHand() method to start a new hand; the code for this method is shown in Listing 6-45.
private void initNewHand() {
currScore = 0; ❶
if (playerHand.isEmpty()) { ❷
myTurn = true;
} else if (computerHand.isEmpty()) {
myTurn = false;
}
deck.addAll(discardPile); ❸
deck.addAll(playerHand);
deck.addAll(computerHand);
discardPile.clear();
playerHand.clear();
computerHand.clear();
dealCards(); ❹
drawCard(discardPile);
validSuit = discardPile.get(0).getSuit();
validRank = discardPile.get(0).getRank();
if (!myTurn) {
computerPlay();
}
}
Listing 6-45
initNewHand() method
❶
Let’s reset the points earned for the hand.
❷
If the human player won the previous hand, then it’s their turn to play first.
❸
Add the discard pile and both players’ cards back to the deck, then clear the lists and the discard pile. We’re basically putting all the cards back to the deck.
❹
Deal the cards, like at the beginning of the game.
Now that we have all the required logic and assets for ending a hand, it’s time to put the code for checking if the hand has ended. We can do this on the ACTION_UP case of the onTouchEvent method; Listing 6-46 shows this code. The pertinent code is in bold.
We simply need to check if the player’s hand is empty; if it is, the hand has ended. The next thing we need to do is to check on the computer’s side if the hand has ended. Listing 6-47 shows that code.
We simply check if the computer’s hand is empty; if it is, the hand has ended.
And that’s all the logic we need to write for the Crazy Eights game. The logic for ending the game is already shown in Listing 6-44 (bullet 5); when either one of the players reaches 300, the game ends.