© Ted Hagos, Mario Zechner, J.F. DiMarzio and Robert Green 2020
T. Hagos et al.Beginning Android Games Developmenthttps://doi.org/10.1007/978-1-4842-6121-7_2

2. Project Basics

Ted Hagos1 , Mario Zechner2, J. F. DiMarzio3 and Robert Green4
(1)
Makati, Philippines
(2)
Graz, Steiermark, Austria
(3)
Kissimmee, FL, USA
(4)
Portland, OR, USA
 
You will build many interesting apps, to be sure. Whether it be a gaming app, line of business app, or some other kind, we need to learn the basics of creating, building, and testing an app in Android Studio first; this chapter is all about that. In here, we’ll cover the following:
  • Create a simple project.

  • Create an Android Virtual Device (emulator), so we can run and test projects.

Create a Project
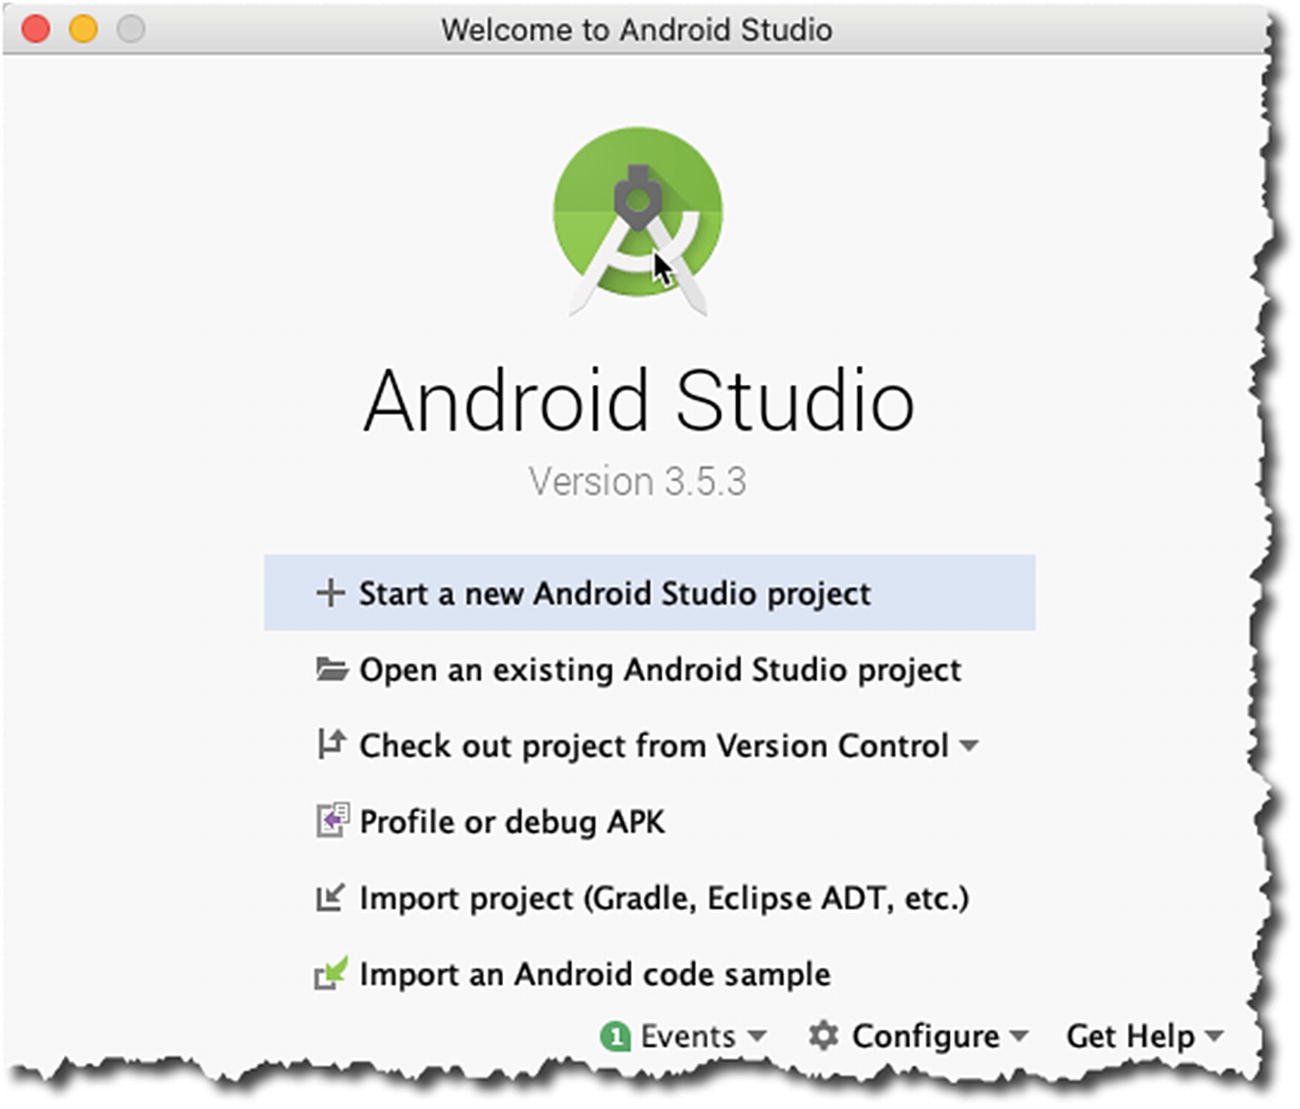
Launch Android Studio, if you haven’t done so yet. Click “Start a new Android Studio project,” as shown in Figure 2-1. You need to be online when you do this because Android Studio’s Gradle (a project build tool) pulls quite a few files from online repositories when starting a new project.
../images/340874_4_En_2_Chapter/340874_4_En_2_Fig1_HTML.jpg
Figure 2-1

Welcome to Android Studio

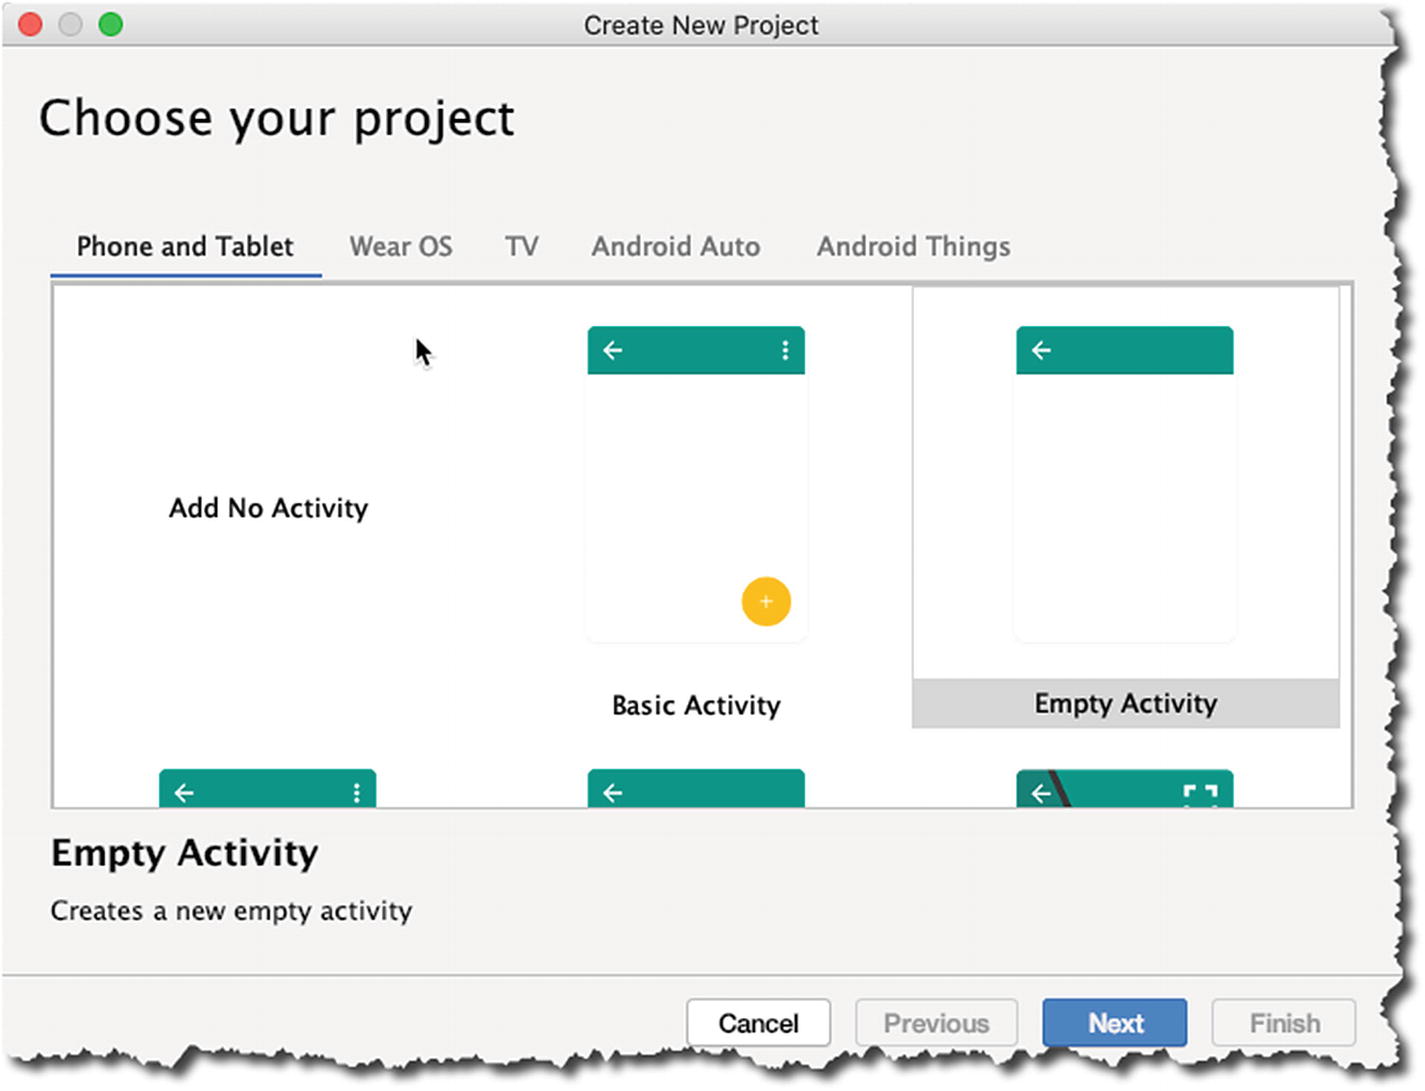
During the creation process, Android prompts for what kind of project we want to build; choose “Phone and Tablet” ➤ “Empty Activity,” as shown in Figure 2-2—we’ll discuss Activities in the coming chapters, but for now, think of an Activity as a screen or form; it’s something that the user sees and interacts with.
../images/340874_4_En_2_Chapter/340874_4_En_2_Fig2_HTML.jpg
Figure 2-2

Create a new project, choose an Activity type
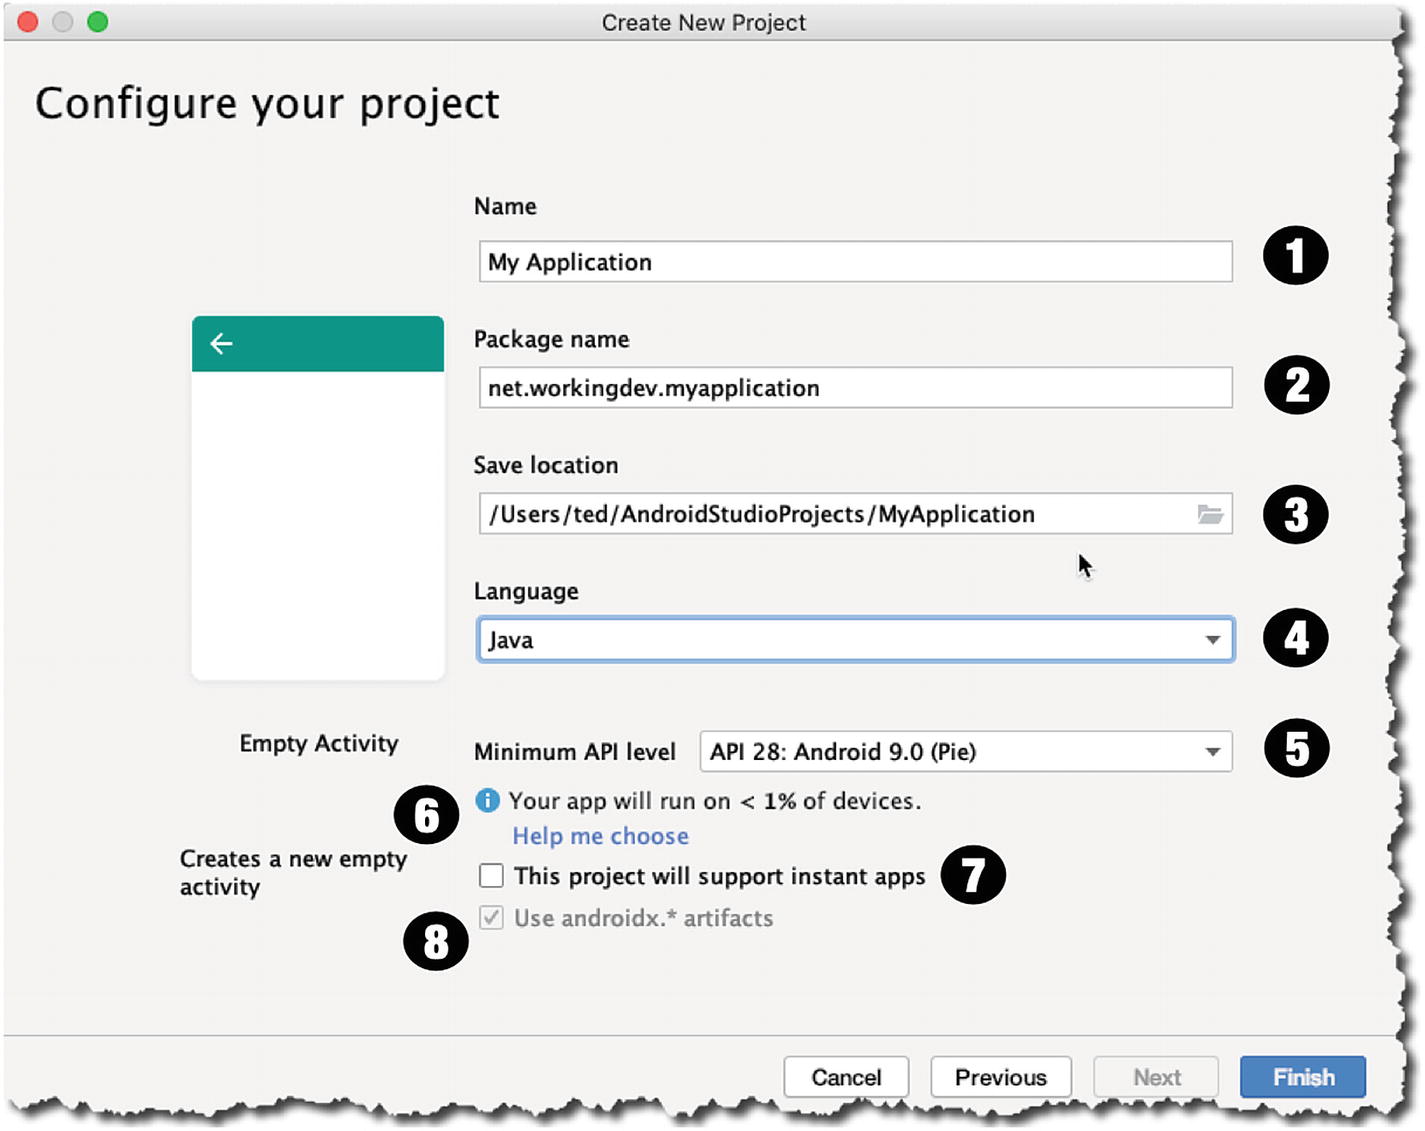
In the next screen, we get to configure the project. We set the app’s name, package name (domain), and the target Android version. Figure 2-3 shows the annotated picture of the “Create New Project” screen.
../images/340874_4_En_2_Chapter/340874_4_En_2_Fig3_HTML.jpg
Figure 2-3
Create New Project

NAME—This is what you want to call the application; this is also known as the project name. This name becomes the name of the top-level folder which contains all of the project’s files. This name also becomes part of your application’s identity, should you release it in the Play Store.

PACKAGE NAME—This is your organization or company’s domain name in reverse DNS notation. If you don’t have a company name, you can use anything that resembles a web domain. At the moment, it won’t matter if we use a real company name or not, since we won’t release this to the Play Store.

SAVE LOCATION—This is a location in your local directory where the project files will be kept.

LANGUAGE—You can use either Kotlin or Java; for this project, we will use Java.

MINIMUM API LEVEL—The min API level will determine the lowest version of Android which your application can run on. You need to choose wisely and prudently because it can severely limit the potential audience for your app.

HELP ME CHOOSE—This shows the percentage of Android devices that your app can run on. If you click the “Help me choose” link, it will open a window that shows the distribution of Android devices, per Android version.

INSTANT APPS—If you want your app to be playable, without the user installing your app, enable this check box. Instant apps allow a user to browse and “try out” your app in Google Play without downloading and installing the app.

ANDROID.X—These are support libraries. They’re included so that you can use modern Android libraries (like the ones included in Android 9) but still allow your app to be run on devices with lower Android versions.

When you’re all done, click “Finish” to begin the project creation. Android Studio scaffolds the project and creates startup files like the main Activity file, Android Manifest, and other files to get the project propped up. The build tool (Gradle) will pull quite a few files from online repos—it can take some time.
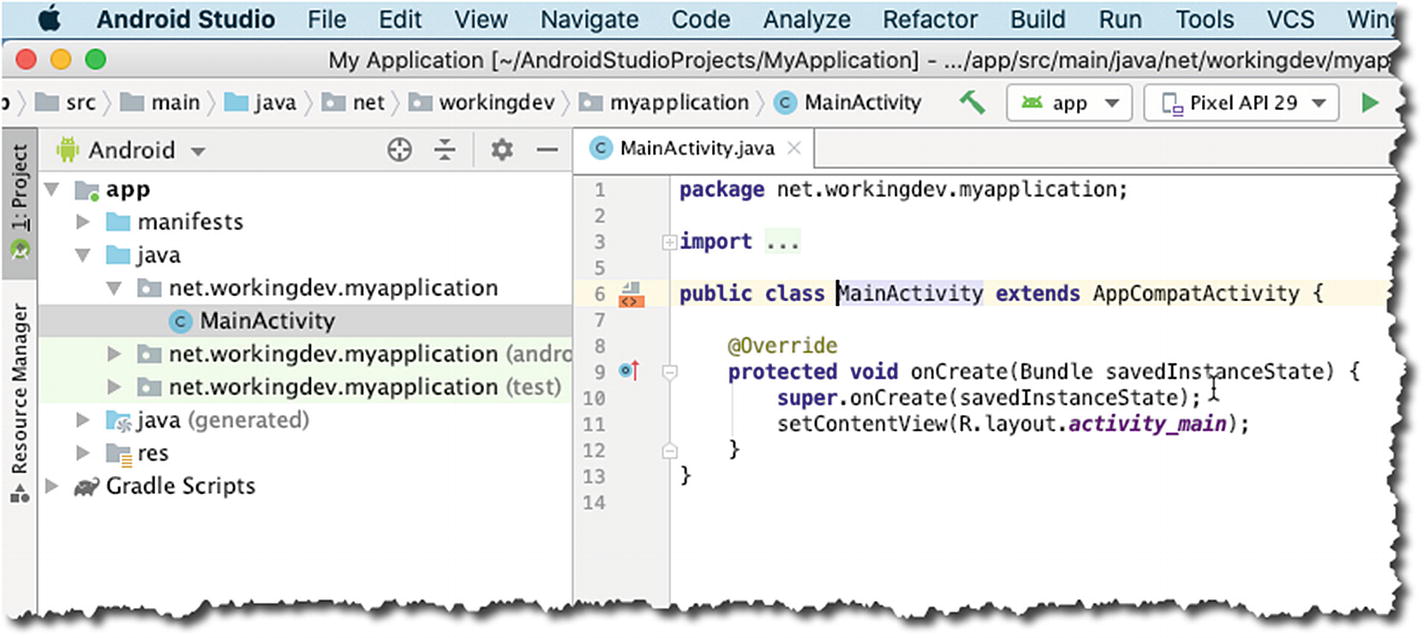
After all that, hopefully the project is created, and you get to see Android Studio’s main editor window, as shown in Figure 2-4.
../images/340874_4_En_2_Chapter/340874_4_En_2_Fig4_HTML.jpg
Figure 2-4

Main editor window

Android Studio’s screen is composed of several sections which can collapse and expand, depending on your needs. The section on the left (Figure 2-4) is the Project Panel; it’s a tree-like structure that shows all the (relevant) files in the project. If you want to edit a particular file, simply select it in the Project Panel and double-click; at that point, it will be opened for editing in the main editor window. In Figure 2-4, you can see the MainActivity.java file available for editing. In the course of time, we will spend a lot of hours doodling in the main editor window, but for now, we simply want to go through the basic process of application development. We won’t add or modify anything in this Java file nor any other in the project. We’ll leave it as is.

Create an AVD

We can test the application either by running it in an emulator or plugging a physical Android device into the workstation. This section covers setting up an emulator.
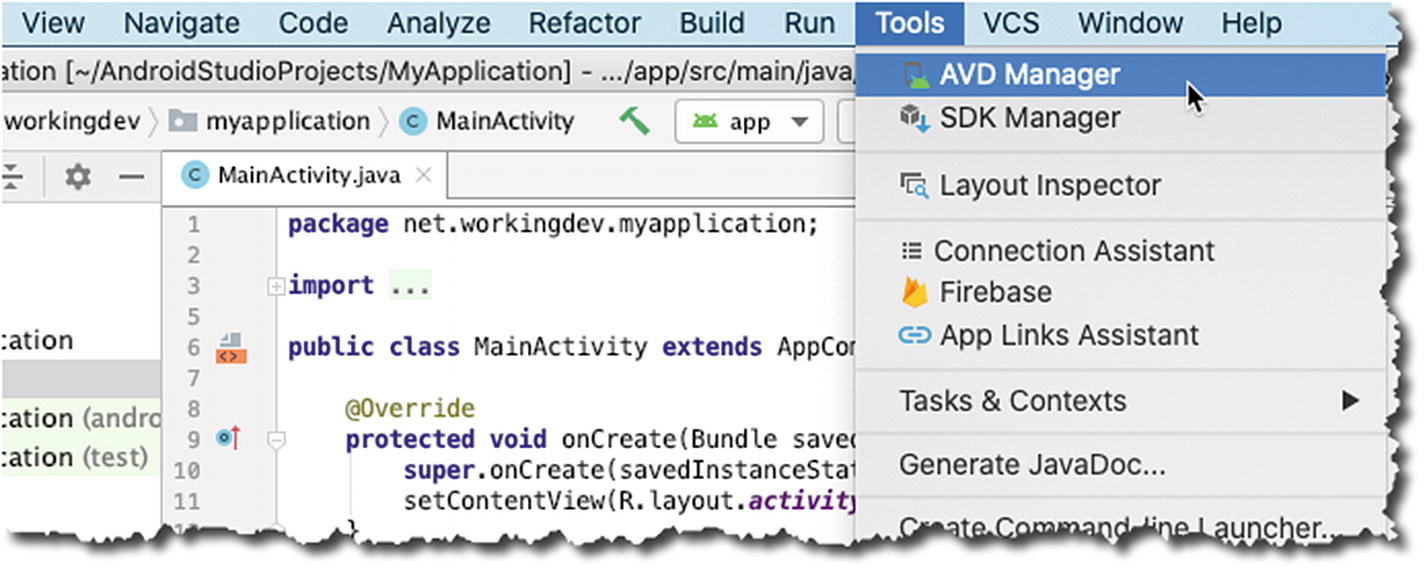
From Android Studio’s main menu bar, go to ToolsAVD Manager, as shown in Figure 2-5.
../images/340874_4_En_2_Chapter/340874_4_En_2_Fig5_HTML.jpg
Figure 2-5

Menu bar, Tools, AVD Manager

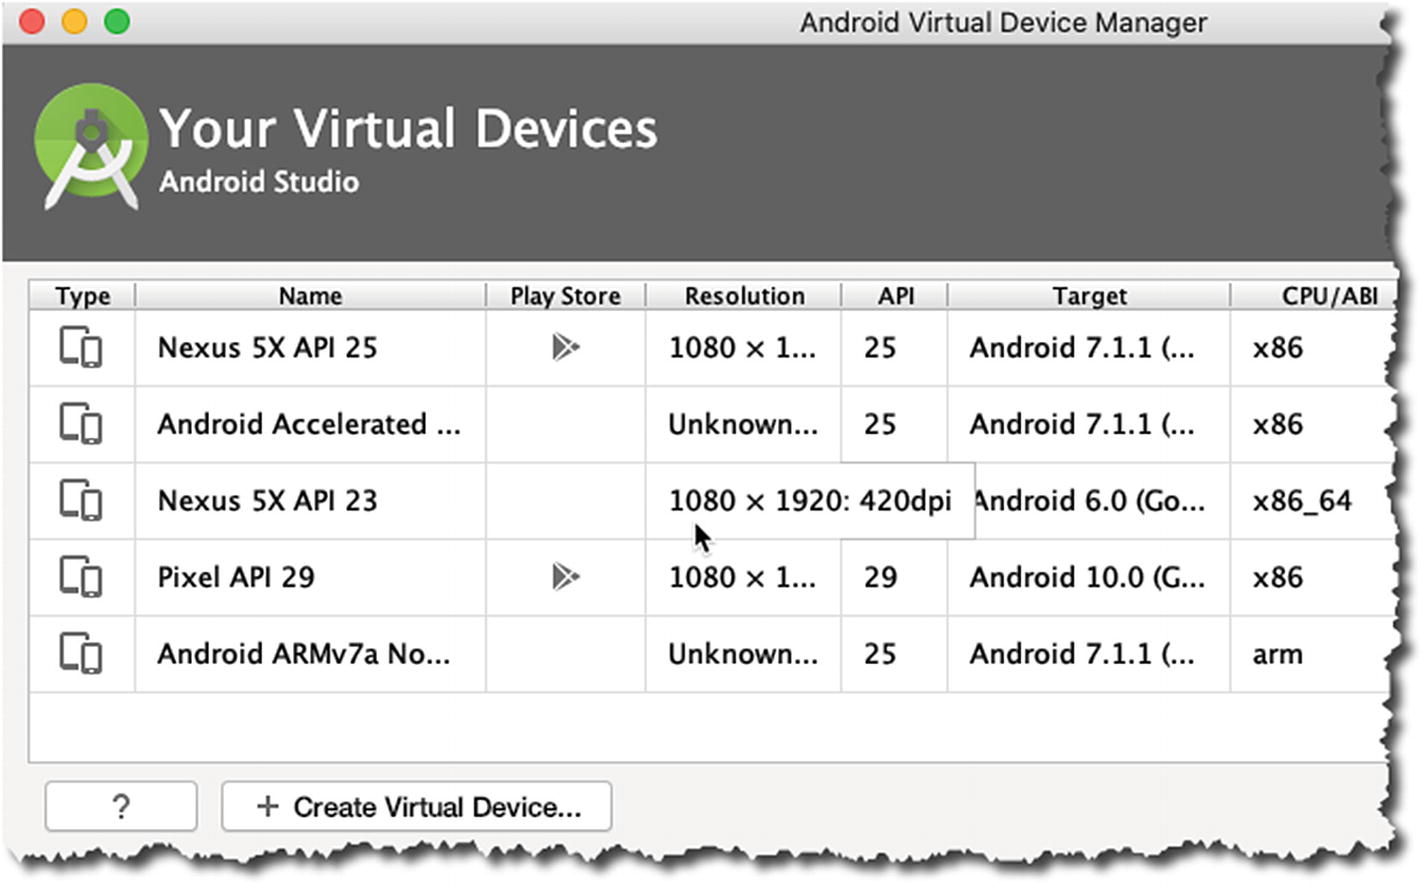
The AVD manager window will launch. AVD stands for Android Virtual Device; it’s an emulator that runs a specific version of the Android OS which we can use to run the apps on. The AVD manager (shown in Figure 2-6) shows all the defined emulators in our local development environment.
../images/340874_4_En_2_Chapter/340874_4_En_2_Fig6_HTML.jpg
Figure 2-6

AVD manager

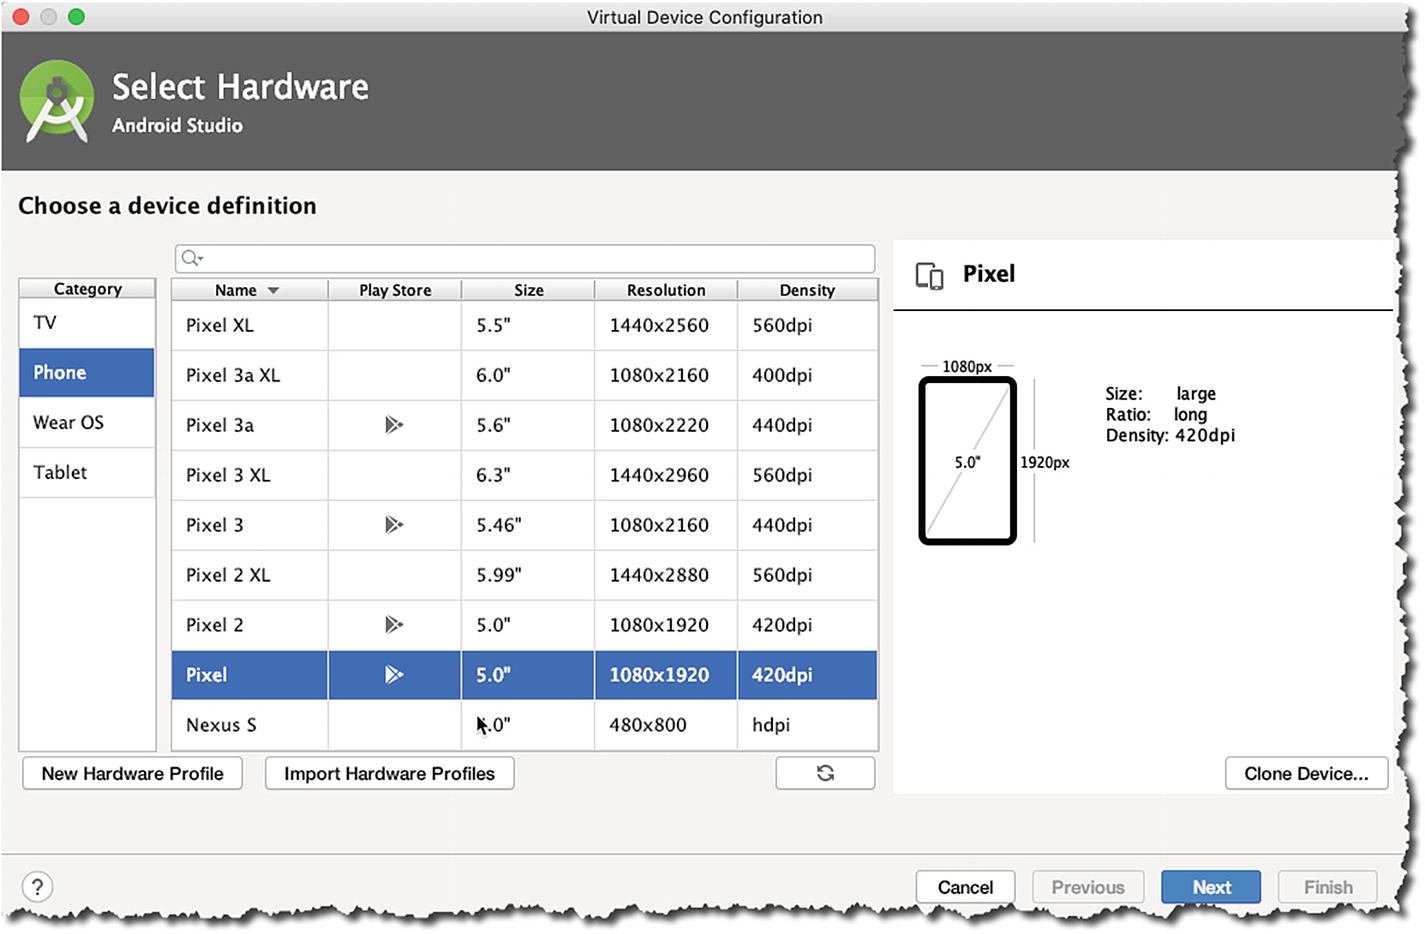
As you can see, I already have a couple of emulators; but let’s create another one; to do that, click the “+ Create Virtual Device” button, as shown in Figure 2-6. That action will launch the “Virtual Device Configuration” screen, as shown in Figure 2-7.
../images/340874_4_En_2_Chapter/340874_4_En_2_Fig7_HTML.jpg
Figure 2-7

Virtual Device Configuration

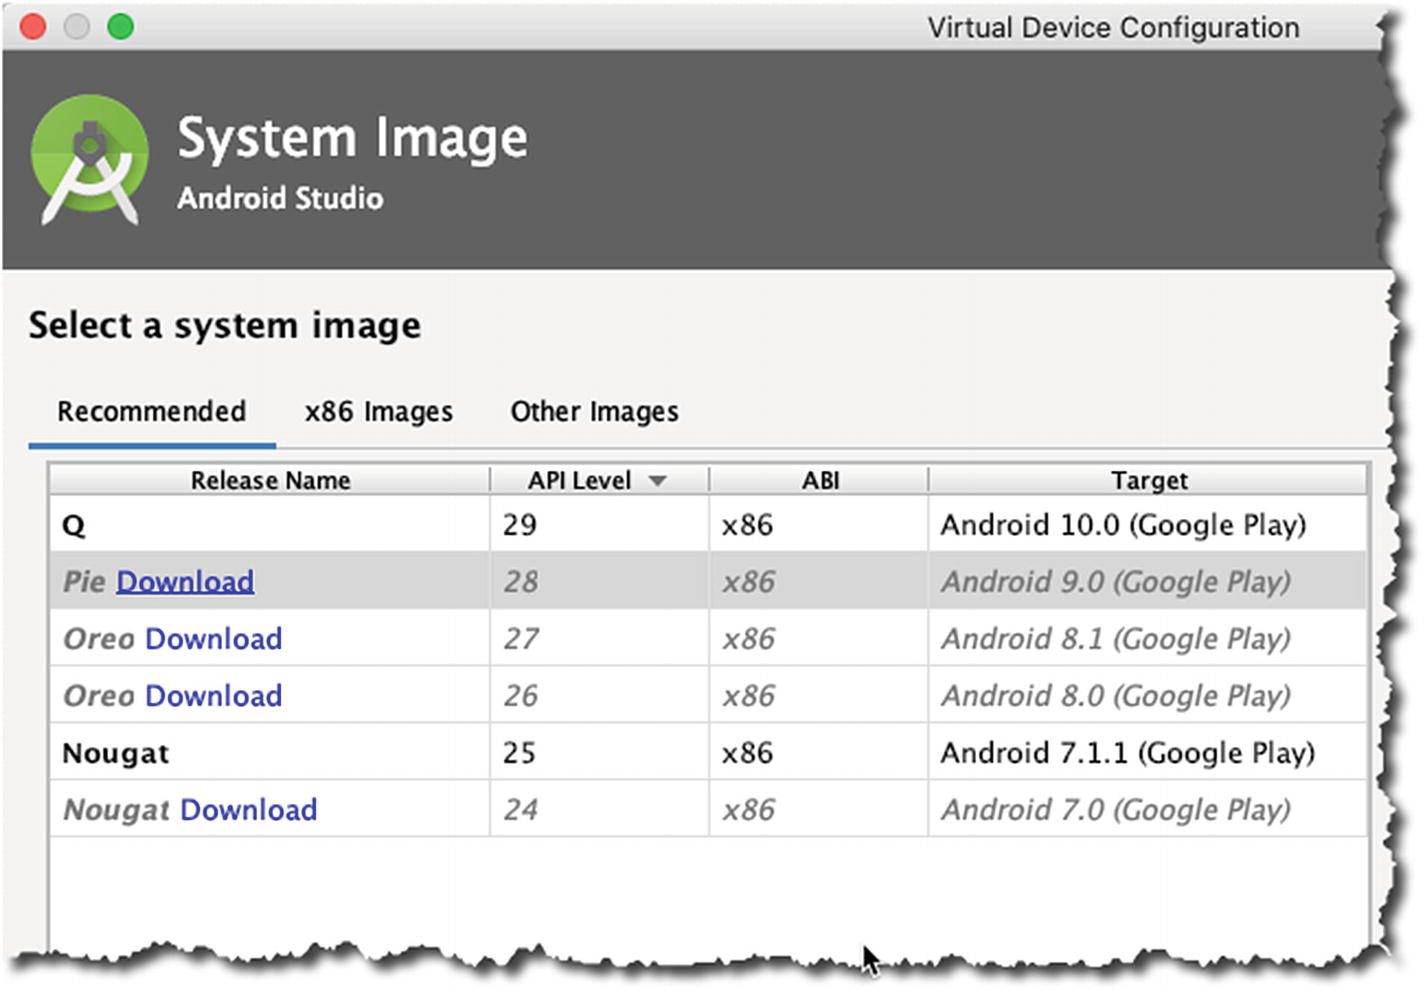
Choose the “Phone” category, then choose the device resolution. I chose the Pixel 5.0” 420dpi screen. Click the “Next” button, and we get to choose the Android version we want to run on the emulator; we can do this on the “System Image” screen, shown in Figure 2-8.
../images/340874_4_En_2_Chapter/340874_4_En_2_Fig8_HTML.jpg
Figure 2-8

Virtual Device Configuration

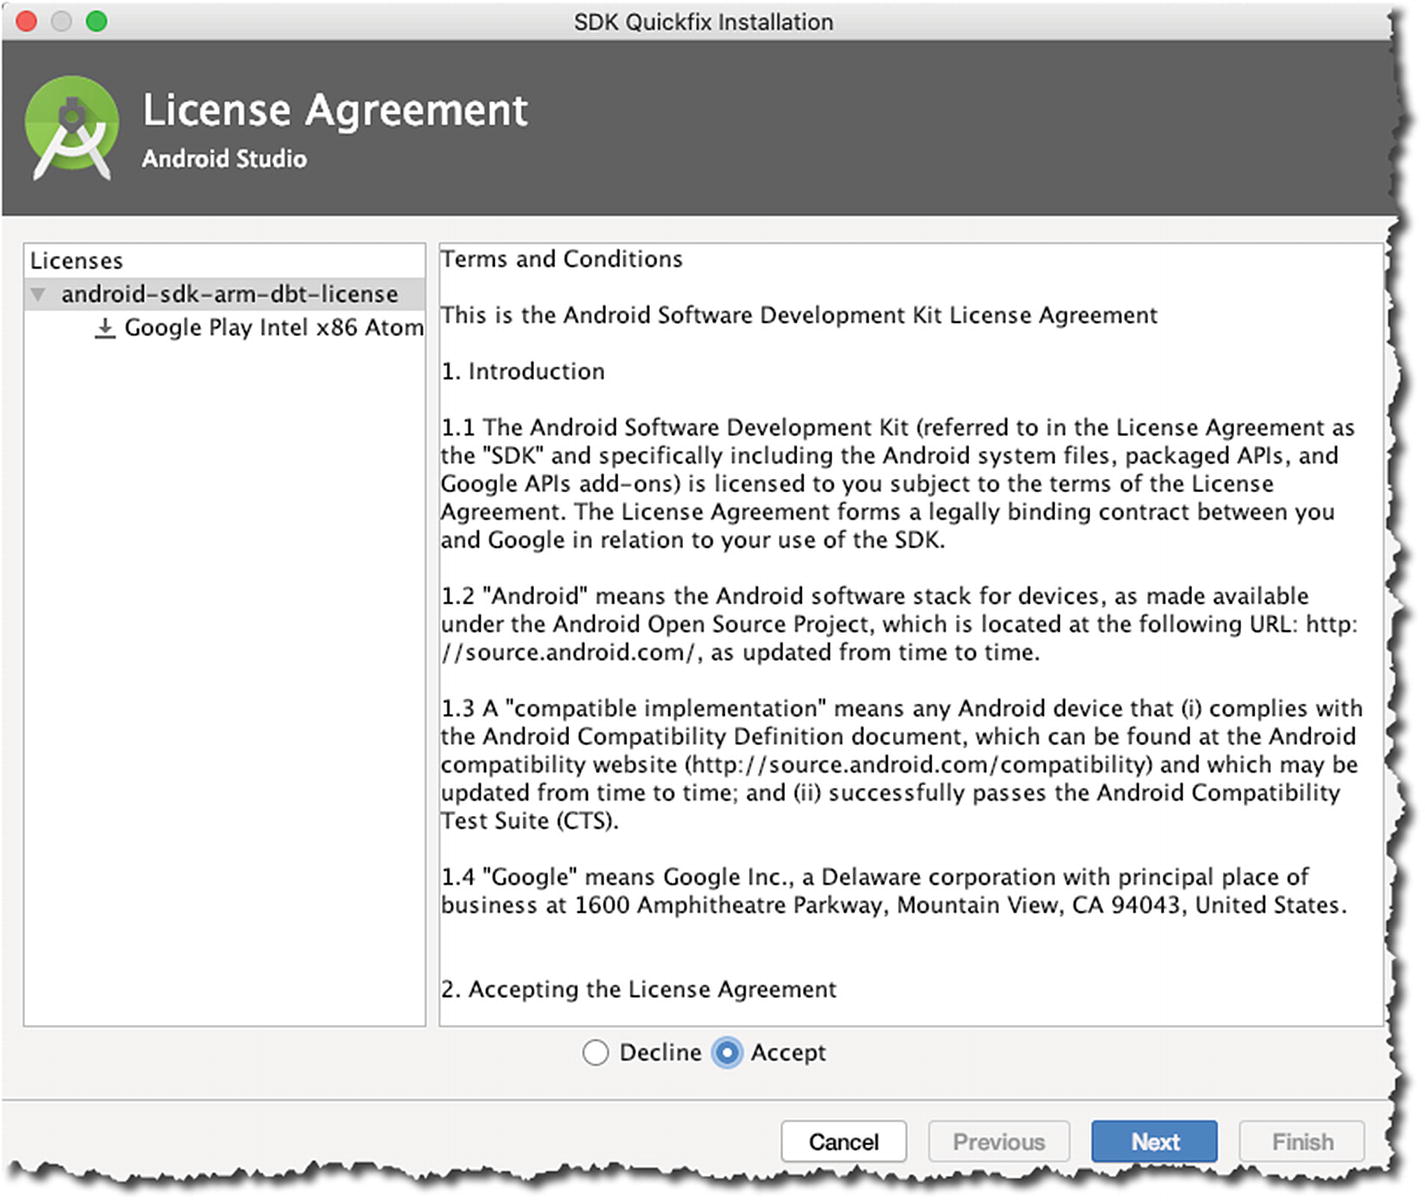
I want to use Android 9 (API level 28) or Pie, as some may call it; but as you can see, I don’t have the Pie system image in my machine just yet—when you can see the “download” link next to the Android version, that means you don’t have that system image yet. I need to get the system image for Pie first before I can use it for the AVD; so, click the “download” link. You’ll need to agree to the license agreement before you can proceed. Click “Accept,” then click “Next,” as shown in Figure 2-9.
../images/340874_4_En_2_Chapter/340874_4_En_2_Fig9_HTML.jpg
Figure 2-9

SDK Quickfix Installation

The download process can take some time, depending on your Internet speed; when it’s done, you’ll get back to the “System Image” selection screen, as shown in Figure 2-10.
../images/340874_4_En_2_Chapter/340874_4_En_2_Fig10_HTML.jpg
Figure 2-10

Virtual Device Configuration

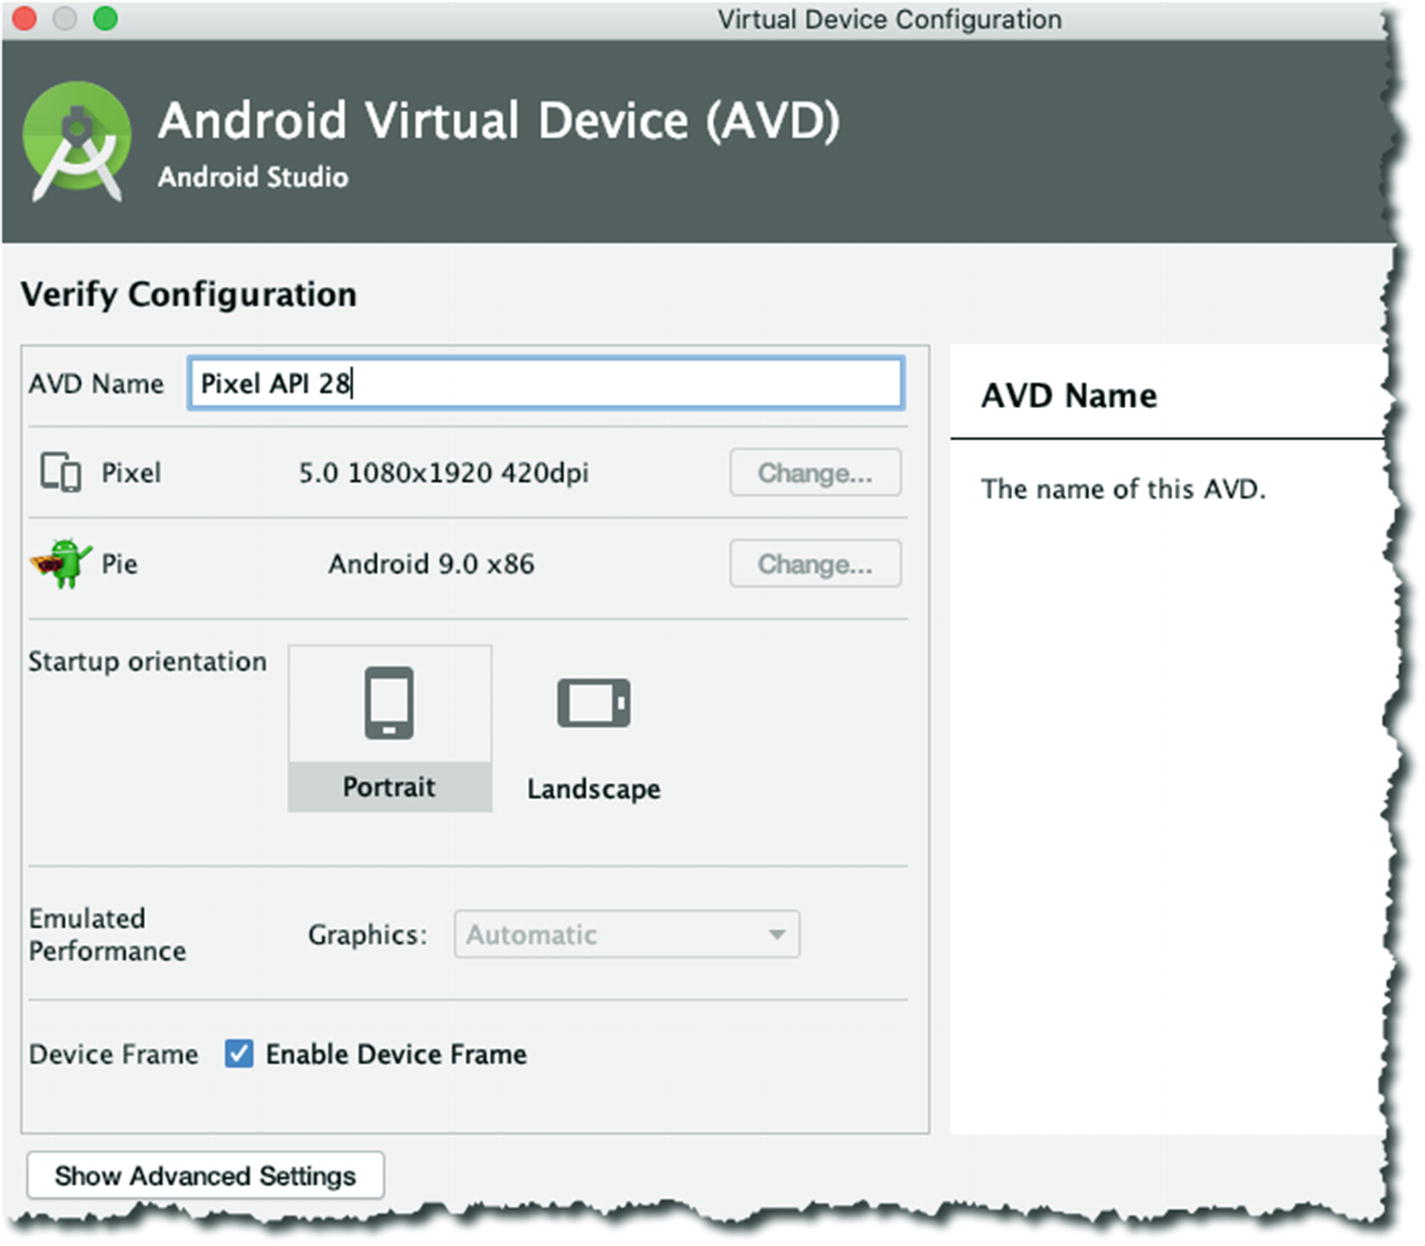
As you can see, we can now use Pie as a system image for our emulator. Select Pie, then click “Next.” The next screen shows a summary of our past choices for creating the emulator; the “Verify Configuration” screen is shown next (Figure 2-11).
../images/340874_4_En_2_Chapter/340874_4_En_2_Fig11_HTML.jpg
Figure 2-11

Verify Configuration

The “Verify Configuration” screen not only shows the summary of our past choices, you can configure some additional functionalities here. If you click the “Show Advanced Settings” button, you can also configure the following:
  • Front and back camera

  • Emulated network speed

  • Emulated performance

  • Size of internal storage

  • Keyboard input (whether enabled or disabled)
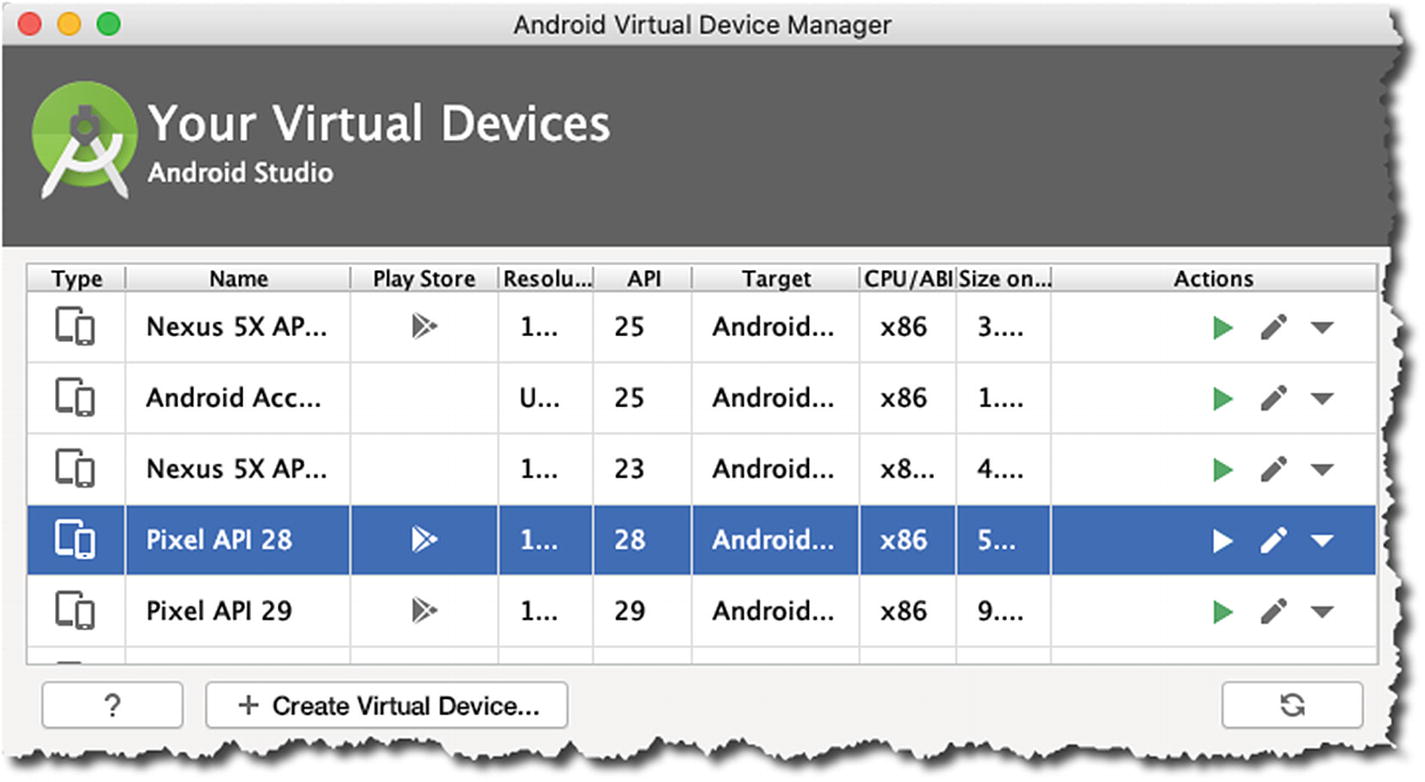
When you’re done, click the “Finish” button. When Android Studio finishes provisioning the newly created AVD, we’ll be back in the “Android Virtual Device Manager” screen, as shown in Figure 2-12.
../images/340874_4_En_2_Chapter/340874_4_En_2_Fig12_HTML.jpg
Figure 2-12

Android Virtual Device Manager

Now we can see the newly created emulator (Pixel API 28). You can launch it by clicking the little green arrow on the “Actions” column—the pencil icon edits the configuration of the emulator, the green arrow launches it.

When the emulator launches, you’ll see an image of the Pixel phone pop up on the desktop; it needs time to boot up completely. Go back to the main editor window of Android Studio to run the app.
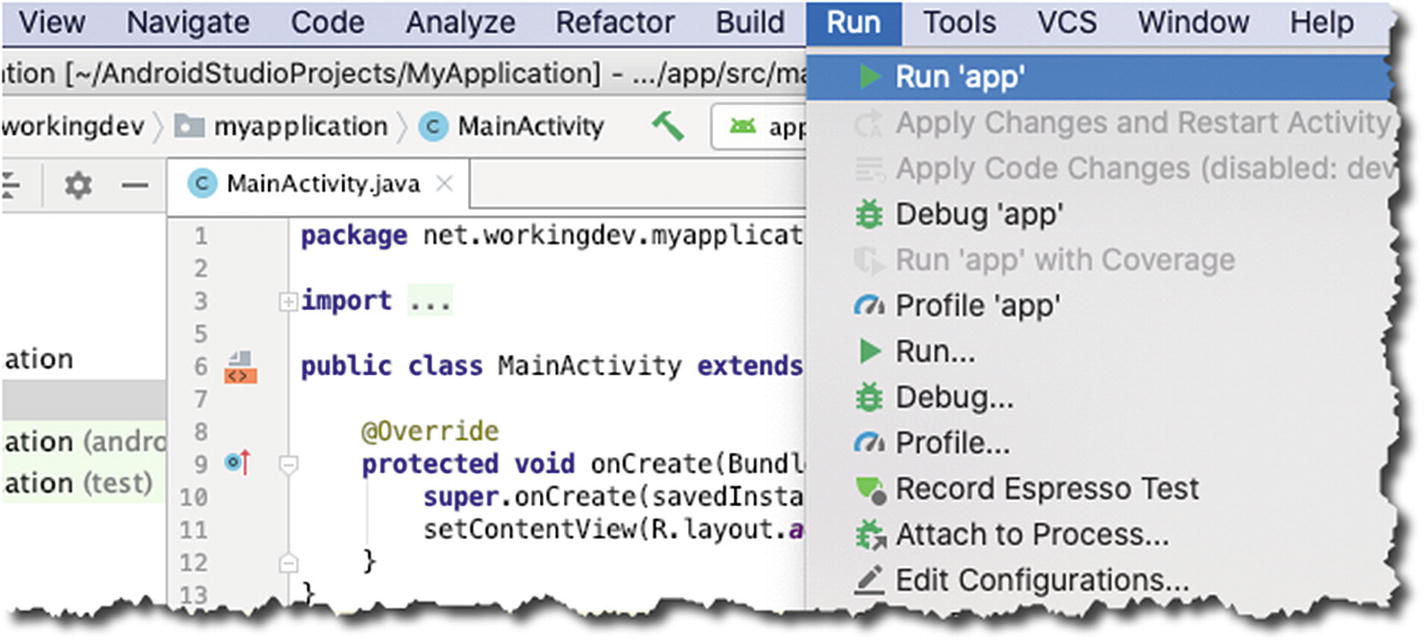
From the main menu bar, go to RunRun ‘app’, as shown in Figure 2-13.
../images/340874_4_En_2_Chapter/340874_4_En_2_Fig13_HTML.jpg
Figure 2-13

Main menu bar, Run

Android Studio compiles the project; then it looks for either a connected (physical) Android device or a running emulator. We already launched the emulator a while ago, so Android Studio should find it and install the app in that emulator instance.
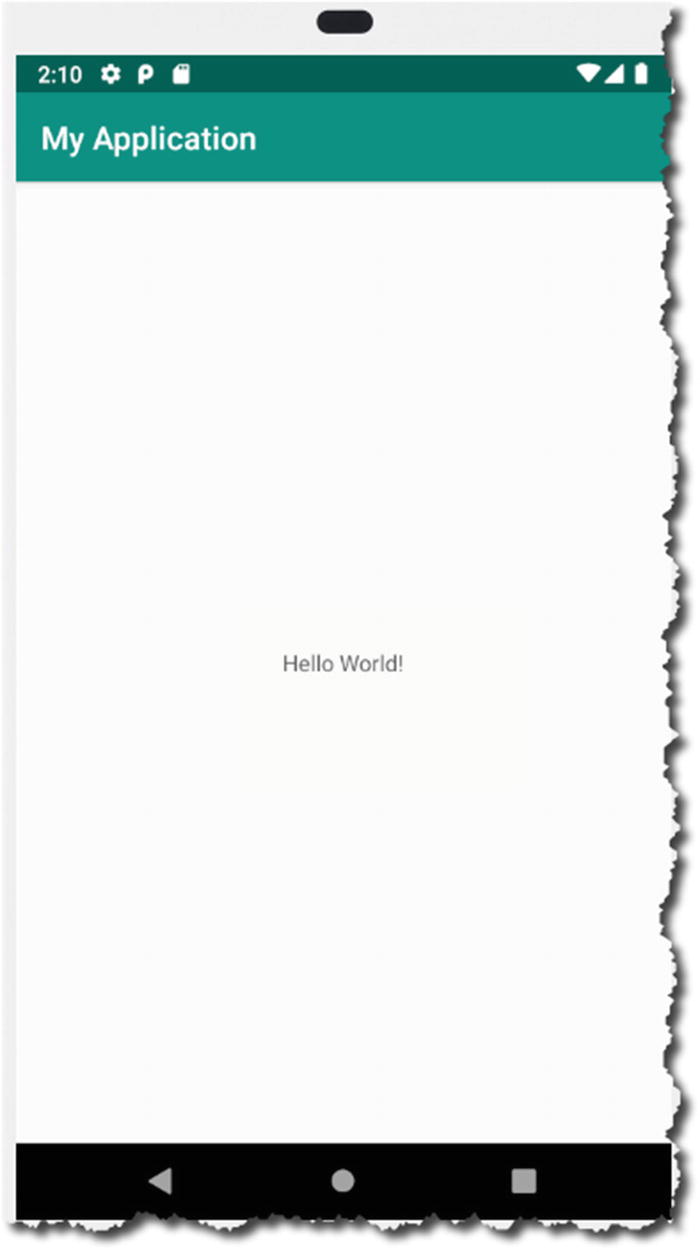
If all went well, you should see the Hello World app that Android Studio scaffolded for us, as shown in Figure 2-14.
../images/340874_4_En_2_Chapter/340874_4_En_2_Fig14_HTML.jpg
Figure 2-14

Hello World

Key Takeaways

  • Android projects almost always have an Activity. If you want to start with a basic project, choose one with an “Empty Activity” and build from there.

  • Pay some attention to what you put in the project details during creation; if you do release the project to Google Play, those project information will be part of your application, and many people will see it.

  • Choose the minimum SDK carefully; it will limit the number of potential users of your app.

  • You can use an emulator to run your app and see how it’s shaping up. Testing using an emulator is much better if you have HAXM (emulator accelerator) enabled on your system; if you’re on Linux, acceleration can be achieved using KVM.
..................Content has been hidden....................

You can't read the all page of ebook, please click here login for view all page.
Reset
13.58.121.251