You will learn how to set up your Visual Studio environment to enable extension development for VSTS/TFS. Developing a build and release task and publishing and using it in build/release will give you the capability to add your own functional components to TFS build and release management.
Prerequisites: You have Visual Studio 2015 and VSTS/TFS. In your Visual Studio environment, npm is available. If not, get npm from https://www.npmjs.com/get-npm and set up Node.js and npm.
Lesson 13.01 – Update npm and Add Visual Studio Project Templates for TFS Extensions
Let’s prepare the Visual Studio environment for developing extensions for Team Services and TFS build and release management .
Open a command prompt as administrator and run the following command to update npm to the latest version (see Figure 13-1):

Figure 13-1. Update npm
npm install npm@latest–gGet the TFS Cross Platform Command Line Interface (tfx-cli) by using this npm command (see Figure 13-2).

Figure 13-2. Get tfx-cli
npmi -g tfx-cliClose all Visual Studio instances and download the VSTS Extension Project Templates from https://marketplace.visualstudio.com/items?itemName=JoshGarverick.VSTSExtensionProjectTemplates (see Figure 13-3).
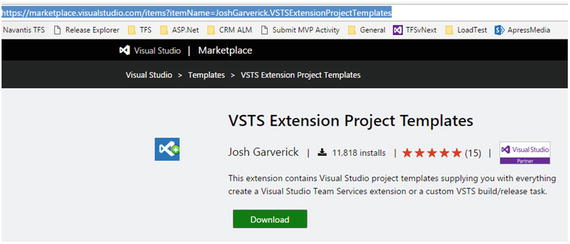
Figure 13-3. Download VSTS Extension Project Templates
Install the downloaded .vsix (VSOExtensionPackage.3.0.vsix) file. See Figure 13-4.
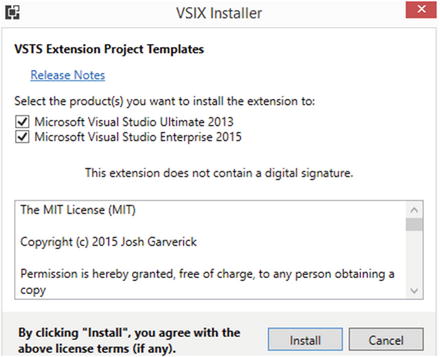
Figure 13-4. Installing VSTS Extension Project Templates
Installation should add templates to all compatible Visual Studio versions. See Figure 13-5.
Figure 13-5. Completed VSTS Extension Project Templates installation
Open Visual Studio. You can see two new project templates. One is for creating VSTS/TFS extensions in TypeScript tab . See Figure 13-6.
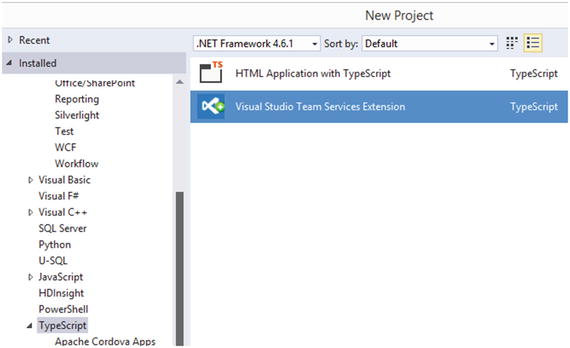
Figure 13-6. TypeScript-based VSTS extension template
The other one is found in the PowerShell section and is used to create VSTS/TFS Build Release extensions. This is the extension we are going to discuss in this chapter. See Figure 13-7.
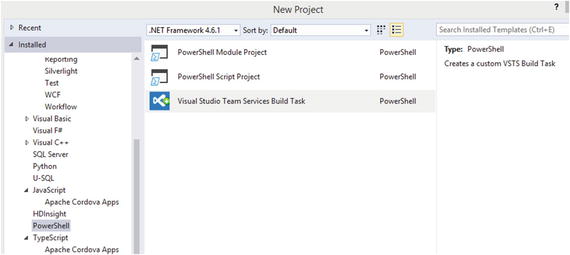
Figure 13-7. PowerShell-based VSTS extension template
You have set up your Visual Studio environment to develop extensions for TFS/VSTS in this lesson.
Lesson 13.02 – Develop a Build/Release Extension and Packaging
Let’s develop a build and release extension using the new templates and package it for upload to Marketplace ( https://marketplace.visualstudio.com/vsts ).
Create a Visual Studio solution named “BuildReleaseExtensionDemo” and add a project named “DemoBuildReleaseTask” to it with the template Visual Studio Team Services Build Task, found in the PowerShell section. See Figure 13-8.
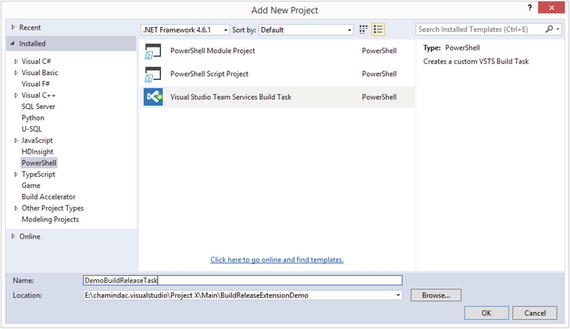
Figure 13-8. Build Task project template
The project is created with an Example Task template. See Figure 13-9.

Figure 13-9. Build Task project
In Task Runner Explorer in Visual Studio, the Gruntfile.js file will show as “failed to load” for few seconds until node_modules and VstsTaskSdk have loaded as specified in Gruntfile.js. See Figure 13-10.

Figure 13-10. Task runner showing error
After few seconds, the Task Runner Explorer shows that node_modules have loaded and the VstsTaskSdk has been copied to ExampleTaskps_modules. See Figure 13-11.

Figure 13-11. Task runner loading modules
This should add node_modules and VstsTaskSdk , as shown in the Solution Explorer in Figure 13-12.
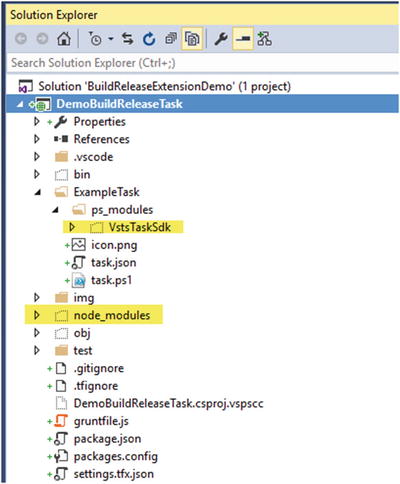
Figure 13-12. VstsTaskSdk and node_modules added
If this does not work automatically for some reason, you can manually download the node modules by running the npm update command from the project folder . See Figure 13-13.
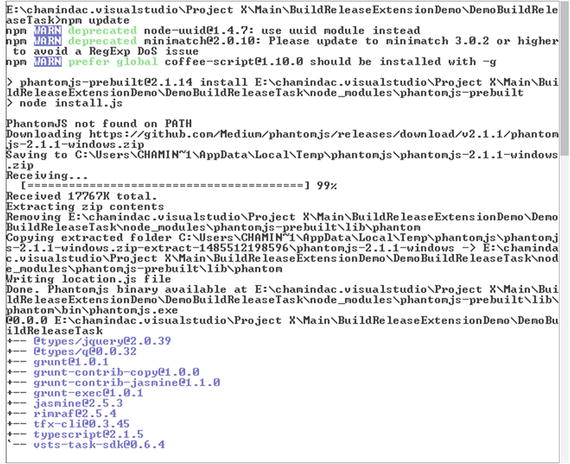
Figure 13-13. Manually adding node_modules
To get the VstsTaskSdk manually to the ps_modules folder inside the task folder, open a PowerShell window as administrator and run the following command (see Figure 13-14):

Figure 13-14. Manually adding VstsTaskSdk
Save-Module -Name VstsTaskSdk -Path .But, if you download VstTaskSdk manually, make sure to move all contents from the version-numbered folder to the VstsTaskSdk folder . See Figure 13-15.

Figure 13-15. Manually added VstsTaskSdk in a version-numbered folder
Cut the files from the version-numbered folder in Windows Explorer. See Figure 13-16.

Figure 13-16. Cut the added VstsTaskSdk files from the version-numbered folder
Paste the VstsTaskSdk content into the ps_ modules folder (this folder is added automatically when downloading VstsTaskSdk). See Figure 13-17.

Figure 13-17. Paste the VstsTaskSdk files into the ps_modules folder
Remove the version-numbered folder so that the folder structure looks as shown in Figure 13-18.

Figure 13-18. VstsTaskSdk files
Let’s rename the task as “DemoTask.” First, change the folder name to “DemoTask ,” as shown in Figure 13-19.

Figure 13-19. Rename task
Open gruntfile.js and replace Exampletask with DemoTask. See Figure 13-20.

Figure 13-20. Update gruntfile.js with new task name
Open task.json in the DemoTask folder and change the values, as shown in Figure 13-21. Provide name as DemoTask and set the same value to InstanceNameFormat. Provide a friendlyName and a description. Change the two variables available by default to have the YourName variable as a string and ShowWarningMsg and ShowErrorMsgandFail as Boolean variables. Visibility indicates whether it is available for build or release or both (for both option you need to specify Build and Release seperated by a comma).
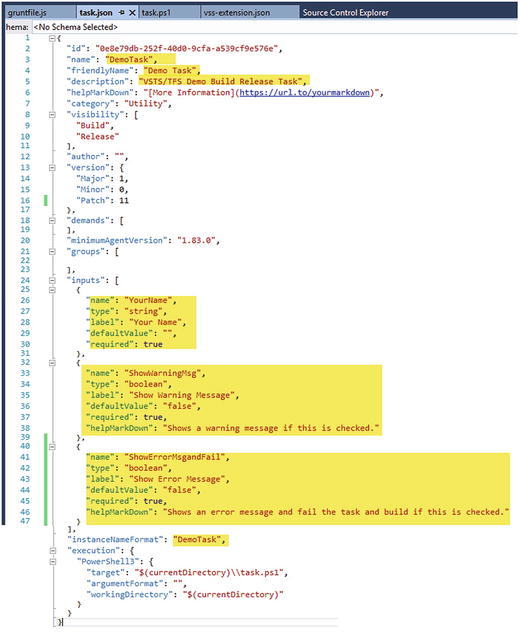
Figure 13-21. task.json
Open task.ps1 in the DemoTask folder and replace the PowerShell code with the following (or download from https://github.com/chamindac/Book-Beginning-Build-ReleaseManagement-/blob/master/Chapter13/BuildReleaseExtensionDemo/DemoBuildReleaseTask/DemoTask/task.ps1 ).
## DemoTask.ps1#[CmdletBinding(DefaultParameterSetName = 'None')]param()Write-Host "Starting DemoTask"Trace-VstsEnteringInvocation $MyInvocationtry {$YourName = Get-VstsInput -Name YourName -Require$ShowWarningMsg = Get-VstsInput -Name ShowWarningMsg$ShowErrorMsgandFail = Get-VstsInput -Name ShowErrorMsgandFail$compName = $env:COMPUTERNAME;Write-Host ("Hello from {0}, {1}" -f $compName, $YourName);if($ShowWarningMsg.ToLower() -eq "true"){Write-Warning ("Warnig message you requested from {0}, {1}" -f $compName, $YourName);}if($ShowErrorMsgandFail.ToLower() -eq "true"){Write-Error ("Error message you requested from {0}, {1}" -f $compName, $YourName);}} catch {throw;} finally {Trace-VstsLeavingInvocation $MyInvocation}Write-Host "Ending DemoTask"Open the vss-extension.json file and change the ID, version, name, description, and publisher. The publisher name should be the name you intend to use in Marketplace ( https://marketplace.visualstudio.com ). The extension is not yet ready for the public. Keep it false. How to make an extension public is discussed later in this chapter. Leave the links as they are for the time being. See Figure 13-22.
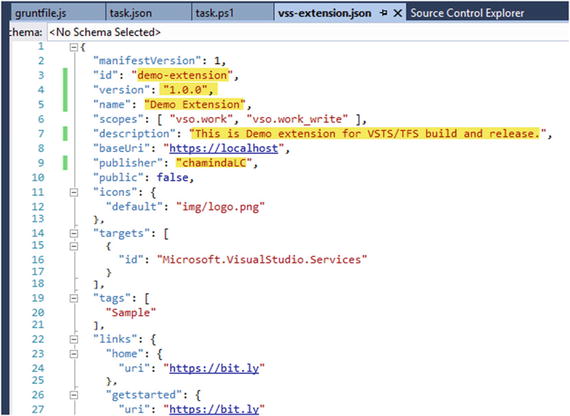
Figure 13-22. vss-extension.json
Change the file path and name of the contribution to DemoTask (task folder name must be used for these two items). Change the contribution ID to be demo-task. Save vss-extension.json with the changes . See Figure 13-23.

Figure 13-23. vss-extension.json
The vss-web-extension-sdk module is required in order to package the extension. This should be available in node_modules, since vss-extension.json is set to look for it in there. See Figure 13-24.

Figure 13-24. Setting vss-web-extension-sdk/lib.
To download vss-web-extension-sdk to node_modules, execute the following command from the project folder (see Figure 13-25):

Figure 13-25. Downloading vss-web-extension-sdk
npm install vss-web-extension-sdkTo package the Demo extension, execute the following command from the project folder (see Figure 13-26):

Figure 13-26. Packaging the extension
tfx extension create --manifest-globs vss-extension.jsonThe packaged .vsix will be available in the project folder. See Figure 13-27.
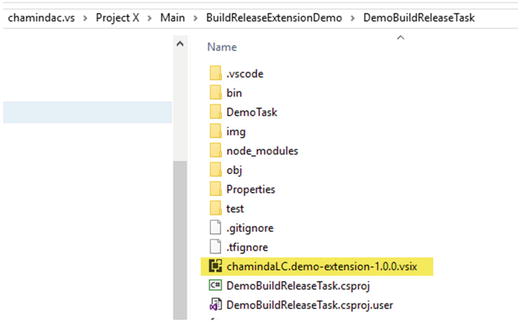
Figure 13-27. Packaged .vsix file
In this lesson, you created an extension to build and release and packaged it to get it ready for deployment.
Lesson 13.03 – Sign Up for Publishing Extensions in Marketplace and Publish Extension
You need to sign up in Visual Studio Marketplace to publish extensions.
Go to https://marketplace.visualstudio.com and click on the Publish Extensions link in the footer of the page. See Figure 13-28.
Figure 13-28. Publish Extensions link
Sign in with your Microsoft account that has a VSTS account to test the extension.
After signing in with your Microsoft account, in the popup window, provide your publisher ID. It is the same value used for Publisher in vss-extension.json. Provide a display name and click Create. See Figure 13-29.

Figure 13-29. Create a publisher
This will allow you to upload extensions to share privately (publishing extensions publically is discussed later in this chapter). Click on the Upload new extension button, shown in Figure 13-30.
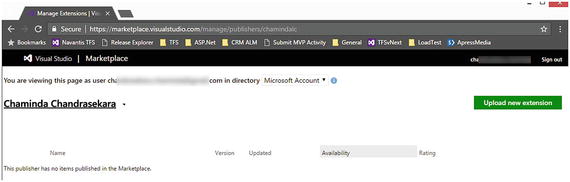
Figure 13-30. Publisher
In the popup window, click the Browse button and select the extension packaged in the previous lesson. See Figure 13-31.

Figure 13-31. Browsing extension
Click on Upload after selecting the extension .vsix. See Figure 13-32.
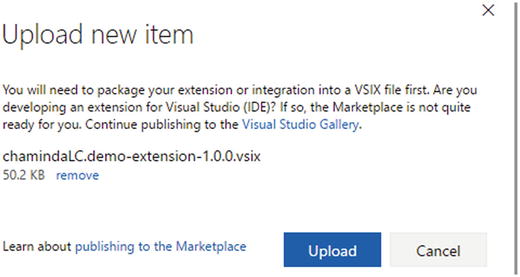
Figure 13-32. Uploading the extension .vsix
The extension uploads , and it is not yet shared to any VSTS/TFS account since it is private. To share it, click on the Share button. See Figure 13-33.

Figure 13-33. Uploaded extension
In the popup window, provide your VSTS account name and click OK. See Figure 13-34.
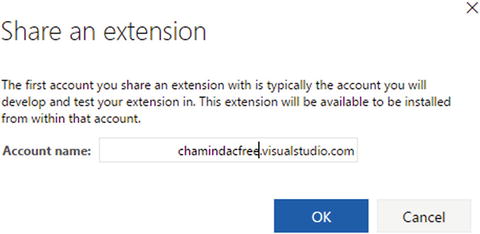
Figure 13-34. Sharing the extension
The extension is now shared with your VSTS account. See Figure 13-35.
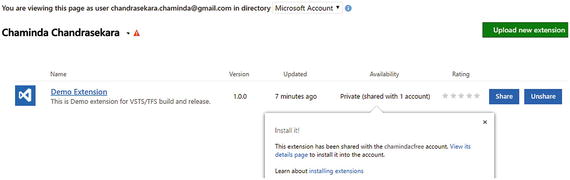
Figure 13-35. Shared extension
You created a publisher, uploaded the extension to Marketplace, and shared it with your Team Services account.
Lesson 13.04 – Install Privately Shared Extension
Let’s install a shared extension to the Team Services account.
Go to your VSTS account and click on Manage extensions . See Figure 13-36.
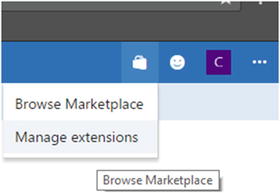
Figure 13-36. Manage extensions
The shared extension is available to install . Click on Demo Extension Name. See Figure 13-37.
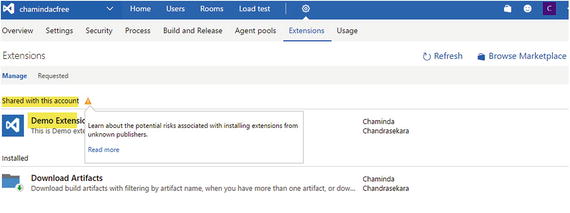
Figure 13-37. Extension available to install
The Marketplace extension page will be opened. Install the extension into your VSTS account by clicking Install. See Figure 13-38.

Figure 13-38. Install extension
Select your Team Services account in the popup window and click Confirm. See Figure 13-39.
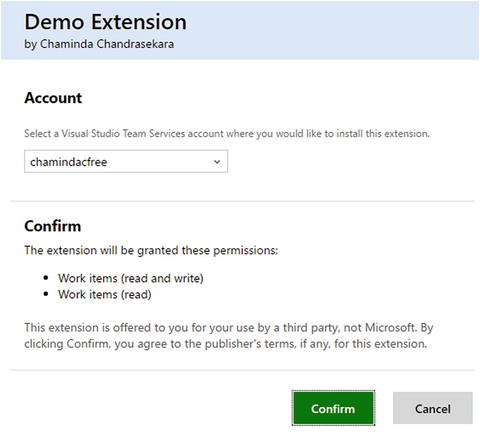
Figure 13-39. Select Team Services account in which to install extension
The extension will be installed in your VSTS account. See Figure 13-40.
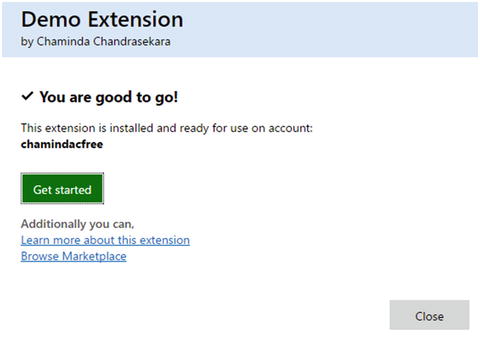
Figure 13-40. Extension installed
Refresh the Manage Extensions page, and you will see the extension is now installed. See Figure 13-41.
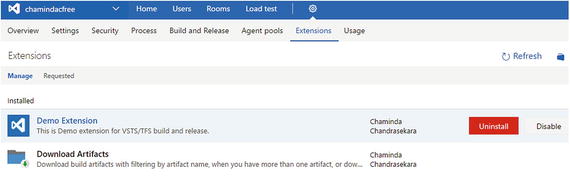
Figure 13-41. Extension available
You have installed a privately shared extension to your Team Services account.
Lesson 13.05 – Use the Extension in the Build/Release
After installing a privately shared extension to VSTS or uploaded and installed it to on-premises TFS, it can be used with a build or release (as specified in the task).
Create a folder named “Dummy” in a team project and add an empty text file, dummy.txt, and check it in. This is just to allow the build to have a repository path. See Figure 13-42.

Figure 13-42. Dummy
Create a new empty build definition and set the repository to Dummy . See Figure 13-43.
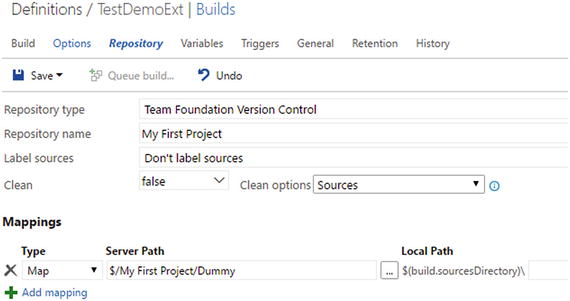
Figure 13-43. Map to Dummy
Click Add build step in the Build tab of the build definition. In the pop up Task Catalog window Utility tab, you will find the new “Demo Task” added with the new extension . Add it to the definition. See Figure 13-44.
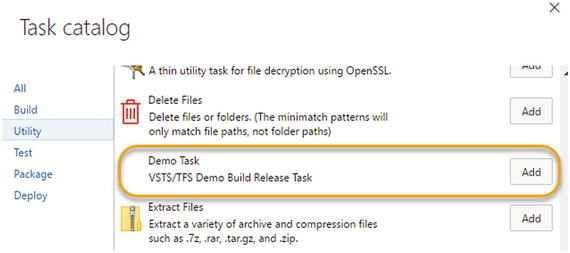
Figure 13-44. Add Demo task
In the Demo task, provide a value for the Your Name field and select Show Warning Message. See Figure 13-45.
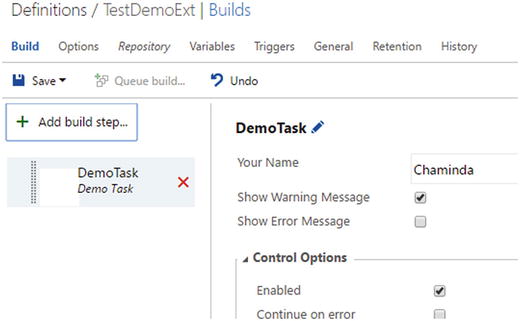
Figure 13-45. Demo task
Queue a new build. The Demo task displays a message and warning message , and the build succeeds. See Figure 13-46.
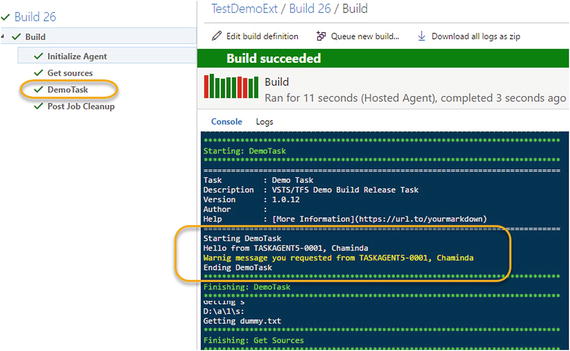
Figure 13-46. Demo task running with warning
Edit the build definition and select the Show Error Message option as well. See Figure 13-47.
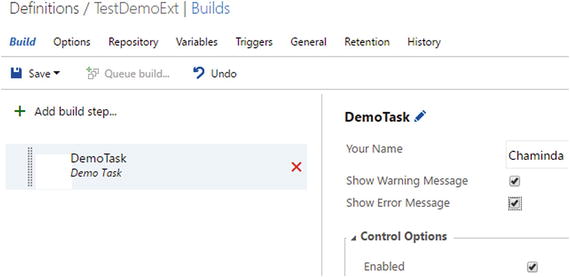
Figure 13-47. Demo task enabled to show error
Queue a build. The Demo task will show an error message and fail both the task and the build. With this, you have learned how to create a build release task and run it. It shows warnings, and on errors it knows how to fail a task . See Figure 13-48.

Figure 13-48. Demo task failing with error
In this lesson, you used the extension installed to the Team Services/TFS with a build definition.
What Else Is Possible with Build/Release Extensions?
You have learned how to add new build/release tasks to the Task Catalog . You have created a publisher account, but you could not share your extensions publicly. In order to make the extension available publicly in Marketplace, it should have useful functionality and should work with Visual Studio/Visual Studio code or Team Services/TFS. You have to follow the instructions found at https://www.visualstudio.com/en-us/docs/integrate/extensions/publish/publicize to become a verified publisher.
Once you have done so, you can make your extensions public by changing the vss-extension.json public setting to true. See Figure 13-49.
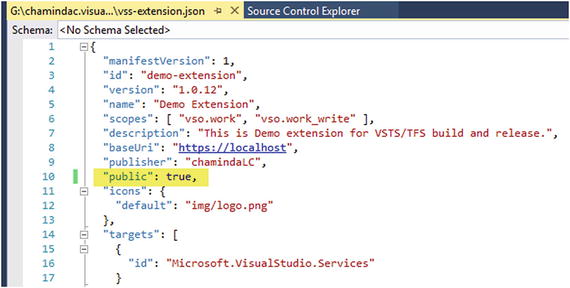
Figure 13-49. Making an extension public
Your extensions will be public once you package and update them. Make sure to increase the version number for each update to make it effective. See Figure 13-50.

Figure 13-50. Public extensions
You have seen that the Demo task we created had a blank icon and default logo, and that its page in Marketplace had no documentation. Before you make your extensions public, you need to improve these.
You can replace the icon.png file in your task folder with an image named “icon.” There is no need to reference this file from task.json or anywhere. It will be automatically displayed as the icon of the task as long as it is in the folder of the task.
You can replace logo.png in the img folder of the extension template. This is referred to in the vss-extension.json icons section as follows:
"icons": {"default": "img/logo.png"},Add a folder called “screenshots ” to the img folder; you can add screenshots of your extension for the documentation. See Figure 13-51.
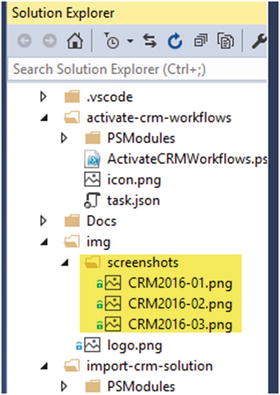
Figure 13-51. Screenshots for extension
This should be referred to in vss-extension.json as shown here:
"screenshots": [{"path": "img/screenshots/CRM2016-01.png"},{"path": "img/screenshots/CRM2016-02.png"},{"path": "img/screenshots/CRM2016-03.png"}],
Adding license text is required for a public extension. See Figure 13-52.
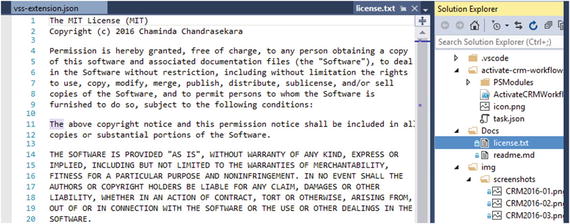
Figure 13-52. License for extension
The readme.md file can be added for documentation purposes. See Figure 13-53.
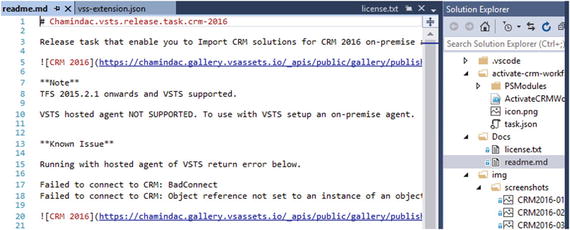
Figure 13-53. Readme file for the extension
Refer to these files in vss-extension.json as follows:
"content": {"details": {"path": "Docs/readme.md"},"license": {"path": "Docs/license.txt"}},
You can update the extension with screenshots once it is in Marketplace. You have to put screenshot URLs in the readme.md file, then package and update again. See Figure 13-54.

Figure 13-54. Using screenshots in documentation
To package an update to an extension , execute the package command with --rev-version. This will auto-increment the version of the generated .vsix by updating the vss-extension.json automatically. See Figure 13-55.

Figure 13-55. Packaging extension with version increment
To update an extension in Marketplace , click on the dropdown menu and select Update. Then, browse for the updated package and update it. See Figure 13-56.

Figure 13-56. Updating extension in Marketplace
You can add multiple build tasks in a single extension package. To do that, add separate task folders for each of the tasks. See Figure 13-57.
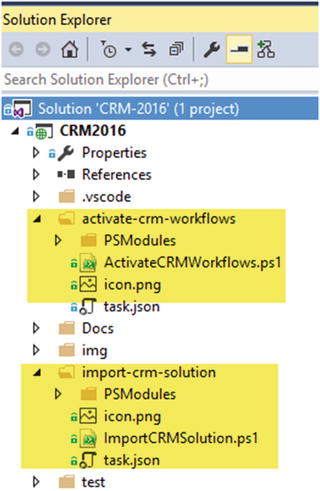
Figure 13-57. Multiple tasks in extension
In the vss-extension.json file, define contributions for each of the tasks in order to enable multiple tasks in a single extension package , as follows:
"contributions": [{"id": "activate-crm-workflows","type": "ms.vss-distributed-task.task","targets": ["ms.vss-distributed-task.tasks"],"properties": {"name": "activate-crm-workflows"}},{"id": "import-crm-solution","targets": ["ms.vss-distributed-task.tasks"],"type": "ms.vss-distributed-task.task","properties": {"name": "import-crm-solution"}}]
You can refer to the following extension code to learn how to set up documentation, icons, logos, and so forth for the extensions you are developing. These examples are done on the version 2.4 of the VSTS Extension Template ( https://marketplace.visualstudio.com/items?itemName=JoshGarverick.VSTSExtensionProjectTemplates ), but it mostly has a similar implementation to what we just worked with (version 3.0.2) except they do not use the VstsTaskSdk PowerShell module .
https://github.com/chamindac/vsts.release.task.crm-2016
https://github.com/chamindac/vsts.release.task.restart-win-service
https://github.com/chamindac/vsts.release.task.download-artifacts
The VSTS default tasks are available in GitHub at https://github.com/Microsoft/vsts-tasks . You can study them to learn more about developing extensions.
You should always try to handle individual requirements in builds/release steps with custom PowerShell scripts and so on by using default available tasks. But, if you have common functionality that is beneficial to many other projects in your organization, and to other organizations, you can use the extending capability of Team Services/TFS build/release tasks.
Summary
In this book, you have learned how Visual Studio Team Services/TFS Build & Release management can help you enable continuous delivery so that you can achieve DevOps. Many concepts are covered, and the role Team Foundation Services Build & Release can play is explained in the book. Concepts such as using agent pools and queues, the security aspect of them, and setting up prerequisites for builds and release are explained via walkthrough lessons that even cover setting up in the Linux platform and building .NET source code in external repositories such as GitHub.
Several lessons allowed you to explore the deployment capabilities of Team Foundation Build & Release to Microsoft cloud platform Azure. You have been given detailed practical guidance on automating deployments of websites in the Azure app service, doing database deployments to Azure platform, micro-services deployments in Azure Service Fabric, docker-enabled ASP.NET Core web app deployments, and more using Team Foundation build and release management.
Hands-on lessons gave you experience in automating the generation of effective release notes with each deployment in a given target environment (QA, UAT, Production, and so forth) to empower your teams to achieve DevOps by enabling the requirement to production delivery traceability. Walkthroughs for deploying to and using packages from Team Services package management feeds with build and release management have given all the required guidance to use Team Services Package Management for internal NuGet and npm package sharing.
Dynamics CRM Solution deployment lessons have given you hands-on experience automating deployments for CRM with Team Services/TFS. Walkthroughs for CRM deployments could be followed by anyone who has minimal knowledge of Microsoft Dynamics CRM.
Test automation lessons on how to integrate the automated tests into builds and deployments have covered all essentials required in order for you to gain practical knowledge of challenges in test automation and overcoming them. The hands-on lessons even include guidance on setting up an on-demand test farm using Azure virtual machines to effectively reduce implementation costs.
Several hands-on lessons in the book allowed you to understand how to optimize the build release management definitions by using capabilities such as task groups. Knowledge in diagnosing and fixing issues in automated builds and deployments has been given via practical walkthroughs. Information on enhancing the capability of TFS Build & Release Management by using Team Services/TFS Marketplace extensions and writing your own extensions for any missing functionality was provided with hands-on lessons.