
In this chapter, we'll start using the Google Web Toolkit (GWT). We'll show you what's in the package and what you need to know to start developing applications using GWT. We'll do this by showing you how to set up the development environment and start running the sample application that accompanies this book. In the remaining chapters, we'll use the sample application to illustrate different aspects of developing applications in GWT. Eventually, the sample application will become a full task-management application as described in Chapter 1.
In order to run the sample application, you need to install GWT on your developer machine. If you already have GWT installed, you can skip this section; just make sure that you have the correct version installed. This book is targeted at GWT version 1.5, so make sure you have at least this version. Furthermore, you'll need a Java SDK of at least version 1.5. You can download the Java SDK from http://java.sun.com.
The first thing you have to do is download the binary distribution from Google. Google has put the toolkit distribution on their developer community site at http://code.google.com. Google uses this site to host their APIs and libraries, but you can host your project there as well. The project site for the toolkit can be found at http://code.google.com/webtoolkit. Besides the distribution, you'll find the reference API, sample applications, blogs, articles, and a lot of third-party libraries that provide additional functionality for GWT. When you click the download link, the site suggests the latest GWT release for your operating system. Fortunately, there's little difference in developing GWT applications on the different platforms. We'll use the Windows platform as an example, as it's still the most commonly used platform. However, developing on other platforms should be quite similar.
It has proved necessary to maintain separate distribution kits for the three major platforms (Windows, Mac, and Linux), because the hosted mode environment uses a different browser depending on the platform to visualize the application. On the Windows platform, GWT uses Internet Explorer, whereas on Linux it comes with a packaged version of Mozilla Firefox. It's important to know that the compiled and deployable application, which consists of JavaScript and HTML, will work on all platforms and browsers. And more important, this is done without you having to worry about the differences during development.
After downloading the distribution pack, you should unpack the archive into a convenient place. For easy reference, you can add an environment variable (GWT_HOME) pointing to this place. Because GWT comes with a set of command-line scripts, we also advise you to add the installation directory to your PATH environment variable so the scripts can be called from any location without an explicit reference to the installation directory.
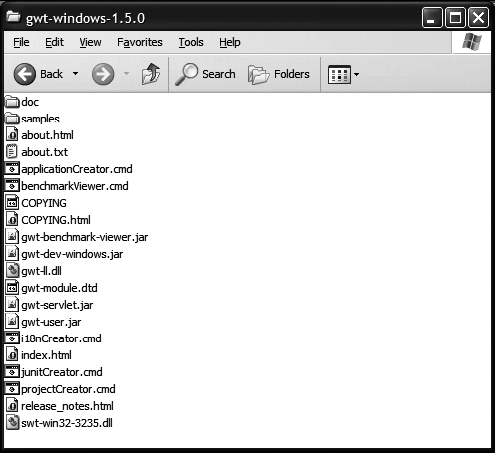
Figure 3-1 shows the content of the binary distribution for the Windows platform. The package consists of the following sets of files:
gwt-servlet.jar and gwt-user.jarare the libraries that contain the GWT API. These files are used during development, but are also required at runtime.gwt-dev-windows.jaris the platform-specific library. It contains the GWT compiler, and along with the DLL files is responsible for hosted-mode emulation. In the Linux and Mac distributions, this file is calledgwt-dev-linux.jarandgwt-dev-mac.jar, respectively.applicationCreator.cmd, benchmarkViewer.cmd, i18nCreator.cmd, junitCreator.cmd, and projectCreator.cmdare command-line scripts that facilitate the development of your GWT application. we'll discuss a couple of these scripts in this chapter. The more advanced scripts will be covered in their corresponding chapters.The
docandsamplesdirectories and the HTML and text files contain the Javadocs of the GWT libraries, as well as sample applications to show the usage of the most commonly used components.
Now that you have GWT installed on your system and have a basic understanding of what's inside, you're ready to start your first project. The guys at Google created a convention for the structure of GWT projects. It remains popular for authors of toolkits such as GWT to use the principle of convention over configuration, eliminating large and complex configuration files but without losing the flexibility to configure the toolkit any way you like. Before we tell you how to configure GWT to fit any structure, let's look at the structure Google proposes. We'll show what their convention looks like by creating the first part of our sample application.
You start with a directory for the project (gwtasks). Inside this directory, only one subdirectory is needed. That's where the sources are placed, so it should be no surprise that it's called src. Here you can create a package structure just as with any other Java application. Figure 3-2 shows the directory structure for your project. In the package structure, you can see three files with the same name, but different extensions. Each of these files is essential to GWT. Together they define the GWT module for the application.
As you can see, the Java file is placed inside a client folder. Every class in the client package will be compiled into JavaScript by the GWT compiler. The class inside GWTasks.java extends the GWT class EntryPoint and represents the start of our application. In this respect, it's just like the main method for a Java application.
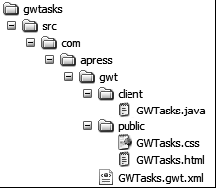
The HTML file is placed inside a folder called public. This is where all resources that should be made available to the client, such as images and style sheets, will go. The HTML file is our visual starting point. It contains a basic HTML structure in which we'll place our user interface and a JavaScript include tag pointing to our GWT module.
The third file contains the configuration of our GWT module. Here, we can enable and configure specific GWT features we want to use. For now, two things get configured here: we specify that we want the GWT user interface components and we specify which class will be our entry point.
Fortunately, we won't have to create this directory structure ourselves. GWT comes with a set of easy-to-use scripts. Two of these scripts are particularly convenient for starting a new GWT module.
The application creator script creates a project structure as described in the previous section. Calling it without any arguments will display the argument options. Note that because we added the GWT installation directory to our PATH environment variable, we don't have to refer to the installation directory. Instead, we can call the script directly.
>applicationCreator Missing required argument 'className' Google Web Toolkit 1.5.0 ApplicationCreator [-eclipse projectName] [-out dir] [-overwrite] [-ignore][-addToClassPath classPathEntry] [-addModule module] className where -eclipse Creates a debug launch config for the named eclipse project -out The directory to write output files into (defaults to current) -overwrite Overwrite any existing files -ignore Ignore any existing files; do not overwrite -addToClassPath Adds extra elements to the class path. -addModule Adds extra GWT modules to be inherited. and className The fully-qualified name of the application class to create
Only one argument is mandatory: the fully qualified class name of the GWT application. As we've seen in Figure 3-2 the package name of the class should end with client. This is part of the GWT convention, and is enforced by the applicationCreator script. The optional argument eclipse allows you to specify an Eclipse launcher configuration to start the application in hosted mode from within Eclipse. This is particularly useful when debugging the GWT module. With the optional out argument, you can specify the folder in which the application should be created. If this is omitted, the application gets created in the current folder. The options ignore and overwrite allow you to specify whether existing files can be overwritten or should be ignored—that is, not re-created. These options are used when you want to regenerate some of the files. For example, you would use the ignore option if you messed up the .gwt.xml file and want the original file back. Just delete the .gwt.xml file and call applicationCreator again. If you just want to start again, you can use the overwrite option. The files you've created will remain untouched, but the script will overwrite any of the files it generates. In particular, this means it will overwrite the .java, .gwt.xml, and .html files. Finally, the options addToClassPath and addModule enable you to configure your project environment. The first allows you to extend your classpath by passing an additional library. The latter is used to enable the use of other GWT modules. More on this feature can be found in Chapter 6.
Besides creating the project structure and the three basic GWT-files, the application creator script creates two convenient scripts in the root of the project: one to compile the project and another to run the project in hosted mode. Both scripts call a Java application with the required GWT libraries on the classpath.
Let's start creating the sample application by making a call to this script. We want it to create an Eclipse launcher called gwtasks and put everything in a folder with the same name. Our module name should be GWTasks, and it should be in package com.apress.gwt.client.
> applicationCreator -eclipse gwtasks -out gwtasks com.apress.gwt.client.GWTasks
Created directory gwtasks/src
Created directory gwtasks/src/com/apress/gwt
Created directory gwtasks/src/com/apress/gwt/client
Created directory gwtasks/src/com/apress/gwt/public
Created file gwtasks/src/com/apress/gwt/GWTasks.gwt.xml
Created file gwtasks/src/com/apress/gwt/public/GWTasks.html
Created file gwtasks/src/com/apress/gwt/public/GWTasks.css
Created file gwtasks/src/com/apress/gwt/client/GWTasks.java
Created file gwtasks/GWTasks.launch
Created file gwtasks/GWTasks-shell
Created file gwtasks/GWTasks-compile
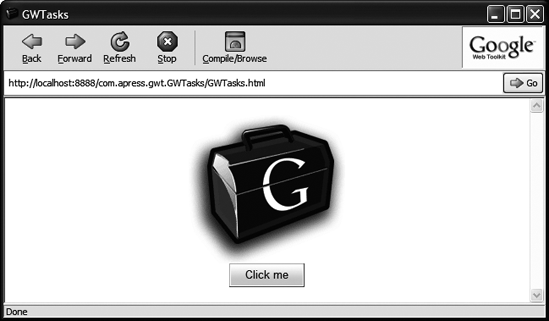
Now that we have our application, we can start it. Step inside the newly created project folder and make a call to the GWTasks-shell script. This will launch the hosted mode browser and point it at our freshly created application, which should look like Figure 3-3. Go ahead and have a look around the web site. As you can see, it already contains some sample functionality.
Now that we have a basic project structure, we want to start programming. Google has added a script to generate the Eclipse project files. Fortunately for IntelliJ Idea 7 users, these files can also be used to start your Idea project. The projectCreator script can also be used to generate an Ant script. However, this script is only useful if you want to package the GWT module in a Java archive to be used inside another project. To be able to use an archive, it must contain both the .class files and the .java files. The .class files are needed so the archive can be used just like any other archive. The .java files are needed so the GWT compiler can generate the JavaScript for the components.
>projectCreator Please specify either -ant or -eclipse. Google Web Toolkit 1.5.0 ProjectCreator [-ant projectName] [-eclipse projectName] [-out dir][-overwrite] [-ignore] [-addToClassPath classPathEntry] where -ant Generate an Ant buildfile to compile source (.ant.xml will beappended) -eclipse Generate an eclipse project -out The directory to write output files into (defaults to current) -overwrite Overwrite any existing files -ignore Ignore any existing files; do not overwrite -addToClassPath Adds extra elements to the class path.
Calling the script from our project folder, we only have to specify the argument for Ant and/or Eclipse, depending on the purpose of the project. We can specify gwtasks as a project name for both options.
gwtasks> projectCreator -ant gwtasks -eclipse gwtasks
Created directory test
Created file gwtasks.ant.xml
Created file .project
Created file .classpath
The Ant script contains four tasks. The default target compiles the sources into a bin folder using the Java compiler from your JDK. This implies that it doesn't generate any JavaScript. It's a normal Java compilation. Both target package and all will compile the code into class files and bundle the project into a Java archive (JAR) containing both the source and the binary files. Finally, the target clear will remove all compiled output from the project structure.
Now that we have our project set up, we can open it inside our IDE. In Appendix A, you can read more detailed information on how to use either Eclipse or IntelliJ Idea for GWT development. Let's start building our sample application with a simple component. You need a logon screen to register for the application. It will be quite simple, showing two input fields with a description and a button to perform the login action.
First we have to clean up the generated sample application. Open gwtasks.html from the public folder in your favorite editor. As you can see, the head element contains the title of the page, a section defining some styles for the page, and an important JavaScript include. This JavaScript include is the only thing linking the application to the HTML page. The file that gets included will be generated by the GWT compiler and contains the code to start the application.
The body section contains an iframe for history support. The iframe tag is a special HTML that allows you to include another document inside your HTML page. The iframe is needed to support the browser's Back and Forward buttons inside your dynamic RIA. To make the support fully functional, some code is needed in the application as well, to specify how the application should react to these buttons. This will be covered in more detail in a later chapter.
All we really need to get started with our sample application is a clean HTML page containing the JavaScript include and a point of reference where we can put our GWT components. Listing 3-1 shows the file after we're done cleaning it up; as you can see, it already contains some elements to conveniently put our component in the center of the screen.
Example 3-1. A Clean HTML File
<html>
    <head>
        <script language='javascript' src='com.apress.gwt.GWTasks.nocache.js'>
        </script>
    </head>
    <body>
        <table align=center>
            <tr>
                <td id="slot1"></td>
            </tr>
        </table>
    </body>
</html>
Now we can start coding some Java. After opening the file GWTask.java in your favorite editor, you can see that the class is inherited from the GWT class com.google.gwt.core.client.EntryPoint and implements only one method, onModuleLoad. This method is called as soon as the application is started, just like the main method in a Java application. From this point, we're going to build our application. You can clean up the existing code by removing all lines inside the onModuleLoad method.
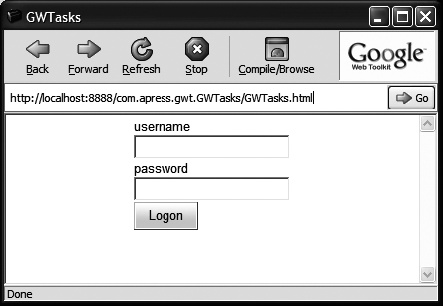
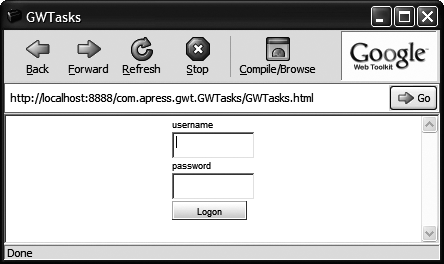
Now we can really start coding. If the logon page were created in HTML, it would contain two input tags: one of type text and one of type password. GWT provides two classes which do exactly that. Create a TextBox for the username, and a PasswordTextBox for the password. Furthermore, we need a button to submit the values of these text boxes to the server for authentication. Create a Button with value "Logon" for this purpose. Now that we have our basic components, we want to arrange them vertically and add labels for the two text boxes. We use a VerticalPanel and Labels to do that. Finally, we need to put the components into our HTML page. Inside the HTML page, we've defined a table cell with the ID slot1. Using the class RootPanel, we can retrieve a reference to that cell and add the panel to it. Listing 3-2 shows the resulting code.
Example 3-2. Creating a Logon Screen
public void onModuleLoad() {
    final TextBox username = new TextBox();
    final PasswordTextBox password = new PasswordTextBox();
    final Button button = new Button("Logon");
    final VerticalPanel panel = new VerticalPanel();
    panel.add(new Label("username"));
    panel.add(username);
    panel.add(new Label("password"));
    panel.add(password);
    panel.add(button);
    RootPanel.get("slot1").add(panel);
}
As you can see in this small piece of code, creating an HTML page is relatively easy and shows remarkable similarities to programming a Swing application. In principle, you only have to create the components you want to display and arrange them using the different panels GWT provides. More on GWT's different panels is covered in Chapter 4.
We have now written enough code to compile and run. Although it contains no functionality whatsoever, it does include some visual components. You can see the resulting output by starting the application in hosted mode, either by calling the GWTasks-hosted script in the root of our project or, if you're using Eclipse, by using the Eclipse launcher. The result should look something like Figure 3-4.
Another way to check the result is to compile the code into JavaScript by calling the GWTasks-compile script and open the result in your favorite web browser. The script creates a folder called www containing the web site. As the application doesn't contain any server-side code yet, the generated files can be hosted by any web server. It's completely platform-independent and contains only HTML and JavaScript.
Of course, there's no point in leaving the application like this. We want to introduce some functionality as well. Let's extend our panel by creating a welcome message when the user logs on with a known password. For this, we need to create an action that will be triggered when the button is clicked. We can add an EventListener to the Button and program the actions that need to be performed when the Button is clicked. Add the code from Listing 3-3 to the onModuleLoad method underneath the line that creates the Button. This code adds behavior to the click event. The onClick method is called whenever the Button gets clicked. We're using an anonymous inner class to define the logic that needs to be executed. Note that we can reference both the username and the password variable because we declared them as final in Listing 3-2.
Example 3-3. The Click Listener for the Submit Button
...
button.addClickListener(new ClickListener() {
public void onClick(Widget sender) {
if("secret".equals(password.getText())) {
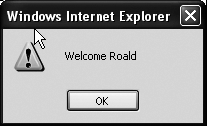
Window.alert("Welcome " + username.getText());
} else {
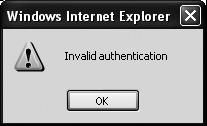
Window.alert("Invalid authentication");
}
}
});
...The call to the Window.alert method gets translated to the JavaScript alert method. It triggers a pop-up dialog box containing the text as a warning. You normally don't want to use this in your application except for debugging, but for the application in its current state, it will suffice.
If you still have the hosted mode running, all you need do to see and test the result is click the Refresh button in your browser window. This is one of the great advantages of GWT: it enables you to develop the front end without needing to recompile the entire application continuously. This results in a short development cycle. Depending on the input in the text boxes, the application now shows us either Figure 3-5 or Figure 3-6.
If you would style every element inside your HTML page separately, you would have a hard time achieving a consistent style throughout your application. Fortunately, you can define your styles in a central place and bind these styles to the HTML elements. Each style can be bound either by creating a style for a specific tag or by defining a style and binding it to tags using the class attribute. These style definitions can either be defined in the head section of your HTML page or be included from a Cascading Style Sheet (CSS) file.
Every GWT component has its own style classifications associated with it. That way you can easily create a stylesheet for your GWT application without needing to assign style names to every component you create. This helps to make sure that your code remains clean. Of course, you may add or replace the style names with names of your choice. The GWT Javadoc contains a section about the CSS style rules that apply to each component by default. The GWT Javadoc is included in the binary package and available online at http://google-web-toolkit-doc-1-5.googlecode.com/svn/javadoc/1.5/index.html. For example, the TextBox class by default has the style name .gwt-TextBox assigned to it. Furthermore, the style name .gwt-TextBox-readonly is defined to style the text box when the readonly flag is set.
Now that we know that every component already has a style name associated with it, we can start creating a stylesheet. There are two ways to link a stylesheet to the application. The most commonly known way is to link it inside the HTML file like this:
<html>
        <head>
                <link rel="stylesheet" href="gwtasks.css"/>
        </head>
        ...
Of course, there's also the option of specifying the styles inside the HTML directly, but best practice is to put the styles in a separate file.
GWT also provides a way to link the stylesheet more tightly to the Java code. Inside the module descriptor, you can specify stylesheets that are specific for your module by adding the following code somewhere inside GWTasks.gwt.xml:
<module>
       ...
        <stylesheet src="GWTasks.css"/>
        ...
</module>
The results are the same, as GWT dynamically writes every stylesheet in the descriptor into the resulting HTML page. The major benefit of this procedure arises when you're going to use the GWT module inside another application. In that case, you don't want to be forced to find out which stylesheets need to be included into your application just because you're using another module.
Now that we're referring to a stylesheet, we had better create one. The GWTasks.css file is created in the same directory as the .html file, so we need to open the stylesheet from the public folder. Inside the stylesheet, we can define formats for HTML elements and style classes. For now, we only want to style the GWT components we've used so far. By defining the following style, all the labels will have a font size of 9 pixels:
.gwt-Label {
        font-size: 9px;
}
Both text boxes and the button can be styled with the same style definition. Here we also want the font size to be 9, but we also want to define a fixed width and height for the objects:
.gwt-Button, .gwt-TextBox, .gwt-PasswordTextBox {
        font-size: 9px;
        height: 19px;
        width: 75px;
}
Hitting the Refresh button in the hosted-mode browser immediately shows the result of our new style. Figure 3-7 shows our final logon screen.
While we have a relatively simple application, the code is easy to understand. But as soon as we start extending the application to a reasonable size, we want to be able to debug it. Fortunately, every GWT application can be debugged with the standard Java debug tools, because in hosted mode, the Java code is interpreted inside a normal Java Virtual Machine (JVM) instead of being compiled to JavaScript. If you're developing inside an IDE, starting the hosted mode in debug mode and connecting your debugger to the process is as easy as clicking a button. In Eclipse, you can use the launcher that was created by the application creator script. If you start the hosted mode through the GWT scripts, you need to manually change the script and add two parameters to the Java call. To enable the debugger, you have to add -Xdebug. This option enables the debug mode inside the JVM. Furthermore, you have to specify how you're going to connect to the JVM. Therefore, you have to add the option -Xrunjdwp as well. This is used to specify a number of options, including the port number on which the debugger can connect to the JVM. The complete script should look like Listing 3-4.
Example 3-4. Script for Starting Your GWT Application in Hosted Mode with Debugging Enabled
java -Xdebug-Xrunjdwp:transport=dt_socket,address=127.0.0.1:52996,suspend=y,server=n-cp "$APPDIR/src:$APPDIR/bin:$GWT_HOME/gwt-user.jar:$GWT_HOME/gwt-dev-linux.jar"com.google.gwt.dev.GWTShell -out "$APPDIR/www" "$@"com.apress.gwt.GWTasks/GWTasks.html
After starting your application in hosted mode, the debugger can connect to the JVM on port 52996.
Now you've seen the fundamentals of GWT. We started this chapter by configuring our development environment. You've seen where to get the GWT distribution and should have an understanding of what it contains. Your development environment is set up and ready to start creating your GWT applications.
Using the command-line scripts from the distribution package, you can create a basic application, run it, and debug it. You've also seen how you can adjust the basic application and have begun creating the sample application. Using a limited set of GWT classes, you've created a basic logon screen and styled it using a stylesheet.
Chapter 4 will give a more thorough introduction on the widgets GWT provides. Using these widgets will enable you to build more enhanced and interactive interfaces.