
This chapter will cover the following subjects:
Installing RPG Maker MV (RMMV)
A short overview of story and game play in roleplaying games (RPGs)
Starting up RPG Maker and taking your first steps toward creating your very own game
Note
This book will exclusively cover RPG Maker MV. If you have an earlier version of the engine (such as XP, VX, or VX Ace), you will have to upgrade to MV to follow along.
Before you can use RMMV, you must have it installed. First, I’ll walk you through the process of getting and installing your own copy of RMMV.
Where Can I Get RMMV?
RMMV (and a slew of related products) can be purchased from the official site at www.rpgmakerweb.com . The exact link is http://www.rpgmakerweb.com/products/programs/rpg-maker-mv . Alternately, RMMV is also available from Steam.
Note
If you’re a Mac user, you’ll need to grab the Steam version, as the standalone installer is Windows-only.
When it’s not on sale, RMMV costs $79.99, but you can try it free for 20 days by grabbing the trial version if you’re a Windows user. Unfortunately, Mac users have no trial version at this time; a situation we can only hope changes eventually.
You will be asked for your name and e-mail address when you download the RMMV trial.
So, I Downloaded a Copy of RMMV. What Next?
If you have a standalone version of RMMV, what follows next is finding the downloaded archive and running the Setup.exe located within it. Afterward, installing it is as easy as following the steps in the installer.
Once the installation is complete, loading it up for the first time will bring up a screen such as illustrated in Figure 1-1.
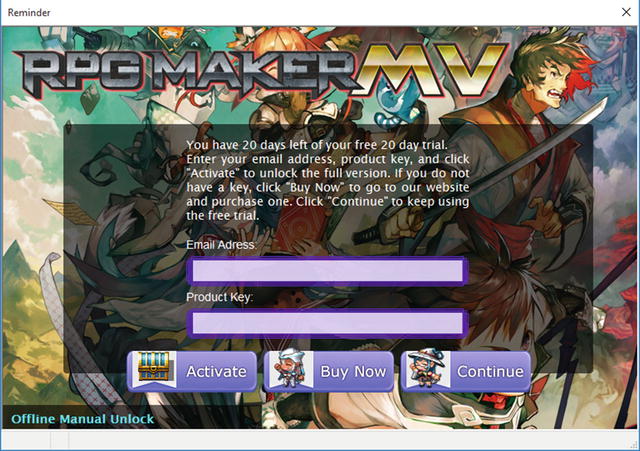
Figure 1-1. The starting screen for trial versions of RMMV
The screenshot is pretty self-explanatory. If you have purchased RMMV, you need only type in your product key as well as the email you provided at that time to activate the software by clicking on the Activate button. Otherwise, you can click on Buy Now to buy a copy of RMMV. If you would rather keep using the trial, you can just click Continue.
Note
If you’re using the Steam version, that platform will automatically install RMMV for you once you purchase it and choose to download it. As it is a full version by default, you shouldn’t have to worry about the activation screen just described.
So, I’m Done
Welcome to the world of video game development! I hope you enjoy your stay! Now that you have a functioning copy of RMMV, we can continue. Before we start using the application, it would be good to talk about RPG design in general. Let us begin with the most important aspect, the story.
Note
The current version of RPG Maker MV at the time of this writing is version 1.1. If you have a newer version of the software, it may include extra features not discussed here.
Story
Perhaps the most important thing about an RPG is its story. Even in the days of old, when the first Dragon Quest (known as Dragon Warrior in the United States until the eighth entry in the series was released) and Final Fantasy games were in their prime and storage was an issue with the earliest consoles, RPG developers sought to invest their players into the simple plot that they managed to fit within the cartridge. Perhaps the most important thing I can point out is that not every story needs to be complex. Complexity helps, sure, if you can make it work. Sometimes, it’s the little things that have the greatest impact. The basic facets of any basic RPG story are virtually identical to those used in your standard fantasy or sci-fi book with a heroic protagonist:
You have a protagonist: In an RPG, this is the main character controlled by the player. The protagonist is a distinct entity, with goals, dreams, and desires.
You have a conflict: The most typical fantasy conflict for both books and video games is a great evil that rises, and only the hero/chosen one/protagonist (whether alone or with help) can defeat them. With that said, don’t limit yourself. If you come up with a great plot that involves a conflict between the protagonist and himself, for example, feel free to take that ball and run with it.
You have obstacles: Think back to the last RPG you played or fantasy book you read. The protagonist did not start the adventure and defeat the main villain within ten minutes/pages (if they did, it was probably a fake-out and not an actual victory). The protagonist probably started from a position of relative weakness and set out into the world to defeat the antagonist, being deterred every so often by hostile forces (some aligned with evil, and some not) and hindrances such as a broken bridge or a collapsed mine shaft.
You have a climax and a resolution: The protagonist, after countless tribulations, finally reaches the castle of the “Dark Lord.” With a carefully calculated strike of his weapon of choice, he defeats his timeless foe. Or does he? Depending on the type of story you want to tell, perhaps your antagonist escapes to live another day. Perhaps he was merely subordinate to an even greater evil.
A great story can save an otherwise mediocre RPG, but a mediocre story can ruin even great RPGs. You must define what type of story your RPG will have. Following are some questions that should get you thinking along the right track:
Will it be a fantasy RPG? If so, will magic be prominent? Will alternate forms of abilities, such as technology or something else altogether, take center stage?
Or will you have a sci-fi RPG? That’s neat, too. Will technology be prominent, or will the setting be a devastated future where everyone is basically surviving with sticks and stones?
When will the story take place? You can have a modern-day story set in a high school, for example, or a historical spy thriller set during the cold war. Maybe you want your story to take place in prehistory!
Who is your protagonist? Is he young? Old? Is your protagonist female? Define why your protagonist is doing what he/she is doing. A good backstory can set the stage for greater things during the actual story.
Who are your protagonist’s allies? Do they know each other at the time of the game’s events, or will they meet one during the game? Define their backstories. Or perhaps you want a mysterious type in your party? Those are cool too, if you know how to create them.
What is your protagonist’s quest? Is he/she seeking an artifact to save the world? Or perhaps the end of the world will be brought about by a heinous villain. Of course, you could just do something else entirely and have your party go on a journey of self-discovery.
Who are some important nonplayer characters in the story? Will they aid or hinder the party? Are any of them related to any of your party members?
All of those questions are good to consider for getting the ball rolling on a great story. It’s important to take some time to think about the story you want for your game before you get too invested in trying to actually create it. Or maybe you don’t want to make an RPG at all. Although this book is meant to teach you about the intricacies of RMMV via the creation of an RPG, there’s nothing to prevent you from applying the knowledge you will gain from this book to create something completely different. You could use RMMV’s framework to create a game that eschews battles and magic systems altogether! In fact, there have been many games created with earlier versions of RPG Maker that are not RPGs . Off the top of my head, I can offer You Are Not the Hero (YANTH, for short) for RPG Maker VX Ace, which is a quirky action-platformer with many minigames and a self-aware sense of humor. You could take it even further by creating, with the engine, an interactive novel in the same vein as To the Moon (created using RPG Maker XP). At the end of the day, the only limits to your story are those you place on yourself.
Game Play
Of course, while the story of an RPG is important, you want your game play to be a bit more enticing than just going into a single 30-floor dungeon and killing things (although that has worked on more than one occasion as well, especially for action RPGs). Basically, ask yourself this question: Would I play this game from start to finish? If you can’t answer yes to that question with a straight face, you have to re-evaluate your game, or have friends do it for you. A tried-and-true template for an RPG’s game flow is the following:
A town gives the player quests with objectives located at a nearby dungeon.
The dungeon is filled with those objectives and a boss.
After defeating the boss, the player unlocks the next area.
This is a new town and a new dungeon.
Repeat until the final dungeon with the final boss.
It may seem ridiculously simple and boring, but several famous RPG franchises (Dragon Quest and Final Fantasy come to mind) had plots for most of their earlier iterations that followed that general sequence. Of course, there’s no problem with making the game a bit more nonlinear and allowing your players to branch off into areas they perhaps shouldn’t be in yet (as long as there is an appropriate risk-to-reward ratio). Also evaluate whether you want to add vehicles to your game, such as airships, submarines, or horses. You might even make certain vehicles available only after lengthy side quests but reward the player for doing those quests by allowing the special vehicle to access otherwise inaccessible areas. Here are some other things to consider concerning your game’s play:
What type of progression will you be using? Will you have the conventional system of gaining experience via combat/quest completion and then grant skills/spells/abilities as your characters level up? Or maybe you will go for something a little less conventional, perhaps a system similar to Final Fantasy 2 (the real FF2, not the one released in the West that is technically Final Fantasy 4), in which you get stats by doing, so that if you take hits, you gain health. If you cast a spell, you gain magic points, and so forth.
How difficult do you want the game to be? Easier isn’t always equal to boring, mind you. Chrono Trigger is one of the most renowned Japanese RPGs of all time, and I’ve always felt that the battle system and encounters were on the easier side for such a game. Shin Megami Tensei, on the other hand, is rather fair, if extremely challenging, for newer players. Fairness is ultimately more important than difficulty when it comes to RPG game play.
How many characters will the player’s party have? Is the protagonist an army of one, or does he/she have allies? I’ll elaborate on the importance of this in the following paragraphs.
Balance is an important consideration when you are designing your game. A preceding bullet point asks about party size. There is a concept in video game theory, especially related to turn-based games, called action economy . Generally, each character gets only a certain number of actions in the period of time defined as a turn. The more characters you have, the more actions your party receives in total. For example, the original Dragon Quest had the player control a single hero. That meant effects that caused the player character to miss a turn (such as sleep) were particularly dangerous. It also created a trade-off whereby if you were close to defeating an enemy but your hero was near death, you had to decide whether to heal yourself or attack again. If you were making an RPG with a single playable character, you would have to keep such facts in mind.
On the flip side, if you have a party of three or four characters, you must design some of the party’s potential enemies around that. Maybe the party will face off against venomous plants that can spew poison at the entire group. When you have multiple characters, you can be a little more liberal with effects that cause turn-skipping, as the player would still have other characters to defeat those effects or otherwise continue fighting. A game’s balance is one of the hardest things to perfect but is, thankfully, something you can work toward with the feedback you receive from your game’s players and your own play-testing.
Entire works have been written about video game design, and it is beyond the scope of this book to discuss the topic further at this time. Even so, I will touch upon a few other facets of RPG game design specifically in later chapters, as the need arises. Let us move on to a basic overview of RMMV itself. So, you’ve probably already started up RMMV and have taken a cursory look around. If you have just recently installed the software (and gotten past the Product Activation screen if you’re using the standalone version of RMMV), you’ll notice that you’re dumped into a lifeless screen, like the one in Figure 1-2.
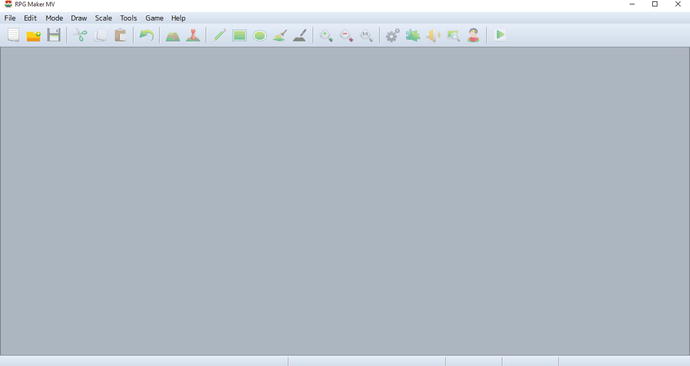
Figure 1-2. The opening screen of RPG Maker MV
The first thing you’ll want to do is go to the File menu at the top-left of the interface and select New Project. That will bring up a prompt asking for three things.
Name: Whatever name you put in this field will also populate the Game Title field. As the field suggests, it is the name of the folder that will be created to store your RMMV data.
Game Title: Self-explanatory. This gets auto-populated with whatever you write in the Folder Name, but you can change the contents of this field manually just by overwriting the text.
Location: Where the RMMV Project folder will be saved. You can click the small button to the right labeled “Choose…” to change the destination.
Once you have worked out what you want your project to be called, click OK. I called mine “BRMMV” and saved it in the default location. The program will take some time to add the relevant default assets to your new project and will then dump you on a barebones map such as the one in Figure 1-3.
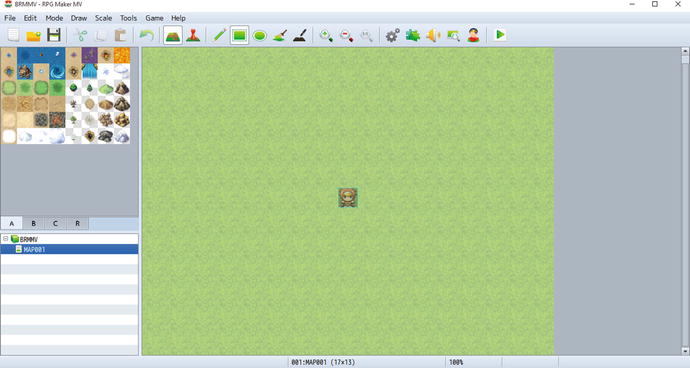
Figure 1-3. Your first world
Looks much better now, doesn’t it? You should now be seeing a character with reddish-brown hair in the middle of an empty grassland. In the top-left part of the screen, you can see various graphics, each of a specific pixel size. Those graphics are called tiles and make up the pieces that you can use to create your own RPG locations. RMMV comes with a fairly robust Run-Time Package (RTP ) that includes all sorts of things you will need for making your very own game. It will serve you well up to the moment you decide to use completely custom assets for your game development.
For now, let us mess around a bit. At the top of the screen, find the menu option named Game and click it. Then click Playtest . You will get a title screen with a nice song and the following options:
New Game
Continue: This should be grayed out, as there are no saved games to continue from.
Options: Brings up a window with six gameplay-related options:
Always Dash: By default, the player character can dash at double speed during the game by holding the Shift key. With this option set to on, holding the key is not necessary.
Command Remember: This instructs the game to remember the last option selected in various game menus (such as the battle menu and the character status menu). It defaults to off, and turning it on is a matter of taste.
BGM Volume: Allows you to raise and lower the game’s Background Music volume. Defaults to 100%.
BGS Volume: Allows you to control the game’s Background Sound volume. Defaults to 100%.
ME Volume: Like the previous two options, but for Music Effects instead.
SE Volume: You get the idea, but this one is for Sound Effects.
Use your keyboard’s arrow keys or your mouse (hooray for newly added mouse support in MV) to select New Game and then press Enter (or left-click if you’re using the mouse). Now you should be able to control the character with your arrow keys or with mouse clicks. You’ll quickly find that there’s a whole lot of nothing to do in this barren grassland (you should also see that your main character has three other companions as well). Press X or Esc, or right-click with the mouse, to access the Character menu. You will see several options, including Save (which allows you to record your progress; RMMV defaults to Save Anywhere, but you can use simple eventing in combination with defined save points to have a save system similar to many of the Final Fantasy games, for example). Feel free to poke around in the various menus. (You can use the spacebar, Enter key, or left-click to select and X, Esc, or right-click to cancel/deselect.) Once you’re done, hit Game End (which should probably be called End Game or Quit).
Now that we’re back where we started, let’s integrate everything I’ve talked about. First, let’s change the name of Game End. If you click on the Tools item in the menu toolbar for RMMV, you will see several options
Database (Hotkey F9): The Database is the meat and bones of RMMV in its stock form (and even if you make ample use of scripting). It contains a whopping 15 tabs that contain very nearly everything you could ever think of needing for an RPG.
Plugin Manager (Hotkey F10): The Plugin Manager allows you to enable and disable plugins, which are essentially sequences of code created using JavaScript that can add functionality to your game. If you want to add new features to your game that are otherwise unavailable in RMMV’s robust chassis, then you’ll need to use plugins. I’ll cover the use of this manager near the end of the book, when I cover basic scripting.
Sound Test (Hotkey N/A): As the name suggests, you can listen to sounds contained within your project. The four different types of sounds are the following:
BGM—Background Music: Such things as the default title screen song are considered BGM.
BGS—Background Sounds: If you can hear something constant in an area, but it is not music, it is probably a BGS. Quake and Wind are two of the stock examples present within RMMV.
ME—Music Effects: Mini-songs, if you will, such as the tune played when you rest at an inn.
SE—Sound Effects: The simplest of sounds, yet so important as well. A slew of things are SE. The sounds of fire spells and sword attacks are but two of the types of SE present within RMMV’s stock content.
Event Searcher(Hotkey N/A): A completely new menu option for this newest version of RPG Maker. I will cover it in greater detail in the next chapter once we start working on things that are relevant to the Event Searcher. Suffice to say that it can be really helpful when your game project gets bigger.
Character Generator(Hotkey N/A): Allows you to create new character (human-based) models by mixing and matching hair, eye, and skin color with many other customization options. If you’d rather, you can always click Randomize and see what pops up. New to MV is the ability to generate character models for side-view battles as well.
Resource Manager(Hotkey N/A): Added back into MV for version 1.1, after an odd absence from MV 1.0. The Resource Manager allows you to preview, import, export, and delete assets from your RMMV project.
For this task, like most other things we’ll do during the course of this book, we will want to go to the Database. Once there, you will see the 15 tabs I mentioned previously. To change the menu options, we click the Terms tab (which happens to be the last one). You’ll see four major categories:
Basic Statuses: A block containing full names and abbreviations for Level, HP, MP, TP, and EXP.
Parameters: Contains the terms for what are also called stats (short for statistics) in RPGs. Examples include Defense and Luck.
Commands: This section of the Terms tab contains names for menu options and item type names, among others.
Messages: New to RPG Maker MV is the ability to change the contents of many messages that are displayed in gameplay.
The Commands section of the Terms tab is what we’re looking for, as displayed in Figure 1-4.
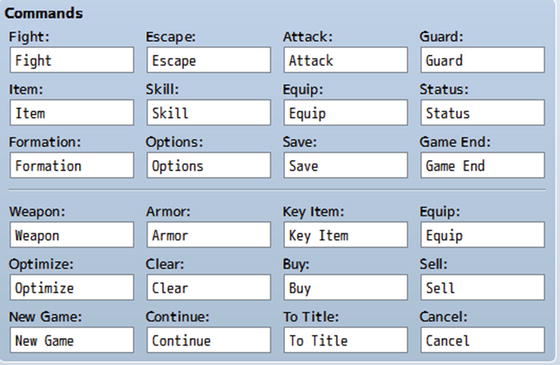
Figure 1-4. The Commands section of the Terms tab
As you can see, from here we can change the name of any of those listed terms. So let’s change “Game End” to “End Game.” Click Apply to save the change and then OK to close the Database menu. Now, let’s see if we can add some diversity to our player character’s surroundings. Figure 1-5 shows my own efforts. Use the provided tiles to replicate it as best you can.
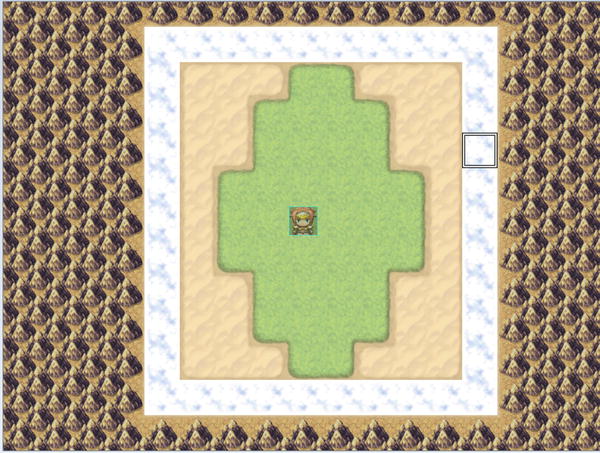
Figure 1-5. A simple map
From inner to outer layer, the tiles are
Grass
Desert
Clouds
Mountain (Dirt) on top of Wasteland
There are a few drawing tools that you can use (RMMV defaults to the pencil, which draws in tiles as you click/drag your mouse). They are located almost directly below the Help item of the menu toolbar. You can choose to draw rectangles or ellipses, or fill a large area with the same tile. I used the Fill tool to add the Wasteland tile and then the Mountain on top of the Wasteland.
Tip
You can find the name of a tile by mousing over it. The tile name will be displayed in the lower-left corner of the application.
Once you have added the terrain to your map, load up the game again, and you should be able to move all the way to the clouds. The mountains will stop you from moving any further. Simple, isn’t it?
Summary
This chapter has covered the installation and initialization of RPG Maker MV, as well as providing a short overview of game play and story design considerations and a first look at the game-development engine. However, there’s not much of a game here yet. Let’s move on to a topic that is important for creating video games of all genres, RPGs included—command variables and switches.