The best way to learn a programming language or a web framework is to dig in and write some code. After reading the first two chapters, you should have a good understanding of the Rails landscape. Chapter 4 will lead you through the Ruby language, but first let’s write a little code to whet your appetite. This chapter builds a foundation and will get you excited by walking you through the construction of a basic application. You will learn how to create a database and how to connect it to Rails, as well as how to use a web interface to get data in and out of the application.
You will receive a lot of information in this chapter, but it shouldn’t be more than you can absorb. The goal is to demonstrate, not to overwhelm. Rails makes it incredibly easy to get started, and that’s a feature this chapter highlights. There are a few places where Rails really shines, and getting something running is one of them. By the end of this chapter, you’ll have a working web application to play with, explore, and learn from. You’ll build on this application throughout the rest of the book, adding features and refining functionality.
An Overview of the Project
This chapter will walk you through building a simple blog application that lets you create and publish articles, like WordPress or Blogger. The first iteration focuses on the basics: creating and editing articles.
Before you start coding, let’s sketch a brief summary of the goals and flow of the application at a very high level. The idea isn’t to focus on the nitty-gritty, but instead to concentrate on the general case.
Your application will have two kinds of users: those who post and publish articles and those who wish to comment on existing articles. In some cases, people will play both roles. Not all users will need to create an account by registering on the site. It will also be nice if people can notify their friends about interesting articles using a feature that sends a friendly email notification to interested parties.
You will add some of these features in later chapters. Other application requirements will likely come up as you continue, but these are enough to get started. In the real world, specifications evolve as we learn how real users interact with our web applications. Don’t let this frustrate you or surprise you—that’s what the Agile methodology of software development recognizes and celebrates. Rails doesn’t penalize you for making changes to an application that’s under construction, so you can engage in an iterative style of development, adding and incrementing functionality as you go.
You start with what matters most: articles. You may wonder why you don’t begin with users. After all, without users, who will post the articles? If you think about it, without articles, what could users do? Articles are the epicenter of the application, so it makes the most sense to start there and work out the details as you go. Ready? Let’s get started!
Creating the Blog Application
As you saw in Chapter 2, the first step is to create a new Rails application. You could come up with a fancy name, but let’s keep it simple and call the application blog. It’s not going to win any awards for creativity, but it works.
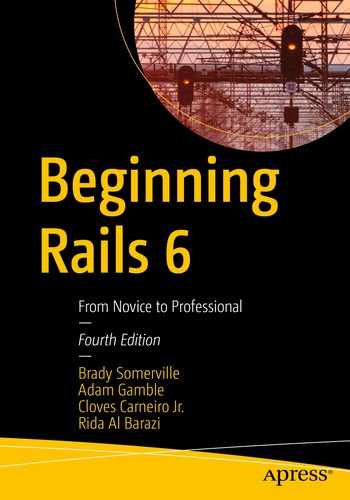
The Rails directory structure
Rails Directory Structure
Folder/File | Description |
|---|---|
app | All the components of your application. |
bin | Executables to support Rails. |
config | Configuration files for all of the components of your application. |
db | Files related to the database you’re using and a folder for migrations. |
lib | Libraries that may be used in your application. |
log | Log files that your application may require. |
node_modules | External javascript dependencies. |
public | Static assets served by your application, such as images, JavaScript, and CSS files. |
storage | Contains uploaded files when using Active Storage’s disk service. |
test | Directory containing unit tests for your application. |
tmp | Contains temporary files supporting your application. |
vendor | External libraries, such as gems and plug-ins, that your application bundles. |
.browserslistrc | Configuration file which declares what types of browsers your frontend (JS/CSS) tools should try to support. |
.gitignore | Contains patterns of files/directories to ignore when saving changes to version control. |
.ruby-version | Declares which version of Ruby to use with this Rails project. |
babel.config.js | Configures babel so you can write javascript code with new features and syntax that can still work on older browsers. |
config.ru | A file used by rack servers to start the application. |
Gemfile | Used by the bundler gem to keep a list of gems used in your application. |
Gemfile.lock | Canonical resource of what gems should be installed. |
package.json | Declares javascript dependencies and configuration. |
postcss.config.js | Config for PostCSS (a tool that lets you process CSS with javascript). |
Rakefile | Lists available for tasks used by Rake. |
README.md | Human-readable file generated to describe an application. |
yarn.lock | Canonical resource of which javascript dependencies should be installed (like Gemfile.lock, but for javascript!). |
The config/database.yml File
The first thing you should notice is the different sections: development, test, and production. Rails understands the concept of environments and assumes you’re using a different database for each environment. Therefore, each has its own database connection settings, and different connection parameters are used automatically. Rails applications run in development mode by default, so you really only need to worry about the development section at this point. Still, other than the database names (db/*.sqlite3), there should be little difference between the connection parameters for each environment.
This example uses the default SQLite database because it’s easy to use and set up. However, you can use the database management system of your choice by passing the –d or --database= option to the “rails new” command with one of the following options as per your preference: mysql, oracle, postgresql, sqlite3, sqlserver, or other supported database servers. (See “rails new --help” for a complete list.)
If you select a database other than SQLite, the rails command may prefill the database parameter based on the database server and project name: blog in this case. If you give your application a different name (say, a snazzy Web 2.0 name like blog.ilicio.us *beta) with a database server such as MySQL, you’ll see something different here. It doesn’t matter what you name your databases, as long as database.yml references the correct one for each environment. Let’s stick with the convention and create the databases using the default names.
The .yml extension refers to a YAML file. YAML (a recursive acronym that stands for “YAML Ain’t Markup Language”) is a special language for expressing objects in plain text. Rails can work with YAML natively and can turn what looks like plain text into Ruby objects that it can understand.
YAML is whitespace sensitive: it uses spaces (not tabs) to convey structure and meaning. Make sure your editor knows the difference between tabs and spaces, and be sure that when you’re editing YAML files, you use only spaces.
Creating the Project Databases
When using SQLite, you aren’t forced to create the database, because a new database file is automatically created if one doesn’t exist; but it will come in handy when you try a different database engine. You also may see some messages like db/development.sqlite3 already exists. Don’t be afraid—this is an indication that an SQLite file was found. If you see that message, rest assured that your existing database was left untouched and no database file has been harmed.
Regardless of the database management system you select, you should notice that the databases you want to use are created. This is another case in which Rails removes some complexity from your mind and helps you focus on your application.
Depending on how your environment is set up, you may not need to specify the username, password, and other options in your config/databases.yml file to create the database.
then you need to adjust your connection settings. If you’re having problems, make sure the database exists and that you’ve entered the correct username and password in the config/database.yml configuration file.
Creating the Article Model
Now that you can connect to the database, this section will explain how you create a model. Remember that models in Rails usually correspond to database table names. Because you want to model articles, let’s create a model named Article. By convention, model names are camel-cased singular and correspond to lowercased plural table names. So an Article model expects a table named articles; a Person model expects a table named people.
Camel case means that each word begins with a capital letter and is written without spaces. For instance, a class that described blog images would be written as BlogImage. Refer to http://en.wikipedia.org/wiki/CamelCase for more information.
Rails is smart enough to use the correct plural name for most common words; it doesn’t try to create a persons table.
Like most things in Rails, models have their own generator script that makes it easier to get started. The generator automatically creates a new model file in the app/models directory and also creates a bunch of other files. Among these are a unit test (for testing your model’s functionality, as discussed in Chapter 16) and a database migration. A database migration contains instructions for modifying the database table and columns. Whenever you generate a new model, a migration is created along with it.
If you want to skip generation of the migration when generating a new model, you can pass the --no-migration argument to the generator. This may be useful if you’re creating a model for an existing database or table.
As you can see from the usage banner, the generator takes a model name as its argument and an optional list of fields. The model name may be given in camel-cased or snake-cased format, and options can be provided if you want to automatically populate the resulting migration with column information.
Snake-cased words are written in all lowercase with underscores replacing spaces, for instance, blog_image. For more information, visit http://en.wikipedia.org/wiki/Snake_case.
If you look at the lines that start with create, you see that the generator has created an Article model, an Article test, an articles fixture (which is a textual representation of table data you can use for testing), and a migration named 20191219235126_create_articles.rb. From that, your model is generated.
The first part of the migration file name is the timestamp when the file was generated. So the file on your computer will have a slightly different name.
Creating a Database Table
You need to create a table in the database. You could do this with a database administration tool or even manually using SQL, but Rails provides a much more efficient facility for table creation and maintenance called a migration. It’s called a migration because it allows you to evolve, or migrate, your schema over time. (If you’re not familiar with databases, tables, and SQL, consult Appendix B for the basics.)
Schema is the term given to the properties that make up a table: the table’s name, its columns, and its column types, as well as any default values a column will have.
What’s the best part about migrations? You get to define your schema in pure Ruby. This is all part of the Rails philosophy that you should stick to one language when developing. It helps eliminate context switching and results in higher productivity.
As you can see from the output of the model generator, it created a new file in db/migrate called 20191219235126_create_articles.rb. As mentioned before, migrations are named with a numeric prefix, which is a number that represents the exact moment when the migration file was created. Because multiple developers can create migrations in a development team, this number helps uniquely identify this specific migration in a project.
The db/migrate/20191219235126_create_articles.rb File
In its initially generated form, the migration is a blank canvas. But before you go any further, let’s note a few important items. First, notice the instance method: change. In previous versions of Rails, there would be an up and down class method, but now Rails is smart enough to figure it out based on the modifications you make in this method. You can roll back without ever writing a method that explicitly drops the table. Pretty slick, isn’t it?
Completed db/migrate/20191219235126_create_articles.rb File
Let’s step through the code. First, you use the create_table method, giving it the name of the table you want to create. Inside the code block, the string, text, and datetime methods each create a column of the said type named after the parameter; for example, t.string :title creates a field named title with the type string. The timestamps method, in the t.timestamps call, is used to create a couple of fields called created_at and updated_at, which Rails sets to the date when the record is created and updated, respectively. (For a full description of the available method types you can create in your migrations, see https://api.rubyonrails.org/classes/ActiveRecord/Migration.html.)
On its own, this migration does nothing. Really, it’s just a plain old Ruby class. If you want it to do some work and create a table in the database for you, you need to run it. To run a migration, you use the built-in db:migrate Rails command that Rails provides.
Just as the output says, the migration created the articles table. If you try to run the migration again (go ahead, try it), nothing happens. That’s because Rails keeps track of all the migrations it runs in a database table, and in this case there’s nothing left to do. If for some reason you decide you need to roll back the migration, you can use the db:rollback task to roll back. Try it and you will notice that it dropped the articles table. Remember that we never wrote any code to drop the table, Rails just handled it for us. Imagine if you would have edited the database schema directly with a database management tool; if you wanted to roll back, you’d have to remember what it looked like before and exactly what you changed. This makes your life much easier. Okay, before we move on, don’t forget to run migrations again since we rolled back.
Generating a Controller
app/controllers/articles_controller.rb: The controller that is responsible for handling requests and responses for anything to do with articles.
test/controllers/articles_controller_test.rb: The class that contains all functional tests for the articles controller (Chapter 16 covers testing applications).
app/helpers/articles_helper.rb: The helper class in which you can add utility methods that can be used in your views (Chapters 7 and 8 cover helpers).
app/assets/stylesheets/articles.scss: This is a SASS (Syntactically Awesome Style Sheets) file where you can put style sheets for the associated views.
SASS is a language that compiles into CSS. SASS extends CSS with enhanced syntax that helps developers organize their CSS and simplify their code. (See https://sass-lang.com/ for more info.) Rails supports SASS out of the box by precompiling it into CSS automatically via the Asset Pipeline.
The controller generator also creates an empty directory in app/views called articles. This is where you place the templates for the articles controller.
Up and Running with Scaffolding
One of the most talked-about features that has given a lot of exposure to Rails is its scaffolding capabilities. Scaffolding allows you to create a boilerplate-style set of actions and templates that makes it easy to manipulate data for a specific model. You generate scaffolding using the scaffold generator. You’re probably getting used to generators by now. Rails makes heavy use of them because they help automate repetitive tasks and generally remove the chances for errors when creating new files. Unlike you probably would, the generator won’t ever forget how to name a file; nor will it make a typo when creating a class. Let’s use the scaffold generator now and solve the mystery of how this works.
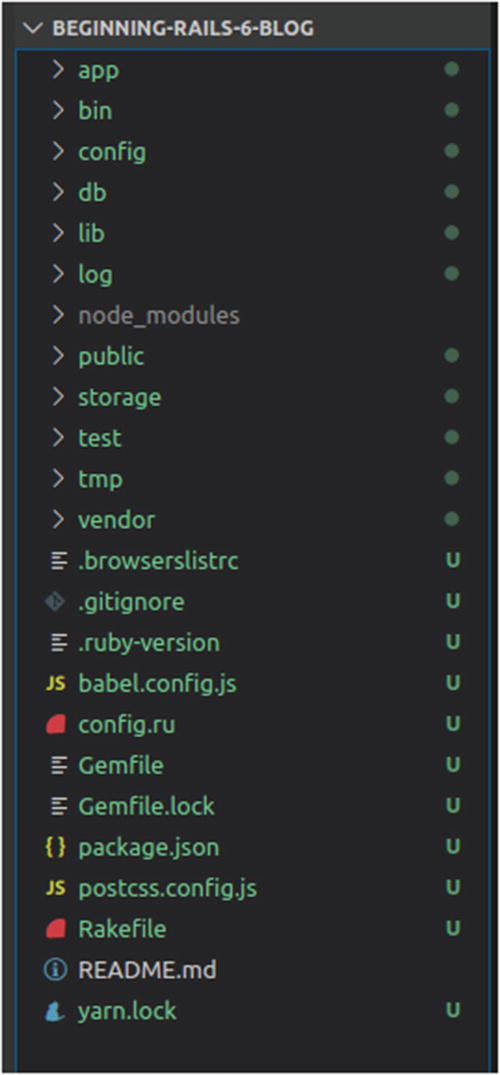
Articles scaffolding

Adding an article
Notice that every time you add an article, you’re redirected back to the show action, where you see the details of the article you just created. You can click “Back” to go the index action, where you see all of your articles listed. You can edit them, delete them, or create new ones. You’ve got to admit, Rails gives you a lot of functionality for free.
Speed is the key benefit here. The scaffold generator allows you to quickly get something running, which is a great way to test your assumptions.
Scaffolding comes with an important disclaimer. You shouldn’t use it in production. It exists to help you do exactly what you just did: get something running. By its definition, it’s a temporary or unfinished product.
Adding More Fields
Now that you can see the model represented in the browser, let’s add some more fields to make it a little more interesting. Whenever you need to add or modify database fields, you should do so using a migration. In this case, let’s add the excerpt and location fields to the articles table.
The db/migrate/20191220013103_add_excerpt_and_location_to_articles.rb File
Looking at the add_column method, the first argument is the table name (articles), the second is the field name, and the third is the field type. Remember that the change method knows how to migrate up or down, so if in the unlikely event you want to remove these columns, Rails will know how.
If all goes according to plan, the articles table now has two new fields. You could edit the view templates in the app/views/articles folder to add form elements for the new fields, but instead let’s call the generator again (you’ll learn about views in Chapter 7):
app/models/article.rb
app/controllers/articles_controller.rb
app/helpers/articles_helper.rb

Additional fields added to the new article form
This exposes one of the issues of this type of scaffolding: when you generate new versions of the scaffold files, you run the risk of overwriting custom changes you may have made. We’re doing it this way as an illustration, but you wouldn’t normally do this.
Adding Validations
You may wonder what happens if you try to save a new article without giving it any information. Try doing that: Rails doesn’t care. Actually, it’s the Article model that doesn’t care. This is because in Rails, the rules for data integrity (such as required fields) are the responsibility of the model.
Validation Added to the app/models/article.rb File

Error messages for an article
If you’ve done any web development before, you know that validating fields is a major nuisance. Thankfully, Rails makes it easy.
Notice that you don’t need to restart the web server when you make changes to your project files in the app/ directory. This is a convenience provided by Rails when running in development mode.
Chapter 6 goes through all the specifics of model validations. For now, you’re using only the most primitive methods of protecting your data. It shouldn’t surprise you that Active Record is capable of much more involved validations, such as making sure a numeric value is entered, validating that data are in the correct format using regular expressions, and ensuring unique values, among other checks.
Regular expressions (regex for short) are expressions that describe patterns in strings. Like most programming languages, Ruby has built-in support for regular expressions.
Generated Files
The app/controllers/articles_controller.rb
As you did in this chapter, after you’ve generated scaffolding, if you change your model, you have to regenerate it if you want your application to follow suit. Most of the time, however, you make the changes by hand and have a variation of the default scaffold.
It’s important to realize why scaffolding exists and to be aware of its limitations. As you’ve just seen, scaffolding helps when you need to get something running quickly to test your assumptions. It doesn’t take you very far in the real world, and eventually you end up replacing most (if not all) of it.
Explore the generated code and see if you can figure out how it hangs together. Don’t worry if you can’t understand all of it—the chapters that follow will discuss it in depth. With everything you know about Rails already, you should be able to piece together most of it.
Try changing a few things to see what happens. If you inadvertently break something, you can always run the scaffolding generator again to revert to the original. Can you see how the views in app/views/articles are related to the actions? What about the response messages, like Article was successfully created? What happens when you change them? See if you can find where the error messages for failed validations are rendered. If you remove the message, does the record still get saved? You can learn a lot by exploring, so take as much time as you need.
Summary
This chapter started by outlining the basics of the sample application. Then, you rolled up your sleeves and created a database and configuration files. Based on the goals of the application, you began by creating the tables necessary to run the core of your Article model and got a first look at the simplicity and flexibility that migrations give the development process. The scaffolding allowed you to test your assumptions about the model and table you created by getting a firsthand look at it in action. You also took a first crack at adding in validations that ensure you maintain the integrity of your data. The chapters that follow investigate these concepts in depth, starting with the first part of the MVC principle: models.