In this appendix, you will learn how to install SharePoint Server 2010 for the purposes of establishing a test environment for the completion of exercises available within this book. It is recommended that prior to completing this exercise, you review the following resources:
Hardware and Software Requirements for SharePoint Server 2010
http://technet.microsoft.com/en-us/library/cc262485.aspx
Administrative and Service Accounts Required for Initial Deployment of SharePoint Server 2010
http://technet.microsoft.com/en-us/library/ee662513.aspx
Deployment Scenarios for SharePoint Server 2010
http://technet.microsoft.com/en-us/library/cc303424.aspx
SharePoint Server 2010 Resource Center
http://technet.microsoft.com/en-us/sharepoint/ee263917.aspx#tab=1
When installing SharePoint Server 2010, you have a choice between installing a standalone server and a complete server.
The standalone server will automatically deploy all configurations to your environment, including the installation of a SQL Server 2008 Express database. You will have very little choice in how specific services are configured, and the entire farm will be deployed to a single server. This option is only recommended for product evaluation or demonstration scenarios and is not advisable for use in production environments.
For details on how to create a standalone server-type installation, please review the following article from Microsoft:
http://technet.microsoft.com/en-us/library/cc263202.aspx
The complete installation type is most commonly chosen by system administrators and provides greater flexibility and control over the configuration of specific SharePoint components. It is the recommended installation for long term use of a system and will be the installation type we review as part of this exercise.
To complete the following exercise, you should have already installed Windows Server 2008 or Windows Server 2008 R2 on the server you wish to install SharePoint on. In addition, you should have already installed and configured SQL Server 2008 or SQL Server 2008 R2 so that it is available for use by your SharePoint Farm. For more information on this, please refer to the Hardware and Software requirements resource listed previously in this Appendix.
TRY IT OUT: Installing SharePoint Server 2010
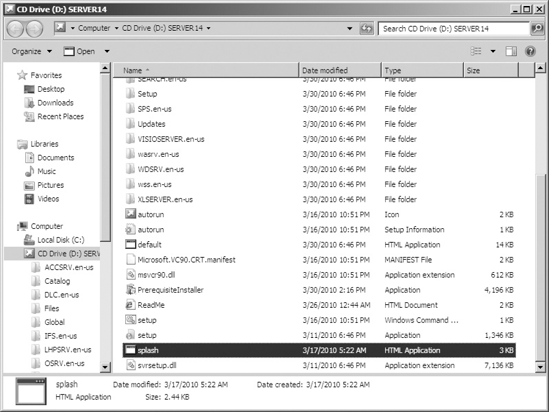
Open the install media location for SharePoint Server 2010.
Locate the splash.hta file as shown in Figure A-1.
Run the splash.hta file. The SharePoint Server 2010 Installation Options window will appear as shown in Figure A-2.
Select the Install Software Prerequisites option. The SharePoint 2010 Products Preparation Tool will appear, listing the products that are about to be installed on your server. Please note that you must have an active Internet connection in order to download the prerequisite software on your server.
Click Next.
Review and accept the terms of the License Agreement.
Click Next to download and install the prerequisite software on your server. This process may take several minutes depending on a number of factors, such as the speed of your network connection and server. Once all components have been successfully installed, the Installation Complete window will appear.
Click Finish.
Return to the SharePoint Server 2010 Installation Options window and select the Install SharePoint Server option.
The product key window will appear. Enter the SharePoint Server 2010 Standard or Enterprise key Microsoft provided to you based on your licensing agreement and click Continue.
Review and accept the Microsoft Software License Terms.
Click Continue.
The Choose a File Location window will appear. Depending on your corporate guidelines, you may select an alternate location for the installation of the SharePoint 2010 software and search index files. Once you have selected the appropriate file locations, click the Install Now button.
Once the core software installation is finished, you will be required to run the SharePoint Products Configuration Wizard. Ensure the checkbox is selected and click Close.
The SharePoint Products Configuration Wizard will launch. Click Next.
You will receive a warning message that certain key services will be started or reset during the process. Click Yes to continue.
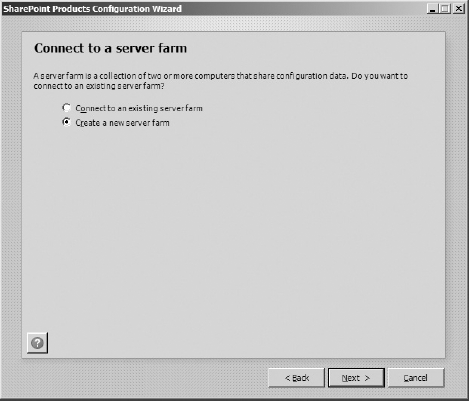
The Connect to a Server Farm window will appear. If this is the first server of a multiple server farm or you are installing on a single server, select the Create a New Server Farm option as shown in Figure A-3 and click Next. If you are adding new servers to an existing SharePoint farm, then select the Connect to an Existing Server Farm option.
The Configuration Database Settings window will appear. Enter the name of your database server as well as the credentials for your database access account and click Next.
You will then be asked to provide a passphrase for the farm, which is required when joining additional servers to the farm. Enter your passphrase in the required fields and click Next. It will be important to make note of this passphrase in case it is required at a later time.
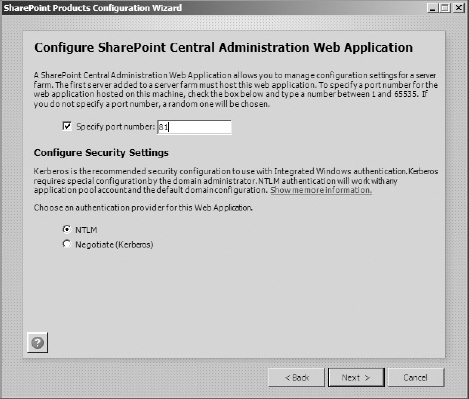
You will then be redirected to the Configure SharePoint Central Administration Web Application step. For this step you must specify a port number for your web application. Ideally it would be best to enter something that will be memorable. Next select an authentication provider. In this example we will select NTLM, as shown in Figure A-4.
The Completing the SharePoint Products Configuration Wizard screen will appear with all the selected settings displayed for your review. Click Next.
The SharePoint Configuration Wizard will run. This process may take several minutes to complete. Once this process has finished, a successful configuration message will appear. Click Finish.
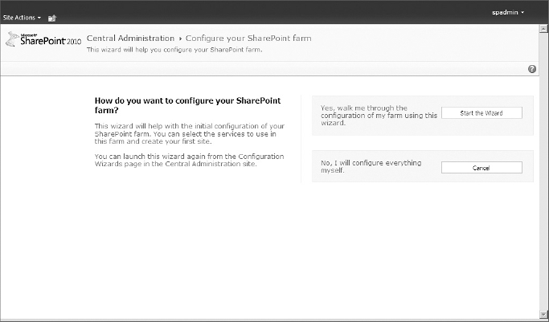
The Central Administration Site will appear. The next step will be to configure the various services for your SharePoint farm, as shown in Figure A-5. You may select to configure the services via the Farm Configuration Wizard or manually. For this example, we will run the Farm Configuration Wizard by selecting the Start the Wizard button. However for production scenarios, you should consider configuring these services manually to allow for greater control and flexibility.
Specify the Service Account that you wish to run each of the services with.
Ensure each of the services is selected.
Click Next. The Farm Configuration Wizard will create and configure each of the services. This may take several minutes.
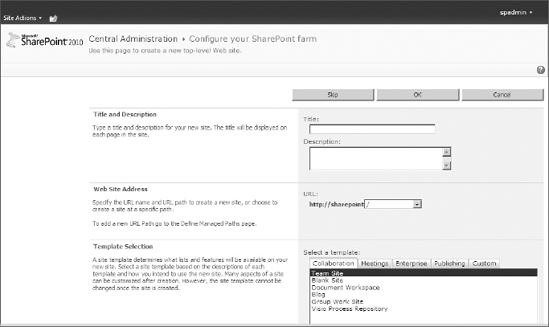
Once the services are configured, you will be redirected to a page, as shown in Figure A-6, where you can create the first site collection for your SharePoint farm.
Enter Beginning SharePoint 2010 for the Title field.
For the Template Selection, select the Publishing tab and select the Publishing Portal.
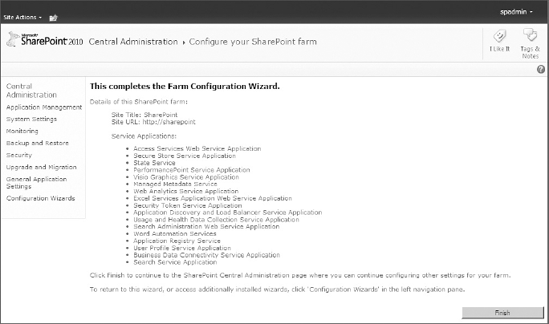
Click OK. Your new site collection will be created and the Farm Configuration Wizard will complete, as shown in Figure A-7.
Click Finish.