
In Chapter 3, you learned that Microsoft Azure provides a reliable place to store and access data but using it requires Internet access. Sometimes it's more efficient to cache frequently accessed data on the Windows Phone device itself.
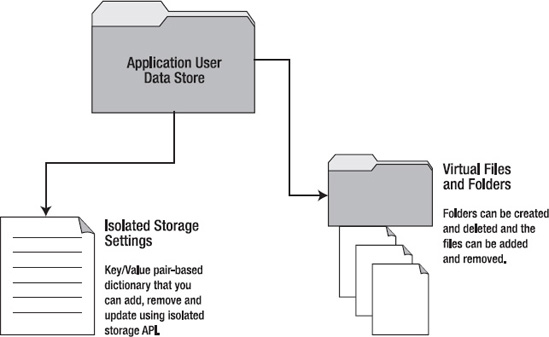
Isolated storage is a place on a Windows Phone 7 device where an application can save files, configuration information, and other data. Each application is allocated its own portion of the available space, but can't access file systems used by the operating system itself, a limitation that prevents a rogue application from accessing system data and possibly corrupting it. The amount of storage that can be assigned to any single application depends on the phone's available space.
With isolated storage, a Windows Phone application can create and maintain a virtual file storage system that can contain virtual folders and files; you won't have direct access to the underlying Windows Phone file system but the isolated storage will provide you with API to work with the file system. All input and output operations can be performed only on the application's isolated storage level.
Support for isolated storage on a Windows Phone is provided by the following two namespaces, whose features are depicted by Figure 13-1.
Isolated File Storage:
System.IO.IsolatedStorage.IsolatedStorageFileallows you to create, use, and remove directories and files in the virtual isolated storage. The files can be added and retrieved through file stream usingSystem.IO.IsolatedStorage.IsolatedFileStream, which can also cache images, sounds, and files that are dynamically loaded from the Web. In the first demo, you will learn how use isolated storage to cache an image loaded from the Web.Isolated Local Settings:
System.IO.IsolatedStorage.IsolatedStorageSettingsprovides APIs for storing and working with key-value pairs cached in isolated storage and for storing application settings and user specific settings.
In this chapter, you will learn how to work with a phone's isolated storage. The first example will show you a technique to cache an image downloaded from the Web into the isolated storage file. The second demo will show you how to save and retrieve name and value pairs using isolated storage settings.
You'll begin by building an application to work with the local storage on a phone. The application, named IsolatedStorageStoreImageDemo and shown in Figure 13-2, demonstrates the basic functions available through the isolated storage APIs, including the following:
Retrieving application-specific isolated storage.
Getting isolated storage quota.
Saving and retrieving isolated storage files.
In this demo, when the Get Image button is clicked for the first time, the application checks to see whether there is enough space available in isolated storage. If there is, the image will be downloaded from the web site and then saved to isolated storage via isolated storage file stream. If the button is clicked again, the image will be loaded into an isolated storage file.

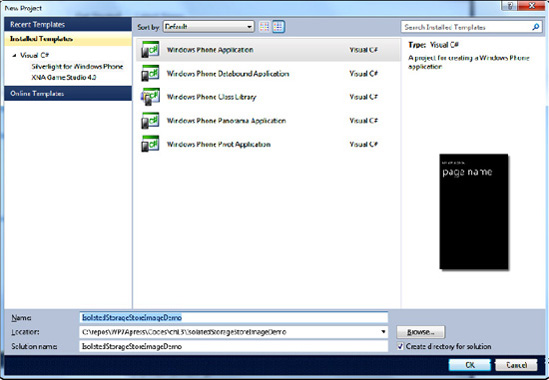
You'll build the demo in three steps. First, you'll create a new Visual Studio project. Next, you'll build the project's user interface and finish up by adding code to respond to commands from the user.
To set up the IsolatedStorageStoreImageDemo project, follow the steps you've used for previous examples in this book.
Open Microsoft Visual Studio 2010 Express for Windows Phone on your workstation.
Create a new Windows Phone Application by selecting File

You'll first code the user interface, which we've chosen to implement in XAML. Sometimes it's faster to work with XAML than with managed code, especially when you're working with a simple example, like this one, which requires only a few controls. Go to the Solution Explorer, open MainPage.xaml, and replace the XAML you find there with the code that appears in the following sections.
Begin by adding the following XAML markup to MainPage.xaml to identify where the resource to build the application's main page will be found:
<phone:PhoneApplicationPage

    x:Class="IsolatedStorageStoreImageDemo.MainPage"
    xmlns="http://schemas.microsoft.com/winfx/2006/xaml/presentation"
    xmlns:x="http://schemas.microsoft.com/winfx/2006/xaml"
    xmlns:phone="clr-namespace:Microsoft.Phone.Controls;assembly=Microsoft.Phone"
    xmlns:shell="clr-namespace:Microsoft.Phone.Shell;assembly=Microsoft.Phone"
    xmlns:d="http://schemas.microsoft.com/expression/blend/2008"
    xmlns:mc="http://schemas.openxmlformats.org/markup-compatibility/2006"
    mc:Ignorable="d" d:DesignWidth="480" d:DesignHeight="768"
    FontFamily="{StaticResource PhoneFontFamilyNormal}"
    FontSize="{StaticResource PhoneFontSizeNormal}"
    Foreground="{StaticResource PhoneForegroundBrush}"
    SupportedOrientations="Portrait" Orientation="Portrait"
    shell:SystemTray.IsVisible="True">
Referencing the namespace as xmlns="http://schemas.microsoft.com/winfx/2006/xaml/presentation" allows you to use common Windows Phone controls such as text boxes, buttons, and list boxes to create the main page. The code snippet also includes a reference to a codebehind class (x:Class="IsolatedStorageStoreImageDemo.MainPage") that will handle the main page controls' events.
Next, to create the main application page and populate it with controls, add the following XAML markup to the preceding block of code, also in MainPage.xaml:
<Grid x:Name="LayoutRoot" Background="{StaticResource PhoneBackgroundBrush}">
        <Grid.RowDefinitions>
            <RowDefinition Height="Auto"/>
            <RowDefinition Height="*"/>
        </Grid.RowDefinitions>

        <!--TitleGrid is the name of the application and page title-->
        <Grid x:Name="TitleGrid" Grid.Row="0">
            <TextBlock Text="IsolatedStorageStoreImageDemo"
                       x:Name="textBlockPageTitle"
                       Style="{StaticResource PhoneTextTitle1Style}"
                       FontSize="28" />
        </Grid>

        <!--ContentGrid is empty. Place new content here-->
        <Grid x:Name="ContentGrid" Grid.Row="1">

    <Image Height="458" HorizontalAlignment="Left"
                   Margin="20,134,0,0" Name="image1" Stretch="Uniform"
                   VerticalAlignment="Top" Width="423" />
            <Button Content="Get Image" Height="70"
                    HorizontalAlignment="Left" Margin="0,598,0,0"
Name="btnGetImage" VerticalAlignment="Top"
Width="443" Click="btnGetImage_Click" />
<TextBox Height="72" HorizontalAlignment="Left"
Margin="12,29,0,0" Name="txtImageUrl"
Text="http://res1.newagesolution.net/Portals/0/twitter2_icon.jpg"
VerticalAlignment="Top" Width="460" />
</Grid>
</Grid>
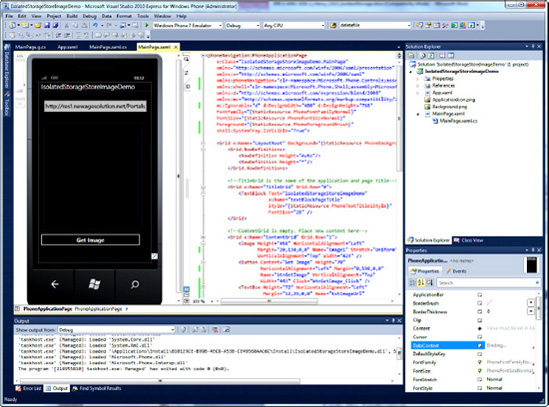
</phoneNavigation:PhoneApplicationPage>Once you've loaded the XAML code for the main page, you should see the layout shown in Figure 13-4. Now it's time to use the Isolated Storage APIs to add behavior to the application.
In Solution Explorer, open MainPage.xaml.cs and replace the code there with the following C# code blocks, in precisely the order in which they are presented.
Begin by specifying the namespaces the application will use. System.IO.IsolatedStorage and System.IO contain the APIs needed to work with the isolated file storage.
using System;
using System.Net;
using System.Windows;
using Microsoft.Phone.Controls;
using System.Windows.Media.Imaging;
using System.IO.IsolatedStorage;
using System.IO;

namespace IsolatedStorageStoreImageDemo
{Now add the following block of code to MainPage.xaml.cs to initialize the application's variables:
public partial class MainPage : PhoneApplicationPage
{
    private string ImageFileName = null;


    WebClient _webClient; // Used for downloading the image first time from the web site
...Now add the application's constructor, which uses the WebClient.OpenReadCompleted event to download its target image. The code contains logic to check whether enough space is available in the phone's isolated storage to save the downloaded image. If space is available, the image gets saved; otherwise it's loaded directly into the image control.
public MainPage()
{
    InitializeComponent();

    SupportedOrientations = SupportedPageOrientation.Portrait |
        SupportedPageOrientation.Landscape;

    _webClient = new WebClient();
// Handles when the image download is completed
_webClient.OpenReadCompleted += (s1, e1) =>
{
if (e1.Error == null)
{
try
{
bool isSpaceAvailable =
IsSpaceIsAvailable(e1.Result.Length);
if (isSpaceAvailable)
{
// Save Image file to Isolated Storage
using (IsolatedStorageFileStream isfs =
new IsolatedStorageFileStream(ImageFileName,
FileMode.Create,
IsolatedStorageFile.GetUserStoreForApplication()))
{
long imgLen = e1.Result.Length;
byte[] b = new byte[imgLen];
e1.Result.Read(b, 0, b.Length);
isfs.Write(b, 0, b.Length);
isfs.Flush();
}
LoadImageFromIsolatedStorage(ImageFileName);
}
else
{
BitmapImage bmpImg = new BitmapImage();
bmpImg.SetSource(e1.Result);
image1.Source = bmpImg;
}
}
catch (Exception ex)
{
MessageBox.Show(ex.Message);
}
}
};
}Note
In order to create a sub-directory, you must create a directory path string, such as "MyDirectory1SubDirectory1" and pass it to the CreateDirectory method. To add a file to SubDirectory1, you must create a string that combines the file name with its path, such as "MyDirectory1SubDirectory1MyFileInSubDirectory1.txt", and then use IsolatedStorageFileStream to create a file. In order to add contents to the file, use StreamWriter.
When you use the Remove method in IsolatedStorageFile, use it with caution as it will delete all directories and files. To avoid accidently deleting everything in the isolated storage, create a warning prompt window to confirm with the user that it will be OK to delete everything in the isolated storage. Another possibility is to use IsolatedStorage.DeleteFile or IsolatedStorage.DeleteDirectory to delete a specific file or directory to avoid removing all files or directories. Please refer to MSDN documentation for more information at http://msdn.microsoft.com/en-us/library/kx3852wf(VS.85).aspx.
Tip
System.IO.Path.Combine provides a great way to combine directory paths and files without worrying if the backslashes () are properly added. Also, when searching files or directories, you can use a wild card (*) when building a directory or file path.
Now, add code for the isSpaceAvailable helper method that the application uses to determine whether there is enough space available in isolated storage to store the image.
// Check to make sure there are enough space available on the phone
       // in order to save the image that we are downloading on to the phone
       private bool IsSpaceIsAvailable(long spaceReq)
       {
            using (IsolatedStorageFile store =
IsolatedStorageFile.GetUserStoreForApplication())
  {
                long spaceAvail = store.AvailableFreeSpace;
                if (spaceReq > spaceAvail)
                {
                   return false;
                }
                return true;
            }
}When the Get Image button is clicked, it checks to see if the image exists in the isolated storage. If the image exists, the image is loaded from the isolated storage; otherwise the image is downloaded from the web site.
private void btnGetImage_Click(object sender, RoutedEventArgs e)
        {
            using (IsolatedStorageFile isf =
                IsolatedStorageFile.GetUserStoreForApplication())
            {
                bool fileExist = isf.FileExists(ImageFileName);

                if (fileExist)
                {
                    LoadImageFromIsolatedStorage(ImageFileName);
                }
                else
                {
                              if (!string.IsNullOrEmpty(txtImageUrl.Text))
                    {
                // Use Uri as image file name
                        Uri uri = new Uri(txtImageUrl.Text);
                        ImageFileName =
uri.AbsolutePath.Substring(uri.AbsolutePath.LastIndexOf('/')+1);
                        _webClient.OpenReadAsync(new Uri(txtImageUrl.Text));
                    }

                }

            }

}The image is streamed directly from the isolated storage into the image control.
private void LoadImageFromIsolatedStorage(string imageFileName)
        {
            // Load Image from Isolated storage
            using (IsolatedStorageFile isf =
IsolatedStorageFile.GetUserStoreForApplication())
            {
                using (IsolatedStorageFileStream isoStream =
isf.OpenFile(imageFileName, FileMode.Open))
                {
                    BitmapImage bmpImg = new BitmapImage();
                    bmpImg.SetSource(isoStream);
                    image1.Source = bmpImg;
                }
            }
        }

    }
}To test the completed application, press F5 on your keyboard and run it.
In this brief demo, you've learned to work with isolated storage files by storing a downloaded image into the isolated storage and then retrieving the image from the isolated storage. In the next demo, you will interact with the name and value dictionary of the isolated storage settings.
In this section, you'll build an application, named IsolatedStorageSettingsDemo, that demonstrates CRUD operations (create, read, update, and delete) of System.IO.IsolatedStorage.IsolatedStorageSettings. Figure 13-5 shows how its UI will look on a Windows Phone.
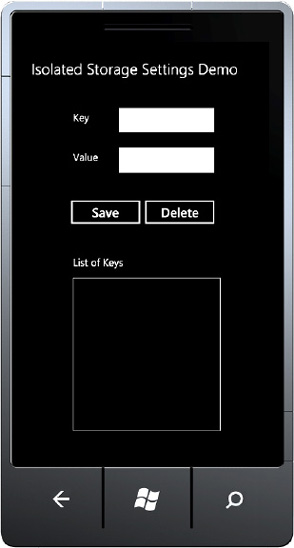
In the IsolatedStorageSettingsDemo application, when the Save button is clicked, the value in the Value text box will be added to the isolated storage settings using the key in the Key text box. Whenever new key-value pair data is added to the isolated storage settings, the key will be added to the list box of keys. When any of the keys in the list box of keys is selected, the Key text box and the Value text box will be populated with the data retrieved from the isolated storage settings. The Delete button will delete the selected key from the isolated storage settings.
To build the demo, create a new project and then add XAML markup to create a new main page and its controls. Finally, you'll add behavior to the application with C# code that makes use of isolated storage APIs to save and retrieve key-value pairs.
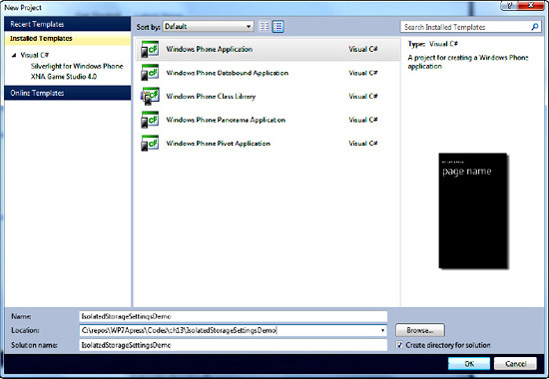
To create the new IsolatedStorageSettingsDemo project, open Microsoft Visual Studio 2010 Express for Windows Phone. Select File
Now you'll build the application main page.
To create the UI for IsolatedStorageSettingsDemo, go to Solution Explorer, open MainPage.xaml, and replace XAML with the following chunks of XAML markup in the sequence shown.
The following code identifies where to find the UI controls that will be used to build this main page for this application. Using the namespace xmlns="http://schemas.microsoft.com/winfx/2006/xaml/presentation" will allow you to add common Windows Phone controls like text boxes, buttons, and list boxes, which will be used to create the main page. Also, you are adding a reference to a codebehind class (x:Class="IsolatedStorageSettingsDemo.MainPage") that will handle the main page controls' events.
<phone:PhoneApplicationPage
    x:Class="IsolatedStorageSettingsDemo.MainPage"
    xmlns="http://schemas.microsoft.com/winfx/2006/xaml/presentation"
    xmlns:x="http://schemas.microsoft.com/winfx/2006/xaml"
    xmlns:phone="clr-namespace:Microsoft.Phone.Controls;assembly=Microsoft.Phone"
    xmlns:shell="clr-namespace:Microsoft.Phone.Shell;assembly=Microsoft.Phone"
    xmlns:d="http://schemas.microsoft.com/expression/blend/2008"
    xmlns:mc="http://schemas.openxmlformats.org/markup-compatibility/2006"
    FontFamily="{StaticResource PhoneFontFamilyNormal}"
    FontSize="{StaticResource PhoneFontSizeNormal}"
    Foreground="{StaticResource PhoneForegroundBrush}"
    SupportedOrientations="Portrait" Orientation="Portrait"
    mc:Ignorable="d" d:DesignWidth="480" d:DesignHeight="768"
shell:SystemTray.IsVisible="True">Now add the various controls and layouts you need to create the UI shown in Figure 13-5.
<Grid x:Name="LayoutRoot" Background="{StaticResource PhoneBackgroundBrush}">
    <Grid.RowDefinitions>
        <RowDefinition Height="Auto"/>
        <RowDefinition Height="*"/>
    </Grid.RowDefinitions>

    <!--TitleGrid is the name of the application and page title-->
    <Grid x:Name="TitleGrid" Grid.Row="0">
        <TextBlock Text="Isolated Storage Settings Demo"
                   x:Name="textBlockListTitle"
                   Style="{StaticResource PhoneTextTitle1Style}"
                   FontSize="30" />
    </Grid>

    <!--ContentGrid is empty. Place new content here-->
    <Grid x:Name="ContentGrid" Grid.Row="1">
<TextBox Height="72" HorizontalAlignment="Left"
Margin="172,46,0,0" Name="txtKey" Text=""
VerticalAlignment="Top" Width="212" />
<Button Content="Save" Height="70"
HorizontalAlignment="Left" Margin="78,228,0,0"
Name="btnSave" VerticalAlignment="Top" Width="160"
Click="btnSave_Click" />
<ListBox Height="301" HorizontalAlignment="Left" Margin="94,392,0,0"
Name="lstKeys" VerticalAlignment="Top" Width="290" BorderBrush="White"
BorderThickness="1" SelectionChanged="lstKeys_SelectionChanged" />
<TextBlock Height="39" HorizontalAlignment="Left" Margin="94,62,0,0"
Name="lblKey" Text="Key" VerticalAlignment="Top" />
<TextBox Height="74" HorizontalAlignment="Left" Margin="172,124,0,0"
Name="txtValue" Text="" VerticalAlignment="Top" Width="212" />
<TextBlock Height="39" HorizontalAlignment="Left" Margin="94,140,0,0"
Name="lblValue" Text="Value" VerticalAlignment="Top" />
<Button Content="Delete" Height="70" HorizontalAlignment="Left"
Margin="224,228,0,0" Name="btnDelete" VerticalAlignment="Top"
Width="160" Click="btnDelete_Click" />
<TextBlock Height="39" HorizontalAlignment="Left" Margin="94,347,0,0"
Name="lblListOfKeys" Text="List of Keys" VerticalAlignment="Top" />
</Grid>
</Grid>
</phoneNavigation:PhoneApplicationPage>Once you've added the XAML markup blocks displayed in this section to MainPage.xaml, you should see the UI shown on the Visual Studio Design View tab in Figure 13-7.

Now it's time to add behavior to the application.
From Solution Explorer, open MainPage.xaml.cs and replace the code you find there with the following blocks of C# code.
Begin by listing the namespaces the application will use. Note the inclusion of System.IO.IsolatedStorage in order to work with the isolated storage settings.
using System;
using System.Windows;
using System.Windows.Controls;
using Microsoft.Phone.Controls;
using System.IO.IsolatedStorage;
namespace IsolatedStorageSettingsDemo
{
    public partial class MainPage : PhoneApplicationPage
    {
private IsolatedStorageSettings _appSettings;Now add the next code block to the MainPage class. Notice the use of the BindKeyList() method, which will retrieve all keys from the isolated storage settings and bind them to the list box created in the previous section.
public MainPage()
        {
            InitializeComponent();
            SupportedOrientations = SupportedPageOrientation.Portrait;
            _appSettings = IsolatedStorageSettings.ApplicationSettings;
    BindKeyList();
}Now add an event handler for the Save button. When the Save button is clicked, the application reads the key and the value from the text boxes into the isolated storage settings.
// Handles Create and Update
// If the key does not exist key-value pair will be added
// ElseIf the key exists the value will be updated
        private void btnSave_Click(object sender, RoutedEventArgs e)
        {
            if (!String.IsNullOrEmpty(txtKey.Text))
            {
                if (_appSettings.Contains(txtKey.Text))
                {
                    _appSettings[txtKey.Text] = txtValue.Text;
                }
                else
                {
                    _appSettings.Add(txtKey.Text, txtValue.Text);
                }
_appSettings.Save();
                BindKeyList();
            }
        }
Note
An isolated storage file will perform much better than isolated storage settings because a file can be streamed in and out of the isolated storage file as raw data by using StreamWriter and StreamReader, whereas the storage and retrieval of data in an isolated storage settings key-value pair dictionary requires serialization. However, there is complexity in using isolated storage files: you need to use the file stream to save and retrieve the data and you must be careful to dispose the stream after each use. In the isolated storage settings, there is inherent simplicity in using the key to save and retrieve the data.
Next, add an event handler for the Delete button. When the Delete button is clicked, it removes the selected key from the isolated storage settings and rebinds the list box.
private void btnDelete_Click(object sender, RoutedEventArgs e)
        {
            if (lstKeys.SelectedIndex > −1)
            {
                _appSettings.Remove(lstKeys.SelectedItem.ToString());
_appSettings.Save();
                BindKeyList();
            }
}Finally, you'll use the Listbox changed event to update the Key and Value text boxes of the application interface. When the user selects a key from the list box, the application will load the key and its associated value from the isolated storage settings using the selected key and then populate the key and value text boxes.
// When key is selected value is retrieved from the storage settings
        private void lstKeys_SelectionChanged(object sender, SelectionChangedEventArgs e)
        {
            if (e.AddedItems.Count > 0)
            {
                string key = e.AddedItems[0].ToString();
                if (_appSettings.Contains(key))
                {
                    txtKey.Text = key;
                    txtValue.Text = _appSettings[key].ToString();
                }
            }
        }
private void BindKeyList()
{
lstKeys.Items.Clear();
foreach (string key in _appSettings.Keys)
{
lstKeys.Items.Add(key);
}
txtKey.Text = "";
txtValue.Text = "";
}
}
}To test the finished application, press F5. The result should resemble the screenshot shown in Figure 13-5.
In this chapter, you learned how to save application data on a Windows Phone device using either an isolated storage file or isolated storage settings. From the demo applications, you learned to create, read, update, and delete isolated storage data.
In Chapter 14, you will learn to pinpoint the location of the phone by working with the Windows Phone's global positioning system (GPS), connected networks, and cellular telephone networks. You will also learn to interact with Microsoft's Bing Maps.