Faculty of Computers & Information, Menoufia University, Shibin El Kom, Egypt
In the previous two chapters, we prepared the Kivy environment for developing desktop applications. After making sure everything was working as expected, we installed Buildozer to build the Android applications. The first application we created in the book was very simple; a single label widget displayed some text. After that, more widgets were added to the application using layouts. The button press action was handled using on_press. A nested widget tree was created, which made debugging much more complicated. For that reason, the KV language was introduced for structuring the widget tree and separating the GUI from the Python logic.
This chapter discusses accessing and using the Android Camera for capturing and sharing images with an HTTP server. The Camera widget is used to access the Android Camera. After making sure everything is working on the desktop, we use Buildozer to build the Android application. The proper permissions are specified in the buildozer.init file. The Android Camera is, by default, rotated 90 degrees and Kivy canvases are used to handle this issue. Three canvas instances will be discussed—canvas, canvas.before, and canvas.after. In order to limit the effect of a given instruction to just some widgets, the PushMatrix and PopMatrix instructions are discussed.
After the camera is previewed at the proper angle, images will be captured in order to upload them to an HTTP server. The server is created using Flask and runs on a desktop computer. Using the IPv4 address and port number of the server, the requests to the Python library will upload the captured images using the Kivy Android application and an HTTP POST message.
This chapter ends by creating a live preview of the Android Camera in the web browser of the server. The images are saved into the device memory as a bytes array without being saved in the device storage, in order to save time. Such bytes arrays are then uploaded to the server. The server then interprets these bytes array in order to show the images on an HTML page in the web browser.
Kivy Camera Widget
There are different libraries in Python to access the camera, such as OpenCV and PyGame. Kivy also supports a widget called Camera to access the camera. It is simpler as it does not ask to use a library. The size of the APK file that uses a widget is smaller than the APK in which a library is packaged.
The KV file that has a Camera widget inside the BoxLayout root widget is shown in Listing 3-1. The preferred resolution is specified using the resolution property. Capture images at 1280x720 if possible. Notice the difference between the Camera widget size and resolution. The widget size sets the size of the widget on the application GUI, whereas the resolution defines the pixel density of the captured images.
The play property specifies whether the camera is played after the application starts or not. If it’s set to True, the camera will play after the application starts. This simple KV file is the minimum code required to access the camera.
BoxLayout:
Camera:
resolution: 1280,720
play: True
Listing 3-1
Adding the Camera Widget to the Widget Tree
The Python code associated with this KV file is also very simple and is shown in Listing 3-2. Just create a class that extends the kivy.app.App class and override its build() function. Because this function is empty, the only way to link the Python code to the KV file is to have it named test.kv.
import kivy.app
class TestApp(kivy.app.App):
def build(self):
pass
app = TestApp()
app.run()
Listing 3-2
Python File Associated with the KV File in Listing 3-1
At this point, we have created a desktop application that accesses the camera. Let’s start building the Android application.
As discussed in Chapter 1, the application’s Python file must be named main.py. In order to have permission to access the Android Camera, the android.permissions field must specify such permission as follows:
android.permissions=Camera
After that, the Android application can be built using Buildozer according to the following command. Remember that this command builds the APK file in debug mode, deploys it to the USB connected Android device, and runs the application after it’s installed.
ahmed-gad@ubuntu:-$buildozer android debug deploy run
Figure 3-2 shows one of the captured images using the Android application. It is rotated counterclockwise 90 degrees. To solve this issue, the widget must be rotated clockwise 90 degrees. Because clockwise rotation uses a negative angle, the rotation by an angle -90 is required. Kivy supports canvases that apply transformations to its widgets.
Figure 3-2
Capturing an image using the Android Camera accessed using the Camera widget
Kivy Canvas
The area in which we draw is commonly know as the canvas. In Kivy, canvases are containers of instructions that define the graphical representation of the widget, not the drawing area. There are three canvas instances in Kivy—canvas, canvas.before, and canvas.after. So, each widget can be assigned these three different instances.
Inside each of the three instances, there are two types of instructions that canvases can do—context and vertex. Vertex instructions draw on the widgets. For example, if a rectangle or a line is to be drawn on a widget, it is a vertex instruction. Context instructions do not draw anything but just change how things appear on the screen. For example, context instructions can transform the widget by changing its rotation, translation, and scale.
Before adding a canvas instruction, a canvas instance must be attached to the widget of interest. After that, we can add instructions. For example, the code in Listing 3-3 attaches the canvas instance to a Label widget and draws a rectangle using the Rectangle vertex instruction.
BoxLayout:
Label:
canvas:
Rectangle:
pos: 0,0
size: 200, 200
Listing 3-3
Adding Canvas to the Label Widget to Draw a Rectangle
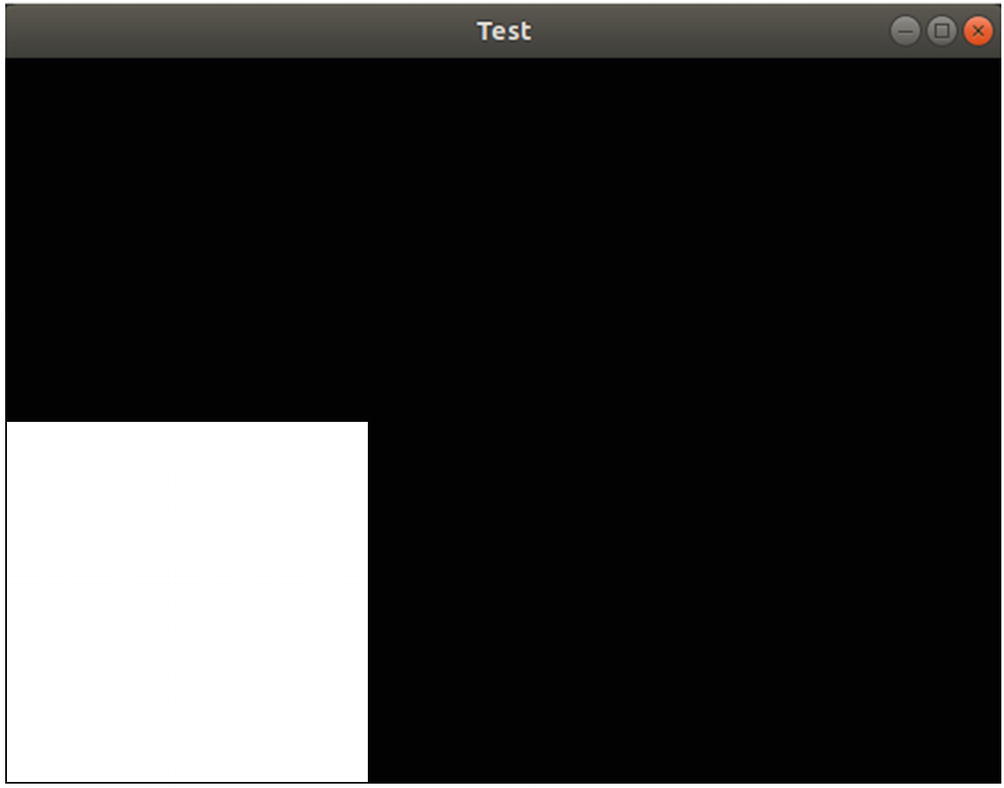
The rectangle is placed at the pixel (0, 0), which is origin of the Kivy coordinate system corresponding to the bottom-left corner (except for RelativeLayout and ScatterLayout). The width and height of the rectangle are set to 200 pixels. Thus, the rectangle starts at the bottom-left corner and extends in the horizontal and vertical directions by 200 pixels. Figure 3-3 shows the rectangle.
Figure 3-3
Drawing a rectangle on the Label widget
We can change the color of the rectangle using the Color context instruction. This instruction accepts the RGB color using the rgb property, where each channel is given a value between 0 and 1. In Listing 3-4, red is the assigned color.
It is very important to understand that the context instructions are applied to the widgets and vertex instructions below them. If a widget or a vertex instruction is added before the context instruction, the context instruction will not be applied. In this example, if the Color vertex instruction is added after the Rectangle vertex instruction, the rectangle will be colored red.
BoxLayout:
Label:
canvas:
Color:
rgb: 1, 0, 0
Rectangle:
pos: root.pos
size: 200,200
Listing 3-4
Using the Color Context Instruction to Change the Rectangle Color
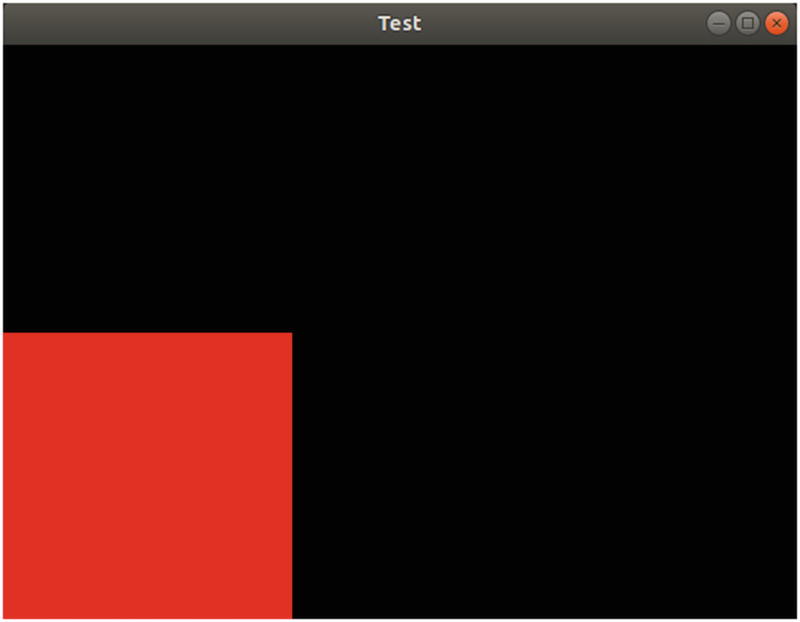
The result, after running the application with the KV file in Listing 3-4, is shown in Figure 3-4. The rectangle is colored according to the Color instruction.
Figure 3-4
Drawing a red rectangle on the Label widget
We can repeat the previous instructions for a second label widget according to Listing 3-5. The color applied is green rather than red and the rectangle is positioned at the center of the window.
BoxLayout:
Label:
canvas:
Color:
rgb: 1, 0, 0
Rectangle:
pos: root.pos
size: 200,200
Label:
canvas:
Color:
rgb: 0, 1, 0
Rectangle:
pos: root.width/2-100, root.height/2-100
size: 200,200
Listing 3-5
Two Label Widgets Assigned to Two Canvas Instances to Draw Two Rectangles
Drawing two rectangles using two Rectangle instructions
After using the vertex instructions, we can start using the second type of instructions, which is context. It is very important to note that the context instructions must be applied before determining where the instructions should be applied. Suppose we rotate a rectangle created using the Rectangle vertex instruction. In that case, the context instruction that rotates the rectangle must be added before the Rectangle instruction. If the context instruction is added after the Rectangle instruction, the rectangle will not be changed. This is because the context instructions are active only before rendering the drawings. The context instructions have no effect after a drawing has been rendered.
The context instruction that rotates the widgets is called Rotate. According to Listing 3-6, this context instruction is added before the Rectangle vertex instruction to rotate the rectangle. Using the angle property of the Rotate instruction, the rotation is to -45, which rotates it clockwise. The rotation axis (or axes) can be defined using the axis property. The value 0,0,1 means rotation around the Z-axis.
By default, the rotation is relative to the origin of the coordinate system (0, 0). In this example, we are not interested in making the rotation around the (0, 0) point but around the window centerpoint. Using the origin property, we can change the rotation origin to the center of the window.
BoxLayout:
Label:
canvas:
Color:
rgb: 1, 0, 0
Rectangle:
pos: root.pos
size: 200,200
Label:
canvas:
Color:
rgb: 0, 1, 0
Rotate:
angle: -45
axis: 0,0,1
origin: root.width/2, root.height/2
Rectangle:
pos: root.width/2, root.height/2
size: 200,200
Listing 3-6
Using the Rotation Context Instruction to Rotate the Rectangle
Figure 3-6 shows the result after rotating the rectangle.
Figure 3-6
Rotating the rectangle using the Rotation context instruction
In the previous examples, the context instructions such as Color and Rotate must be added into the canvas instance before the vertex instructions such as Rectangle in order to affect the drawing. The vertex instruction must be written into the KV file on a line before the line in which the target widget is placed. If the widget is located at line 5 for example, then the vertex instruction must be located before line 5, not after it. In the previous examples, we are able to control the placement of the context instructions before the vertex instructions. In some situations, it is not possible to do that.
Let’s consider the application shown in Listing 3-7, in which we want to rotate a button.
BoxLayout:
Button:
text: "Rotate this Button"
Listing 3-7
A Button To Be Rotated
If the canvas instance is added inside the Button widget according to Listing 3-8, the Rotate context instruction inside the canvas instance will be added after, not before, the Button widget that we want to rotate. Thus the Rotate context instruction will not affect the widget. We need to add the context instruction before, not after, the widget. We will discuss two solutions to this problem.
BoxLayout:
Button:
text: "Rotate this Button"
canvas:
Rotate:
angle: 45
origin: root.width/2, root.height/2
Listing 3-8
The Rotate Context Instruction Has Been Added After the Button Widget and Thus Does Not Affect It
For a given parent widget, the instructions added to its canvas instance will not only get applied to the parent widget but are also applied to the child widgets. Based on this feature, we can find our first solution. If we want to perform a context instruction on a given widget, we can add that instruction to the canvas instance of its parent. Such instruction will affect both the parent and its child widgets. Listing 3-9 implements this solution. Note that the context instructions not only affect what is drawn using vertex instructions such as Rectangle but also can affect the widgets.
BoxLayout:
canvas:
Rotate:
angle: 45
origin: root.width/2, root.height/2
Button:
text: "Rotate this Button"
Listing 3-9
Placing the Canvas Instance Inside the Parent Widget in Order to Affect Its Children
The result is shown in Figure 3-7. We solved the problem successfully, but there is an issue.
Figure 3-7
The Button widget is rotated successfully after the canvas is added to its parent
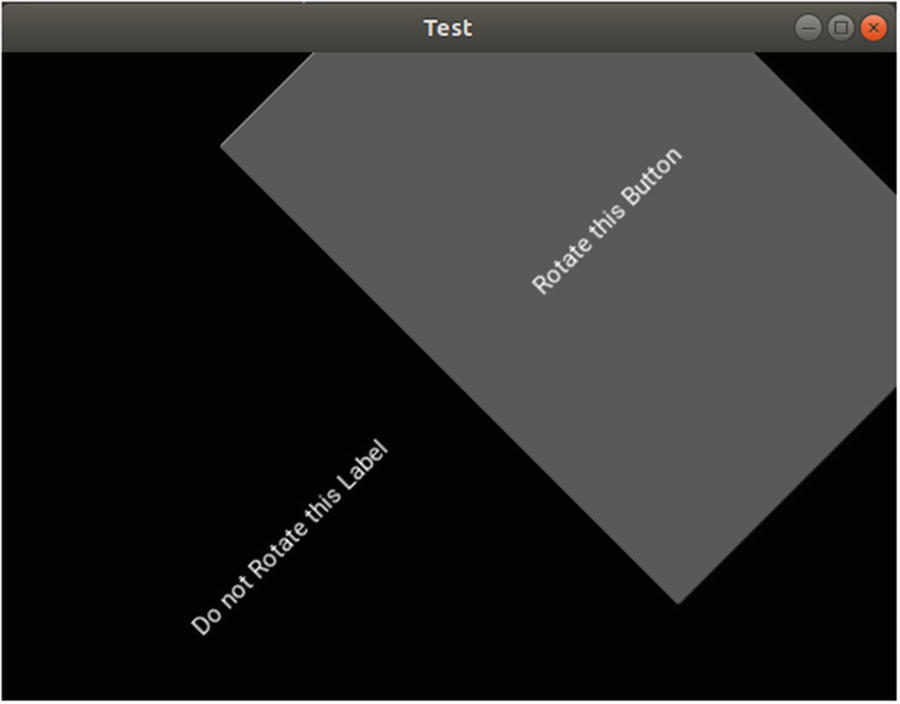
The previous solution not only rotated the button but also its parent. If there is another child rather than the button, it will be rotated too. The KV file shown in Listing 3-10 has a Label widget that should not be rotated. Unfortunately, it will get rotated, as shown in Figure 3-8.
BoxLayout:
canvas:
Rotate:
angle: 45
origin: root.width/2, root.height/2
Label:
text: "Do not Rotate this Label"
Button:
text: "Rotate this Button"
Listing 3-10
Adding the Context Instruction to the Parent Widget Affects All of its Children
Figure 3-8
The Rotate context instruction affects the Button and Label widgets
canvas.before
The previous solution of adding the context instruction to the parent widget affects all child widgets. There is no way to just apply this effect to a specific child. To solve this issue, this solution will use the canvas.before instance rather than canvas according to the KV file in Listing 3-11. Instructions inside this widget will be executed before the widget is rendered. Thus, if the Rotate content instruction is added inside it, the Button widget will be rotated successfully.
BoxLayout:
Label:
text: "Do not Rotate this Label"
Button:
text: "Rotate this Button"
canvas.before:
Rotate:
angle: 45
origin: root.width/2, root.height/2
Listing 3-11
Using canvas.before Rather Than canvas to Rotate the Button Widget
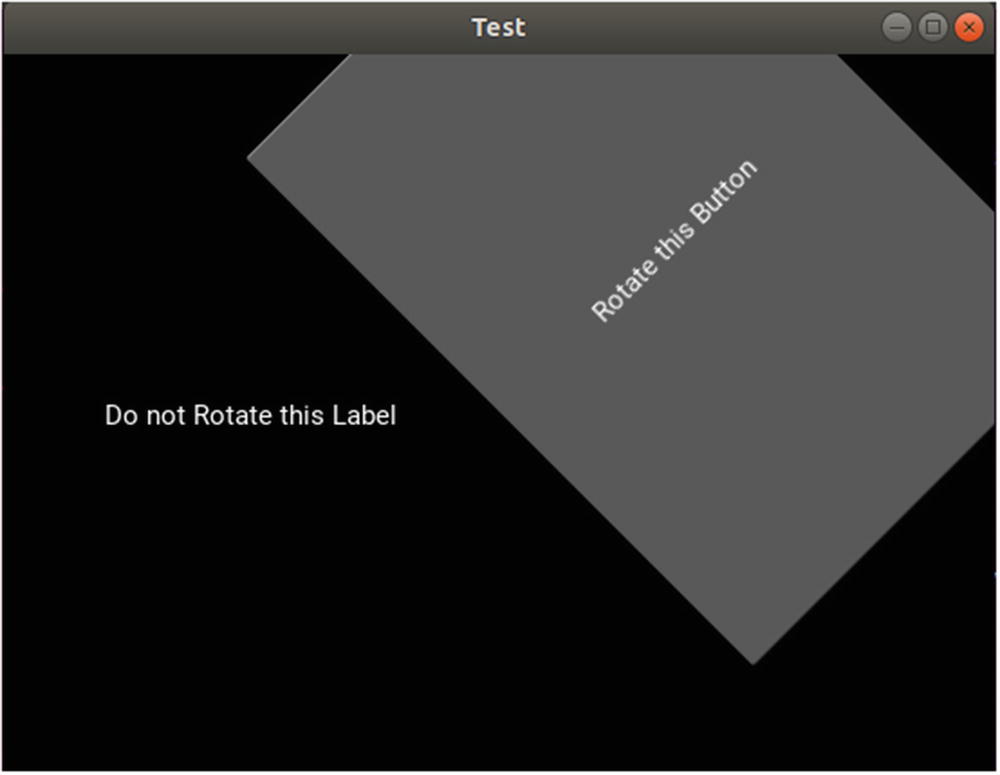
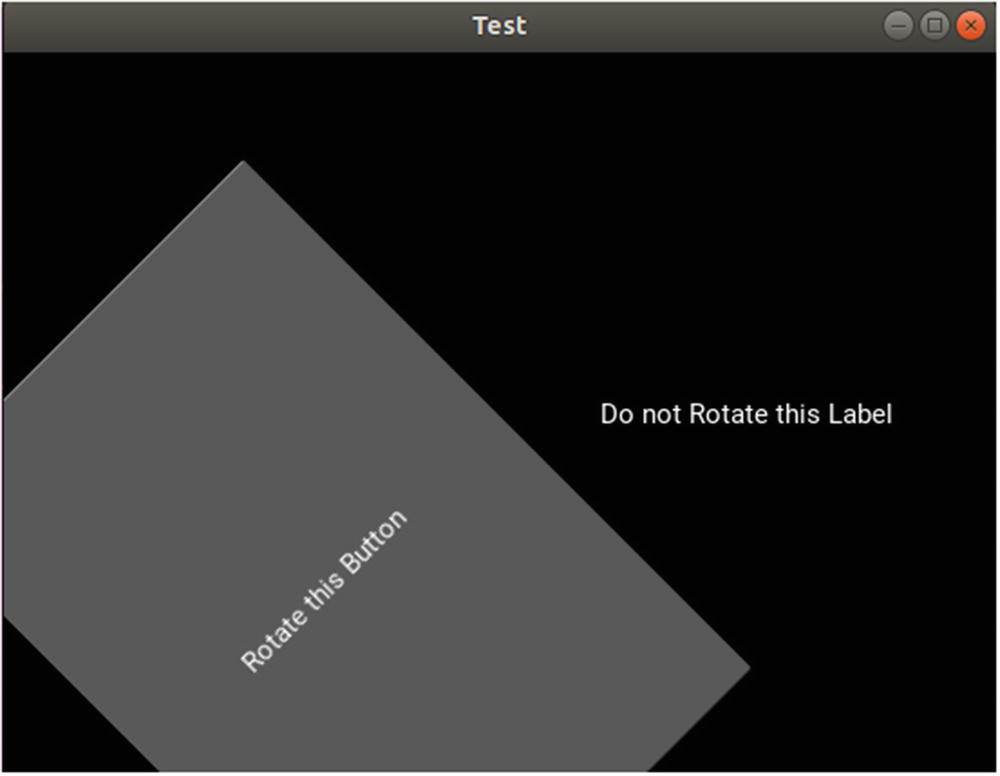
The application window is shown in Figure 3-9. Only the Button widget is rotated; the Label remains unchanged.
Figure 3-9
Rotating only one child using the canvas.before instance
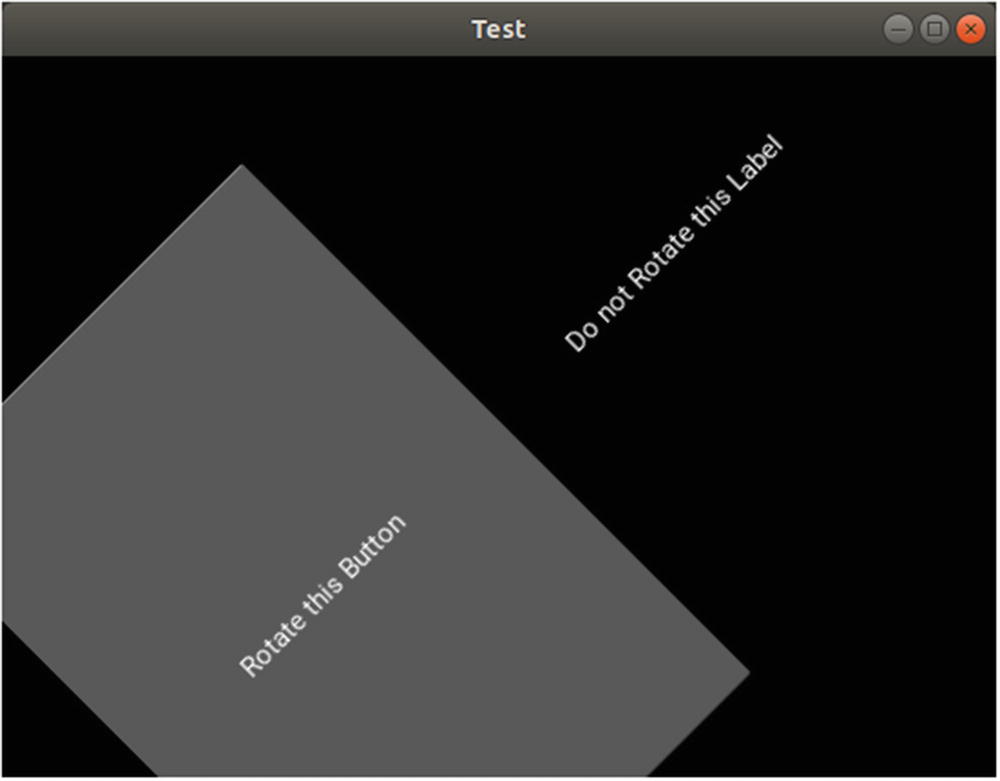
In the previous example, there is a trick. The widget we are looking to rotate is added to the end of the widget tree and this is why the Label is not affected by rotation. If the Label is added after the Button, then the Button and the Label widgets will be rotated. The modified code is shown in Listing 3-12 and the application window is shown in Figure 3-10. Why was the Label widget rotated?
BoxLayout:
Button:
text: "Rotate this Button"
canvas.before:
Rotate:
angle: 45
origin: root.width/2, root.height/2
Label:
text: "Do not Rotate this Label"
Listing 3-12
Placing the canvas.before Instruction Before the Label Widget
Figure 3-10
The Button and Label widgets are rotated after canvas.before is added before Label
The canvas instructions in Kivy are not limited to the widget they are added to. Once an instruction is added in any widget, it will affect other widgets until something cancels the effect of the instruction. For example, if the Button widget is rotated by 45 degrees, then the widgets after it will also be rotated by 45 degrees. If the Label widget comes after the Button and we don’t want it to be rotated, we can rotate the Label widget by -45 degrees in order to return it to its original state. The KV file that cancels the Label widget rotation is shown in Listing 3-13. The application window in shown in Figure 3-11. Note that the label is first rotated by 45 degrees then rotated by -45 degrees. If there are more than one widget after the Button, it will be tiresome to rotate them all to return them to their initial states. A better solution is to limit the effect of the Rotate context instruction to just the Button widget.
BoxLayout:
Button:
text: "Rotate this Button"
canvas.before:
Rotate:
angle: 45
origin: root.width/2, root.height/2
Label:
text: "Do not Rotate this Label"
canvas.before:
Rotate:
angle: -45
origin: root.width/2, root.height/2
Listing 3-13
Rotating the Label by -45 Degrees to Cancel the Effect of the Button Rotation
Figure 3-11
The Left widget is unchanged after rotating it back by -45 degrees
canvas.after, PushMatrix, and PopMatrix
In order to avoid applying the Rotate instruction to the widgets below the Button widget and limit the effect to the Button widget, Kivy provides the PushMatrix and PopMatrix instructions. The idea is to save the current context states represented by rotation, translation, and scale. After saving the state, we can apply rotation to the Button widget. After the rotated Button widget is rendered successfully, we can restore the saved context state. Thus, only the Button widget will be rotated and all other widgets will retain their context state.
Listing 3-14 shows the KV file that uses PushMatrix and PopMatrix. The resultant window is identical to the one shown in Figure 3-11.
BoxLayout:
Button:
text: "Rotate this Button"
canvas.before:
PushMatrix:
Rotate:
angle: 45
origin: root.width/2, root.height/2
canvas.after:
PopMatrix:
Label:
text: "Do not Rotate this Label"
Listing 3-14
Using PushMatrix and PopMatrix to Limit the Effect of the Context Instructions
Note that the PushMatrix instruction is inserted inside the canavs.before instance, while the PopMatrix instruction is inserted inside the canvas.after instance. Adding the PopMatrix instruction inside canvas.after ensures that it will be executed only after the Button is rotated successfully. If this instruction is added to canvas.before, then the button will not be rotated. In fact, the button will be rotated according to the Rotate instruction and then the context state will be restored before rendering the rotated button. Thus we will not feel by the effect of rotation.
Camera Rotation
After understanding how canvases and their instructions work, we can rotate the Camera widget, which is our original target. We can build the application using the KV file shown in Listing 3-15. The file uses the instructions discussed previously (canvas.before, canvas.after, PushMatrix, and PopMatrix). It is important to be familiar with them before going further. Note that we are changing the KV file without changing the Python code.
BoxLayout:
Camera:
resolution: 1280, 720
play: True
canvas.before:
PushMatrix:
Rotate:
angle: -90
axis: 0,0,1
origin: root.width/2, root.height/2
canvas.after:
PopMatrix:
Listing 3-15
The KV File That Rotates the Camera Widget
To show the complete idea, the Python code used in Listing 3-2 is repeated in Listing 3-16.
Remember to set the name of the KV file to test.kv in order to match the characters before the word App in the class name after converting them to lowercase. Also remember to add CAMERA to the android.permissions field of the buildozer.spec file to have the permission to use the camera.
import kivy.app
class TestApp(kivy.app.App):
def build(self):
pass
app = TestApp()
app.run()
Listing 3-16
Python Code Associated with the KV File in Listing 3-15
Figure 3-12 shows the application running on an Android device. The widget is placed at the correct angle.
Figure 3-12
The Camera widget is placed correctly in the Android application
Before going ahead in this chapter, let’s quickly recap what we have discussed so far the book. We prepared the Kivy development environment for building desktop and Android applications. The main tools required were Kivy and Buildozer. We started by creating a simple application in which just a single widget was used. The Kivy BoxLayout container was discussed in order to add more than one Kivy widget to the application window. To allow the user to interact with the application, we discussed how to set and get text widgets such as TextInput and Label. Button press action was handled using on_press.
The Camera widget is also used to access the camera using Kivy. Because the captured images using the Android Camera are by default rotated counterclockwise by 90 degrees, we have to rotate the Camera widget clockwise by -90 degrees. The canvas instance in Kivy allows us to do transformations to the widgets using the context instructions. Moreover, canvases have vertex instructions for drawing shapes on the widgets such as rectangles. Other Canvas instances were discussed, which are canvas.before and canvas.after. In order to limit the effect of the canvas instructions to just a selected widget, the PushMatrix and PopMatrix instructions were discussed.
In the next section of this chapter, we are going to extend the application created previously in order to view the camera, capture an image, and upload it to an HTTP server. We build an application that not just views the camera but also captures images. An HTTP server is created using the Flask API, which runs on the PC. The server has an open socket based on its IPv4 address and a port number, which waits for requests asking for uploading files. Using the requests Python library, the Kivy application uploads the captured image to the server using an HTTP POST message. Once the server receives an HTTP POST message from the Kivy application, it uploads the file to a selected directory. Let’s get started.
Capturing and Saving an Image Using Kivy
We now want to modify the application written in Listings 3-15 and 3-16 to capture and save an image on button press. For this, a Button widget will be added to the end of the window, as shown in Listing 3-17. The question is, how do we capture the camera images? Generally, when a widget calls the export_to_png() function, an image of the widget (i.e., a screenshot) is captured and saved as a PNG file to the specified directory. If the Camera widget called this function, the camera image will be saved as a PNG file.
There are some notes to gain a better understanding of the KV file shown in Listing 3-17. The orientation of the BoxLayout is set to vertical to ensure that widgets are arranged vertically so that the button can be added to the end of the layout. The Camera widget is added before the Button widget so that the button is added to the end of the window.
The Camera widget is given an ID of camera to access it inside the Python code to call the export_to_png() function when the button is pressed. The capture() function inside the Python code will be called when the on_press action is fired.
BoxLayout:
orientation: "vertical"
Camera:
id: camera
size_hint_y: 18
resolution: (1280, 720)
play: True
canvas.before:
PushMatrix:
Rotate:
angle: -90
origin: root.width/2, root.height/2
canvas.after:
PopMatrix:
Button:
text: "Capture"
size_hint_y: 1
on_press: app.capture()
Listing 3-17
Adding a Button that Captures an Image When Pressed
The last note is that the size_hint_y property is added to the Camera and the Button widgets. The size of the widgets is calculated automatically according to the BoxLayout. This property hints to the layout to make the height of a given widget larger, smaller, or equal to the height of another. For example, if the size_hint_y is set to 2 for the camera and 1 for the button, then the Camera widget height will be double the height of the button. If it is set to 3 for the camera and 1 for the button, then the camera height will be three times the button height. If both are set to the same number, the height of the two widgets will be equal. In this example, we assigned a large value to the Camera widget and a small value to the button in order to not hide too much area from the screen.
Similar to the size_hint_ y property, there is a size_hint_x property that controls the width of the widgets.
After preparing the KV file, we need to discuss the Python file shown in Listing 3-18. Note that the class is named PycamApp. Thus the KV file should be named pycam.kv in order to get it implicitly used. Inside the capture() function, the Camera widget is fetched into the camera variable based on its ID. That variable calls the export_to_png() function, which accepts the path in which the captured image is saved. You can change this path to customize the application.
Python File Associated with KV File in Listing 3-17 that Captures an Image on Button Press
After building and running the Android application, its window is shown in Figure 3-13. By pressing the button, the camera image will be saved in the specified directory. This image is what will be sent to the server. So, let’s start building the server.
Figure 3-13
Capturing an image on button press
Building the HTTP Server Using Flask
After saving the captured image, we send it to the HTTP server. The server is created using the Flask API, which runs on a PC. Because Flask is out of scope of this book, we will not discuss it in detail. You can read more about Flask in Chapter 7 of my book, Practical Computer Vision Applications Using Deep Learning with CNN (Apress, 2018).
Listing 3-19 lists the Flask code for building the HTTP server. The server is made to listen for file upload requests. First, an application instance is created using the flask.Flask class. The constructor of this class accepts the import_name argument, which is set to the folder name that contains the Flask Python file.
At the end of this code, the application listens for requests using the IPv4 address 192.168.43.231 and port number 6666.
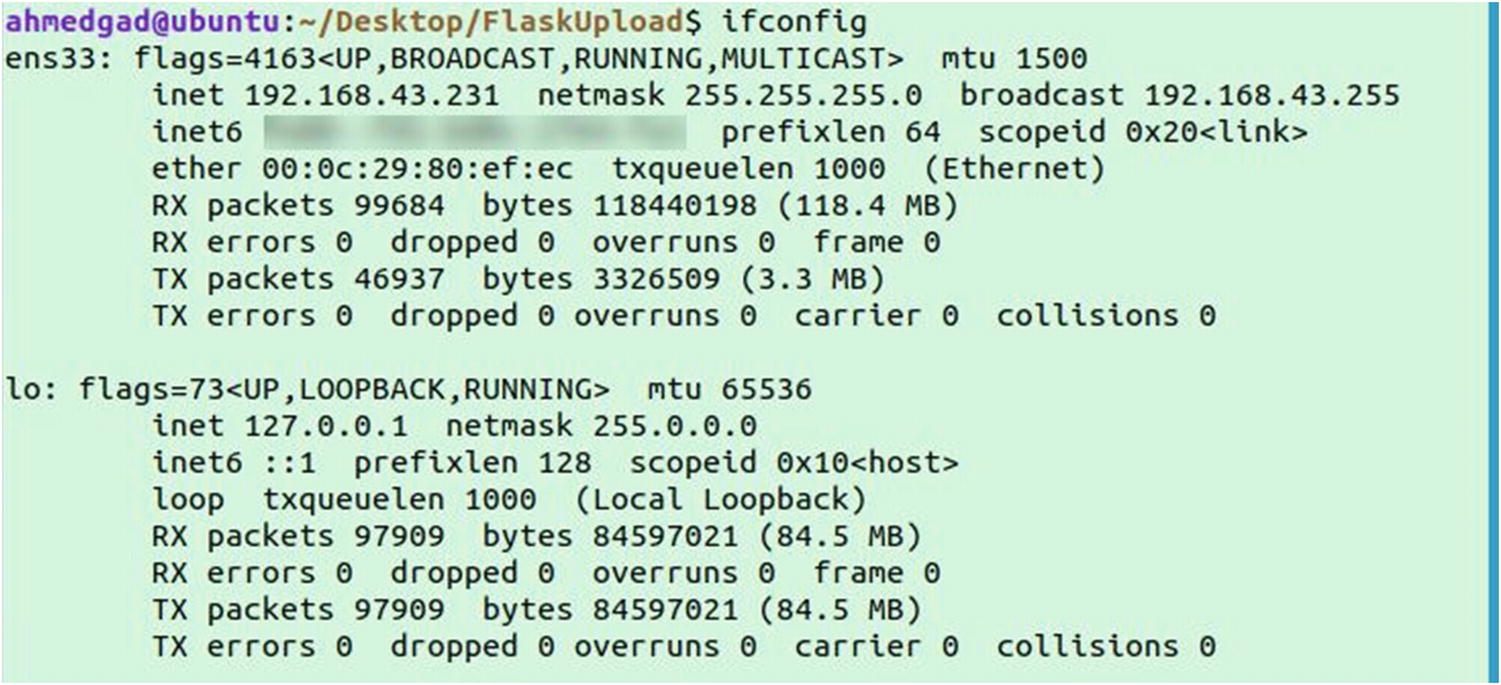
If you do not know your IPv4 address, use the ifconfig terminal command. If the command is not found, install net-tools using this command:
ahmed-gad@ubuntu:-$sudo apt install net-tools
After that, you can execute the ifconfig command, as shown in Figure 3-14.
Figure 3-14
Using the ifconfig terminal command to determine the IPv4 address
The debug argument controls whether to activate debug mode. When the debug mode is on, changes to the server will be applied automatically without needing to restart it.
The route()decorator tells Flask which function to execute when a URL is visited. The URL is added as an argument to the decorator and the function is added below the decorator, which is upload_file() in this example. The URL is set to /, which means the root of the server. Thus, when the user visits http://192.168.43.231/:6666, the route() decorator associated with the root directory of the server will receive this request and execute the upload_file() function.
The route() decorator accepts an argument called methods, which receives the type of HTTP messages that the function will respond to as a list. Because we are just interested in the POST HTTP message, it will be set to ['POST'].
The data to be uploaded is sent as a dictionary of key and value. The key is an ID for the file and the value is the file itself. Inside the upload_file() function, the file to be uploaded is fetched using the flask.request.files dictionary. It receives a key referring to the file to be uploaded. The used key is media. This means when we prepare the Kivy application, the key of the image to get uploaded must be set to media. The file is returned into a variable, which is file_to_upload in our example.
If we are interested in saving the file according to its original name, its name is returned using the filename property. Because some files are named to deceive the server and perform illegal actions, the secure filename is returned using the werkzeug.secure_filename() function. After returning the secure filename, the file is saved using the save() function. When the file is saved successfully, a print message appears on the console and the server responds with the word SUCCESS to the client.
Note that the server accepts any file extension. You can read more about Flask to learn how to upload files with specific extensions.
Using Requests for Uploading Files to the HTTP Server
Before modifying the Android application to upload the file, we can build a client as a desktop application that uses the requests library for uploading a file. It will be easier to debug than the mobile application. The application does not include Kivy code and thus we will interact with the server using terminal commands. The client-side code is shown in Listing 3-20.
print("Connection Error! Make Sure Server is Active.")
Listing 3-20
Using Requests to Upload the Captured Image to the Server
The dictionary holding the files to be uploaded is prepared. It has a single key-value pair. As we stated earlier, the key will be set to media because the server is waiting for that key. The file is opened using the open() function that receives its path. The rb argument specifies that the file is opened as read only in binary mode.
The requests.post() function receives two arguments. The first is the URL that directs it to the root of the server after specifying its socket details (IPv4 address and port). The second one is the dictionary. A try and catch statement is used to check if there is a problem with connection establishment. This ensures that the application will not crash even if there is an error in establishing the connection.
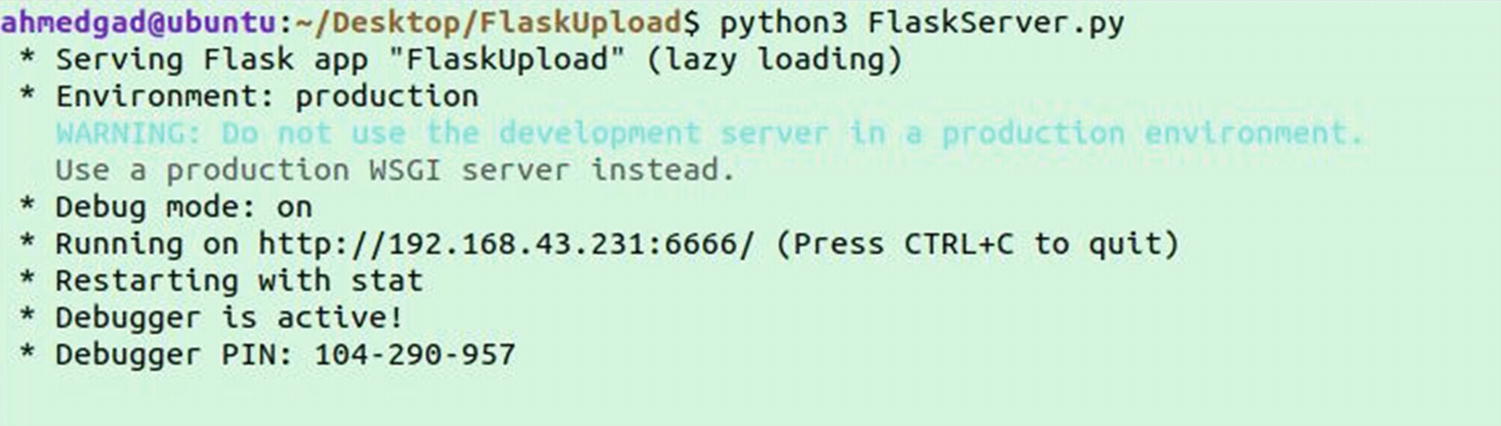
After building both the server and the client, we can start running the server. There is no GUI for the server and thus its interface is the terminal. Because the server is a regular Python file, we can run it by typing the Python filename after the keyword python or python3 according to the Python version used. If its name is FlaskServer.py, it will be executed using the following command. Remember to use the proper path to locate the Python file.
We will see informational messages indicating that the server is running successfully, as shown in Figure 3-15.
Figure 3-15
Running the Flask HTTP Server
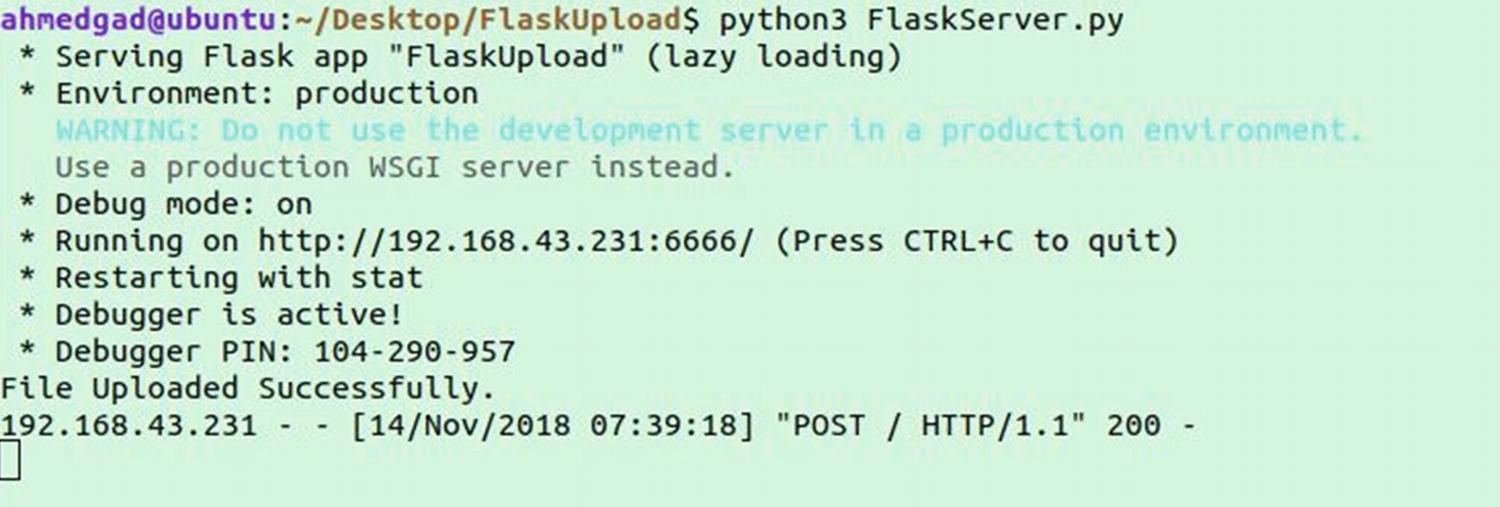
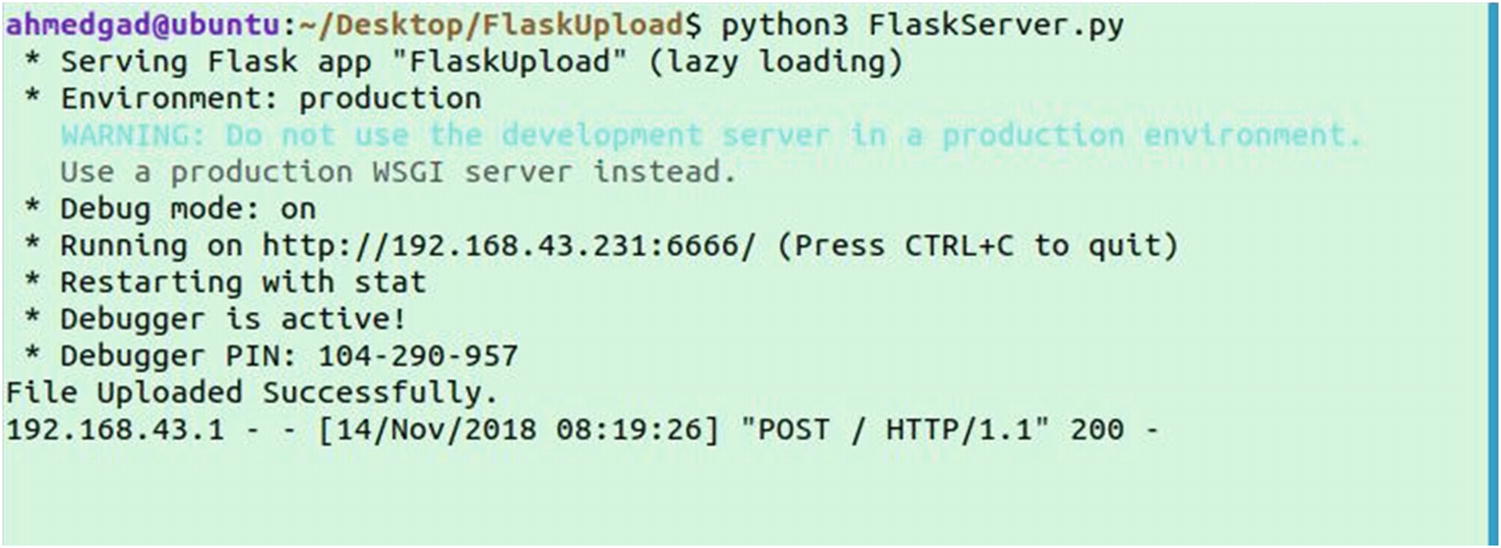
After running the client-side application and pressing the button, the server receives an HTTP POST message and uploads the file successfully according to the messages printed on the console in Figure 3-16. The HTTP status code of the response is 200 which means the request is fulfilled successfully.
Figure 3-16
Captured image by the Kivy application is uploaded successfully to the Flask HTTP Server
Upload the Camera Captured Image Using the Kivy Android Application
After making sure that the desktop client-side application works well, we can prepare the Android application. Compared to Listing 3-18, the changes will be inside the capture() function, as shown in Listing 3-21.
import kivy.app
import requests
class PycamApp(kivy.app.App):
def capture(self):
camera = self.root.ids['camera']
im_path = '/storage/emulated/0/'
im_name = 'captured_image_kivy.png'
camera.export_to_png(im_path+im_name)
files = {'media': open(im_path+im_name, 'rb')}
try:
self.root.ids['capture'].text = "Trying to Establish a Connection..."
self.root.ids['capture'].text = "Connection Error! Make Sure Server is Active."
def build(self):
pass
app = PycamApp()
app.run()
Listing 3-21
Capturing and Uploading Images to the Server Using the Android Application
Because the server might be offline, we need to reflect that to user. After clicking the Capture button, a message should be displayed informing the user that the connection is being established. If there is a connection error, a message is also displayed to reflect that.
In order to be able to change the text of the button, we have to access it within the Python file. In order to access a widget, it must have an ID. The previous KV file in Listing 3-17 does not assign an ID to the button. The modified KV file in Listing 3-22 assigns an ID to the Button widget. The assigned ID is capture.
BoxLayout:
orientation: "vertical"
id: root_widget
Camera:
id: camera
size_hint_y: 18
resolution: (1280, 720)
play: True
canvas.before:
PushMatrix:
Rotate:
angle: -90
origin: root.width/2, root.height/2
canvas.after:
PopMatrix:
Button:
id: capture
text: "Capture"
size_hint_y: 1
on_press: app.capture()
Listing 3-22
Assigning an ID to the Button to Access it Inside the Python File
Because the widgets arrangement did not change compared to the previous application, the application window will be identical to the previous application.
Dynamic IP Address in Requests
Now, the application depends on a static IPv4 address for the server. If the server uses the dynamic host configuration protocol (DHCP), the IPv4 address of the server might change and thus we have to rebuild the application with the new address. To make the process dynamic, we can use a TextInput widget in which the IPv4 address of the server can be entered. Before posting the dictionary to the server, the text from the widget is fetched in order to build the URL. The modified KV file is shown in Listing 3-23. To access this widget, it is assigned the ID ip_address.
BoxLayout:
orientation: "vertical"
id: root_widget
Camera:
id: camera
size_hint_y: 18
resolution: (1280, 720)
play: True
canvas.before:
PushMatrix:
Rotate:
angle: -90
origin: root.width/2, root.height/2
canvas.after:
PopMatrix:
TextInput:
text: "192.168.43.231"
id: ip_address
size_hint_y: 1
Button:
id: capture
text: "Capture"
size_hint_y: 1
on_press: app.capture()
Listing 3-23
Adding a TextInput Widget to Enter the IPv4 Address of the Server
The Python code after using the TextInput widget is shown in Listing 3-24.
import kivy.app
import requests
class PycamApp(kivy.app.App):
def capture(self):
camera = self.root.ids['camera']
im_path = '/storage/emulated/0/'
im_name = 'captured_image_kivy.png'
camera.export_to_png(im_path+im_name)
ip_addr = self.root.ids['ip_address'].text
url = 'http://'+ip_addr+':6666/'
files = {'media': open(im_path+im_name, 'rb')}
try:
self.root.ids['capture'].text = "Trying to Establish a Connection..."
requests.post(url, files=files)
self.root.ids['capture'].text = "Capture Again!"
except requests.exceptions.ConnectionError:
self.root.ids['capture'].text = "Connection Error! Make Sure Server is Active."
def build(self):
pass
app = PycamApp()
app.run()
Listing 3-24
Fetching the IPv4 Address from the TextInput Widget
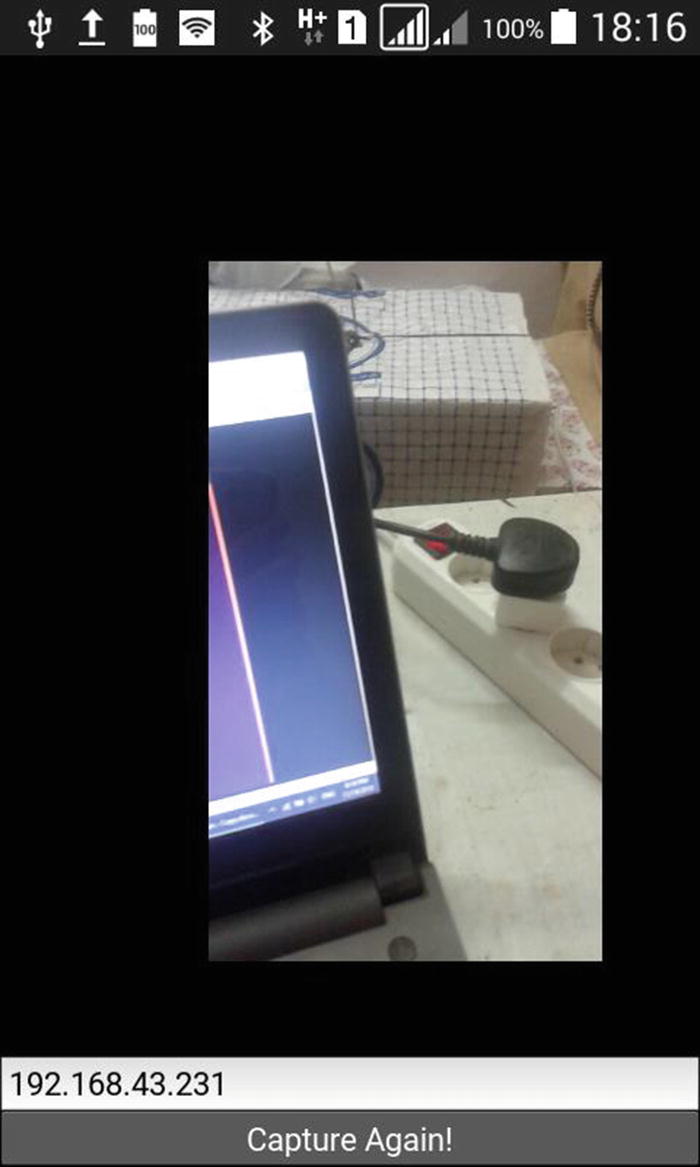
The application window is shown in Figure 3-17. Note that the text of the button is changed to “Capture Again!” which means the file is uploaded successfully according to the Python code. Remember to run the server before pressing the button. Try to use a different IPv4 address and note how the button text changes to reflect that there is a connection error.
Figure 3-17
The image capture application after using the TextInput widget to enter the IPv4 address of the server
The Flask server log messages also appear on the terminal, as shown in Figure 3-18. The messages reflect that the server received a message of type POST from a client with the IPv4 address 192.168.43.1.
Figure 3-18
Log messages from the server after receiving a file
At this point, we successfully created a Kivy Android application that shares a single image captured using the camera to an HTTP server. This is by saving the image to the device storage and then uploading it.
The remaining part of this chapter extends this application by live previewing the Android Camera in the server’s web browser. This is done by capturing the camera image and storing it in the device memory as a bytes array. The image will not be stored in the device storage as a file in order to save time. The bytes array is uploaded to the Flask server using an HTML POST message, as was done previously in this chapter. The server receives each image and displays it on an HTML page using the <img> element. We create a live Android Camera preview by continuously capturing images, uploading them to the server, and updating and refreshing the HTML page.
Capturing and Storing a Camera Image to the Memory
Previously in this chapter, the Camera widget images are captured and saved as PNG files using the Kivy export_to_png() function. When this function is called by a widget, a screenshot from the widget is taken and saved as a PNG file to the directory specified in the function. The saved PNG file is uploaded to the server using the HTTP POST message.
If we would like to continuously preview the captured images using the Android Camera, we have to capture the Camera widget, save each captured image as a PNG file, and post them to the server. Saving a file each time an image is captured is time consuming. Moreover, it is not required to save the file in the storage. We just need to send the captured image to the server as soon as it is available. There’s no need to delay the transmission process. For such reasons, we can use tools that capture an image and save the pixels in memory rather than saving it in a file. We can use the glReadPixels() function in OpenGL or return the texture of the widget using the get_region() function. Both functions capture and save the image to the device memory rather than saving it as a file. This speeds up the process.
The glReadPixels() function is available in the kivy.graphics.opengl module. Its signature is as follows:
kivy.graphics.opengl.glReadPixels(x, y, width, height, format, type)
The function works by capturing an image of a region from the Kivy application window. The region starts from the lower-left corner located using the x and y arguments. The width and height of the region are specified using the width and height arguments. Using the first four arguments, the region is successfully specified. The region starts at (x, y) and extends horizontally to the left by a value equal to width and goes vertically up by a value equal to height. Because we are interested in capturing the region at which the Camera widget is placed, we can return the coordinates of this widget and assign them to the four arguments.
Before returning the pixels of that region, some other arguments need to be specified to control how the pixels are saved into the memory.
The format argument specifies the format of the pixel data. There are different values for it, such as GL_RED, GL_GREEN, GL_BLUE, GL_RGB, GL_RGBA, and more. These values exist in the kivy.graphics.opengl module. We are interested in capturing an RGB image and thus will use the GL_RGB values.
The type argument specifies the type of the pixel data. It has different values such as GL_UNSIGNED_BYTE, GL_BYTE, GL_UNSIGNED_SHORT, GL_SHORT, GL_UNSIGNED_INT, and more. These values exist in the kivy.graphics.opengl module. We are interested in saving the image as a byte array and thus the GL_UNSIGNED_BYTE argument is used.
The function has other two optional arguments called array and outputType that we are not interested in editing.
Another way to capture the image of a widget is using the get_region() method of the kivy.graphics.texture.Texture class. For any widget with a texture, we can call this function to return its texture. It has four arguments as shown here. They are identical to the first four arguments in the glReadPixels() function.
get_region(x, y, width, height)
You can use any of these functions to capture images from the Camera widget and save the result in the memory. For get_region(), it works with widgets having texture. Some widgets do not have texture such as TextInput and thus we cannot use get_region() with it. On the other hand, glReadPixels() captures images without caring whether a widget has texture or not.
For making things simpler, we can use get_region(). The complete code used to capture an image using get_region() and save it to the memory is shown in Listing 3-25.
We will start building a desktop application to make debugging easier. At the end of the chapter, we can build the Android application.
The Camera widget is fetched using its ID from the KF file to determine its left-bottom location (camera.x, camera.y). This is in addition to its resolution (camera.resolution) to return the captured images size where camera.resolution[0] is the width and camera.resolution[1] is the height. These four values are assigned to the four arguments in the get_region() method.
The get_region() method returns an instance of the TextureRegion class. In order to return the pixels of the texture, we can use the pixels property. It returns the texture of the widget as pixels in RGBA format as an unsigned bytes array. This array is saved in memory. In this example, the bytes array is saved in the pixels_data variable. The data within this variable will later be posted to the server.
Now, we can debug the application to ensure everything works as expected. This is by saving the captured image using Python Image Library (PIL). Because get_region().pixels returns a bytes array in RGBA format, we need to construct the image from that array. The frombytes() function in PIL supports building an image from a bytes array. The function accepts the mode argument by specifying the image mode, which is the string “RGBA” in this example. We also specify IMAGE size in the size argument as a tuple and the raw byte data in the data argument.
Note that this function accepts the size as an integer. It is better to convert the width and height of the Camera widget to integers. This is because the returned width and height of the Camera widget might be float. The image returned by the frombytes() function is saved using the save() function.
The KV file used with the previous Python code to build the desktop application is shown in Listing 3-26. It is the same file used in the last application in the previous example except for removing the TextInput widget, as we are not interested in contacting the server at the current time.
After running the application, the window is as shown in Figure 3-19.
Figure 3-19
An image captured using get_region() and saved into the device memory
If you click on the button, the get_region().pixels will capture the area of the Camera widget and save it in memory.
Up to this point, we have successfully captured an image using the get_region() method and saved it to device memory. The next step is to send this image to the Flask server.
Posting the Captured Image to the Flask Server Using a HTTP POST Message
In the previous example, the image is saved into the memory as a bytes array and is ready to be sent to the server. Listing 3-27 shows the Python code that sends the array to the Flask server.
self.root.ids['capture'].text = "Trying to Establish a Connection..."
requests.post(url, files=files)
self.root.ids['capture'].text = "Capture Again!"
except requests.exceptions.ConnectionError:
self.root.ids['capture'].text = "Connection Error! Make Sure Server is Active."
def build(self):
pass
app = PycamApp()
app.run()
Listing 3-27
Uploading the Bytes Array to the Server
The returned array of bytes from the get_region() method is inserted into the dictionary that will be sent to the server. Note that the dictionary is assigned to the files argument of the requests.post() function. This means that the bytes array will be received at the server as a file.
Everything else in the code works as discussed in the previous example. Note that we are not interested in using the PIL anymore on the client-side.
The KV file for the client-side application is shown in Listing 3-28, after adding the TextInput widget.
BoxLayout:
orientation: "vertical"
Camera:
id: camera
size_hint_y: 18
resolution: (1280, 720)
play: True
TextInput:
text: "192.168.43.231"
id: ip_address
size_hint_y: 1
Button:
id: capture
text: "Capture"
size_hint_y: 1
on_press: app.capture()
Before Sending Images to the Server
At the server-side, we are going to receive the uploaded bytes array as a file. This file will be read in order to convert its content to an image using the PIL.Image.frombytes() function, as seen previously. In order to convert the byte array into an image using this function, it receives the size of the returned image in the size argument. Using different size rather than the correct one may degrade the image quality. Thus, we need to know the image size on the server-side. How do we do that?
Every POST message from the client to the server holds the file to be uploaded. We can also send the image size in that message. Unfortunately, this sends more data in every message as the image size is sent every time an image is uploaded. Because the image size is fixed, we do not have to send it more than once.
A better solution is to send a POST HTTP message to the server before sending any images. This message tells the server about the size of the images it will receive in the next messages. When the server receives the uploaded images in new messages, it can use the previously received image size. For such reasons, a new Button widget is added to the end of the widget tree. When pressed, the size of the Camera widget will be fetched and uploaded to the server in a POST HTTP message.
Listing 3-28 shows the modified KV file of the client-side Kivy application. The new button is assigned the ID cam_size. When this button is pressed, the cam_size() function in the Python code will be executed.
BoxLayout:
orientation: "vertical"
Camera:
id: camera
size_hint_y: 18
resolution: (1280, 720)
play: True
TextInput:
text: "192.168.43.231"
id: ip_address
size_hint_y: 1
Button:
id: capture
text: "Capture"
size_hint_y: 1
on_press: app.capture()
Button:
id: cam_size
text: "Configure Server"
size_hint_y: 1
on_press: app.cam_size()
Listing 3-28
KV File for the Client-Side Application
The Python code of the client-side Kivy application is shown in Listing 3-29 after adding the cam_size() function. A dictionary is created to hold the width and height of the images to be uploaded (i.e., the Camera widget). Such data will be sent to the server in the /camSize directory as parameters and thus the params argument of the requests.post() function is used. If the message is sent successfully to the server, then the newly added Button widget is useless. Thus it will be deleted from the widget tree using the delete_widget() function.
self.root.ids['capture'].text = "Trying to Establish a Connection..."
requests.post(url, files=files)
self.root.ids['capture'].text = "Capture Again!"
except requests.exceptions.ConnectionError:
self.root.ids['capture'].text = "Connection Error! Make Sure Server is Active."
def build(self):
pass
app = PycamApp()
app.run()
Listing 3-29
Informing the Server by the Width and Height of the Captured Images
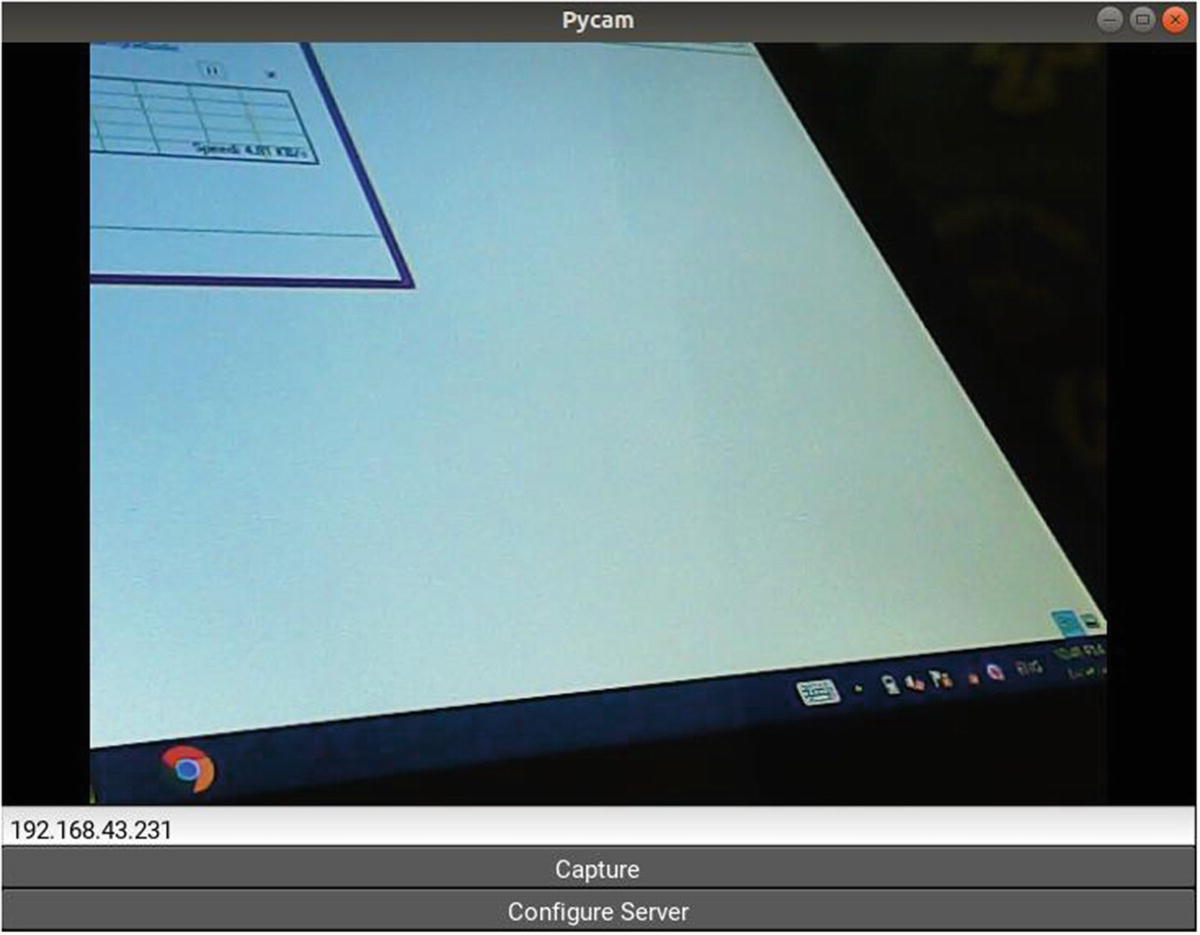
Figure 3-20 shows the client-side application window.
Figure 3-20
The window of the application after adding the server configuration button
After preparing the client-side Kivy application, the next step is to prepare the server-side Flask application.
Processing the Received Image at the Server
After successfully building the Kivy application on the client-side, the next step is to prepare the server-side Flask application. It starts by receiving the dimensions of the uploaded images (width and height) and then receives the uploaded images. The application’s Python code is shown in Listing 3-30.
There are variables called cam_width and cam_height are defined outside any function. Those variables hold the width and height of the images. The route decorator with the /camSize URL executes the cam_size() function when the button with ID of cam_size in the KV file is pressed. Inside this function, the width and height of the Camera widget are received from the client as arguments using the flask.request.args dictionary. They are assigned to the previously created two variables. In order to use those variables rather than create new ones, we define them as global at the beginning of the function.
Remember to convert the type of the received data to integer before assigning them. The int(float()) variable guarantees that the conversion happens without errors.
Restoring Images from the Received Bytes Arrays at the Server
The upload_file() function is similar to the one used previously in this chapter. It receives the uploaded file using the flask.request.files dictionary. The uploaded file is read using the read() function. The received file is converted to an image using the PIL.Image.frombytes() function. Just for debugging purposes, the image will be saved into a PNG file when developing the client-side application.
After preparing the client and server applications, we can test them according to Figure 3-21. By running the client Kivy application and pressing the button with the ID cam_size, the image size (width and height) will be sent to the server and that button will be removed. After pressing the other button, an image will be captured and sent to the server as a bytes array file. The file is read at the server and returns the bytes array. That array is converted into an image using the PIL.Image.frombytes() function. Figure 3-21 shows that everything is working fine.
Figure 3-21
The image dimensions followed by uploading the bytes array are sent to the sever
At this point, both the Kivy client and the Flask server applications are working well with each other in order to upload a single image. In order to send images continuously from the client to the server, we can build an HTML page that will display the received images.
Saving and Displaying the Received Images Using an HTML Page
Up to this point, we successfully built both the client-side and server-side applications. The client-side application sends the image and its width and height are also sent to the server. The client sends the image as a bytes array to the server. The server uses the received width and height for saving the array as a PNG file.
Because we are interested in displaying the received images, we are going to build a very simple HTML page with an <img> element in which the path of the uploaded image to be displayed is assigned to the src attribute. After receiving and saving the uploaded image as a PNG file, the server application creates the HTML file after updating the src attribute according to the path of the uploaded image. Then, the HTML page is opened in the web browser using the open() function of the webbrowser module. This function accepts the page URL as an argument. The updated server application is shown in Listing 3-31.
Displaying the Restored Images on the Server on an HTML Page
The HTML code is written as text inside the html_code variable. The formatted code for better visualization is shown in Listing 3-32. In addition to the <img> element, the <h1> element prints a title above it. The HTML code is written into an HTML file according to the specified path in the html_url variable.
<html>
<head>
<title>Displaying Uploaded Image</title>
</head>
<body>
<h1>Uploaded Image to the Flask Server</h1>
<img src="out.png" alt="Uploaded Image at the Flask Server"/>
</body>
</html>
Listing 3-32
HTML Page to Display the Images
After capturing an image in the client, uploading it to the server, and updating and displaying the HTML page, the result looks as shown in Figure 3-22. Note that the application opens a new tab in the browser for each uploaded image. This will be a trouble later when we try to continuously upload images.
Figure 3-22
Displaying the uploaded images to the HTML page on the server
Displaying the Received Image Without Being Saved
In the client-side application, we used the get_region() method in order to avoid saving each uploaded image. We need to do the same thing to the server-side application.
Currently, the server receives the bytes array, saves it to a PNG file using PIL, and displays it in the web browser. We need to remove the in-between step of saving the image as a PNG file. Thus, we need to display the uploaded image as a bytes array directly to the web browser. This is done by inlining the bytes array of the image into the src attribute of the <img> HTML element as a base64 encoded image.
For encoding the bytes array as base64, the base64 Python module is used. Make sure it is installed in your machine. Listing 3-33 shows the updated server-side application.
Note that we are longer need to use PIL. This is because we are not interested in either converting the bytes array into an image or saving the image.
Inlining the Bytes Array Into the src Attribute of the <img> HTML Tag
The line used to convert the image to base64 encoding using the b64encode() function is shown next. This function accepts a bytes array and thus it is fed by the uploaded data in the file_to_upload variable.
im_base64 = base64.b64encode(file_to_upload)
The im_base64 variable holds the base64 encoded image. The value in this variable is assigned to the src attribute of the <img> element as a data URL. The URL used is data:;base64,. Note that the URL does not accept the bytes array directly but after converting it into a string using the encode('utf8') function. You can read more about data URLs.
Remember that we have to convert the uploaded Bytes array image into a PIL image in order to rotate it. Then the PIL image is converted back to a bytes array in order to encode it using base64. By doing this, we do not have to save the image as an external file.
Continuously Uploading Images to the Server
Previously, a single image was uploaded to the server. Now, we want to continuously upload images to the server. To do this, there will be changes to both the client-side and server-side applications.
After clicking the Capture button of the client-side Kivy application, the application enters an infinite while loop. In each iteration, a camera image is captured and sent to the server in a POST HTTP message. The updated Kivy application is shown in Listing 3-34.
self.root.ids['capture'].text = "Trying to Establish a Connection..."
requests.post(url, files=files)
self.root.ids['capture].text = "Capture Again!"
except requests.exceptions.ConnectionError:
self.root.ids['capture'].text = "Connection Error! Make Sure Server is Active."
def build(self):
pass
app = PycamApp()
app.run()
Listing 3-34
Client-Side Application for Continuously Capturing and Uploading Images to the Server
At the server-side Flask application, a new browser tab is opened for each uploaded image. This is a problem when we want to continuously upload images. To solve this issue, we use a flag variable named html_opened. It is set to False by default, which means no tab is opened. After uploading the first image, it will be set to True and thus the application will not open any other tabs. The updated Flask application is shown in Listing 3-35.
html_code = '<html><head><meta http-equiv="refresh" content="0.5"><title>Displaying Uploaded Image</title></head><body><h1>Uploaded Image to the Flask Server</h1><img src="data:;base64,'+im_base64.decode('utf8')+'" alt="Uploaded Image at the Flask Server"/></body></html>'
Server-Side Application for Continuously Receiving the Uploaded Images and Displaying Them in the Web Browser
Another change in the server application is the use of a <meta> tag to refresh the HTML page every 0.5 seconds.
Controlling Image Upload Rate Using Clock
The previous application used the UI thread to upload images to the server. This hangs the applications and prevents the user from interacting with its widgets.
It is better to do time-consuming operations in another thread rather than the UI thread. In our application, this solution is not feasible. This is because if we created a new thread it will still have to access the Camera widget from the UI thread each time an image is captured.
Another solution is to upload the image to the server in a new thread rather than the UI thread. This makes the UI of the application more responsive than before. Also, we can slow down the process by controlling the rate of uploading images to the server.
Using the kivy.clock.Clock object, we can schedule a function call in the future for execution. Because we are interested in executing the function multiple times in the future, the kivy.clock.Clock.schedule_interval() function is a good option. It accepts the function to be executed and the number of seconds between the two executions. The modified code of the Kivy application is shown in Listing 3-36. The interval is set to 0.5 seconds. Remember to match the number of seconds for uploading an image in the schedule_interval() function and refreshing the HTML page in the <meta> tag.
t = threading.Thread(target=self.send_files_server, args=(files, url))
t.start()
def build(self):
pass
def send_files_server(self, files, url):
try:
requests.post(url, files=files)
except requests.exceptions.ConnectionError:
self.root.ids['capture'].text = "Connection Error! Make Sure Server is Active."
app = PycamApp()
app.run()
Listing 3-36
Uploading the Images in a New Thread
In this example, a new function called upload_images() is created to hold the code responsible for capturing and uploading each image. This function increments a variable named num_images for each uploaded image. Inside the function, just the image is captured using camera.texture.get_region(). To upload it, a new thread is created at the end of this function.
Using the Thread class inside the threading module, we can create new threads. Inside the constructor of that class, the thread target is specified and it can be a function that is called after the thread is running. If that function accepts arguments, we can pass them using the args argument of the constructor.
In our application, a callback function named send_files_server() is created and it accepts the image to be uploaded to the server in addition to the server URL.
After running the Kivy and Flask applications, the messages printed to the terminal indicate successful execution.
The terminal execution of the Kivy application is shown in Figure 3-23.
Figure 3-23
Terminal execution of the client-side application
Figure 3-24 shows the output of the Flask application.
Figure 3-24
Terminal execution of the server-side Flask application
We have now created a desktop Kivy application that accesses the camera, continuously captures images, uploads them to the Flask server, and displays the captured images in the web browser. The next step is to build the Android application.
Building the Live Camera Preview Android Application
We need to make some changes to the client desktop Kivy application in order to make it suitable as an Android application.
We have to rotate the Camera widget by -90 degrees using the Rotate context instruction because the Android Camera is by default rotated 90 degrees. This was discussed previously in this chapter. The KV file that rotates the widget is shown in Listing 3-37.
BoxLayout:
orientation: "vertical"
Camera:
id: camera
size_hint_y: 18
resolution: (1280, 720)
play: True
canvas.before:
PushMatrix:
Rotate:
angle: -90
origin: root.width/2, root.height/2
canvas.after:
PopMatrix:
TextInput:
text: "192.168.43.231"
id: ip_address
size_hint_y: 1
Button:
id: capture
text: "Capture"
size_hint_y: 1
on_press: app.capture()
Button:
id: cam_size
text: "Configure Server"
size_hint_y: 1
on_press: app.cam_size()
Listing 3-37
Rotating the Image 90 Degrees for the Android Application
Note that rotating the Camera widget does not mean that the uploaded images to the server are also rotated. This operation just rotates the Camera widget that displays the camera images. The captured images are still rotated by 90 degrees. Because of this, we need to modify the Flask application in order to rotate each captured image by -90 before displaying it in the web browser. This is shown in Listing 3-38. The bytes array is converted into a PIL image, which is rotated by 90 degrees. Finally, the rotated image is converted back into a bytes array in order to be encoded according to base64.
html_code = '<html><head><meta http-equiv="refresh" content="0.5"><title>Displaying Uploaded Image</title></head><body><h1>Uploaded Image to the Flask Server</h1><img src="data:;base64,'+im_base64.decode('utf8')+'" alt="Uploaded Image at the Flask Server"/></body></html>'
Rotating the Captured Images at the Server by 90 Degrees
After preparing the client-side and server-side applications, we can build the Android application according to the following terminal command.
ahmedgad@ubuntu:~/Desktop/NewApp$ buildozer android debug deploy run logcat
Make sure to change the path to the application root in which the buildozer.spec file exists and activate the virtual environment (if you prepared the development environment in a virtual environment).
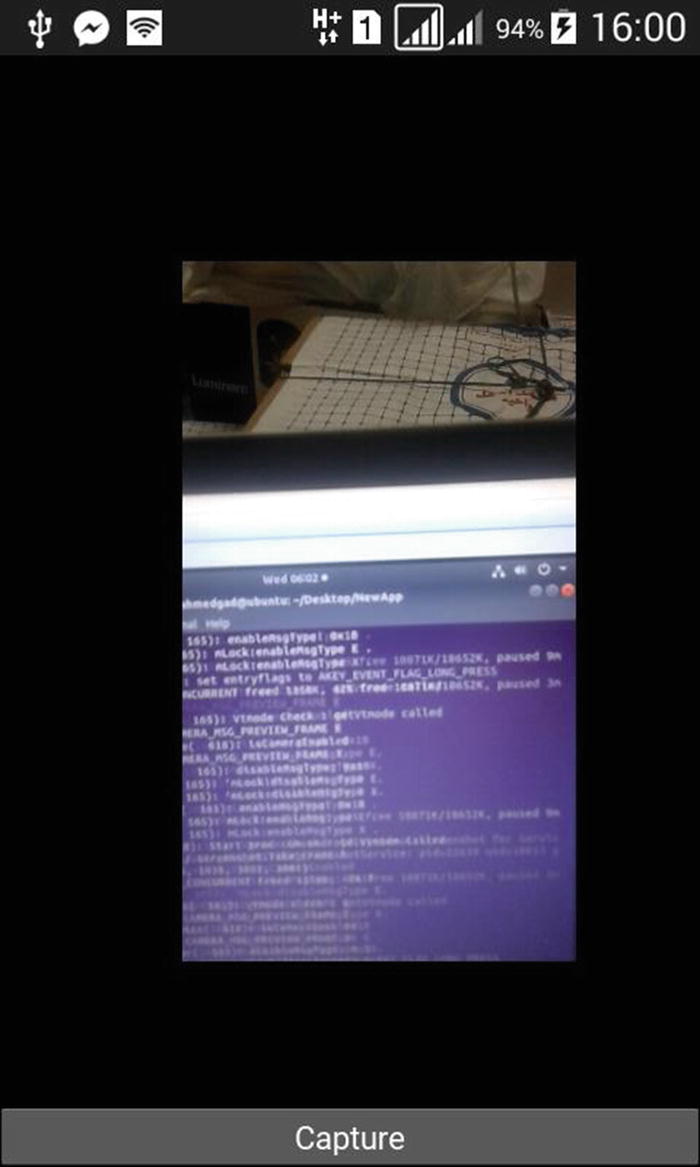
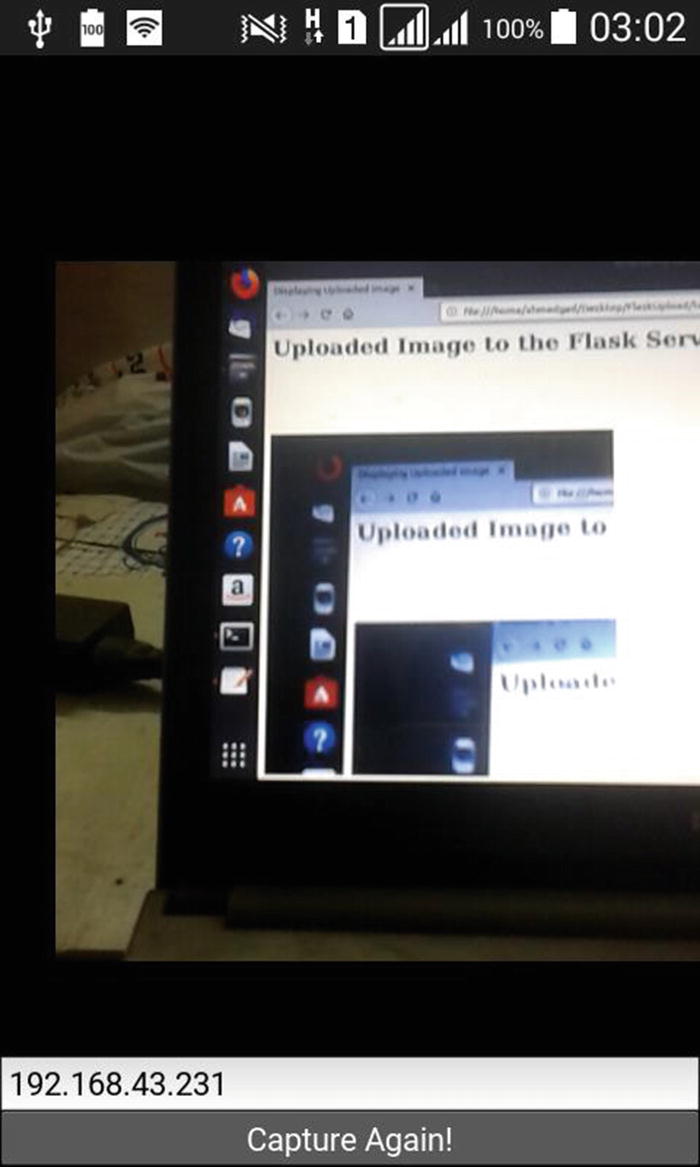
The window of the Android application is shown in Figure 3-25.
Figure 3-25
Window of the Android application for continuously uploading images
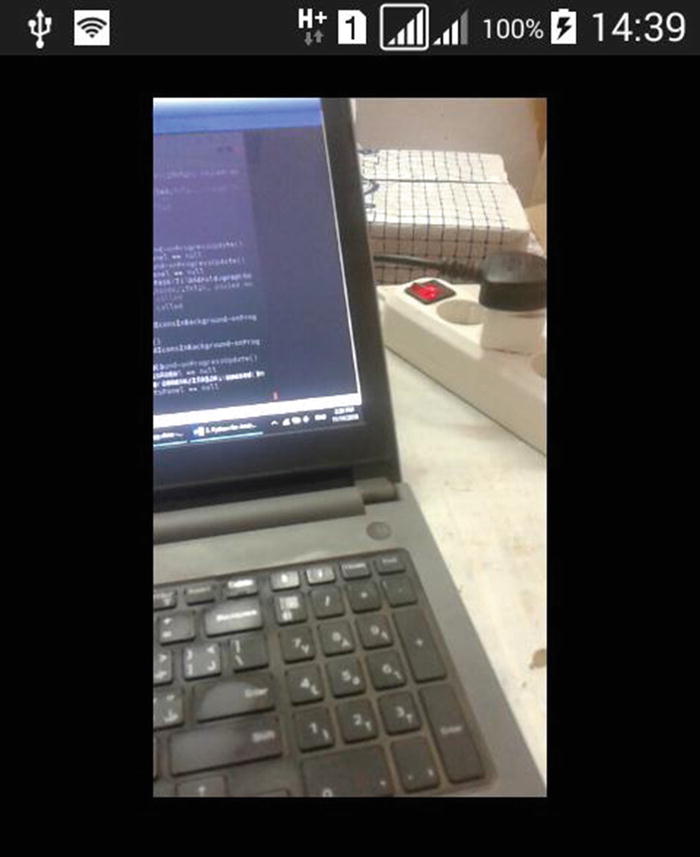
After clicking on the Capture button, the Android application captures images continuously and uploads them to the server, where they are displayed in an HTML page. Figure 3-26 shows one of the displayed images.
Figure 3-26
An uploaded image displayed in the web browser of the server
Summary
This chapter discussed accessing the Android Camera via the Camera widget. Before building the Android application, we created a desktop application to make sure everything worked as expected. We built the Android application using Buildozer. To have permission to access the Android Camera, we had to update the android.permissions field inside the buildozer.init file . Because the Android Camera is rotated 90 degrees by default, it must be rotated back. This is done using Kivy canvases. Three canvas instances were discussed—canvas, canvas.before, and canvas.after. In order to limit the effect of a given instruction to just certain widgets, the PushMatrix and PopMatrix instructions were discussed.
After the camera was previewed at the proper angle, images were captured in order to upload them to an HTTP server. The server is created using Flask and runs on a desktop computer. Using the IPv4 address and port number of the server, the requests Python library will upload the captured images using the Kivy Android application and an HTTP POST message.
At the end of this chapter, we previewed the Android Camera in the server’s web browser. The images are saved into the device memory as bytes array, without being saved in the device storage, in order to save time. Such bytes arrays are then uploaded to the server. The server then interprets these bytes array and shows the images via an HTML page in the web browser.
In the next chapter, a more convenient design is created for the live preview project by separating the buttons into different screens. Kivy supports the Screen class for building screens and the ScreenManager class for managing such screens. We can navigate from one screen to another. To understand how to create an application with multiple screens, the next chapter starts by discussing how to create custom widgets.