
Appendix D. Building web applications with JavaScript
This appendix discusses how to use the new CMIS 1.1 Browser binding with JavaScript code, and provides hands-on examples to demonstrate some basic concepts. Hold on tight; the pace will be very fast. If we explained all the background along the way, this appendix could take an entire book on its own. For that reason, we’re assuming you already know HTML, Ajax, and JavaScript for this high-speed survey of the subject.
D.1. JavaScript and CMIS background
Over the last few years, rich web applications have become more and more popular. Several factors are influencing this trend. The invention of the asynchronous JavaScript plus XML (Ajax) technologies in the late 1990s laid the foundation to overcome the traditional request-response scheme, where each action on a web page resulted in a new HTML page being delivered to the browser. Instead, now you can build web applications that behave more like desktop applications by changing only parts of a web page and manipulating the DOM tree on the fly. A second trend has been the enormous progress in JavaScript technology in web browsers over the last few years. The evolution from primitive language interpreters to highly optimized on-the-fly compilation has made it possible to build a new generation of browser applications that formerly were restricted to the desktop, such as inbrowser games.
Powerful libraries have accompanied the evolution of the language. JQuery (http://jquery.com/) is among the most popular candidates in this space, taking much of the burden off the developer to deal with browser and platform differences. Other libraries have a more specific domain, such as UI widget elements, layout management, or Model-View-Controller frameworks helping with the modularization of complex web applications.
Another important factor is the enormous demand for mobile applications. Nearly all smartphones and tablets today have a powerful web browser with JavaScript support. HTML plus JavaScript makes it possible to build platformindependent mobile applications. This is a huge advantage, given the abundance of mobile platforms with their proprietary and/or incompatible programming languages and associated APIs. Dozens of frameworks and JavaScript libraries are focused on mobility.
Last but not least, HTML5 is in the final stage of standardization, closing even more gaps when compared to traditional desktop applications (for example, better support for rich media). Today many browsers support HTML5 or parts of it.
D.1.1. CMIS and web browsers using XML
How does CMIS fit into the world of browsers and web applications? When you first look at CMIS 1.0, you might be disappointed. As you’ll recall from earlier chapters, CMIS 1.0 supports two protocols:
- SOAP (web services)
- AtomPub
Both are web protocols based on HTTP, but their support in JavaScript isn’t the best match. SOAP is heavyweight, chatty, and nearly impossible to use without good library support. It isn’t very browser friendly and therefore is almost never used in browser applications. For these reasons, SOAP loses momentum. Things look a bit better for AtomPub, but data is still transferred over the wire, which is an issue, especially for mobile applications. A JavaScript application has to do a lot of work to parse the large AtomPub responses.
D.1.2. Creation of the Browser binding
In early 2011, the CMIS TC recognized this situation, and a subcommittee was founded to specify another binding focusing on web browsers and JavaScript. This work resulted in the CMIS Browser binding. The Browser binding comes with CMIS 1.1 (targeted to be finalized around the time this book is published).
What makes the Browser binding better suited for web applications? First, the underlying data encoding isn’t based on XML but on the JSON protocol (www.json.org). The JSON syntax is oriented closely to the syntax of JavaScript. In theory, a single statement in JavaScript can parse and process a JSON document. This makes parsing and generating JSON a natural and easy task in JavaScript.
Second, JSON is lightweight and far less verbose than XML. This makes it better suited for low-bandwidth connections and mobile applications while still being readable and text-based. The mapping between JSON and the CMIS domain model is direct and straightforward. There’s no overhead from a predefined structure as in AtomPub, and there’s a 1:1 mapping from the CMIS JSON protocol to its domain model. The Browser binding also defines a fixed URL syntax compared to the more flexible approach in AtomPub. From a CMIS consumer perspective, this makes life a lot easier. You don’t have to deal with various possibilities like, for example, how a link is formed to get the content of a document. The URL always looks the same, and the client always uses the same form of URL no matter what repository is used as a back end. The CMIS Browser binding is restricted to the HTTP methods GET and POST. (All browsers on all platforms support GET and POST.)
D.1.3. OpenCMIS support for the Browser binding today
The OpenCMIS Java library already supports the CMIS Browser binding, even if it isn’t yet an official standard. It’s also supported in the Chemistry Workbench, and you may have noticed the additional option in the login dialog box where you select the binding, shown in figure D.1.
Figure D.1. The Chemistry Workbench supports the Browser binding today.

You just have to enable it in the configuration of whatever server you’re using. Although a full tour of the Browser binding and JavaScript is out of scope for this book, we’ll cover the most important aspects here.
The remainder of this appendix will guide you through the first steps to take for a CMIS application in JavaScript running entirely in a web browser. Before you begin, you should be familiar with the basics of HTML, Ajax, and JavaScript. You can find many tutorials on the web if you need more background on these things. To dig deeper, you definitely should look in the Browser binding section of the CMIS 1.1 specification.
For each method in each service of the CMIS domain model, you’ll find the URL and the JSON syntax required. We’ll start with plain vanilla JavaScript to provide an understanding of how things really work. Later we’ll switch to the popular JQuery library to demonstrate how such a library can simplify your life. We’ll restrict ourselves to a few select methods of the CMIS domain model to keep this section manageable. But once you get the basic concepts down, it should be easy to apply them to the remainder of the services not covered here. You can use your favorite IDE for JavaScript; we don’t require a specific one. A JavaScript debugger will be useful, though. Often these are simple browser add-ons (such as Firebug for Firefox). A simple text editor, a browser, and a JavaScript debugger are sufficient.
D.2. Try it—Hello Browser binding
Let’s get started! We’ll use the Apache InMemory Repository and the data model of the Blend application from elsewhere in the book. See chapter 1, section 1.2.2, for setup instructions for the Apache InMemory Repository. The first exercise is the simplest way to get access to a CMIS repository. Open a web browser and enter the following URL: http://localhost:8081/inmemory/browser.
You’ll see a page containing a lot of cryptic-looking braces and colons. This is a JSON response. The URL calls the getRepositories method of the CMIS repository service. You can use a browser add-on that formats the output nicely to make the information much more readable. Figure D.2 shows an example from the JSON-View add-on for Firefox.
Figure D.2. JSON data response for the getRepositories call

D.2.1. First steps
Let’s see how you can use the information from the Browser binding from a JavaScript application. First you need some infrastructure for a basic web application. Open a text editor and create a file called index.html with the following contents:
<!DOCTYPE html>
<head>
  <meta charset="UTF-8">
  <title>OpenCMIS Browser Binding</title>
  <meta http-equiv="Content-Type" content="text/html; charset=UTF-8">
  <link rel="stylesheet" type="text/css" href="../css/opencmis.css"/>
  <script src="cmis.js" type="text/javascript"></script>
</head>

<body>
  <h3>CMIS and JavaScript</h3>
    <p>Get repository info from Apache InMemory Repository: </p>
    <input type="button" value="Get RepositoryInfo"
                          onClick="doRepositoryInfo()">
    <div id="repositoryInfo"></div>
</body>
</html>
Save your file, and open a web browser with a URL like file:///<path-of-index.html>/code-step01/index.html. Replace <path-of-index.html> with the path where you stored your file. Alternatively, you can drag the file to the browser’s address bar. (You can find the full code for all the examples in this appendix in the JavaScript sample from the download accompanying this book.)
Now create a second file named cmis.js with the following contents:
function doRepositoryInfo() {
   alert("TODO: call repository info");
}
If all works well, you should see a page like the one shown in figure D.3.
Figure D.3. First signs of JavaScript output on your new page
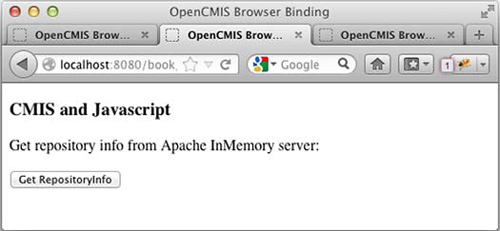
When you click the Get RepositoryInfo button, you should see a pop-up window displaying “TODO: call repository info.” You’ve created your first web application, consisting of an HTML page with a JavaScript method. The JavaScript is included from a separate file (you can also create JavaScript inline in the same HTML page if you prefer this style). What remains to be done is the real work calling the remote repository.
D.2.2. Your first Browser binding call (getting the repository info)
Ideally, what you’d like to do now is use a JavaScript method that calls the URL http://localhost:8081/inmemory/browser using the Ajax technique, parse the JSON response, and display the information from the response on your web page. Let’s try it by adding the code from the following listing to the file cmis.js.
Listing D.1. Getting the repository info


When the button is clicked, you call a JavaScript function called doRepositoryInfo. This calls the CMIS repository with a URL returning the available repositories using an Ajax request. Later, if the call succeeds, a callback method is fired. This callback parses the JSON response and dynamically adds an HTML table in your index.html page in the <div> tag, which you use as a placeholder.
Note that the JSON response from the CMIS server can be parsed in a single line of JavaScript code!
json_object = JSON.parse(http_request.responseText);
Also note how simple and straightforward processing the result can be when creating the HTML table. The elements in the RepositoryInfo are directly accessible as JavaScript elements, such as ri.repositoryName.
D.2.3. Complications: the same origin policy
Unfortunately, if you try the code and open the index.html page from your local filesystem, the code doesn’t work. The reason is a security mechanism in the browser called the same origin policy. Ajax calls are only processed if the server is in the same domain from which the originating page comes. Your page comes from the local filesystem, and your server runs on localhost:8081. The browser doesn’t process the call in this case. Add a web.xml file, and package your two files into a WAR package as a real web application first. Then deploy this on the same Tomcat server where the InMemory Repository runs. Now it will work, and you’ll see the result shown in figure D.4.
Figure D.4. Repository info displayed after you work around the sameorigin issue

D.2.4. Using JSON-P
You may be thinking that things look pretty bleak. Requiring that the web application run on the same server as the repository is a severe restriction! What if you want to use the public Alfresco server at cmis.alfresco.com, for example?
For this reason, there’s a common technique for web applications called JSON-P. We can’t cover the details here, but the trick is to wrap the server response in a JavaScript method and dynamically add this method to your index.html page.
Want to know more about JSON-P?
Check the following web pages for more details on JSON-P: http://www.json-p.org and http://en.wikipedia.org/wiki/JSONP.
The server must support JSON-P. So the CMIS specification adds an optional URL parameter, callback=. You can try opening a modified form of the previous URL: http://localhost:8081/inmemory/browser?callback=myFct. The result will be the same as before, but wrapped in a function call:
myFct(
{
 "A1": {
  "principalIdAnyone": "anyone",
  "principalIdAnonymous": "anonymous",
  "repositoryDescription":
     "Apache Chemistry OpenCMIS InMemory Repository (Version: ?)",
  "vendorName": "Apache Chemistry",
  "aclCapabilities": { ... },
  "cmisVersionSupported": "1.0",
  "productVersion": "?",
  "repositoryId": "A1",
  "changesIncomplete": true,
  "thinClientURI": "",
  "rootFolderUrl": "http://localhost:8080/inmemory/browser/A1/root",
  "latestChangeLogToken": "0",
  "rootFolderId": "100",
  "capabilities": { ... },
  "repositoryName": "Apache Chemistry OpenCMIS InMemory Repository",
  "repositoryUrl": "http://localhost:8080/inmemory/browser/A1",
  "changesOnType": [ ],
  "productName": "OpenCMIS InMemory-Server"
  }
 }
)
Now you have to add a myFct-like function to your script that’s called from the server response. The code looks like this:
function doRepositoryInfo() {
  performJsonpRequest(
    "http://localhost:8080/inmemory/browser",
    "processGetRepositories");
}

function processGetRepositories(json_object) {
  printRepositoryInfos(json_object);
}

function performJsonpRequest(url, callback) {
  var callUrl = url;

  var paramChar = (url.indexOf('?') == -1) ? '?' : '&';
    callUrl = url + paramChar + 'callback=' + callback;

  var script = document.createElement('script'),
  script.setAttribute('src', callUrl);
  script.setAttribute('type', 'text/javascript'),
  document.body.appendChild(script);
}
Leave the function printRepositories as it was. performJsonpRequest dynamically adds a script tag to the web page fed from the server response. The InMemory Repository responds with a function call, processGetRepositories, and passes the JSON data as a parameter. processGetRepositories parses the result and displays the repository information as before.
For a real web application, things become more complicated because you may need more callback functions. Usually a unique ID is added to the generated script, which allows later removal. The ID must be modified on each JSON-P request. The article at http://mng.bz/G5Y2 gives more background about JSON-P. You can find the full code in the code download folder step2.
This is a lot of work for a simple function call. A JavaScript library can take most of the burden from these JSON-P requests and do the magic behind the scenes. It can then be as simple as setting a flag that specifies whether you want to use JSON-P.
D.2.5. Hello JQuery
JQuery is such a library, and it’s very popular and widely used. It hides many browser differences and makes the JavaScript code more readable and compact. From now on we’ll use JQuery for the examples.
One of the pitfalls with JSON-P is the error handling. In case of an error, the script tag isn’t added, and there’s no chance to get more information about the error (such as the HTTP status code). The CMIS specification for this reason adds an optional query parameter, suppressResponseCode=true. A client can add this parameter to a URL, and the server will always return the HTTP status code 200. The client can use the response body to get information about the kind of error (see the spec for error responses).
Also note that JSON-P processing in JavaScript opens the door for cross-site request forgery (XSRF) attacks. We don’t cover the details here; you can find more information in chapter 11 and in the CMIS spec. OpenCMIS contains some example JavaScript code for how to use this. Let’s do the same now using JQuery. First you have to add JQuery to your main page in index.html:
<head>
   ...
  <meta charset="UTF-8">
  <script type="text/javascript"
    src="https://ajax.googleapis.com/ajax
          /libs/jquery/1.7.1/jquery.min.js">
  </script>
  <script src="cmis.js" type="text/javascript"></script>
</head>
The code now looks like this (the full code is in the step3 folder):
function doRepositoryInfo() {
  performRequest(
    "http://localhost:8080/inmemory/browser",
    null,
    "GET",
    printRepositoryInfos,
    true);
}

function errorHandler(event, jqXHR, settings, excep) {
  alert("Call was aborted:" + jqXHR);
}

function performRequest(url, params, method, cbFct,
     jsonp, username, password) {
    $.ajax( {
        url: url,
        data: params,
        dataType: (jsonp ? "jsonp" : "json"),
        type:  method,
        username: username,
        password: password,
        success: cbFct,
        error: errorHandler,
        timeout: 5000
    });
}

function printRepositoryInfos(infos) {
  for(repId in infos) {
    var ri = infos[repId];
    $('#repositoryInfo').html(
      '<h4>Repository "' + ri.repositoryName + '" ('
        + ri.repositoryId + ')</h4>' +
      '<table>' +
      '<tr><td>Id:</td><td>' + ri.repositoryId + '</td></tr>' +
      '<tr><td>Name:</td><td>' + ri.repositoryName + '</td></tr>' +
      '<tr><td>Description:</td><td>' + ri.repositoryDescription
        + '</td></tr>' +
      '<tr><td>Product:</td><td>' + ri.vendorName + ' '
        + ri.productName + ' ' + ri.productVersion + '</td></tr>' +
      '<tr><td>Root folder id:</td><td>' + ri.rootFolderId
        + '</td></tr>' + '<tr><td>Repository URL:</td><td>'
        + ri.repositoryUrl + '</td></tr>'
        + '<tr><td>Root folder URL:</td><td>' + ri.rootFolderUrl
        + '</td></tr>' +
      '</table>'),
  }
}
You can see that the choice of whether to use JSON or JSON-P is a parameter to the ajax function. The code to generate the result is more compact because it uses the $ syntax instead of document.getElementById. By adding a timeout value, you have the chance to catch an error even when using JSON-P. JQuery generates the necessary script tags and callback function on its own.
D.3. CMIS basic operations with the Browser binding and JQuery
With all those details out of the way, you’re ready to perform some actual CMIS operations. The next few sections go over a few basic CMIS operations like getting the children of a folder, creating a document, and querying. First up are folder children.
D.3.1. Enumerating a folder’s children
It’s time to do something useful. You’ll get the children of a folder and display the result on a web page (full code is in the step4 folder). Begin by adding a text box to your web page in which a folder ID can be entered:
<body>
  <h3>CMIS and JavaScript</h3>
    <h4> Get Children of folder: </h4>
    <form >
    <fieldset>
      <legend>Enter a folder id</legend>
      <input type="text" id="folderidfield" value="?"/>
    </fieldset>
  </form>
  <p></p>
    <button id="getchildren">Get children!</button>  <br/>
  <p></p>
    <div id="foldersection">
    </div>
    <div id="docsection">
    </div>
</body>
Then modify your JavaScript file:
$(document).ready(function() {
   $('#getchildren').click(function() {
      getChildren($('#folderidfield').val());
   });
   rootFolderId = "100";
   baseUrl = "http://localhost:8080/inmemory/browser/A1";
   $('#folderidfield').val(rootFolderId);
});
When the page is loaded, including the JQuery library $(document).ready, you add an event handler for the event when the user clicks the Get children! button. This function reads the text entered in the text box and performs a request to the server. You pass some additional parameters to indicate that you don’t want all the information the server can return.
The createChildrenTable method parses the JSON response and creates two tables: one for the folder and one for the documents found in the response. For each result, a row is added to the table and the values for the returned properties are filled in the columns. You omit some technical properties so the table doesn’t get too wide. Note that some value types (such as DateTime) need a conversion to String. The JSON result is an array of properties that once again can be directly parsed to JavaScript elements. For each folder, the name is translated to a hyperlink that again calls the function to get its children. You end up in a kind of mini browser for CMIS, even if you miss a possibility to navigate up the hierarchy. For each document, you add a link pointing to the content instead.
Probably the best way to understand the details is to use a JavaScript debugger to step through the code. Some debuggers can also display the HTTP communication between browser and repository. JQuery handles all the details nicely regardless of whether you want to use JSON or JSON-P.
In a real-world program, you wouldn’t hardcode the URL and the ID of the root folder. Instead, you’d first do a getRepositoryInfo request and get the values from the response. But this example keeps things simple. The modification is a nice exercise for you. To add an Up link, you need to store the parent ID for each folder you enumerate and dynamically add a link navigating to the parent folder. Figure D.5 shows the finished page.
Figure D.5. Get Children of Folder page showing child folders and documents

D.3.2. Integrating JavaScript components
As mentioned earlier, one of the cool things about JavaScript is that tons of reusable components are available. Why not modify the example a bit and integrate it with a JavaScript media player? We’ll use The Blend application from part 2 of the book; but instead of creating a table, you’ll feed the media player the songs found in a folder. (The full code is in the step5 folder.)
Be sure to import the sample data into the application. To be able to listen to the music, you have to deploy the application to a web server. Opening index.html from the filesystem will give you the playlist but won’t play the songs. Because entering a folder ID is a bit inconvenient, you modify the code to use the path instead of the ID. You extract the artist and title properties from the metadata and construct the proper URL for the content (the song) and feed that data to the player. The result looks like figure D.6.
Figure D.6. Using a JavaScript player component to listen to music from your repository

That looks much better, doesn’t it? Now that you have components figured out, let’s move on to adding data.
D.3.3. Uploading a document
The next step will be to upload a document. The CMIS spec for the Browser binding requires sending an HTTP POST request. Uploading a document mostly requires transferring content from the browser to the server. Uploading content in HTTP from a web form in a browser uses the multipart/form-data content type. The CMIS spec for the Browser binding follows this approach. This makes document creation easy and doesn’t even require Ajax calls. In fact, uploading content with Ajax is difficult because you have to encode into multipart/form-data on your own. Doing this directly from a simple HTML form is much easier; Ajax doesn’t offer an advantage here.
The tricky part is getting the return value from the server. You’re interested in the object ID of your newly created document. But browsers aren’t prepared to programmatically process a form response and will directly present the JSON result to the user. Usually, web applications respond with another HTML page from a form POST, but in this case you get a JSON response. The spec therefore suggests sending the response to an invisible IFrame. If your web application is on the same server as the CMIS repository, you can directly process the response from the IFrame.
If you’re on a different server, you’re once again in the trap of the same origin policy, and the browser won’t give you the response. The CMIS spec in this case suggests doing another GET request, passing a token that identifies the former upload request. The token is an arbitrary string but must be unique. Passing properties along with the content can be done easily using HTML forms. In this example, you do the minimum with name, folder ID, and type ID, but these can quickly be extended to other properties. Here’s the HTML code for the upload (the full code is in the step6 folder):
<form id="createdochtmlid" action="" target="createresultframe"
        enctype="multipart/form-data" onsubmit="prepareCreate()"
        method="post">
     <fieldset>
      <legend>Create document HTML</legend>
      <table>
        <tr>
          <td><label for="name">Name:</label></td>
          <td><input name="propertyValue[0]" type="text" id="name"
               value="My Document"/></td>
        </tr>
        <tr>
          <td><label for="typeId">Type-Id:</label></td>
          <td><input name="propertyValue[1]" type="text" id="typeId"
               value="cmis:document"/></td>
        </tr>
        <tr>
          <td><label for="folderId">Folder-Id:</label></td>
          <td><input type="text" id="folderId" name="objectId"
               value="100"/></td>
        </tr>
        <tr>
          <td><label for="contentId">Content:</label></td>
          <td><input id="contentId" name="Browse..." type="file"
               size="50"/></td>
        </tr>
        <tr>
        <td><input id="createdochtml" type="submit"
              value="Create Doc!"/></td>
        <td></td>
        </tr>
      </table>
     </fieldset>
     <input name="propertyId[0]" type="hidden"
          value="cmis:name" />
       <input name="propertyId[1]" type="hidden"
             value="cmis:objectTypeId" />
       <input name="cmisaction" type="hidden"
             value="createDocument" />
       <input id="transactionId" name="token"
             type="hidden" value="" />
  </form>
On submitting the form, you call a JavaScript prepareCreate function that dynamically generates a unique ID for the transaction as a token and adds the URL to post the request to prepareCreate as shown here:
function prepareCreate() {
    init = true;
    $("#transactionId").val(createRandomString());
    $("#createdochtmlid").attr("action", rootUrl);
    return true;
}
The global variable indicates that the user has started an upload and that when the IFrame is loaded the code should do something. The target of the request is this invisible IFrame:
<iframe id="createresultframe" name="createresultframe"
        style="width:0px;height:0px;visibility:hidden"
        onload="createDocumentDone()">
 </iframe>
Once it’s loaded, the JavaScript method createDocumentDone() is called. It retrieves the object ID from a second call, using the token identifying the transaction:
function createDocumentDone() {

  if (init == null || !init)
    return;

  var transId = $("#transactionId").val();
  getObjectFromTransaction(transId, function(data) {
      var text = "Document successfully created with id: " +
                     data.objectId + " and transaction id: " + transId;
      $("#createdocsection").html(text);
  });
}
The getObjectFromTransaction method (shown next) gets the object ID by doing a GET request. It passes a callback function that parses the object ID from the response and handles the output on the HTML page:
function getObjectFromTransaction(transId, cbFct) {
    var params = {
        cmisselector: "lastResult",
        token: transId,
        suppressResponseCodes: true
    };
    $.ajax( {
        url: baseUrl,
        data: params,
        dataType: "jsonp",
        type:  "GET",
        success: cbFct
    });
}
If the CMIS repository is on the same server, you can avoid the second call and get the object ID directly:
function createDocumentDone() {
  try {
    cont = $('#createresultframe').contents().text();
    if (cont) {
      var json = jQuery.parseJSON(cont);
      if (!checkError(json, "#responsesection")) {
        $("#responsesection").html("Document successfully
        created with id: " + json.properties["cmis:objectId"].
        value + " and transaction id: " + transId);
      }
    }
  } catch (ex) {
      trace("Same origin policy for transaction: " + transId + ",
          exception: " + ex);
}
You can find the full code in the step6 folder. The final result is shown in figure D.7.
Figure D.7. Creating a document by posting an HTML form

D.3.4. Query
As a next step, you perform a CMIS query and display the result in your web page (the full code is in step05-cmisquery). First, add a text box to the web page in which the user can enter a query string:
<body>
  <h3>CMIS and JavaScript</h3>
    <h4> Make a Query: </h4>
    <form >
    <fieldset>
      <legend>Enter a query</legend>
      <textarea id="queryfield" cols="80" rows="5">
          SELECT * from cmis:document
      </textarea>
    </fieldset>
  </form>
<button id="doquery">Do query!</button>  <br/>
    <div id="queryresponsesection"></div>
</body>
Then modify the JavaScript file:
$(document).ready(function() {
   $('#doquery').click(function() {
      doQuery($('#queryfield').val());
   });
});

function doQuery(queryString) {
        $("#queryresponsesection").html(null);
        trace("doing query: " + queryString);
        var params = {
            cmisaction: "query",
            q: queryString,
            searchAllVersions: "false",
            includeAllowableAction: "false",
            includeRelationships: "none",
            suppressResponseCodes: "false"
        };

     performRequest("http://localhost:8080/inmemory/browser/A1",
        params, "POST", createQueryTable, true);
}
When the page is loaded, including the JQuery library $(document).ready, you add an event handler for the button-click event of the query button. This function reads the text entered in the text box and performs a request to the server. Note that this time you do an HTTP POST request instead of a GET, and you pass some additional parameters to filter out all versions, allowable actions, relationships, and renditions. The createQueryTable method parses the JSON response, adds a row to the table for each found object, and displays the values for some selected properties in the columns. Note that some value types need a conversion to String. The JSON result is an array of properties that once again can be directly parsed to JavaScript elements. The full code is in the step7 folder, and the resulting page is shown in figure D.8.
Figure D.8. Query results rendered in the browser
