Objectives
On completion of this chapter, you should be able to
- Understand the use of MS-Project in different knowledge areas with examples
In previous chapters, we discussed about using MS-Project for managing scope, schedule, and cost of a project. However, MS-Project can very well be used to manage other project constraints like quality and risks. The purpose of this chapter is to provide you methods of using MS-Project to manage processes related to other knowledge areas. Not all the project management processes are simply transposed to MS-Project and some may not be managed in MS-Project at all. This chapter provides you techniques to manage your projects with MS-Project and the Project Management Body of Knowledge (PMBOK ®) Guide processes. Table 10.1 gives some examples of using MS-Project in managing project management processes from other knowledge areas like quality.
Table 10.1 Some sample processes in which MS-Project can be used
|
PMBOK® process |
How MS-Project can be used |
|
Plan quality management |
Relevant standards and regulations for each task can be recorded in the Task Notes or a user-definable field. Hyper Text Mark-up Language (HTML) link can also be used to refer to a relevant standard of the task. |
|
Manage Quality |
MS-Project also allows you to create project templates and use them subsequently. For quality audits, such templates can be created and used. These help as tools in the Manage Quality Assurance process. |
|
Control quality |
1. You can analyze variances and trends using visual reports. This can help you in quality control. 2. Additional activities (tasks) should be included in the schedule for checking Quality. |
|
Plan Resources management |
1. All people involved in a project may be entered into the Resource Sheet. Information about resources may be entered into either existing fields or user-definable fields (as MS-Project allows you to define your own custom field). This may include roles, responsibilities, and the project organizational structure. 2. Resources may be grouped using the Grouping function and an organizational structure may be created in a table format. |
|
Manage communications |
Once the reporting requirements get defined then the MS-Project Tables and Reports may be used effectively to create reports for various project stakeholders. |
|
Identify risks |
1. Analyzing a Gantt Chart schedule of a project can help you identify risks related to resources and so on. 2. User-defined field feature may be used to assign a risk log item number and description in the Entry table or in the Resource Sheet. |
|
Monitor risks |
If you are familiar with Visual Basic® for Applications, you can use it to create macros in MS-Project to alert you when trigger events occur. This can help you to identify new risks and then respond to them appropriately. |
As discussed earlier, Table 10.1 is representative only and MS-Project can be used in many different ways as a tool or as a means to generate inputs for various processes. The following examples explain in detail how one can use some features of MS-Project for managing project management processes.
Example Problem: Planning Quality
Management Using MS-Project
As we discussed earlier we can use MS-Project for quality management processes too. This particular example deals with quality standards of a mobile app development project. The Android coding style, which is available on the Internet, has to be associated with the Development task in the project. The guided example explains the steps involved in using a hyperlink to associate quality standards.
- Double click and open the project file. (Copy Sample Project file AppDevelopment-start.mpp from the Practice-Files/Ch10 folder and save as AppDevelopment.mpp) The file will open with a task list as shown in Figure 10.1. Click on the View tab and select Gantt.
Let us say you want to associate the standard with the task Development. A hyperlink can be inserted by right clicking the task and selecting Link from the contextual menu that appears as shown in Figure 10.2.
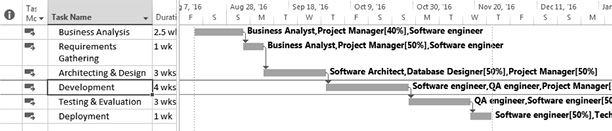
Figure 10.1 Open project file AppDevelopment-start, to insert a hyperlink
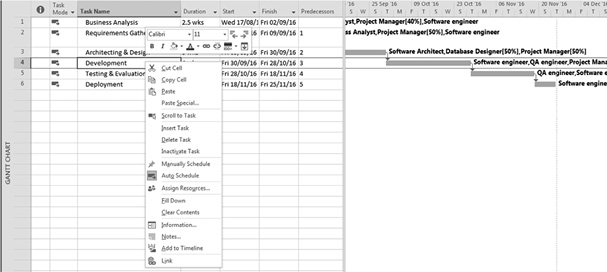
Figure 10.2 Select link from shortcut menu of the task
- You get Insert Hyperlink dialog box as shown in Figure 10.3. There is a “Text to display” box. Here, you have to type the text you want to appear with the hyperlink indicator. (Note: Indicators are small icons representing information for a task or resource that is displayed in the Indicators field. The Indicators field is located to the right of the ID field and appears in a number of tables.) As you see later, when you move the cursor to the Indicators field, the text appears explaining the hyperlink. Enter the text Android Coding Style.
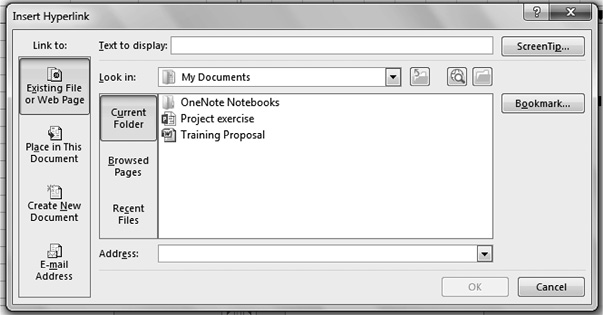
Figure 10.3 Insert hyperlink dialog box
- Although you have added a name to the link, you have yet to specify the website. Click the Browse the Web button (icon with a lens, in the middle) to start your Web browser, and then copy the web address (https://source.android.com/source/code-style in this case) from the Address box of the browser and paste it into the Address box in the Insert Hyperlink dialog box. Press OK and this will complete the process of creating the Hyperlink.
- Now you can observe the Hyperlink icon in the Indicator column of the task Development. You can also verify whether the link is working. For that, move the cursor in the Indicator column of the task Development. A screen tip displays the link description Android coding style as shown in Figure 10.4. The cursor changes in shape (fist with finger pointing up), pointing to the existence of an HTML link. When you click the link, a separate browser window pops up to navigate you to the website of Android coding style.
Close the file.

Figure 10.4 Link descriptions get displayed by a screen tip, when you move the cursor over the hyperlink indicator
Example Problem: Using MS-Project
for Creating Risk Register
A risk register is created during risk identification by the project team and contains information on project risks. This document gets updated with other risk management processes (perform qualitative analysis of risks, control risks, etc.). In a project, to start with, a risk register contains information on identified risks and their root causes. Subsequently, as the project progresses, risk analysis is carried out on a regular basis and the register is updated with information like ranking, probability, impact, and status (like retired). In MS-Project, you can attach notes to tasks and resources. This feature can be effectively utilized to create a Risk Register. As we progress with the project, this document can be updated to include information like new risks, risk mitigation plan, and contingency plans.
With the help of an example we shall understand how attaching notes to tasks helps you to build a risk register. The guided example deals with linking a risk register created in Microsoft Excel to a small project for Software enhancement.
- For this, you need the file enhancement-start.mpp and Risk Register-Software-Project.xls in your working directory. Copy these files from the Practice-files/Ch10 folder. Rename the enhancement-start.mpp as enhancement.mpp and open the project plan by double clicking on enhancement.mpp file (Figure 10.5). In the View tab, Zoom group, select Zoom Entire Project and view the entire project.
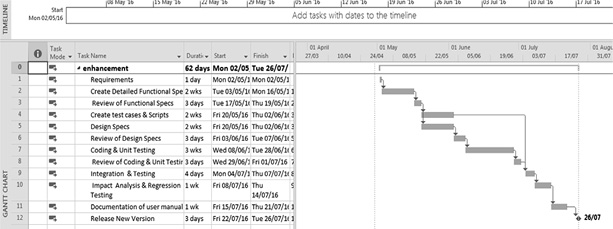
Figure 10.5 Chart of the enhancement project
- Check whether Project Summary Task is displayed. It should be. If it is not displayed (for any reason), select File and then Options. The Project options dialog pops up.
Select Advanced and click on the check-box Show Project Summary Task (under Display Options for This Project).
- Select the top-level summary task, that is, enhancement. In the Task tab, Properties group, click on Task Notes. The Task Information dialog box will pop up with the Notes tab highlighted as shown in Figure 10.6. (Another way of doing the same is to double click on the task, and then select the Notes tab in the Task Information dialog that pops up.)
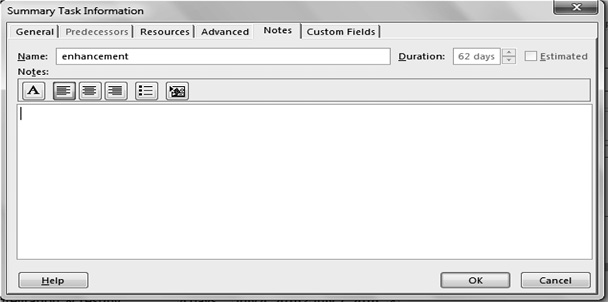
Figure 10.6 Task information dialog box
- You can enter plain text in the dialog to create simple notes (known as Short Notes) or you can embed a file like drawing or spreadsheet (to create Long Notes). The objective here is to embed a spreadsheet. Click on the Insert Object button (button with arrow) on the Summary Task Information dialog box. The Insert Object dialog box will appear. Select the Create from File radio button (Figure 10.7).
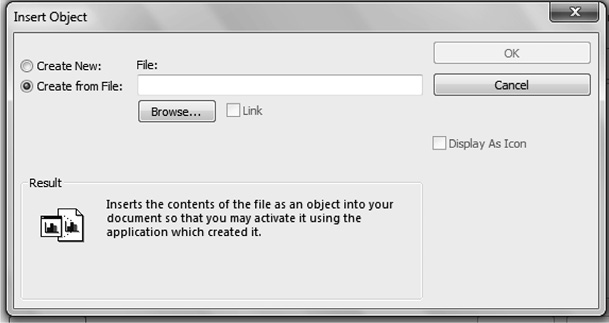
Figure 10.7 Creating an object and inserting it as task notes
- Click on the Browse button and select the file RiskRegister-Software-Project.xls from your working folder. This worksheet contains information on risks such as probability, impact, and cause of the risk event and gets embedded as notes for this specific task. (Note: In the Excel spreadsheet, only qualitative values of probability and impact of risks are indicated)
- The next step is to confirm that the notes are attached. Once you attach notes, you will observe that the indicator column of Summary task has a notes graphic attached to it as shown in Figure 10.8. Move the cursor there. If there are short notes (text, without any embedded object), then they get displayed as the screen tip.
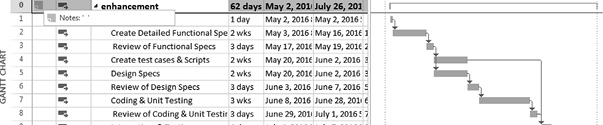
Figure 10.8 Notes indicator in MS-Project
- In this case, long notes are attached and you have to double click on the Notes icon. The Task Information dialog then pops up displaying the notes you added as shown in Figure 10.9. You may double click on the displayed notes, in the dialog, to activate the relevant application (Microsoft Excel in this case). This shall help you to update the risk register during project execution. (Notes can also be used in case of resources to add additional information.)
Close all files.
To conclude, we discussed in this chapter how MS-Project can be used in processes related to different knowledge areas (knowledge areas not related to project time management and project cost management). Although the discussion is about managing a single project, we can extend the same to a consolidated project. Similarly, although we have considered here processes defined in PMBOK ® we can very well use MS-Project for processes defined through other similar standards or framework.
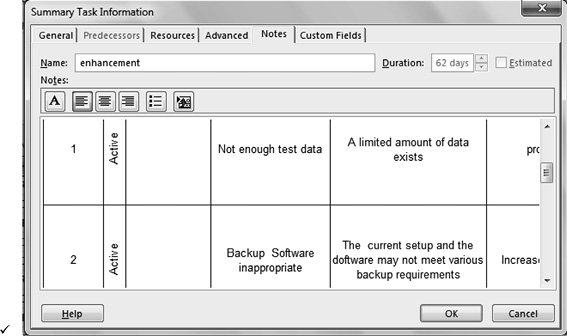
Figure 10.9 Notes are displayed in the dialog and you may double click to start the relevant application