
Chapter 14. Build Your First Tricopter
Quadcopters are a little easier to build, but tricopters have advantages that make them more exciting to fly—especially for shooting aerial video. I built my first one in 2010, inspired by David Windestal’s beautiful aerial GoPro videos. I didn’t get many flights out of that first build, but I learned a lot. After building several more, I’ve developed an affordable kit that anyone can build—the Maker Hangar Tricopter.
Why Fly Tri?
A tricopter’s three motors are usually separated by 120°, not 90° like a quadcopter’s. This makes them great for video because you can place the camera really close to the body and still have no propellers in view. And where quads must rely on counter-rotating propellers to handle torque and balance the aircraft, a tricopter can use identical props because it has a special servo in the back—a yaw servo—that twists the tail motor to counter torque.
Tricopters fly differently, too. With their dedicated motor for yaw (turning), they fly with more fluid, natural-looking movements—they can bank, pitch, and yaw like an airplane, but still hover like a helicopter. A quadcopter’s flight is more robotic, as the controller board calculates the precise rotation for all four motors to create the proper torque and balance to yaw the aircraft. If you let go of the stick, a quad stops turning abruptly; for video work, this can be obvious and distracting. Let go of a tricopter’s stick and the tilted tail motor takes a moment to return to a hovering position; this gives you a slow stop and even a little overshoot, as though a person were moving the camera.
Finally, tricopters are a lot of fun to fly, especially for stunts and acrobatics. The tilting motor also gives you much higher yaw speeds—that means they turn faster.
A Tricopter for Makers
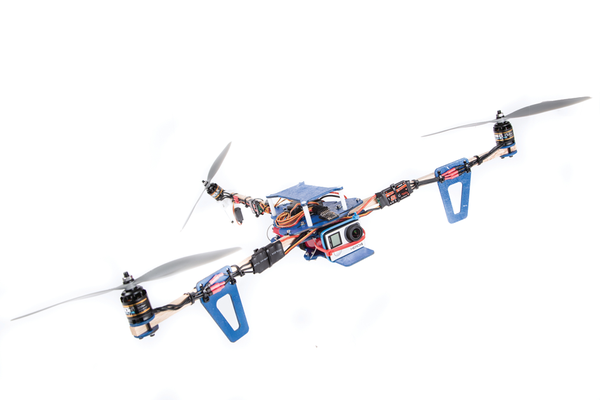
The Maker Hangar Tricopter is made of wood—hackable, easy to drill and cut, and a natural absorber of vibration, the enemy of aerial video. The airframe is big, with plenty of room for large controller boards, video transmitters, drop mechanisms, or whatever you can imagine. And we widened the front arms to about 150° so our tricopter is more agile.
The kit includes a 3D-printed tail assembly and all the hardware you’ll need, plus a wire rope vibration absorber that will pretty much erase camera vibrations even if your propellers are unbalanced. A carbon-fiber hinge provides a strong, smooth connection between the tail motor and airframe.
Finally, like most tricopters, the two front arms lock in place for flight, then fold back neatly for transportation and storage.
Parts
-
Maker Hangar Tricopter Kit—$85 from http://bit.ly/1D9wNWU
The kit includes:
-
Laser-cut plywood airframe parts (download the files from Dropbox)
-
3D-printed tail assembly (download the files from Dropbox)
-
Carbon-fiber hinge pieces
-
Oak square dowels, 7/16"×7/16"×12” (3) for the arms
-
Bolts, stainless steel, M3: 25mm (8), 6mm (4), 10mm (16), and 22mm (8)
-
Lock nuts, M3 (25)
-
Washers, M3 (16) and M4 (2)
-
Bolts, nylon, 6-32×3/8” (4)
-
Nuts, nylon 6-32 (4)
-
Standoffs, 6-32×1-1/2” (4)
-
Cable ties (20)
-
Push rods, 2-1/2"×0.047” (2)
-
Push rod connectors (2)
-
Velcro straps (2)
-
Wire rope, 3” lengths (4)
Electronics (not included)—see the kit web page for complete recommendations:
-
Flight controller board (see Step 12 below)
-
R/C receiver to match your R/C transmitter
-
Motors, brushless outrunner, 900kV (3) Emax GT2215/12
-
ESCs, 20A (3) Emax Simon
-
Props, 10×4.7 (3)
-
Batteries, LiPo, 3,300mAh (2)
-
Servo, micro
-
Servo extension, 6”
-
Wire, 16 gauge stranded
-
Heat-shrink tubing
-
Servo cable, male to male
-
JST connector (optional)
Tools
-
Pliers, needlenose
-
Pliers, side cutting
-
Wire cutters/strippers
-
Hot glue gun
-
Cyanoacrylate (CA) glue
-
Screwdriver
-
Hex driver set
-
Adjustable wrench
-
Sandpaper
-
File
-
Hobby knife
-
Soldering iron and solder
-
Heat gun or hair dryer
-
Helping hands (optional)
It’s a great kit for anyone wanting to get into multicopters or aerial photography. You can also build it totally from scratch: download the PDF plans, laser cutter layouts, 3D files for printing, flight controller settings, and watch the how-to video series in this Dropbox folder.
Specs
-
Flight time: 12 minutes
-
Frame weight: 325g
-
Flight weight: 1kg
-
Compatible with 8″–10″ props
-
Wire rope vibration absorber
-
22mm motor mounts

Step #2: Assemble the Hinged Tail
To build the hinge, glue the 2-1/2” carbon rod flush into the 3/4” carbon tube using CA glue. Hot-glue this end into the 3D-printed motor mount. Also hot-glue the 1” carbon tube into the 3D-printed tail piece.

Now put it together: slide an M4 washer on the hinge rod, then the tail piece, then another washer. Finally, glue the 1/2” carbon tube to the end of the rod to capture the whole assembly.

Hot-glue the servo into the tail piece and install two “easy connectors” in 1/16” holes on the servo arm. You can glue the hardwood tail arm into the tail piece now as well.

Step #3: Assemble the Hinged Tail (Cont’d)
Bolt the tail motor into the motor mount with M3 washers.

Finally, connect the servo linkages. Use pliers to create a tiny “Z-bend” on the end of each push rod. Hook the bent ends into the motor mount, and slide the unbent ends into the easy connectors on the servo arm.

Step #4: Assemble the Front Arms
Drill each front arm using the two templates provided: at one end for the motor mounts, and at the other end for the rotation bolts for folding the copter arms.

Note that the motor template has two different spacing patterns; use each pattern on only one arm, so your motors will end up being mounted symmetrically.

Step #5: Assemble the Front Arms (Cont’d)
Then mount the remaining two motors using the four round plywood motor mount pieces—the ones with the larger center holes go up against the motors—and M3×22mm bolts with washers.

Step #6: Prepare the Body Plates
Install the nylon standoffs on the upper body plate, but don’t mount the small top plate yet.

Bolt four of the small plywood brackets to the lower body plate, and four to the camera/battery tray, using M3×10mm bolts and nuts.

This tray is optional (you could just velcro the battery to the bottom of the copter) but it’s highly recommended for video because it’s isolated from vibrations by short wire ropes. Clamp the four wire ropes into the brackets on the bottom plate, but don’t connect the camera tray yet.

Step #7: Install the ESCs
Connect the three electronic speed controllers (ESCs) to the motors and zip-tie them to the arms.

Arrange the three arms in their folded configuration, then measure out enough wire to extend all the power and ground wires to meet at the back of the body. Solder the extension wires and insulate connections with heat-shrink tubing. Strip the free ends and solder them into your battery connector.

Note
Now’s also the time to splice in a JST connector (optional) if you want to power an onboard FPV (first-person video) system and watch live video from the tricopter. Learn more about batteries, FPV, and other flight components in the first season of Maker Hangar videos.

Step #8: Attach the Arms
Bolt the two front arms to the lower body plate through the outer mounting holes, using M3×25mm bolts and lock nuts. Place the upper body plate on top, then pass two more bolts through the locking slots and the inner arm holes, and secure with washers and lock nuts. Finally, clamp the tail arm between the body plates using four bolts.

Test the folding action and loosen or tighten bolts until the arms fold smoothly and lock forward securely.


Step #11: Mount the Receiver and Flight Controller
Attach your flight controller to the upper body plate using hot glue, double-sided tape, or bolts through the mounting slots. (We used the Flip 1.5 MWC controller. You can download the settings at the Maker Hangar project page.)

Bind your R/C receiver to your transmitter (see Maker Hangar Season One, Episode 12), and then set the throttle ranges by plugging each of your ESCs, in turn, into the receiver’s Throttle port (Season 2, Episode 4). Mount the receiver and plug it into the flight controller. Center the yaw servo and tighten the linkages.

Finally, screw the top plate to the standoffs to protect your electronics, and your Maker Hangar Tricopter is complete!
Step #12: About Flight Controllers
The flight controller board converts the signals from your transmitter into the motor speeds that move your tricopter. It also reads the aircraft’s position and movements with its onboard gyros and accelerometers, and makes tiny changes to motor speeds to counter the wind, torque, and other forces that are trying to tip the copter over.

These are the boards I recommend for the Maker Hangar Tricopter:
- OpenPilot CC3D
-
The best flight experience, easy setup, but tuning takes time
- HobbyKing KK2
-
OK flight experience, fast tuning with onboard display, best for beginners
- ArduPilot APM 2.6
-
Most powerful and expensive; programmable waypoint capabilities with GPS, compass, and barometer
- Flip 1.5 Multi Wii Controller (MWC)
-
Small, simple, and affordable, but powerful and flies well; optional barometer and compass