Apple’s Human Interface Guidelines1 (often known as the HIG) are essential reading for anyone creating mobile apps for iOS – not just designers. The HIG sets out how Apple has worked to make UIKit flexible for you as an app developer but also clear and meaningful to your users.
People use Apple’s accessibility features , such as reduced transparency, VoiceOver, and increased text size, to personalize how they interact with their devices in ways that work for them. An accessible app supports such personalization by design and gives everyone a great user experience, regardless of their capabilities or how they use their devices.
—Apple Human Interface Guidelines: Accessibility
The two most common bits of feedback that we receive about the accessibility of third-party apps involve element labels and the order of navigation for VoiceOver. Additionally, color palette choices, Dark Mode support, and media captioning are all great practices.
—Apple Accessibility Team3
We cover accessibility labels in the section “Accessibility Protocol” of Chapter 6. Later in that chapter, we also include techniques for improving navigation order such as semantic views. For accessibility rules on choosing colors, see the Distinguishable guideline in Chapter 3. For guidance on including captions, see Chapter 10.
In this chapter, we’ll cover iOS system-wide accessibility features, why someone may enable them, and how having them enabled might affect your app. This is not an exhaustive list of accessibility settings; for more details on what’s available from an end-user perspective, see the accessibility section of Apple’s web site.4 Instead, this chapter focuses on accessibility settings that might change the way your app looks or works or settings that might require you to add code or make decisions to best support them.
In UIKit if you’re using the recommended system APIs – Dynamic Type, Accessibility Traits, etc., you’ll get many of these features for free. SwiftUI’s accessibility support is far better than UIKit, for reasons covered in the previous chapter, but will still require some customization. If you’re creating a non-native app through web views, or another cross-platform system, accessibility tools will often ape those of the system you’re compiling for. Ultimately as with anything cross-platform, features will vary and may be limited. While Apple will do as much as possible for you, some settings will require you to query iOS’ UIAccessibility framework for settings and make your own decisions about how to handle them.

Accessibility settings in iOS 13 (right) found in the top level of device settings (left)
Each accessibility option in this menu provides a short description of what enabling this option does. Each option is instantly enabled and present system-wide once triggered. Guided Access requires an additional step to activate the feature once enabled.
Take some time to go through this menu; enabling each one, navigate through your app, and see how each option changes how your app looks and behaves. No setting is destructive and can be instantly disabled. Some settings, however, such as VoiceOver, do change how your device functions. So it’s worth reading a little about the features first, at least so you know how to disable them when you’re done. This menu is all about customizability, so you may find options you want to keep enabled on your personal device.
General Features

Apple presenting its four categories of accessibility considerations at WWDC 2018
Accessibility Shortcut
I mention this first , as this will allow you a quick and easy way to enable many accessibility features on iOS. Therefore, it is the best way to test your apps work with many iOS accessibility tools. Having this simple feature enabled will encourage you to activate these features as a regular part of your development and testing workflows. Importantly, it’s also the simplest way to disable these features, which can save a lot of frustration once you’ve enabled a feature that changes how your device works.
Enable the Accessibility Shortcut before trying out anything else in this chapter.

Enable every option available in this list for easy access to that feature later

Accessibility shortcut activated after pressing the home or sleep button three times
You can then activate the accessibility shortcut when required by triple tapping the side button or home button on older devices. This presents a modal menu (Figure 7-4) where you can activate or deactivate the features you chose from the preceding list. I highly recommend keeping this shortcut enabled, as it doesn’t affect your regular use of the iPhone but gives you pain-free access to accessibility tools when you want to check something out.
Control Center
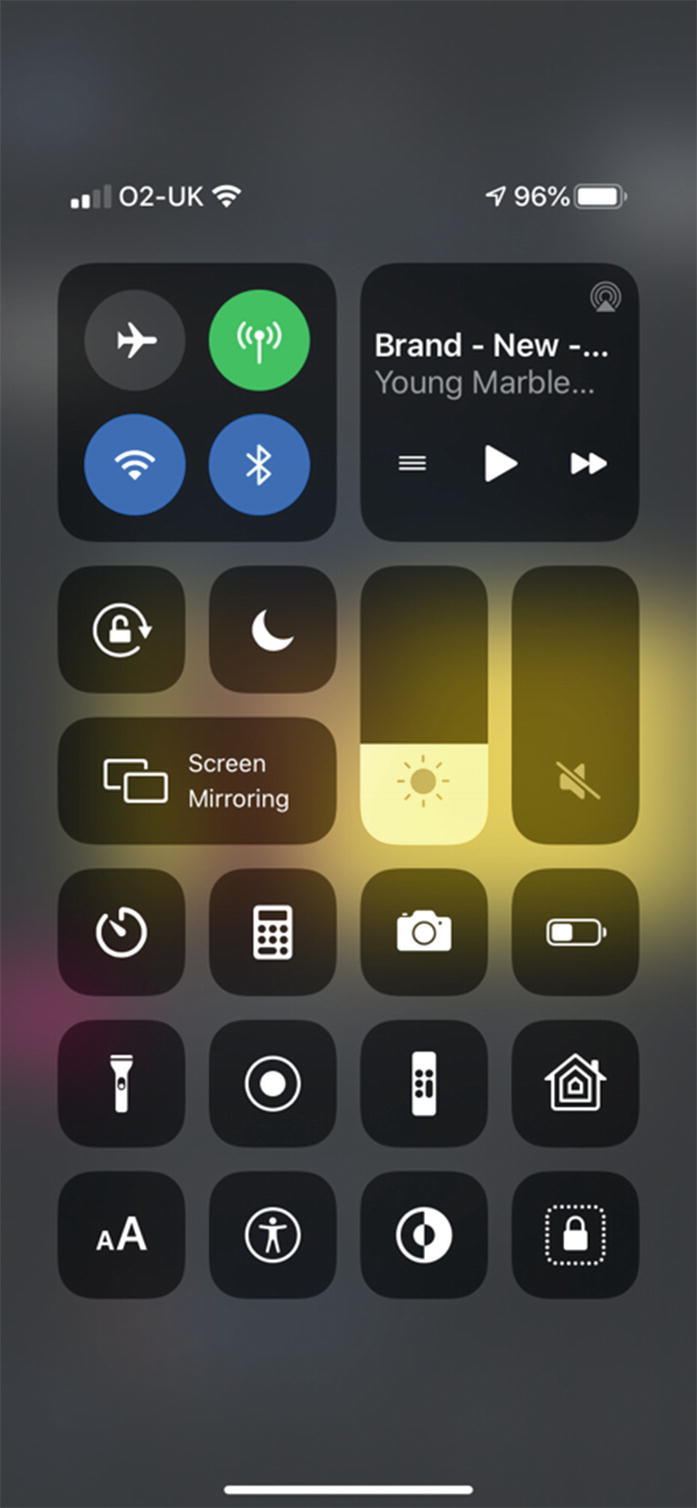
Control Center with accessibility controls on the bottom row. L–R Text Size, Accessibility Shortcut, Dark Mode, and Guided Access
Guided Access
Guided Access allows a device to be locked only to the current app and disable certain app and system features. Guided Access makes the device into a stand-alone kiosk device and is often used in retail settings where you might not wish to give the public unrestricted access to a device. Guided Access is primarily designed, however, to be helpful for people with a range of different needs: Those with learning difficulties can easily get confused by new things or not fully understand the consequences of specific actions. People with motor issues can sometimes cause accidental input and are then unable to return the device to a state they can use. People who suffer from anxiety of attention-deficit disorders can become overwhelmed by too much stimulus. In all of these situations, restricting the options available is desirable.

Setting up Guided Access
Registering for notifications in guided access status
A better way to leverage this is to implement the UIGuidedAccessRestrictionDelegate on startup of your app. This delegate allows you to set custom actions that can be enabled or disabled on request when a customer enables guided access within your app. For example, you might add restrictions for “Settings” or “Delete Items.” This could then be configured by the person setting up guided access to enable the guided access user to customize settings to their preferences but not allow them to delete any items.
Providing unique strings for Guided Access features
Associating human-readable strings with our restrictions enum
Providing our Guided Access strings to iOS
Handling user changes in Guided Access feature status
Detecting the current status of a Guided Access restriction
Localization
Localization is built throughout iOS. While translating your app into different languages can be complex and nuanced, the coding to support this is not. You may feel your app doesn’t need localizing as your business is currently only available in one country, but this doesn’t reflect our global society. A significant number of people in any market will not have the market’s primary language as their first. Plus, removing hard-coded strings from your code is general good code health.
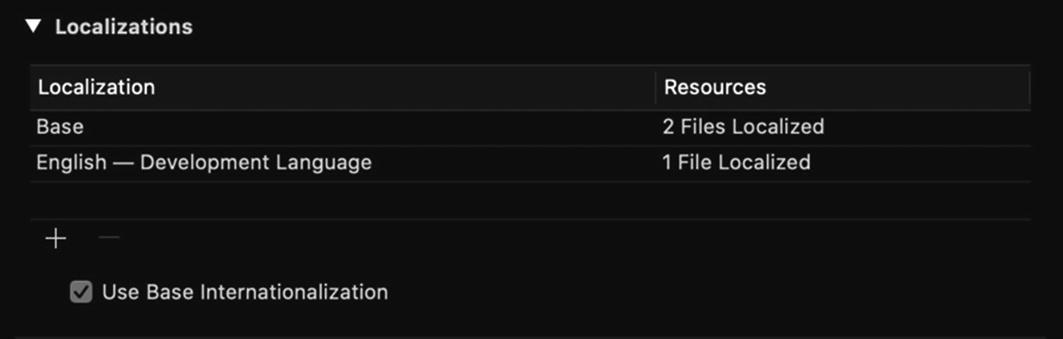
Xcode Project’s Localization settings
From here you can press the + button to add a new language localization and begin the process of getting your app translated. To send your app’s strings to a translator, go to Xcode’s Editor menu, and choose Export for localizations. This will create all the files a translator will require. When you get your translation back, visit the same menu and select Import Localizations. Before you do this, however, there are a few changes you’ll need to make to your app.
Views
Any xib or storyboard file can be localized, and this means more than just strings.
Using autolayout is essential with localization, as it is with dynamic type. It is not possible to guarantee the visual length of your string will be for each localization. Many languages take up much more space than English. English’s 12-character localization becomes the 13-character Lokalisierung in German, while in simplified Chinese, it’s the 3-character 本土化. You can test this using pseudolanguage; we’ll cover this in Chapter 11.
Consider too that some languages, Arabic, for example, are written right to left. iOS will do a great job of flipping your UI for you, but this is based on autolayout constraints. So failure to make them resolve fully can have some strange effects. Finally, ensure your text’s alignments are correct. Only use left-aligned text if this is truly your intention for every experience. For most uses, you should use natural alignment. This presents text left to right in most languages but will switch to right to left when needed.
When creating a new localization by pressing the + button in Figure 5-3, Xcode presents you with a dialog asking what action you’d like to take with each view file in your project. You have two options – a new view file and a localized strings file. The localized strings file will be the preferred option for most uses. See the next section on strings for more on how this works.
The more heavy-duty option is to create a new view file. This duplicates the existing file but allows you to make modifications to the views, not limited to the text values. You can use these files to modify how your views work for languages that are much shorter or longer than your development language, or those languages that are written in a different direction. Be aware that any changes you make to one view file are not reflected in any of the others, meaning if you’re supporting five localizations, that’s five Interface Builder files you’re going to have to change. The good news is that different localizations can have different methods of localization. As an example, it’s possible to support four localizations with strings files and just one with a new interface Builder file.

Xcode File Inspector’s Localize button
Strings
Not all of your app’s strings will be embedded in storyboards. For these, you’ll need to create a Localizable.strings file. Visit File ➤ New ➤ File, and chose a Strings file. Call it Localizable.strings.
A localized value of “Listing Detail” used as the title for the app’s detail page
Setting the pageTitle UILabel’s text using a localized string in code
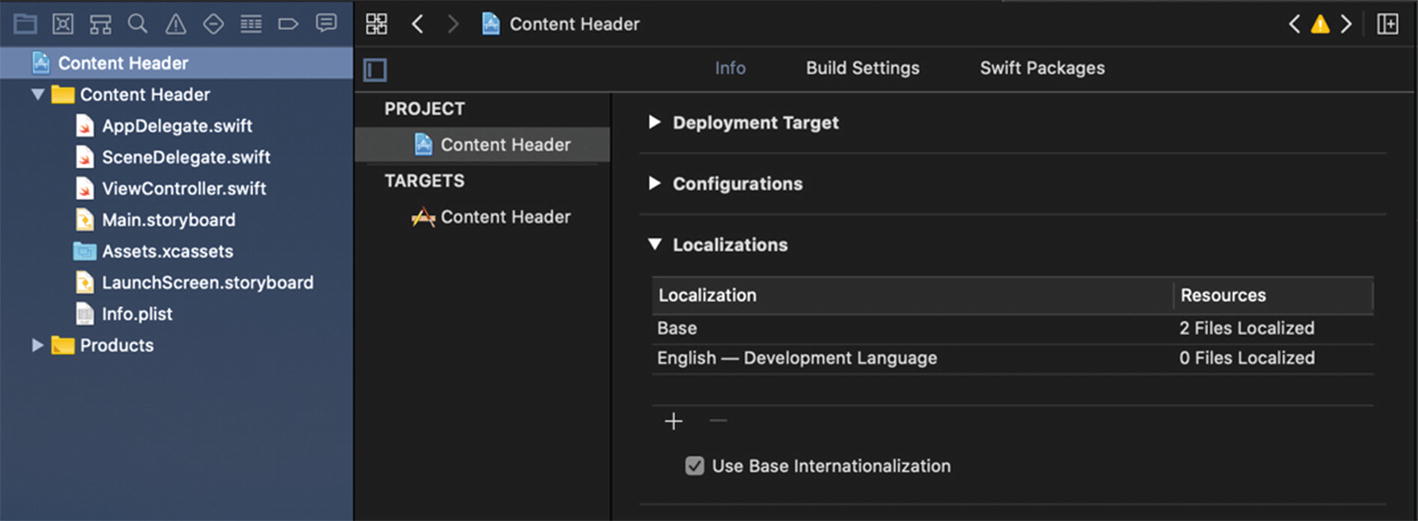
Finding the demo project’s localization settings
You’ll notice there are already two localizations (Figure 7-9). The base localization – the default; and English – my development language. Let’s go ahead and add another. I’m going to use Google Translate to get values in German; you can do the same to choose whichever language you wish.
Caution Never translate your apps using an automated service; always use a professional translation service.

Changing your scheme’s language

Select all the files you want to localize, and choose “Localizable Strings”

The project navigator showing our localized storyboards

Our holiday listing app showing the strings we need to localize
Open the new strings file. Xcode has generated a key-value pair for the only string we have in the storyboard. Here, replace the word Destination with “Ziel.”
An entry in a localizable strings file
Accessing a localized string in code
Be sure to follow the two steps above for the other two strings giving each its own identifier. Once you have done this, we need to create a German localization of our strings file. Select the file in the project navigator, and open the file inspector. Press the “Localize…” button (Figure 7-8). Xcode will then ask which localization the existing file belongs to. Select English and press Localize. Back in the file inspector, you’ll notice the Localize button has disappeared, and in its place is a list of your active localizations with a check next to English. Check German. A new file is created for you with the same content as the original. Here we can start to add our new German localized strings.
Mars in German is Mars. So let’s delete the key-value pair for the heading as we’ll just be using the default. Replace the subheading value with “Der Rote Planet,” and replace the description too. I’ll let you create your own translation here.

Edit your app’s scheme to change the running language

Change the application’s running language with the Application Language option
Change this to German and close the window. On next run, your app will display your new German translation.
Summary
Read Apple’s Human Interface Guidelines. It’s the last word in making your app feel at home on iOS for all of your users. Follow the advice Apple set out here, and you’re more likely to have your app featured on the App Store and less likely to get an app review rejection.
Enable the accessibility shortcut before continuing with the book, and keep it enabled even after you’ve finished reading. It gives you quick access to popular accessibility tools and will help with pain-free accessibility testing.
Preparing your app for localization is good practice as it removes hard-coded strings from your code and makes it easier to change them in future. If you do them decide to localize your app, a bunch of work is already done.
Even if your app is only available in one market you still stand to increase your market by localizing your app.
Over the next three chapters, we’ll dive a little deeper into the accessibility features Apple has created to benefit people with specific disabilities or requirements. The following chapter will cover the broadest range of features; vision considerations.