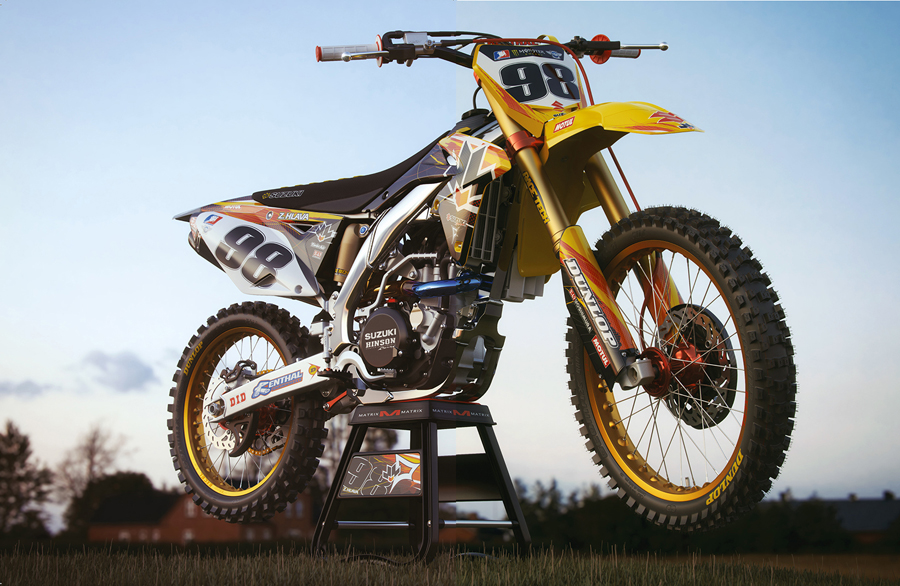
![]() I love technical modelling and dirt bikes. That is the reason why I wanted to make a motocross bike model. I started this project back in 2010, originally for a game. Later I decided to do a detailed high-poly model that would look good on renders. I worked on it in my spare time for a few years until 2013 when I finally manage to finish the model. With help from John we textured the bike with his decals and seat cover. Now I use it to preview bike graphic decals from different companies and people interested in bike graphics.
I love technical modelling and dirt bikes. That is the reason why I wanted to make a motocross bike model. I started this project back in 2010, originally for a game. Later I decided to do a detailed high-poly model that would look good on renders. I worked on it in my spare time for a few years until 2013 when I finally manage to finish the model. With help from John we textured the bike with his decals and seat cover. Now I use it to preview bike graphic decals from different companies and people interested in bike graphics.![]()
| PROJECT | 2012 SUZUKI RM-Z450 WITH JVDL V2 DECALS |
| SOFTWARE USED | AUTODESK 3DS MAX, V-RAY, PHOTOSHOP |
| RENDERING TIME | 6 HOURS |
| ARTIST | ZBYNEˆK HLAVA (IN COLLABORATION WITH JOHN VAN DE LEST) |
| COUNTRY | CZECH REPUBLIC |
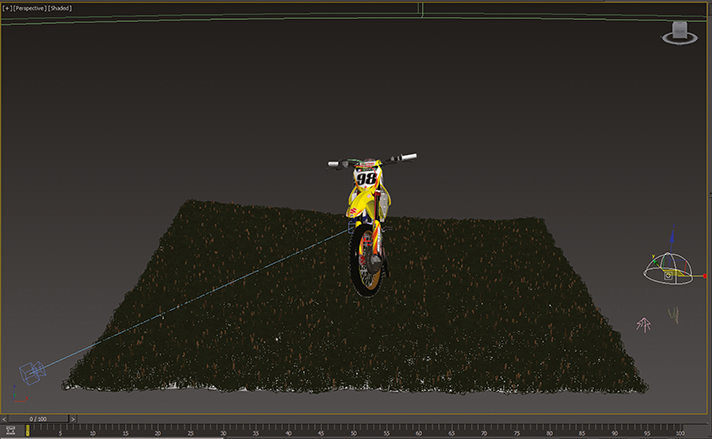
You can see two things in this picture. The lighting is done with an HDRI map in a domelight and the grass is made with MultiScatter.
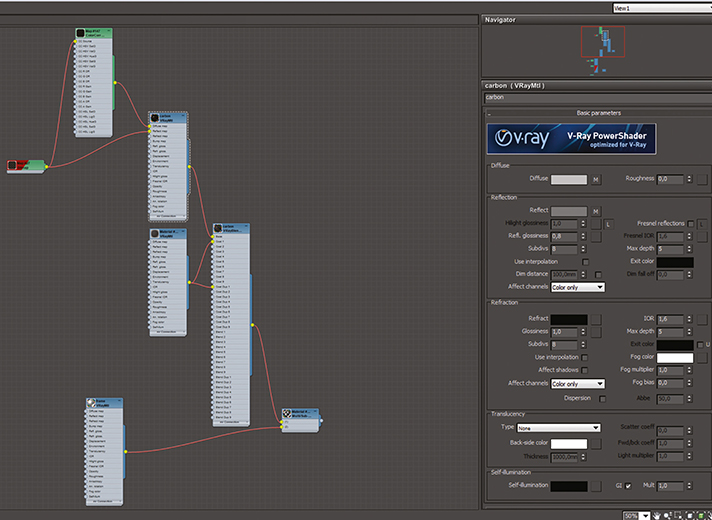
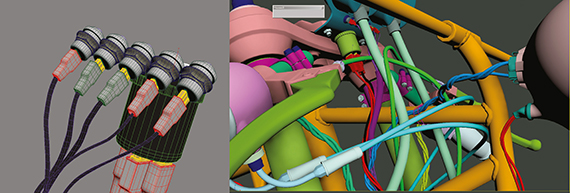
There are lots of materials on the bike. Here are nodes and the settings of the exhaust muffler which uses carbon fibre with clearcoat reflections and metal parts.
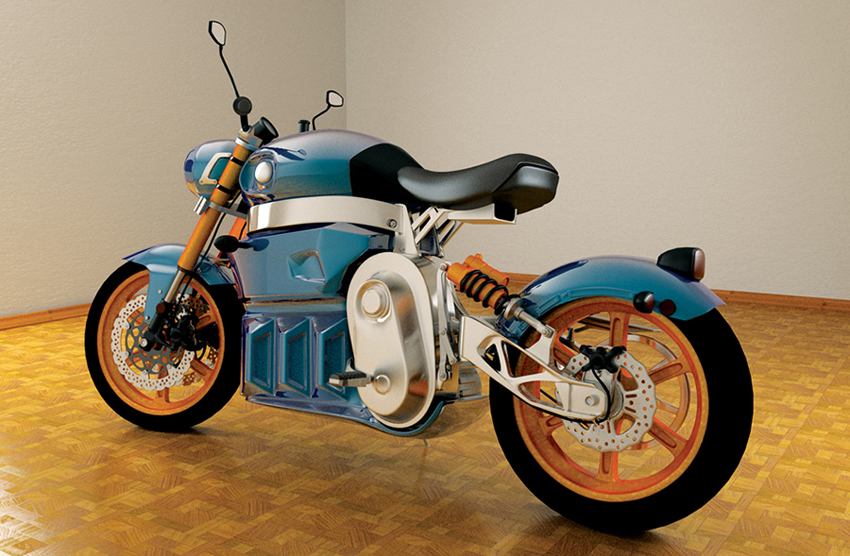
![]() I like motorcycles and when I noticed that there was a new electronic motorcycle, I was enthused by the idea of making a model of it. This is the basic form of the new style of bike, but with added details and ideas by myself.
I like motorcycles and when I noticed that there was a new electronic motorcycle, I was enthused by the idea of making a model of it. This is the basic form of the new style of bike, but with added details and ideas by myself.![]()
| PROJECT | MOTORCYCLE LITO SORA |
| SOFTWARE USED | AUTODESK MAYA 2012, V-RAY 2.0 |
| RENDERING TIME | 2H 34 MIN |
| ARTIST | VYACHESLAV ZAYIKA |
| COUNTRY | UKRAINE |
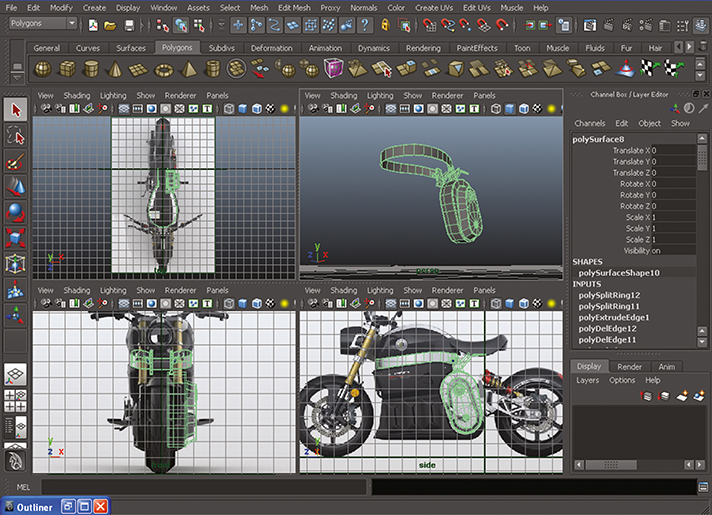
The reference images were loaded and the base forms were modelled using the CV curve tool, Loft, Extrude face and Split polygon tools.
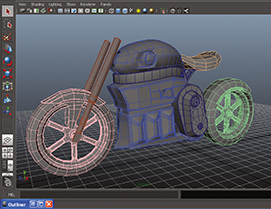
Small details being added to increase the realism of the model.
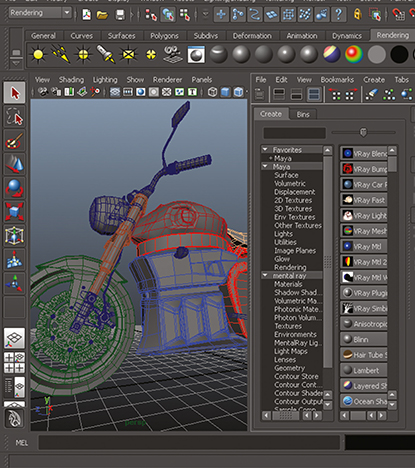
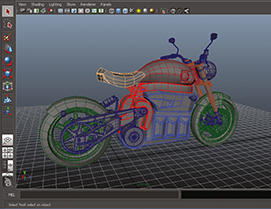
Creating V-Ray materials to give the bike the right kind of finish.
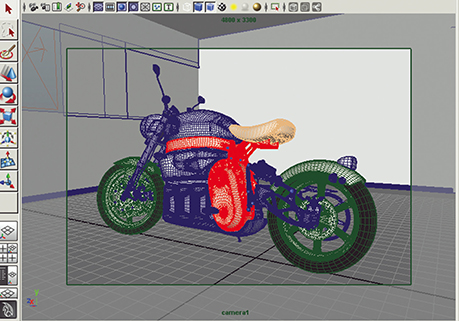
Finally the camera has been set up to create the shot for rendering.
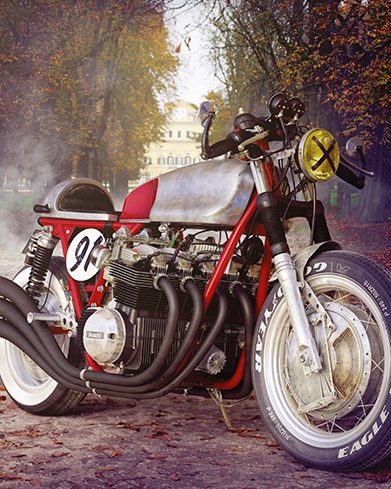
CREATING A CAFÉ RACER
As the old school style of motorbikes has come back into fashion, Andrea Lazzarotti decided to recreate a classic model from Benelli
THE HISTORY
The Benelli 900cc six-cylinder, 4-stroke motorcycle was once a symbol of the Made in Italy industry. It was also the first six-cylinder motorcycle in history, a significant challenge for the engineers of the past. Although it was never a commercial success it is, and remains, a piece of motorcycling history.
| PROJECT | BENELLI CAFÉ RACER |
| SOFTWARE USED | 3DS MAX 2012, COLORISTA 2, ZBRUSH, RHINOCEROS |
| RENDERING TIME | ABOUT 2 HOURS |
| ARTIST | ANDREA LAZZAROTTI |
| COUNTRY | ITALY |

On this model I wanted to create a custom template style café racer that I could make various versions from. This style of bike is back in fashion in recent years to the point that nearly every motorcycle manufacturer has put into production some vintage models from several decades ago, with the necessary improvements required today, insofar as possible, without changing the spirit too.
Initially I had to make a thorough search on the net to find decent pictures to have accurate reference material so that I would be able to model each element without having to invent items. Although there were many photos of the bike in action, I was lucky that some customisers and restorers took detailed photos of their work, and this gave me the opportunity to understand and visualise the various dimensions and aspects of the components, especially the recesses of complex parts such as the engine and carburettors.
The original Benelli was equipped with three carbs, two per cylinder, but I opted to mount six carburettors as it definitely gave it a more impressive and mascular look.
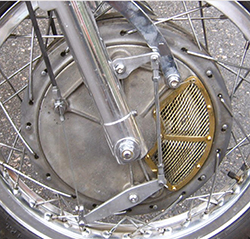
The drum brake mechanism on the front wheel of the bike.
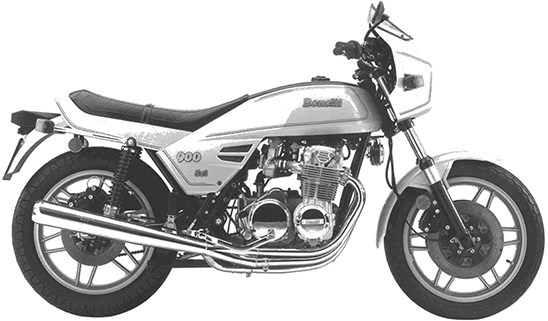
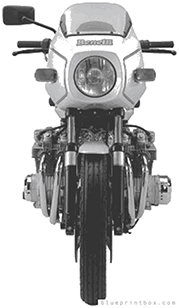
The blueprints of the original design for the bike.
ENGINEERING THE FRAME
After laying out the blueprint that I had found on the net I started to draw the frame tubes. As I didn’t have a view from above, it helped a lot to look at pictures from different angles, all the while maintaining the actual measurements of the bike.
Once the frame was created in the right scale, I created the welding seam between them with a convenient and useful free script called Welder. You can find it here: http://jokermartini.com/2011/08/10/welder.
Then I started to create the spoked wheels and in this case I preferred to exclude the original version and the drum brakes brand of Fontana, which was very common in motorcycle racing at that time. It’s easy enough to change them back by looking on the net for photographic material for this brand. I used splines for the spokes and a circular array for positioning them around the rim.
When the wheels were finished, I started on the engine. It might have been a better idea to have modelled this in Rhinoceros using NURBS, but as I didn’t have much experience with the package I decided to use good old polygons in 3ds Max. I also then would have total control on the final topology. Every corner was filleted and there were geometries fused in others. In addition, each piece was modelled as a separate component, like in the real world. These included the head, cylinders, manifolds, carburettors, coils, side covers, cover lifters, etc. To vary the nuts and bolts I modelled different sets of screws, bolts, allen keys, springs, etc.
Initially I had thought about creating a set of screws and converting them by proxy in order to make the scene more streamlined but in the end I abandoned this idea in light of the fact that several bolts and screws were unique anyway and therefore different from the others.

Creating the frame is always the first step for something like a motorcycle.
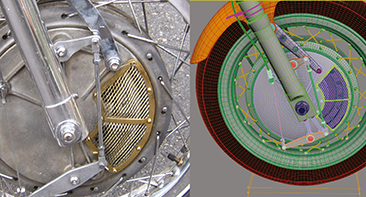
The front wheel and drum brake is quite accurate but varies slightly in design.

Some of the screws and bolts that were unique in places provided plenty of variety.
Getting the correct curvature and scale of the engine was not a quick or easy thing to do, especially for the lower parts where I did not have many photographic references. This was really a work of patience. Once the body of the engine had been created, it was time to add all the little details where the engine was mounted in the frame with coils, spark plugs and the electrical system. The exhaust system was created, starting with a simple spline with bezier handles positioned and curved, then converted to polygons.
Being the owner of a Kawasaki from that period (1970–80) it was not difficult to wire the motorcycle as it should be in reality, both in regards to the electronics and the cables, clutch, brake and accelerator. Obviously I decided not to model the complete electrical system when most of it would not have been visible under the fairing and engine, but a good 60 per cent of it had been done by now. Every bulb and headlight had its own wiring.
Once the engine had been built I had to think about how to continue the design of this special bike. I had taken the time to look at various models of authentic fuel tanks from the time, but also the various approaches taken by other designs were helpful in creating a rough starting point from which to begin to model my fuel tank.
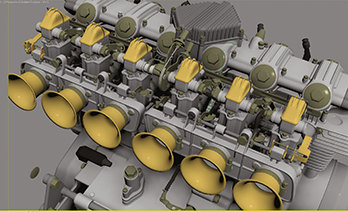
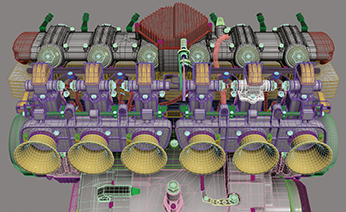
Solid view of the completed engine. Although some duplication sped things up, it was still a painstaking process.
The wireframe of the engine. Most of the engine connections are present, just those out of sight weren’t modelled.

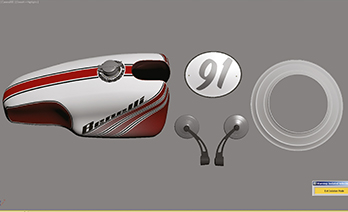
Modelling the fuel tank was relatively easy, it was more a case of deciding which shape to use.
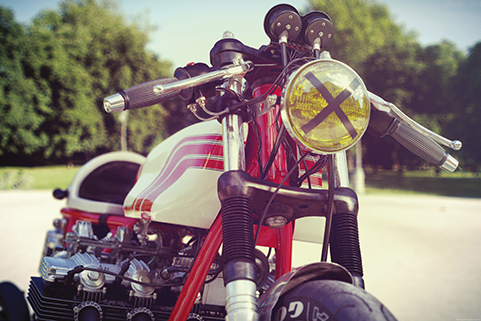
I wanted to give a touch of originality to the design by arranging double headlights, moved to the right side of the windshield. The other reason for doing this was so that people didn’t look at the windshield and think it was something they were already familiar with.
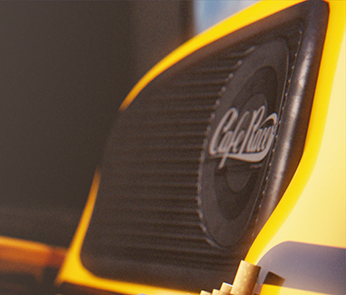
The fuel tank cap was perhaps the only thing actually existing and commercially available at the time. The instrumentation tachometer and speedometer were done taking inspiration from the Kawasaki W800 while the LED plate is steel, bent, drilled and brushed as is often seen in various preparations. For the body fairing near the knees I made one of my many Cafe Racer logos and custom embossed it using a displacement map.
Other features included the bullet-style turn indicators which were much more elongated than those that were on the market for this bike. To give a realistic lighting effect the inside of the light casings (for stop, turn signals and lights) was modelled as they were in reality to simulate the same effect reflections. You simply don’t get the same effect by just using a bump map. I went as far as modelling the light bulb filament present inside.
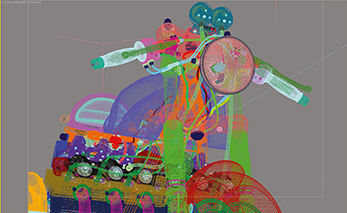
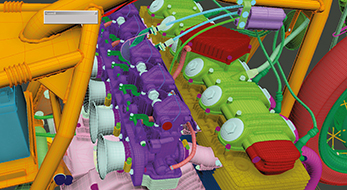
Wireframe showing how all the leads connected the various control systems together.
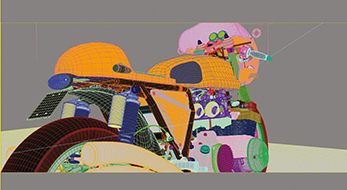
Here’s a wire showing the entire model. It was built from individual components where possible.
The wiring for the plugs and all the leads for the electrical system.
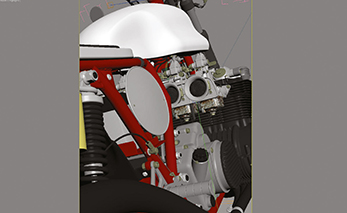
Solid view showing some of the engine detail with it in the frame.
The engine had to be built to an accurate scale to then fit into the frame properly.

The texture for the speedo was designed to have a more retro feel to it.
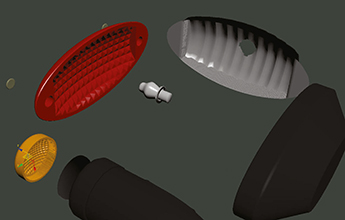
The component parts for the light fittings featured actual elements for a more realistic effect.
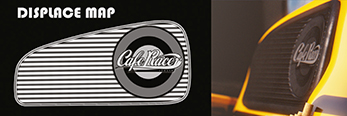
Here’s the logo as a displacement map which was added to the body.

The twin gauges for speed and revs were inspired by the Kawasaki W800.
For the livery I spent some time in deciding what to do. There were many styles and colour combinations that fit well, but in the end I had to force myself into a final decision and opted for a classic yellow with black stripes. This gave it a Camaro feel that said the bike was built for racing.
Thanks also to my colleague, as well as motorcycle enthusiast, Federico Tosi, I created the livery of the helmet. You can see his other creations on Facebook by going to: https://www.facebook.com/tworight.hands?fref=ts
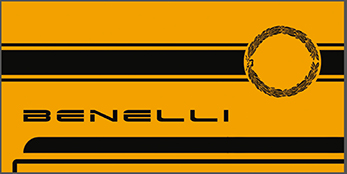
The classic yellow and black livery that was used to give the bike a racer feel.
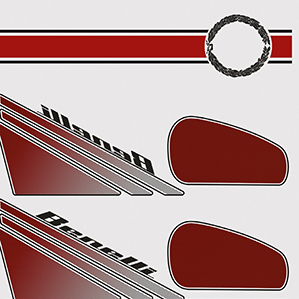
More decals and paint effects that were added to the bodywork.
BACKPLATES AND LIGHTING DESIGNS
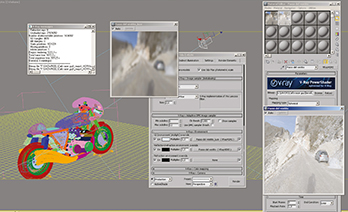
Once the bike modelling was finished it was time to find the ideal real-world location to place it for rendering. For the first location I chose Passo del Vestito, Italy, Massa Carrara (Latitude 44 ° 3′55 .97 “N Longitude 10 ° 13′28 .86” E), where I made several shots in RAW format. I then created an HDRI at 360 degrees, shooting different exposures in RAW with my decrepit old Canon 400D. This used a Sigma 8 mm fisheye lens mounted on a Nodal Ninja for precise and easy 360 degree rotation. I also took lots of pictures from different points of view to create a stock of backplate pictures. Once the shooting was done I used a programme to create a spherical environment that could be used in 3ds Max.
I used a dome with the HDRI image created earlier to illuminate the scene with IBL using V-Ray as the render engine. This ensured a good level of photorealism and an exact fit. For each shot a map rotation was made that fills the photo of the backplate. I used a low-res and blurry version of the HDRI to illuminate the scene using environment skylight, and the full resolution HDRI in the slot for reflection. One direct
light was used to improve the sun light direction. After setting the lighting, backplate and the HDRI I turned on Global Illumination using irradiance maps.
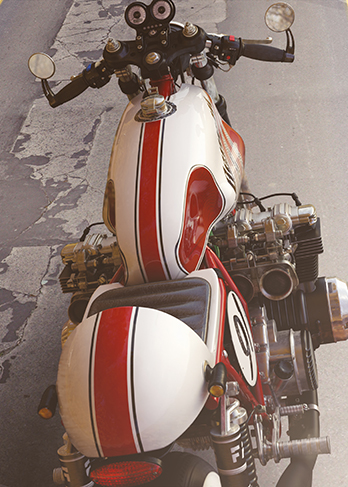
Also in this case, as often happens in my personal work, I wanted to change and create another style. In fact, I wanted to create a model with the engine painted black, red frame, no fairing, race number in place of the side panels and a classic tank with unpainted, bare metal.
Each piece of the body underwent several changes before becoming what it is, because I hardly ever have an overall view of the work I'm doing. I love to change direction, leaving me to implement ideas at the last minute.
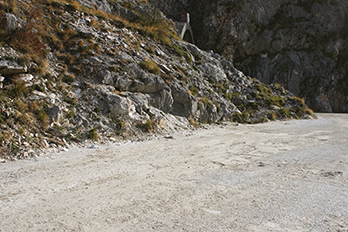
The photo backplate for the road scene before adding the CG elements.
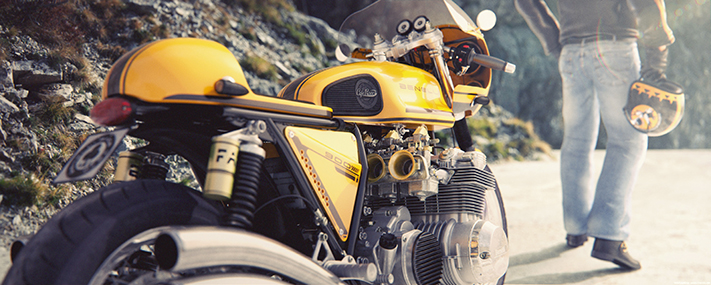
Here’s the classic yellow version and the character walking away from the bike.
These are the alternative textures for some of the other scenes.

A close up of the engine with the photo backdrop of the road behind.
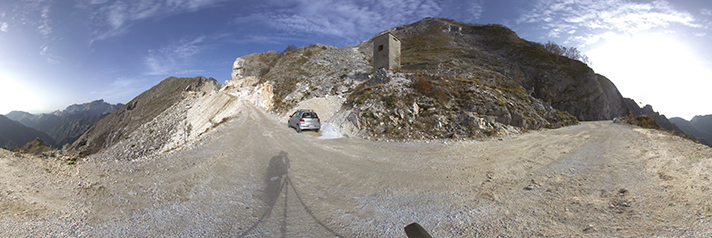
A 360 degree view of the location used to create an HDRI lighting scheme.
For the version of the bike at the park instead I tried to use my old Light Probe, the famous giant ball reflecting on a tripod. This technique is very fast but obsolete because it returns a small image size, which then needs to be cropped into, reducing the image size further. Also, let's not forget that photographing a subject that reflects the environment, and not directly the environment itself as it does with a fisheye, makes everything appear in reverse. I used the ball technique when I needed to quickly grab an environment.
For the bike rider, I took a pre-existing model of a man at low detail and I sculpted it in Zbrush, refining the face and projecting the various textures on the face with the cool tool called Spotlight. From the body I then created a model in 3ds Max with very rough garments which were then refined, modelled and textured in ZBrush. Also the mapping coordinates were generated in ZBrush with the projection master tool.
Once sculpted I saved displacement maps in 16-bit TIFF image formats and put them in V-Ray, with the displacement mode, over the figure. For the material of the skin I used SSS2 in V-Ray. The settings were very standard and I limited myself to mixing a diffuse map created in ZBrush with a subdermal map (a colour edited map of the diffuse) below one of the many tests for the skin.
This created the elements for the third location, at the central park in Parma called the Parco Ducale.
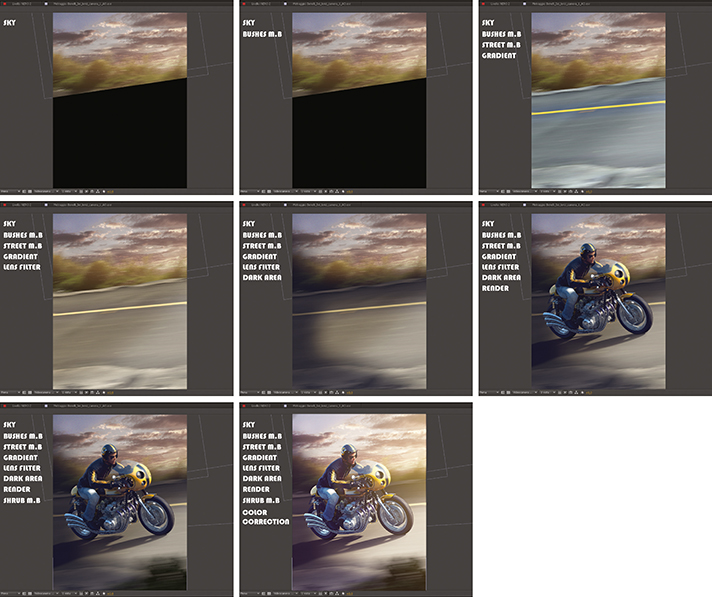
The last image was created without the use of dedicated and photo HDRI backplate, but rendered using only a sun and sky in V-Ray, sky in the environment and GI lighting. The whole image was then composited in AfterEffect adding backgrounds, lighting, camera blur and the bike itself. Finally, Colorista 2 was used for colour correction.
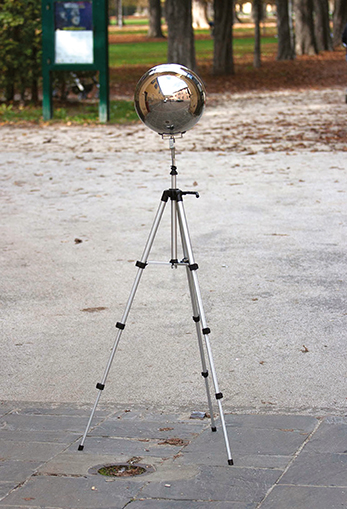
The old reflecting ball on a tripod technique used to quickly generate an environment.
An alternative version of the image set in the central park in Parma.
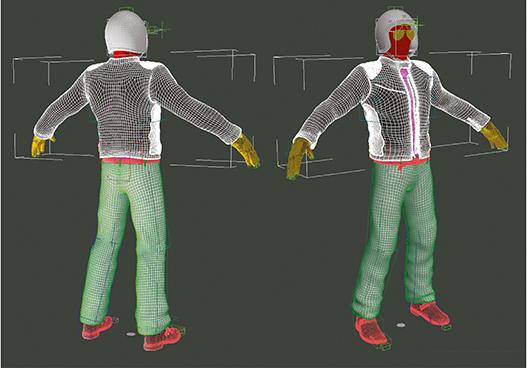
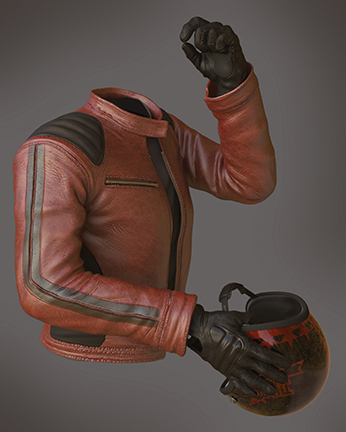
Rough garments were created in 3ds Max and refined again in ZBrush.
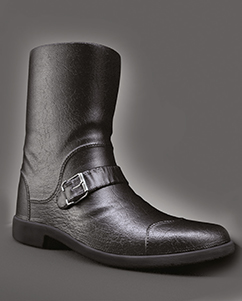
You can’t have a motorbike rider without a cool pair of boots.
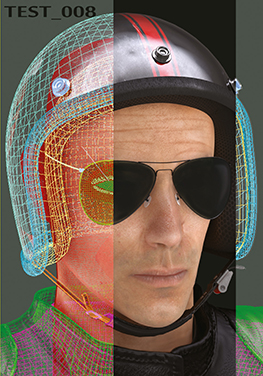
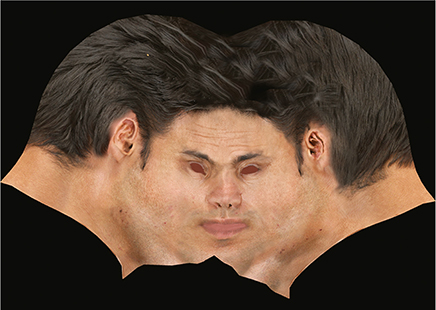
Here are the face textures being unwrapped for UV mapping.
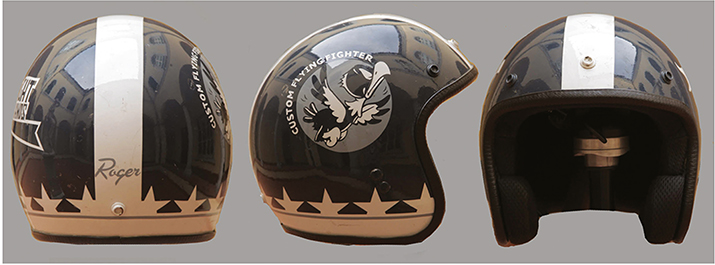
The helmet and texture were specifically designed to cultivate the retro racer feel.
Here are the final steps used in After Effects to put the render passes and the background and lighting together to create the final image.
BENELLI CAFÉ RACER
BY ANDREA LAZZAROTTI
![]() 3DS MAX 2012, COLORISTA 2, ZBRUSH, RHINOCEROS
3DS MAX 2012, COLORISTA 2, ZBRUSH, RHINOCEROS
![]() 2 HOURS
2 HOURS

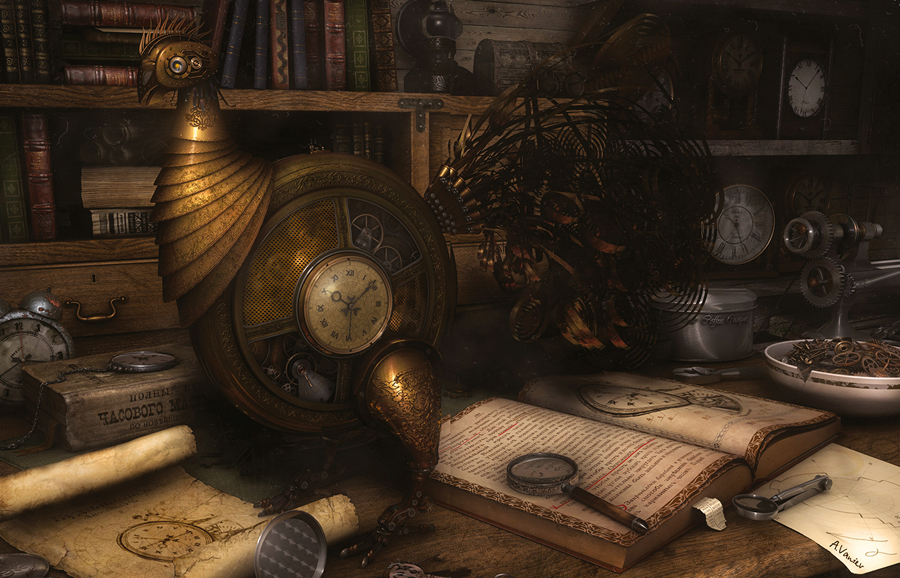
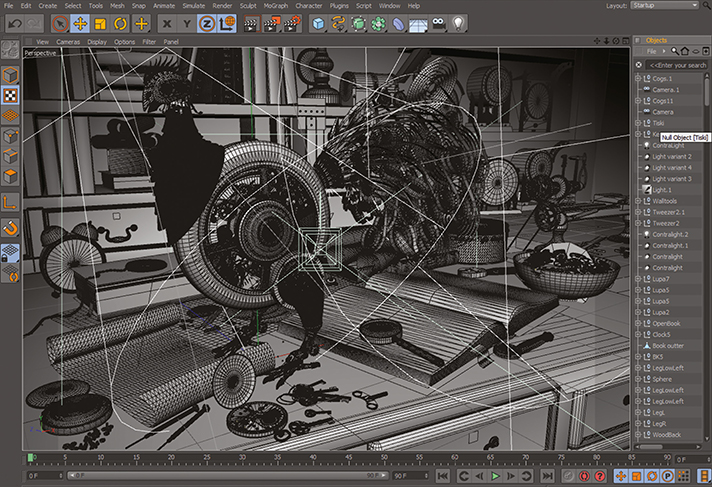
![]() This picture is about clock-making masterpieces. On the one hand it was inspired by a picture of a rooster-formed clock which I saw in a book 10–15 years ago. On the other hand it was inspired by English and Swiss automations of the eighteenth–nineteenth centuries and especially by the mechanisms of a great Russian inventor, Ivan Kulibin. I tried to make it look like a true fully movable mechanical bird. Imagine an alarm clock which can suddenly wake you, and possibly your neighbours, in the morning with loud crowing and then quickly run away from you if you try to hit it, catch it or try to throw a pillow into it.
This picture is about clock-making masterpieces. On the one hand it was inspired by a picture of a rooster-formed clock which I saw in a book 10–15 years ago. On the other hand it was inspired by English and Swiss automations of the eighteenth–nineteenth centuries and especially by the mechanisms of a great Russian inventor, Ivan Kulibin. I tried to make it look like a true fully movable mechanical bird. Imagine an alarm clock which can suddenly wake you, and possibly your neighbours, in the morning with loud crowing and then quickly run away from you if you try to hit it, catch it or try to throw a pillow into it.![]()
Adding various spotlights to highlight the metal form of the alarm clock construction.
| PROJECT | ALARM CLOCK |
| SOFTWARE USED | MAXON CINEMA 4D R13, ADOBE PHOTOSHOP CS3 |
| RENDERING TIME | APPROX. 3 DAYS |
| ARTIST | ALEXANDER VANIEV |
| COUNTRY | RUSSIAN FEDERATION |
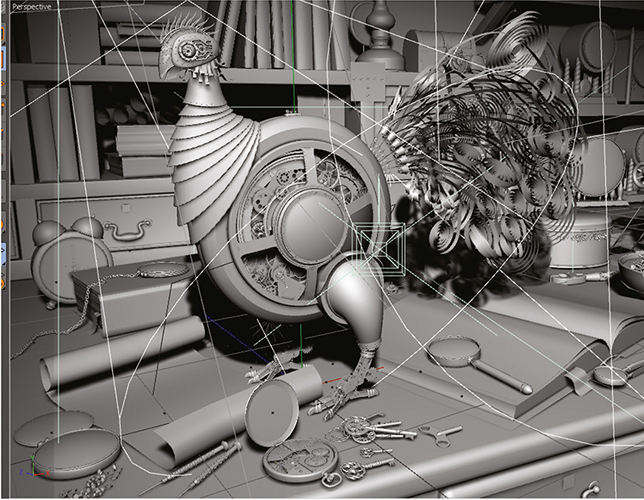
Solid, smoothed surface viewport look at the scene and all the elements to check the composition.