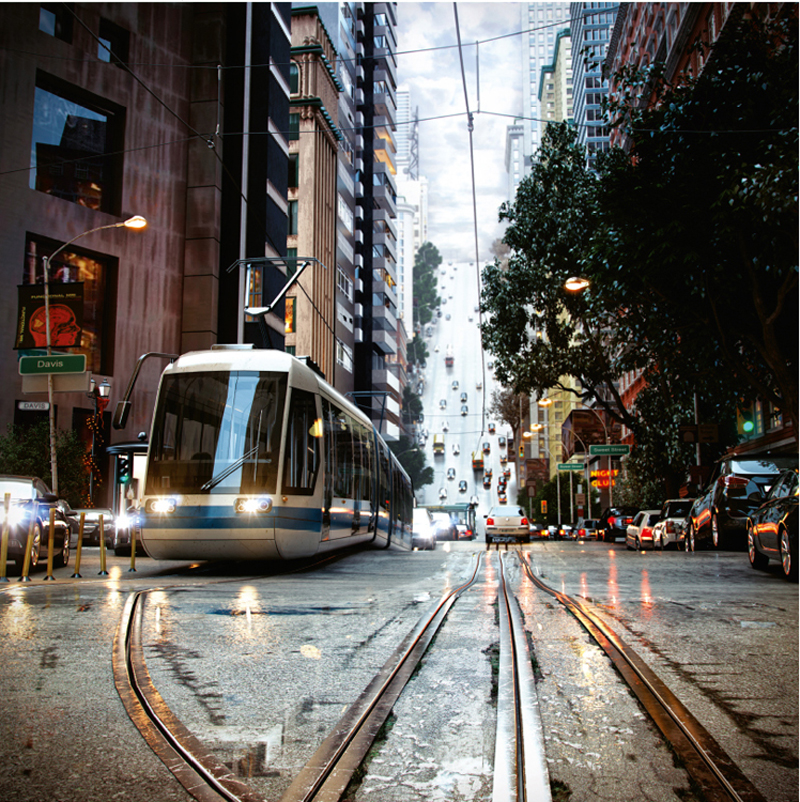
![]() The idea was to create a modern street tram in a busy city with very steep hills in the background. Because I had a basic PC I only modelled the fronts of the buildings and the visible sides of the tram and cars to cut the polygon count down. The image was rendered with V-Ray and post production in Photoshop added colour and styling plus the light effects and reflections.
The idea was to create a modern street tram in a busy city with very steep hills in the background. Because I had a basic PC I only modelled the fronts of the buildings and the visible sides of the tram and cars to cut the polygon count down. The image was rendered with V-Ray and post production in Photoshop added colour and styling plus the light effects and reflections.![]()
V-Ray Materials were used to add textures to the road surfaces.
Photoshop was used to add lens correction and lighting effects.
| PROJECT | STREET DAVIS |
| SOFTWARE USED | 3DS MAX, V-RAY, PHOTOSHOP |
| RENDERING TIME | 8 HOURS |
| ARTIST | GILVAN ISBIRO |
| COUNTRY | BRASIL |
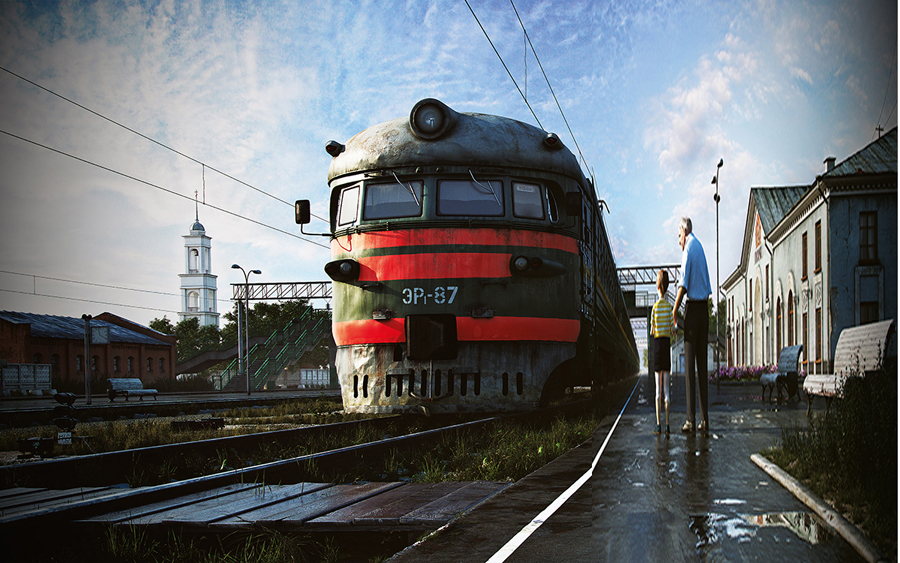
![]() This picture is from my memories. In my childhood I spent my holidays in the countryside. My granddad and I took a train and went out to explore the countryside. I loved those days and always wanted some way to recreate them. At the time we did not have a camera to photograph those moments so creating the image with CG software helped me to bring to life all those memories in my mind.
This picture is from my memories. In my childhood I spent my holidays in the countryside. My granddad and I took a train and went out to explore the countryside. I loved those days and always wanted some way to recreate them. At the time we did not have a camera to photograph those moments so creating the image with CG software helped me to bring to life all those memories in my mind.![]()
| PROJECT | GAGARIN |
| SOFTWARE USED | 3DS MAX 2012, VRAY, PHOTOSHOP |
| RENDERING TIME | 8 HOURS |
| ARTIST | ANTON TURKIN |
| COUNTRY | RUSSIA |
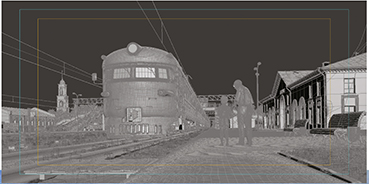
The wireframe showing that everything in this scene is CG, from the characters to the background.
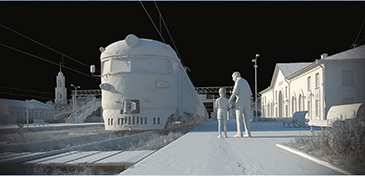
Working out the position of the sunlight as it shines across the scene. This is a clay render to check the lighting.
![]() The train was modelled, textured and lit in CINEMA4D. Originally I wanted to photograph several trains and mount them using Photoshop, but there were just way too many reflections on the surface. When I rendered it I used multi-pass rendering, so it was possible to work on the reflection and shadow maps in Photoshop after rendering. The backdrop was a mixture of Argentina (foreground) and Austria (mountains). Most important additions were the lights on the train, as well as the smoke. Both were painted in afterwards using Photoshop.
The train was modelled, textured and lit in CINEMA4D. Originally I wanted to photograph several trains and mount them using Photoshop, but there were just way too many reflections on the surface. When I rendered it I used multi-pass rendering, so it was possible to work on the reflection and shadow maps in Photoshop after rendering. The backdrop was a mixture of Argentina (foreground) and Austria (mountains). Most important additions were the lights on the train, as well as the smoke. Both were painted in afterwards using Photoshop.![]()
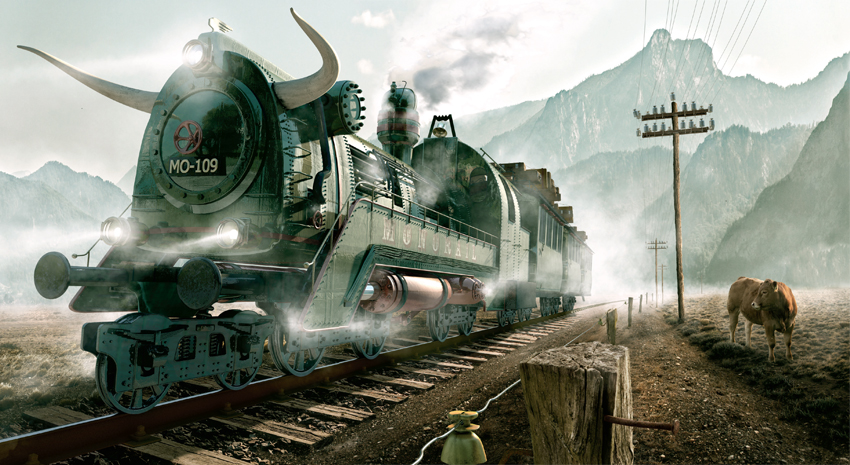
| PROJECT | MONORAIL |
| SOFTWARE USED | CINEMA4D R14, ADOBE PHOTOSHOP CS6 |
| RENDERING TIME | ABOUT 10 HOURS |
| ARTIST | ULI STAIGER |
| COUNTRY | GERMANY |
The train is CG but the backgrounds are composites from two different countries.
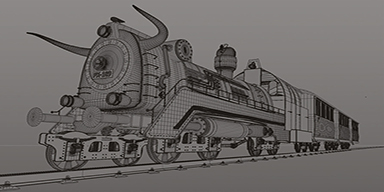
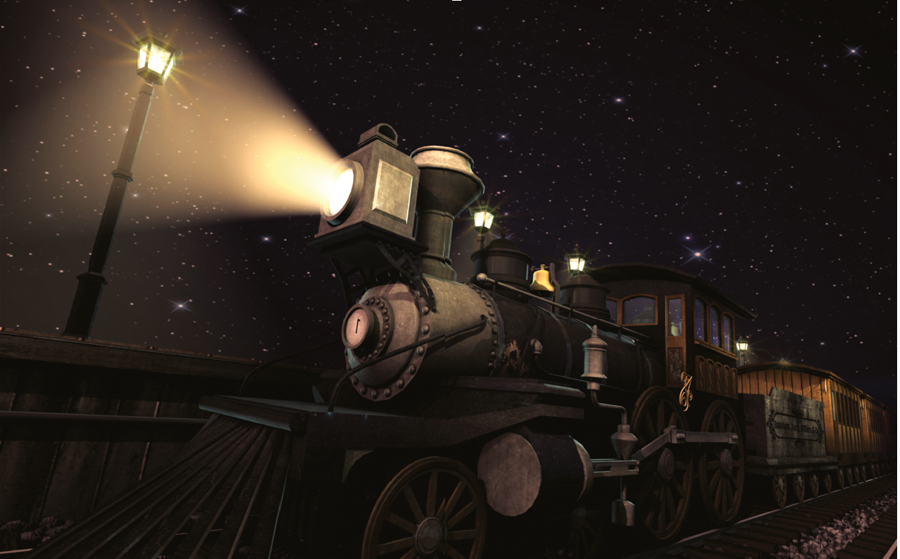
![]() I really wanted to make a beautiful old-time steam train. I found my inspiration on Google when I saw a picture of Baldwin, an old steam train from the company Burnham, Parry, Williams & Co. made in 1876. I modelled and rendered it using Autodesk Maya. The final image featured textures that I made from batch rendering many different layers and using Autodesk Composite to mix them together.
I really wanted to make a beautiful old-time steam train. I found my inspiration on Google when I saw a picture of Baldwin, an old steam train from the company Burnham, Parry, Williams & Co. made in 1876. I modelled and rendered it using Autodesk Maya. The final image featured textures that I made from batch rendering many different layers and using Autodesk Composite to mix them together.![]()
| PROJECT | THE BALDWIN STEAM TRAIN |
| SOFTWARE USED | AUTODESK MAYA 2014 |
| RENDERING TIME | AROUND 30 MINUTES |
| ARTIST | KRISTÍN SNORRADÓTTIR |
| COUNTRY | ICELAND |
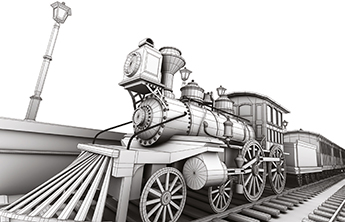
An ambient occlusion render to show the lighting on the model.

Ambient occlusion with wireframe render showing the detail of the model.
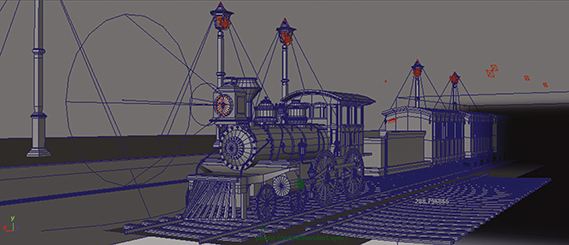
A front-view screenshot of the train from the scene file in Autodesk Maya 2014.
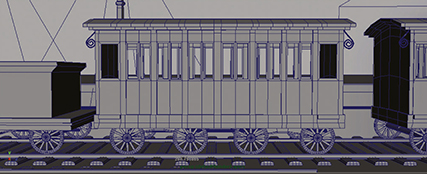
The side view of one of the wagons. Once small elements were built they were duplicated to make up the whole.
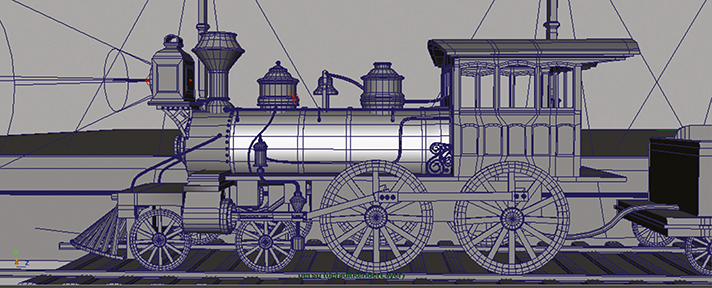
The engine itself was the most complex part of the model.
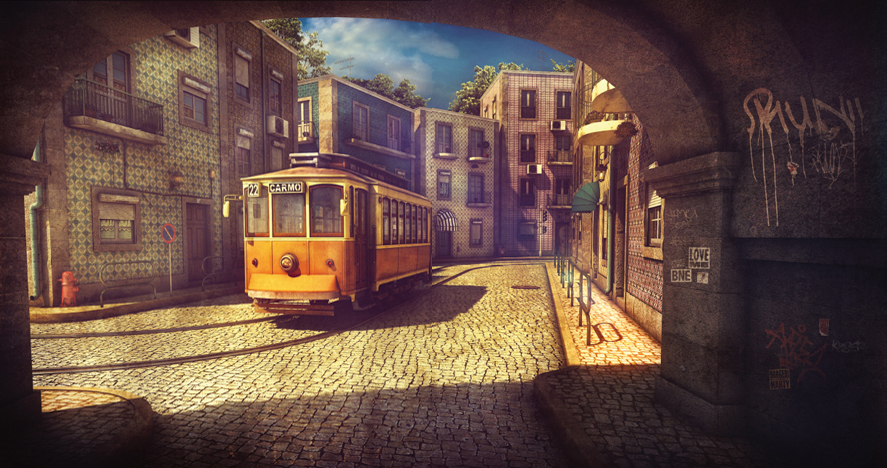
BUILDING THE LISBON TRAM
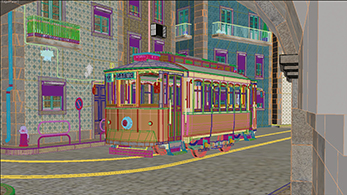
Discover how Omer Messler created an old-fashioned-style tram on the streets of Lisbon, Portugal
DIRTY URBAN CITIES
The main reason for creating this image originally was for my portfolio and then uploading to my website. Before I started working on the project I needed to feel inspired to create it. For me this is one of the most important steps! I spend plenty of time here, thinking and looking at references. These can be almost anything like a photo, painting, movie, or simple everyday things that inspire me to form my main idea for the project. For this one I wanted to create something old, dirty and urban. This led me to Lisbon City in Portugal. I immediately fell in love with the street style, buildings and the amount of detail.
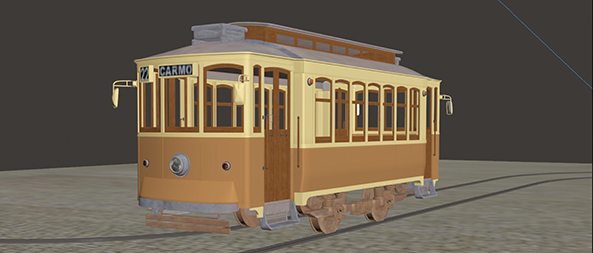
I had in mind to create a scene which was both simple and beautiful so I decided to make an old tram. After searching the Internet for reference images of trams, I found this very charming tram and decided to put it as a main object in my street scene. The street itself was totally made up in my head, inspired by reference images I found on the Internet.
The whole image took about three weeks to make during the evening hours between my daytime work in the studio and was created using 3ds Max 2012 and rendered using V-Ray. Textures and post work were done using Photoshop CS5.

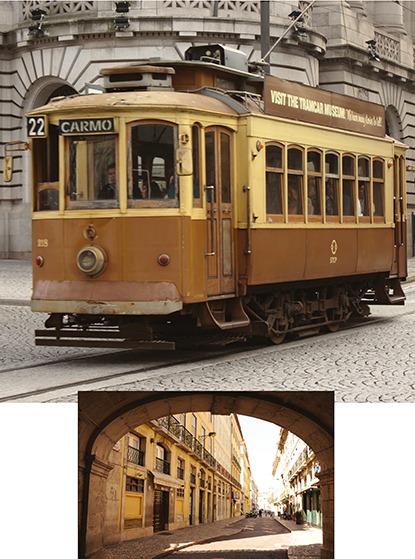
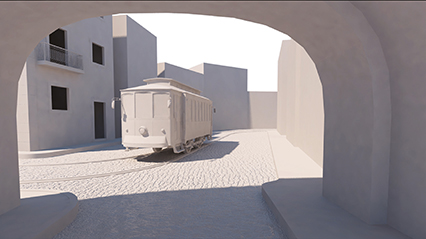
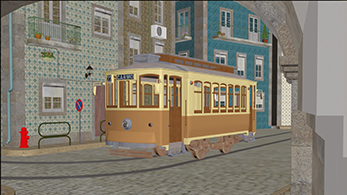
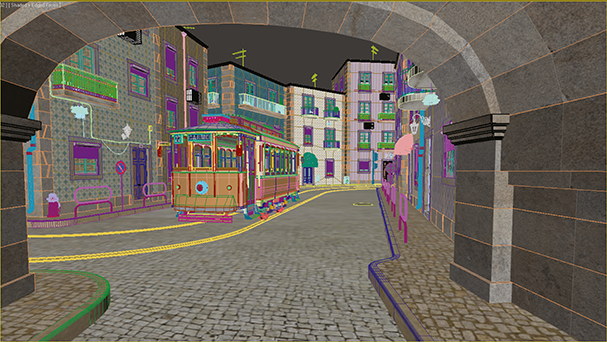
The Lisbon Tram – final image

Some of the reference images that went into creating the Lisbon Tram.
| PROJECT | LISBON TRAM |
| SOFTWARE USED | 3DS MAX, V-RAY, PHOTOSHOP |
| RENDERING TIME | 50–60 MIN |
| ARTIST | OMER MESSLER |
| COUNTRY | ISRAEL |
SKETCHING AND MODELLING
First, I started by searching for all possible references of the tram and street scene due to the fact that I was unable to find an accurate blueprint for the tram itself. I ended up with around 200 images, some of which are featured in this tutorial. The process of searching for references was important because it helped to give me information that was essential for accurately recreating the environment I was imagining. On this occasion what helped me a lot was the technique of keeping things to scale. Finding references was quite easy. When all the research was done, it was time to start the project.
After I got my first idea I made one quick sketch that served as a base for things to come. It doesn't matter if you are good or bad at sketching, it's just that it's the fastest way of making a draft version of the ideas that you have.
The tram became the object I gave more attention to so I started modelling the tram from several references to have the most accurate representation. This included all the small parts like nuts and bolts. By the end, the modelling of the tram came to 794 pieces.
I used symmetry for most of the elements of the tram. A good tip for modelling this kind of work is to model all parts separately. This really helps not only for the modelling, but also for the texturing, and in general it leaves the model really light.
I built a few basic shapes in 3ds Max and staged the camera. I believe that the most important thing at this stage of an image is to define the main shapes in the composition, because the whole scene is going to be built around those shapes. The camera is another important consideration because the scene is created from the camera's point of view and so you only need to create what the camera sees. If you don't do this part right then, it's going to be a waste of time changing the main shapes later on, when you get into the detailing. It's also good to place some basic lights and define some materials. After the 3D scene blocking was finished, it was time to start with the modelling. When I create a scene with lots of details, it can take up to a couple of weeks to complete, depending on the time I have.
The modelling process for the street elements was extremely simple. The low-res buildings were very easy. To begin with they were just a plane or a box, and then I made the windows and doors and finished with fine details. I paid special attention to give extra quality while modelling.
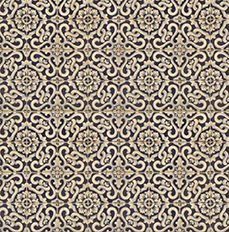
I found this mosaic texture on the walls of a building so decided to use it in this scene.
The scene was built from basic blocks once the camera position had been set. Each element was added until the entire scene was mapped out.


Without any blueprints to refer to, the reference images were essential for getting everything to scale.
Most parts of the scene were not difficult at all to model, since there were a lot of quite easy objects. These included boxes converted to Edit Poly and then manipulated, splines with thickness or extruded, etc. Usually when I finish with modelling, at the end the day, I do one quick render, bringing it to Photoshop and do a quick draft paint-over of that image, to make a plan for the next day. These over-paints look really simple but it gives me a better visual reference of the details which I need to do in some areas. Sometimes I end up doing only 40 per cent of what I sketched, sometimes it's more, it all depends on how much time it will take and if the new details will fit into the final model.
A good trick to check if you are producing an accurate piece of work is to assign a material with a high specular and low glossiness to check the behaviour of the mesh. If the brightness is constant and without strange artifacts, you're doing great!
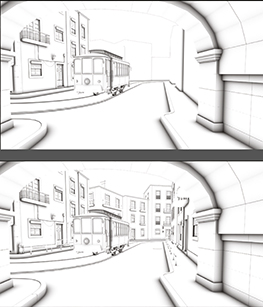
A shaded view gave a basic idea of whether the model had any obvious shortcomings.
Now there’s a wireframe of the tram in the street with all the details added.
Again, the shaded view showed roughly how the final image was going to appear.
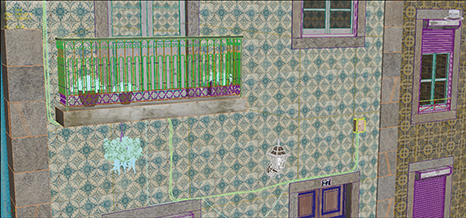
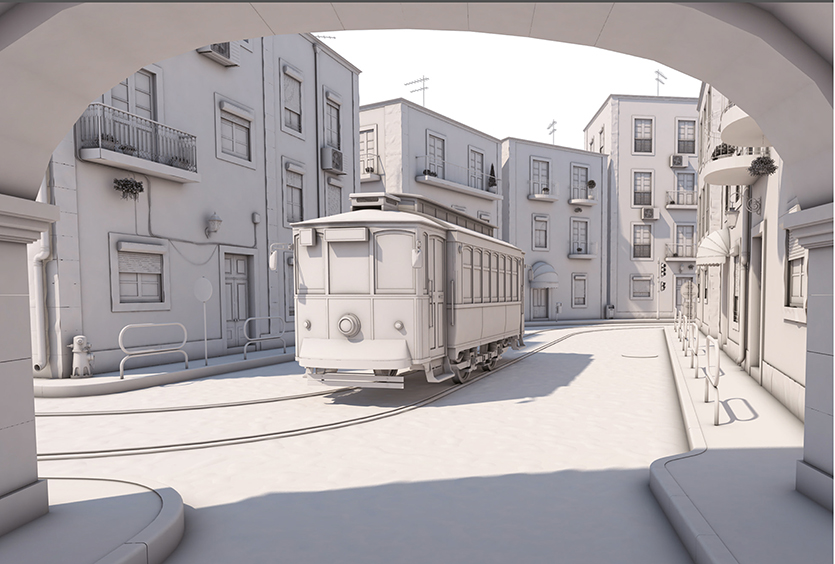
The texture from earlier on was applied to the outside of the street walls.
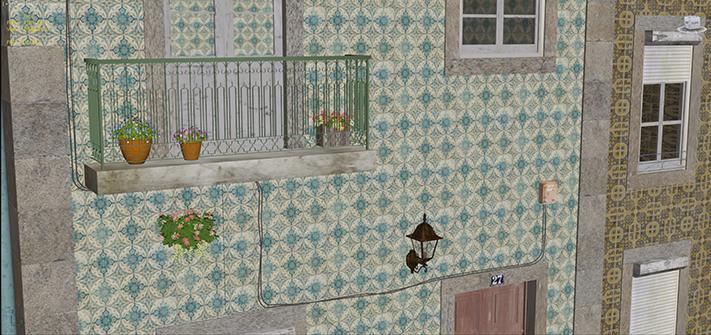
Don’t forget the small details that make an image seem more real like plants and wires.
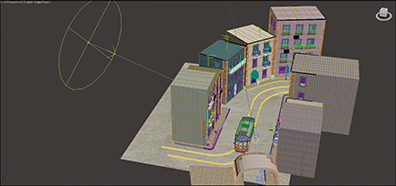
Here’s the entire scene after modelling the train and street.
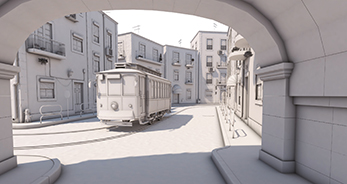
A clay render without the texture shows the lighting and where it will fall in the final image.
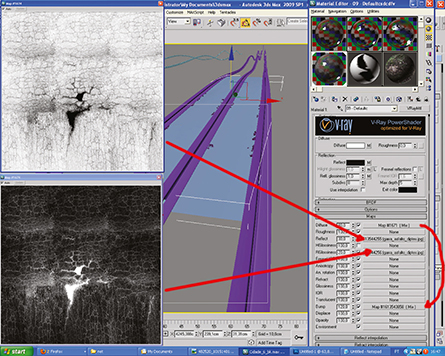
CREATING THE MATERIALS
Once I was satisfied with the modelling I went into the texturing and materials stage. In 3ds Max, I always set Space Gamma to 2.2, which allows you to work in a linear workflow. I used V-Ray materials for every object in the scene, some of them with their Bump and Specular. I used also the ColorCorrect plug-in in order to have more control over the colour, brightness and contrast of the textures, without externally modifying the bitmap itself. After defining the base materials I textured the image based on a combination of those materials. For the UV coordinates, 80 per cent of the time I was using Box UV mapping from the UVW Map modifier. I tried to keep the scale of the Box UV mapping the same for all the objects I textured so I could have similar texture scales and a more realistic look.

Setting the input gamma to 2.2 for a linear workflow.
When I finished the modelling, texturing and materials processes, I started to set up the lighting. I always start with a grayscale render as it helps to get the right lighting setup. The light setup was also very simple to do. You won't believe it but I only used one light. When positioning light it's good to switch to Light View so you can be more precise. You can then get the feeling of where your shadows will be cast.
The image was illuminated with a V-Ray Sun working together with the V-Ray Physical Camera, which offers real control of exposure, shutter speed and ISO. My goal was to give the impression of mid-day lighting. The main idea was to achieve a warm mood in the picture. I created the V-Ray sun which was placed a bit outside of the scene in order to get the sunlight falling on the street. The sun was the only light to illuminate the scene.
The volumetric light was simulated in Photoshop later so that it could be more accurately controlled.
Just one light was used in the scene and that was the overhead mid-day sun.
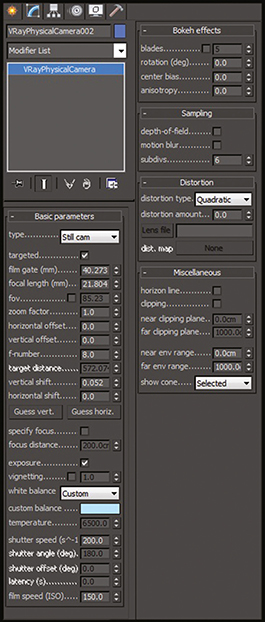
The V-Ray physical camera was used so that there was complete control over the effects created
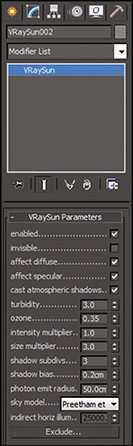
The physical sun characteristics set up in V-Ray. The volumetric effect was added later.
The final rendering was done at 3k resolution, but all the previous test renderings were done at 2k resolution for the sake of speed. The image was rendered in two passes with a resolution of 3150 × 1699. The final rendering process took about 60 minutes on an Intel Core i7 2.93GHz, 8GB RAM, Geforce GTX 650 computer, which was pretty fast when you look at the complexity of the scene. I also rendered some RGB masks for compositing with the 3ds Max free plug-in, RenderMask. After an hour of rendering, I had the beauty render, ready for me to start the post production.
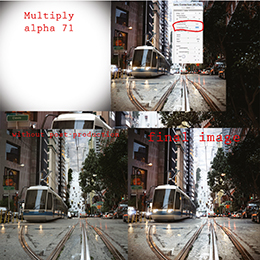
Compositing is the final process, and probably the most important as the final result depends on my ability to create a good artistic look in post editing.
I consider the render out of Max to be just the start of the final stage. It would be very difficult and time-consuming to get a good result directly from the Max renderer, so I used Photoshop to do colour correction, brightness and contrast. I started to bring out the colours individually using the render masks. All these corrections can be done in Max, but like I said, it would take a lot of time and test renders to get a decent result and sometimes it is just not worth the effort. Photoshop gives much more freedom and control over your image. I added the Ambient Occlusion render in Photoshop as a layer by setting the blending mode to Multiply. Next, I retouched the image using the Burn and Dodge tool to add more shadows and give it more life and then I added some extra dirt textures and lens flares.
After I finished the whole image, it was time to promote it on the Internet. What's the reason of doing something if you don't share it with other people? There are a lot of great galleries on the Internet where I usually send my latest illustrations. Sometimes I get useful critiques and ideas that make me think a little bit about what I did and how it could be better. When working on something personal for more than a couple of weeks, you may lose an objective perspective of your work. I know I do. So, it really helps to see how other people will react to the image. If you liked this tutorial and have any questions about it feel free to visit my site: http://www.omermessler.com or to drop me a line.
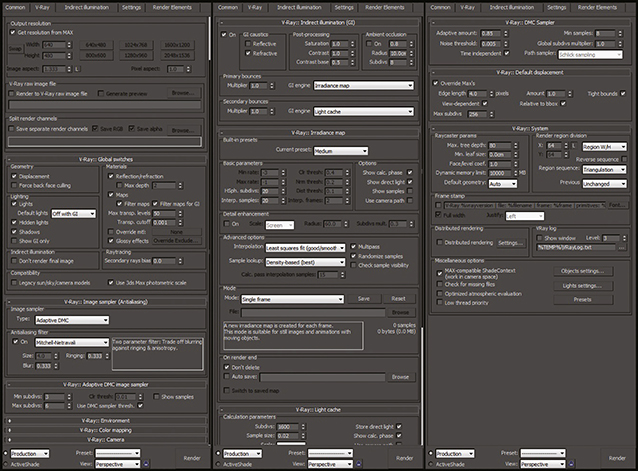
Setting up the render parameters in V-Ray then heading for post production.
LISBON TRAM BY OMER MESSLER
![]() 3DS MAX, V-RAY, PHOTOSHOP
3DS MAX, V-RAY, PHOTOSHOP
![]() 50–60 MIN
50–60 MIN