Chapter 7: The Bride and Groom
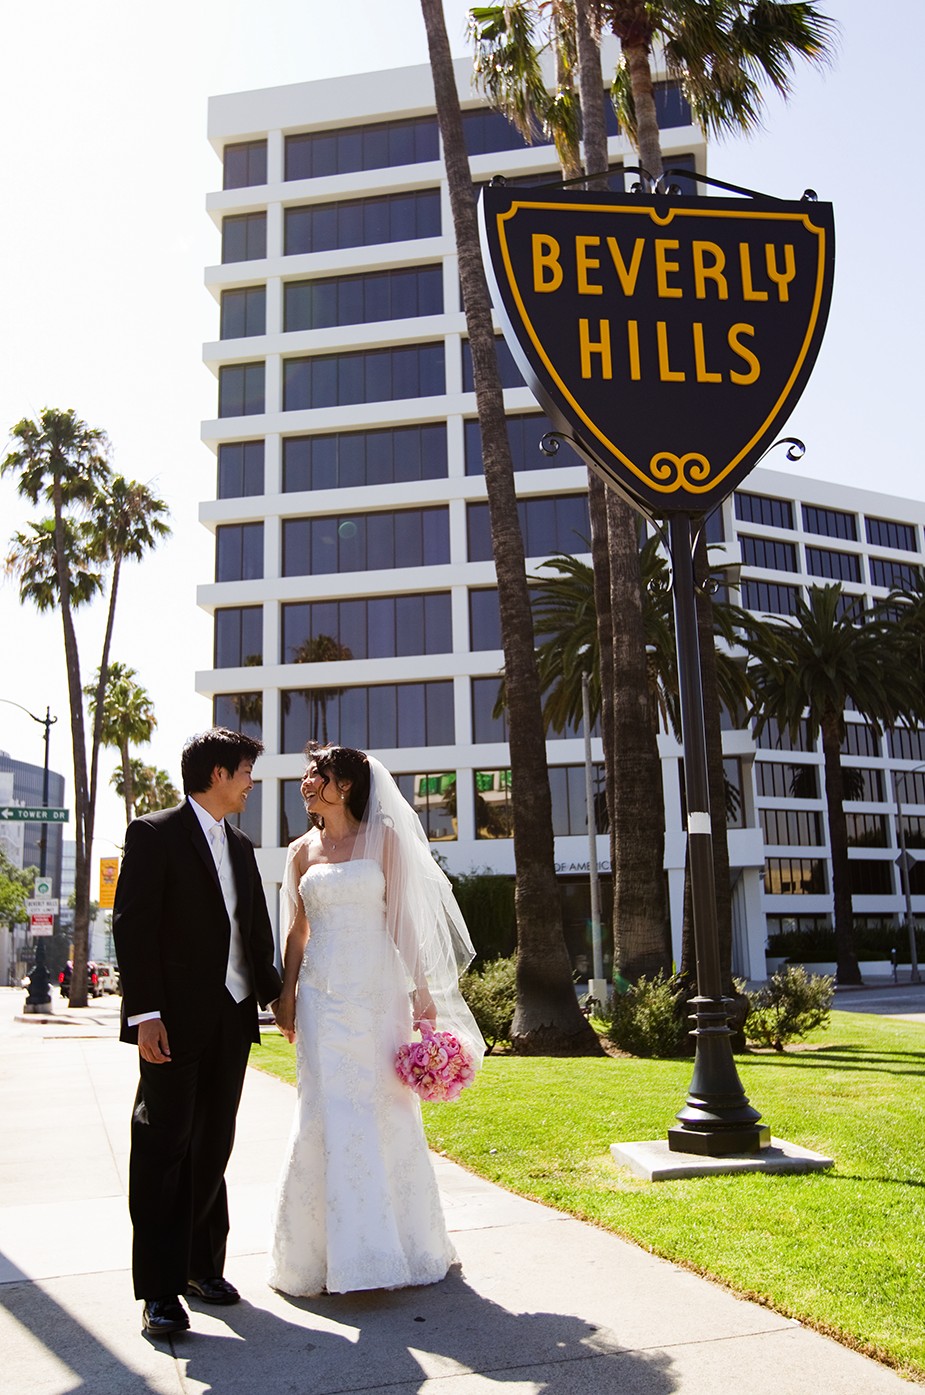
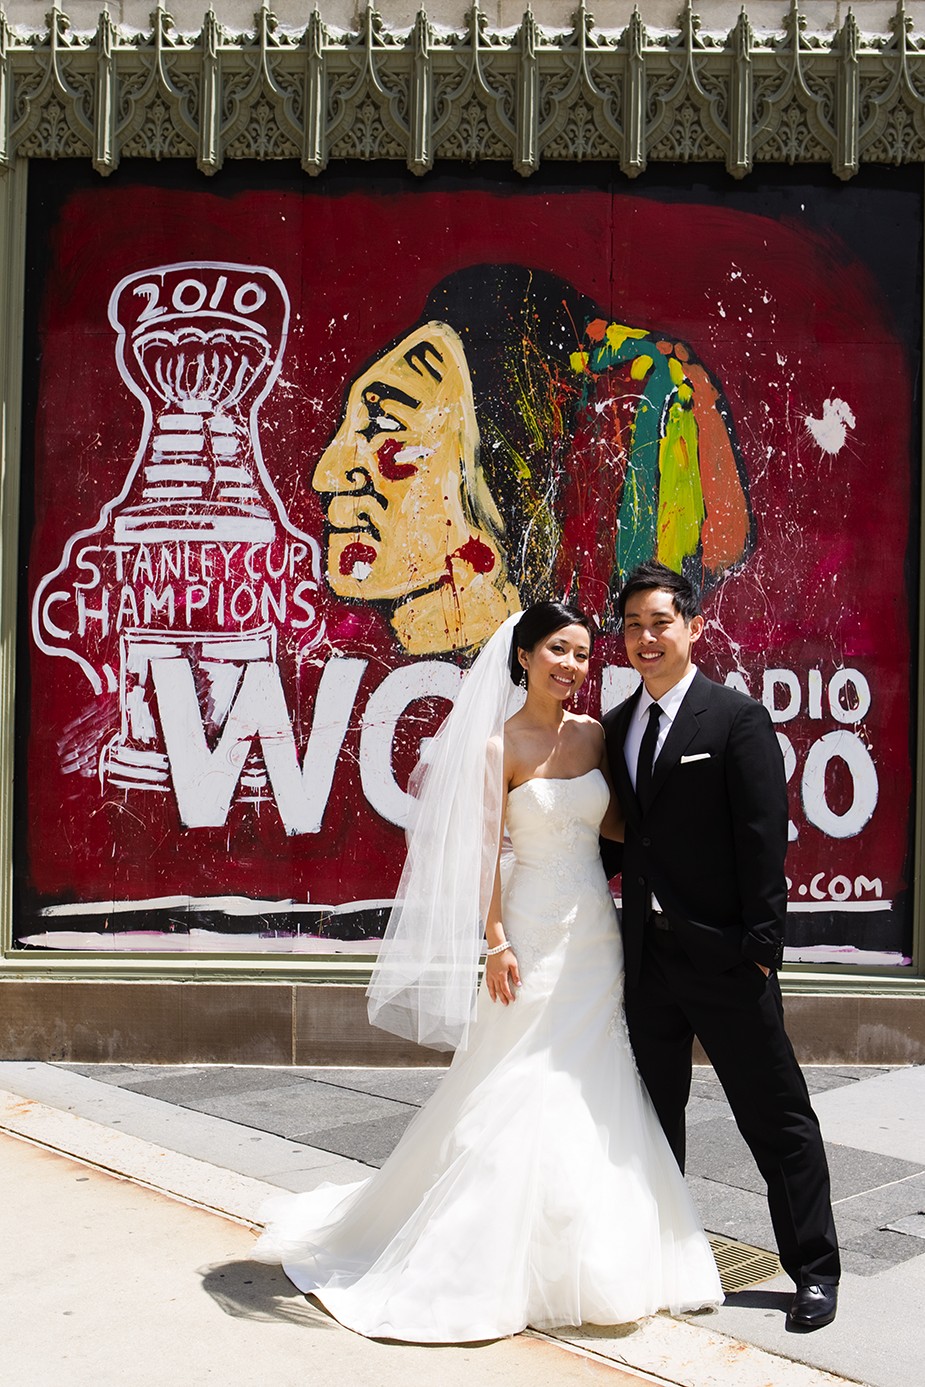
Photographing the bride and the groom is your main focus as a wedding photographer, and while the ceremony and reception are important, the portraits are where you can really shine. The basics are pretty simple: Set up a time and place, pose the couple, and take the portraits. The key is that the time you spend getting the portraits needs to be quality time. You want to make sure the location the portraits are to be taken is near the ceremony or reception location so that you don’t waste the bride’s and groom’s or the wedding party’s time. And you need to have a portrait plan. Ideally, you want to plan when the portraits will take place — before the ceremony, before the reception, or a combination of both times. You will also want to pick a location with good light and a background that adds to the image rather than distracts from it. At times, the area can have another meaning, as is the case in Figure 7-1, where the Beverly Hills sign adds some fun to the photograph while at the same time leaving no doubt where the wedding took place.
7-1
ABOUT THIS PHOTO The Beverly Hills sign adds a location to the portrait of the bride and groom. Taken at ISO 200, f/3.5, 1/1000 second.
When to take the Portaits
To do the best job with the bride and groom portraits, you will need to spend a little time and not rush through the portraits. This means you should schedule the time beforehand and make sure it is included in the wedding schedule. You can take individual portraits of the bride and individual portraits of the groom as they get ready for the ceremony, as well as after it. However, this can be tough logistically, and it is one of the main reasons to work with a second photographer at weddings. When the bride and groom are getting ready at the same time but in different locations, it can be difficult for one photographer to cover everything, so while you are shooting the individual portraits of the bride, the second photographer can shoot the individual portraits of the groom. You can also shoot the portraits of the bride and groom together before the ceremony if the bride and groom agree to it.
There are some really good reasons to do the bride and groom portraits prior to the ceremony:
• Everyone looks his or her best. Because these shots are taken before the ceremony but after the makeup and hair are done, everyone looks fresh and photo-ready.
• You can schedule some extra time. If you know how long these shots will take, you can start preparing earlier and have some time set aside for the portraits here.
• The light can be better. Many weddings start in the late afternoon or early evening, and the light starts to diminish pretty quickly. When you shoot in the early afternoon, you can get brighter light, which is especially helpful for shots indoors where your main light source might be the available light coming through the windows or doors.
• There are fewer distractions. Because there are fewer guests and people around, there are fewer distractions for the bride and groom. This allows them to focus on the photos rather than on mingling with their guests.
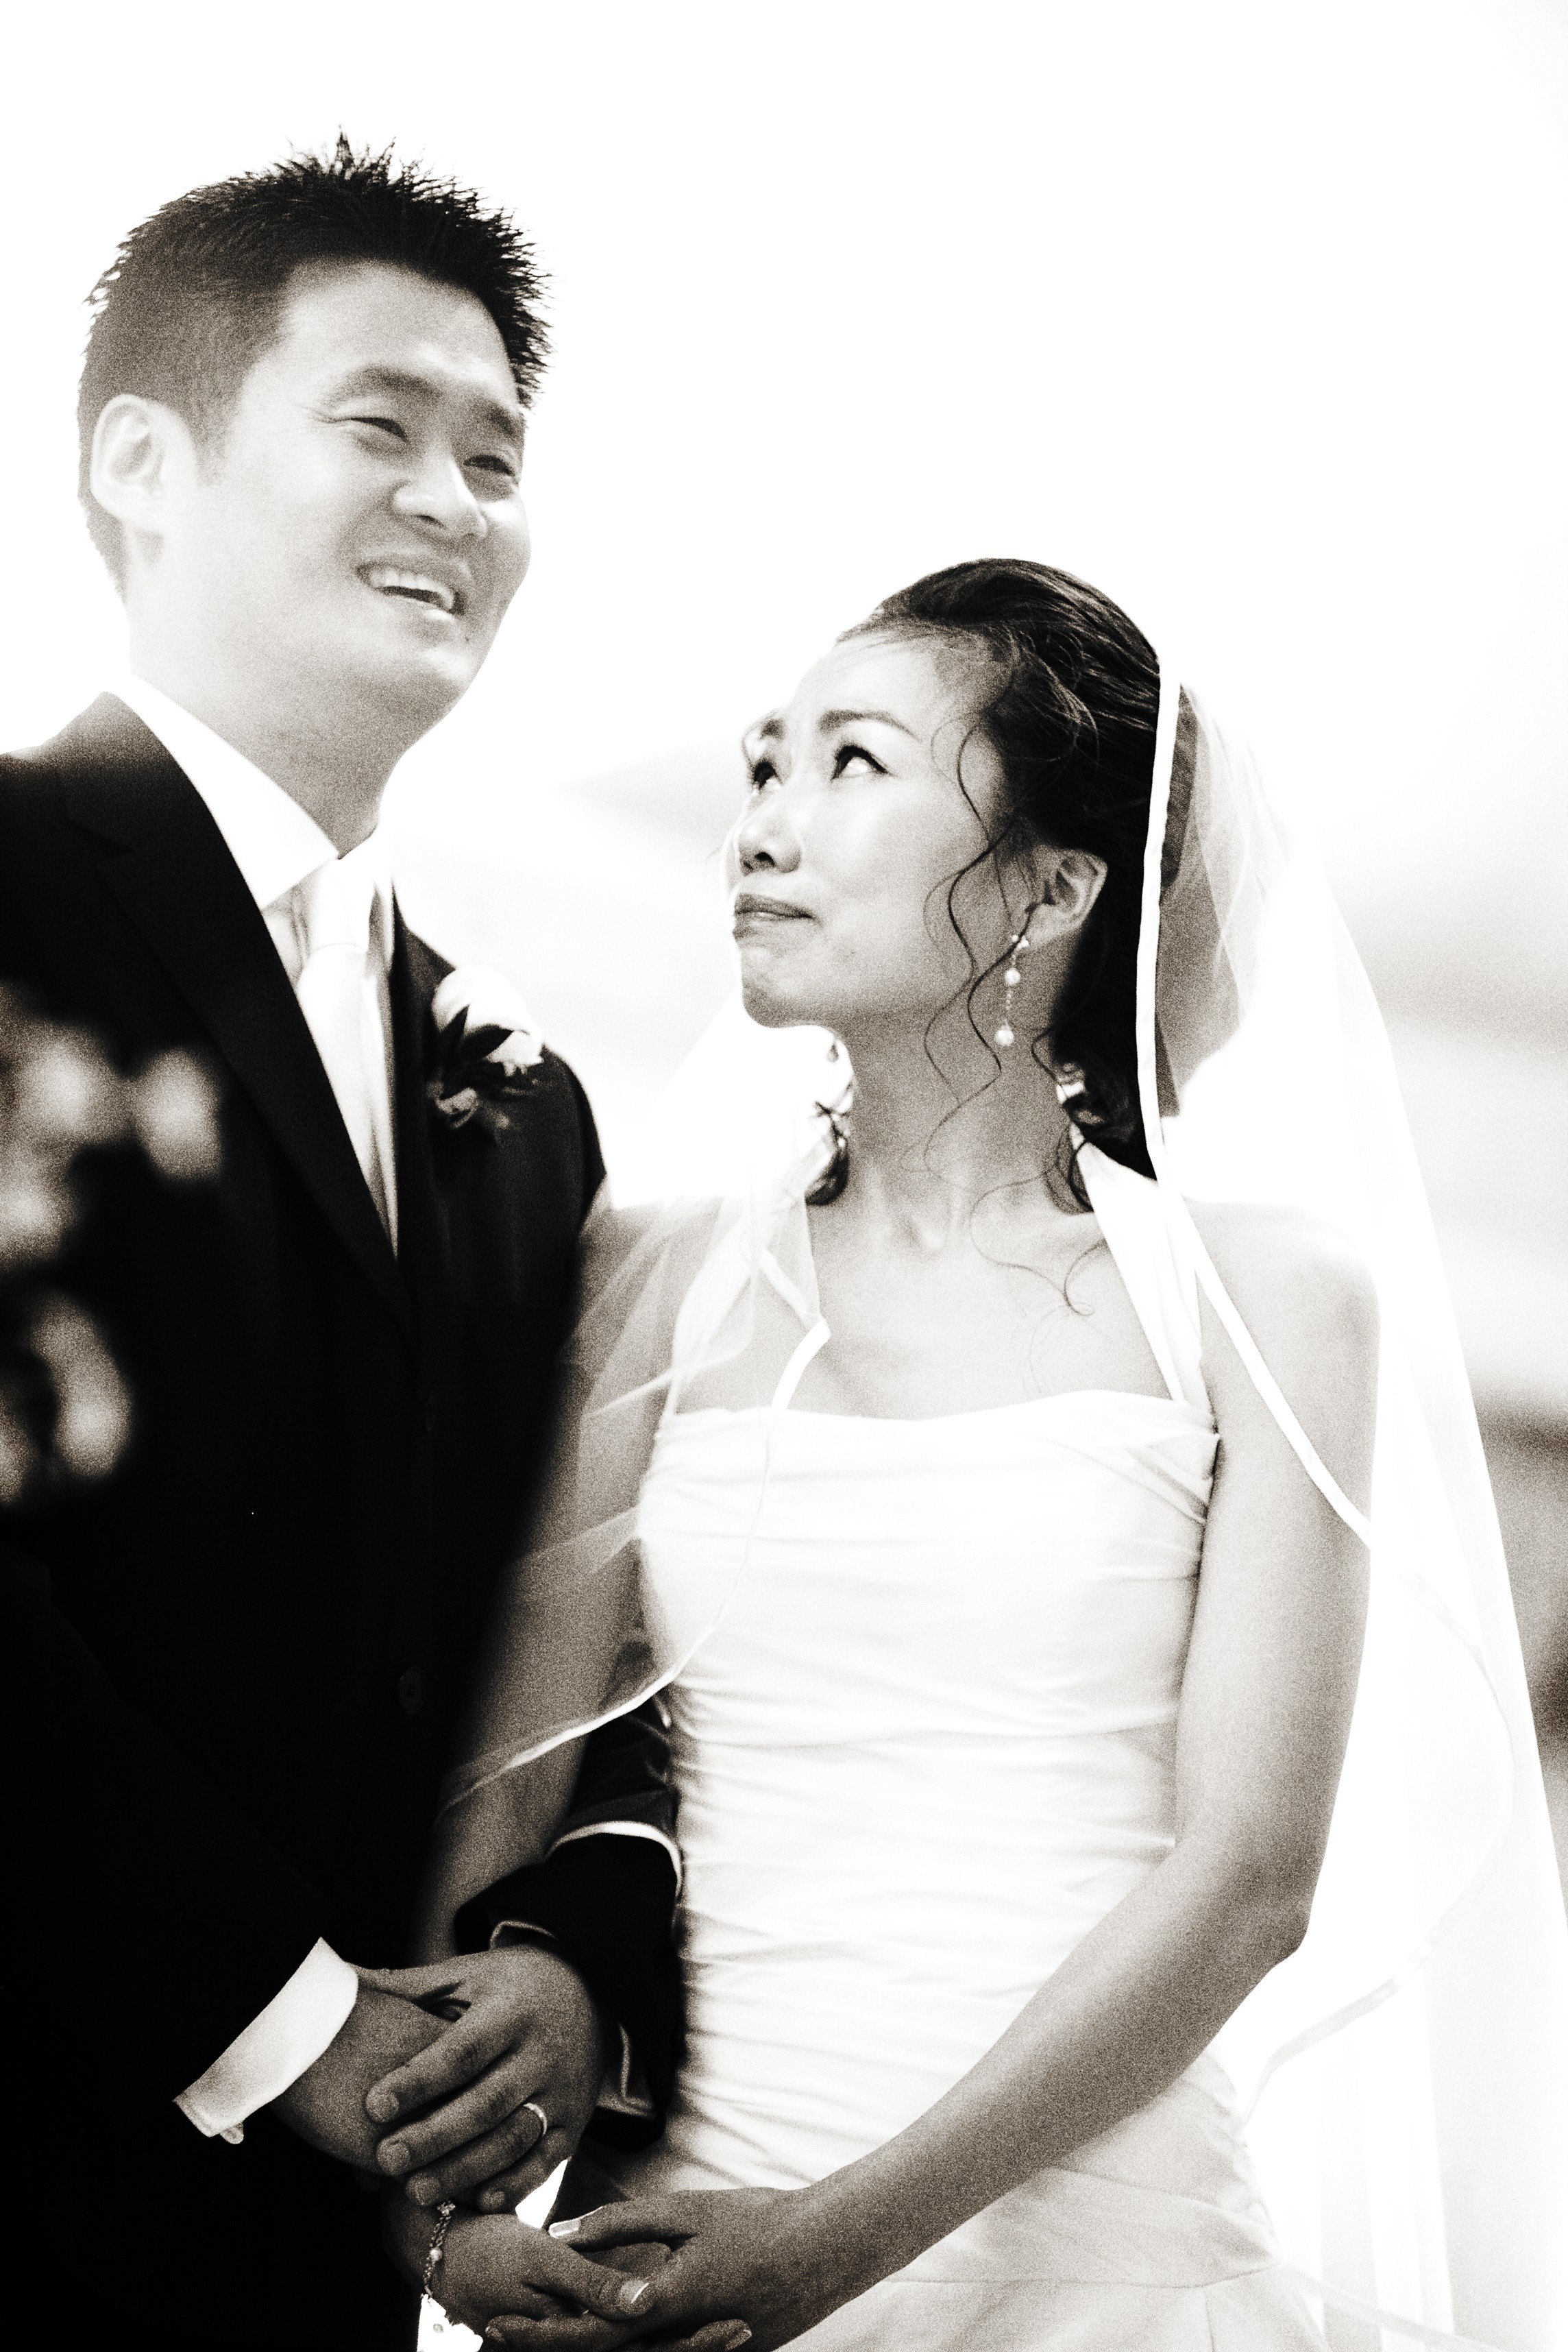
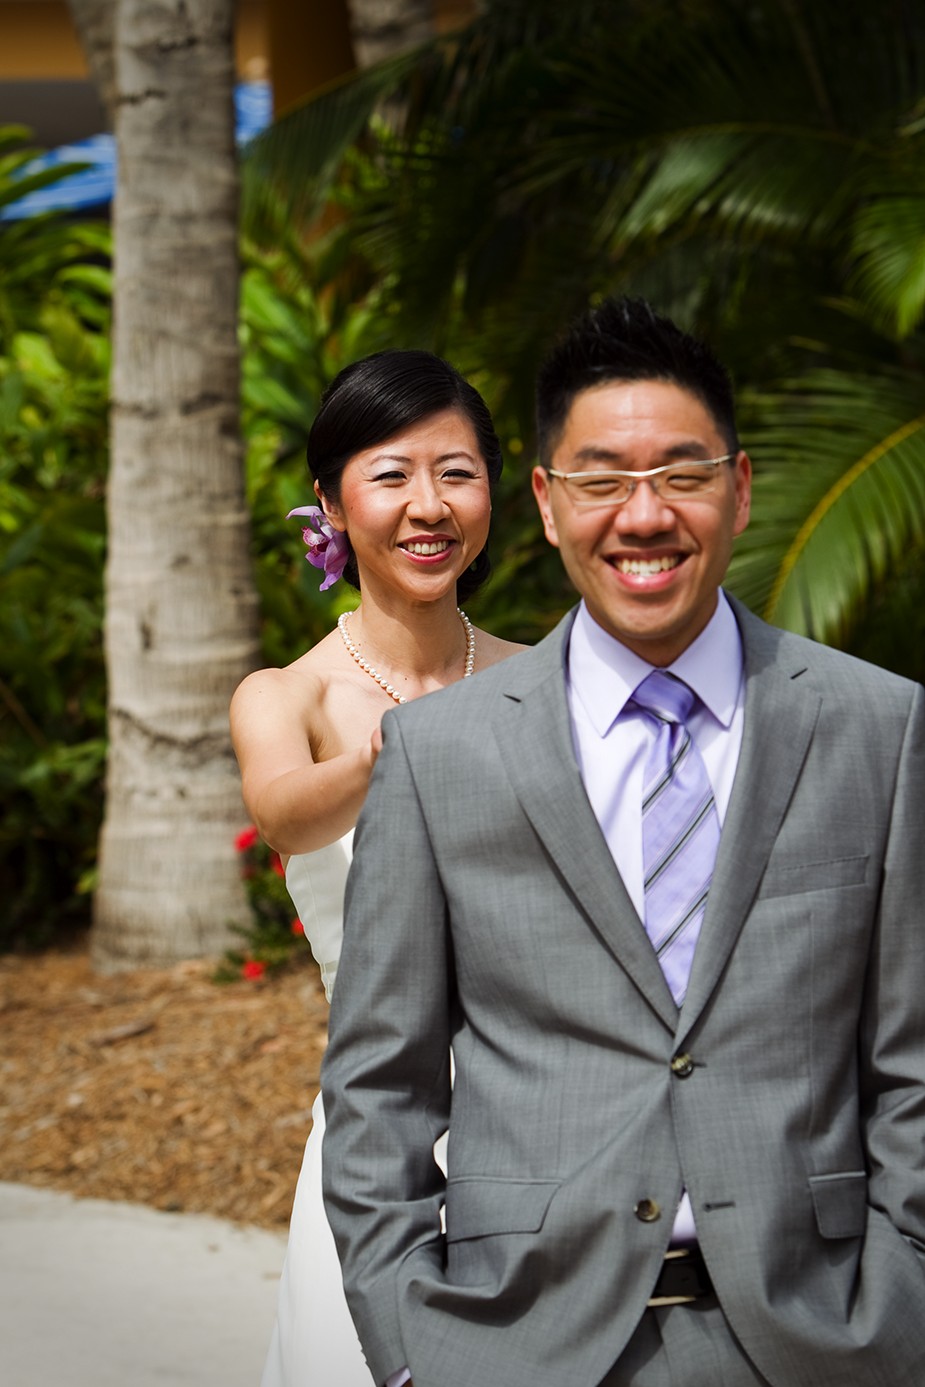
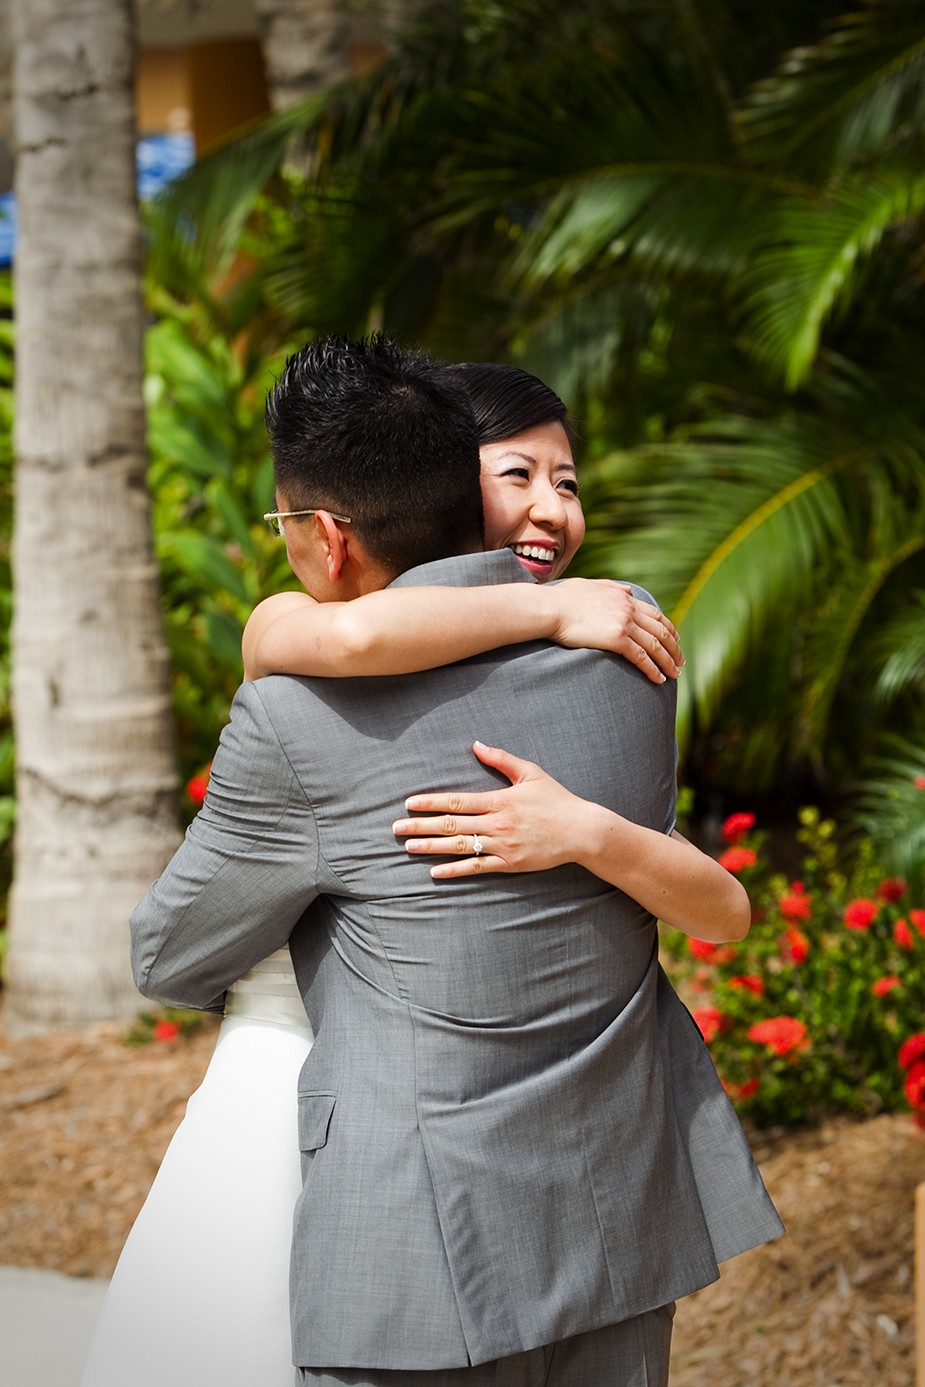
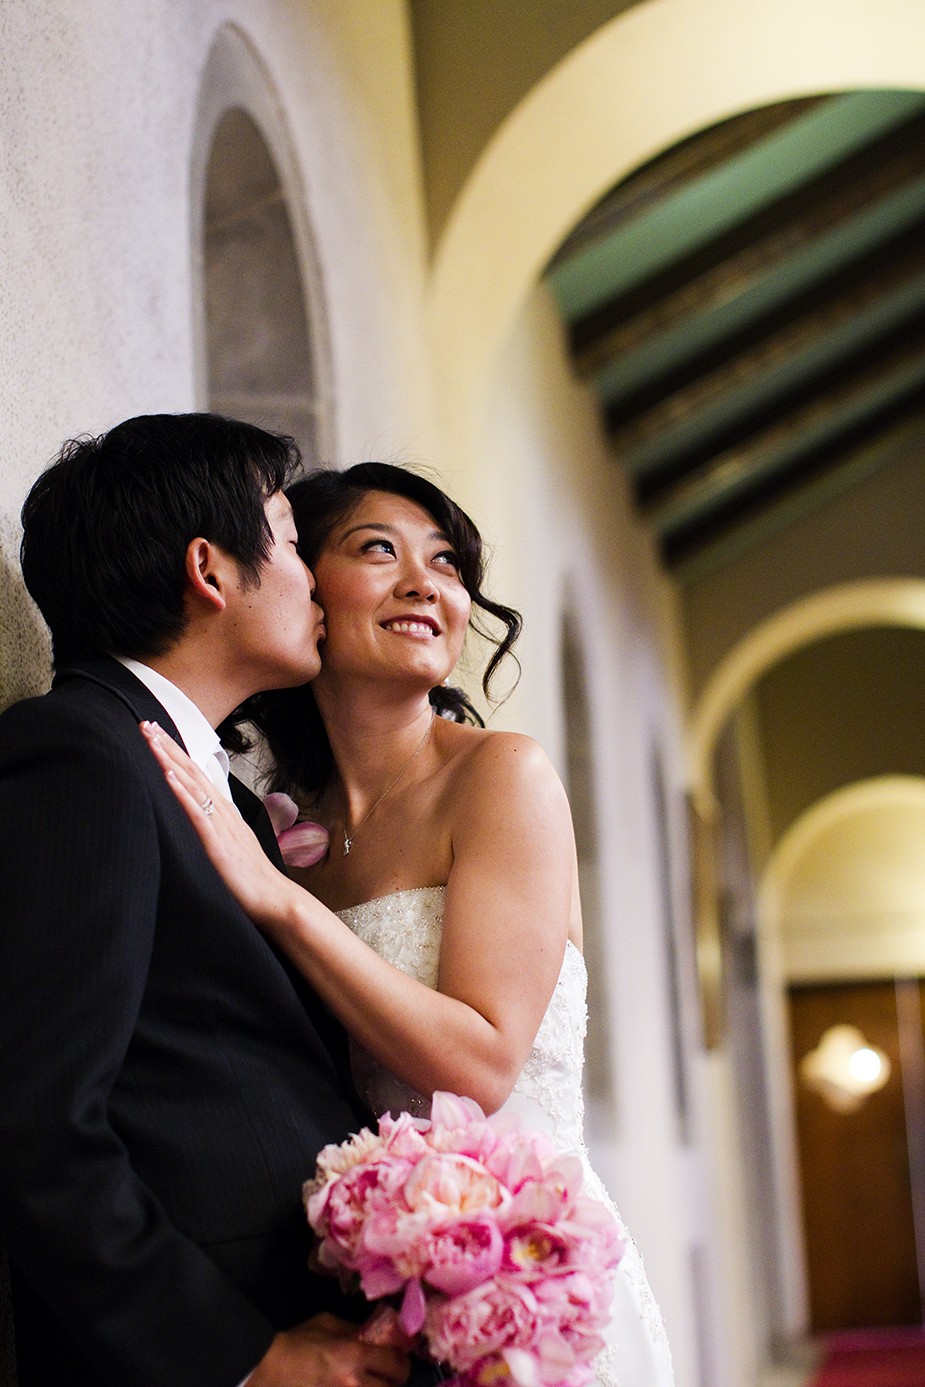
Many times the bride and groom will still want to capture that first look as the groom sees his bride for the first time in the wedding dress. You can set up for a first look photo. As shown in Figures 7-2 through 7-4, it is possible to set up a great shot where you capture the moment the bride and the groom first see each other.
7-2
7-3
7-4
ABOUT THESE PHOTO The first look between the bride and her groom on the wedding day can be set up as a sequence with great results. All images taken at ISO 100, f/5.6, 1/250 second.
There are still some couples that believe the bride and groom shouldn’t see each other until the actual ceremony, when the bride walks down the aisle. In this case, you will have to take the portraits of the bride and groom together after the ceremony, before the reception. Make sure you discuss these options with the couple before the wedding so that they understand how much time is needed for you to get all the photos they want. And there are advantages to taking the portraits of the bride and groom together after the ceremony: The couple is going to be more relaxed, everyone is dressed and ready to go at the same time (before-ceremony shots may find you waiting on some members of the wedding party), and chances are that the mood is a lot lighter. The most important thing is that you listen to the clients’ wishes and don’t pressure them into something that they will regret. Many times, traditional values dictate that the bride doesn’t see the groom until the wedding ceremony, and you need to respect that.
The key to deciding when to take the portraits is to discuss the various options with the clients. Make sure to go over the pros and cons of each option with the couple, and that no matter what time you use for the portraits, you are on the same page as the bride and groom.
The Bride
The bride is at the center of the wedding, and nothing of importance happens without her being present. Your coverage of the bride usually begins when she arrives at the wedding location or the pre-ceremony staging area so that you can capture her getting ready for her day, and continues until she and her new husband are whisked away at the end of the reception. That isn’t to say that the groom should be ignored, but if there is one main subject at a wedding, it is the bride. Chances are that you will spend more time photographing the bride at the wedding than anyone else.
Getting ready
Photographing the bride while she is getting ready is easier if you have developed a rapport with her before the big day. All the time you spent discussing what the couple wants from a wedding photographer, the schedule of events, and the people in the wedding will begin to pay off.
The area where the bride gets ready can range from a large, brightly lit room to a small room in need of some lighting help, but the one thing that usually holds true is that it can seem very chaotic. The bride and her bridesmaids, all in various stages of preparation with bags and boxes, and makeup and hair products, and clothes everywhere, can make for a busy, crowded image.
The following tips will help you get the best shots in what can be a very crowded, difficult situation.
• Look for the best angles. Look for the angles that will keep the attention on your subjects and not highlight the background. If needed, move some of the furniture and clear the art off the walls; and then carefully pick the right angle. Just remember to put the items back where they belong when you are done.
• Use a shallow depth of field. Shooting with a shallow depth of field allows the camera to use as much of the available light as possible and create a nice blurred background, keeping the attention on the bride. If you are shooting the entire room, make sure that the focus point is on the main subject, because with a shallow depth of field, items in the foreground and background will be out of focus. Using a shallow depth of field, as shown in Figure 7-5, makes the background pleasantly out of focus.
7-5
ABOUT THIS PHOTO With an aperture of f/2.2, the shallow depth of field causes the background to be out of focus and focuses the attention on the subject. Taken at ISO 400, f/2.2, 1/250 second.
• Use a wide-angle lens carefully. Wide-angle lenses are great for capturing the scene inside and can even make a smaller room look big. On the downside, the distortion on the edges of the frame can make anything appearing there look odd, so try to keep the people in the middle of the frame. This is particularly true when you use a fisheye lens, where the distortion on the edges is extreme.
• Use the available light. If the room has windows, the light coming in often helps with the photos. However, if the light is very bright, it can cause exposure problems in the room because the difference between the very bright light and any shadows in the room makes the tonal range difficult to capture. If that is the case, try to diffuse the light. A diffuser works, but you can also use a thin white tablecloth or sheet. Just make sure the material is white, because the light will pick up any color present in the material, and you will end up with a similar colorcast in your image. For example, a light green or blue material will turn your whole scene a light blue or green.
• Use a flash if needed. There are two good reasons to use a flash: The first is to add light to the scene because it’s too dark, and the second is to balance the light coming through the window. When using a flash in the small room, aim the flash at the ceiling to bounce the light into the room, creating a larger, softer, and more flattering light.
• Talk to your subjects. Candid shots are great, but it is important to get the images you need for your client; this means letting the bride and the bridesmaids know what you are up to. It will also help you build your rapport with the bride. A little direction from you can help you create better shots.
• Look for the emotions. A wedding is a very emotional time for the bride and everyone else involved. During the time the bride and groom are getting ready, you can capture the emotions that come to the surface before the ceremony. Again, the rapport you have built with your clients comes into play. The more comfortable they are around you and your camera, the easier it will be for them to allow the real emotions to come through.
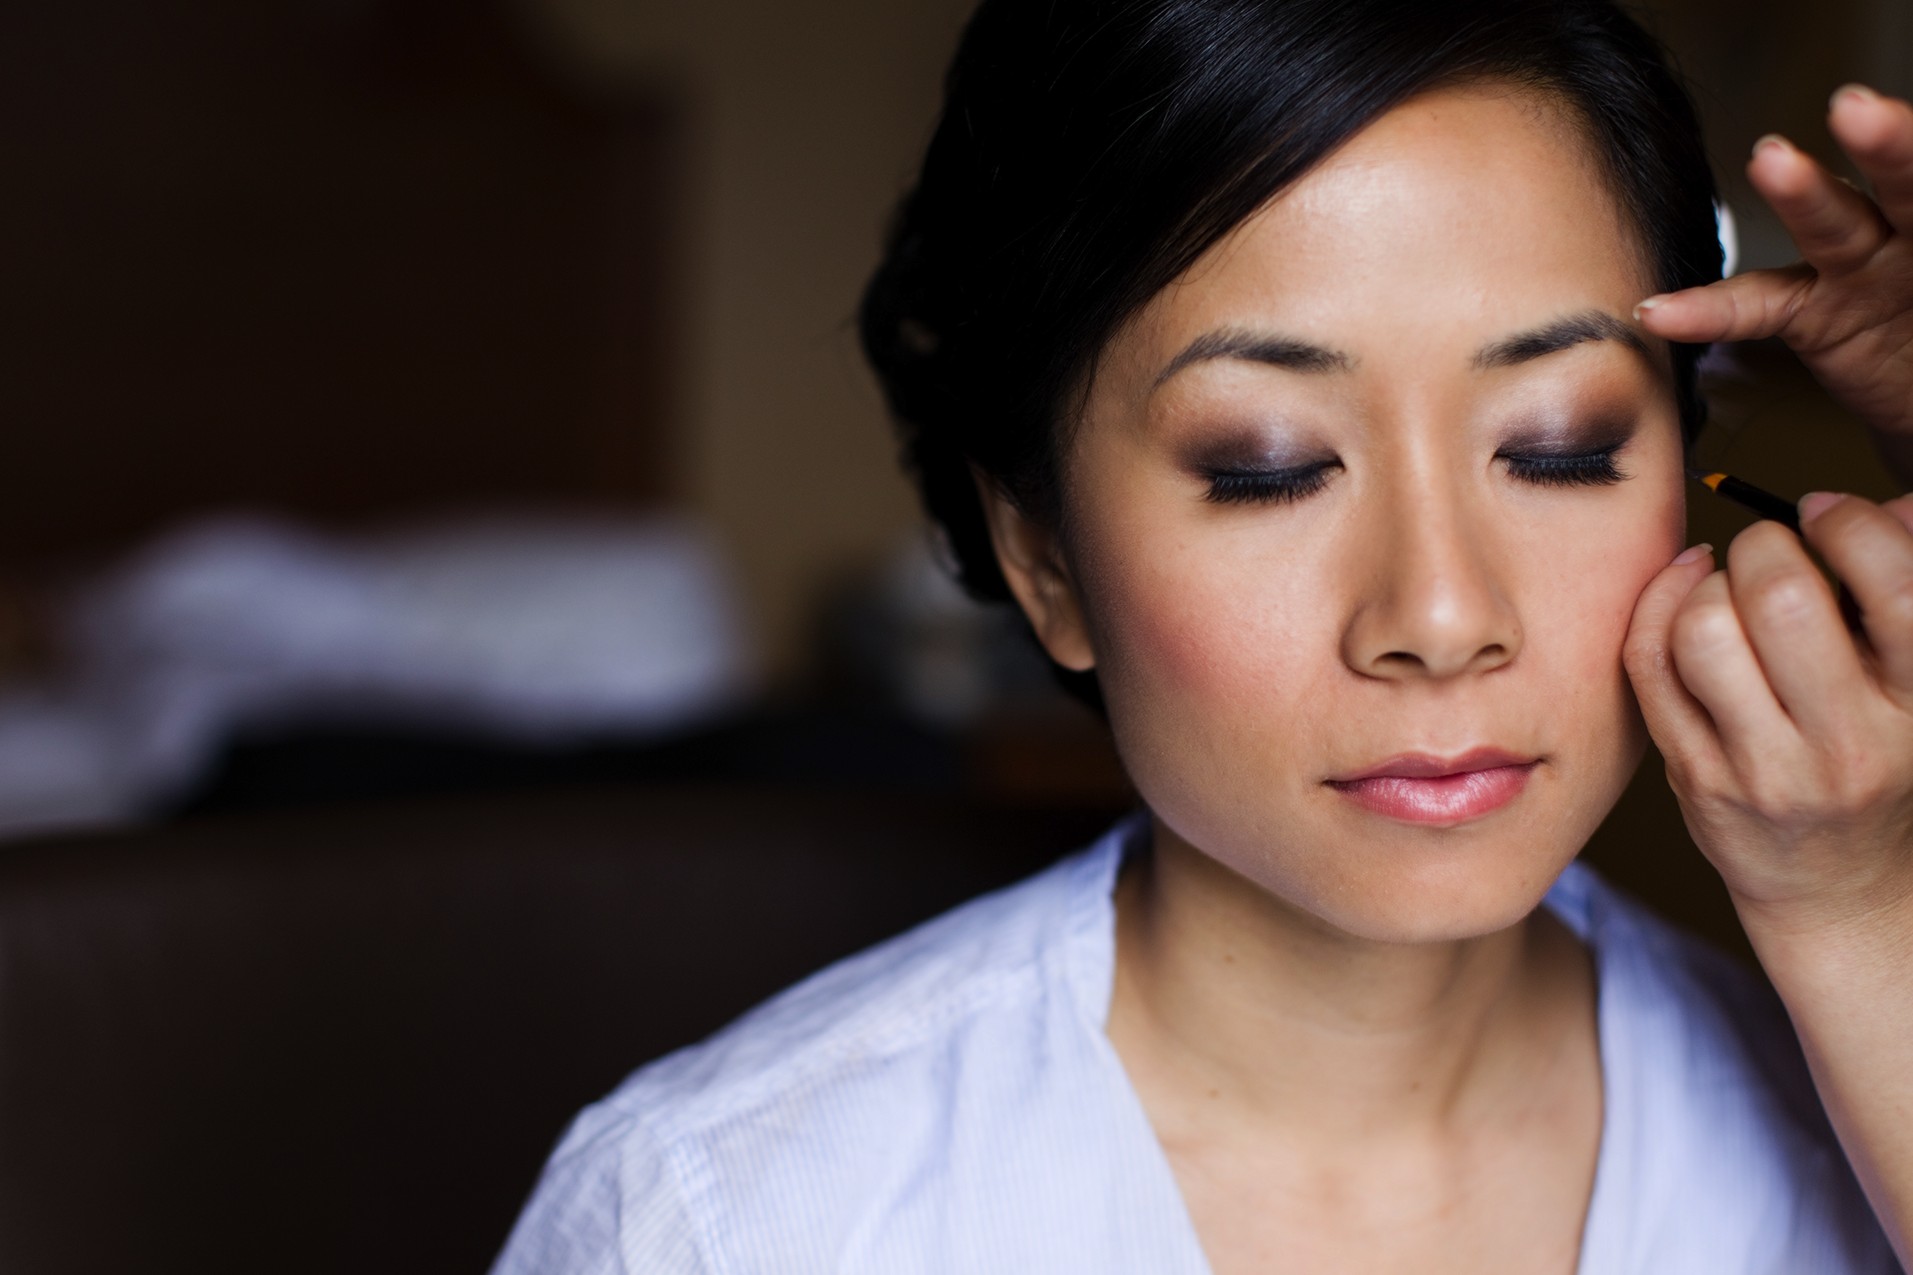
• Hair and makeup. Taking photos during the hair and makeup means working around a group of people. Make sure you introduce yourself to everyone and know that you are being watched by the bridesmaids, family, and hair and makeup artists, so being professional is really important. As shown in Figure 7-6, a simple photograph of the bride getting some makeup touch ups can really set the scene.
7-6
ABOUT THIS PHOTO The bride getting a quick makeup touch up makes for a great photo. Taken at ISO 800, f/2.5, 1/200 second.
• Get in close and fill the frame. Use a longer focal length to get in close to the subject and fill the frame while staying out of the way. If the light is too low, a 35mm, 50mm, or 85mm prime lens with a maximum aperture of f/1.4 or f/1.8 can really save the day.
For tips on shooting the bridesmaids with the bride, see Chapter 8.
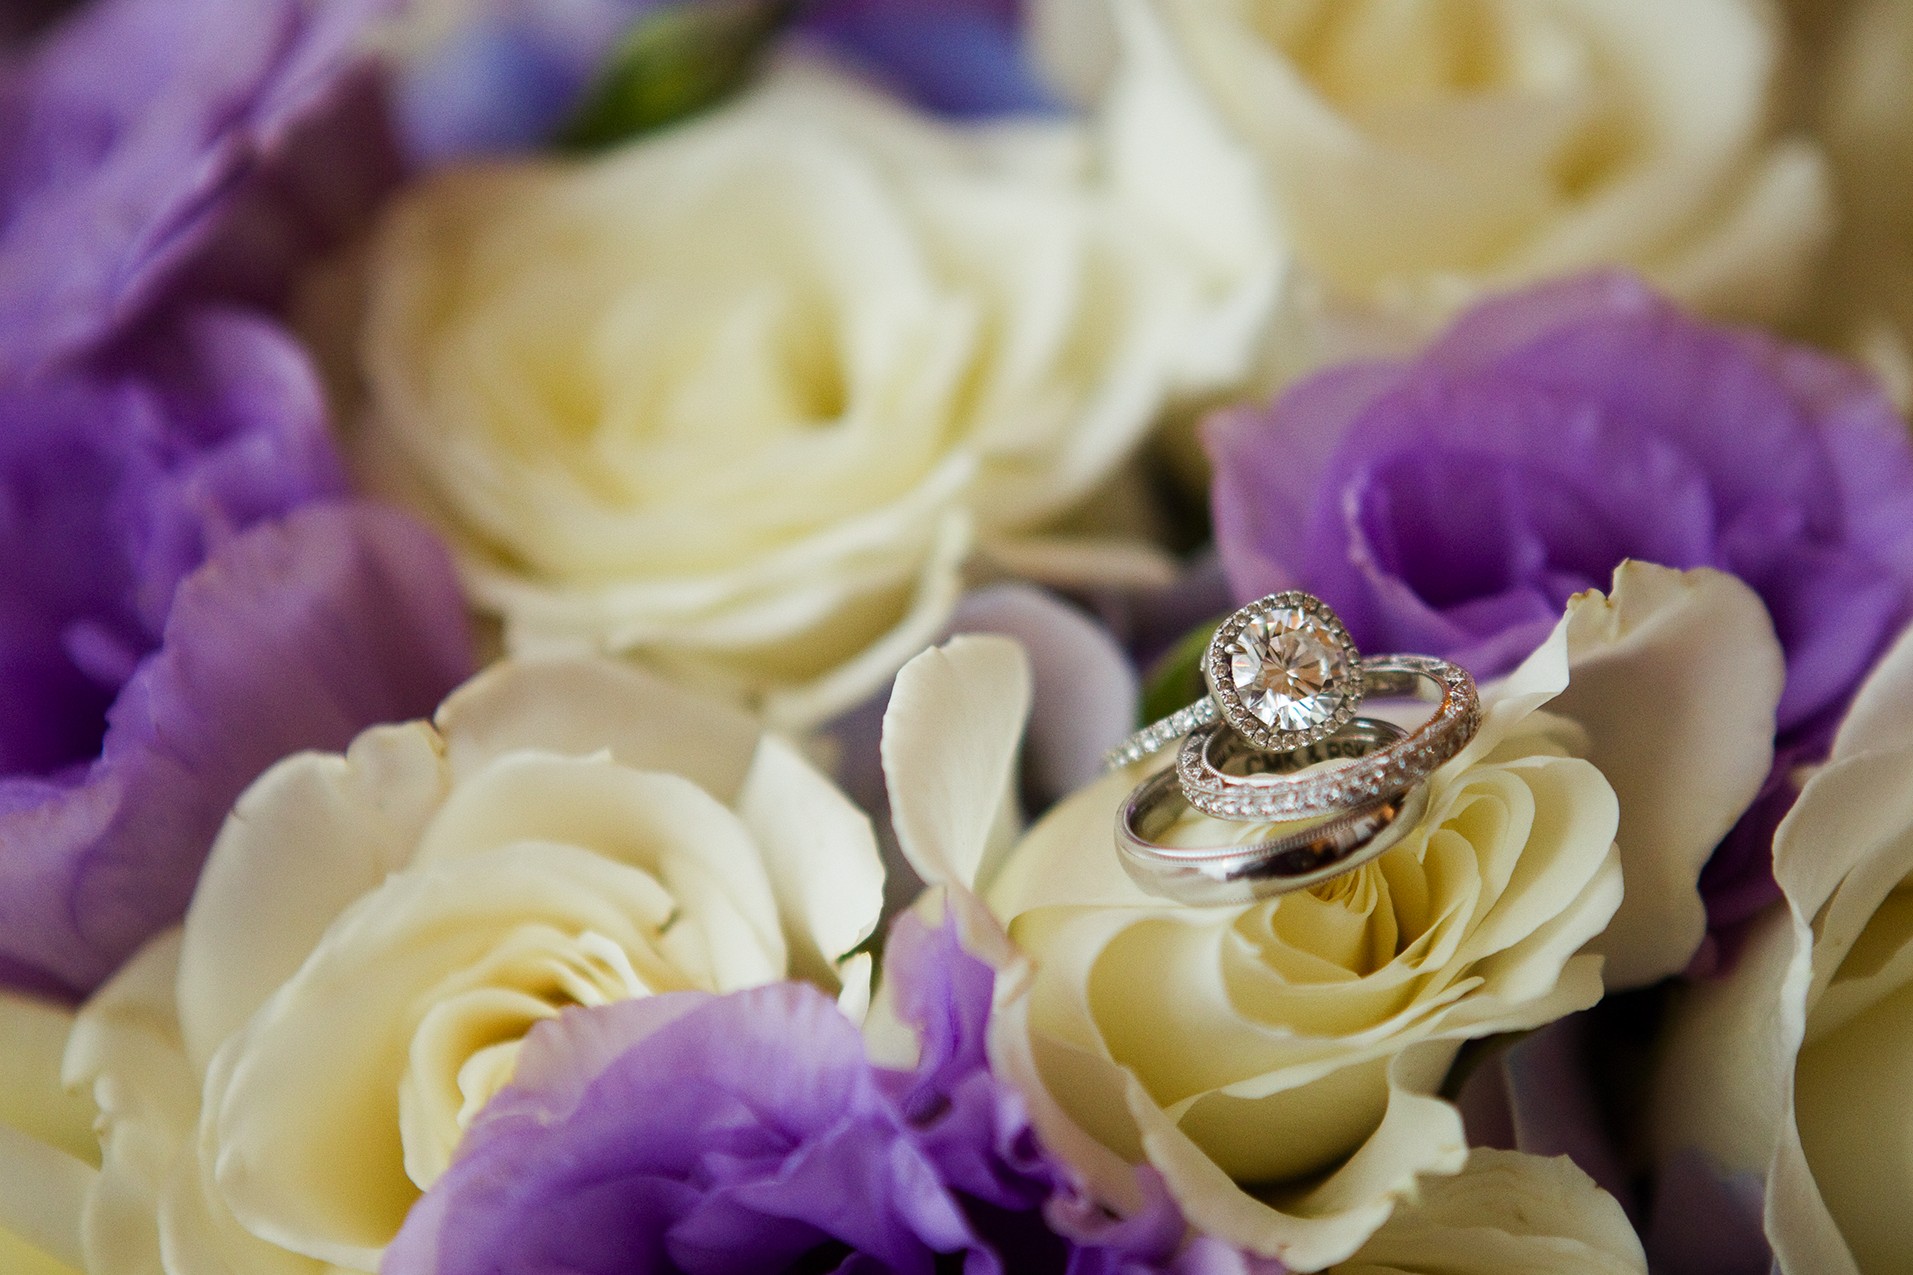
The rings
The wedding rings are the symbol of the marriage of two people, and a lot of time, energy, and money went into their purchase; therefore, while they can be photographed on the bride’s and groom’s hands after the ceremony, taking photographs of just the rings before the ceremony is a great idea. The first thing to know is who has the rings before the ceremony and to make sure that you have access to both of the rings at the same time. If the rings are being held separately, then you will need to make some time during the reception to get the rings from the bride and groom and set up a quick shot. If you explain what it is you need, the couple will be happy to help.
Photographing the rings is more about product photography than it is about people photography, so it takes a little planning, and the exposure settings are important. The rings need to be clean and free of fingerprints and smudges, which you can do with a lens-cleaning cloth, but this makes the rings even more reflective, so it is critical that you make sure nothing unwanted is being reflected back toward the lens. There are times when a reflection is unavoidable, especially if you need to show a special feature, like the inscription as shown in Figure 7-7. The angle of the rings created a reflection that can be seen in the bottom ring, but the careful composition made it possible to see the inscription inside the ring.
7-7
ABOUT THIS PHOTO Notice how while there is a slight reflection on the bottom ring, you can see the inscription inside the ring. Taken at ISO 1000, f/2.8, 1/200 second.
Another important factor is the aperture you use, because the depth of field is impacted by the distance of the lens to the subject. The closer the lens is to the subject, the shallower the depth of field, and when you are shooting the rings, you are going to be really close to get the details. This means that you will have to carefully watch the depth of field so that both rings are in focus. As you use smaller and smaller apertures, the shutter speed needs to decrease to get the same exposure; otherwise, you need to add light with a flash or move the rings into a more natural light setting. You can also increase the ISO so that a faster shutter speed and a deeper depth of field are both possible.
Set the rings in the scene carefully so that they are the focus of the shot, but in surroundings that can help to give the photo a time and place. Either placing the rings on the ring pillow (or a special tray) being held by the ring bearer, as shown in Figure 7-8, or placing them on the wedding invitation can create a strong photo. Use your imagination and look around the location for items you can use to highlight the rings.
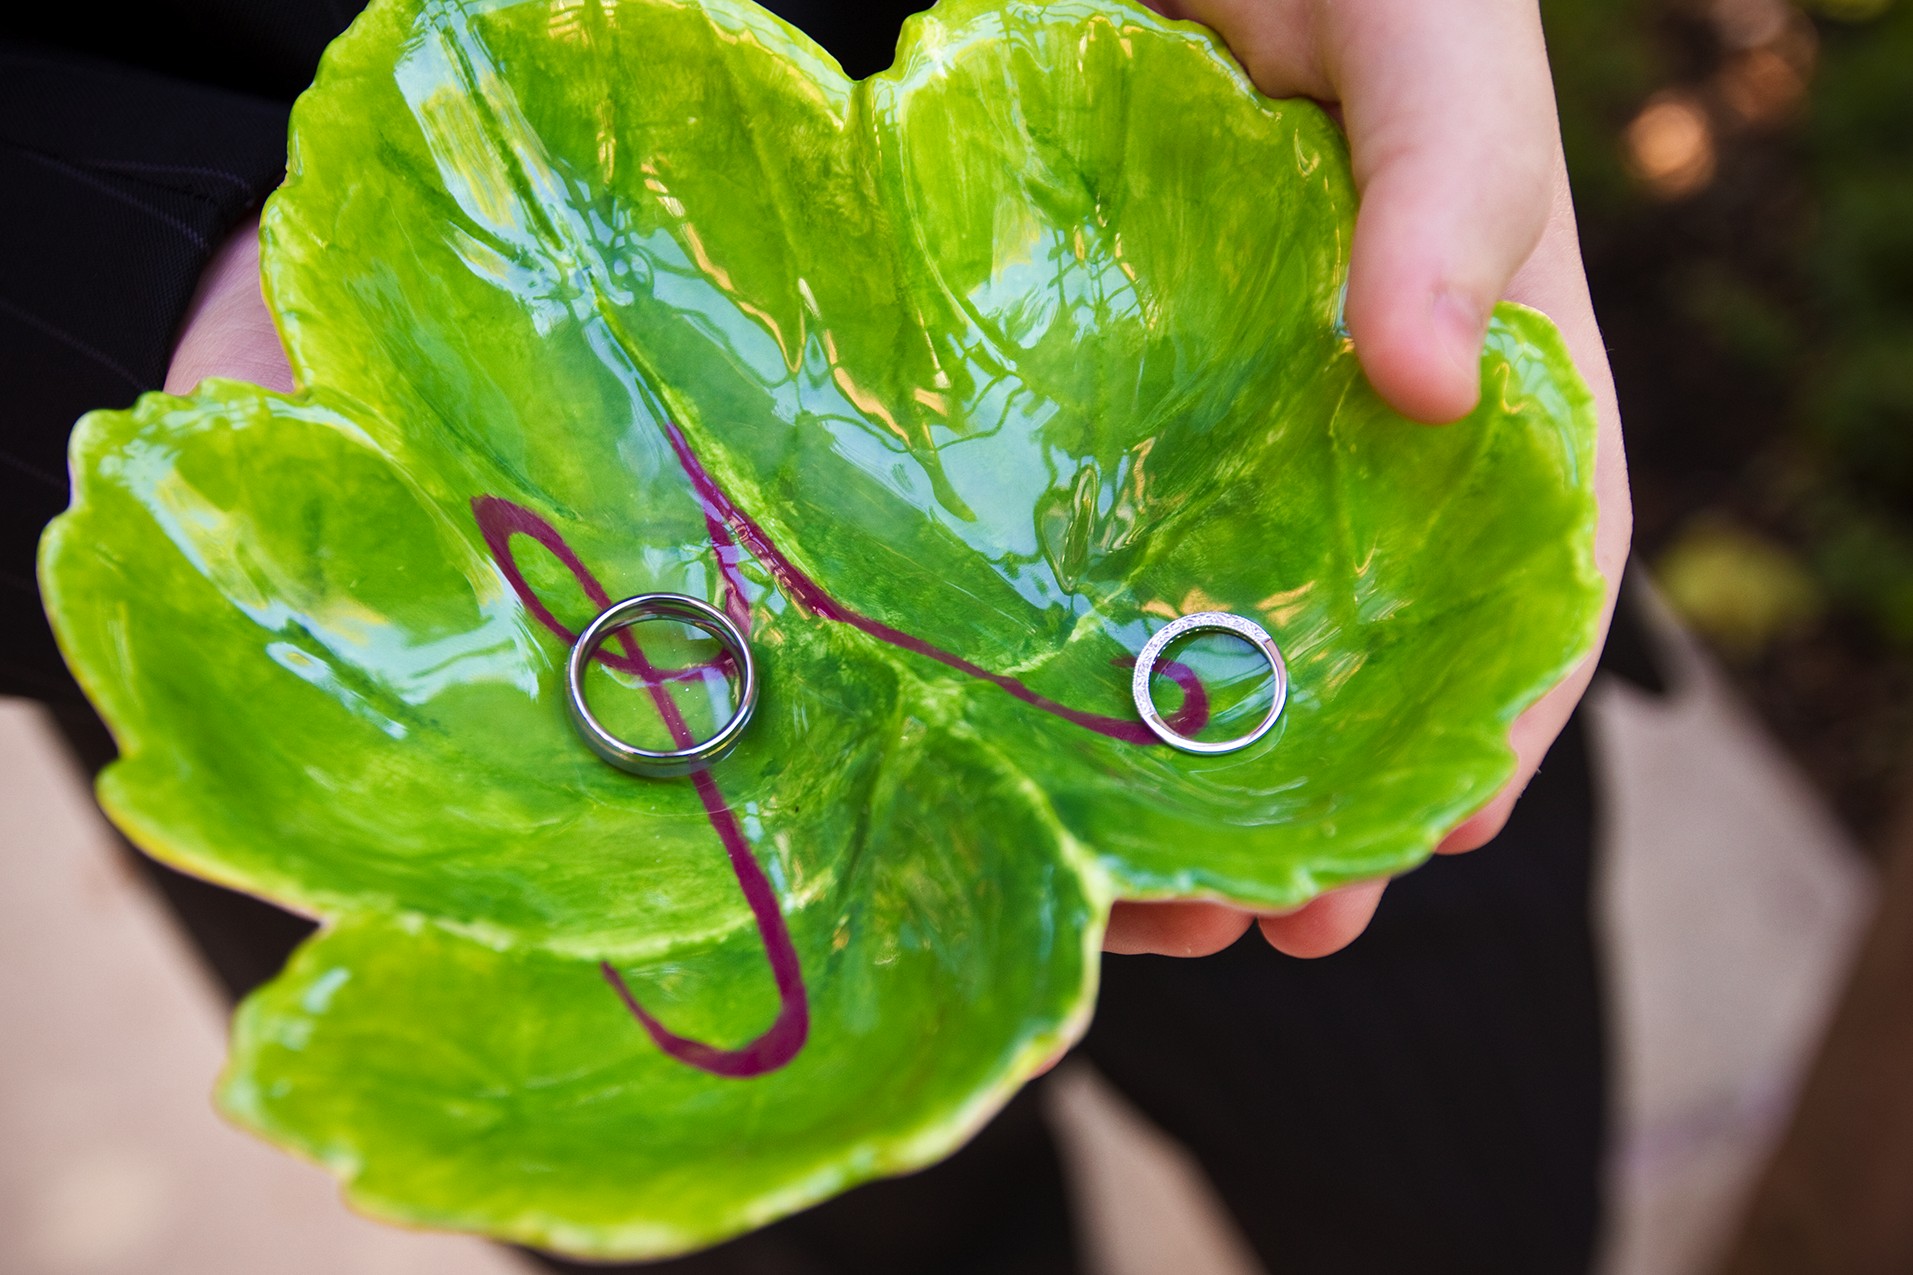
7-8
ABOUT THIS PHOTO Instead of a ring pillow, this custom ring carrier works really well, and the shot will mean more to the couple later. Taken at ISO 400, f/3.5, 1/125 second.
The dress
It takes a lot of time and energy for the bride to pick out the perfect wedding dress. It is likely the most important item of clothing she will only wear only once and for a very short period of time, but it will be in many photos, videos, and memories, and it needs to be photographed.
Photographing the dress calls for a good light and a very accurate exposure to show the dress in the best possible way. But before you can do any of that, you need to find a way to hang the dress and make it look its best, so bring along a sturdy wooden or satin hanger (see Figure 7-9).
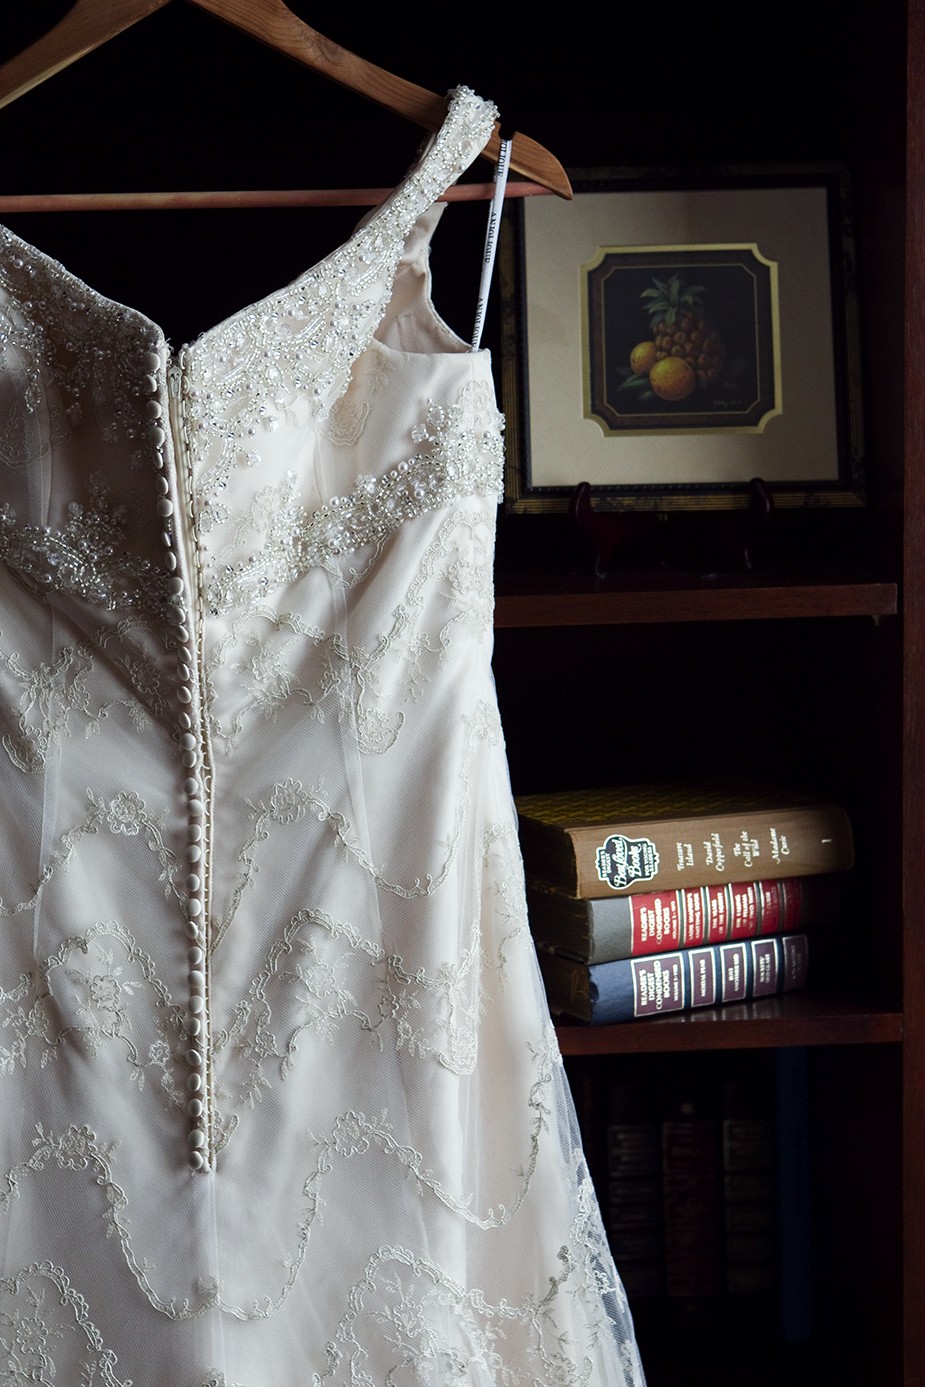
7-9
ABOUT THIS PHOTO Displaying the dress can be a challenge, but it can be made easier when you have a good wooden hanger, as it can appear in the image without detracting from the image. Taken at ISO 500, f/4, 1/200 second.
For exposure help when dealing with the white wedding dress, see Chapter 3.
The next step is to find a spot where natural light offers even coverage for the dress, and because the built-in light meter will try to average the scene to 18% gray, there is a good chance you will have to slightly overexpose the image. To do this accurately, follow these steps:
1. Place the dress where you want to photograph it.
2. Set your camera to auto mode and press the shutter release button halfway down to see what shutter speed and aperture setting the camera suggests for the correct exposure.
3. Change the mode to manual mode and enter the settings from Step 2.
4. Adjust the exposure by either reducing the shutter speed, opening up the aperture, or increasing the ISO. Any of these methods overexposes the image.
5. Take a photograph and check the LCD screen on the back of your camera. It is very important to check the highlight clipping (known by the very scientific term blinkies), which instantly shows you areas that are too bright. Every camera is a little different, so look in the user guide for how to show the highlight clipping on your camera.
6. Adjust the exposure settings and take another photograph.
7. Once the exposure is set, it’s time to adjust the composition and let your creativity come through.
It is important to get these shots done early so that you don’t hold up the bride from getting dressed and throw the timeline out of whack.
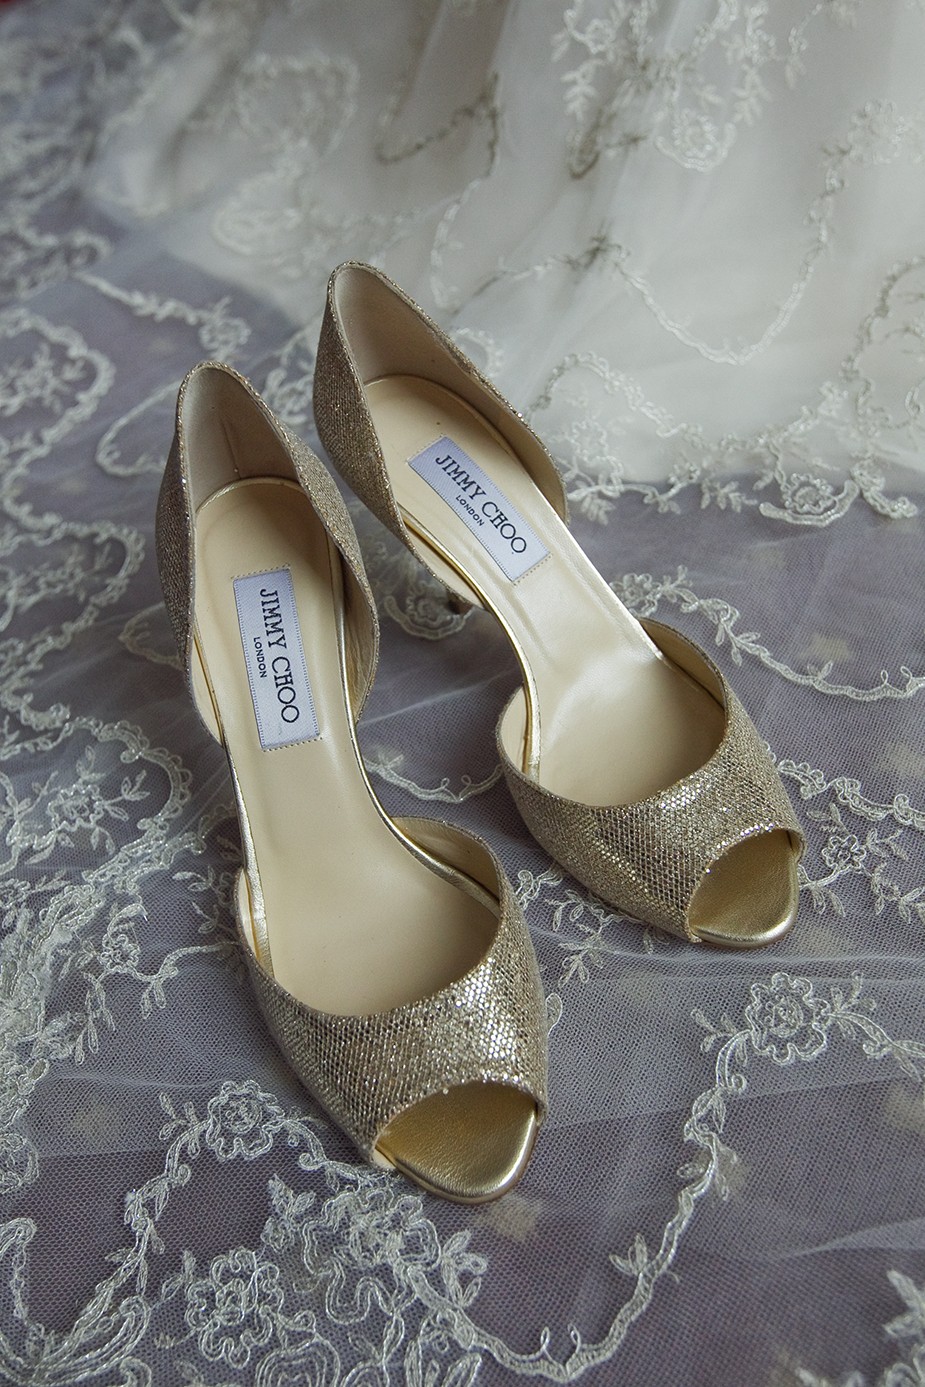
While the dress itself might be the main item of clothing that needs to be photographed, that doesn’t mean it is the only thing. Consider the fine details of the dress, such as beading or lace, the jewelry, and anything else that helps to create a full story of the day.
Take the shoes, for example; they can really be something special, as shown in Figure 7-10. A macro lens is really useful for capturing these details because it allows you to get really close and fill the frame with the smallest of details. These lenses work great for shooting the rings, as well.
7-10
ABOUT THIS PHOTO The bride’s special shoes for the day. Taken at ISO 1000, f/4, 1/200 second.
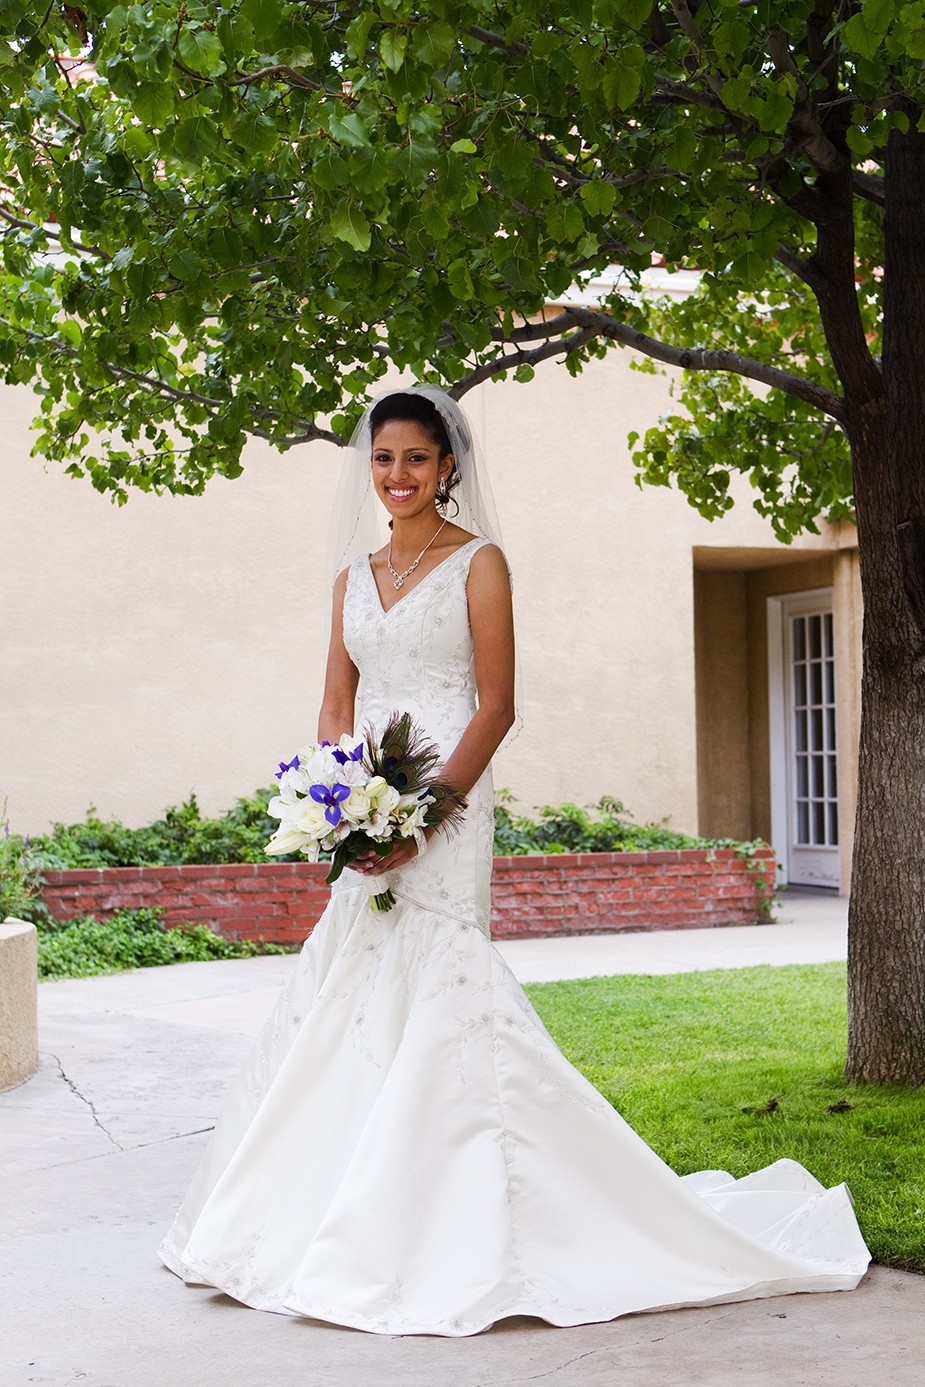
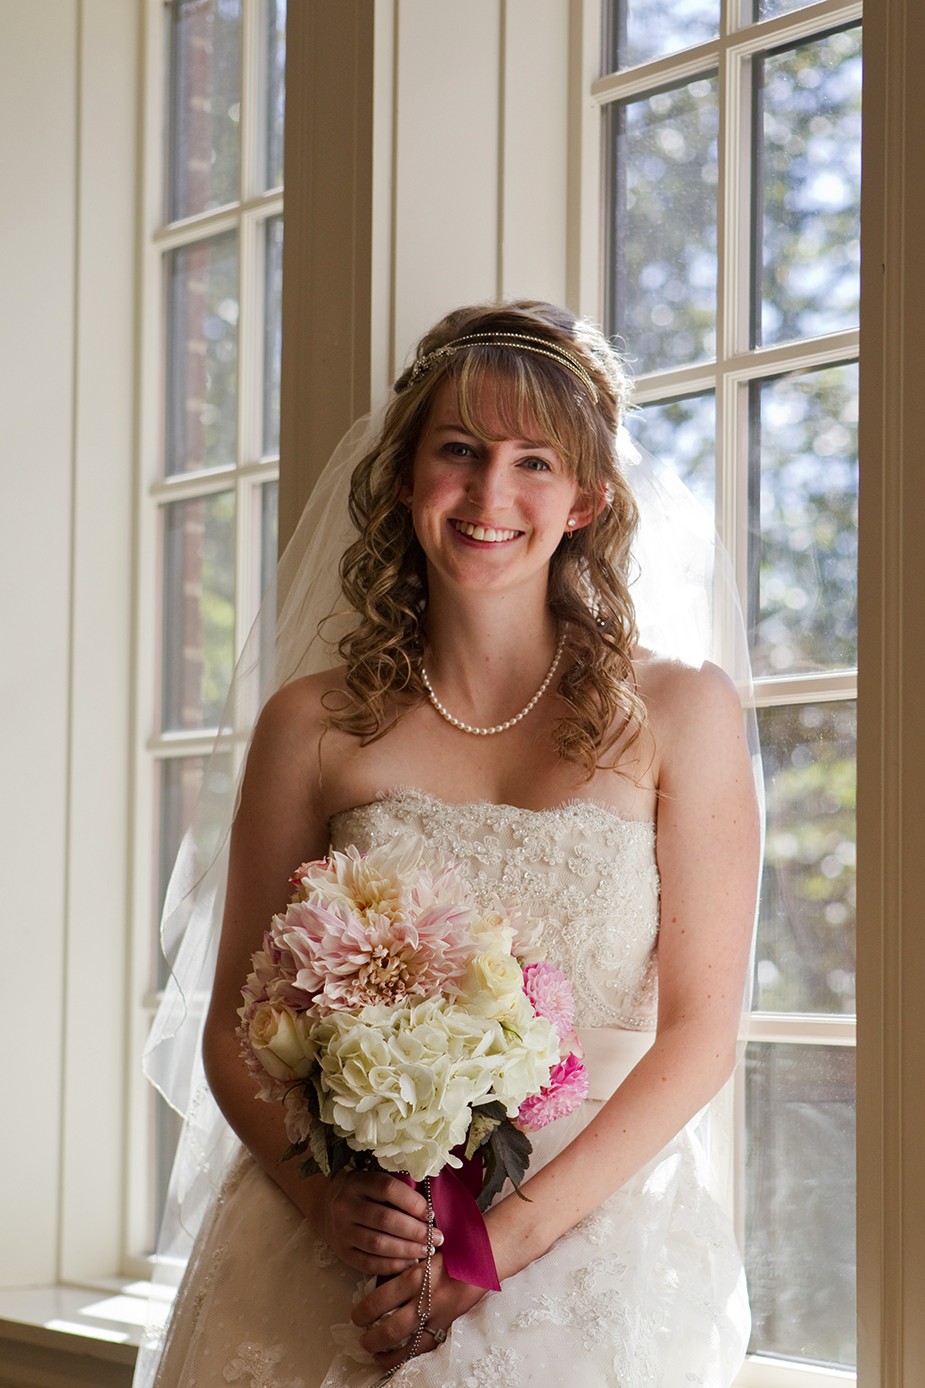
Posing the bride
The time has come to take the portraits of the bride. Pick up any wedding magazine or wedding book of any type and the chances are that the majority of the images will be of the bride, posed, poised, and looking stunning. Before posing the bride or raising the camera to your eye, take a moment and let the bride take a few deep breaths to get her calm and centered. These portraits of the bride can be taken before the ceremony or after, so make sure you discuss the option with the clients and schedule the time.
These posing tips can be applied to the groom as well.
The following tips can help you take better portraits:
• Focus on the eyes. The most important thing to do when taking portraits is to focus on the eyes. It doesn’t matter if the rest of the image is fantastic; if the eyes are out of focus, then the shot will seem wrong. If the bride is standing at an angle and one eye is closer to the camera than the other, focus on the closer eye.
• Watch the joints. When composing a portrait, don’t have the edge of the frame cut off the image at any of the subject’s joints. This includes the wrists, elbows, ankles, knees, and even the waist.
• Keep it simple. There is no reason to create awkward poses where the bride looks uncomfortable because it just results in an awkward image. It doesn’t matter if the images are outdoors or indoors; the same posing works as shown in Figures 7-11 and 7-12.
7-11
7-12
ABOUT THESE PHOTO It’s important to get a variety of different poses with the bride. Figure 7-11 was shot outside on a sunny day using the shade from the tree. Taken at ISO 500, f/4, 1/1600 second. Figure 7-12 was shot indoors using the light coming through the windows. Taken at ISO 400, f/3.5, 1/800 second.
• Watch the angle. Turn the bride slightly so that she is not square to the camera. This is a great way to make the bride look a little slimmer, not that she needs it.
• Have the bride sit or stand. Sitting can help with a bride who slouches because the back of the chair will help her sit up straight, but be careful of this type of shot if the bride is slightly larger because it can make her look a little bigger. Pay close attention to the dress; many times wedding dresses look fuller when the bride is seated. This can make the bride look larger than she is and should be avoided.
• Pick the best focal length. The longer the focal length, the more flattering the subject will look. So try to pick a location that allows you a lot of working room so that you can use a longer lens (think 70-200mm).
Once you have the shots you need of the bride, it’s time to think about getting shots of the groom and then some shots of the bride and groom together. You don’t need to go wild with the images of the bride alone given this is a wedding and not a fashion shoot. Get a few great portraits with different poses and move on to the shots of the groom.
The Groom
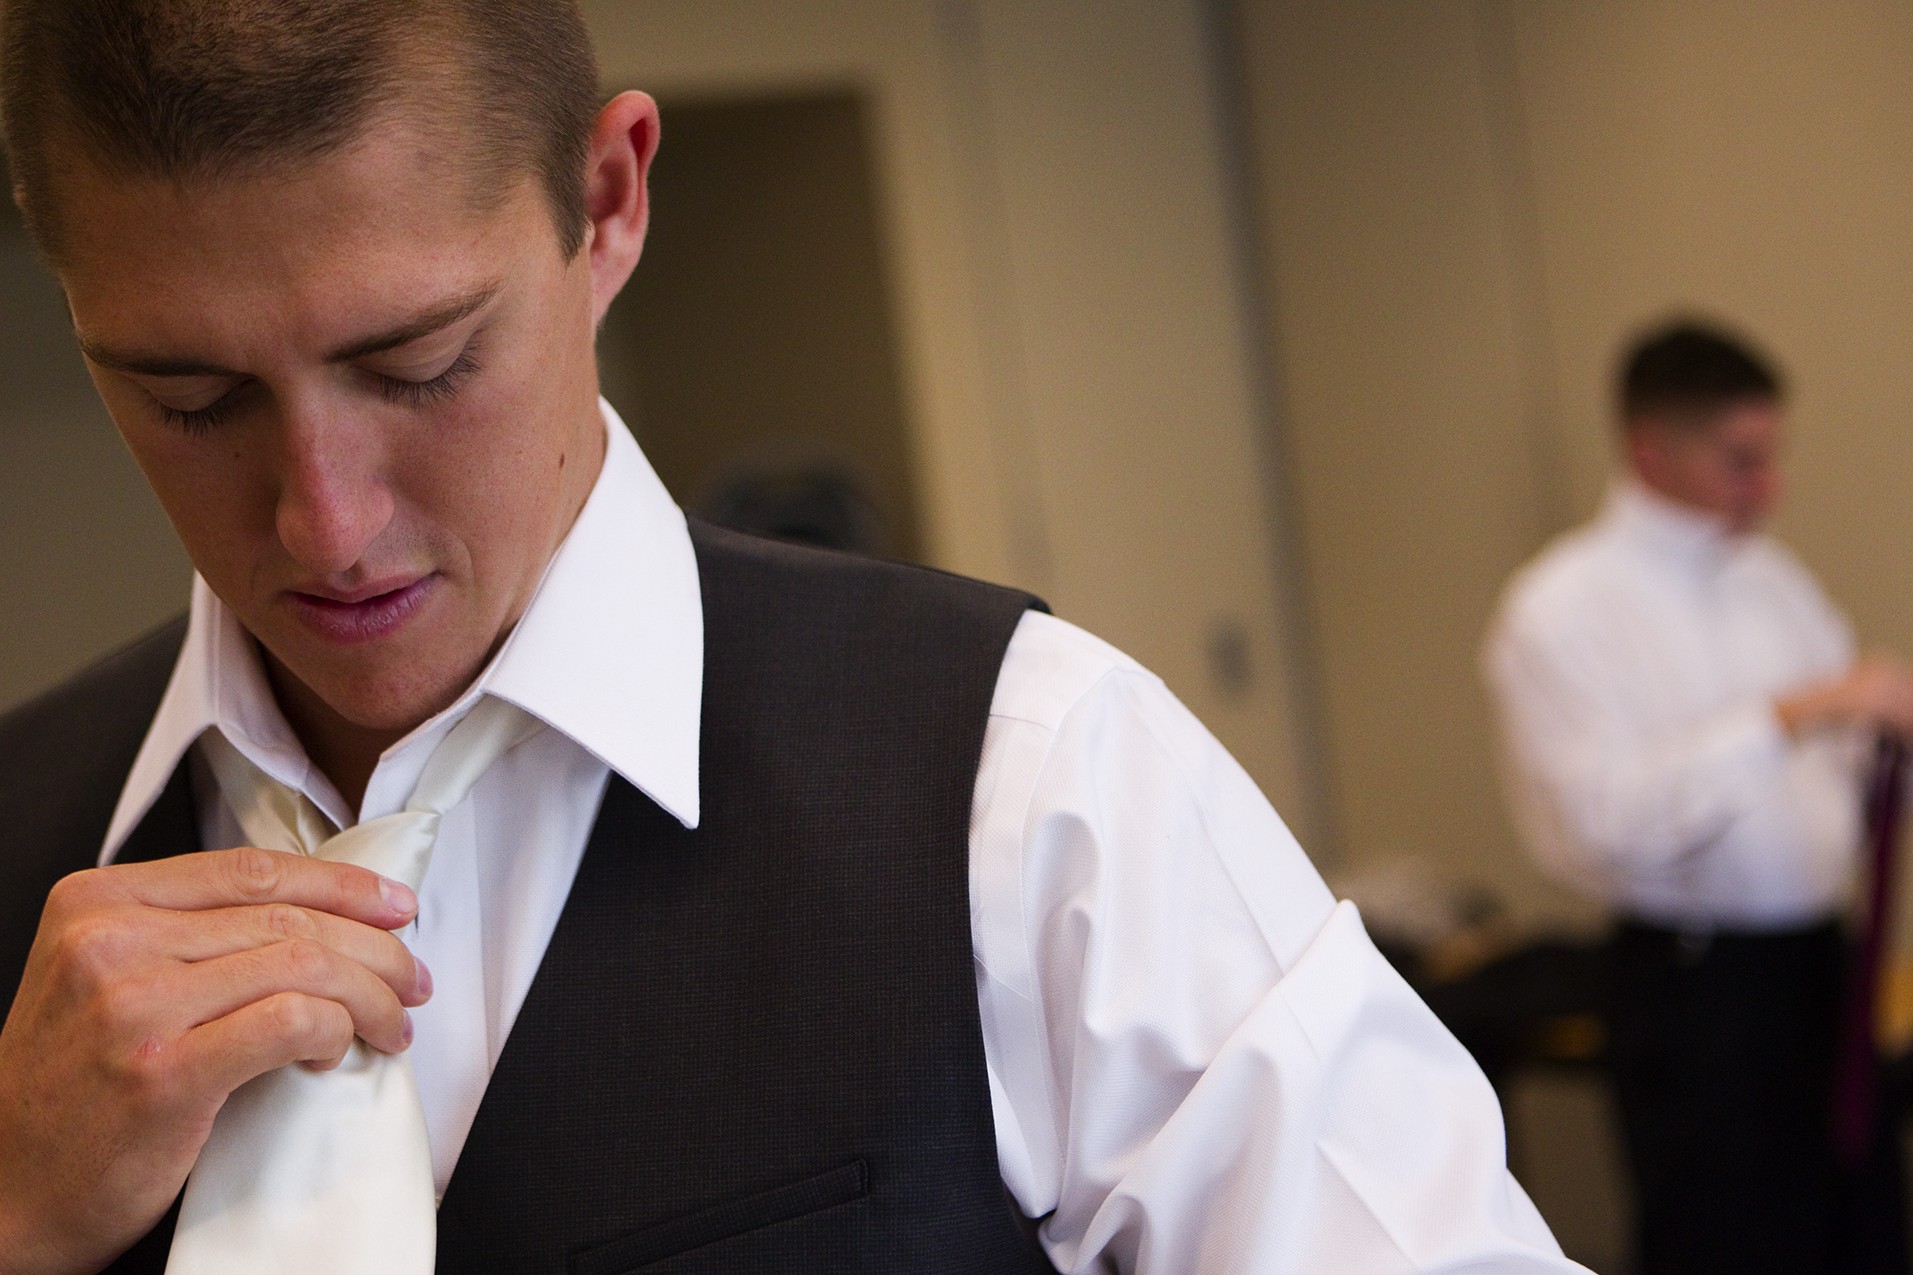
The bride might be the most important person at the wedding, but the groom is a very close second. Many times the groom and the bride get ready at the same time in different locations, making it very difficult to photograph both at the same time. One way to help with this is to have a second photographer work with you at the wedding. If you have a second shooter, he can be taking the photos of the groom getting ready or some portraits of the groom before the wedding, like in Figure 7-13, while you are off shooting the bride getting ready. If you are working as a second shooter, there is a good chance you will be off shooting the groom getting ready while the main photographer is with the bride. If you are covering the wedding alone, you will need to be smart with the timing and make sure you can get from the bride’s staging area to the groom’s staging area so that you can cover as much as possible.

7-13
ABOUT THIS PHOTO The groom poses for a portrait while waiting for the bride to join him for the joint portraits. Taken at ISO 1600, f/2.8, 1/125 second.
Getting ready
Some great moments can be had when the groom is getting ready. The camaraderie between the groom and his groomsmen is very different from that between the bride and the bridesmaids. Men tend to joke around more and use humor to mask their feelings about the big day and the seriousness of getting married. This jovial attitude can be great for images and as the photographer, try to keep the mood light.
A groom can be just as nervous as his bride, especially leading up to the ceremony, and that nervous energy can make for some great moments of him alone and with his groomsmen and family. As with the bride, images of the groom getting ready can help tell the story of the wedding. Capturing those moments showing the groom getting ready like in Figure 7-14 can actually be more difficult than photographing the bride, especially if it is the second shooter who is covering the groom. The second shooter isn’t likely to have the rapport that you have developed with the couple and must come in as a stranger. Make sure that you discuss a second shooter with the couple from the onset so that they know that you will be with the bride and not with the groom when the two are getting ready at the same time. The wedding day is not the time for them to be surprised with this information.
7-14
ABOUT THIS PHOTO The groom getting ready for the big event. Taken at ISO 2500, f/2.8, 1/500 second.
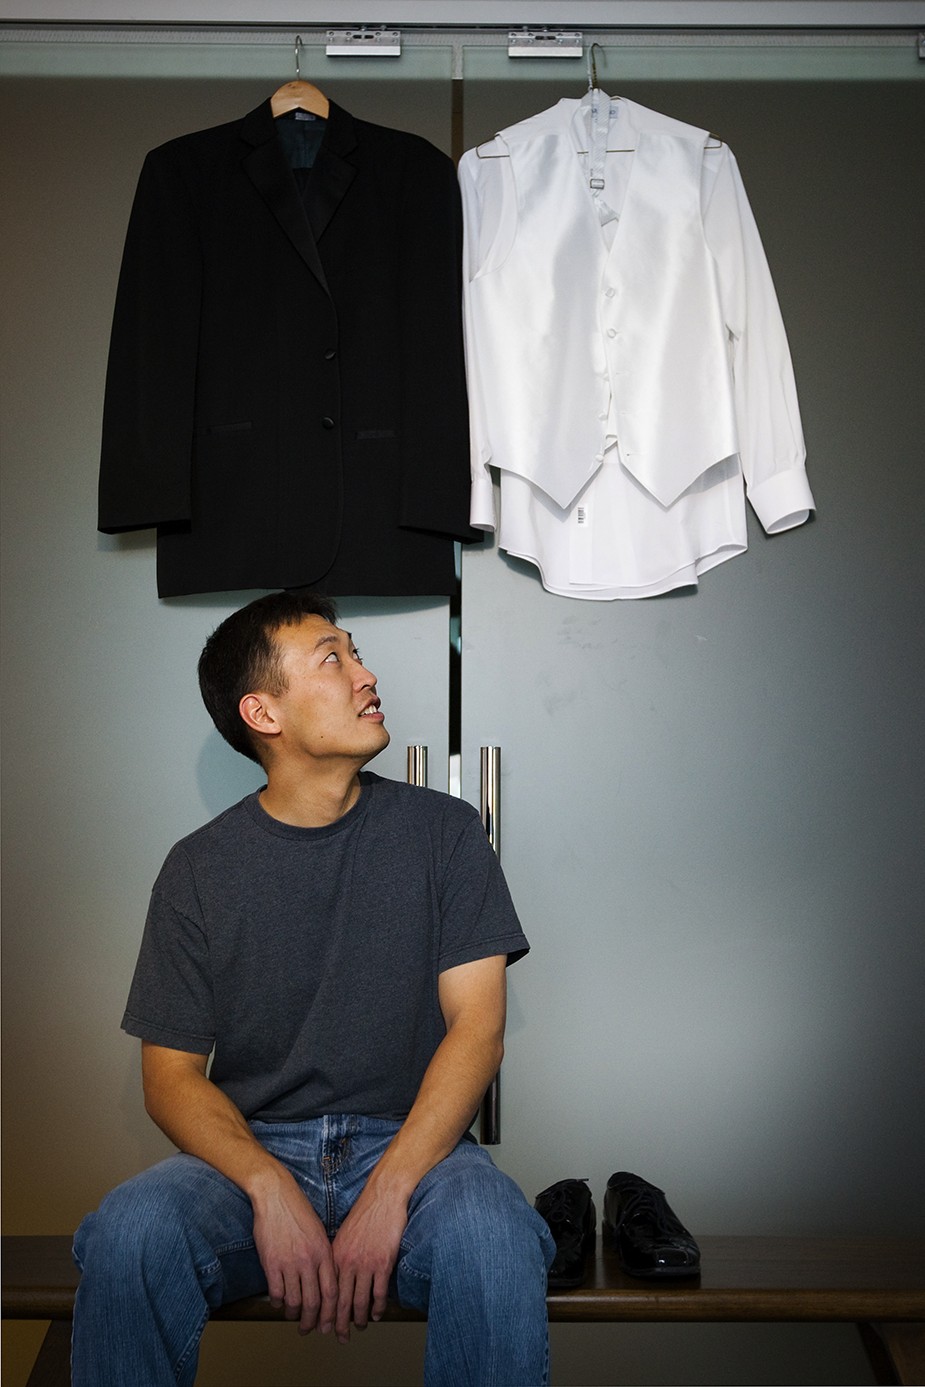
The tuxedo
The groom’s tuxedo or suit might not be as glamorous as the bride’s dress, but it can still make for a great photograph and can help tell the story of the wedding. Because the tux or suit is usually dark, just having it alone in the frame can be a little boring and can cause some exposure concerns. Instead, have the tux laid out with the shoes, or place the groom in the shot as I did in Figure 7-15. This adds a little more of the story to the image and also helps with the exposure. If you are shooting a photo with a mostly dark tuxedo, you want to underexpose the scene slightly to make sure the dark material stays dark. The built-in light meter will try to set the exposure too bright because it is working on trying to achieve an 18% gray average in the image.
7-15
ABOUT THIS PHOTO The groom with his tuxedo all ready to go, Taken at ISO 800, f/3.5, 1/60 second.
These steps will help you get the proper exposure:
1. Set the tuxedo or suit up where you want to photograph it.
2. Set your camera to aperture priority mode and pick an aperture that gives you the desired depth of field.
3. Take a photo and check the LCD screen. The tuxedo should look a little light.
4. Adjust the exposure by dialing in negative exposure compensation; start with a 1/2 stop.
5. Take a photograph and check the LCD screen on the back of your camera. The tuxedo should look darker and truer to the actual color. Check the histogram to see if there is any dark area clipping, which appears as a solid line on the dark side of the graph.
6. Repeat steps 4 and 5 until you have the exposure you want.
7. Now that the exposure is set, it’s time to adjust the composition.
Some of my best shots have happened when I could set the bride and her dress up and then use the same composition for the groom and his tuxedo. These matching images really help tell the story of the couple getting ready for the big day.
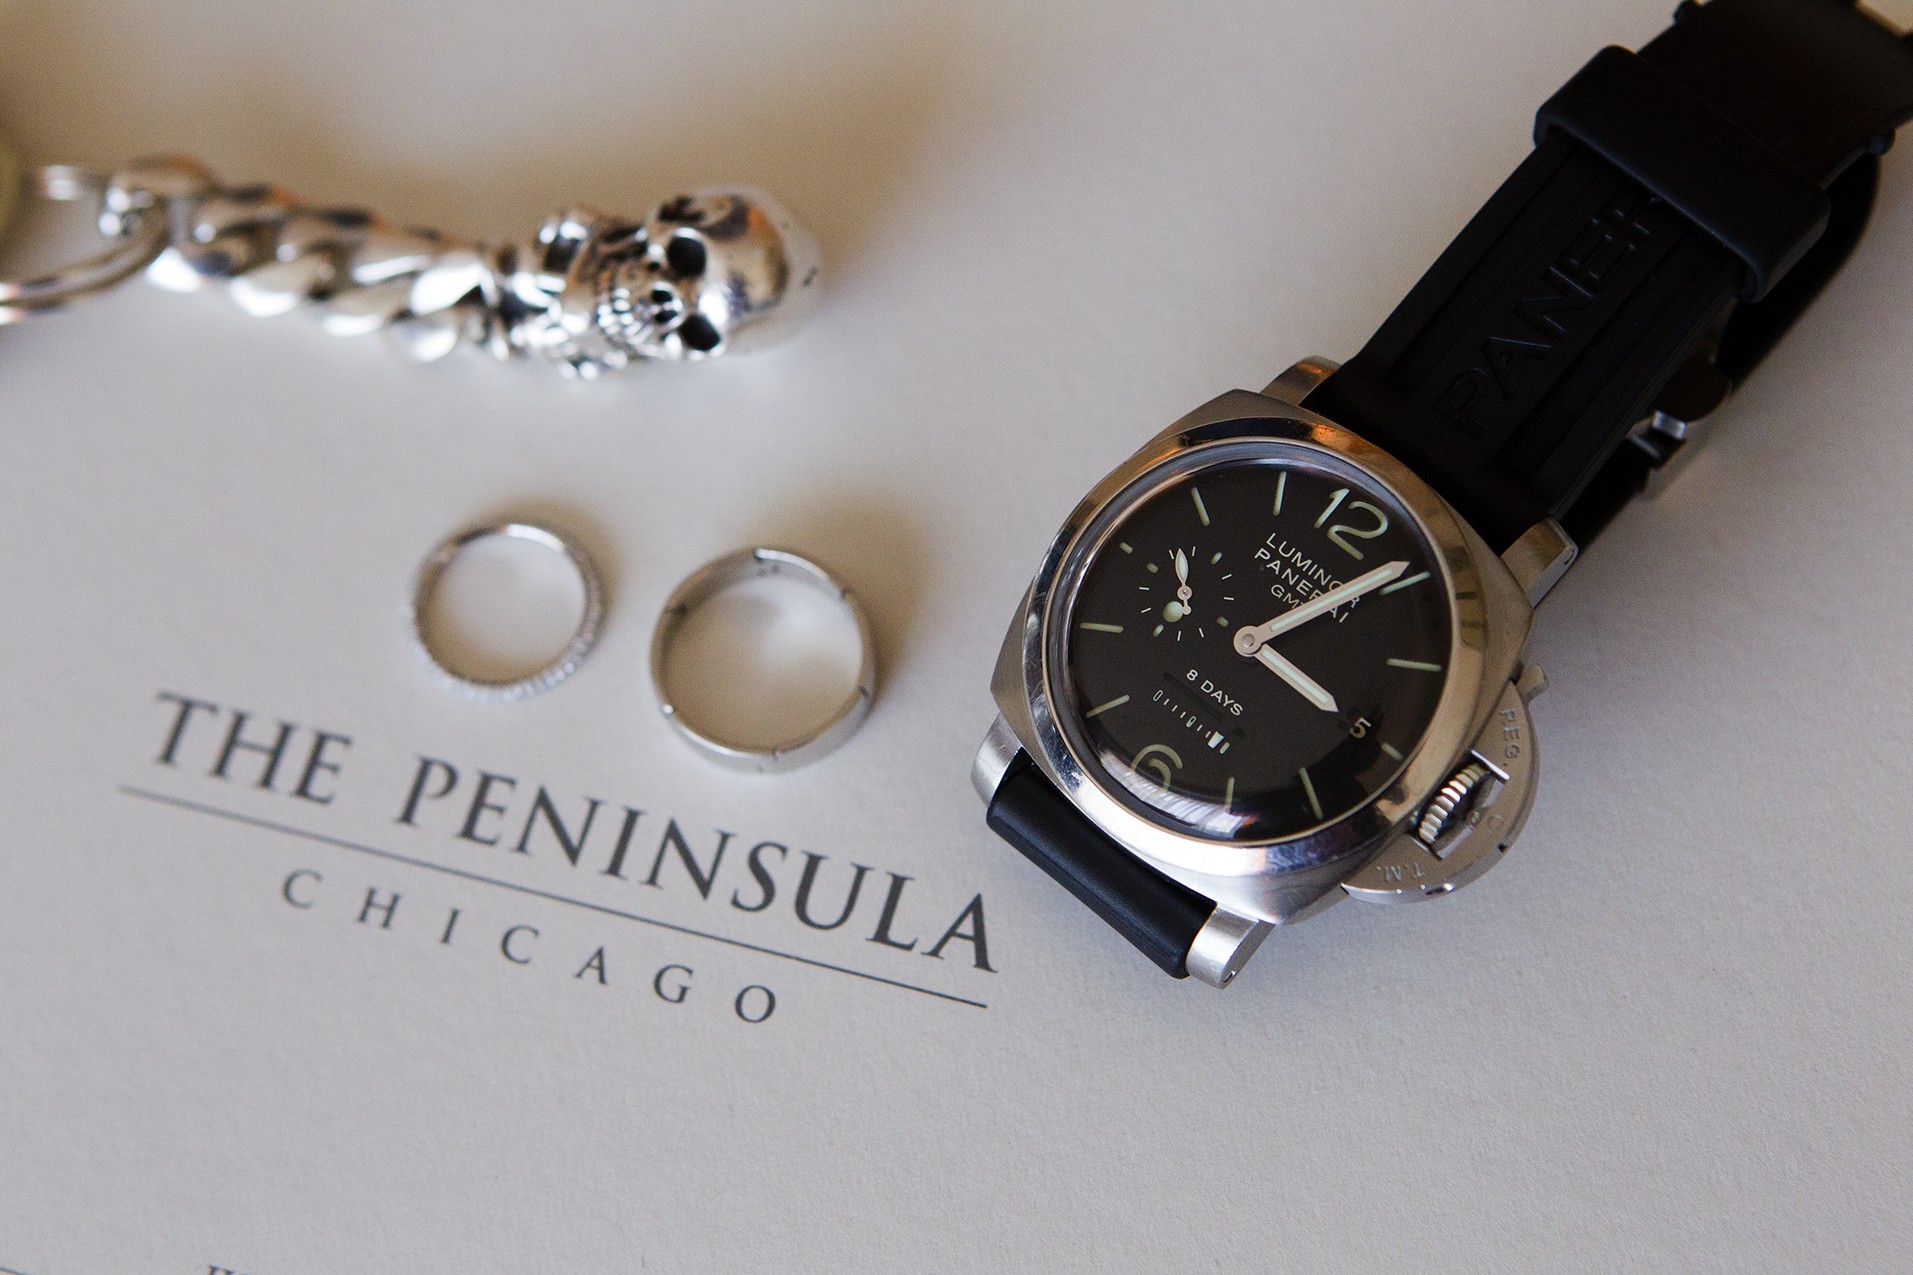
When you are photographing the groom, in addition to capturing the tuxedo, there are many items that make great detail photos. They can run the gamut from a custom set of cuff links, a special watch, or another piece of jewelry to a different type of vest or article of clothing that the groom is wearing. If you are a second shooter and are covering the groom getting ready, this might be the first time you are meeting the groom, so talk to him and work on discovering his personality. Ask the groom if there are any special details he’d like captured, like the watch and keychain shown in Figure 7-16. Many times men get special items handed down from generation to generation, and some of the most common ones are cuff links, so be sure to ask about them specifically.
7-16
ABOUT THIS PHOTO The watch, keychain, and wedding rings along with the location of the wedding make for a great photograph. Taken at ISO 800, f/3.5, 1/60 second.
I know that it is rather clichéd to make jokes about women and their shoes, but men like their shoes as well, and sometimes it is the one place where a little personality shines through.
The best lens to use for these detail shots is one with a macro setting. This enables you to focus in really close and fill the frame with smaller objects. When you use a macro lens, it is important to closely control the depth of field. Given you are shooting very close to the items, the depth of field is very shallow, and even the slightest movement will change what is and isn’t in focus. Check your work on the LCD screen on the back of the camera and zoom in to view the preview at 100% to make sure that the focus is sharp on the subject.
There are close-up filters available that will work for this type of shot. They cost less and are easier to carry around.
Posing the groom
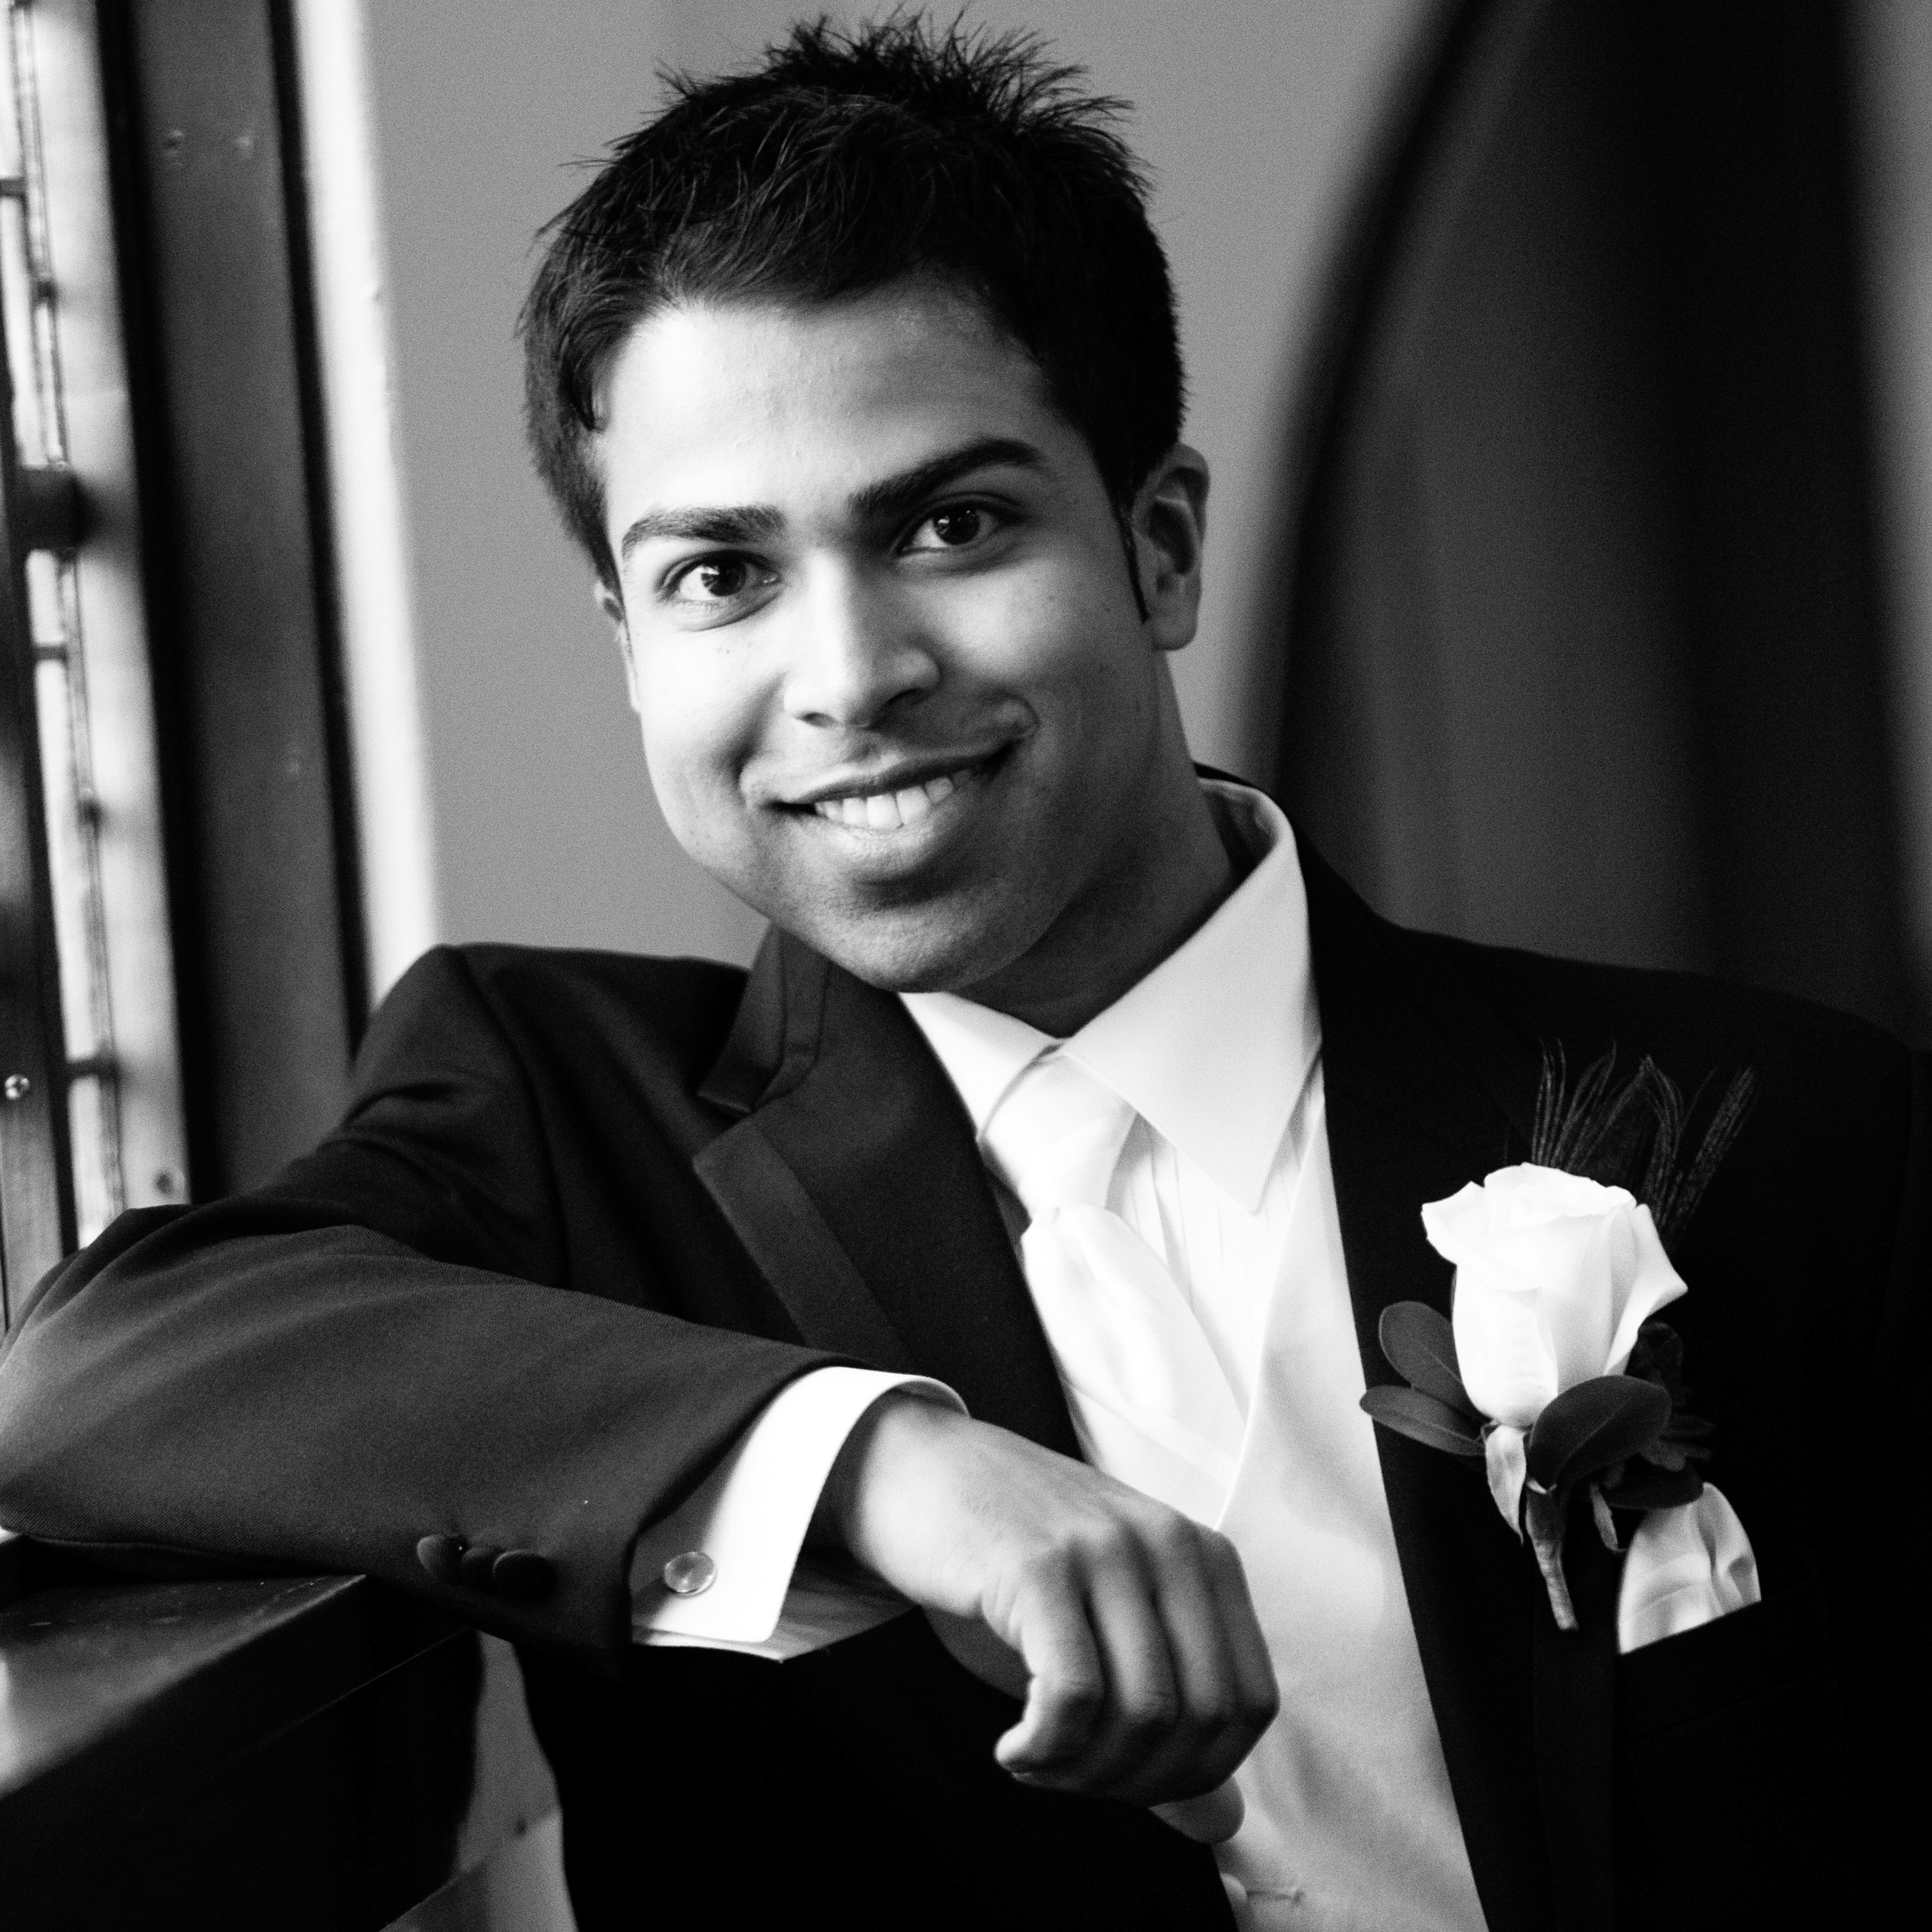
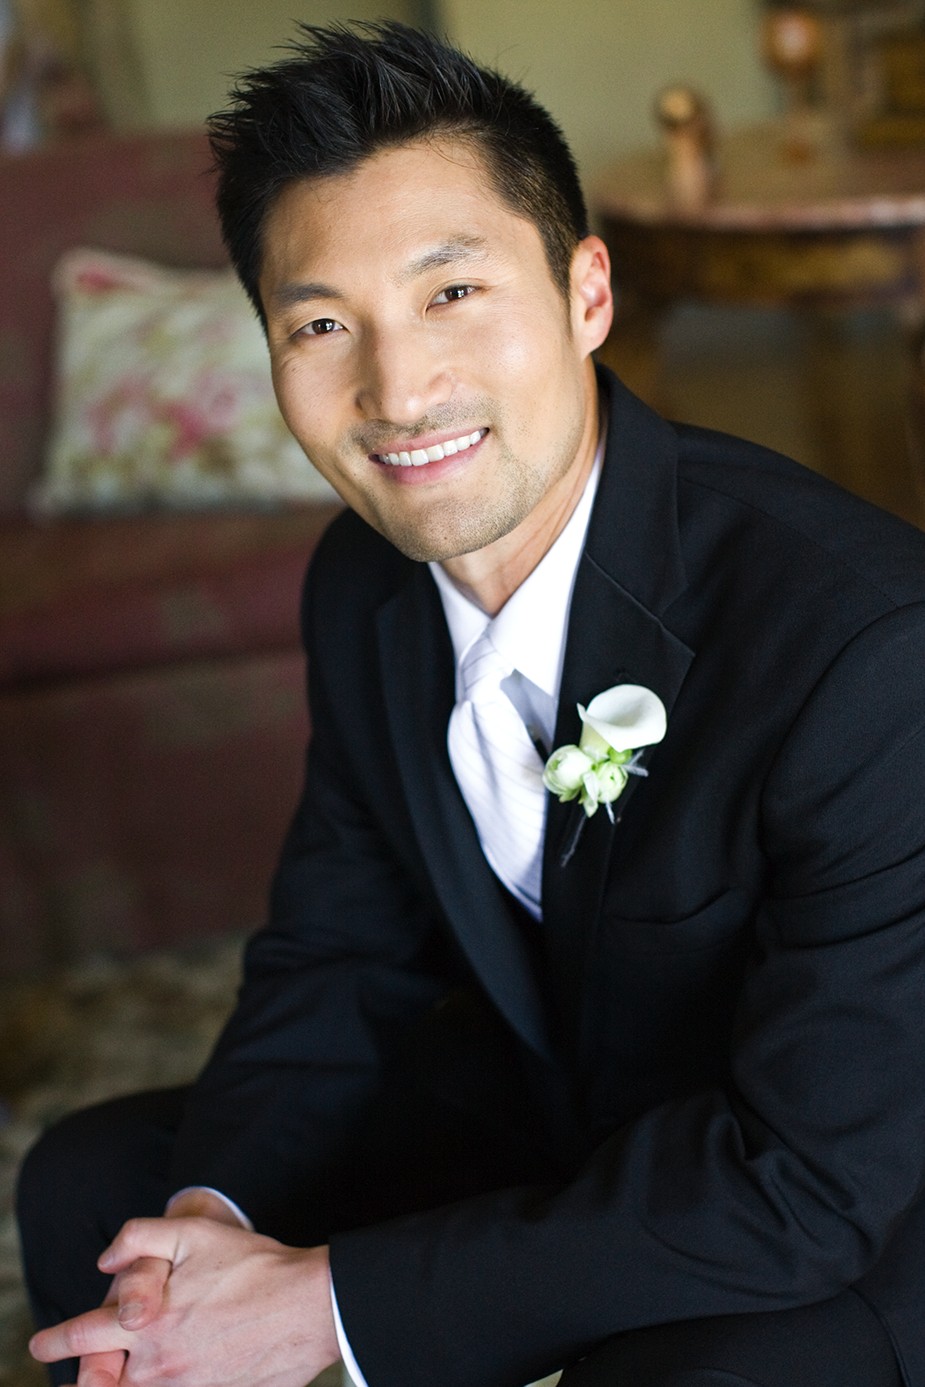
The job of the photographer, any portrait photographer, is to make the subject look as good as possible. Unless the groom is a professional model or actor, the odds are that he doesn’t get his portrait taken much and it can be a nerve-racking experience, especially on his wedding day. So along with making the groom look good, you need to help him be calm and natural. Sometimes you get really lucky and your client is used to being in front of the camera; then it is just a matter of having him do what he does and photographing him doing it. That was the case with Yul Kwon, shown in Figure 7-17, who was really comfortable in front of the camera from his time on television.
7-17
ABOUT THIS PHOTO Yul Kwon, reality TV star, posing before his wedding. Taken at ISO 1000, f/2.5, 1/200 second.
Your confidence and skills when it comes to posing the groom can help with getting a groom to look calm and natural in front of the camera. Here are some solutions to some of the most common problems:
• Bald can be beautiful. The real problem with thinning hair or baldness is that any light illuminating the head and face can reflect back at the camera, creating hot spots, or unwanted reflections. The easiest way to fix this is to change the angle of the camera to the subject and if possible diffuse the light as much as possible. If there is a makeup artist around helping the woman get ready, ask the groom if he’ll consider applying a little makeup to reduce reflections. You might also talk about that option with the couple beforehand; some people will not be open to the idea, and it’s best to know that before the wedding.
• Adjust his glasses. Glasses reflect light but can be easily adjusted so that the reflection goes in a different direction. Just move the arms of the glasses up a little so that the actual angle of the glass points down and not back at the camera. If you are using a flash unit off the camera, try to change the height of the light a little as well to reduce the angle that the light bounces off the glasses. This will really help to eliminate the reflection in the glasses.
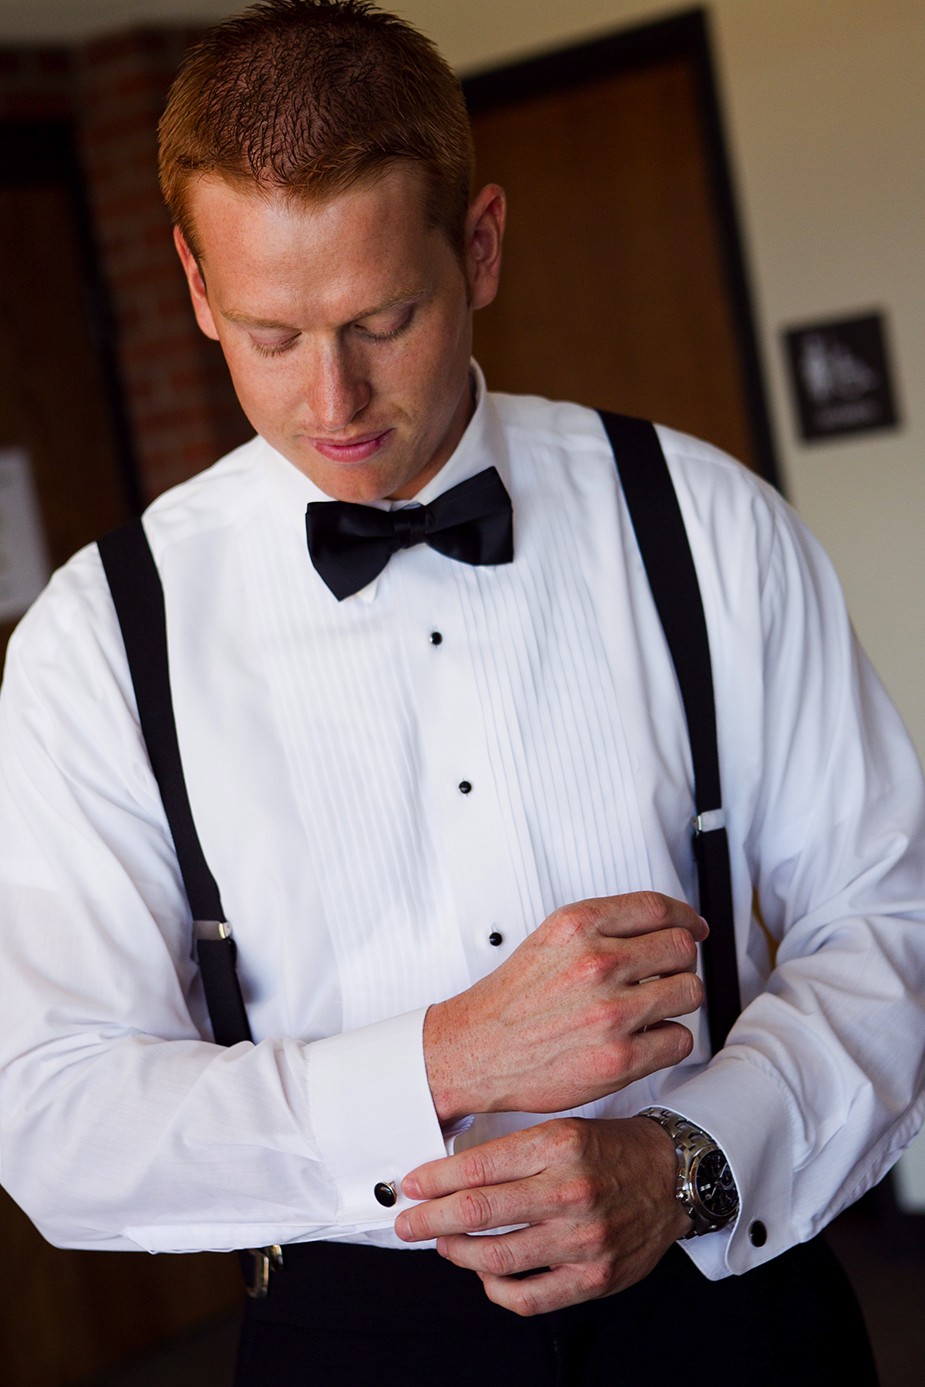
• Position the hands. Hands can add character and interest to a portrait but can also really distract. Many people don’t know what to do with their hands during a portrait shoot, so it is best if you just tell them what you want. You want to minimize the hands in your image by having them turned to the side and not flat toward the camera. Another way to minimize the hands is to keep the hands close to the body and busy doing a task, as shown in Figure 7-18.
7-18
ABOUT THIS PHOTO The groom posing naturally with his hands close to his body and busy working on the cuff links. Taken at ISO 400, f/3.5, 1/400 second.
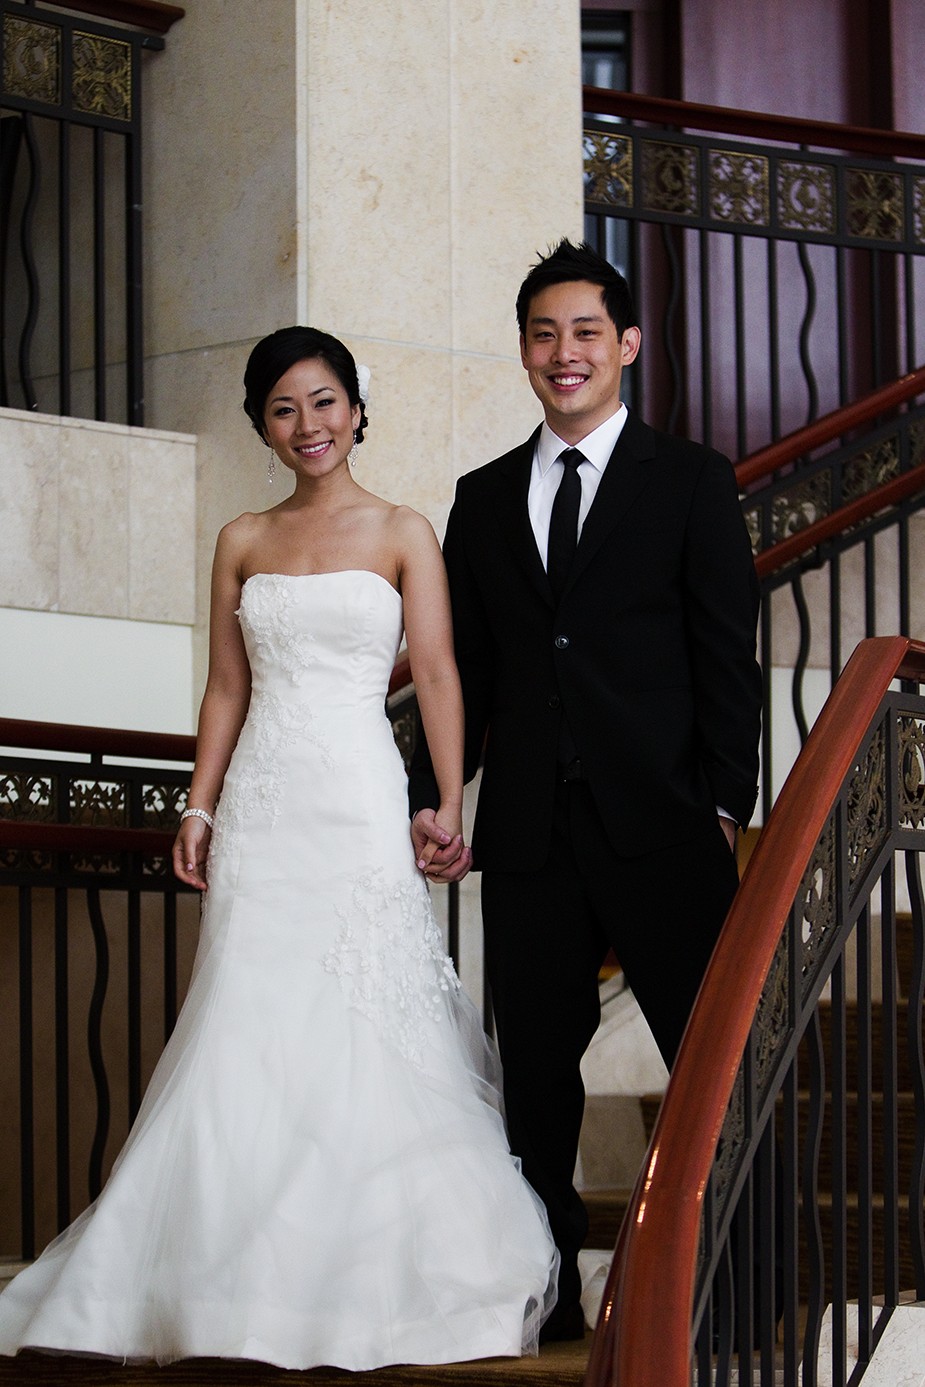
The bride and groom together
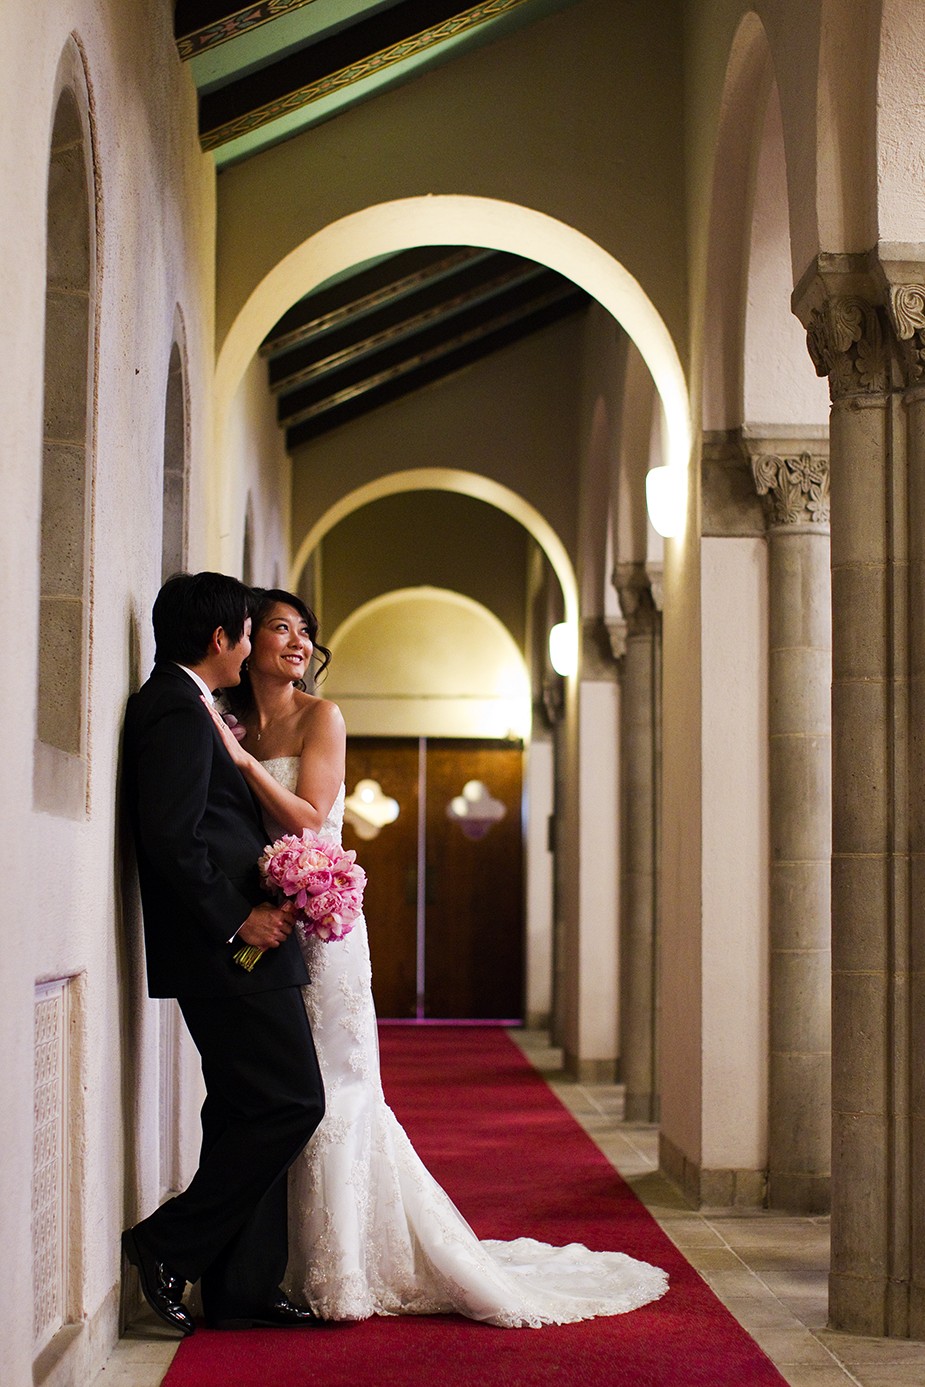
If there is one photo that is the most important of the day, it is the portrait of the bride and groom together. Have a location for the portraits at the ceremony site or reception site in mind if the portraits of the bride and groom together are going to take place after the ceremony and before the reception. If the photos are going to be taken before the ceremony, scout locations that are close to where the bride and groom are getting ready and that are out of view of guests who might be arriving for the ceremony. This allows you to maximize the time photographing the couple rather than spending all the time allocated getting to the location. If you are shooting indoors and need to set up your lights, then do it before bringing the couple there or, at the very least, make sure you know where they are going to go, so you can set up the lighting quickly and there is no wasted time. The light, the red carpet, and the arches all made for an ideal location in Figure 7-19. I made sure the area was free of distractions and posed the couple in the flattering, diffused light coming across from the windows on the other side of the church.
7-19
ABOUT THIS PHOTO I had this location in mind for the bride and groom portraits from the moment I saw the light. This was taken before the ceremony at ISO 2500, f/2, 1/100 second.
Posing the couple
Whether your style is photojournalistic or traditional, you still have to pose your subjects. It is not an easy task, but by studying some of the basic poses, you can create a variety of different shots by making only slight alterations. The most important thing you can do is to get the bride and groom to relax. This comes from the rapport that you have built with them and their trust in you. Many times it is a good idea to shoot the joint portraits without any family or friends present. This is because the couple is most likely not used to being the center of attention and being in front of the camera as much as they are during their wedding day, and having other people around can be a distraction. It all depends on the couple, but if you think it will help, have a close friend of the couple join you to help keep the mood light. Just try to keep the amount of people present to a minimum. You need to plan the poses that you want the bride and groom to do ahead of time and if necessary, keep a little notebook with examples of what you want. The following list offers some tips about posing:
• Traditional poses. Some of the traditional poses include the 3/4-length shot of the bride and groom together, the couple looking at their rings, and a close-up of their hands with the rings visible. These poses are a great starting point for any wedding photographer and should be mastered, even if you want to shoot a more relaxed type of portrait as well. Consider these the building blocks of the wedding portrait because many clients still expect to see them in their wedding album. Also keep in mind that because you can’t take a portrait of the couple’s rings together until after the ceremony, you will have to set aside a few minutes to do that, even if the rest of the portraits are done before the ceremony.
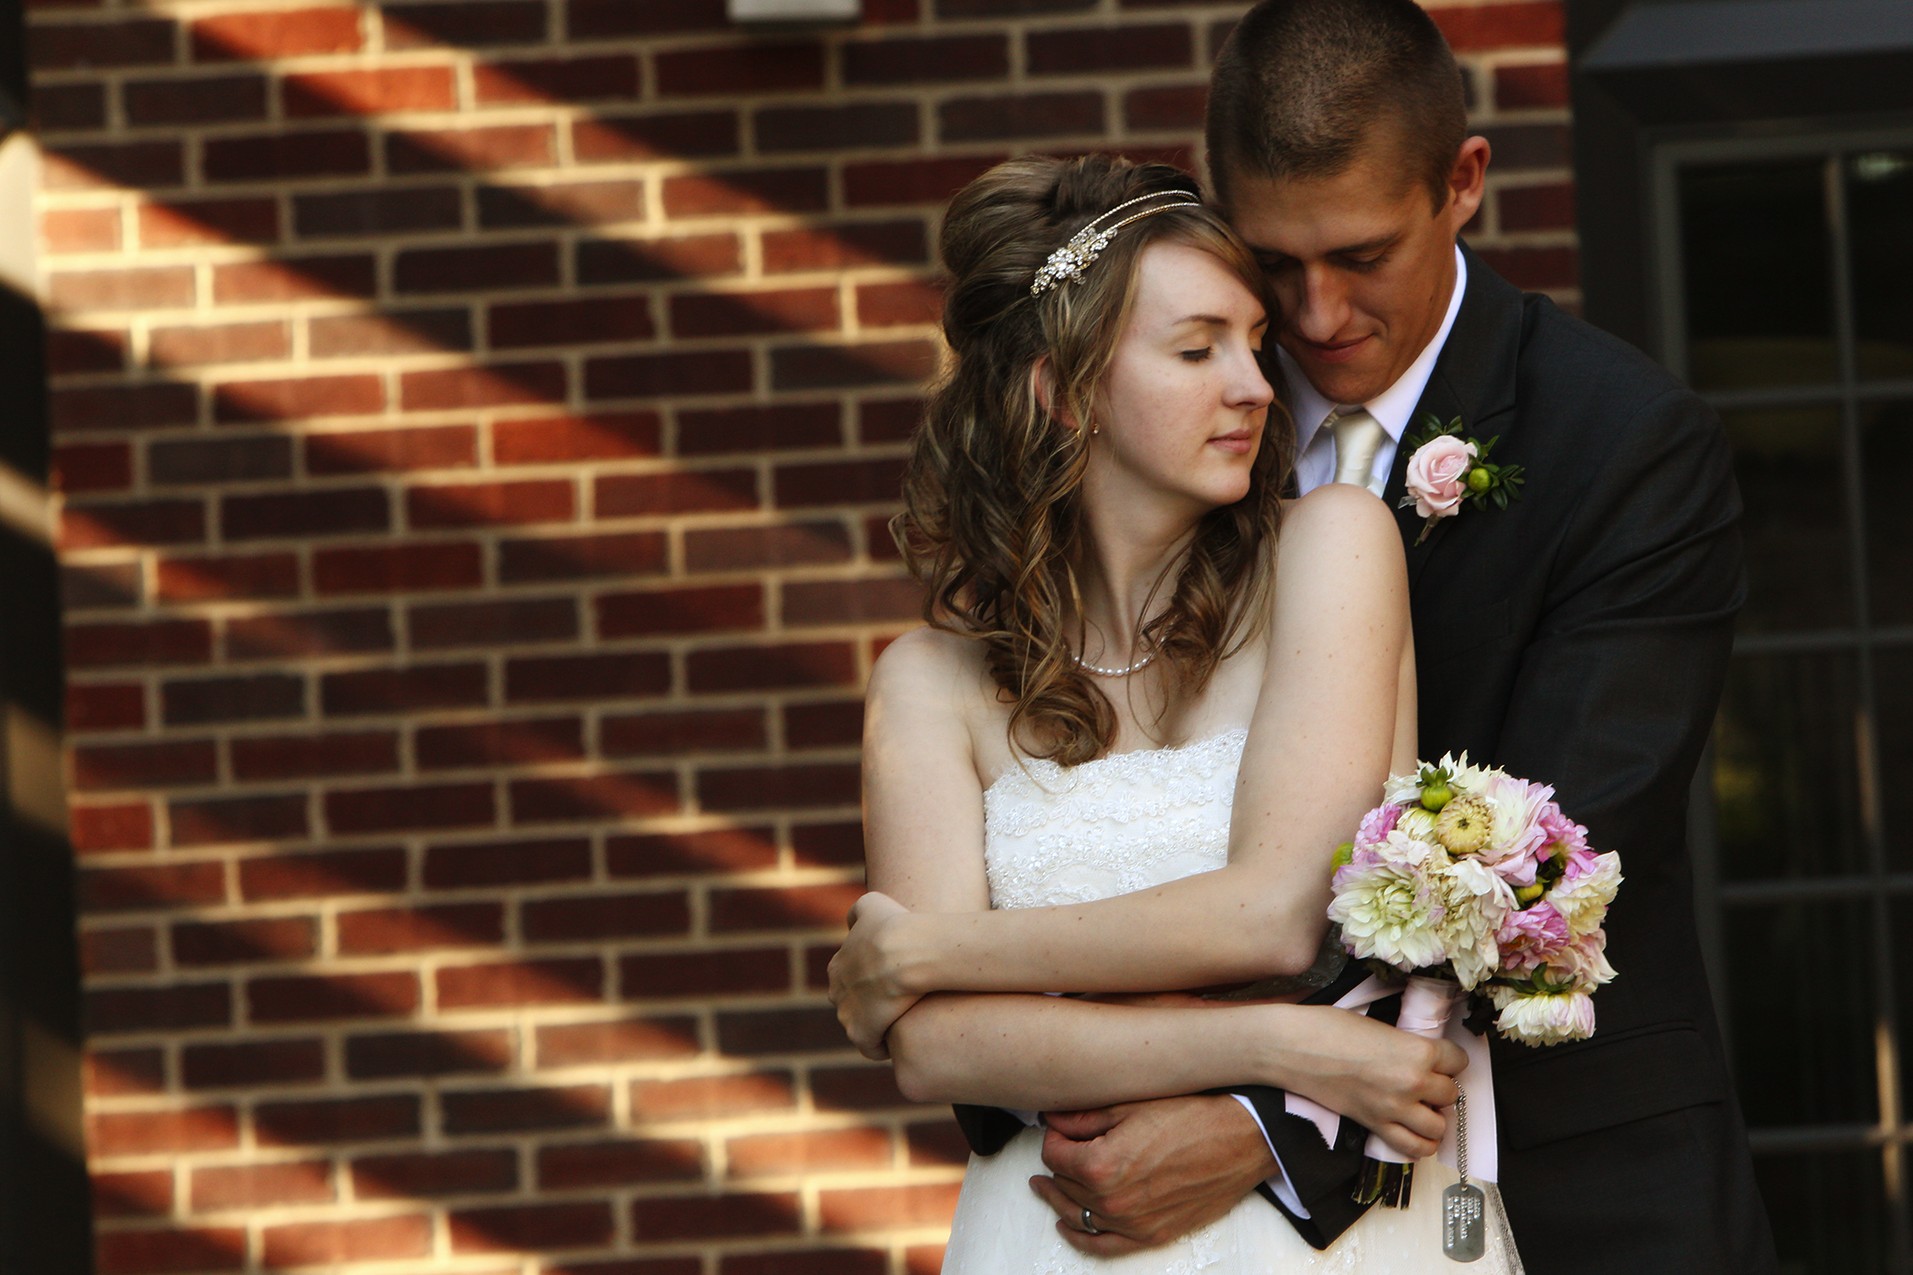
• Relaxed poses. These are more natural and break a lot of the rules of composition, but they can really be worth it. Take Figure 7-20 for example: The bride and groom are not looking at the camera, the pose isn’t traditional, and the groom is even holding the bride’s flowers, but the emotion is present and that’s what makes it a great shot. Instead of a rigidly posed couple, the mood is more relaxed and informal.
7-20
ABOUT THIS PHOTO Getting closer together, the bride and groom share an intimate moment. Taken at ISO 2500, f/2.0, and 1/100 second.
• Compositional helpers. There are some basic compositional guidelines that can really help make a portrait stronger. Use the Rule of Thirds when determining placement of your subjects. You can also use leading lines to draw the viewer’s eye to the most important elements in the image. Figure 7-21 uses both the Rule of Thirds and the architecture and banisters as multiple leading lines drawing your eye into the image. Don’t forget the basics when setting up your portraits.
7-21
ABOUT THIS PHOTO The couple is posed on the stairs with their heads roughly a third of the way down, and each of them is a third of the way into the frame. The leading lines from the architecture also help with the composition. Taken at ISO 1600, f/2.8, 1/250 second.
For more information on composition, see Chapter 3.
• It’s all about the emotion. On the wedding day, there will be a myriad of emotions that can run the gamut from elation to fear. It is a big day. When you have the couple alone together for a few moments, the love for each other should start to come out.
• Keep the mood light. Chances are the couple has been under a little stress that day, and this is most likely the first and could be the only time that they are not surrounded by people. Let them enjoy the moment.
• Talking is good. Let them know what is working and always keep it positive. Also, let them talk to each other; this might be the first time they have had a moment alone, well, almost alone. Silence is often considered golden but not in this case. You can also ask them to communicate love through body language, such as looking at each other, exchanging soft tender kisses, gently caressing each other’s hands, hugging each other tightly, and so on.
• Keep the focus on the eyes. This is true when photographing individual portraits, and it is true when shooting the couple. Make sure that the eyes are in focus; an out-of-focus eye will ruin a portrait quicker than anything else.
• Pay attention, close attention. Sometimes, couples can feel a little intimidated being in front of the camera, and it is the smallest gesture that can mean the most. A little hand squeeze from the bride to her groom or brushing back a stray piece of hair can say volumes.
• Keep the camera to your eye. If you are not looking through the viewfinder, then you will not be able to capture the moment when it happens. Chances are it will be before or right after you take a frame, so be ready to take another one immediately.
Backgrounds
Portrait backgrounds can do one of two things: They can help the photograph by adding a sense of place, such as Figure 7-22, or they can distract, and take attention away from the couple.
7-22
ABOUT THIS PHOTO There are times when the background can really add a sense of history and story to the wedding album. Taken at ISO 100, f/6.3, and 1/200 second.
Some good choices for backgrounds include the following:
• Areas that don’t compete with the couple for your attention. Some wedding locations are extremely beautiful, whether they are white sandy beaches or rolling vineyards, and while the beauty needs to be captured, don’t let it swallow up the couple. In these cases, I make sure to take some shots with the natural beauty as the main subject, then some with the couple as the main subject. The location for the wedding was chosen with a lot of care and planning.
• Areas that have symmetry. Look for areas that have a symmetry that you can use in the portrait. The couple can be placed in the middle of the symmetry points or off to the side, creating a portrait that has more tension. Try it both ways and see what works for you.
• Areas with a staircase. Staircases are a fantastic location for portraits. They allow for numerous levels and angles, and banisters make for great leading lines. There is a sense of elegance and old-world timelessness with portraits on a staircase, especially if the staircase is in an old or ornate building. If the stairs you have to work with are not that great looking, you can always move in a little closer and fill the frame with the couple to try to minimize the surroundings. The good news is that many times, wedding venues are really lovely buildings with a nice staircase somewhere, even if it is only a few stairs.
• Areas with neutral colors. Many times the background colors can draw attention away from the monochromatic black and white of the traditional wedding garb. Look for backgrounds that are neutral or at least complement the colors of the bride’s flowers and groom’s boutonnière. That doesn’t mean all the shots should be boring and plain; just make sure that you choose a location with a subtle background for some of the photos.
• Areas with even lighting. It doesn’t matter how perfect a location or background is if it has bad lighting. Look to see if there is even light present at the time when you will be photographing. For example, the east side of a building might have great light in the morning but be so deep in shadows during the wedding that it won’t do. When photographing inside, see if it is possible to turn on or off the room lights, especially if there is light coming in through a window or door that is more flattering.
Lighting
Photographers talk about hard light and soft light and that soft light is better than hard light, especially for portraits. As I talked about in Chapter 5 and Chapter 6, the larger the light source, the softer and more flattering the light is, and this is important for wedding photographers because you want your clients to look their best. So when it comes to photographing the bride and groom, you want to make sure that the location you choose for the portraits has the best light available.
Outdoor light is covered in Chapter 5, and indoor lighting is covered in Chapter 6.
When you are shooting outdoors, the best light can be in the shade. Look for areas where the hard direct light of the sun does not light the bride and groom but instead they are placed in the shade. This could be the side of a building or the overhanging tree. When shooting outdoors, you will hope that there are a few clouds in the sky, because nothing can soften direct sunlight quite like the clouds. They act like a huge natural diffuser and turn what is a small hard light into a bigger, softer light. You can also use the light to create elements in your image, such as in Figure 7-23, where the interplay between the light and shadow create leading lines for your eye to follow into the photo from the left side. Notice how even though there is obviously bright sun in the sky, by placing the couple in the shade, the light is very soft and diffused, creating a great portrait.
7-23
ABOUT THIS PHOTO The light coming through the overhang creates a great pattern on the wall. Taken at ISO 1000, f/8, 1/160 second.
One last word about the light outside: It changes constantly, so the great light that was present in the early afternoon will have changed by the time the ceremony is over, and the light changes over the year so that the light that appears in March is different to the light appearing in October. When picking a location for the shots, picture how the light will be when you are taking the shots, not how it is when you are scouting the location.
When you are shooting indoors, the light comes either from the available light or from flashes brought in to illuminate the scene. You can also use many light-shaping tools, such as an umbrella or small soft light as well as the Gary Fong diffusers I use, covered in Chapter 2, to very effectively soften the light. The key to using these tools is to get them in as close as possible to your subjects so that the light is relatively large, providing the softest light possible.
Assignment
Show the Love
Weddings are joyous occasions that are all about celebrating the love between two people. It is critical to capture that love, especially when it comes to the portraits of the husband and wife. The good part about this is that you don’t actually have to be at a wedding to practice this. Any happy couple can be your model for this. This assignment is to capture the love between a couple in a photograph, which is not as easy as you might think.
It’s not just his arm around her, or the fact that they are gazing at each other, nor is it the smiles that grace their faces, but instead it is a combination of all those factors that make an example of the love that can be captured in an image.
Make sure that the lighting, location, and composition are all good; then just talk to the couple, and see which poses they are comfortable with and watch for those little signs that show the love. Once you capture a moment of shared bliss, post it to the Web site to share with other readers.
The couple in this photo are not paid models nor did they pose for a magazine shoot. They are just a young, newly married couple very much in love, and the pose conveys that. A look, a touch, a laugh—these all make the image have emotional impact. This was taken at ISO 1000, f/3.5, 1/500 second.
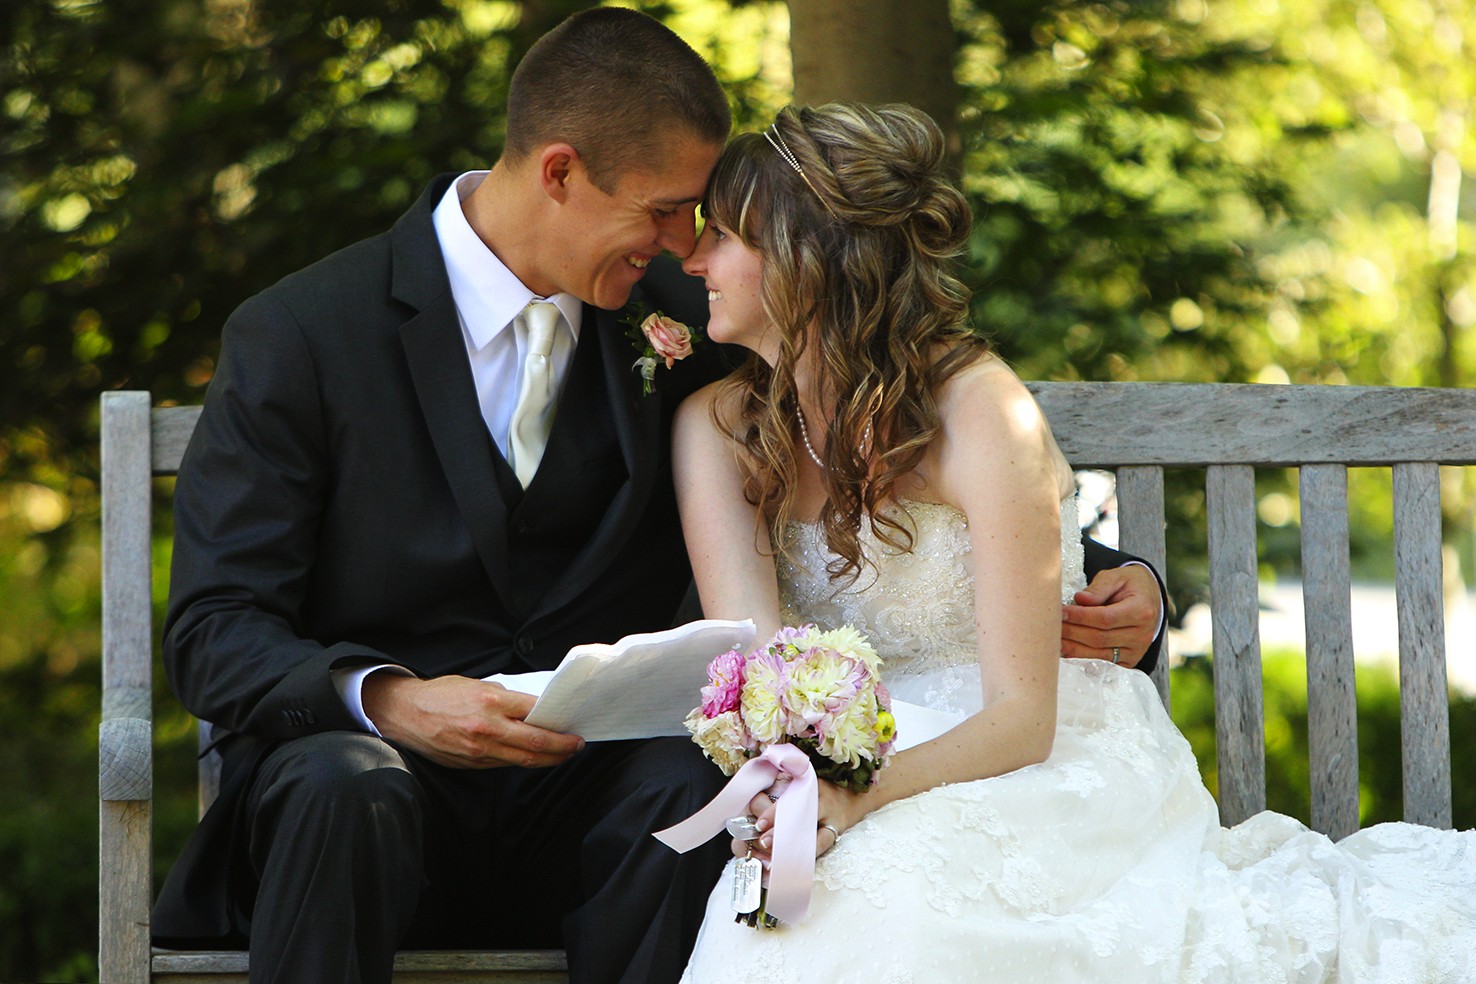
Remember to visit www.pwassignments.com after you complete the assignment and share your favorite photo! It’s a community of enthusiastic photographers and a great place to view what other readers have created. You can also post comments and read encouraging suggestions and feedback.