Chapter 10: The Reception
The ceremony is over, the portraits have been taken, and now comes the reception: the food, the drinks, the dancing, the celebrating, the time when the couple can relax and start to enjoy their life as newlyweds. While everyone else is enjoying the festivities, you are busier than ever. One important factor in making the reception photography go as smooth as possible is to have a detailed timeline so that you can be in place to capture the key moments. Work with the couple and the wedding planner or event coordinator so that you are kept in the loop on any and all changes to the plan. If you are expecting a garter and bouquet toss, but instead it’s time for the cake cutting, you will be left scrambling to get into position. Oftentimes, the DJ is also involved in the schedule, so be sure to communicate with him as well so that you do not miss any important moments.
the venue
The reception venue can vary greatly from wedding to wedding, but a few things are at every reception. And, you can be sure that a lot of time and energy went into picking the right centerpieces, the color scheme, the food, and the decorations. The best time for you to capture these details is before the guests arrive. The timing might be tough, especially if you still need to take portraits, but this is why many weddings have a cocktail or social hour before the main room is opened to the guests. It’s best to be in the room right before the guests because that will be when it is the most complete. The candles will be lit, the place settings will be perfect, and the room will be ready for the guests to arrive.
You will need a wide-angle lens to photograph the room, and should use it from a variety of locations, including changing the height from which you take the photograph. Make sure that you cover the room from the middle, as shown in Figure 10-1, as well as from the right and left sides. While not all these images will end up in the couple’s wedding book, some might just end up with the vendors, which is great networking for you (more on that a little later in this chapter). If there is a balcony or a staircase, try to get a top-down angle on the room, showing the whole layout in one shot.
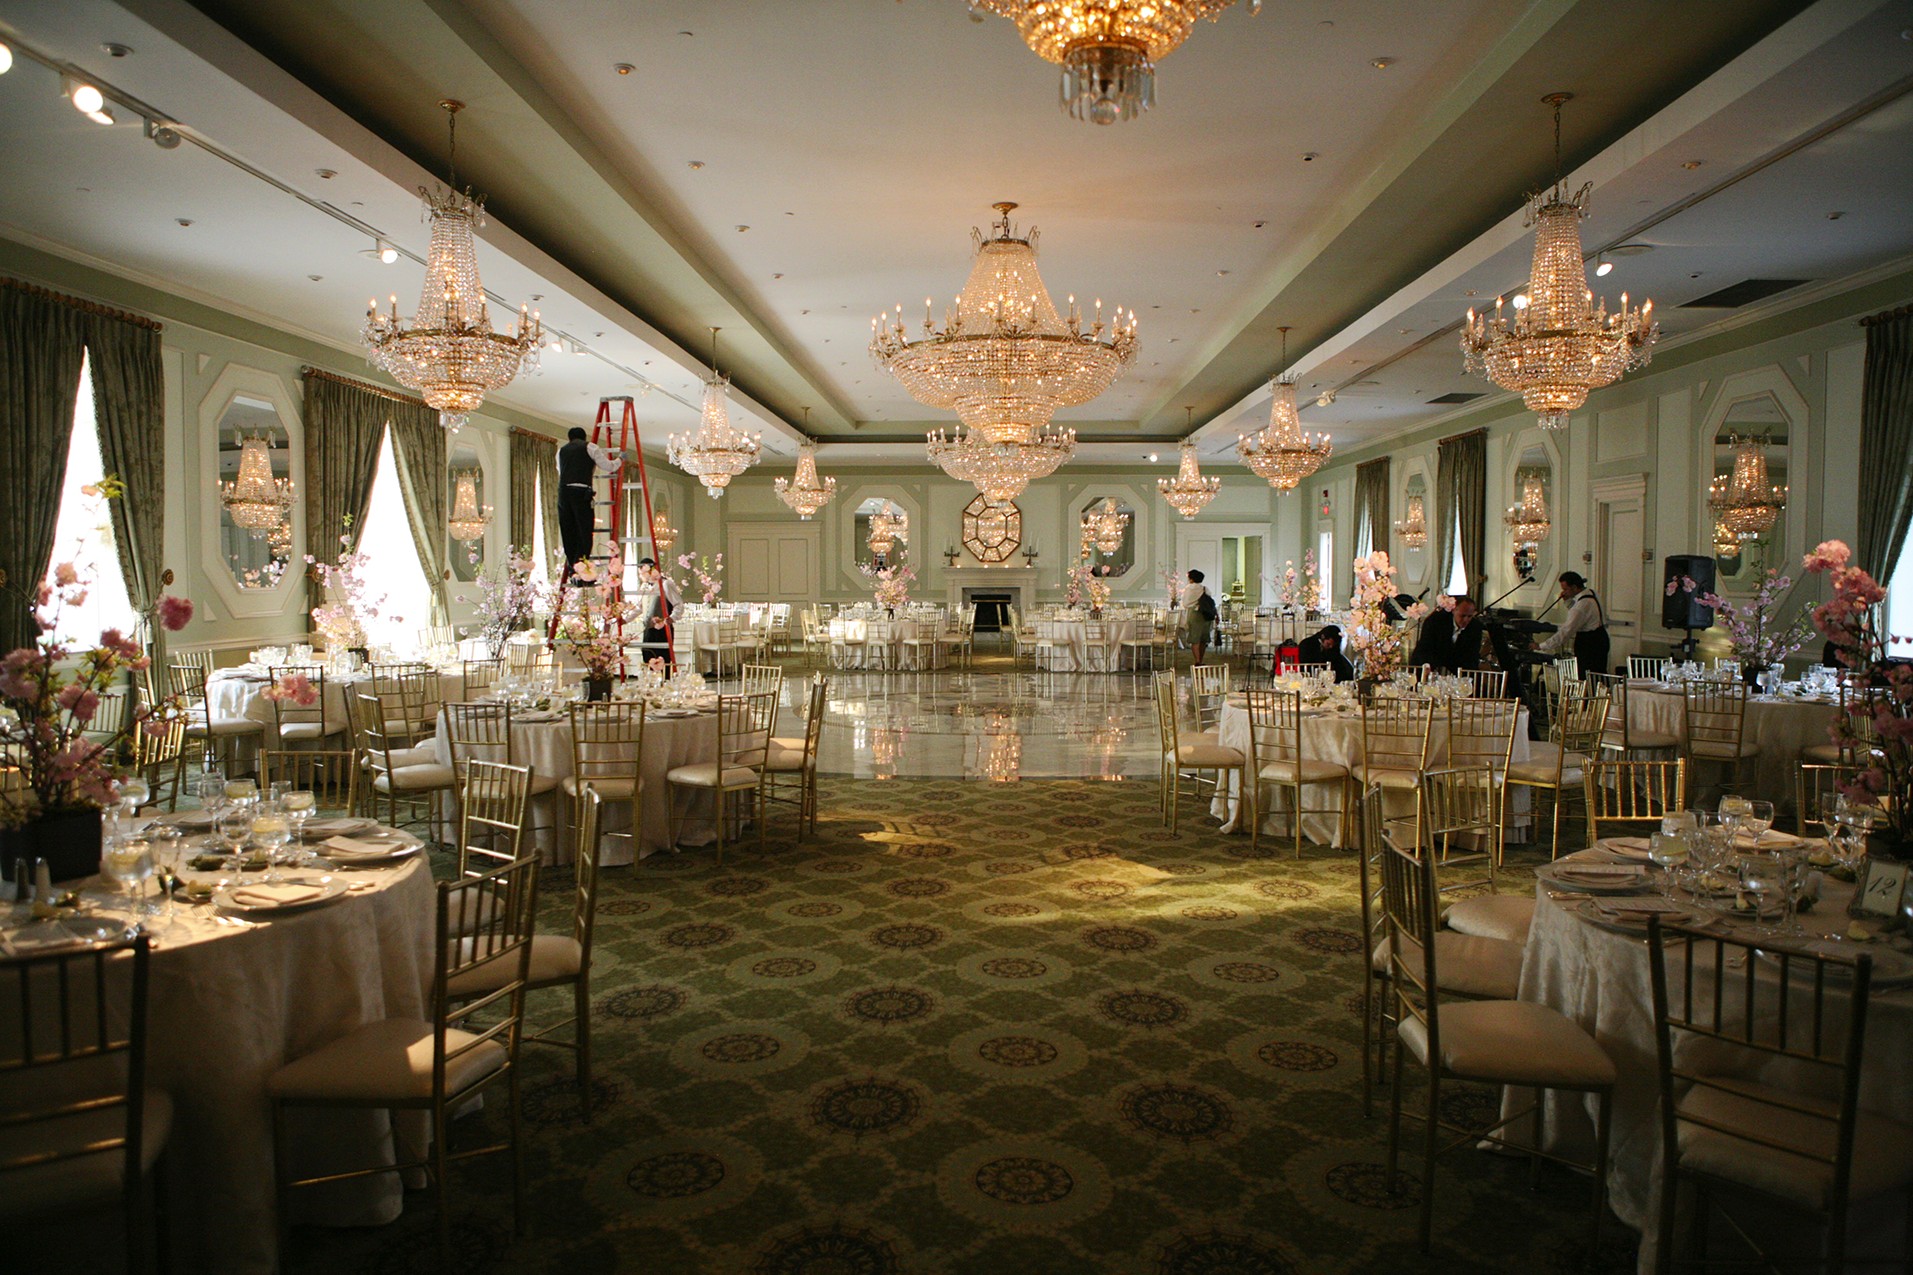
10-1
ABOUT THIS PHOTO With a 24mm focal length, the whole room can be captured at once. Taken at ISO 1600, f/2.8, 1/100 second.
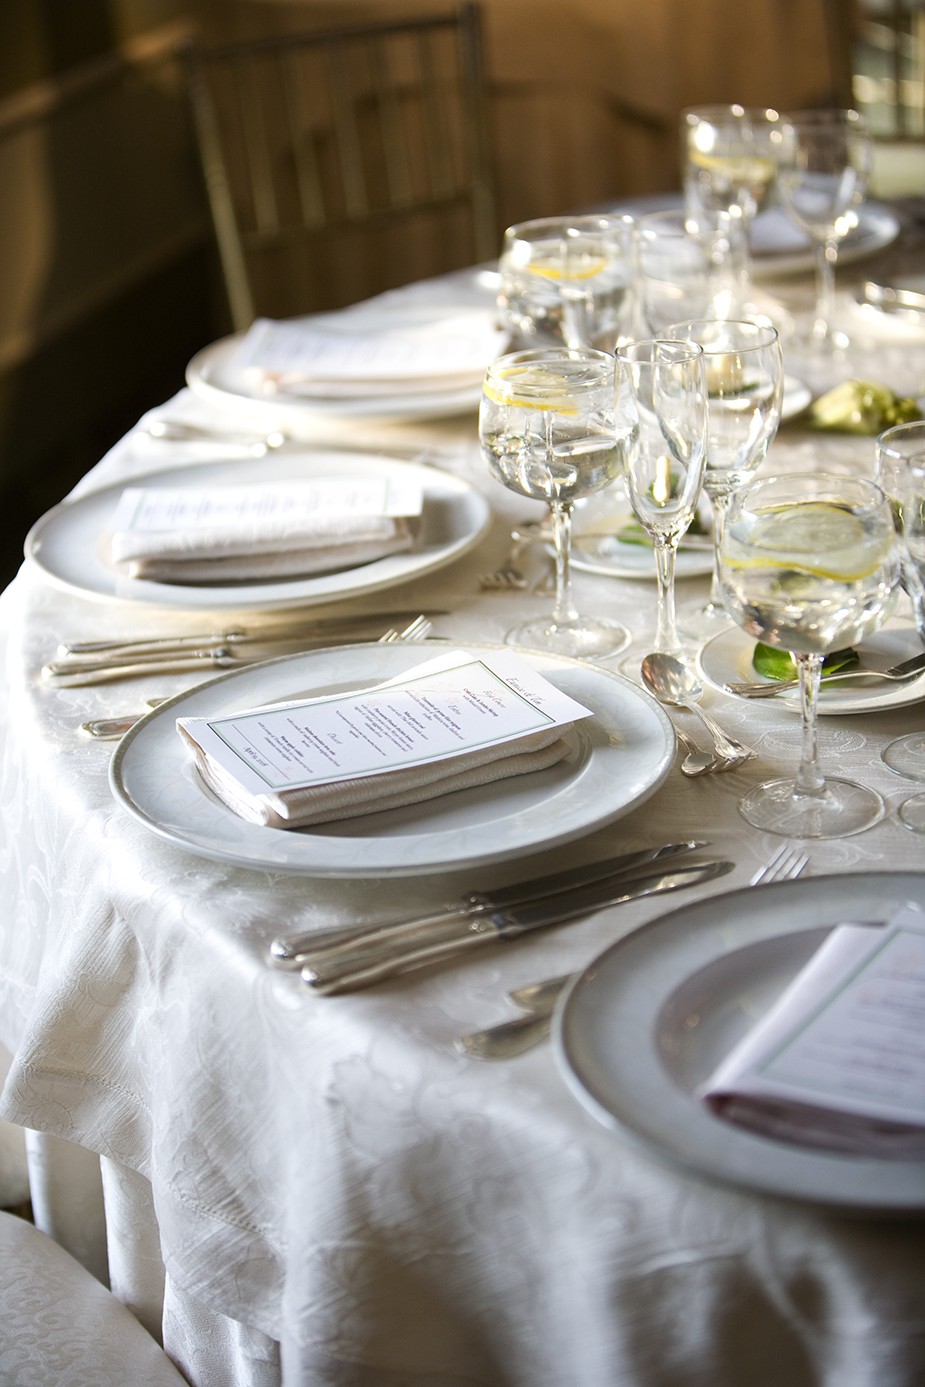
Make sure you capture the centerpieces and a single table setting, and look for any of the small touches that the clients used to personalize the reception, like the details in the place settings, centerpieces, and cake, shown in Figures 10-2 through 10-4. Make sure you take a moment to photograph the wedding cake; it is the perfect time to get a shot of it without people in the way. It is also a great idea to ask the couple if there is anything special at their reception site that they would like you to capture. Now is the time to take care of those types of images; you won’t have a good chance later.
10-2

10-3

10-4
ABOUT THESE PHOTO A single place setting, the centerpieces, and the cake details are all photographs that can and should be taken before anyone even enters the room. In Figure 10-2 a place setting captured at ISO 400, f/2.8 and 1/80 second and +1.33 exposure compensation. Figure 10-3 shows a full table with the beautiful centerpiece taken at ISO 2000, f/2.8, and 1/160 second. Figure 10-4 shows the details on the cake. It was taken at ISO 1250, f/2.8, and 1/60 second with a flash.
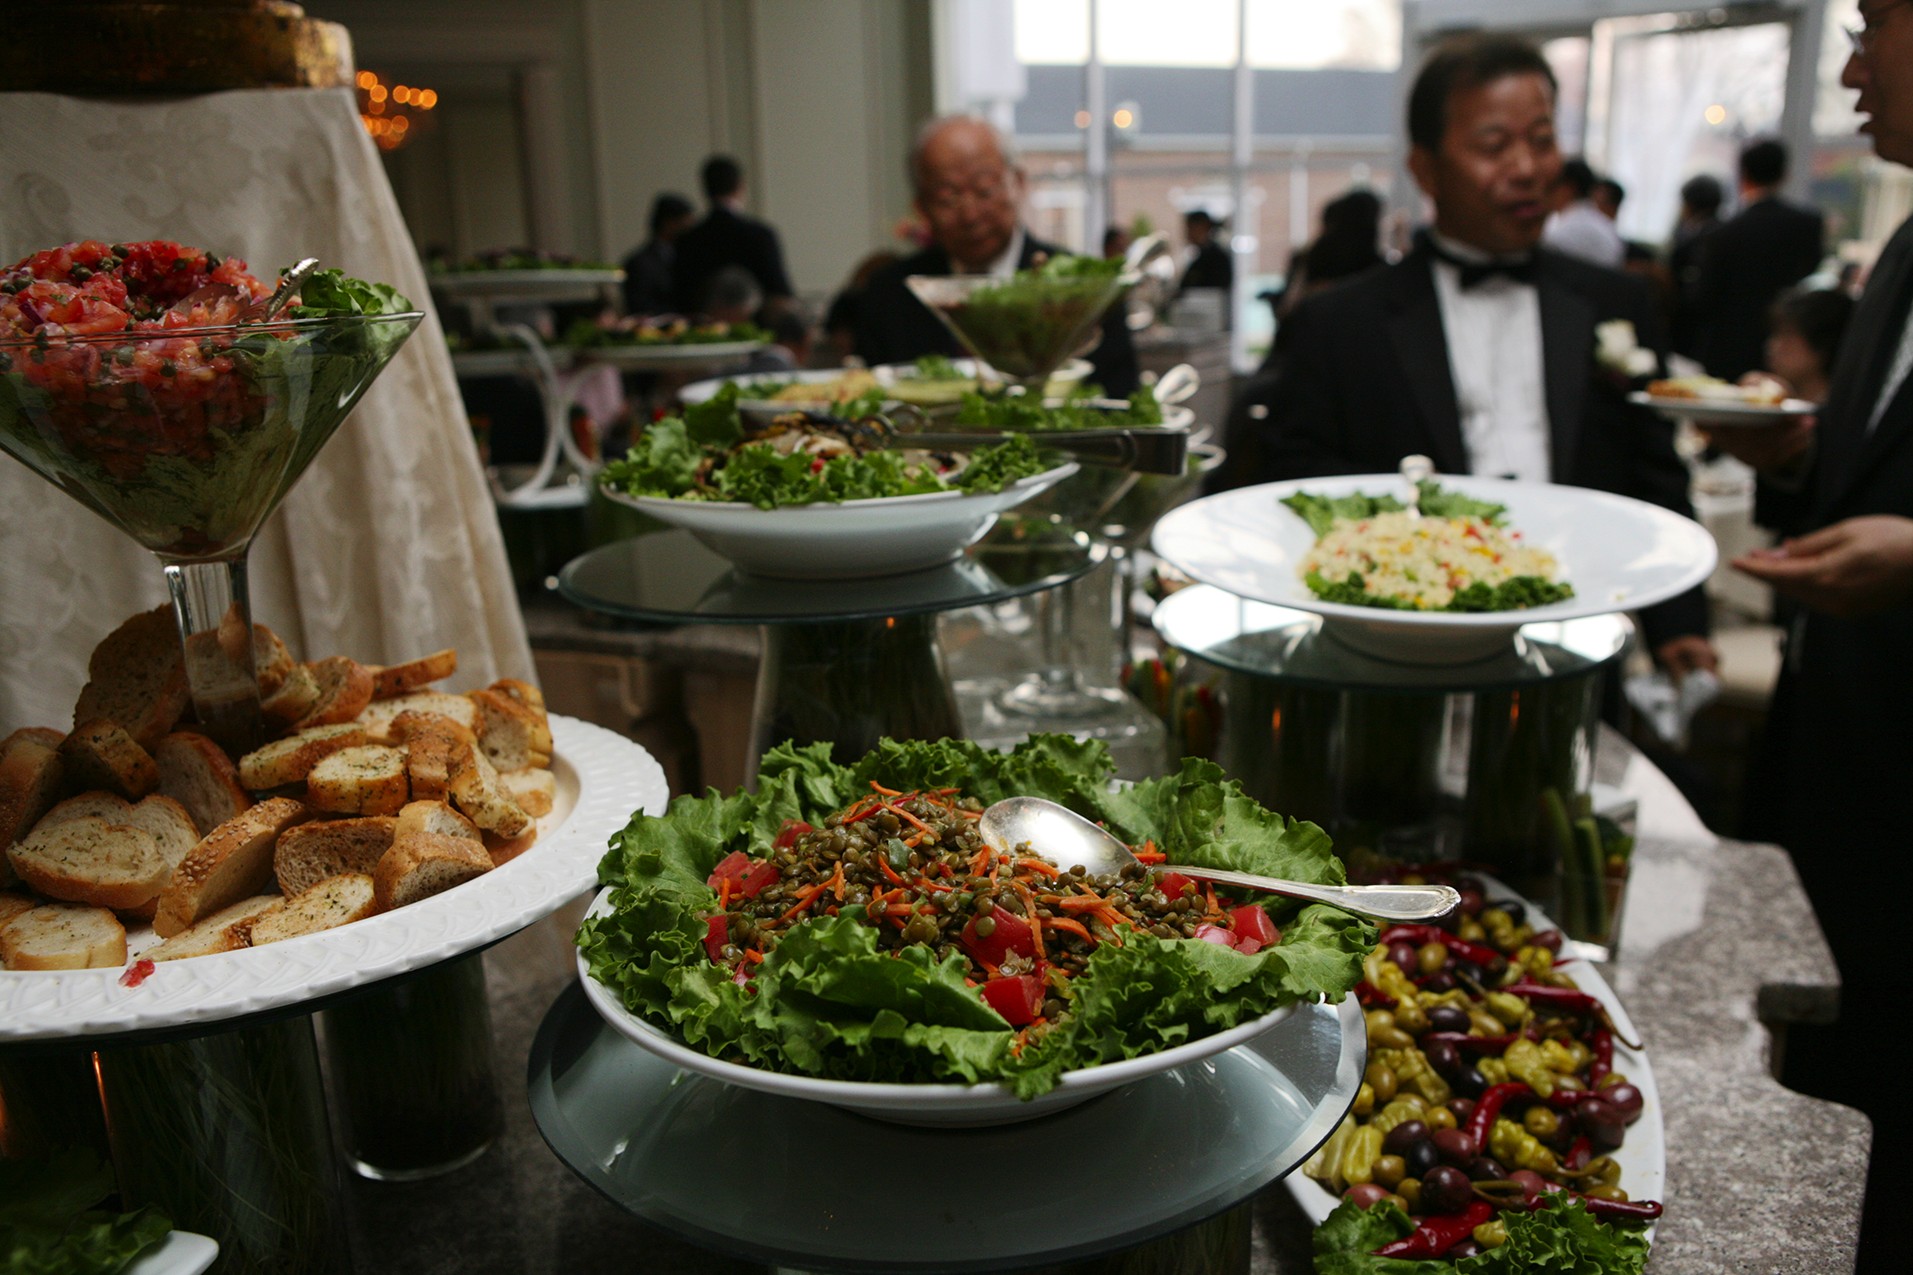
One of the things to shoot during the reception is the food and drink. You can’t do this before the reception because the food isn’t out. As soon as the food is out, grab a few shots, and then get out of the way so as not to disrupt the flow of the wedding. You don’t need a lot of photos, and many of these will not make it into the wedding album, but if they are not there, the clients will notice. One trick to keeping the focus on the food is to use a shallow depth of field, which blurs the background, keeping the food as the center of attention, as was done in Figure 10-5. Many times the bride and groom will be so caught up in the day that they won’t even remember what they ate. I know it sounds hard to believe, but I’ve been told that many times over. On the plus side, the vendors might really like a few professional shots of the food and food setup, which will help with marketing yourself.
10-5
ABOUT THIS PHOTO Photographing the food after it has been set out but before it is served up to the guests takes some quick timing and planning. Be ready to take those few food images quickly. This spread was taken at ISO 800, f/4, 1/1200 second.
the Guests
There is one sure-fire way to make sure that you have photos of all the guests at the wedding and that is to photograph the tables when the guests are all sitting down. The challenging part is to do this without disrupting the flow of the wedding and the conversation at the tables, and timing is really important because no one wants photos of a table full of half-eaten food.
There are two methods to capturing the guests, and it is up to you to decide which works best for you and what you think the couple will like more.
The first method is to have one side of the table get up and walk around to the other side, creating a staggered group. This has the advantage that if you are working by yourself, you can use a flash on the camera fitted with a light modifier to illuminate the whole group. This works well but does have a downside; half the people at the table have to get up and move, which can be disruptive. This works really well if the tables are round but can be used even if the tables are square. When the tables are square, position yourself at a corner and have the group stagger around across the table from you. This can also work if you just have the guests turn toward you, but once again, it works best if you orientate yourself toward the table from the corner.
The second method is to have the group stay where they are but turn to the camera. This method is less disruptive but calls for a little more space between tables for you to pull it off successfully. Because the subjects of the photo are around a table, there needs to be a rather deep depth of field, which means you need to be a good distance away from the table to get the desired depth of field. If you choose this method, be very careful backing up away from the table and make sure you don’t bump into another table, or waiter, or guest.
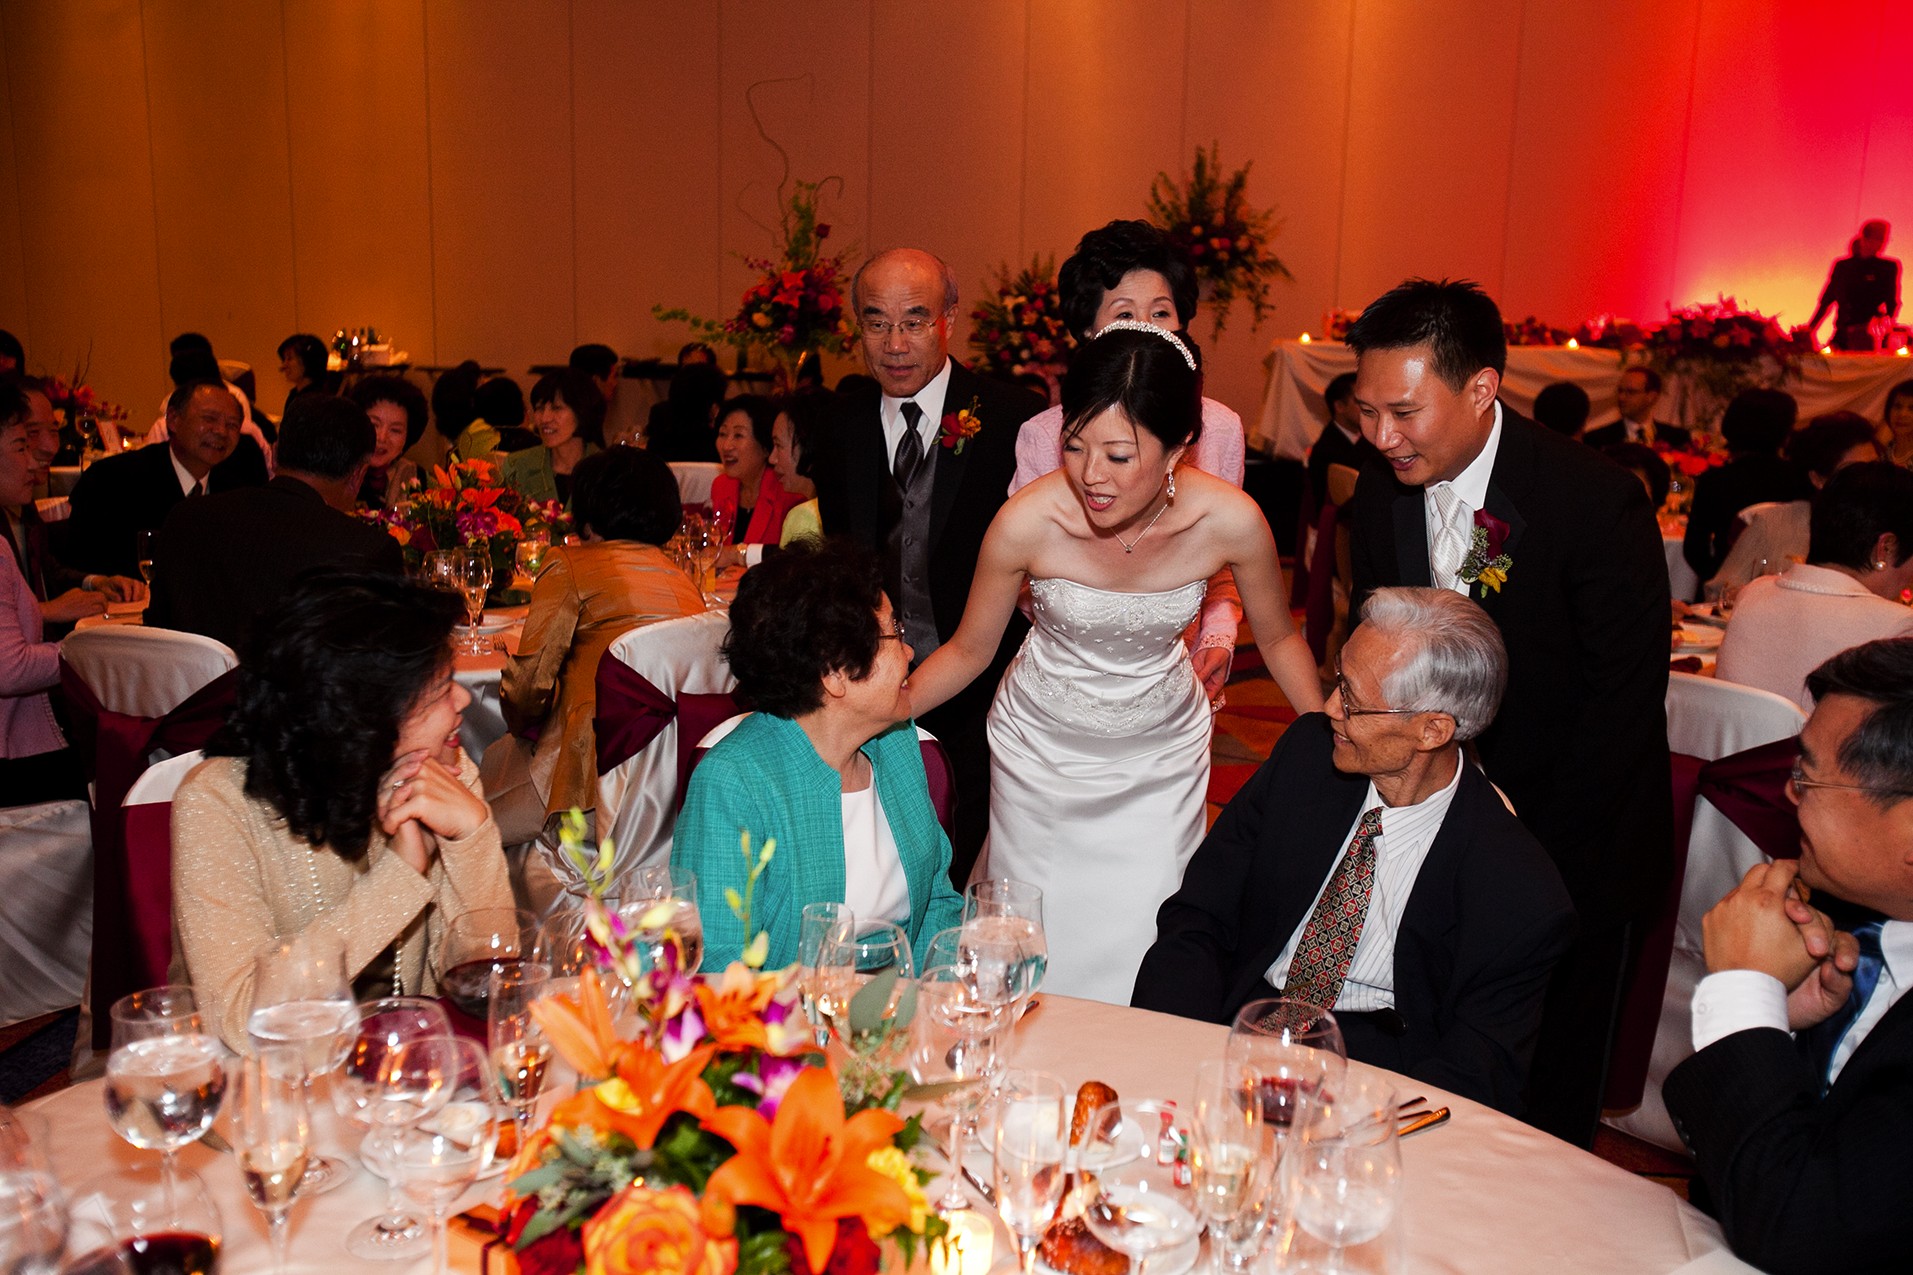
There is a twist to each of these methods, and that is to have the bride and groom visit each table for the photograph, as shown in Figure 10-6. This is helpful three ways: It makes the photo more meaningful because it now isn’t just the guests, but the bride and groom with their guests; it gives the guests something to focus on; and it ends any of the “come back later, we will do it then” you might hear from the table. If you are going to do this, you need to plan it with the bride and groom beforehand so that their dinner isn’t interrupted.
10-6
ABOUT THIS PHOTO The bride and groom captured as they make the rounds visiting each table . Taken at ISO 1600, f/3.5, 1/60 second and .33 of exposure compensation.
Capturing the dances
Some of the most memorable moments at a wedding are the first dance between the newlyweds and the parents dancing with their newly married children. As the wedding photographer, you need to be able to capture these special moments, and here are some ways to be able to do that:
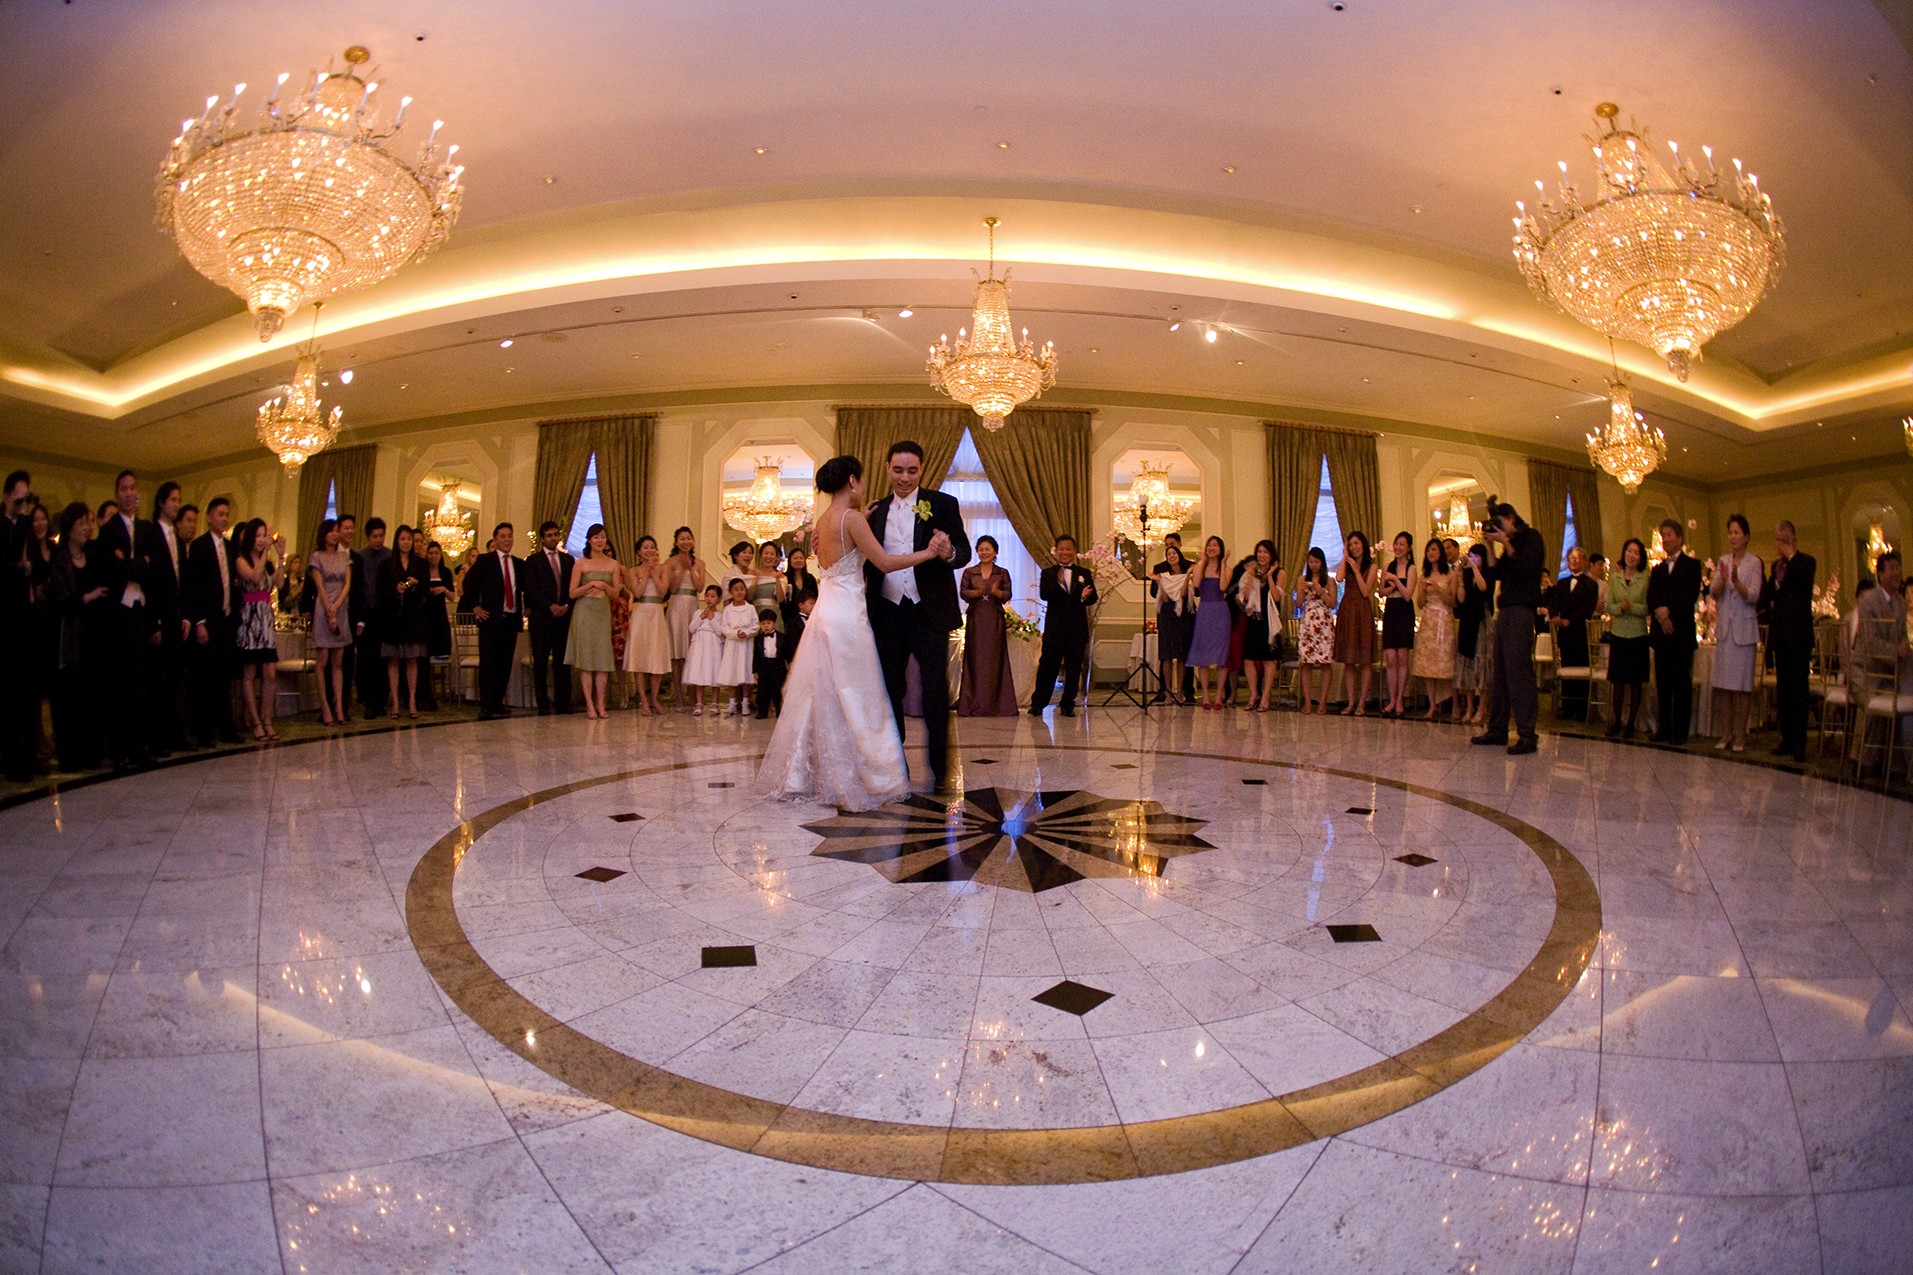
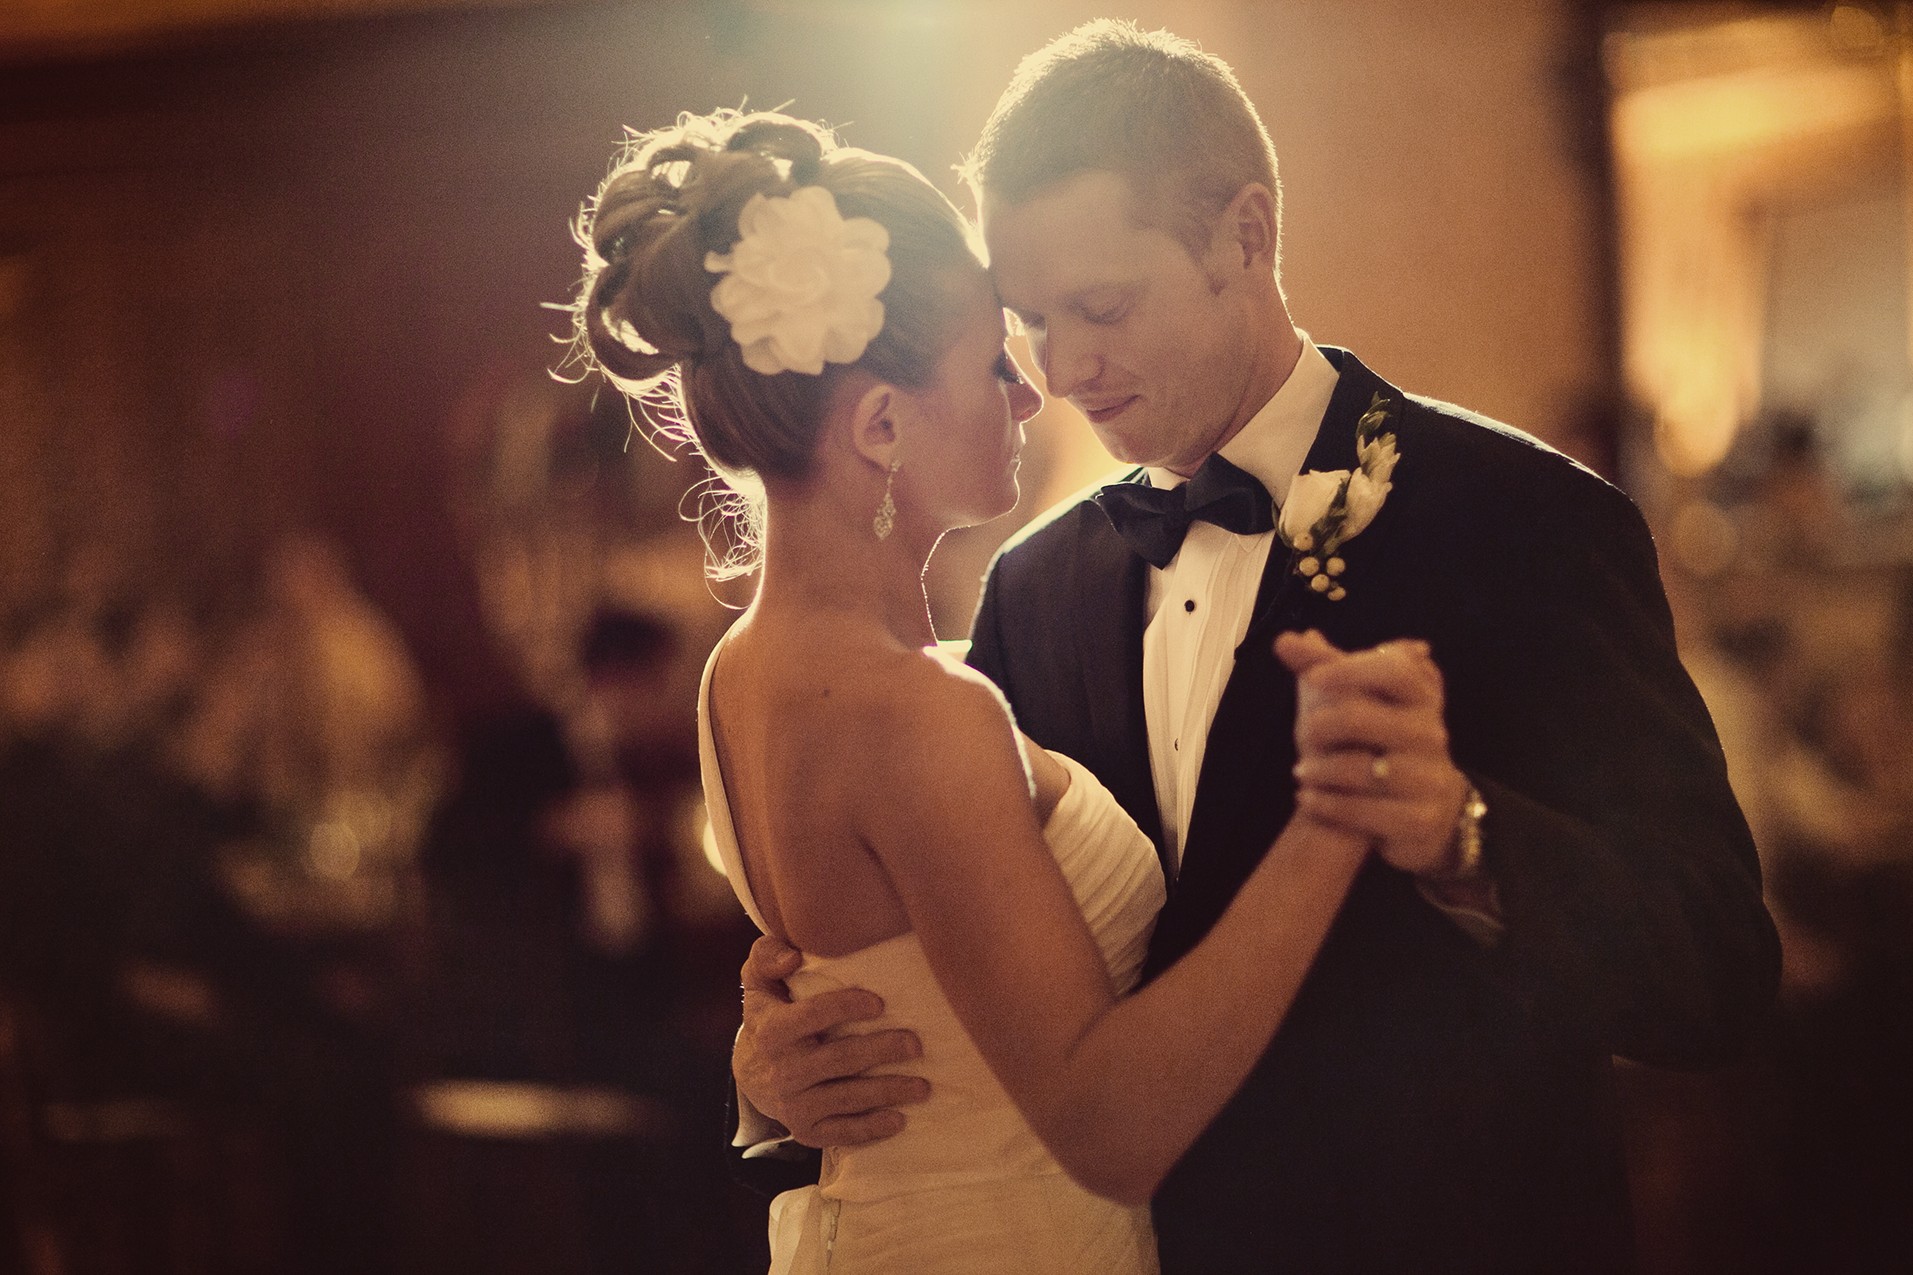
• Get into position. When it comes to the dances, pick a location that gives you a good background. This might be the guests as they surround the dance floor or the band. As with all photos, the background is really important, and it needs to not detract from the main subjects. As you can see in Figure 10-7, using the guests as a backdrop works really well.
10-7
ABOUT THIS PHOTO The newlywed couple enjoys their first dance together, surrounded by friends and family. The 15mm fisheye creates a very spacious feeling in the room. Taken at ISO 3200, f/2.8, 1/15 second.
• Use a wide angle. An overall shot of the couple alone on the dance floor can look great, but remember to keep the couple toward the center of the frame so that the edge distortion that can occur with wide-angle lenses doesn’t come into play. This is particularly true if you use a fisheye lens, as I did in Figure 10-7. It is also important to remember that objects in the mid- and background will seem really far away, so wait until the couple dances closer, into the foreground, for some of the shots.
• Zoom in for expressions. A close-up or two (see Figures 10-8 and 10-9) as the couples revolve around the dance floor is important; try to zoom in without actually getting physically closer, to focus on the eyes and to capture the looks between the couple.
10-8
10-9
ABOUT THESE PHOTO It is important to focus on the eyes, even if they are closed. The focus of Figure 10-8 is the expression on the face of the bride as she dances with her father, taken at ISO 400, f/2.8, 1/60 second. Figure 10-9 shows the love between the newlyweds taken at ISO 2000, f/1.2, 1/125 second.
• Look for dip at the end. Some grooms will have been to dance classes and will try to finish the dance with a flourish. Watch for the dip and be ready to photograph it.
• Have the lights in position. If the room is really dark, and even pushing the ISO on your camera all the way up doesn’t result in a good exposure, make sure your flashes are set up, out of sight, and aimed to add light to the dance floor before the dance starts. Because you can control them from your camera, you can add them as needed.
• Use a slow shutter speed. Using a slow shutter speed combined with Rear-curtain sync shows movement in your images; this can add a nice touch to any dance photos. First make sure you have the shots you need for the album, and then reduce the shutter speed to less than 1/15 second, like the 1/10 second shutter speed used in Figure 10-10, and change the flash mode to Rear-curtain sync. This causes the flash to fire at the end of the exposure, freezing the motion at the end instead of the beginning. It takes some practice to get it just right but when it works, the results are great.
10-10
ABOUT THIS PHOTO There is more movement in this image because the people and the camera were moving while the shutter was open, only to be frozen when the flash fired at the end of the exposure. Taken at ISO 800, f/4, 1/10 second.
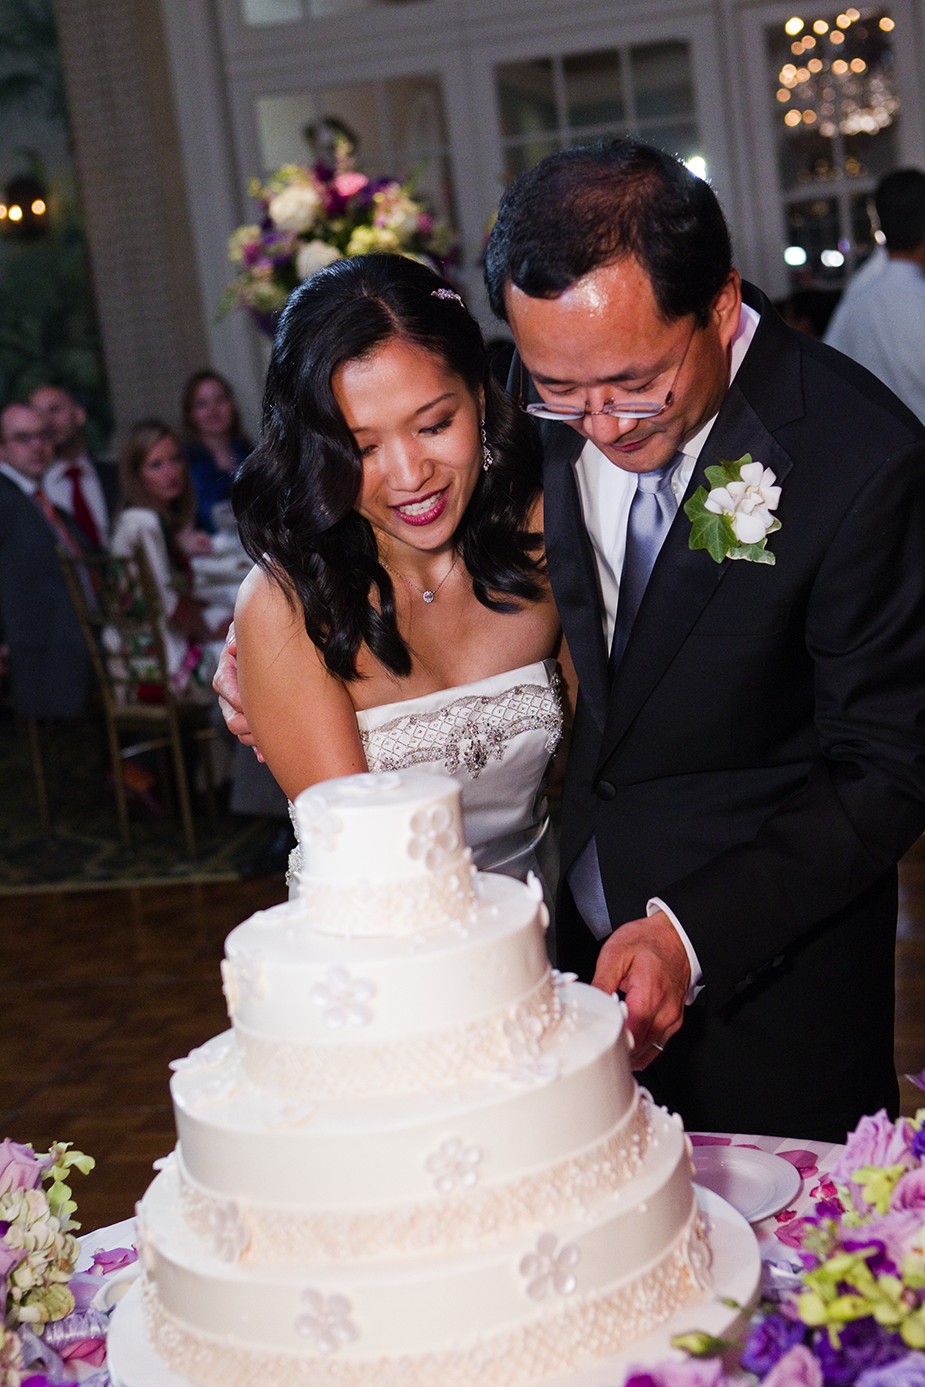
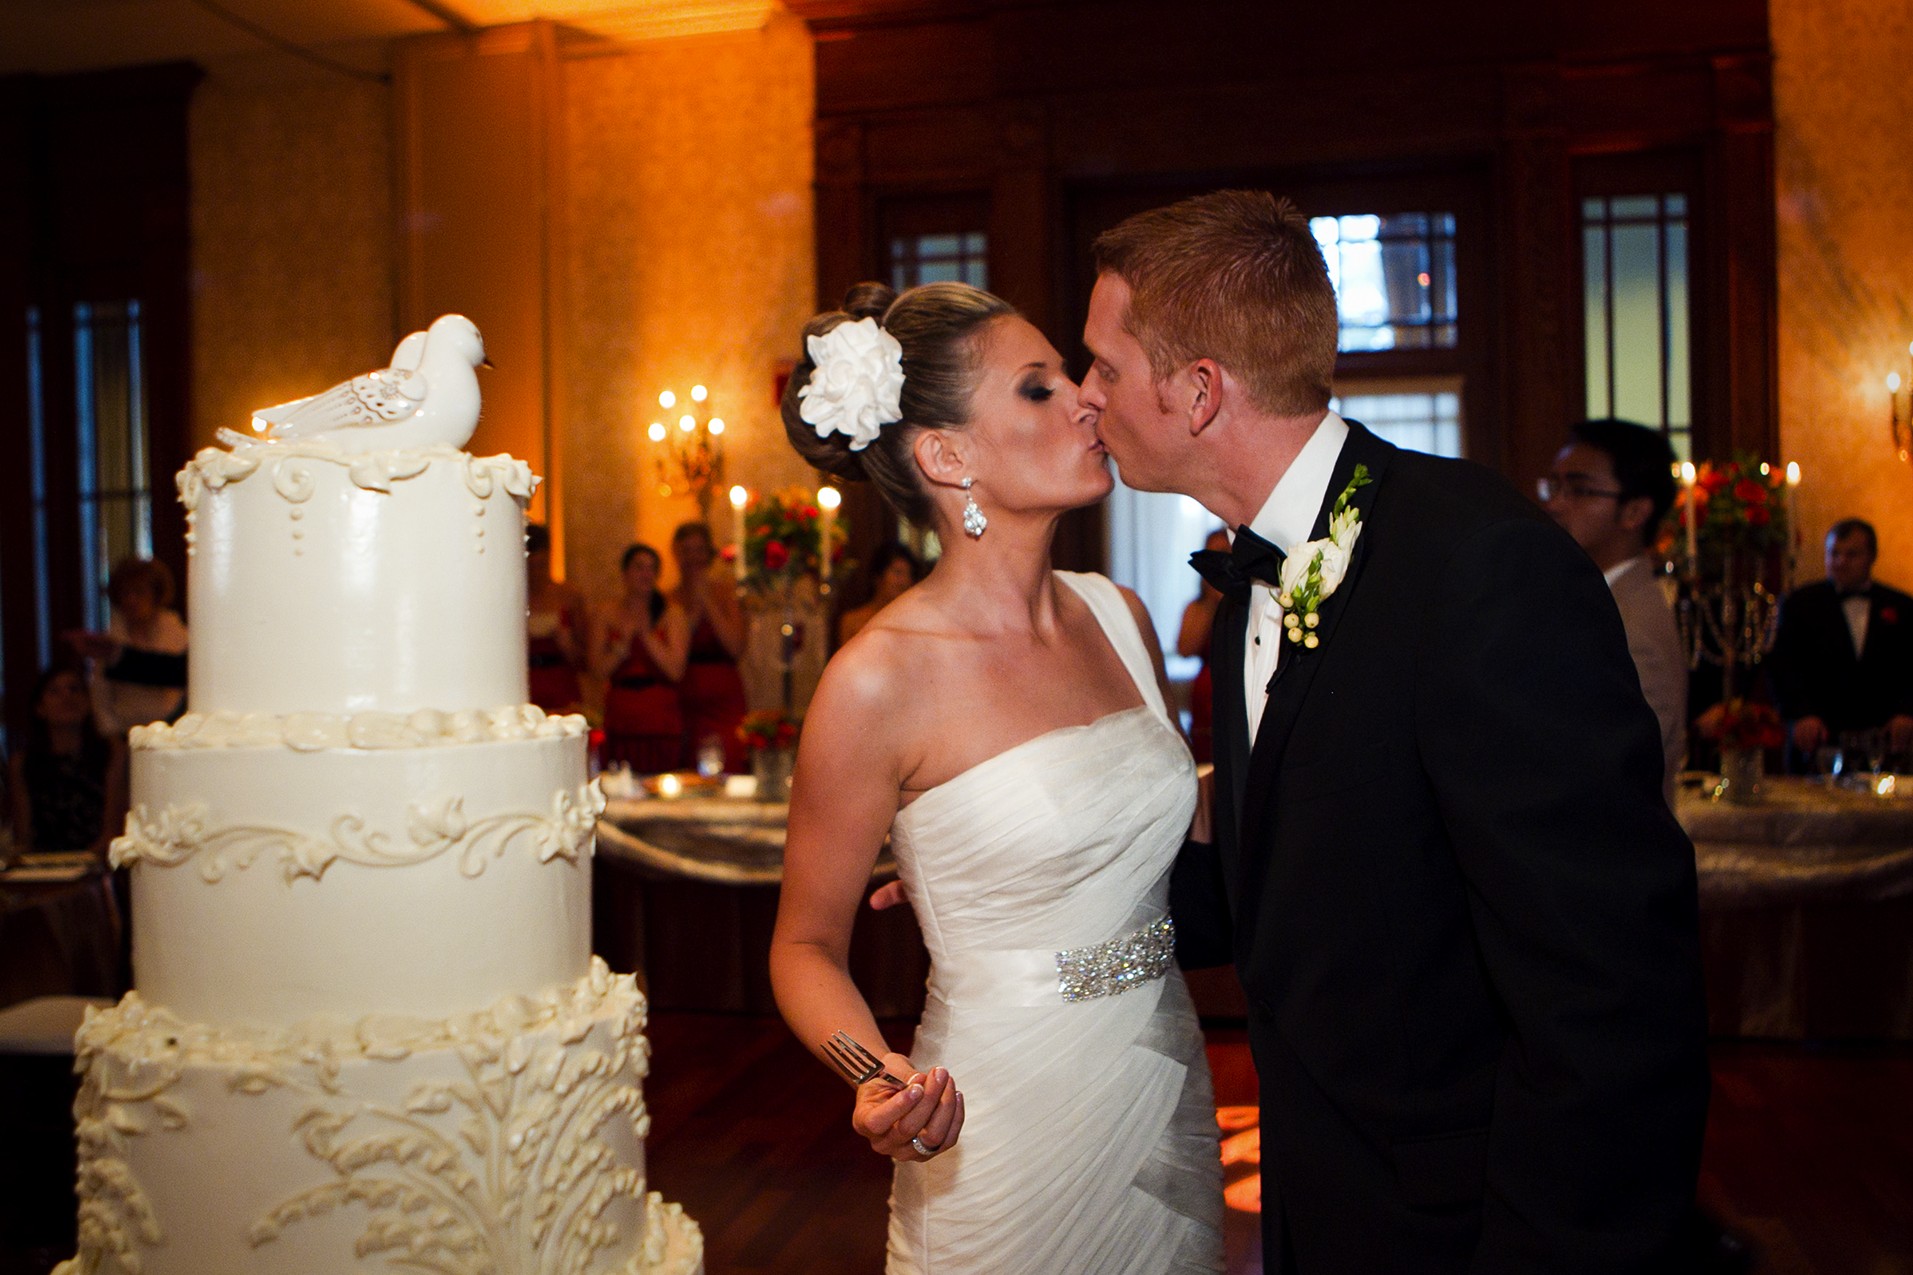
Cake cutting
The bride and groom cutting the cake is one of the reception must-have shots. Given the timing of the cake cutting is planned in advance, there is no reason you cannot capture it in all its glory. If the cake is on display during the whole reception, make sure to get some full views and some close-ups of the cake detail. A macro lens can really help with getting the details. If the cake is being lit by a spotlight or any other room lighting, you will have to adjust the white balance to make sure the cake looks its true color. You can do this one of three ways: You can make sure you are shooting in RAW and plan on adjusting the white balance using software in post-production; you can set the white balance to the type of light predominantly present in the room; or you can set a custom white balance. Using a flash helped to reproduce the cake with natural colors in Figure 10-11, and a little adjusting of the white balance later helped create a great shot of the cake.

10-11
ABOUT THIS PHOTO The cake usually stands alone on its own table. This makes it easier to shoot because there is no clutter surrounding it. Taken at ISO 1600, f/2.8, 1/50 second.
During the actual cake-cutting ceremony, I set up off-camera flash units high on light stands off to the right and left of the cake table to add overall light to the scene. Some things that will really help you capture the scene are as follows:
• Keep your distance. By backing up a little and using a zoom lens, you can cover the whole cake-cutting ceremony. It will always be easier to move in than it is to move backward.
White balance is covered in detail in Chapter 6.
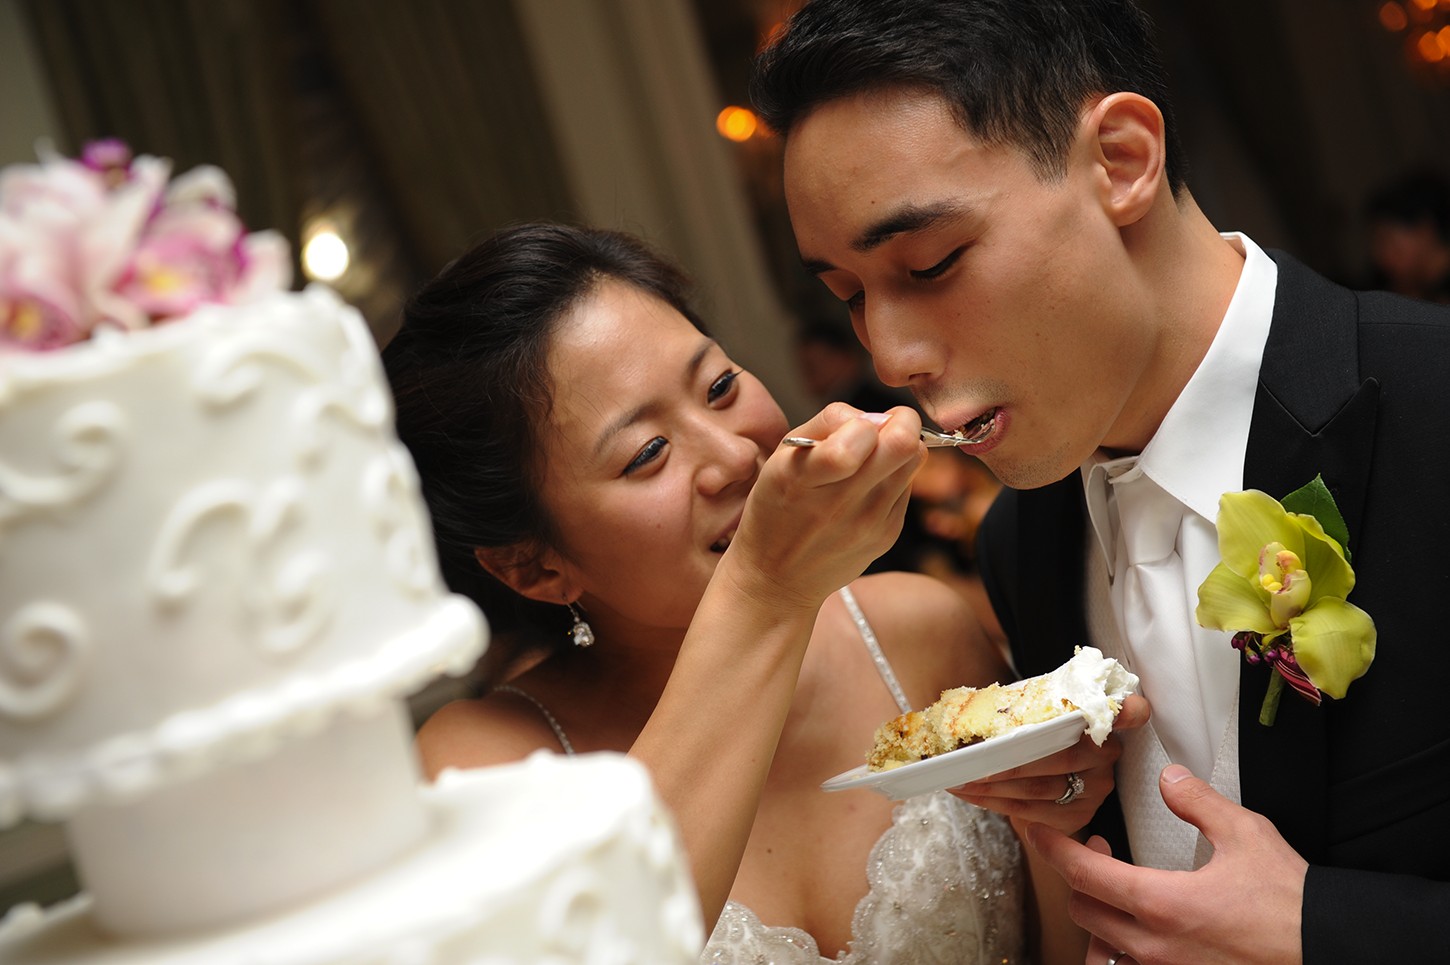
• Use a zoom lens. Because this type of lens allows you to change the composition by changing the focal length without having to actually move, you can use a wide-angle shot to set the scene, then a close-up shot of the bride’s and groom’s hands on the cake knife, followed by a medium shot of the bride and groom cutting the first slice, and so on. You get the idea. Examples of these types of shots can be seen in Figures 10-12, 10-13, and 10-14.
10-12
10-13
10-14
ABOUT THESE PHOTO Other than shots of the cake itself, you want to make sure you get shots of the couple cutting the cake, feeding each other the cake, and hopefully exchanging a kiss after. Figure 10-12 of the bride and groom cutting the cake was taken at ISO 2000, f/3.5 and 1/200 second. Figure 10-13 shows the bride feeding her groom his first bite of cake. Taken at ISO 500, f/4.5 and 1/13 second. The kiss after the first bite of cake in Figure 10-14 was taken at ISO 1600, f/2.8 and 1/60 second.
• Get a posed shot. Have the couple stop and pose during the cake cutting. It might look a little fake while they are doing it but will be a shot they want later on. Have them pause on the key moments such as holding the knife, the first cut, and feeding each other the cake.
• Be polite. Sometimes guests will step between you and the cake table; many times they are just trying to get a quick photo of the moment. Just politely ask them to move aside but try to keep a smile on your face and be friendly.
• Feel free to be the director. Let the couple know what it is they need to do: where to cut the cake, where to look, where to place the knife. They will appreciate it, and you will get better photographs.
• Watch for reactions. This is especially true if you are the second photographer at the wedding. Your job is not only to back up the main photographer with some overall shots but also to look for guests’ reactions, especially if the bride and groom feeding each other the cake becomes messy.
Toasts
If there is one part of the reception that is guaranteed to get an emotional reaction from the bride and groom, and the guests, it is the toasts. Toasts can be a little scary for both the person offering the toast and the couple being toasted. Every eye and ear in the house is on the person offering the toast, and chances are he or she will be a bit nervous.
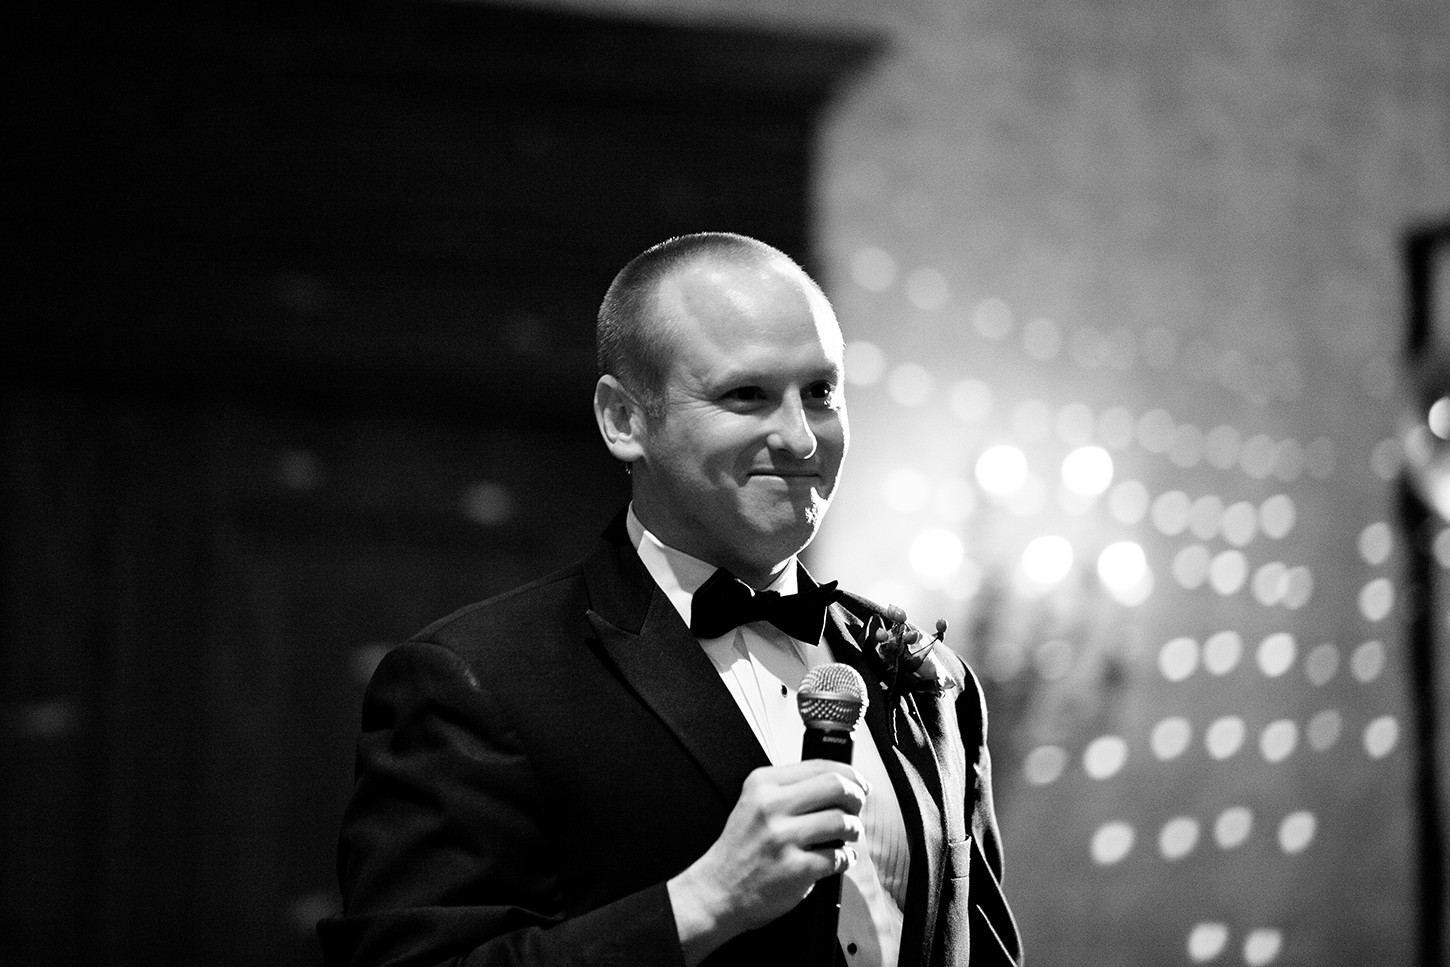
Look for opportunities before the toasts have been said to catch the person who will be offering the toast rehearsing or reading over his notes, as shown in Figure 10-15. It adds a great touch to the wedding album and really helps to tell the whole story of the day. The only way this works is to know who is giving the toasts and when they will happen. This is when a good prime lens that has a maximum aperture of f/1.4 or f/1.8 really pays off. Combine that lens with a high ISO of 3200, or even 6400, and you can capture the moment without a flash, so as not to interrupt the speech preparation.
10-15
ABOUT THIS PHOTO A great moment to capture is a person going over his speech or toast before giving it. Just know who will be speaking, and when, and be ready for this type of candid shot. Taken at ISO 3200, f/1.8, 1/125 second.
The actual speeches are pretty easy to photograph, because it is obvious who is the center of the attention and where the speeches will take place. The most important part of shooting the speech or toast is timing: Wait until the speaker looks up and if he is using a microphone, wait until he has lowered it a little so that you can see his face clearly. Focus on the eyes and use a shallow depth of field to really blur the background, which in turn makes the subject pop off the background. In Figure 10-16, I used an aperture of f/2.8 and patiently waited for the speaker to look up.
10-16
ABOUT THIS PHOTO The speaker lowered the microphone and looked up, the perfect moment for a photograph. Taken at ISO 25000, f/2.8, 1/160 second.
During the toasts, there is another subject to photograph other than the speaker: the bride and groom. If you are shooting with a second shooter at the wedding, make sure that one of you is photographing the speaker and the other is looking for the reactions to the speech. Keep in mind that you do not need a lot of photos of the speaker — a few good ones will go a long way — but the reactions from the bride and groom can be priceless. Using a shallow depth of field allowed me to capture the bride’s reaction to the speech in Figure 10-17, and made sure that she was the subject of the photo by keeping her in focus. So if you have to cover the wedding solo, make sure that you can see both the speaker and the bride and groom from your location to get speaker and reaction shots by yourself.
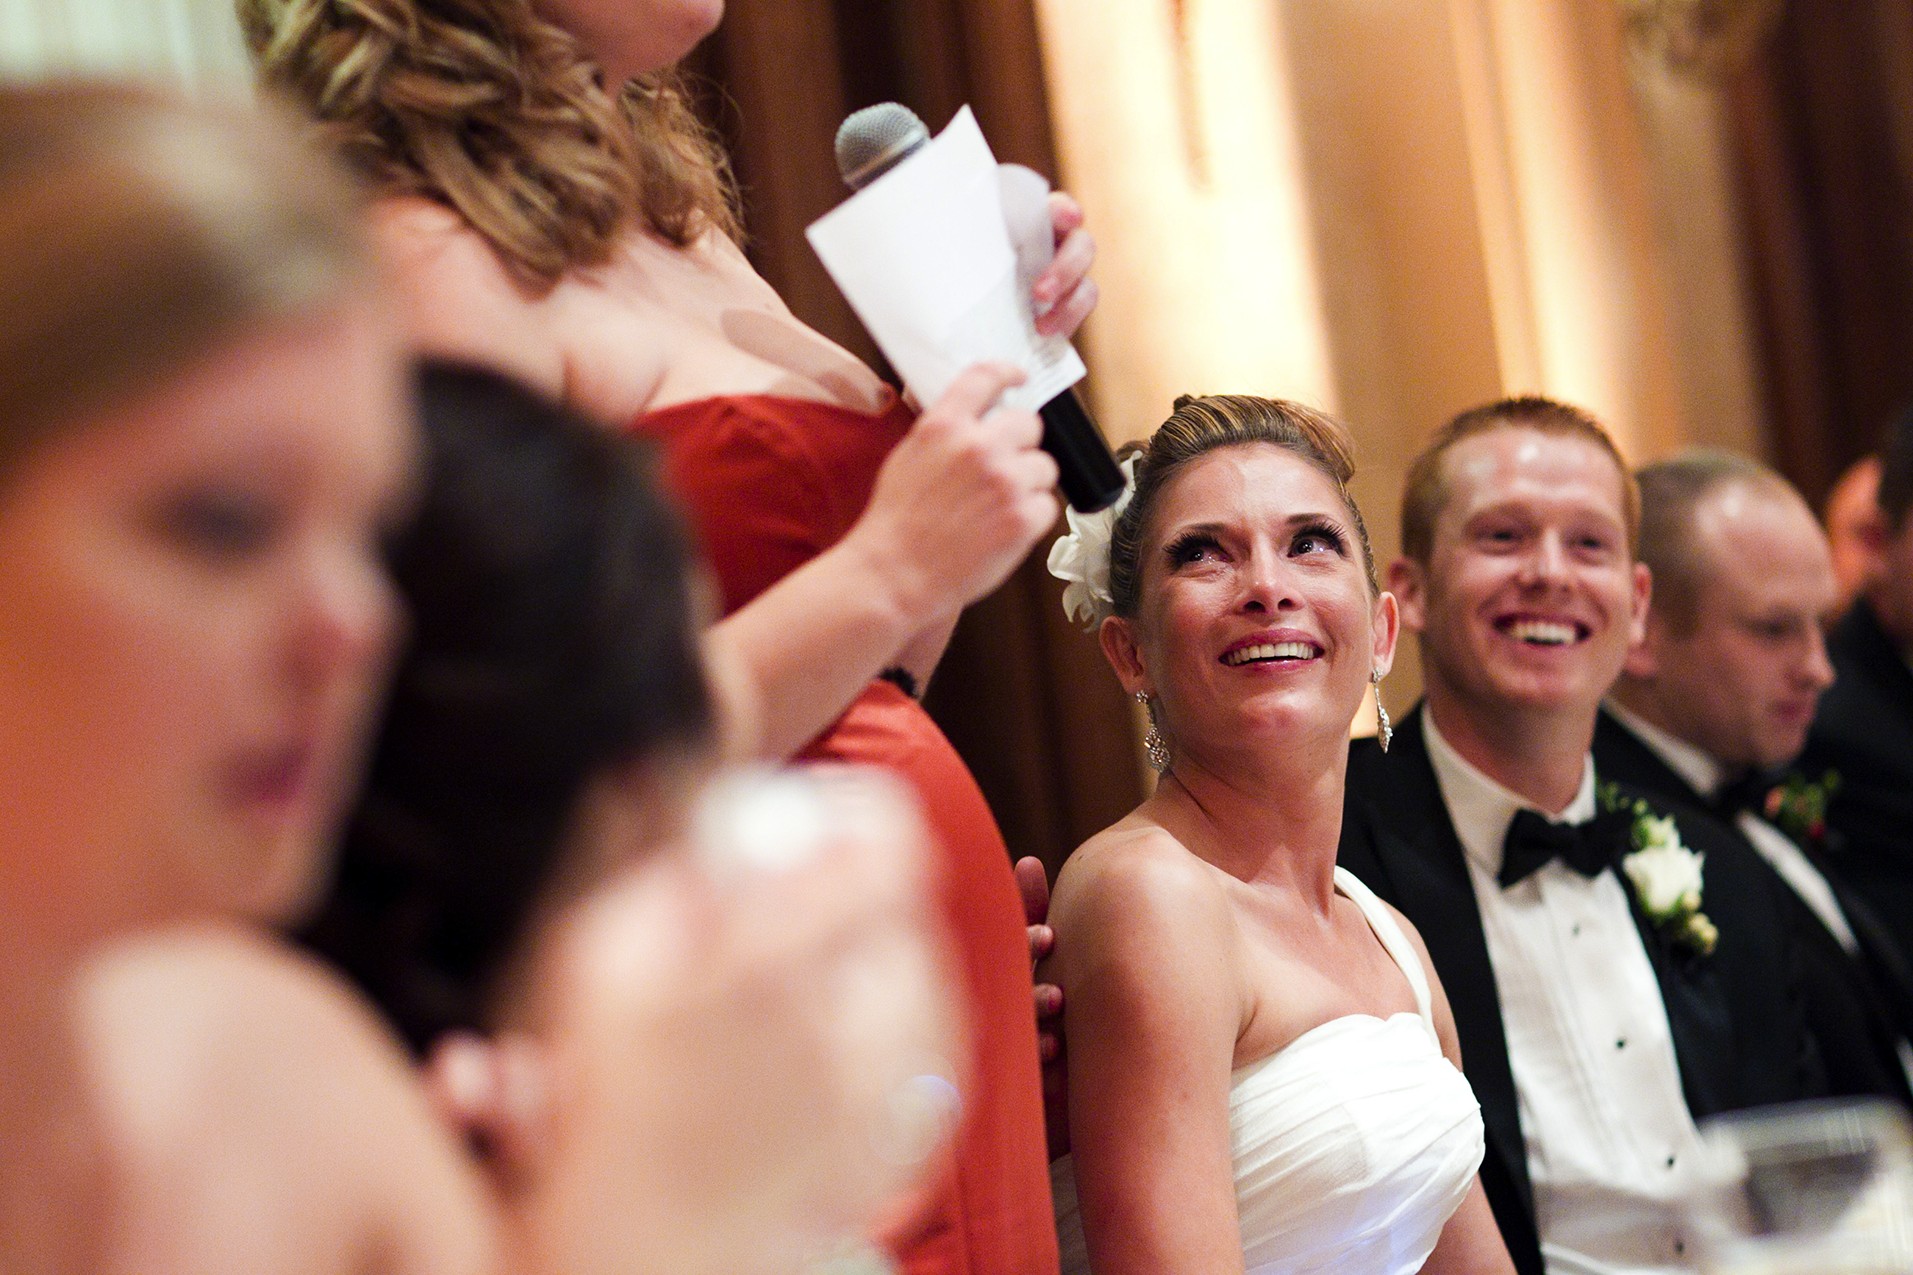
10-17
ABOUT THIS PHOTO The bride reacts to what is being said during the toast from her maid of honor. Taken at ISO 4000, f/2.0, 1/100 second.
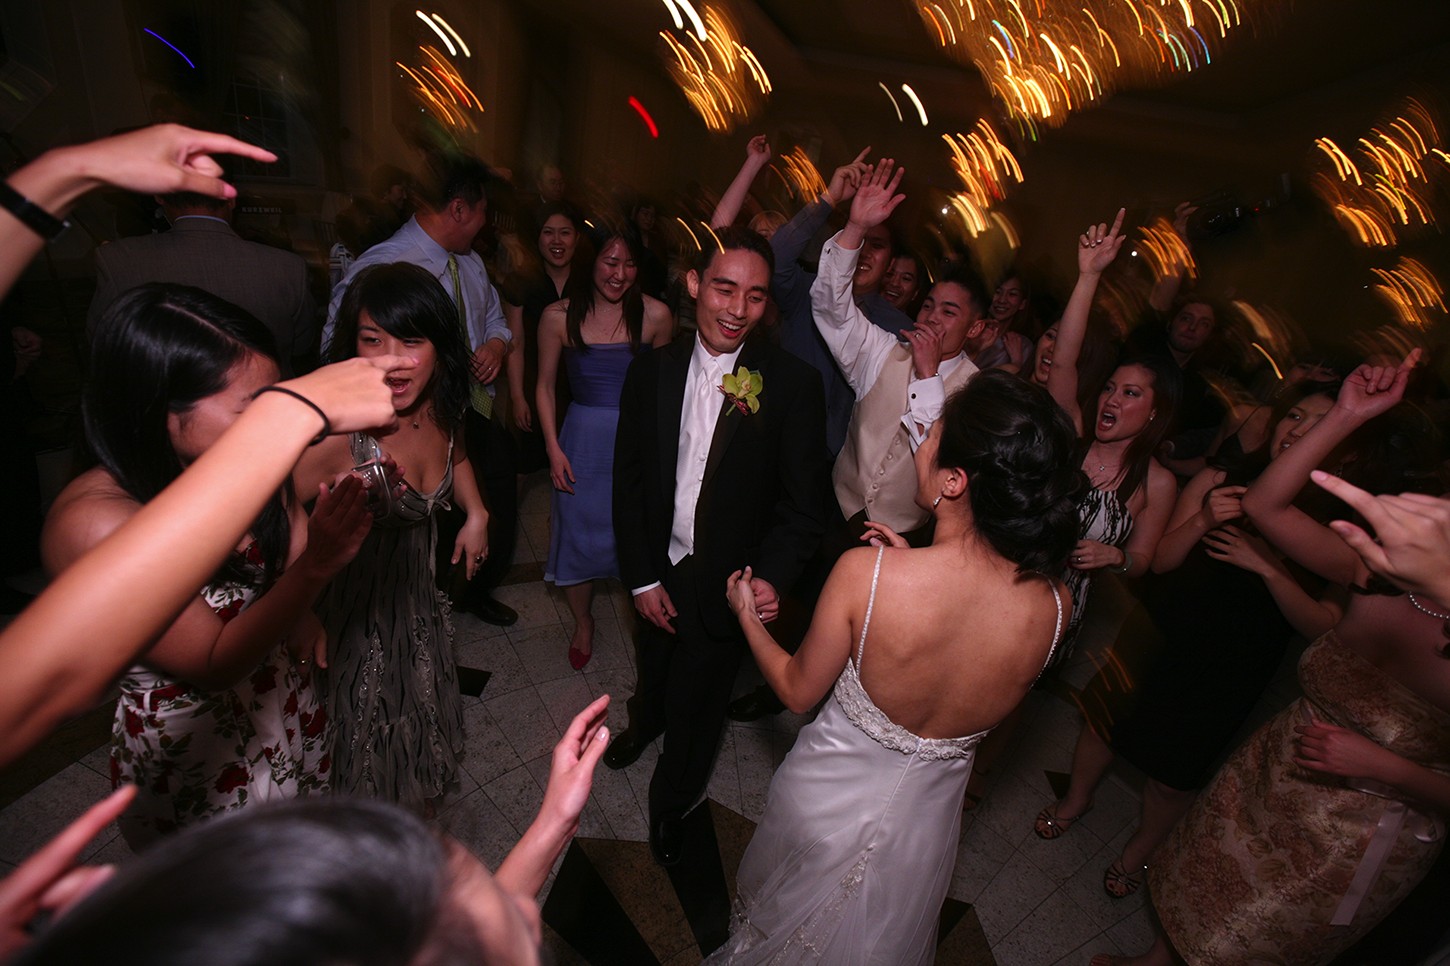
Bouquet Toss and Garter Toss
If you plan properly, you can get some really great shots of the bouquet toss and garter toss, including funny and unexpected moments. The main point is to be ready for anything. These two events can involve a large number of the guests, and because they usually take place rather late in the reception, they can be a little chaotic. You photograph the bouquet toss and the garter toss in the same way.
Because the bouquet toss is usually first, I will cover it first. The concept is usually simple and, because the bride throws the bouquet backward over her head, all the participants face the same way, making it easy for you to get all the action from one location. Usually the band or DJ will announce that the bouquet toss is about to happen and request that all the single girls join the bride on the dance floor. The key is to have the participants spread out so that more of them can appear in the photographs, as opposed to them being clumped together in the middle. It pays to do a little directing here and ask the participants to spread out a little, or make sure you discuss it with the couple if they have a master of ceremonies who will do the announcements. Communication is essential here because there is usually no second chance to get it right, so make sure that they know to wait until everyone is in position and don’t rush the whole throw.
Place yourself off to the side, just in front of the bride, so that you can see the bride, the arc of the bouquet toss, and the participants who will hopefully try to catch the bouquet. If needed, place a flash on a light stand on the other side of the bride, angled to get the whole scene. The rest of the shot is all about the timing of the bride’s toss. Have the band or DJ count down to the throw and start taking shots before she actually tosses the bouquet, as shown in Figure 10-18. Adjust the focus as the bouquet travels through the air and hope that you get the lucky bouquet catcher in action.
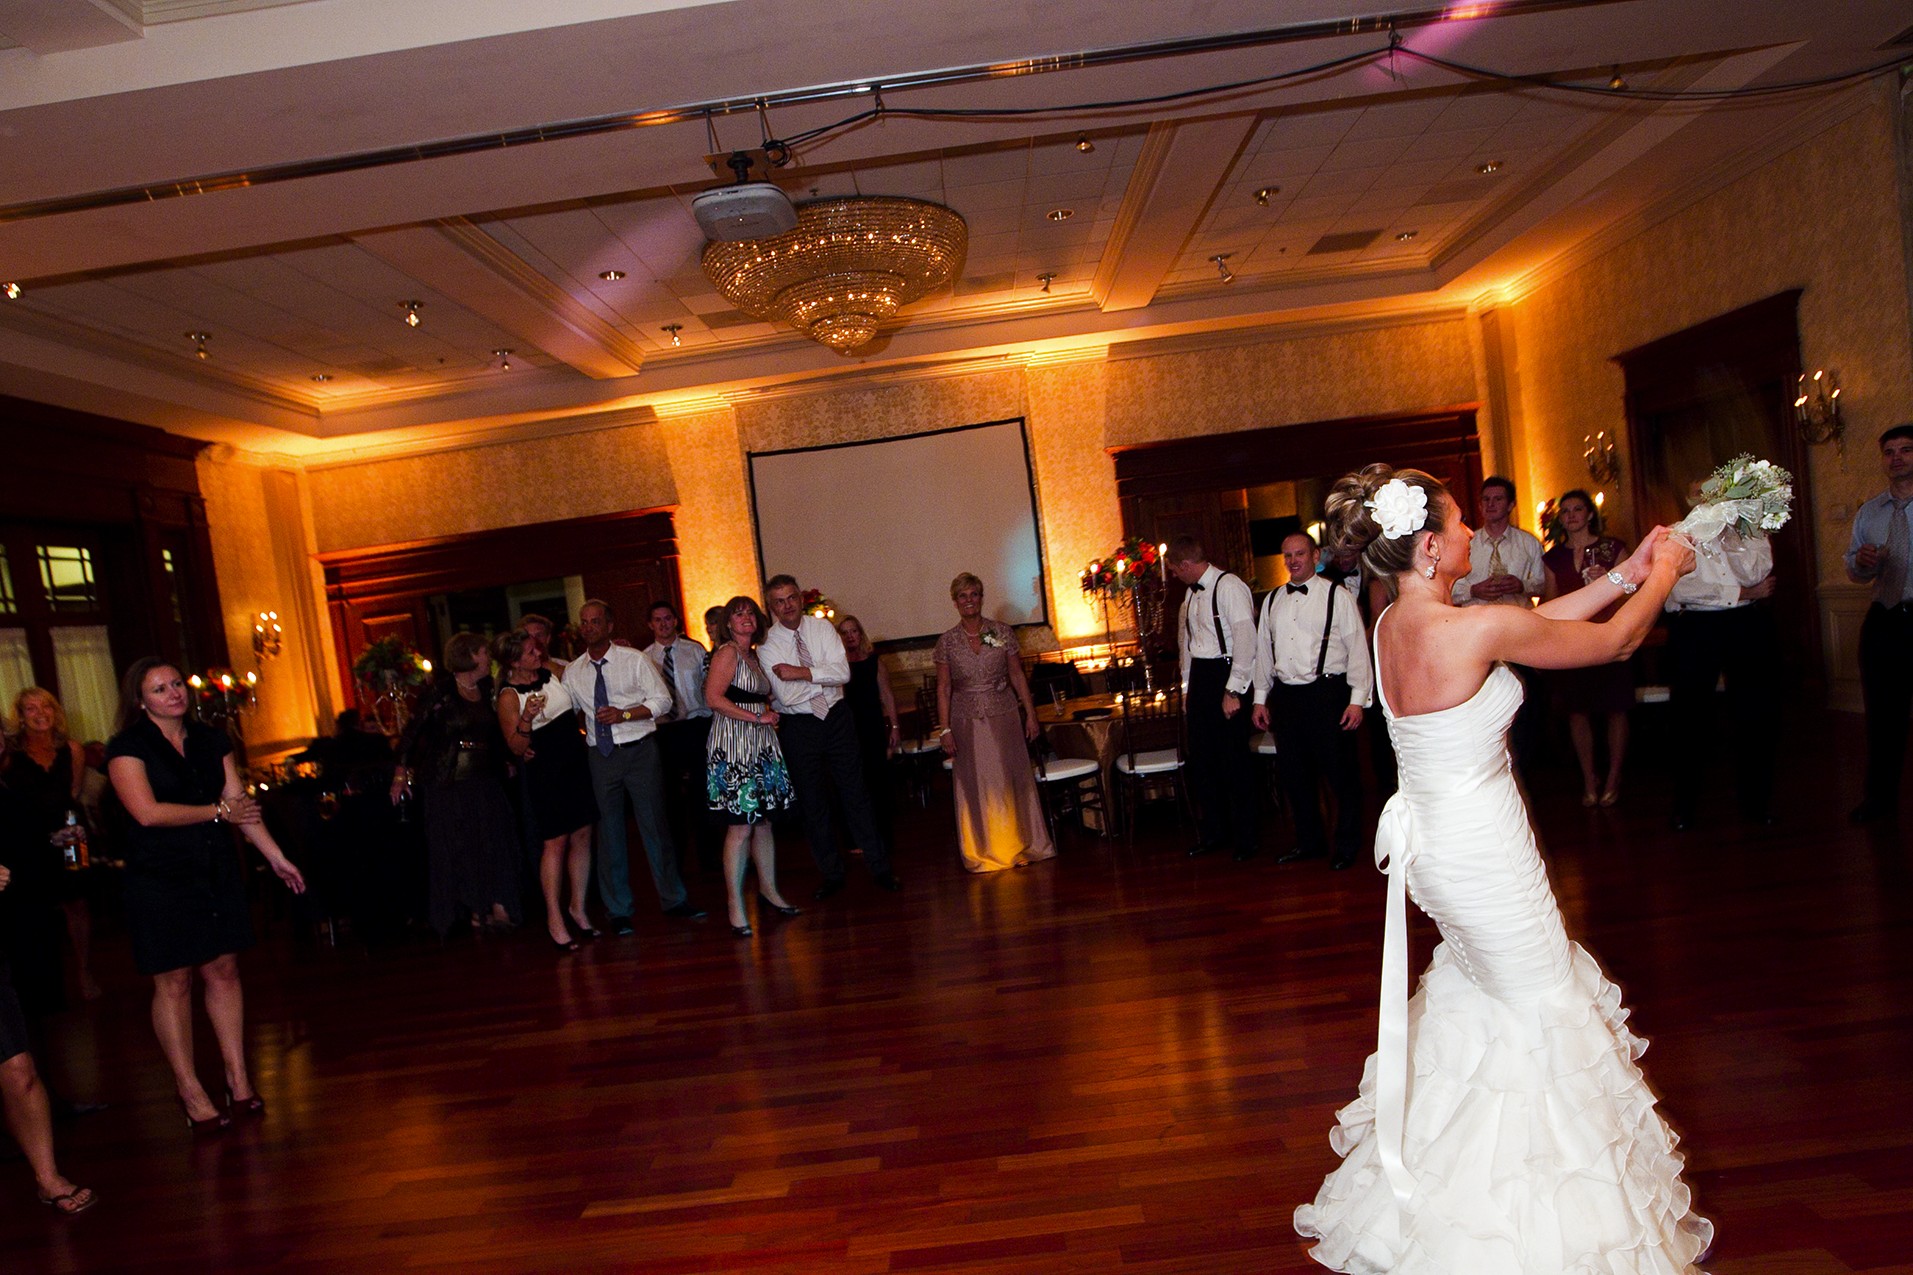
10-18
ABOUT THIS PHOTO The bride gets ready to launch the bouquet toward the waiting eligible female guests. Taken at ISO 2000, f/4, 1/40 second.
Don’t stop taking photographs at this point; look for the relief in the faces of the women who are happy they didn’t catch the bouquet, while the woman who did catch it is congratulated by the bride. After the bouquet toss is all over, make sure you get a portrait shot of the bride and the guest who caught the bouquet right there on the dance floor because the garter toss is next and the setup is the same, so you don’t want to spend a lot of time changing your gear.
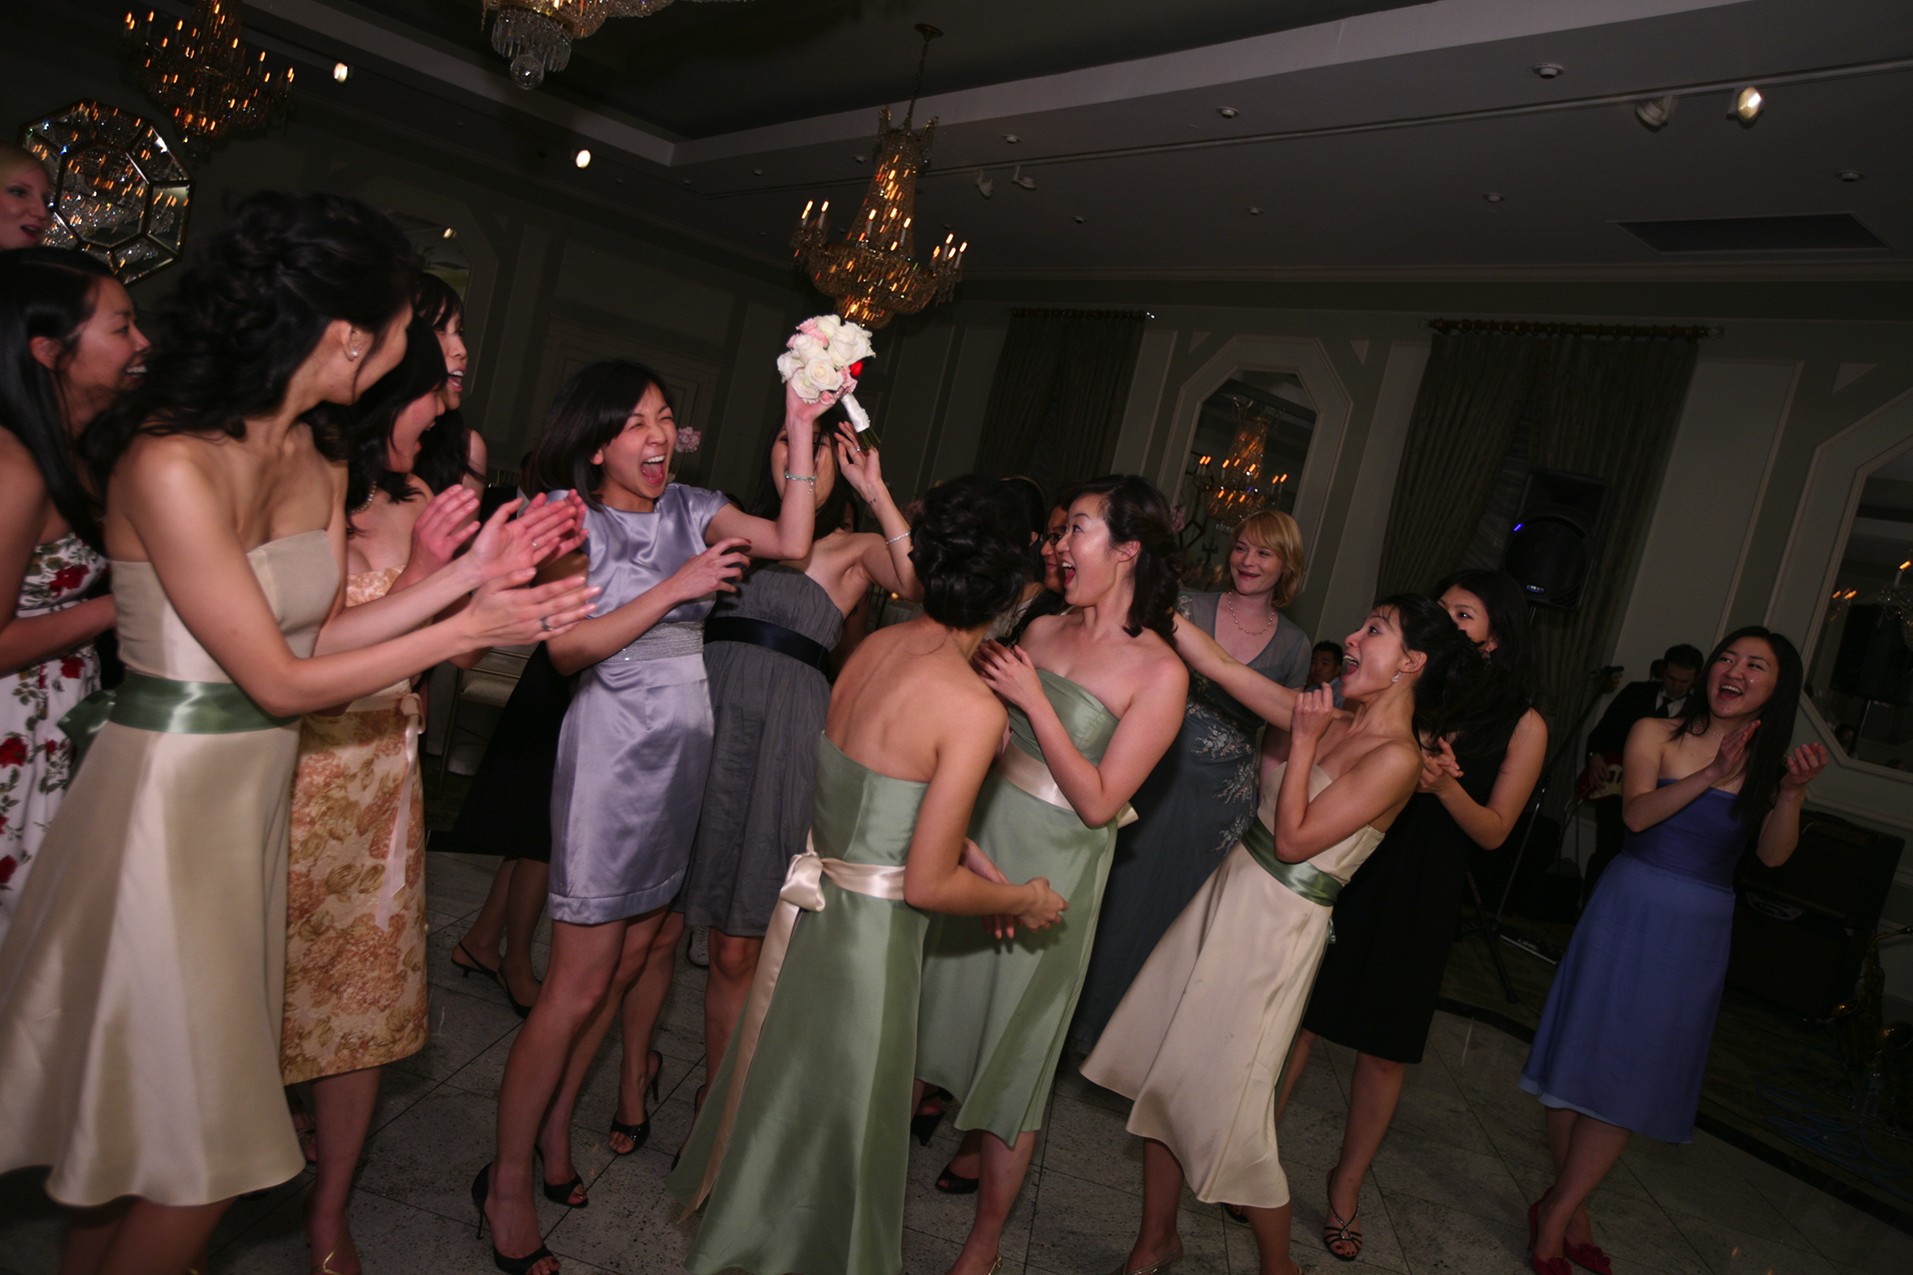
10-19
ABOUT THIS PHOTO The bouquet has been caught and the reaction of the woman who caught it captured. Taken at ISO 400, f/2.8, 1/60 second.
The garter toss follows the same general design as the bouquet toss, and you use the same basic lighting and camera positions. The big difference is the start of the toss, where the groom removes the garter from the leg of his bride. Coordinate with the couple and the wedding planner that the band, master of ceremonies, or DJ issues a request for all the eligible young men to join the groom on the dance floor after the bouquet toss. Make sure that you have a chair ready for the bride to sit in. If you are the one to place the chair, you can control where the bride and groom are located and can get the best angle for photos of the scene. Have the young men gather around the bride and groom, creating a meaningful backdrop to the photos of the groom removing the garter. Have the band or DJ start up the music and capture the groom removing the garter from his bride. Be ready because if you think you have seen everything, the garter removal will most likely prove you wrong. Who knows for sure how the groom got the expression from his bride in Figure 10-20.

10-20
ABOUT THIS PHOTO Focusing on the bride while the groom removes the garter can result in some great spontaneous expressions. Taken at ISO 200, f/2.0, 1/15 second.
With the garter in hand, have the groom wait a moment while the chair is removed and the eligible men get into position to catch. The rest is the same as the bouquet toss only with the men instead of the women. When both tosses are over, try to get a shot of the guests who caught the bouquet and garter together; it will make a nice memory.
Having a second shooter for the bouquet and garter toss means that one of you can focus on the toss, while the other focuses on the catch. Just make sure you plan who is going to do what before the actual toss.
When you work with a second photographer during the bouquet toss and garter toss, make sure that the photographer is out of the frame. Have her shoot the same scene with a different focal length and available light. For example, if you are shooting wide at 20mm, then have the second shooter use a longer lens to capture facial expressions or a close-up of the bride’s or groom’s hands holding the bouquet or garter.
Candids
There are numerous occasions during the reception for candid photos, from the slow dances to the faster dances, from reactions to the speeches and toasts to interactions during the cocktail hour; and the main goal is to capture a moment that will help tell the story of the wedding.
At times, the candid moments simply present themselves to you. For example, while I was photographing the dancing couple in Figure 10-21, one of the guests intentionally bumped into them. Because the couple were already the center of attention, it was easy to capture this moment.
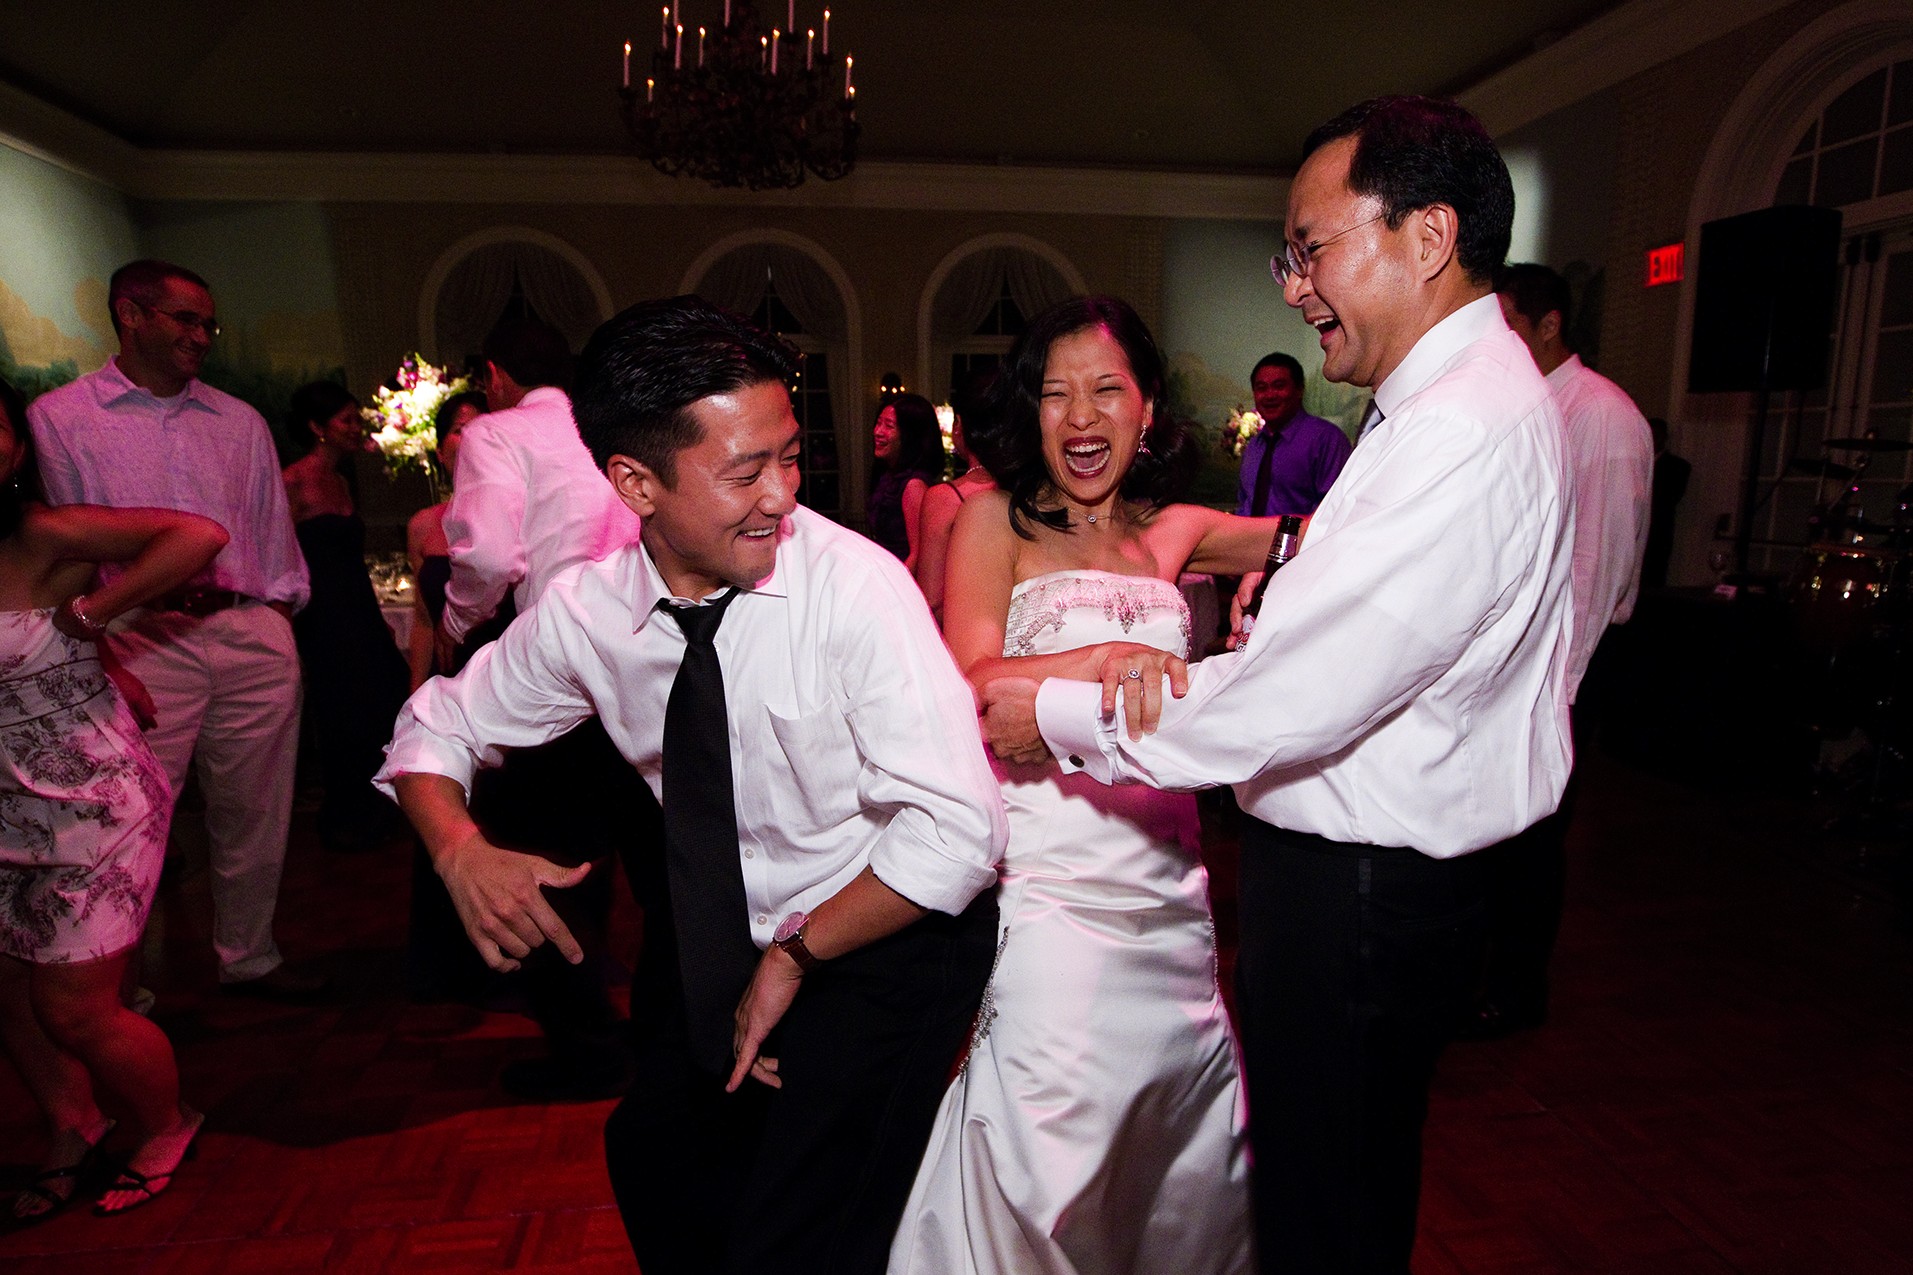
10-21
ABOUT THIS PHOTO The dancing was interrupted, and because I was there and paying attention, I was able to grab a shot that otherwise would never have been captured. Taken at ISO 2000, f/4, 1/40 second.
Some of the best candid photographs happen while people are sitting around talking to each other or listening to the speeches or toasts. The key to this is to use a longer focal length, allowing you to get in closer but not intrude. Look for the reactions to the toasts from the guests, and the easiest way to get in close is to use a longer lens, as I did in Figures 10-22 and 10-23. This enables you to get in close and not get in the way, and because you have been around all day, the guests will stop noticing you when you raise the camera to your eye and start shooting away.
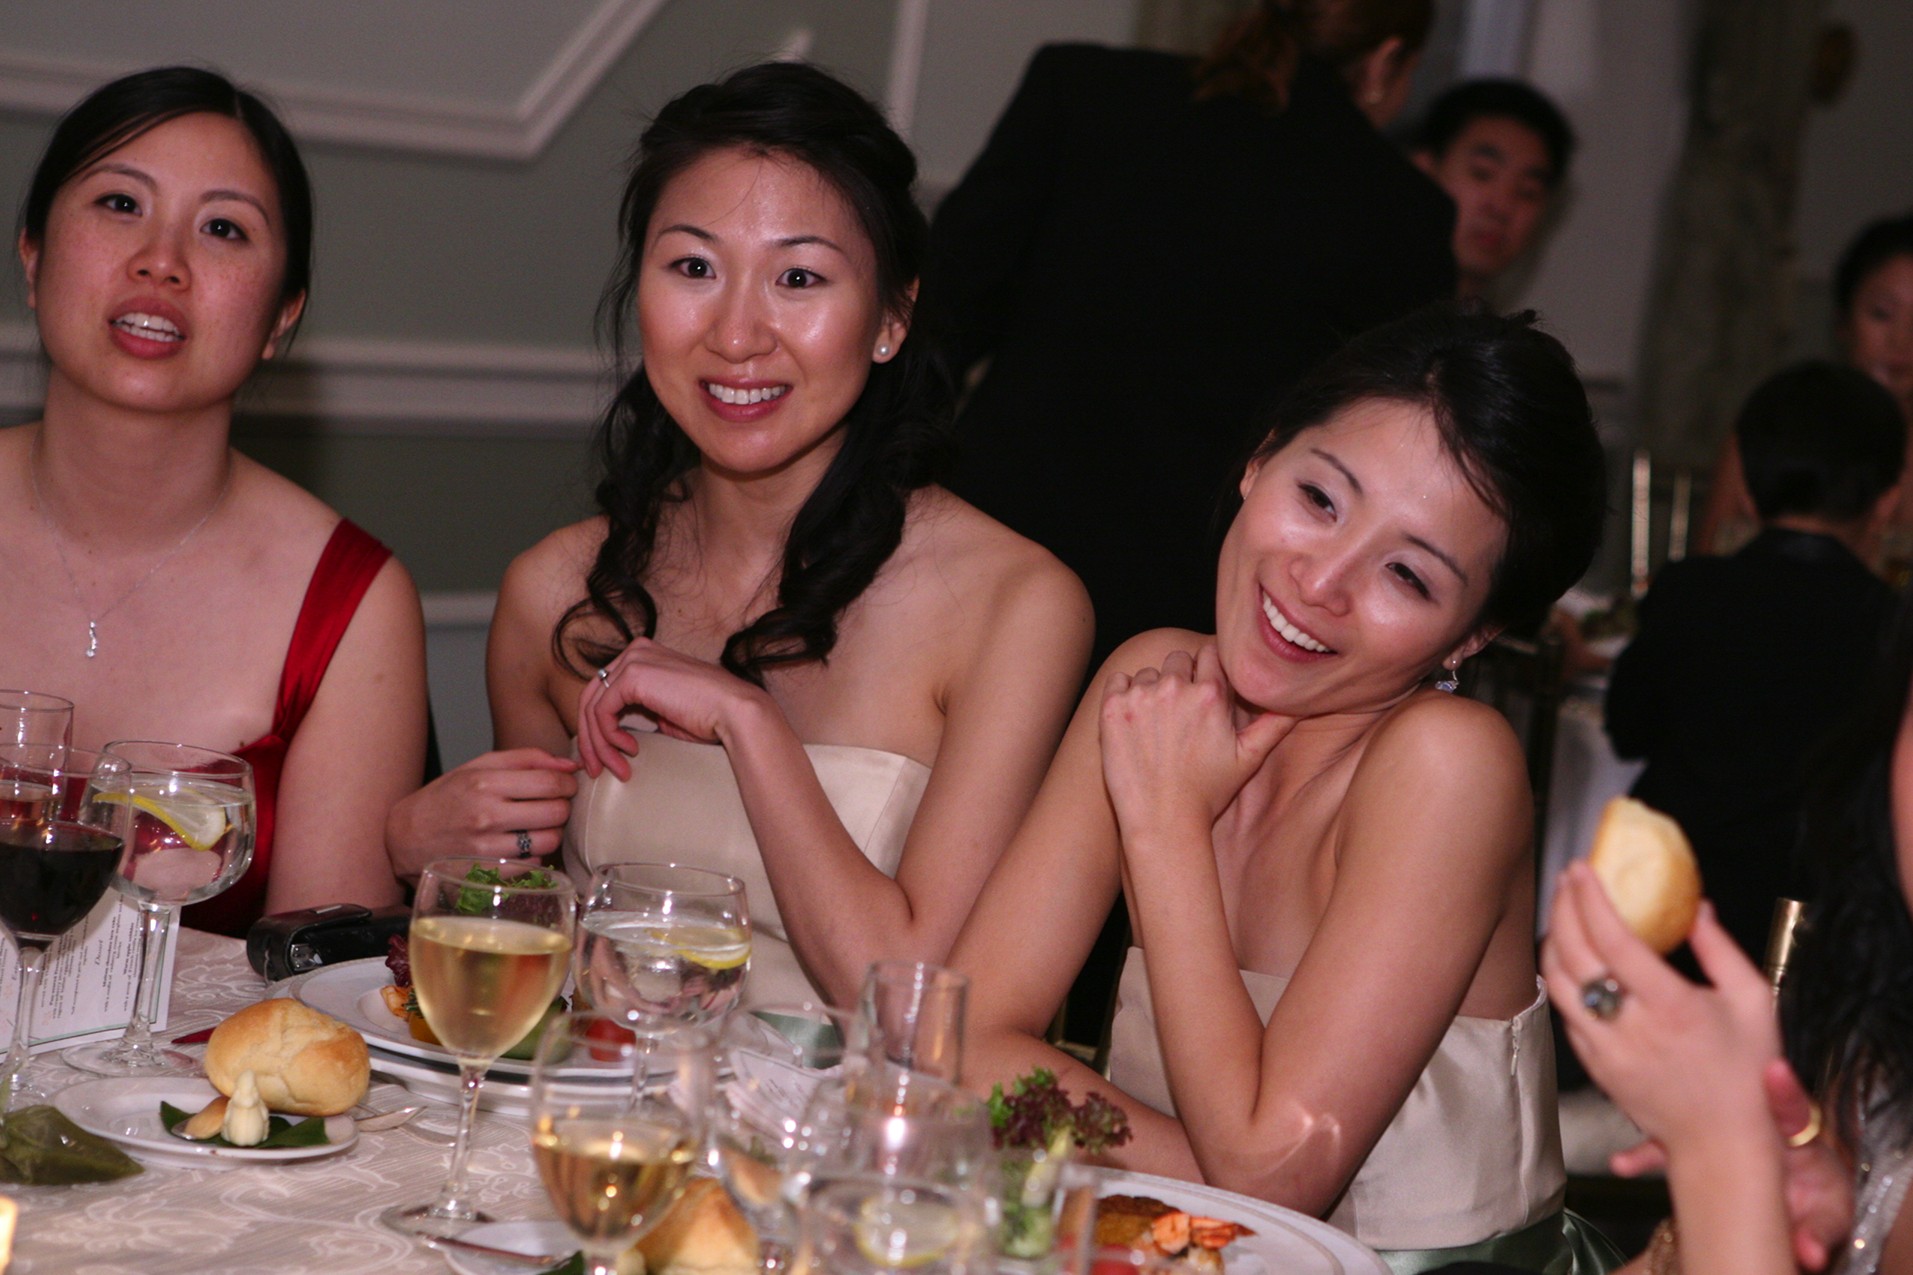
10-22
10-23
ABOUT THESE PHOTOS The guests react to the toasts, and these candids capture those moments perfectly. You don’t need to know exactly what was said to know that it was funny, and maybe a little shocking. Figure 10-22 was taken at ISO 1000, f/3.5, 1/40 second, while the reactions in Figure 10-23 were captured at ISO 400, f/4, 1/60 second.
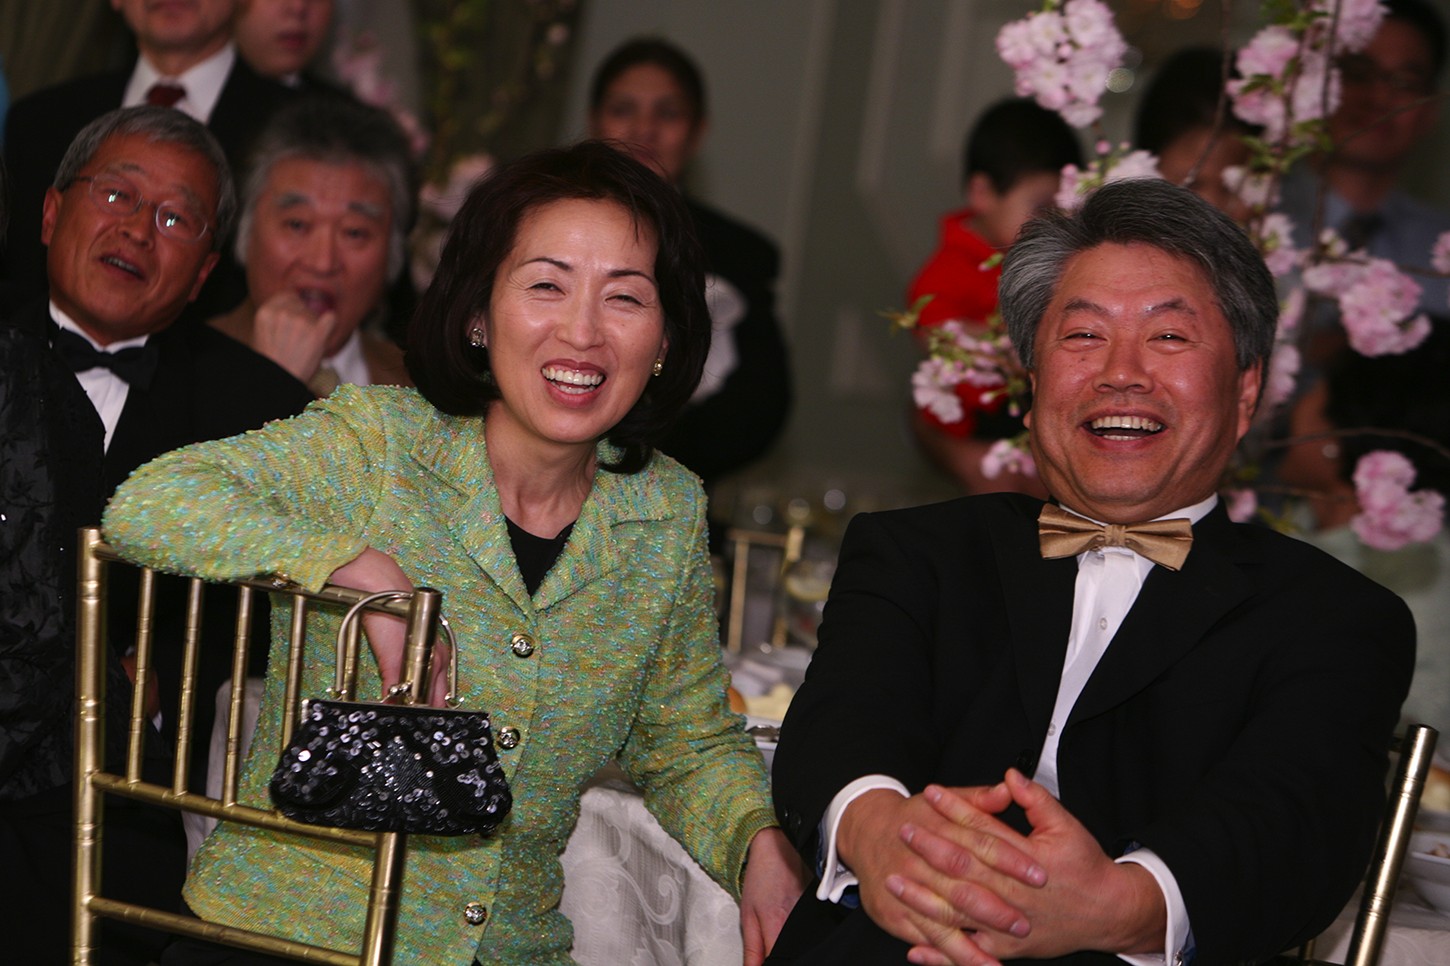
There is one more type of candid. Well, actually, I like to call it the “posed” candid. As you can see in Figure 10-24, the subjects know that a camera is present and do a quick pose for you.
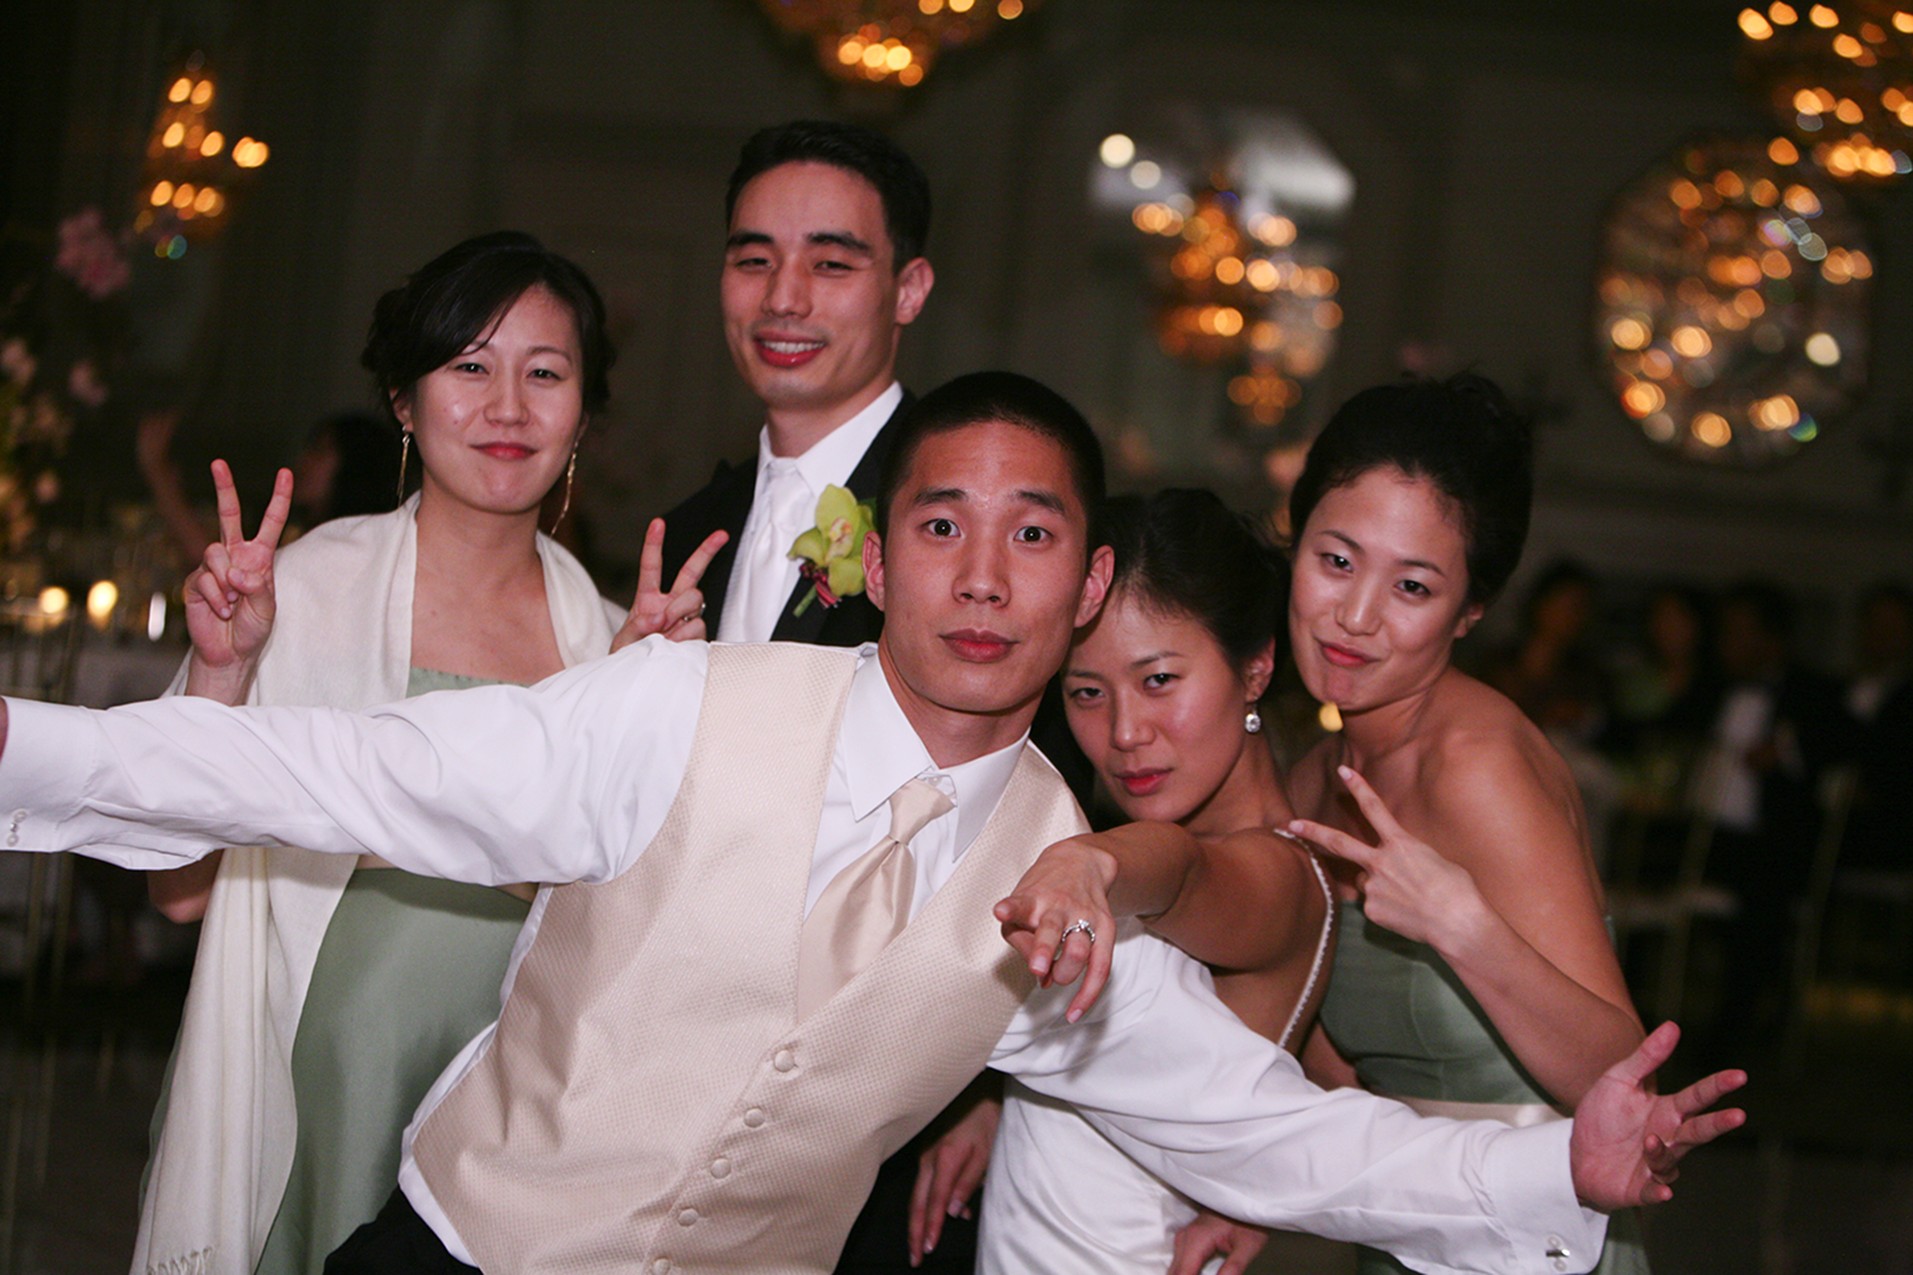
10-24
ABOUT THIS PHOTO A little bit of clowning around is to be expected and hopefully captured. Taken at ISO 800, f/3.5, 1/150 second.
Networking Tips Weddings are a great place for wedding photographers to network and to meet new clients. Just make sure that your networking doesn’t impact the job at hand. The most important job is the one you are on, but that doesn’t mean you can’t think ahead.
Vendors. You will do some of the networking throughout the day, as you interact with the other vendors. This includes the caterers, the flower vendors, the videographer, and anyone else working at the wedding. Exchange business cards with everyone and more important, give them images showing their great work afterward. Just make sure copyright information is on every photo so that if a photo is used by the vendor for any type of advertising, your name gets out there as well.
Guests. If guests are present who are interested in hiring a photographer, they will watch you while you work, and if they are interested in hiring you, they will approach you if given the opportunity. Be professional, and hand them a card and ask them to contact you when the wedding is over. Remember that they would expect this professionalism from the photographer hired to work at their wedding.
Slide shows. Technology is a wonderful thing, and if you can put together a slide show of 25 to 50 choice images from the wedding to be shown at the reception, you not only entertain the clients and their guests but also showcase your work to a room full of potential clients or referrals. Clearly, the time you have between the ceremony and the reception determines whether this is even an option.
Don’t rush off. Once your job is done, don’t just rush off. Let the bride and groom know you will stay for a bit in case they need anything. Use that time to download images and make yourself available to the guests. By now they all know who you are, and guests who are interested in your services might approach you.
Above all, act professionally all the time. You never know who might be watching.
Assignment
Capture a Real Moment
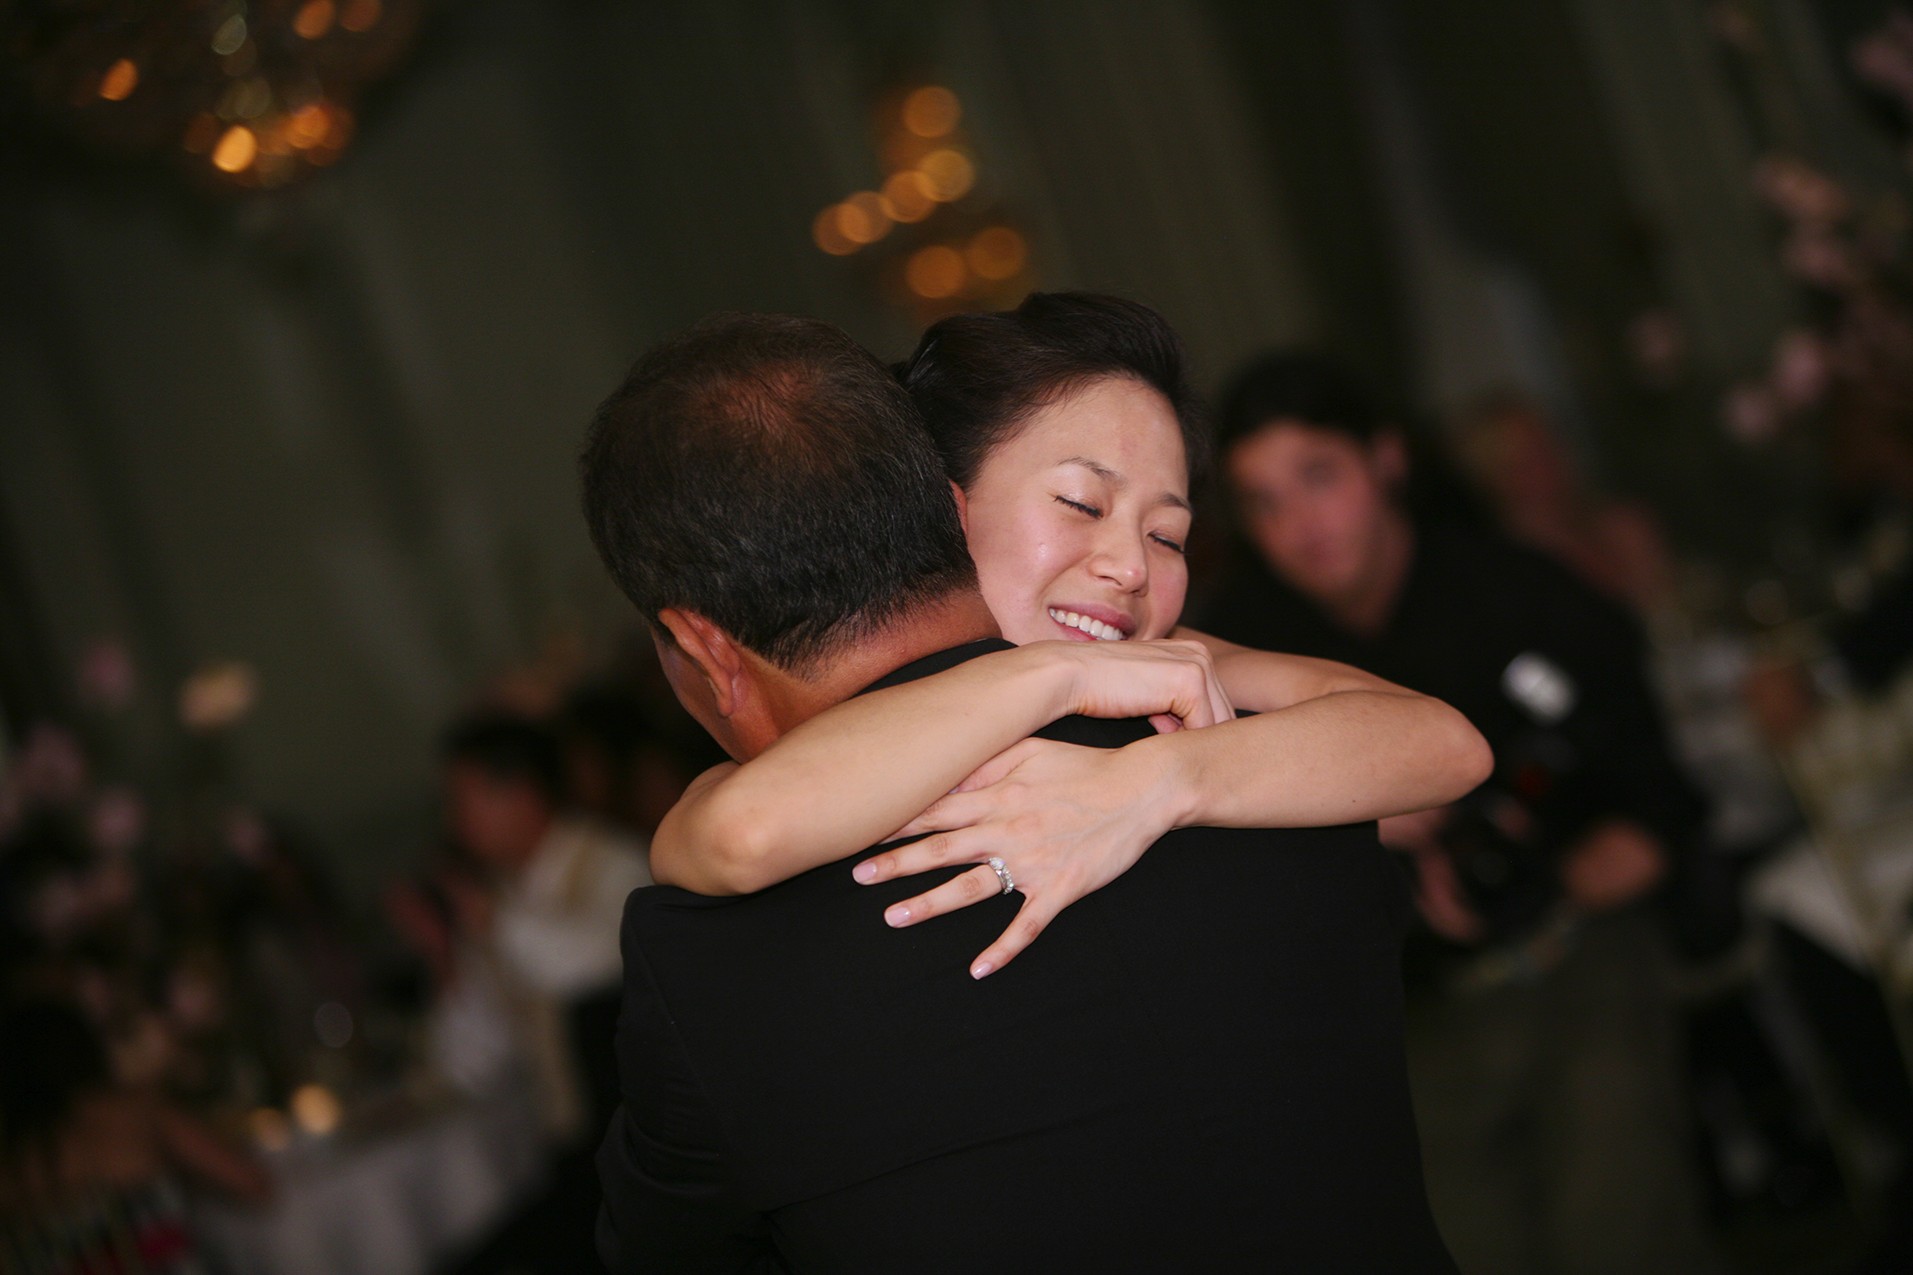
There are so many posed moments in a wedding, from the portraits to the cutting the cake, that some photographers forget to shoot the candid images, to capture real moments. This assignment is about being able to capture the real moments, those that happen between the posed shots. The most important thing that you can do is pay attention because there is never a moment at a wedding when nothing is happening. Once you capture that real moment, upload your shot to the Web site to share with other readers.
Capturing a real moment is all about being able to read people and watch for the details. The good part is that you can practice this anywhere. For example, go and sit in a coffee shop and just watch the facial expressions, conversations, and the gestures of the people around you. This practice will help to train your eye for real moments when they happen at the wedding. There are a few things that can help:
• Always have your camera ready to go. It is no good seeing one of those moments and not having your camera ready with you. These moments usually only last for a split second, so you need to be ready to go.
• Have your camera set up for your location. Every location has different lighting conditions, and you need to make sure your camera is set for the conditions first. It is no good seeing a great moment, and then realizing you need a higher ISO or wider aperture.
• Shoot in burst mode. Once you see a moment unfolding, shoot more than one shot. This will up your chances of capturing that very moment.
The moment captured here took place after the toasts when the bride’s father went over and gave the bride a hug. I would not have been able to capture this moment had I not been paying attention to the bride after the toasts. I saw the hug and immediately brought my camera up to my eye and got the photo. I had already set the camera for the low-light conditions and didn’t have to adjust the settings to get a proper exposure here. The hug only lasted a few seconds and then the moment was gone. Taken at ISO 6400, f/4, and 1/20 of a second.
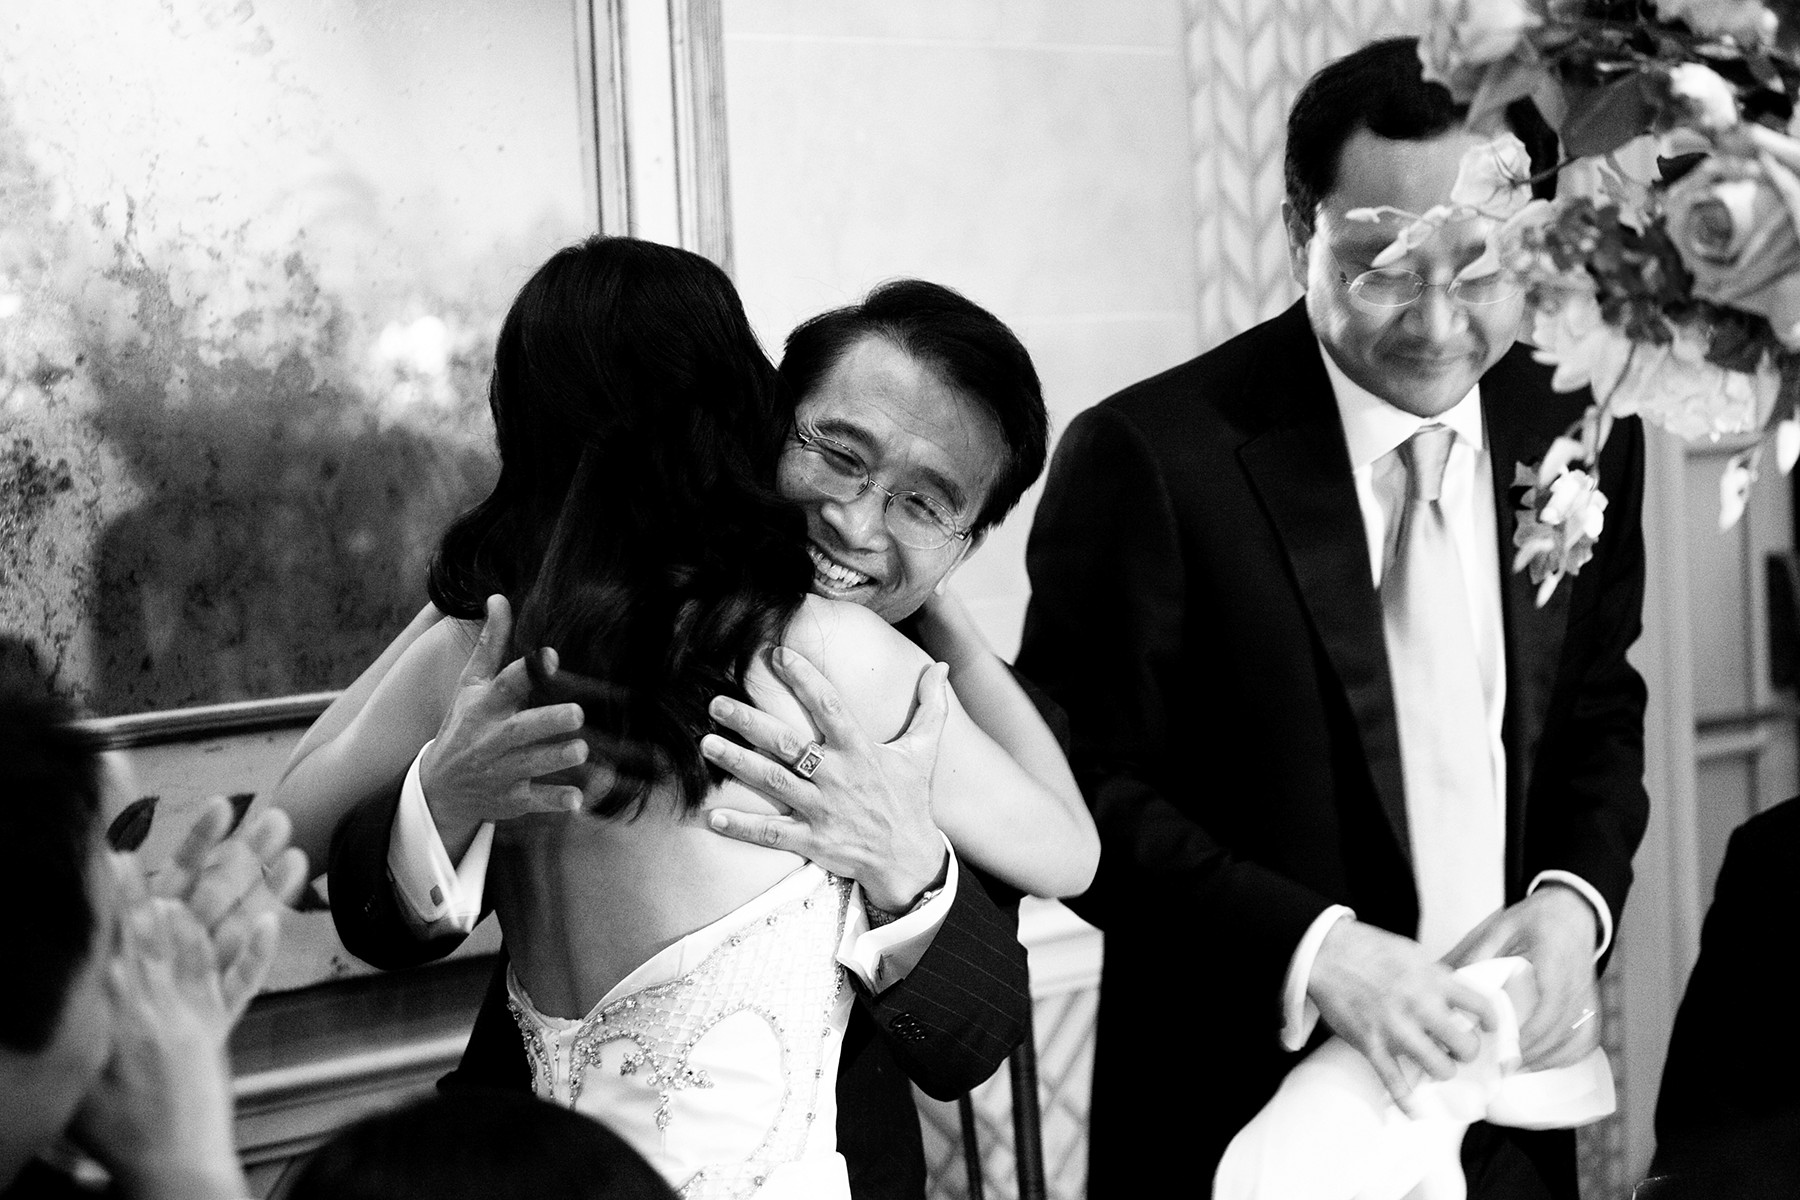
Remember to visit www.pwassignments.com after you complete the assignment and share your favorite photo! It’s a community of enthusiastic photographers and a great place to view what other readers have created. You can also post comments and read encouraging suggestions and feedback.