
Chapter 5: Outdoor Shooting
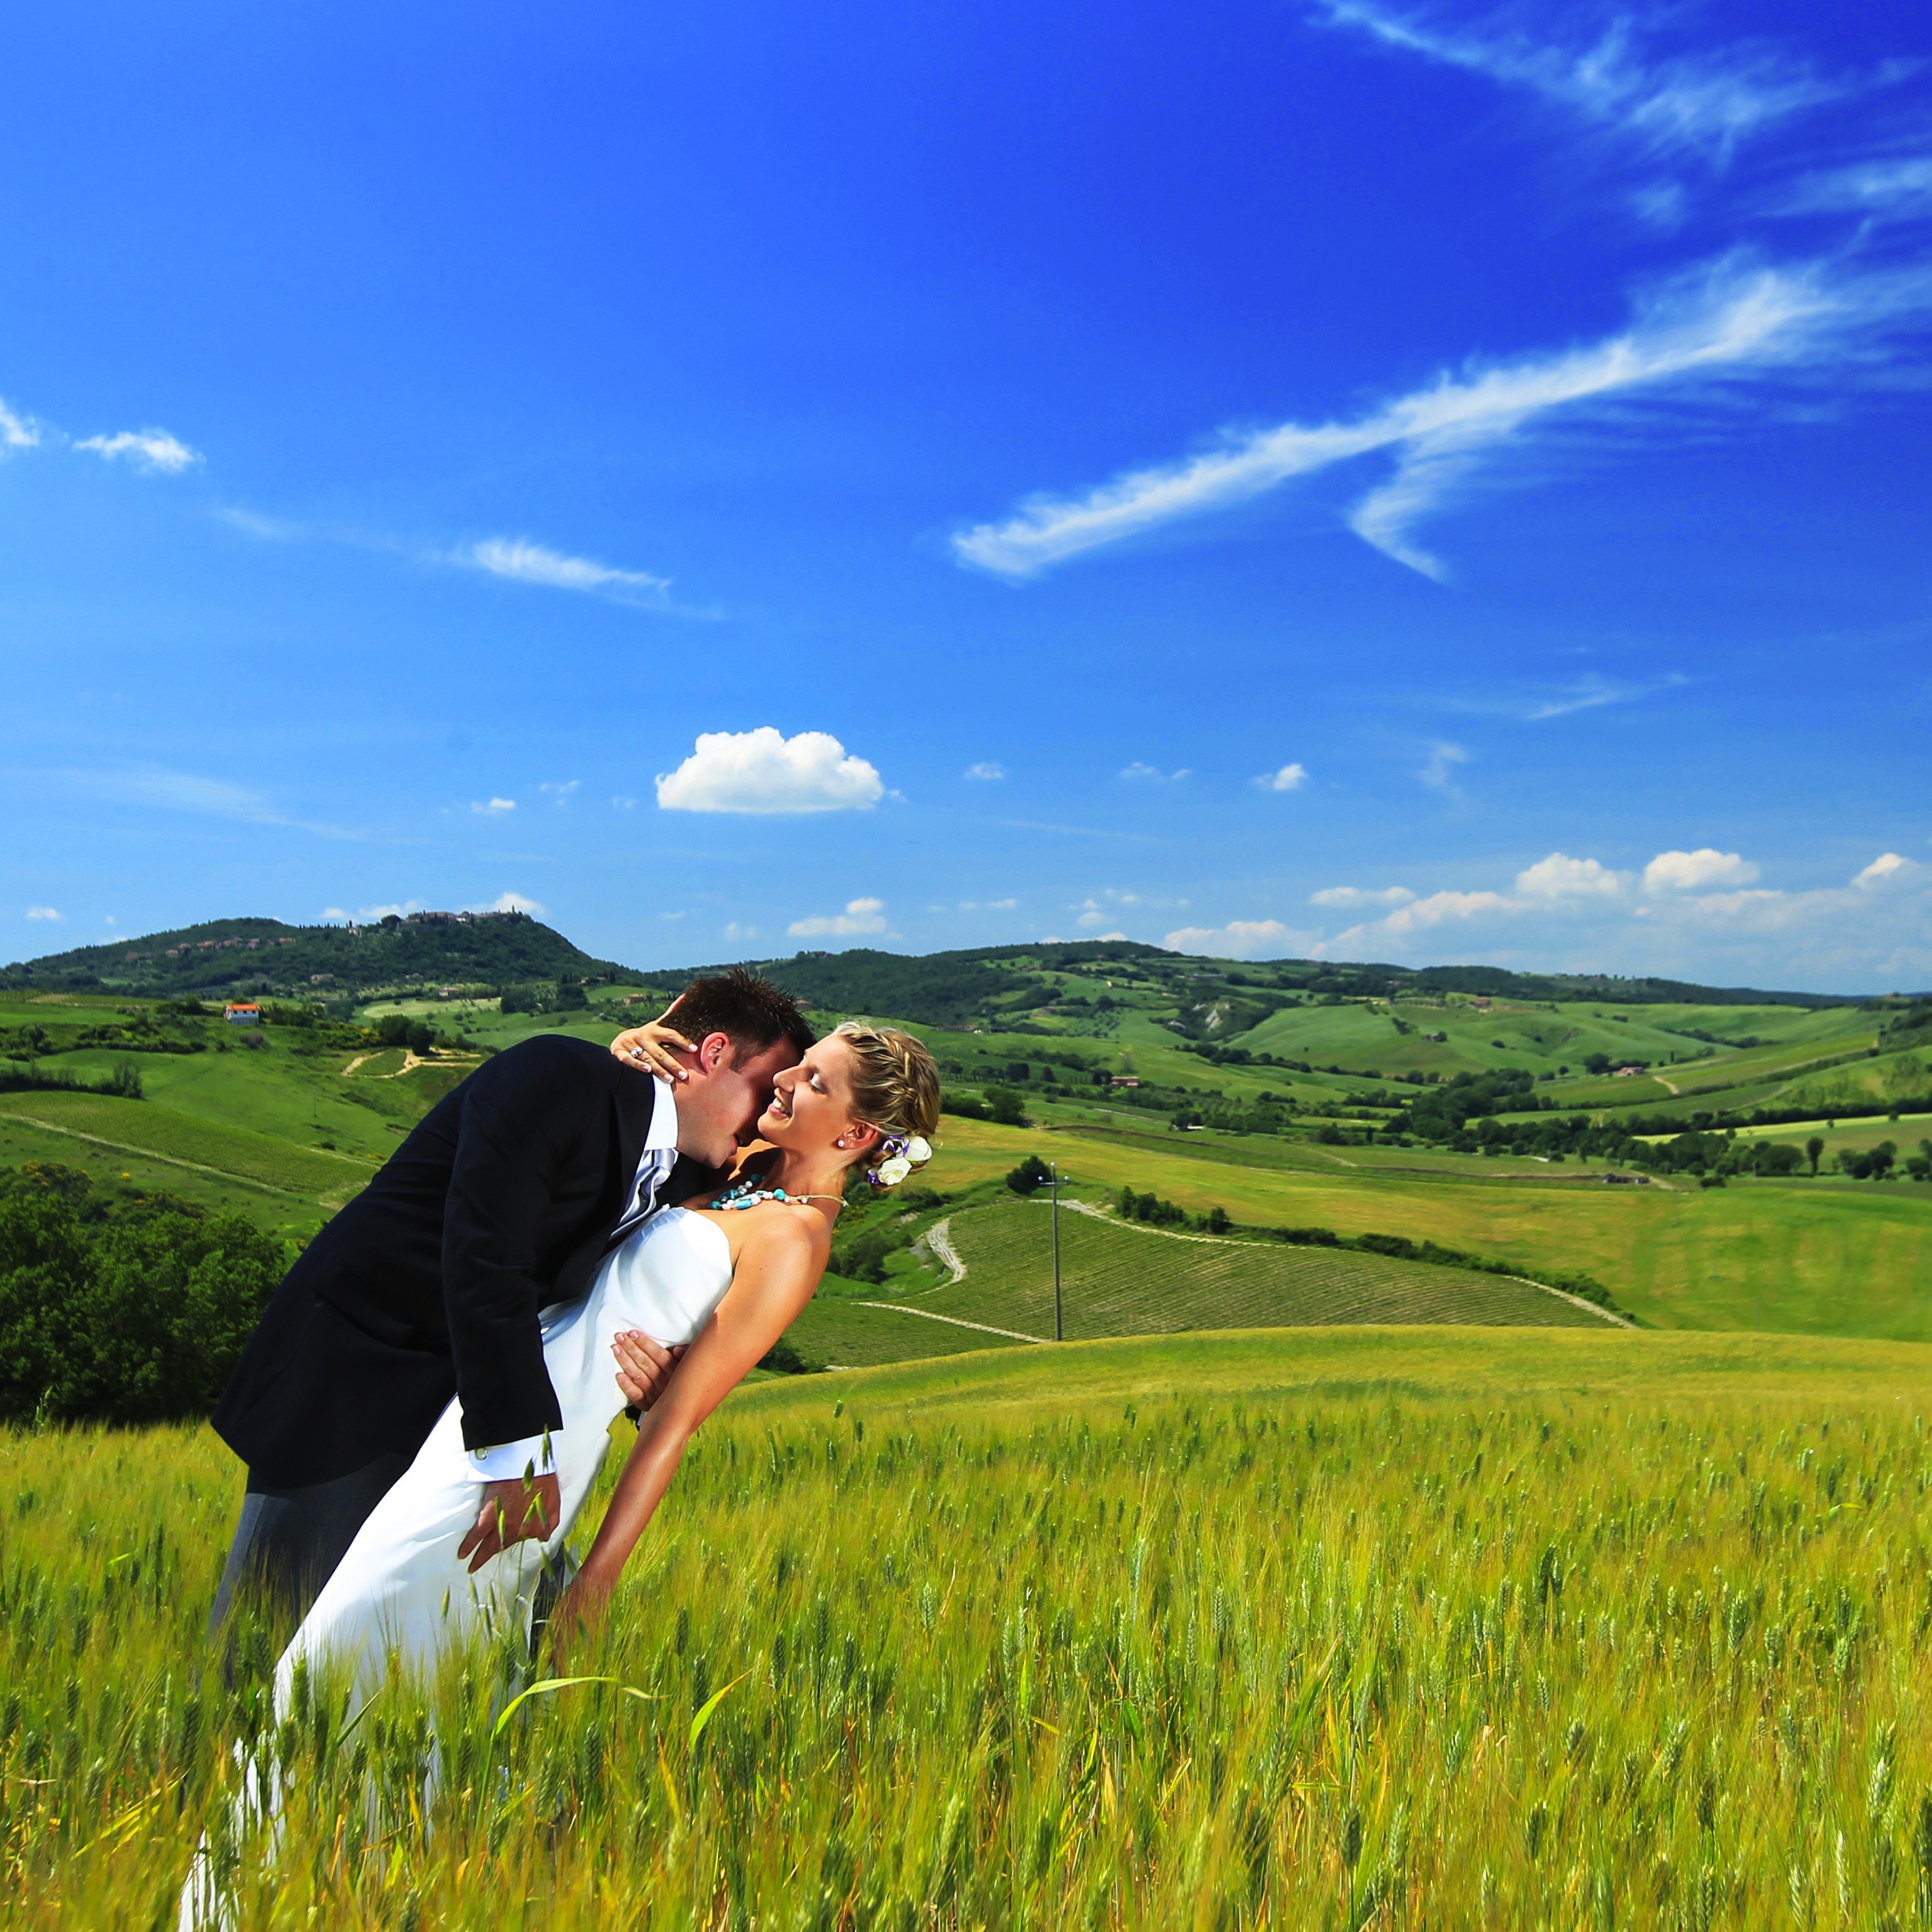
Shooting outdoor weddings can seem easier than shooting indoor weddings. That isn’t to say that you don’t have challenges when shooting outdoors; you do, from the different exposure considerations to the constantly changing lighting conditions. As a wedding photographer working outdoors, you need to be constantly monitoring and adjusting your shutter speed, aperture, and ISO settings to get the best exposure. You also need to plan ahead for where the light will be, not just where it is. But as you can see in Figure 5-1, even in direct sunlight, you can get some stunning photographs.

5-1
ABOUT THIS PHOTO The bride and groom posed with the sun striking them at an angle, creating a backlight. Taken at ISO 1000, f/3.5, 1/1600 second.
Outdoor light can vary from harsh light at midday to softer light in the shadows to golden light at sunset and low light after the sun has set. Each of these situations presents a different challenge to you, but with a little planning and practice, you can overcome the toughest lighting situations.
Exposure considerations
This section is all about how to control the light with your exposure controls. Be it the harsh, bright sun or the deep shadows, or a combination of the two, you have to learn how to get the proper exposure every time.
Bright sun
When people first start to take photographs, they hope for, and often seek out, bright sunlight. The bright sunlight makes it easy to get a sharp image because you can use high shutter speeds and small apertures. This seems to be great until you realize that the creative opportunities are limited. For example, it can be so bright that it becomes difficult to get a shallow depth of field even using the highest shutter speed and the lowest ISO.
The important part when dealing with direct sunlight is to watch the angle of the sun and where it is striking in the image. For example, the sun was directly behind the alter and toward the guests in Figure 5-2, but by using a low angle and not worrying if the sky became overexposed, I used the sunlight to backlight the bride being escorted down the aisle.
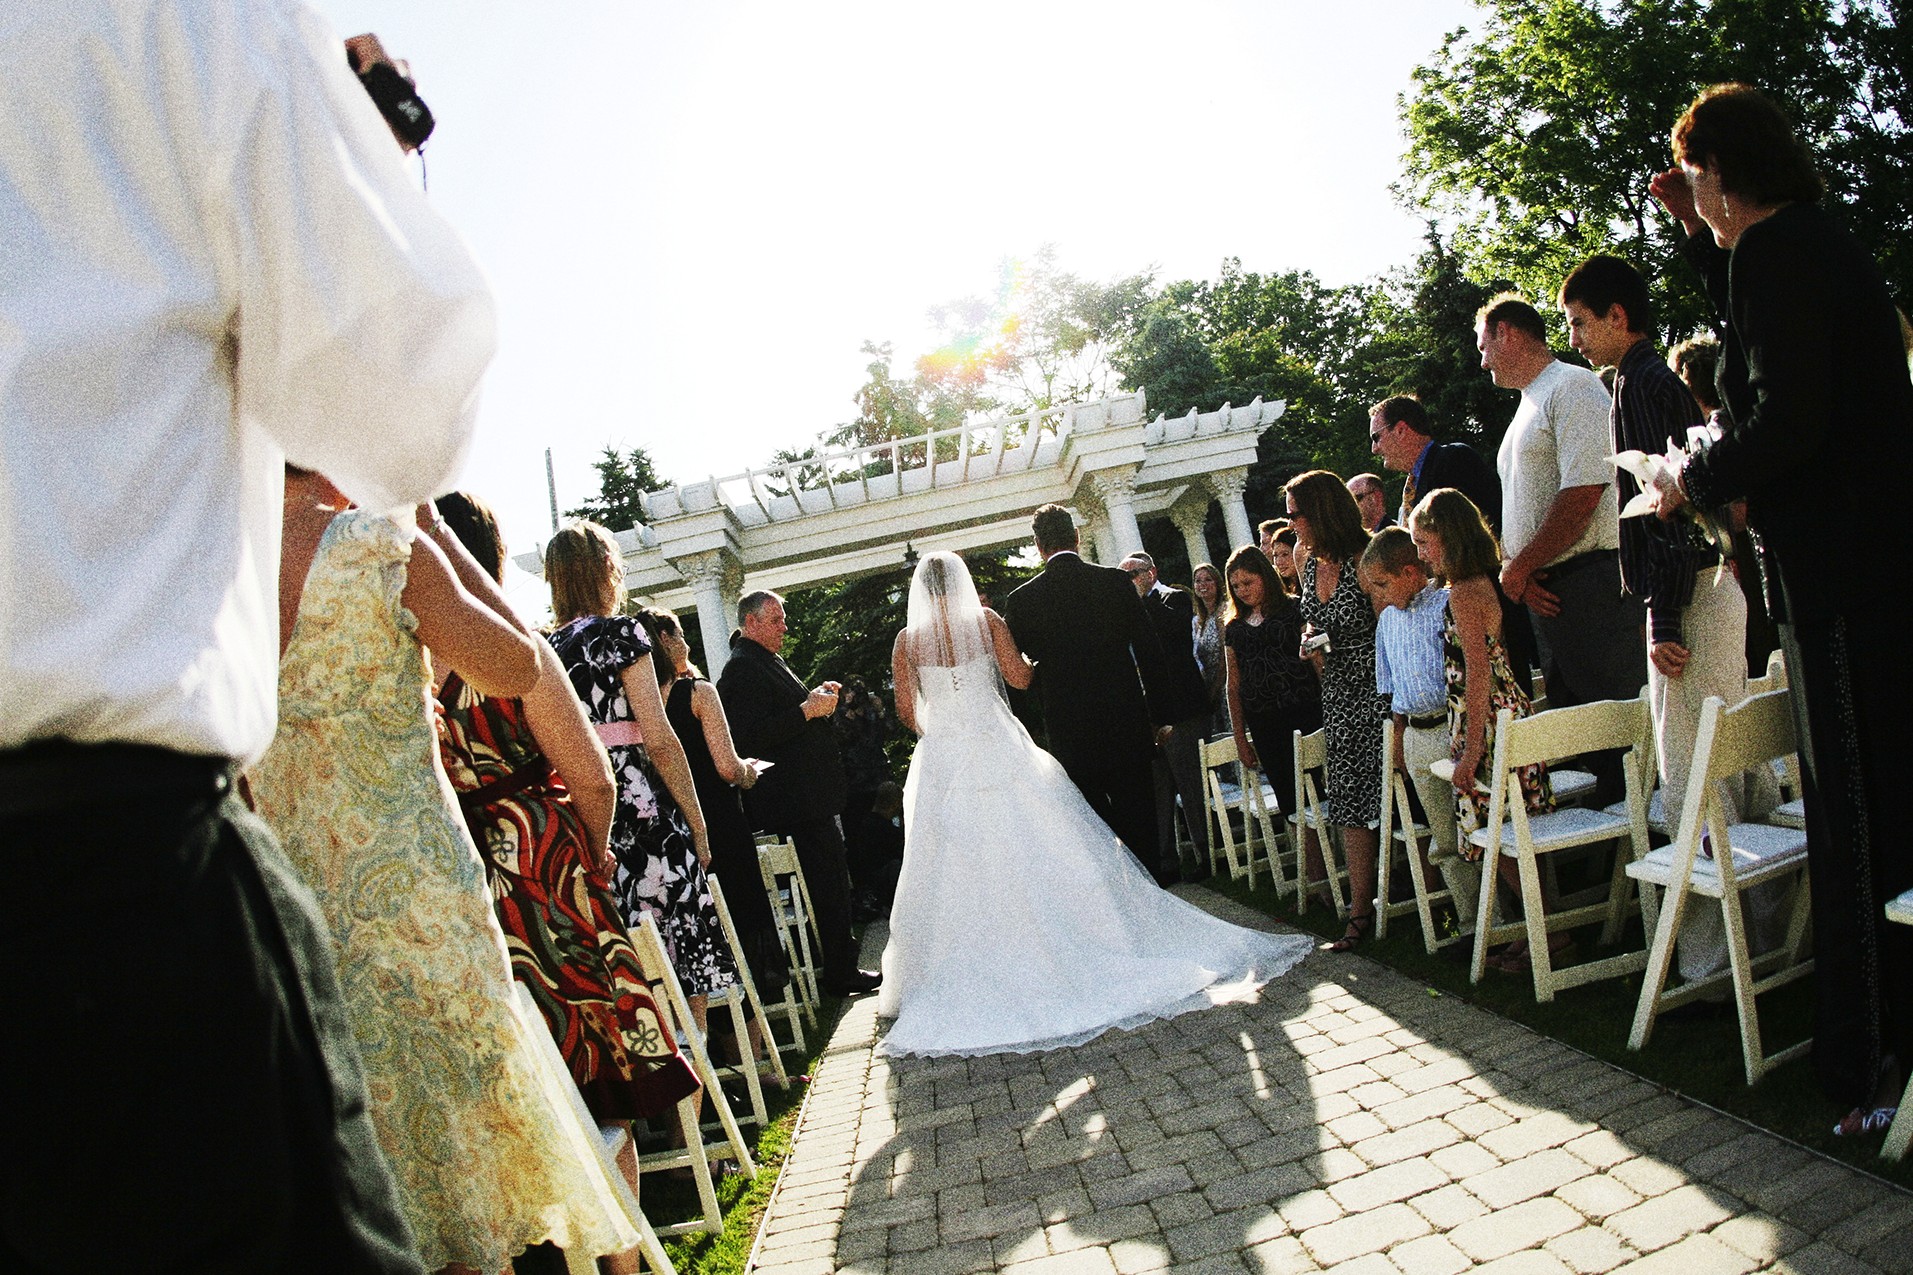
5-2
ABOUT THIS PHOTO The bride being escorted down the aisle directly into the sun. Taken at ISO 100, f/2.8, 1/3200 second using –2/3 exposure compensation.
If you aren’t absolutely sure of the direction the sun is coming from, look at the direction of the shadows the sun is creating. The way the shadows stretch back toward the camera’s location lets you know the direction of the sun.
One quick and easy method of adjusting your exposure for the very bright sun is to purposely underexpose the image by using exposure compensation. This is a setting on your camera that allows you to adjust the exposure for any exposure mode other than Manual mode. For example, in Figure 5-2 I used Aperture Priority mode and set the aperture to f/2.8 to use a shallow depth of field. Then because the meter reading produced a blown-out image, one that has no detail in the lightest areas, I dialed in –2/3 exposure compensation, which underexposed the image by 2/3 of a stop, creating a better exposure. This allowed me to concentrate on the composition.
The quick and easy rule for using exposure compensation is that dialing in positive numbers will lighten the image, while dialing in negative numbers will darken the image. Because the exposure compensation is a global change based on the light meter reading, it is only effective when using modes that actually use the meter reading, so if you are shooting in manual mode, it will have no effect. Now, while exposure compensation may seem like the best way to adjust the exposure settings in difficult situations, you need to know what it does so that you can understand the downside.
When you dial in a positive number, the camera needs to let more light reach the sensor, and there are only two ways to do this: The first is to use a wider aperture; the second is to use a slower shutter speed. When you dial in a negative exposure compensation, the camera needs to let less light in, so it either has to use a faster shutter speed or a smaller aperture. In both of these situations you can get results that you were not expecting. It is important to read your camera manual and understand what settings your camera changes when using exposure compensation.
Another method of getting the best exposure in direct sun is to use the spot-metering mode on your camera. Because the spot-metering mode only looks at a small area of the whole scene, it can be used to get an accurate meter reading in these extremely bright-light situations. The key is to make sure that the metering is done off a part of the scene that isn’t too bright or too dark, so the wedding dress and the tuxedo are both bad choices. The better choice would be the face of the subject. Many of the new cameras have tied the spot-metering area to the focus point being used, so whatever you focus on is what the camera uses as a base for the meter reading.
A downside to photographing in direct sunlight is that everything can look a bit flat and lack character. It is not the light that defines the face, but the shadows. With very bright direct sunlight, there just aren’t too many nice shadows, and those present tend to be very sharp because the light source is very small and hard. The sun might be a very large object giving out a huge amount of light, but because it is very far away, it becomes a small light source. The smaller the light source, the harder the light it provides. The evidence is in the shadows created by the light source — the shadows created by the sun have very distinct edges that don’t have a lot of transition between the light and the dark, which is a key attribute of a hard light source. A softer light source would create shadows that have a greater area of transition between the light and the dark and would look softer to the eye. Softer light is more desirable, especially when it comes to photographing people.
When the subject is lit with direct sunlight and the shadows are hard, there is no easy fix other than to move the subjects into the shade, which is often not an option. As you can see in Figure 5-3, as the sun strikes the bride’s face, it leaves a very hard shadow created by her nose, and there is nothing that can be done about it.
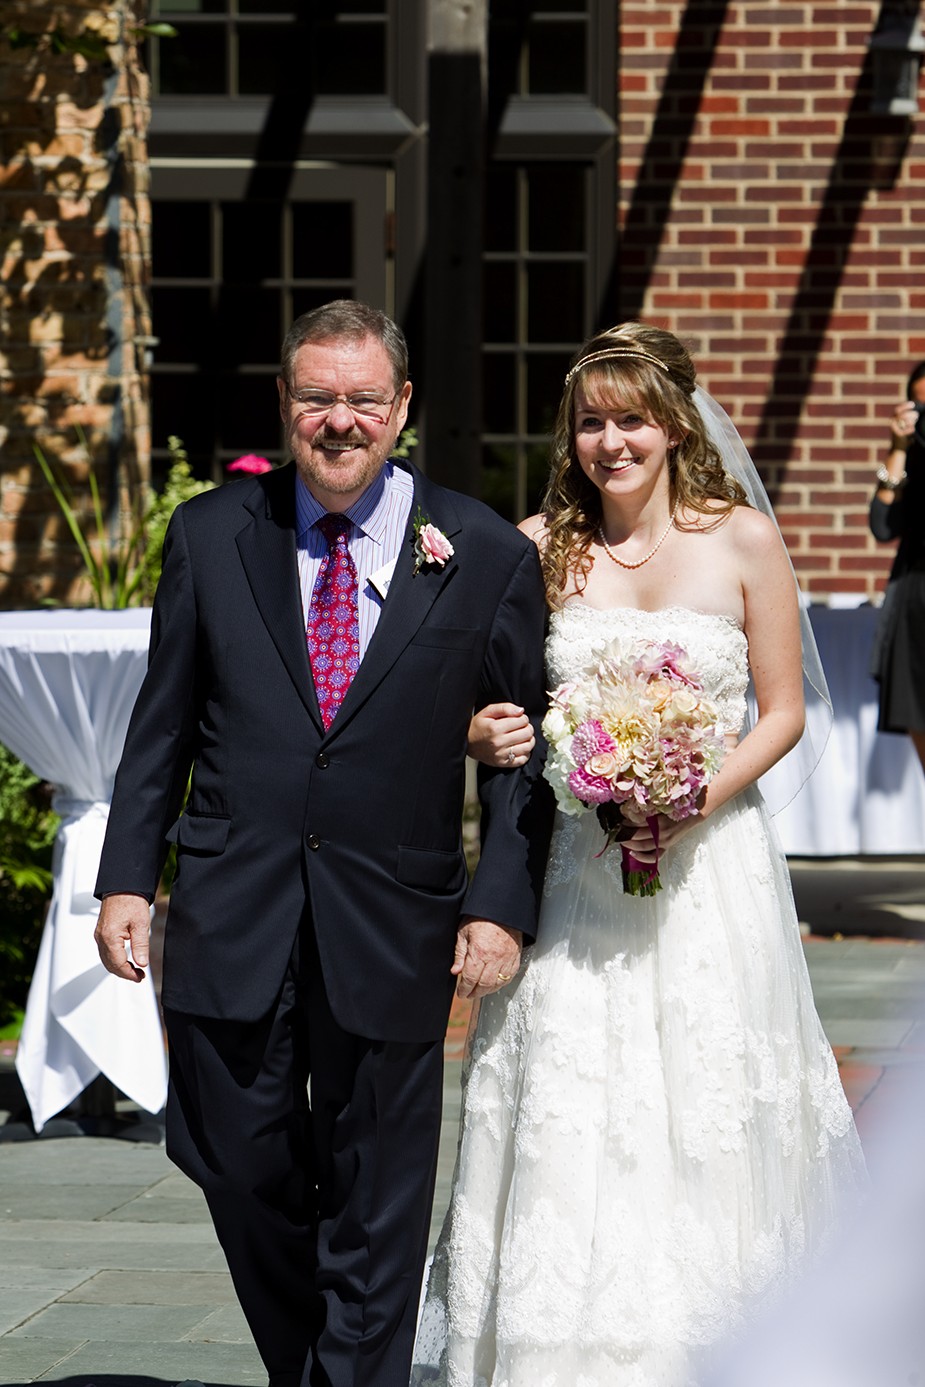
5-3
ABOUT THIS PHOTO The bride being escorted down the aisle is walking in hard direct light, causing shadows to fall across her face. Taken at ISO 100, f/5.6, 1/500 second.
Perhaps the biggest problem with direct sunlight is when it occurs during an outdoor ceremony, as that is the one time that you can’t rearrange the subjects or move them to a shaded area. In a perfect wedding photography world, the photographer would be able to dictate where and when the ceremony would take place and would take into consideration the angle and direction of the sun. Because that isn’t possible, you need to do the next best thing, which is to change your angles and try to minimize the sun’s harsh effects.
Using a lens hood to shade the end of your lens is really important when shooting in direct sun, as it helps to negate any lens flare that can occur when the angle of the lens to the sun causes the light to skip across the front of the lens. Lens flare can be used creatively, but a little can go a long way.
Shade
The shade can be your friend when you are shooting outdoor weddings. This includes the shade formed by trees or any other structure close to the wedding sight, especially if it is a cloudless day. While you can’t control the actual ceremony site, you may have some input for the non-ceremony photographs. Ideally, look for a tree. A tree canopy softens the light from the sun and turns it into a closer, softer light, because shade is just another way to describe diffused light. Diffused light, as described in the previous section, has softer shadows and is more pleasing when shooting portraits. This is a much more flattering light and improves the photos dramatically. As you can see in Figure 5-4, the tree cover creates an even light across the bride and groom.
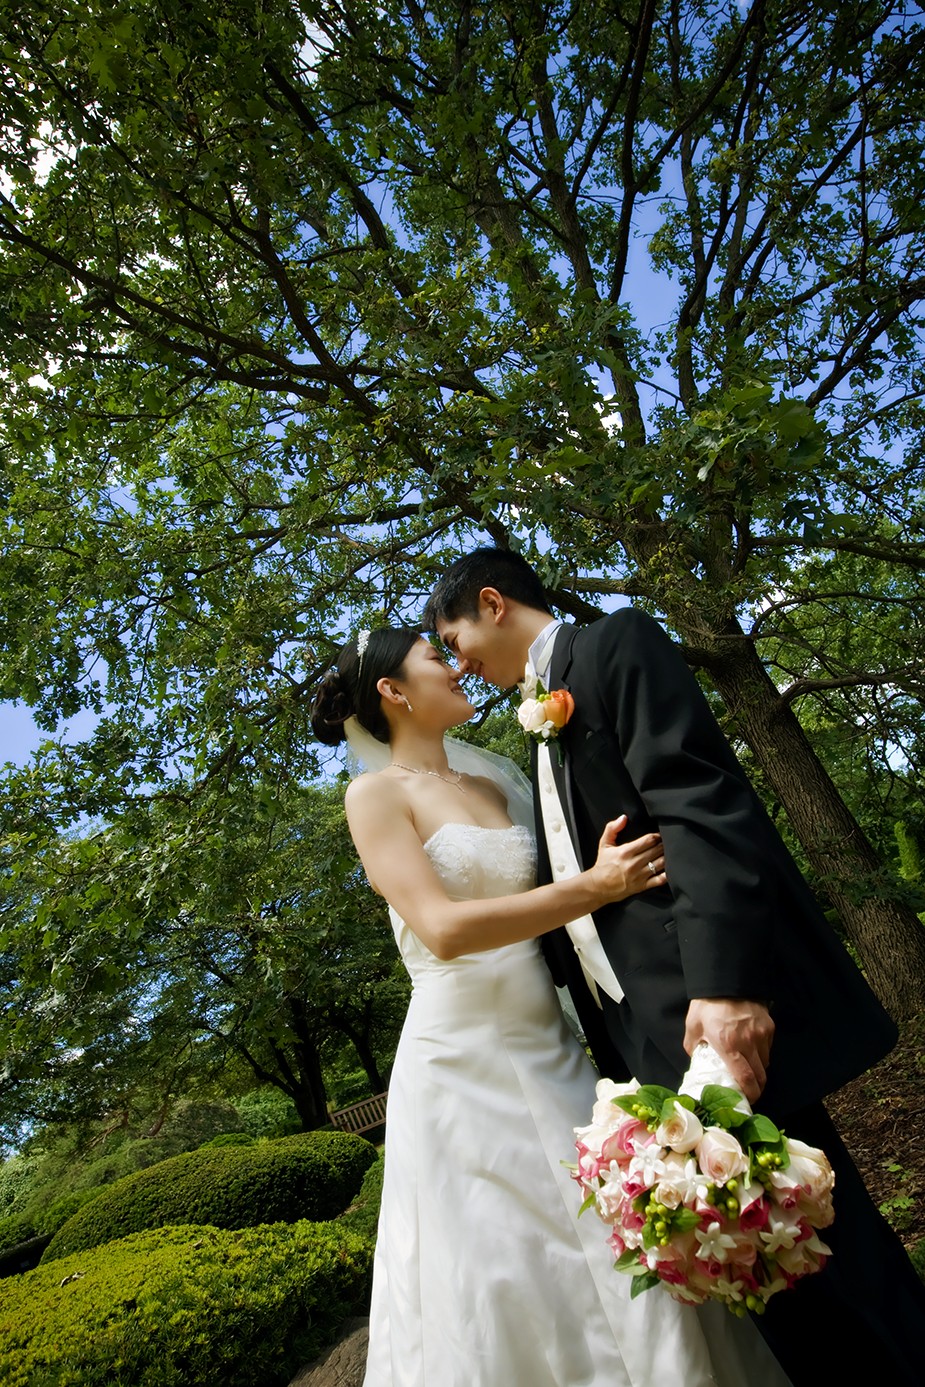
5-4
ABOUT THIS PHOTO Placing the bride and groom under the tree changed the quality of light from a hard light to a softer, more pleasing light. There is still plenty of light available for the portrait. Taken at ISO 400, f/7.1, 1/320 second.
When you look at the light in the shade, there is a direction to the light that you need to take into account when setting up your shots. For example, if the light is coming from directly overhead, then there will be problems with deep shadows in the eye sockets and under the chin and nose. So, make sure you move the subjects around to adjust the light.
For more on white balance and the color of light, see Chapter 6.
The real challenge can be to find a tree or area that has good shade and is big enough for the group you need to shoot, because it is important to have the same type of light on all the subjects. This keeps the tonal values between the bright and the dark parts close, making it much easier to get the correct exposure. Take the group in Figure 5-5, for example: By placing them all in the same light, no one has very bright areas or very dark areas on them. This natural lighting makes for a great group shot.
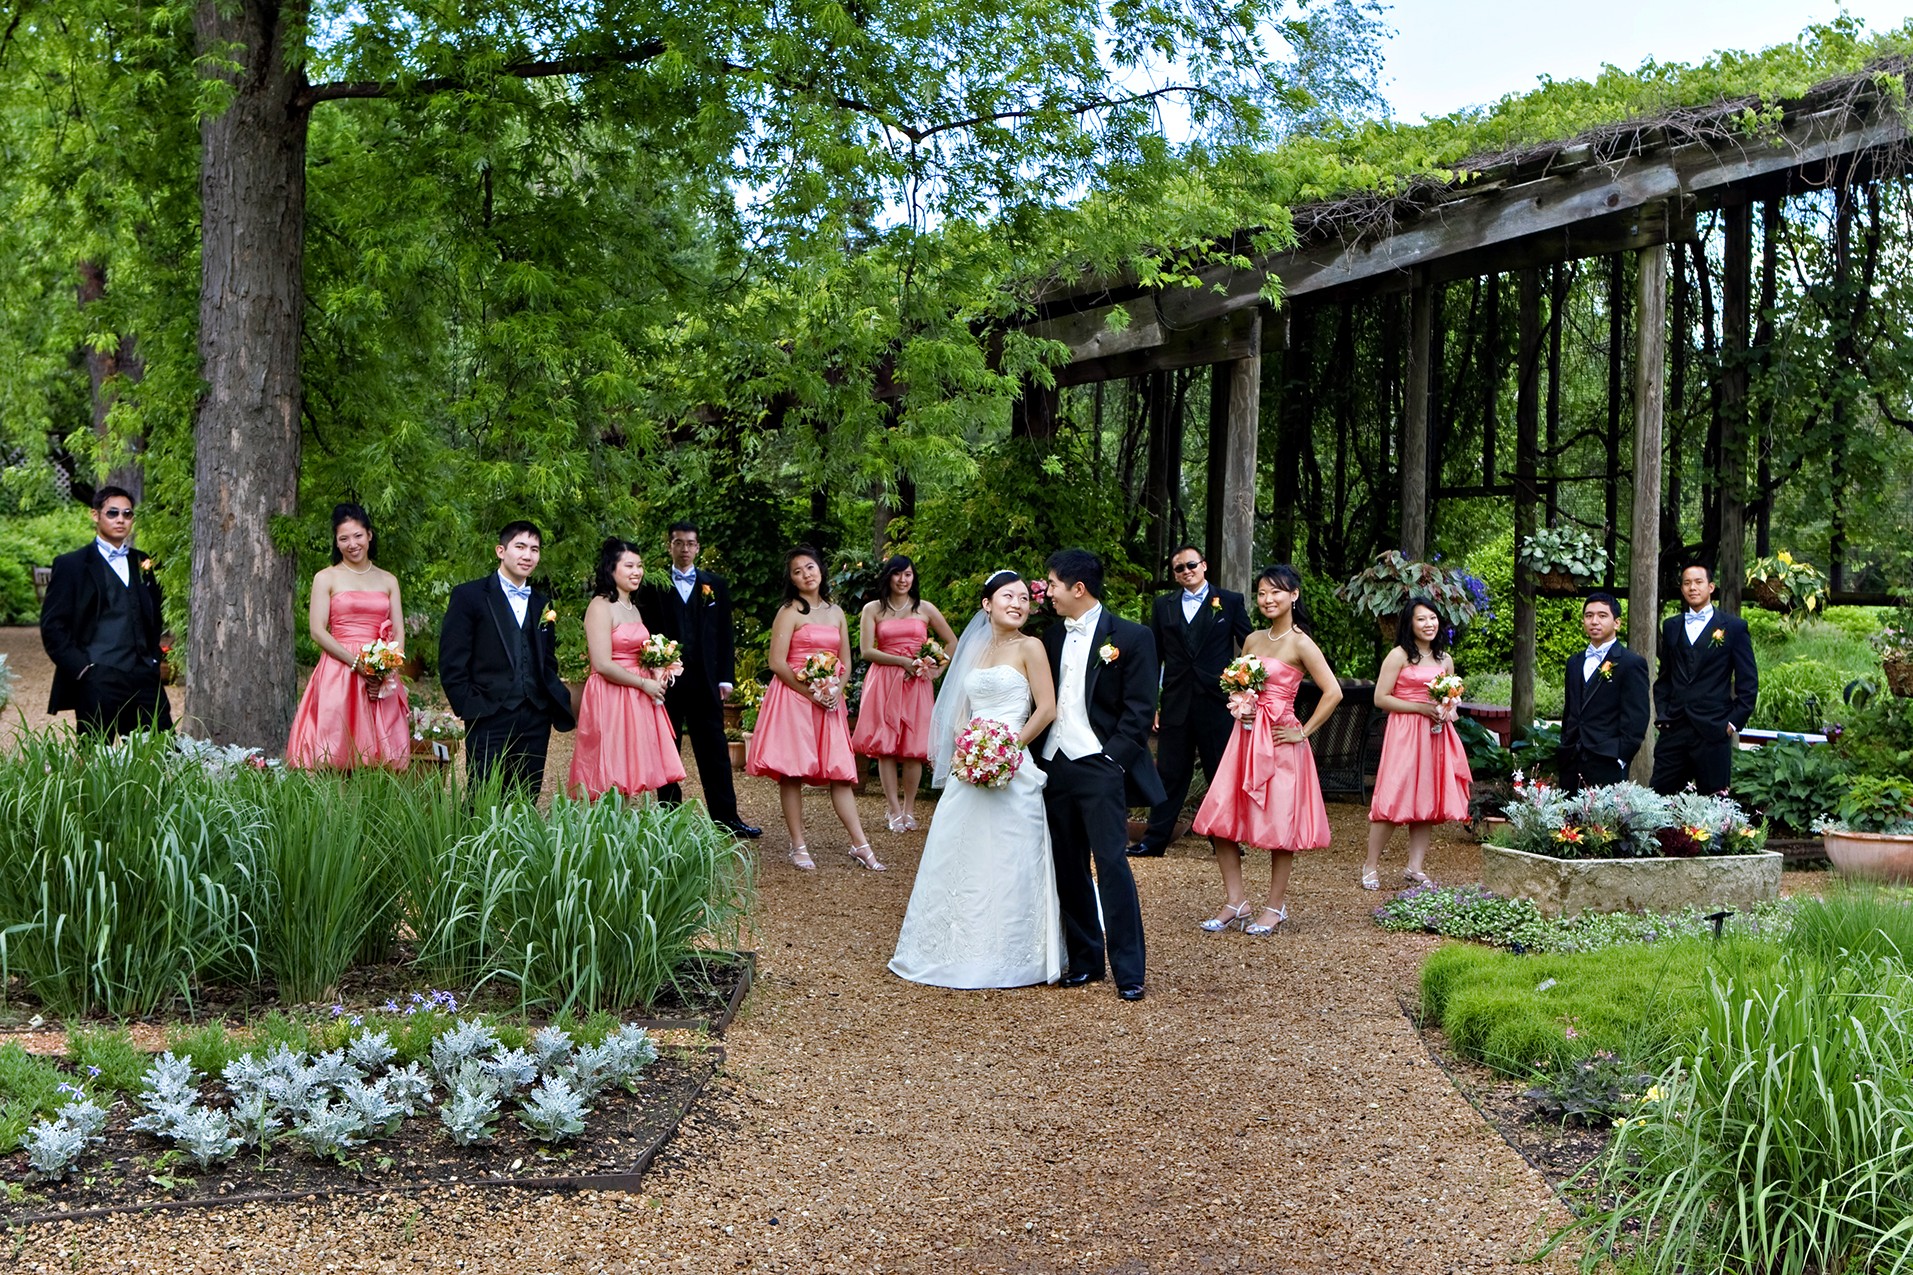
5-5
ABOUT THIS PHOTO Having the same light fall on all the group members makes it easy to expose for a photo. Taken at ISO 400, f/6.4, 1/250 second.
Part sun, part shade
The real challenge when shooting outdoors is dealing with scenes that are part full sunlight and part shade. This can get a little tricky, because when there are areas that are brightly lit and areas of dark shadow in the same scene, the camera’s sensor has a tough time recording the wide range of tones in the same exposure. The sensor in your camera is an amazing piece of technology, but it does have some limitations, and one of those is capturing a really wide range of tones in the same image. When the range of tones in your scene becomes wider than the range of tones the camera can capture, you need to either expose for the bright parts or expose for the dark parts, or add some light to the dark parts to make them closer in tone to the light parts.
There are three different approaches to dealing with scenes that have a range of tones that is wider than your sensor’s capture ability. The first approach is to expose for the darker areas or shadows in your image; you usually lose the detail in the light parts, called the highlights. This isn’t so bad if those bright areas are the sky or something unimportant, but if this detail is in the bride’s dress or groom’s shirt, it might be undesirable. One thing to consider is that the human eye tends to be drawn to the brightest area of an image first, so if you overexpose, or blow out, the highlights in part of your image, you had better have a really good reason, because the viewer will notice it first.
The Color of Light
There is a real difference in color between different types of light. This holds true for the different types of light used indoors, and it’s true for the different light when shooting outdoors. Now the light at midday in the open and the light in the shade and even the light at sunset are all from the same source—the sun. While the source is the same, depending on the time of day and what the light travels through or bounces off of, the color can be very different. The way you deal with the different color light is to adjust the white balance on your camera to match the type of light being used so that the colors are rendered properly.
The good news is that in most cases, the automatic white balance setting works really well, and the newer the camera, the more likely the auto white balance will be accurate initially, without needing any adjustment. However, when you shoot in the shade, people can look a little cold, or in color terms, look a little blue. This is because the color of light in the shade has a blue cast compared to the color of the light in the open, which looks whiter. You can easily fix this by adjusting the white balance in post-production or by setting the white balance to shade (or the equivalent white balance setting if shade isn’t a setting on your camera). Each camera is a little different, so check in the camera manual.
In Figure 5-6, the scene was exposed to show the details in the groom and his best man, and the lightest parts of the image are completely white.
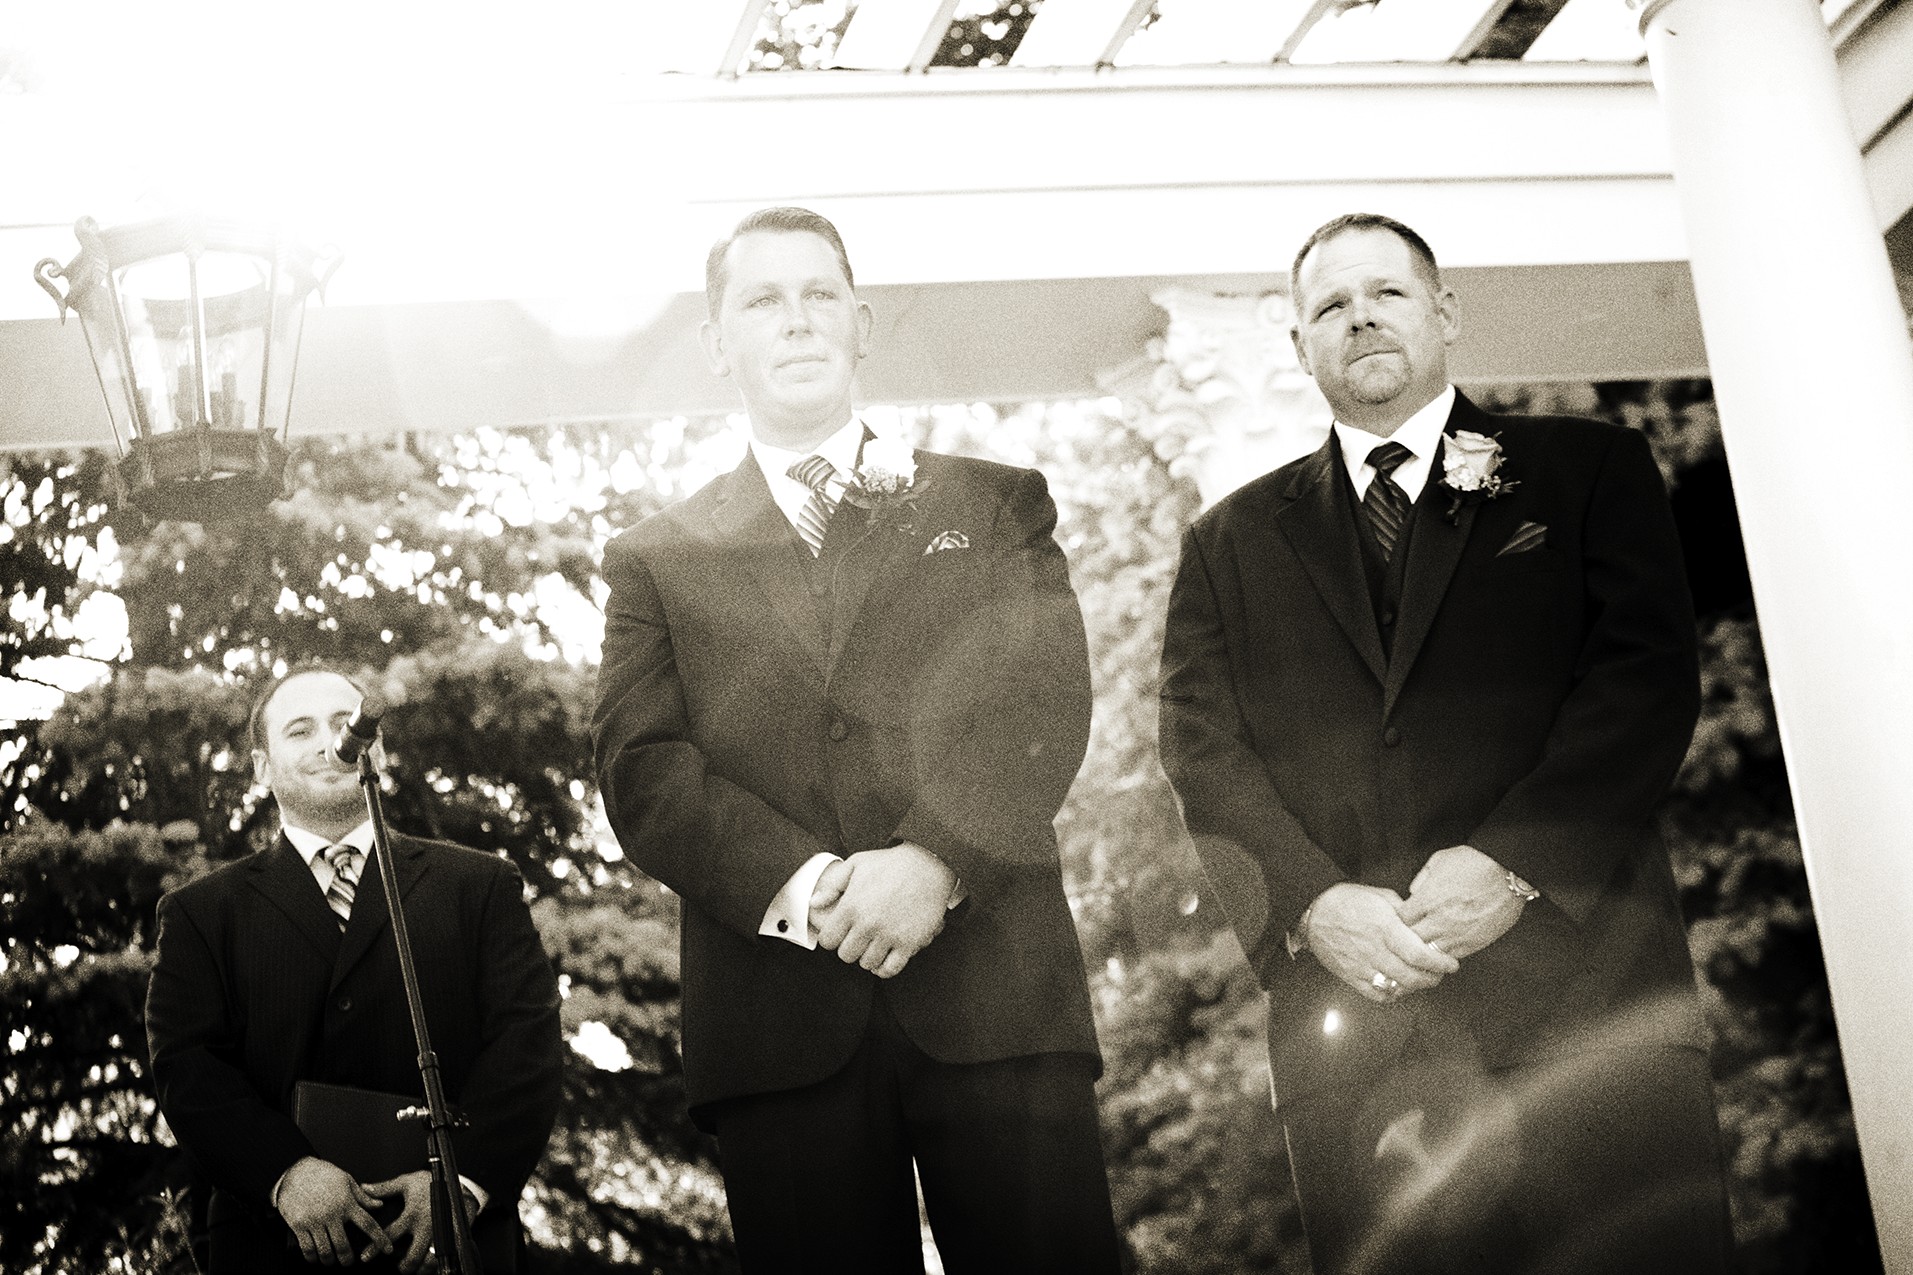
5-6
ABOUT THIS PHOTO At times it impossible to get away from shooting in the direct sun. This photo of the groom and his best man has areas that are overexposed especially in the top left, because the exposure was set to make sure the tuxedos were not too dark. Taken at ISO 320, f/4.5, 1/180 second.
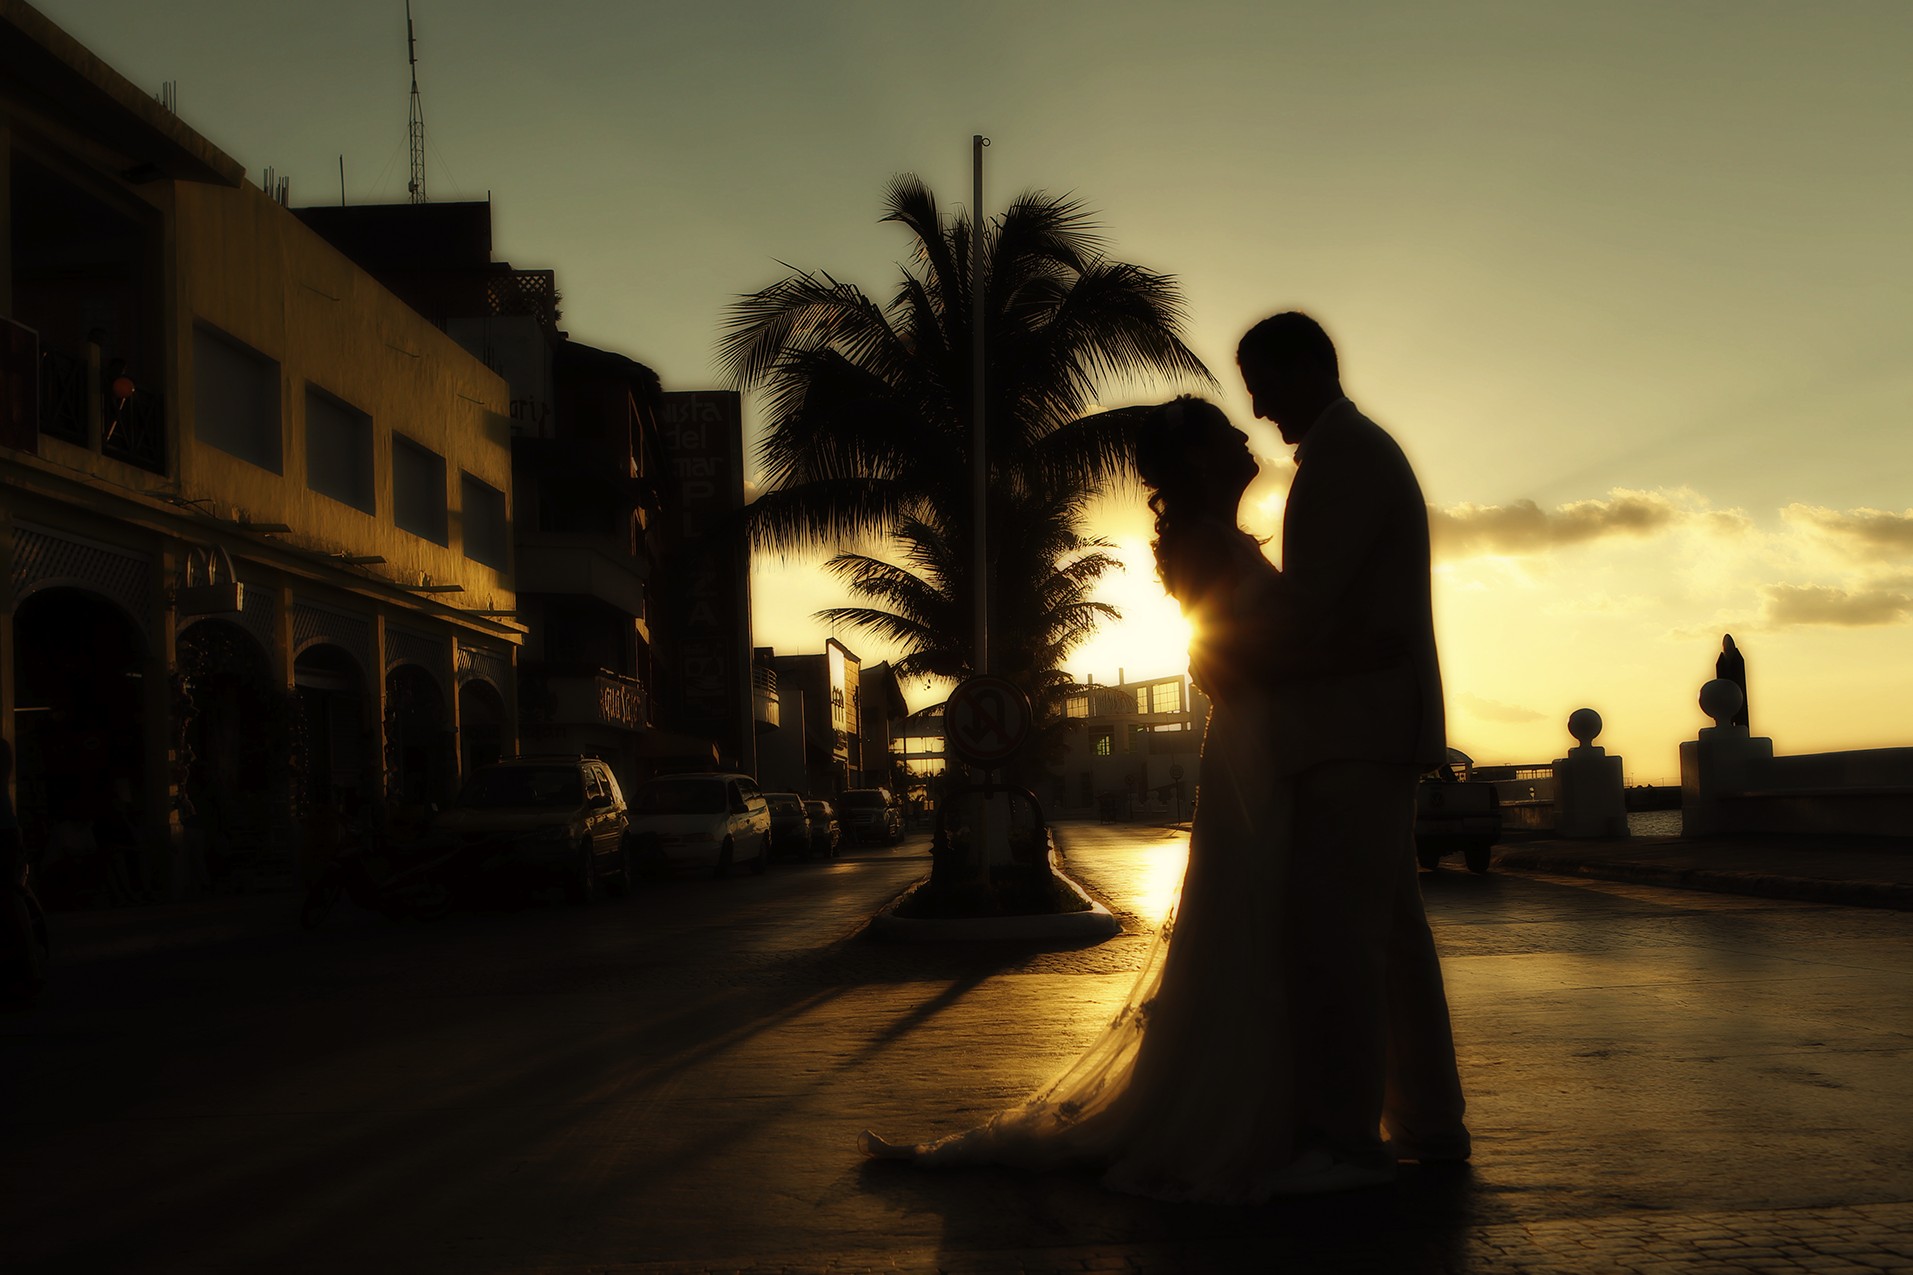
The second approach is to expose for the highlights, but there is a good chance the dark areas or shadows in the photo will turn to solid black, and all detail there will be lost. This approach underexposes the image, and it can generally look too dark, but given the choice, this is the one I would pick, because it is easier to correct an underexposed image in post-processing than one with blown-out highlights. This is because many software-editing programs will allow you to recover details in the dark areas by lightening the image but have a hard time recovering details in the pure white of the severely overexposed areas. If you look at Figure 5-7, the details of the wedding dress still appear, but both the bride’s and groom’s hair have turned pure black in places, as has part of the mast and other shadow areas. The image was exposed for the highlights, and even in the bright sun, none of the wedding dress detail has been lost.

5-7
ABOUT THIS PHOTO The bride and groom pose in the sun in Cozumel, Mexico. Taken at ISO 100, f/5.6, 1/250 second.
The third approach is the best in my opinion because it doesn’t involve blowing out the highlights or darkening the shadows. This is where that trusty flash unit comes in handy, because you can add a little light to the scene — fill light. When you add fill light, you use the flash to add just a touch of light, which makes the dark parts of the image brighter, allowing you to expose for the highlights and still have detail in the dark parts. It takes some practice to master this method because you want to add enough light that the shadows have detail, but not so much light that the scene looks like it is lit by a flash. Think of it as adding light to the dark areas of the scene that reduces the range of tones in the image. There are some things to ask before adding a flash to the scene.
• Is there more light behind the subject than in front of it? Because the idea of using a fill flash is to even out the light in the scene, it works best if there is more light behind the subject than in front of it.
• Are you close enough for the flash to have an effect? The small, dedicated flash units have a limited range, and it would be impossible to use one to add light to a scene from very far away.
• Is the subject in shadow? It is really tough to add light to a scene where there is already a lot of light, and flash works best if the subject is in shadow.
There are some things you need to consider when using fill flash:
• Shutter speed. Many cameras need to have the shutter speed set to 1/250 second or slower for the flash to fire. This means that to get a proper exposure, you will have to use a smaller aperture, such as f/8.
• Adjust the flash output. Many flash units allow you to adjust the power of the flash, which will help keep the photo looking natural. A good starting point is to reduce the power of the flash by 1 stop, and then adjust as needed. This is also known as flash compensation.
• Adjust the flash angle. Most accessory flash units have an adjustable flash head that can be angled from 90-degrees to straight up, and many times from side to side as well. By adjusting the angle of the flash, you can adjust where the fill light illuminates, and a little change in the angle can make a big difference.
The key to using fill light is to practice and practice until the adjustments become second nature. Because each situation is different, the settings you use will be determined by the light present. However, as a starting point, I usually begin with the flash head angled at 45-degrees and with the flash power set to -1. It all depends on the amount of light in the background compared to the amount of light striking your subject. The bigger the difference, the more flash power you will need to use.
One thing that is really useful is to add a diffuser over the flash head on your flash, and I recommend using an OmniBounce diffuser or one of the Gary Fong light modifiers, so that the light produced by the flash is softer and spread out more evenly. When you use a light modifier, you lose some of the flash power, so you might have to also adjust the power. The good news is that when you use a proprietary flash, for example a Canon Speedlite with a Canon dSLR or a Nikon Speedlight with a Nikon dSLR, the camera will calculate fill flash for you.
In Figure 5-8, the couple is posed with the sun in the background, yet they are lit with the flash. The flash was needed otherwise the backlighting from the sunset would have turned the couple into a silhouette. The exposure settings were used to render the sky darker, to give it a more dramatic punch. Had the exposure been set for the couple, the image would have looked like Figure 5-9.
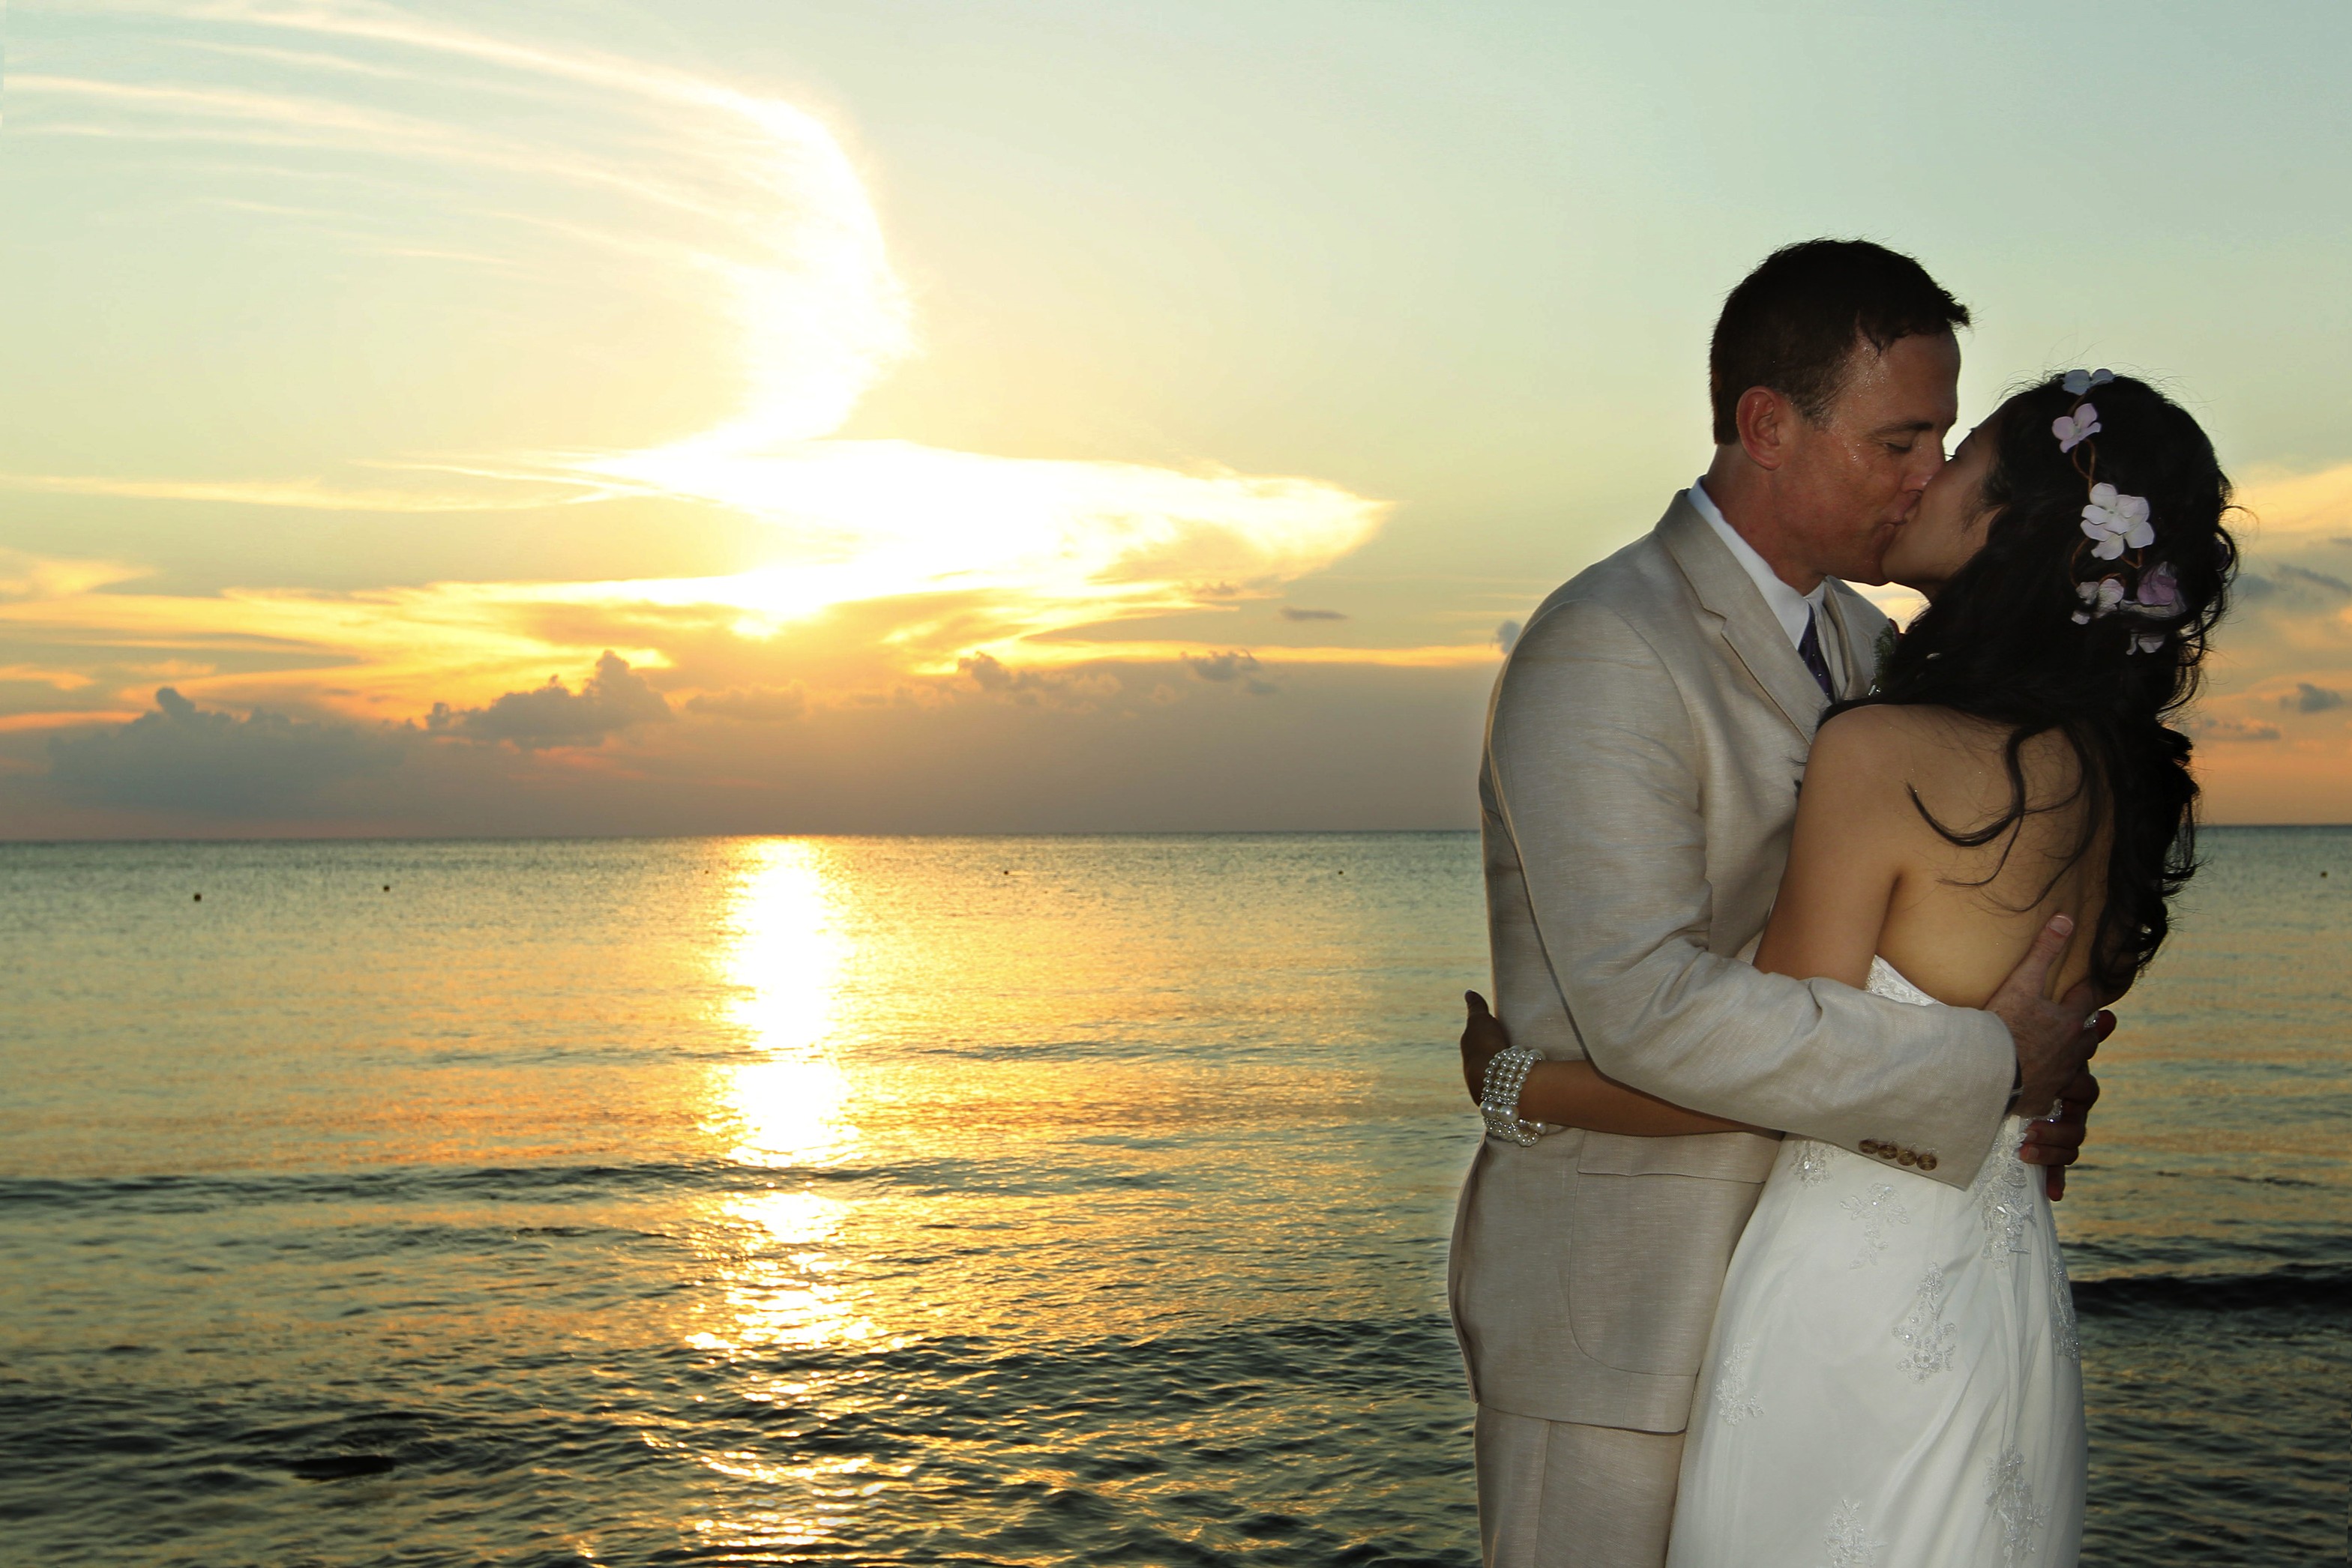
5-8
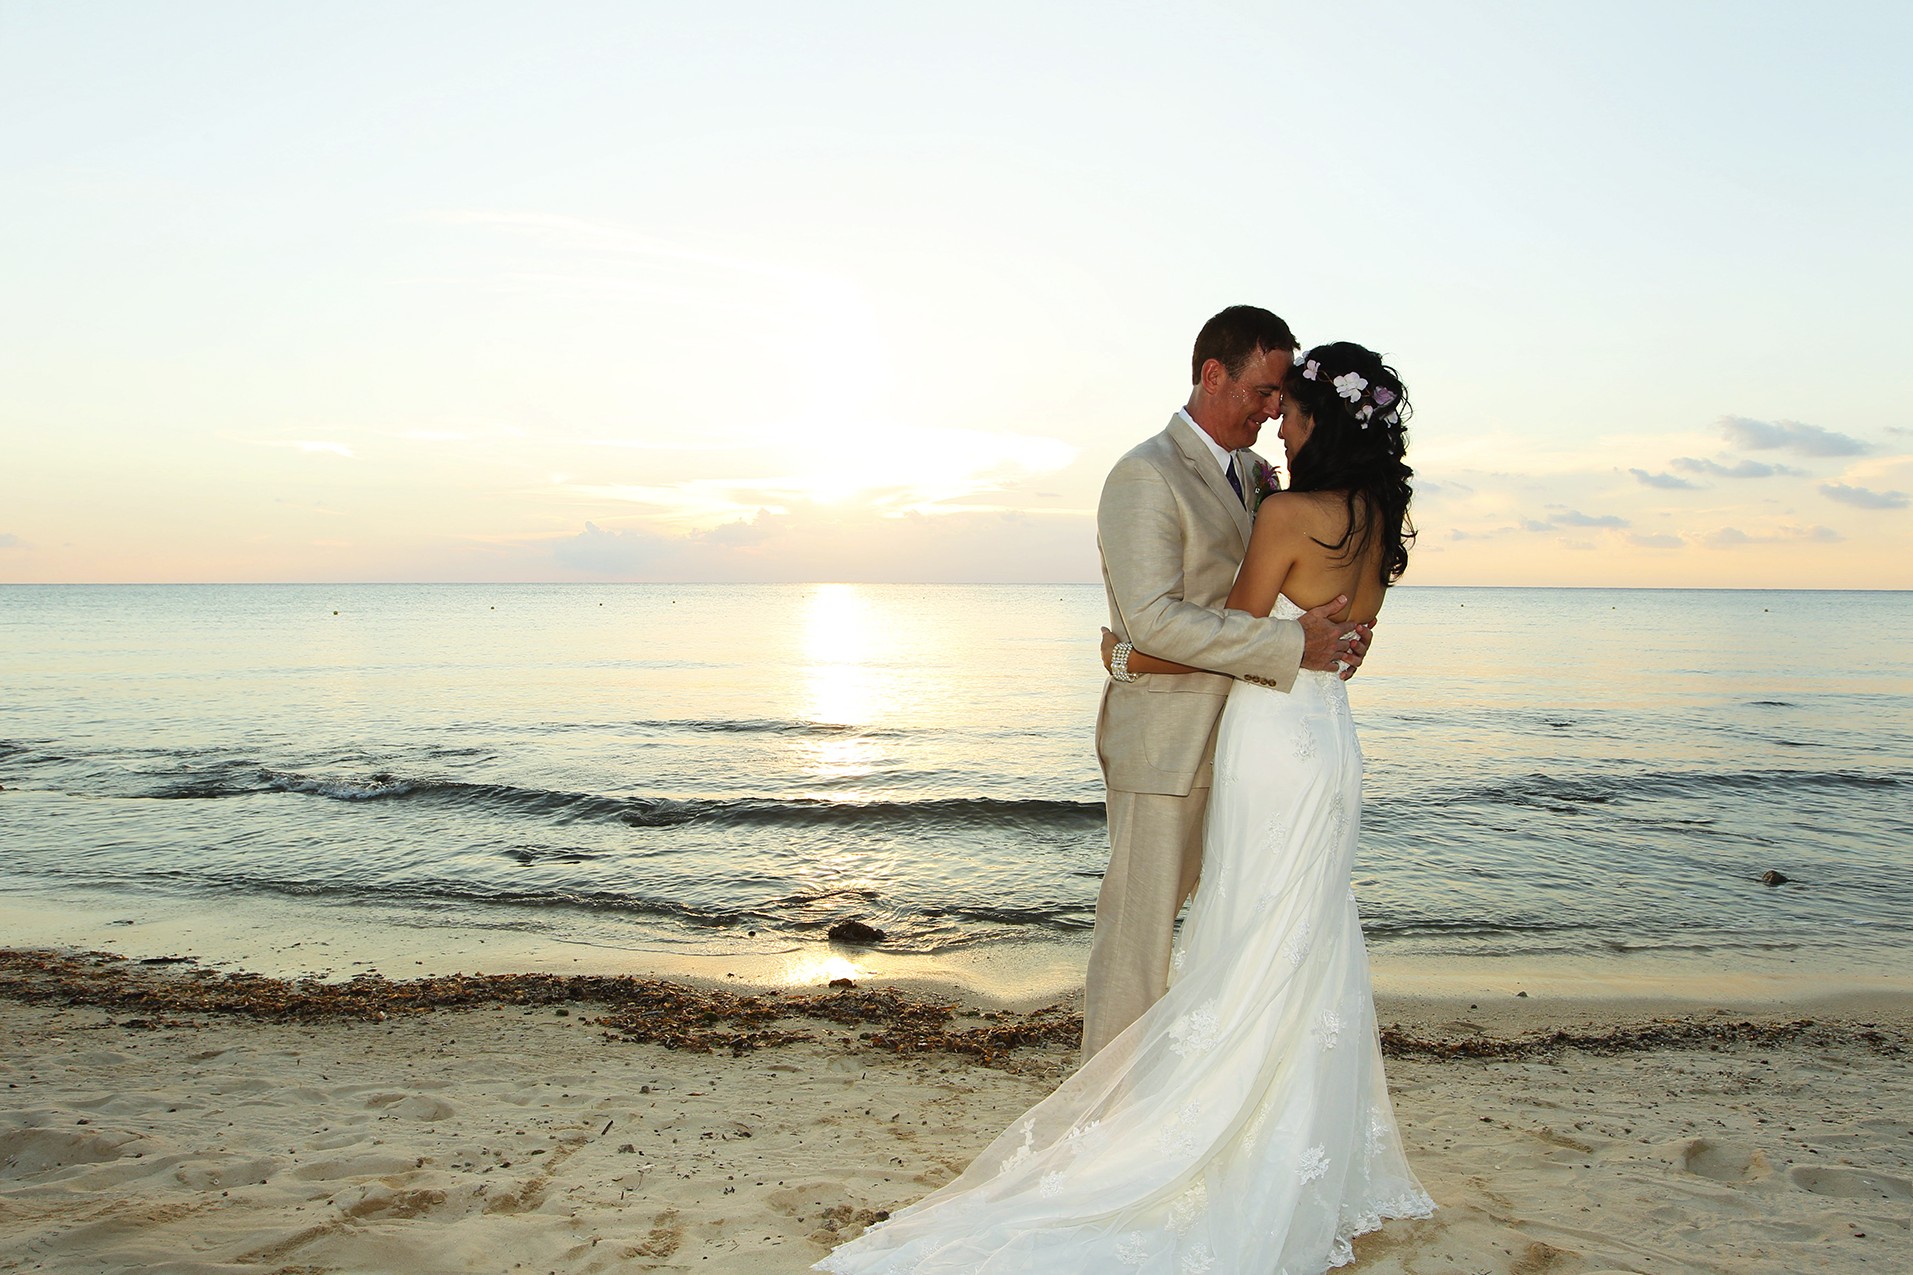
5-9
ABOUT THESE PHOTO The images shown in Figures 5-8 and 5-9 were taken at the same time but, by purposely underexposing the sky in Figure 5-8 and lighting the couple with a flash, the sky and ocean are more dramatic than the shot in Figure 5-9.
If you purposely underexpose the scene to make the sky more dramatic and don’t use a fill light, you will get a silhouette. This is a very popular technique, and you can use it to great effect if the timing and light are right. To get a photograph like Figure 5-10, here is what I recommend:
5-10
ABOUT THIS PHOTO Exposing for the background created this silhouette of the wedding couple. Taken at ISO 100, f/5.6, 1/640 second.
1. Position your subjects so that the light source is directly behind them. Make sure that the subjects are easily identifiable by their edges because they will be nearly or completely black in the final image.
2. Meter on the background. Set the camera to auto mode and use your camera to take a meter reading for the background. I like to use the spot meter to take a reading of the sky behind the subject. Take a note of the shutter speed and aperture settings.
3. Underexpose the image. Enter the settings from Step 2 into the camera while in manual mode and take a photo. Because the meter reading was taken of a brighter area, the settings will underexpose the subjects.
4. Check your image and make any adjustments. Use the LCD screen to see if the image worked and adjust the exposure accordingly, usually to underexpose it a little more.
5. Finalize the image in post-production. You can further enhance these images with software actions during post-production.
For more information on post-production and actions, see Chapter 11.
Sunset and later
One of the best times to take photographs is at sunset and for a short while after. Many photographers refer to this as the golden hour for the quality of the light present. This light is really soft because of the angle of the light as the sun drops below the horizon and is also very warm, because the light travels through the atmosphere at an angle, which just makes everything look better. When shooting people in this light, you need to carefully position the faces so that the subjects face the light and there are no deep shadows in the eye sockets and, if posing more than one individual, you also need to make sure that the light reaches everyone and isn’t blocked by anyone’s head.
The downside to this golden hour light is that it is actually very little light, meaning that the ISO needs to be increased or the aperture needs to be opened wide so that you can use shutter speeds that will give you sharp images. This type of light can be a little flat without much contrast. When the light is too flat, there is no direction to the light source and the subjects’ features look flat, since there is no life in the eyes. One way to add a little pop to images of people taken at this time of day is to use a little fill flash as described earlier. This will add a little spark to the subject’s eyes, making for a better portrait.
RAW versus JPEG
Your camera can record your photos in a variety of formats, including RAW and JPEG. It is important to understand the difference between the two and the advantages to shooting using the RAW file type, especially when in tough lighting conditions. The RAW file type records all the information from the camera’s sensor without any adjustments, very much like a digital negative. This means that all the information that was present is recorded, and none of it is discarded. This creates a rather large file, but having all that information makes it much easier to adjust the image in post-processing. The downside to this is that the file can’t be used in the native RAW format and needs to be processed with a software program to get the file into a usable format. This is either a program from the camera manufacturer or a third-party program that reads and translates the RAW files like Lightroom, Aperture, or the Adobe Camera RAW module of Photoshop. The JPEG format, on the other hand, is usable right out of the camera, but the tradeoff is that the image is processed in the camera and the image is compressed, which means that information is discarded. If the image needs to be edited in post-production, it can be, but the amount of data the software has to work with is much less. I recommend shooting in RAW mode for everything, but especially if the lighting is a challenge.
Another control that can help as the light goes down is the auto ISO setting found on many digital cameras. This setting allows the camera to adjust the ISO automatically while leaving the shutter speed and aperture setting alone. This is great for those images you need to take as the last light of the day fades away. You have the shutter speed set fast enough for sharp images and the depth of field adjusted where you want it, so all that changes is that the ISO rises as the light levels drop. Keep in mind that this can produce digital noise at the higher ISO settings like 1600 or 3200.
Plan ahead
When you shoot outdoors, the light is constantly changing. That means that scenes that are perfectly lit at 3 p.m. are radically different at 5 p.m. and could be completely dark at 8 p.m. This is important to consider when scouting for locations before the wedding. If you can’t visit the location at the same time of day you will be shooting, you need to be able to visualize where the sun will be at the approximate time the photos will be taken. This information can be really useful when working on the photography schedule and shot list. If you know that you will have great light in the afternoon, and have some time available to shoot then, schedule the portraits for that time or at least discuss it with the clients. Many times they will appreciate the concern you have and will work with you to get the best photographs and memories of the day.
There is also a really big difference in the light outside during the day and after the sun has set.
For example, in Figures 5-11 and 5-12, which were taken about seven hours apart, the building remains the same but the lighting changes dramatically. Technology can really make your life easier, especially if you use a smart phone, such as an iPhone. There are apps that tell you the sunrise and sunset times, which will help you predict what the lighting will be like during the ceremony.

5-11
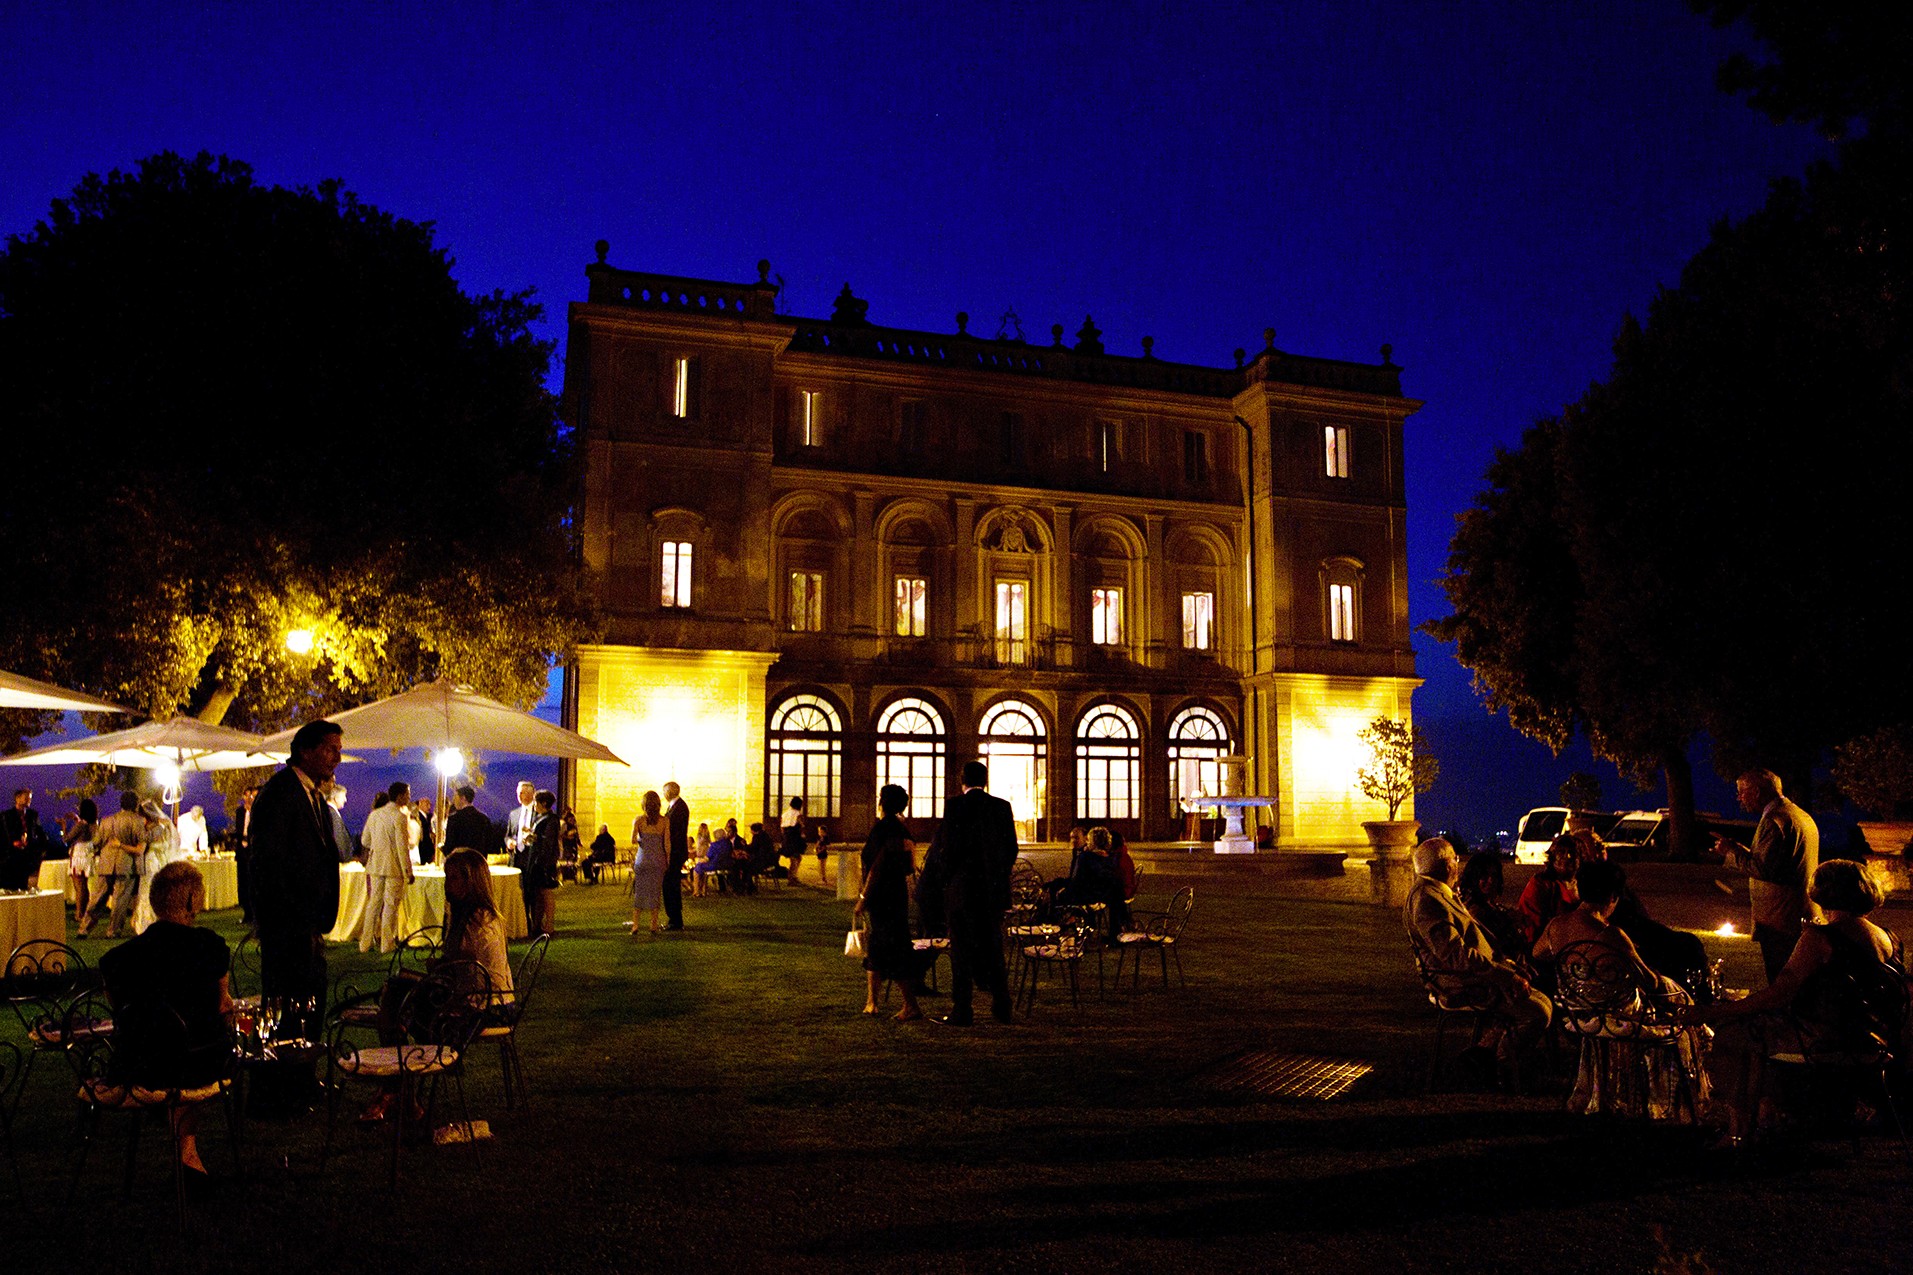
5-12
ABOUT THESE PHOTO This beautiful wedding site is the Villa Grazioli in Grottaferrata, Italy, and the building used to be home to the former cardinal of Rome. Now it is used as a hotel and a beautiful backdrop for a wedding. The same scene can look vastly different depending on the time of day and the lighting. Figure 5-12 was taken at ISO 100, f/5.6 and 1/800 of a second while Figure 5-13 was taken at ISO 3200, f/2.8 and 1/30 of a second.
It is important to pack the right gear for an outdoor shoot as well, and while it seems counterintuitive, one of the most important pieces is the flash unit used for fill flash.
The nice part about shooting a wedding is that because you know approximately what and when things are going to happen, you can plan ahead. If the wedding is going to take place in the late afternoon or the early evening, you can look up the exact time the sun sets and work a quick portrait into the mix, as I did in Figure 5-13. The best time for these shots is after the sun has actually set, and the light takes on a deep red and transitions into a deep blue.
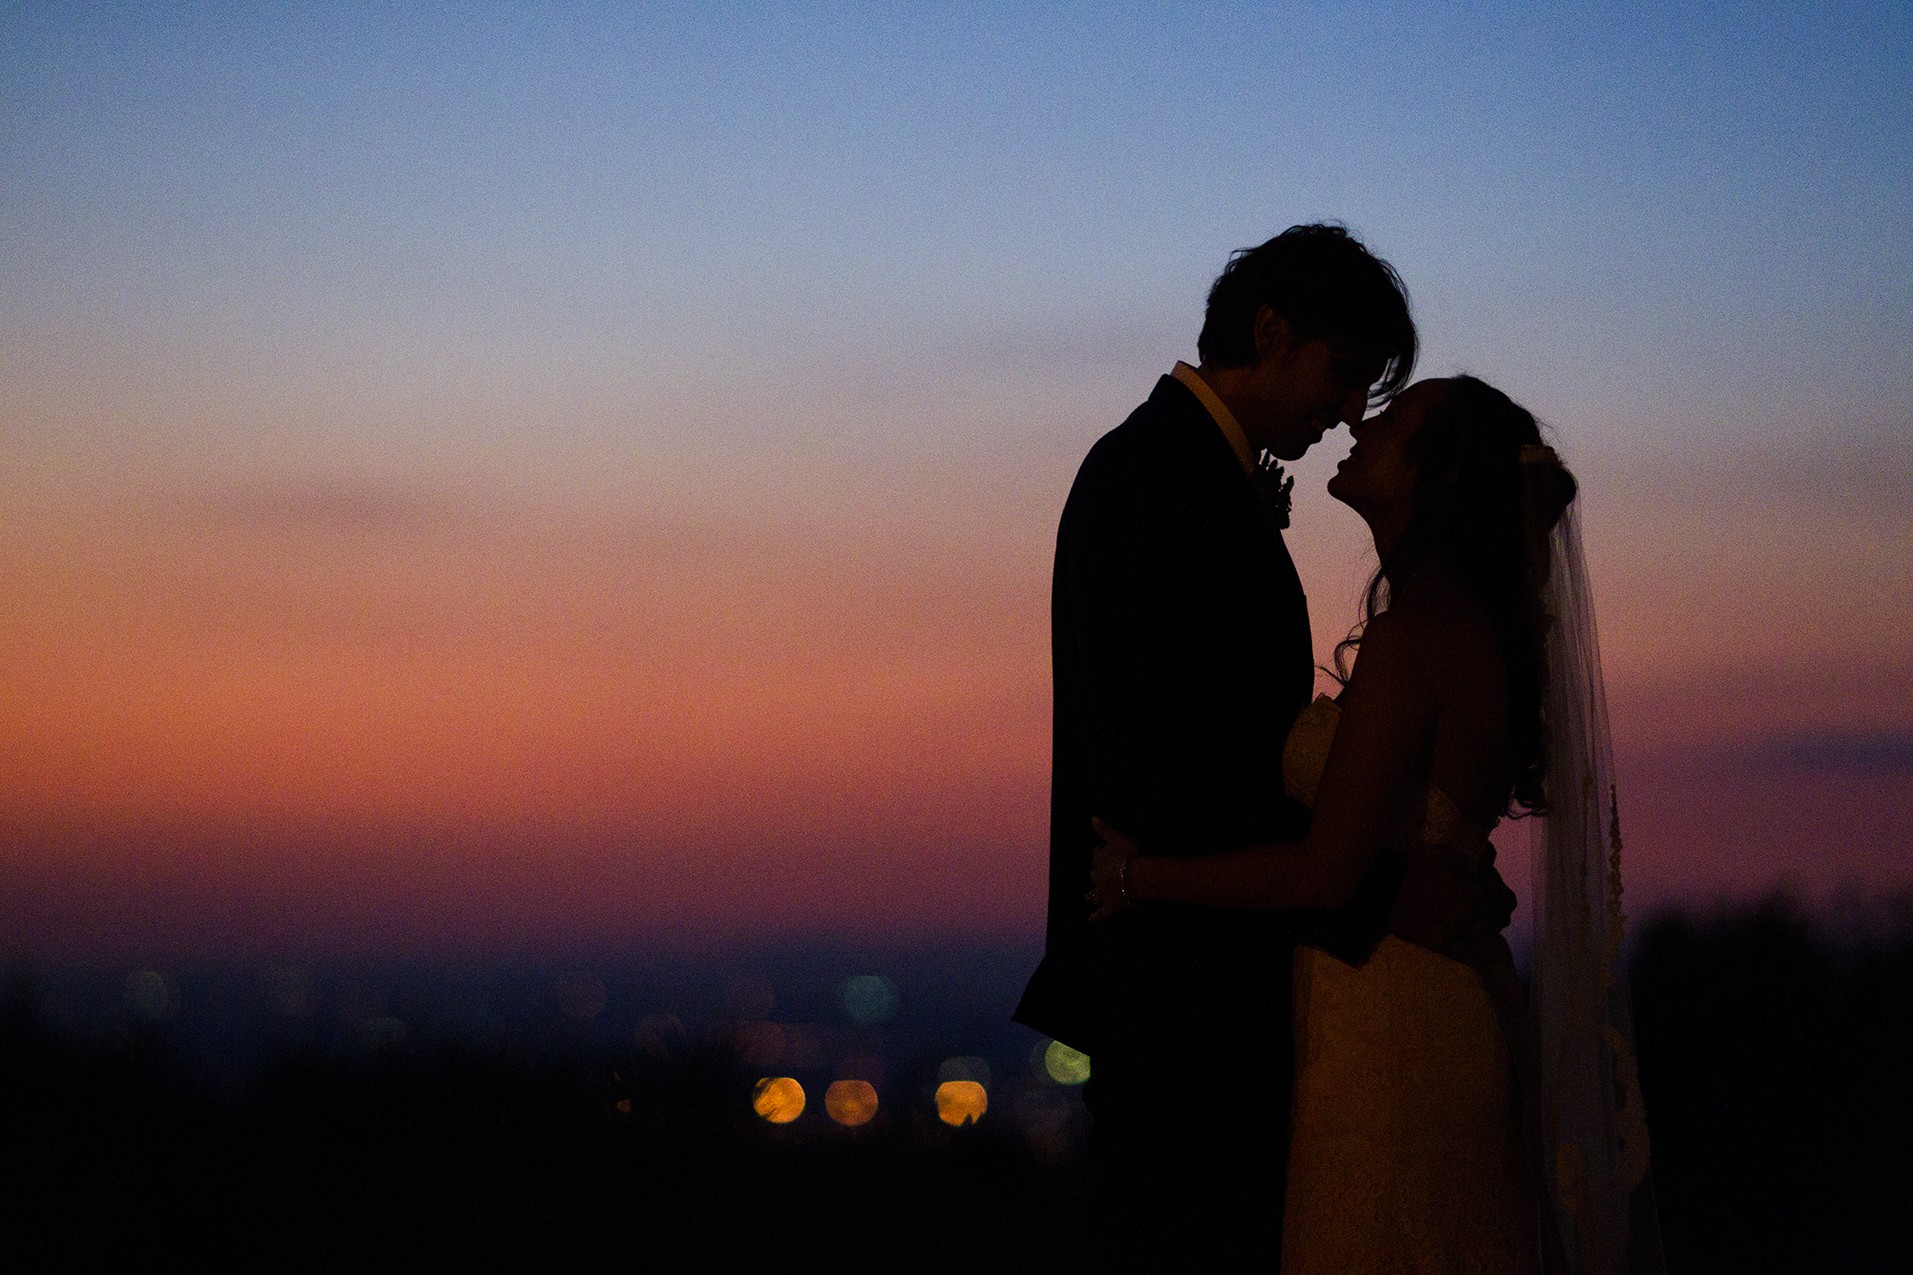
5-13
ABOUT THIS PHOTO The couple is lit by the setting sun that just recently passed below the horizon. Taken at ISO 5000, f/1.4, 1/1250 second.
While shooting outdoors might seem easier than having to deal with a dark interior, there are plenty of other challenges. Make sure you pay attention and plan ahead; the light won’t wait for you.
Assignment
Shoot with Available Light
The assignment here is to shoot during the day using the available light. This assignment might seem easy at first look, but you really need to think about the light in each photo you take. Here are some things to help you along:
• Shoot in RAW. Using the RAW file type gives you greater latitude in post-production editing, and it is especially useful when you are making corrections to the exposure and white balance.
• Look for the shade. The light in shaded areas is much softer and more pleasant to the eye. There are no harsh shadows and bright spots. This is also true on cloudy days when the clouds diffuse the light. This makes cloudy days great for taking photos of people.
• Watch the exposure. Decide whether you are going to expose for the bright parts or the dark parts of your image and constantly adjust as the light changes.
• Watch for highlight warnings. Check your camera and set the LCD to show the highlight clipping warning so that you know when parts of your image have turned completely detail-free white.
Take several shots making adjustments as you do, and post your favorite shot to the Web site to share.
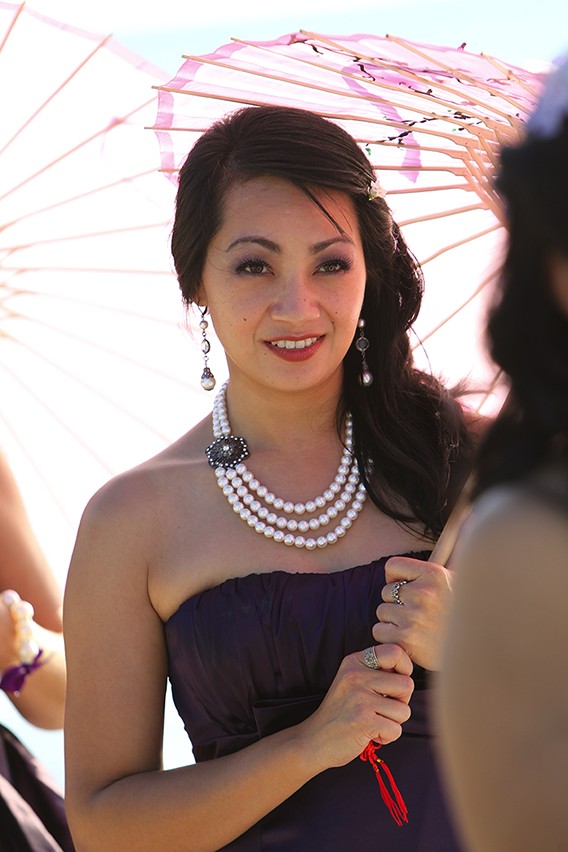
Here, you can see that the bright sun was diffused beautifully by the umbrella that the bridesmaid was carrying. This created a much more even light and helped reduce the tonal range present in the image. It was taken at ISO 100, f/4, and 1/320 of a second.
Remember to visit www.pwassignments.com after you complete the assignment and share your favorite photo! It’s a community of enthusiastic photographers and a great place to view what other readers have created. You can also post comments and read encouraging suggestions and feedback.