
Chapter 3: Exposure and Composition
The basic elements that make up a photograph are exposure and composition. The exposure is how much light is captured by your camera’s sensor. You control the amount of light that is captured by setting the shutter speed, aperture, and ISO. The goal is to have the right amount of light reach the sensor so that the image captured isn’t too bright or too dark. The composition of your images includes where you place the elements in your photograph and, just as important, what you include and exclude when you press the shutter release button as you can see in Figure 3-1. This chapter covers the basics of both exposure and composition and looks at some of the challenges you encounter with wedding photographs.
3-1
ABOUT THIS PHOTO Getting the exposure right is really important, especially when it comes to photos of the bride and groom in their wedding attire. The photograph needs to show both the bright white of the dress and the deep dark areas of the tuxedo. The composition is what makes the image stand out. Taken at ISO 250, f/4, 1/500 second.
Exposure
A photograph is created by capturing light. Your camera and lens are the tools used to capture that light. As the photographer, your job is to control the amount of light that reaches the sensor. The basic controls that manipulate exposure are shutter speed (the length of time the shutter is open to receive light), aperture (the size of the opening in the lens that lets light reach the sensor) and ISO (the sensitivity of the sensor), but before you can pick the settings to use, the light in the scene has to be measured.
Metering a scene
It is imperative that you are able to read the light in any given scene, and the tool you use to do this is a light meter. The good news is that your camera has a built-in light meter that takes a reading of the light through the lens. This allows the camera to measure the light in your scene and only the light in your scene. The light meter in your camera reads the light that is reflected back in the scene and is called a reflected light meter for this reason.
When the light meter reads the light, it tries to determine what the overall brightness of the scene is, and then uses this information to suggest what combination of ISO, shutter speed, and aperture is needed to get a good exposure. The problem arises when you realize that the camera doesn’t actually know what the subject of your photo is. The computer in the camera takes the readings from the light meter and tries to pick the correct exposure. This usually means that the light meter readings are averaged out, creating a setting that will try to get the average light in the scene. This works for a lot of photo subjects but not all, and there are certain circumstances where this doesn’t work at all. Those exposure challenges, such as scenes that have a lot of very light colors like a bride in a wedding dress, can cause the camera’s light meter to underexpose, making everything look too dark; and very dark scenes, such as a groom in a tuxedo, can cause the light meter to overexpose, making the image too light. (How to overcome these challenges is covered a little later on in this chapter.)
Most camera manufacturers have given you not one, but three choices when it comes to using your camera’s built-in light meter: spot metering, center-weighted metering, and a scene metering mode. For Nikon cameras, the scene metering mode is called Matrix metering and for Canon cameras it’s called Evaluative metering, while Sony calls it Multi-segment metering. Each of these modes has its place depending on the subject being photographed. The spot-metering mode looks at a very small part of the overall scene and ignores the rest, and on the newer cameras, this spot meter area is taken from the area that you are focusing on (see Figure 3-2).
3-2
ABOUT THIS PHOTO Because the couple is only a small part of the scene, a spot metering reading on them is important to make sure that the light being read by the camera is only from the subjects. Taken at ISO 200, f/5, 1/400 second.
Center-weighted metering reads the light from the center spot-metering area and looks at the surrounding area as well, but pays more attention to the center area. Center-weighted metering pays less attention to the values at the edges of the scene and is usually used for portraits where the subject doesn’t fill the whole frame. It pays less attention to the surrounding edges because they aren’t as important as the actual subject. As you can see in Figure 3-3, the area of very bright sky is overexposed and has turned completely white because it was not used in the exposure calculation. If it had been, then the rest of the image would more than likely have been underexposed, but leaving detail in the sky. The third metering mode is the scene metering mode, which looks at the whole scene but pays special attention to the focus area and tries to determine the best exposure (see Figure 3-4). One way that camera manufacturers are trying to improve the scene metering modes of their cameras is by using a database of images and comparing the meter readings to that database, which in turn allows the camera to actually guess at the subject being photographed, which increases the odds that the exposure setting will be the right one for the scene.
3-3
ABOUT THIS PHOTO Using center-weighted metering allowed for the important elements of the scene to be read, but the areas toward the edges were ignored, especially the area of very bright sky that is overexposed at the top of the image. (However, the subject is correctly metered.) Taken at ISO 800, f/3.5, 1/250 second.
3-4
ABOUT THIS PHOTO When you have a scene that has no real bright spots or dark spots and the tone is pretty constant, then the scene metering works well to get the proper exposure. Taken at ISO 400, f/3.5, 1/500 second.
When it comes to wedding photography, all these metering modes are useful, depending on the situation. What really starts to matter is what you do with the information that the camera receives from its built-in light meter and how to use it to get the best exposure for any situation. The information from the light meter is used to show you what the camera believes the correct exposure is and whether the current settings are going to overexpose or underexposure the scene. The camera also uses these settings to determine the aperture and shutter speed, depending on the exposure mode of your camera. The four most important exposure modes on your camera and how they are affected by the light meter are as follows:
• Full auto mode. In this mode, the camera sets both the aperture and the shutter speed, and in certain cases, the ISO as well, to capture the right amount of light to get a proper exposure. You have very little control over the settings, and this might be a great mode to use when you just start taking photos, but not so great if you want to control the exposure yourself.
• Shutter speed priority. In this mode, you set the desired shutter speed, and the camera then sets the aperture depending on the light meter reading.
• Aperture priority. In this mode, you set the desired aperture, and the camera then sets the shutter speed depending on the light meter reading.
• Manual mode. In this mode, you set the shutter speed and the aperture, and all the camera does is suggest what the correct exposure should be. While it can be intimidating, it gives you the most control over the exposure.
Shutter speed
Photography is about capturing a moment in time, and the shutter speed is what controls how long that moment is. The shutter speed controls how long the shutter is open, allowing light to reach the sensor when the shutter release button is pressed. The faster the shutter speed, the less light is allowed to reach the sensor, while the longer the shutter speed, the more light is allowed to reach the sensor. The shutter speed is described as a fraction of a second, usually as 1/250, 1/125, 1/60, 1/30, 1/15, and so on. Each time you double the shutter speed, twice as much light is able to reach the sensor. When you halve the shutter speed, half as much light is able to reach the sensor.
When the subject of your photo is moving, you need to decide if you want to freeze the action or show the motion.
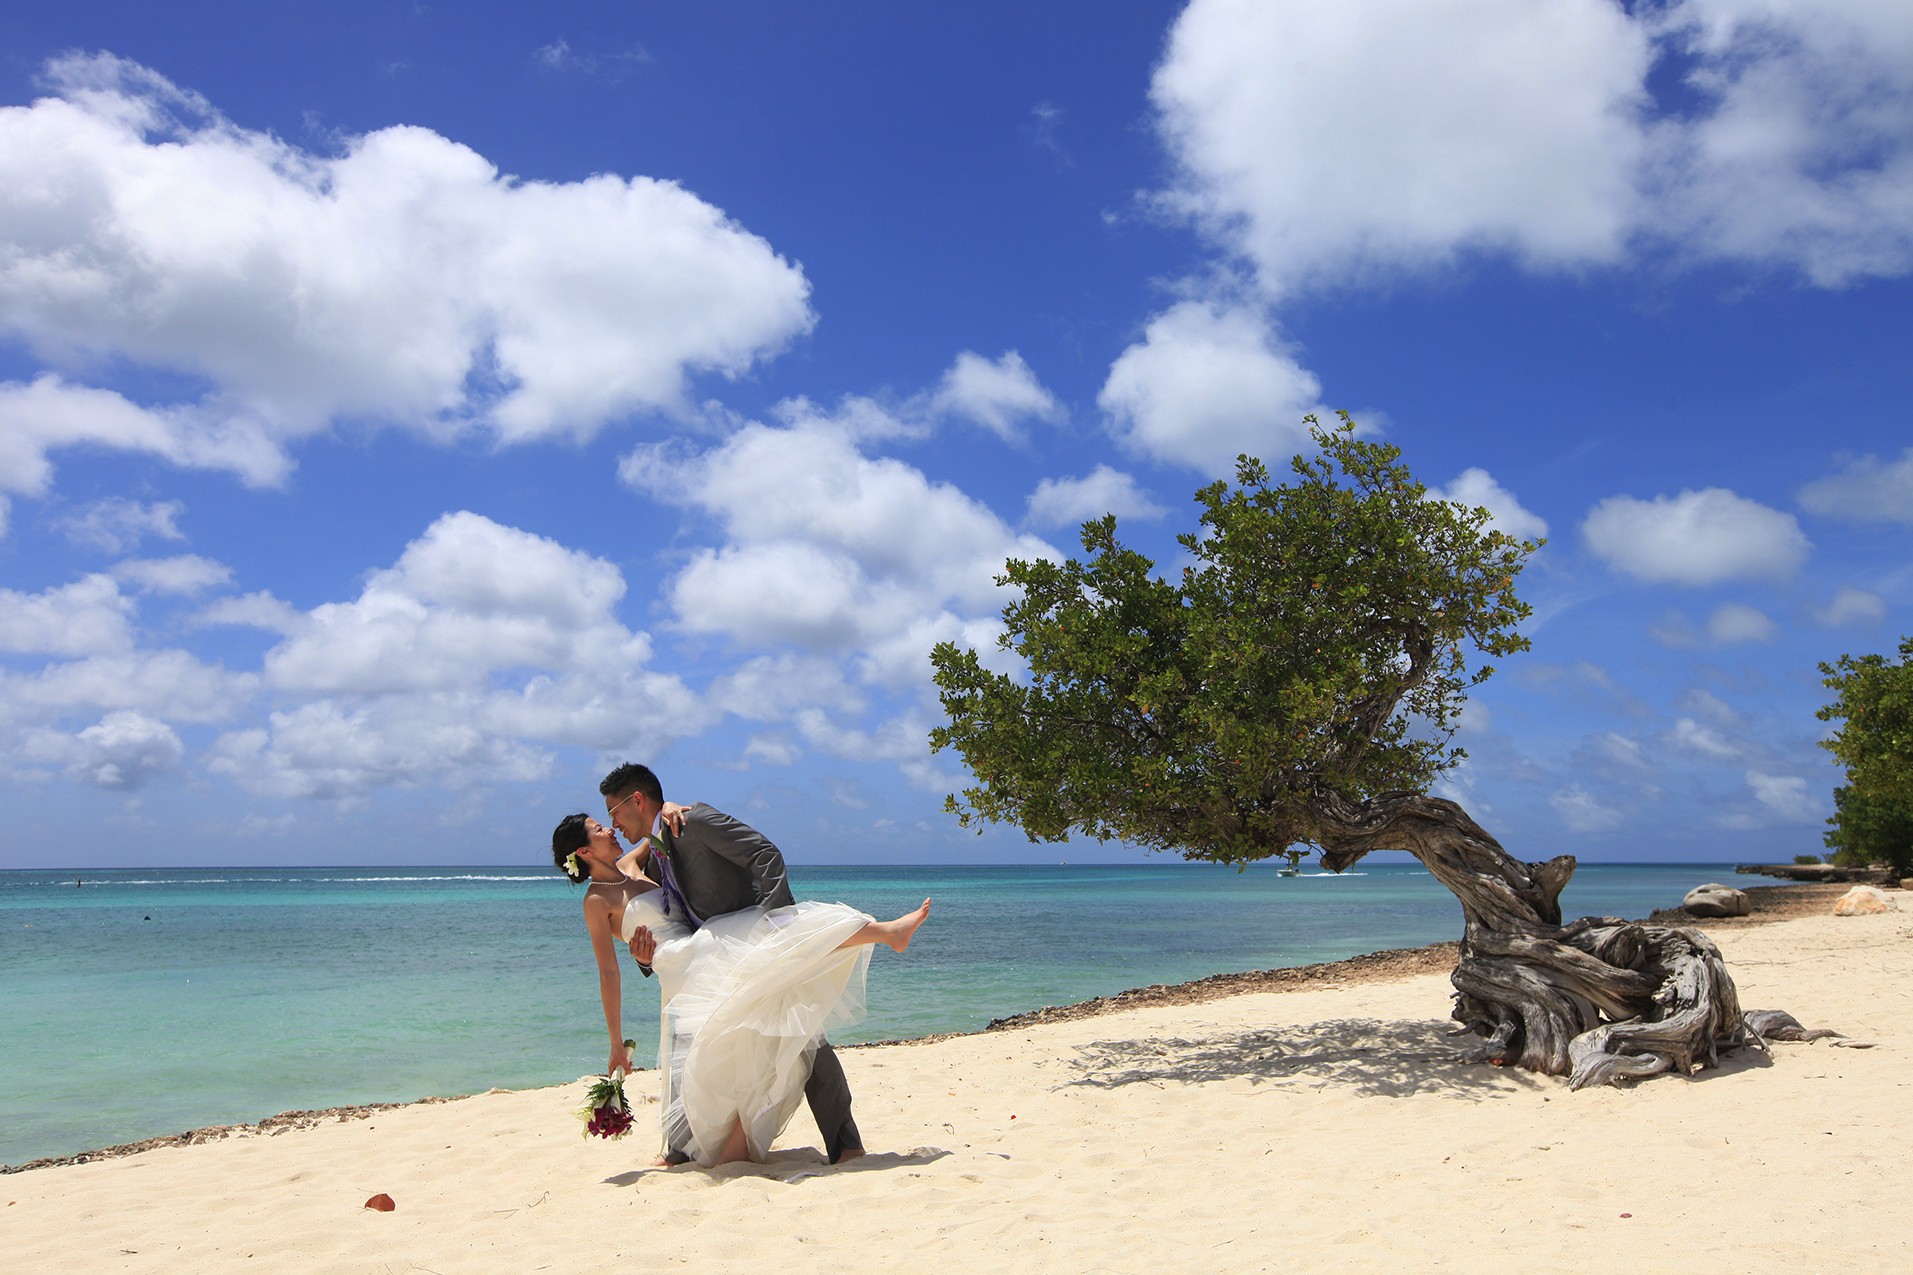
• Freeze the action. To capture a moment in time, the shutter of the camera opens and closes in a fraction of a second. The faster the subject is moving, the faster the shutter speed needs to be to freeze it. A faster shutter speed, such as 1/1000 second, freezes the action. This doesn’t come into play as much with wedding photography given that most times the subjects are moving relatively slow, but you can still use it to make sure everything is frozen in place, as shown in Figure 3-5.

3-5
ABOUT THIS PHOTO When shooting outside in bright sunlight, you can use high shutter speeds and freeze all movement. This outdoor shot was taken using 1/1000 second and froze everything, even the movement of the grass. Taken at ISO 200, f/5, 1/1000 second.
• Motion blur. There are times when you want to be able to show motion in your photographs. A slower shutter speed, such as 1/15 second, shows motion blur. When you leave the shutter open longer, objects that are in motion in your scene will look blurred, while the objects that are still in the scene remain in sharp focus, as shown in Figure 3-6.
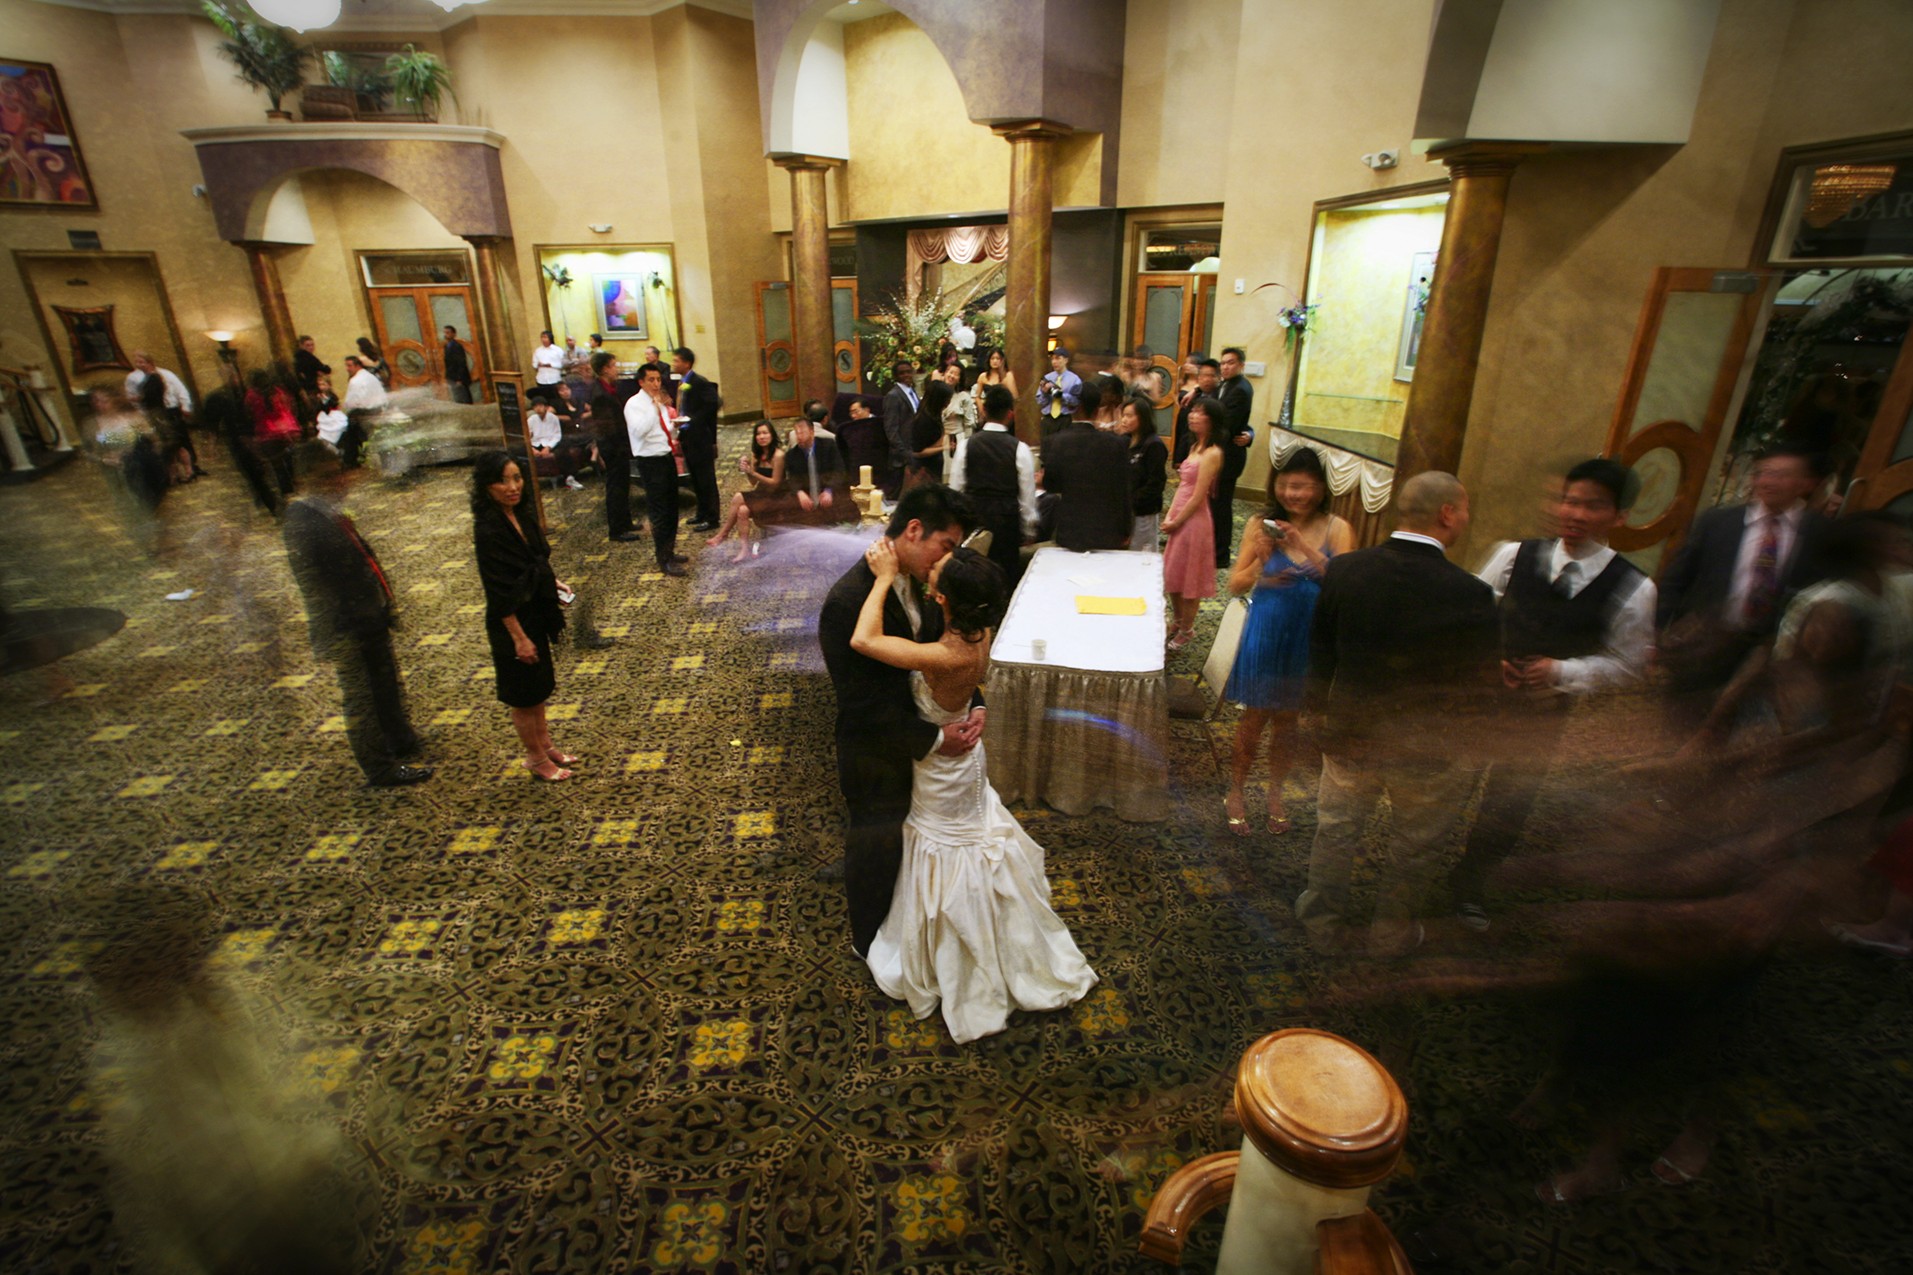
3-6
ABOUT THIS PHOTO Using a rather slow shutter speed of 1.5 seconds allowed the motion of the people around the kissing couple to be seen. Having the bride and groom hold still allowed them to stay in focus and not blur. Taken at ISO 200, f/8, 1.5 seconds.
When you shoot using longer lenses, it is also a best practice to use faster shutter speeds so that any small camera shaking that happens does not affect sharpness of the image. This camera shake can happen when you handhold a camera at too slow of a shutter speed. At longer focal lengths, not only is the subject magnified but the camera shake is magnified as well. The simple rule to avoid camera shake is to use a shutter speed that is 1 divided by the focal length of the lens. For example, if you use a 200mm lens, the minimum shutter speed should be 1/200 second.
Aperture
The aperture is the opening in the lens that light passes through as it travels to the sensor. The size of the opening determines how much light can pass through it at any time. A bigger opening allows more light to reach the sensor, and if the opening is made smaller, less light reaches the sensor. Because the aperture is the opening in the lens, the available apertures that you have to work with are dependent on which lens is attached to your camera.
Refer to Chapter 2 for more informa-tion on how the lens and aperture are related.
The size of the opening is referred to as an f-stop, which is a mathematical way of describing the opening, and it is written as f/1.4, f/2, f/2.8, f/4, f/5.6, f/8, f/11, and so on. Each of the f-stops is related to the one next to it in a very important way — it lets in exactly twice as much or one half as much light, depending on which way you change it. So if you are using f/4 and you change to f/5.6, the amount of light let through is halved, but if you change from f/4 to f/2.8, then the amount of light let through is doubled. Most of the cameras available today allow you to adjust the aperture in 1/3 or 1/2 increments. You can check your camera manual for how to set this on your camera.
Changing the f-stop results in more or less light reaching the sensor, but this action has other consequences as well: Most important, it changes the depth of field.
The depth of field (DOF) is the area in front of and behind the subject that appears to be in acceptable focus. By controlling the depth of field, you can control how much of the image seems to be in focus. The area that is affected starts one third in front of and continues two thirds behind the actual focus point. When you use a large aperture (smaller f-number), the area is very small, creating a shallow depth of field, and when you use a small aperture (large f-number), the area in acceptable focus is larger, creating a deep depth of field.
The depth of field control is one of the most important controls in photography because it allows you to control what is in focus and what isn’t, which in turn allows you to dictate what the subject of the image is. To make the wedding rings and the hands holding them the focus of the photograph in Figure 3-7, I used a very shallow depth of field.

3-7
ABOUT THIS PHOTO By using a very large aperture, in this case f/1.8, it is possible to create a very shallow depth of field, making the part of the subject that is in focus really pop out of the background. In this case it is the wedding rings and the hands holding them. Taken at ISO 1000, f/1.8, 1/400 second.
Another factor that plays a part in the depth of field is the distance between the camera and the subject of the photo. The greater the distance between the camera and the subject, the greater the depth of field area, while moving the camera in really close creates a shallower depth of field.
There are times when a deep depth of field is called for and, when it comes to weddings, this is usually when you are shooting the group portraits, especially if the subjects are posed at different planes, as shown in Figure 3-8. To keep the whole group in acceptable focus, a deeper depth of field is needed, which can mean that you need to increase the ISO or need to decrease the shutter speed to get the proper exposure with a smaller aperture.
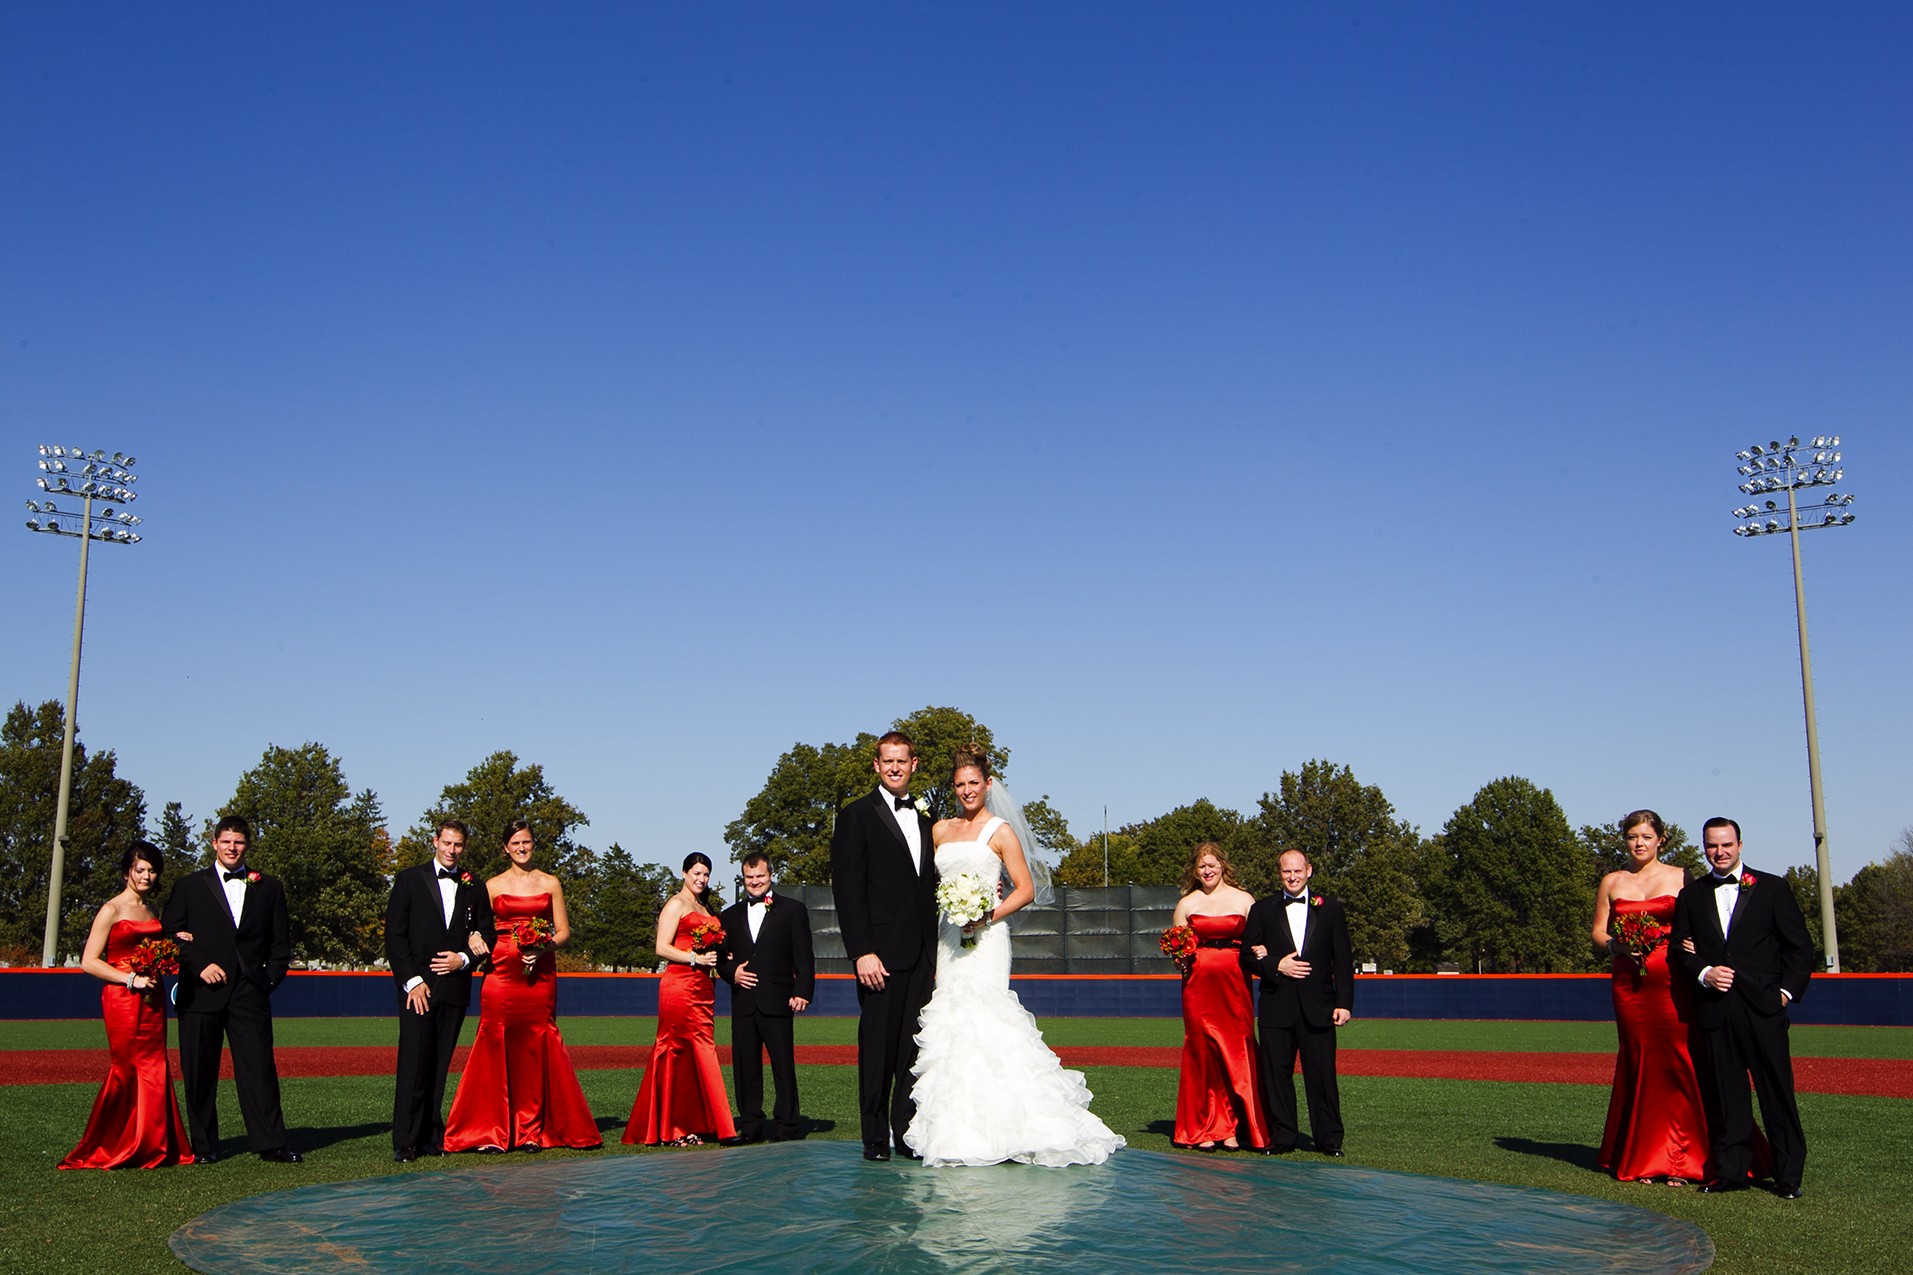
3-8
ABOUT THIS PHOTO By using a small aperture, in this case f/13, the image has a deep depth of field: The wedding party placed behind the couple and even the lights are in focus enough to make the ballpark location clear. Taken at ISO 100, f/13, 1/160 second.
Photographers often use the terms shooting wide open, which means to be using the widest aperture available on their lens, and stopping down, which refers to making the aperture smaller, letting in less light but increasing the depth of field.
ISO
The third setting that goes into controlling your exposure is the ISO. The ISO setting comes from the days of film photography where the sensitivity of the film needed to be standardized. This was so photographers would know how sensitive the film was and could adjust their exposure accordingly, and the same holds true for digital photography. There is a simple logic when it comes to ISO: The higher the number, the more the signal from the sensor is amplified and the less light is needed. Each time the ISO doubles or halves, the sensor is effectively twice as sensitive to light or half as sensitive to light. For example, if you are using an ISO of 800 and change it to 1600, the sensor is now twice as sensitive to light. If you change the ISO from 800 to 400, the sensor is effectively half as sensitive to light.
The only downside to using higher ISOs is that the amplification of the signal can introduce digital noise into your image. This shows up as random, colored dots, especially in areas that should be a smooth tone. This is also one of the areas that camera manufacturers have really improved on in the last few years, and cameras now can produce images that are virtually noise free at higher ISOs than ever before.
Test the high ISOs on your camera and decide what level of digital noise you can live with, because all camera models are different.
Putting it all together
The three settings that are used to control the exposure all work together because they use the same measurement when talking about the amount of light: the stop. When you double the amount of light, it is called a stop. It doesn’t matter if you do that by doubling the size of the aperture or leaving the shutter open twice as long; each change is a full stop and is equivalent. What this means is that you can adjust the exposure using any of the controls interchangeably. For example, because light is measured by stops, you can pick the aperture you want and adjust the shutter speed to make sure the exposure is right. Therefore, if you want to take a photo with a shallow depth of field so that the subject pops off the background, start with an f-stop of f/4, a shutter speed of 1/250 second, and an ISO of 400, which will give the proper exposure. If after you take the photo, you realize that the depth of field is still too deep, open the lens up one full stop to f/2.8. However, now there is too much light coming through the lens and reaching the sensor, so you need to adjust the shutter speed and/or the ISO to get an equivalent exposure. You can remove a full stop of light by halving the time the shutter is open from 1/250 of a second to 1/500 of a second. This will allow exactly half as much light to reach the sensor. You can also reduce the ISO one full stop by changing the ISO from 400 to 200, making it exactly half as sensitive to light.
Exposure Challenges
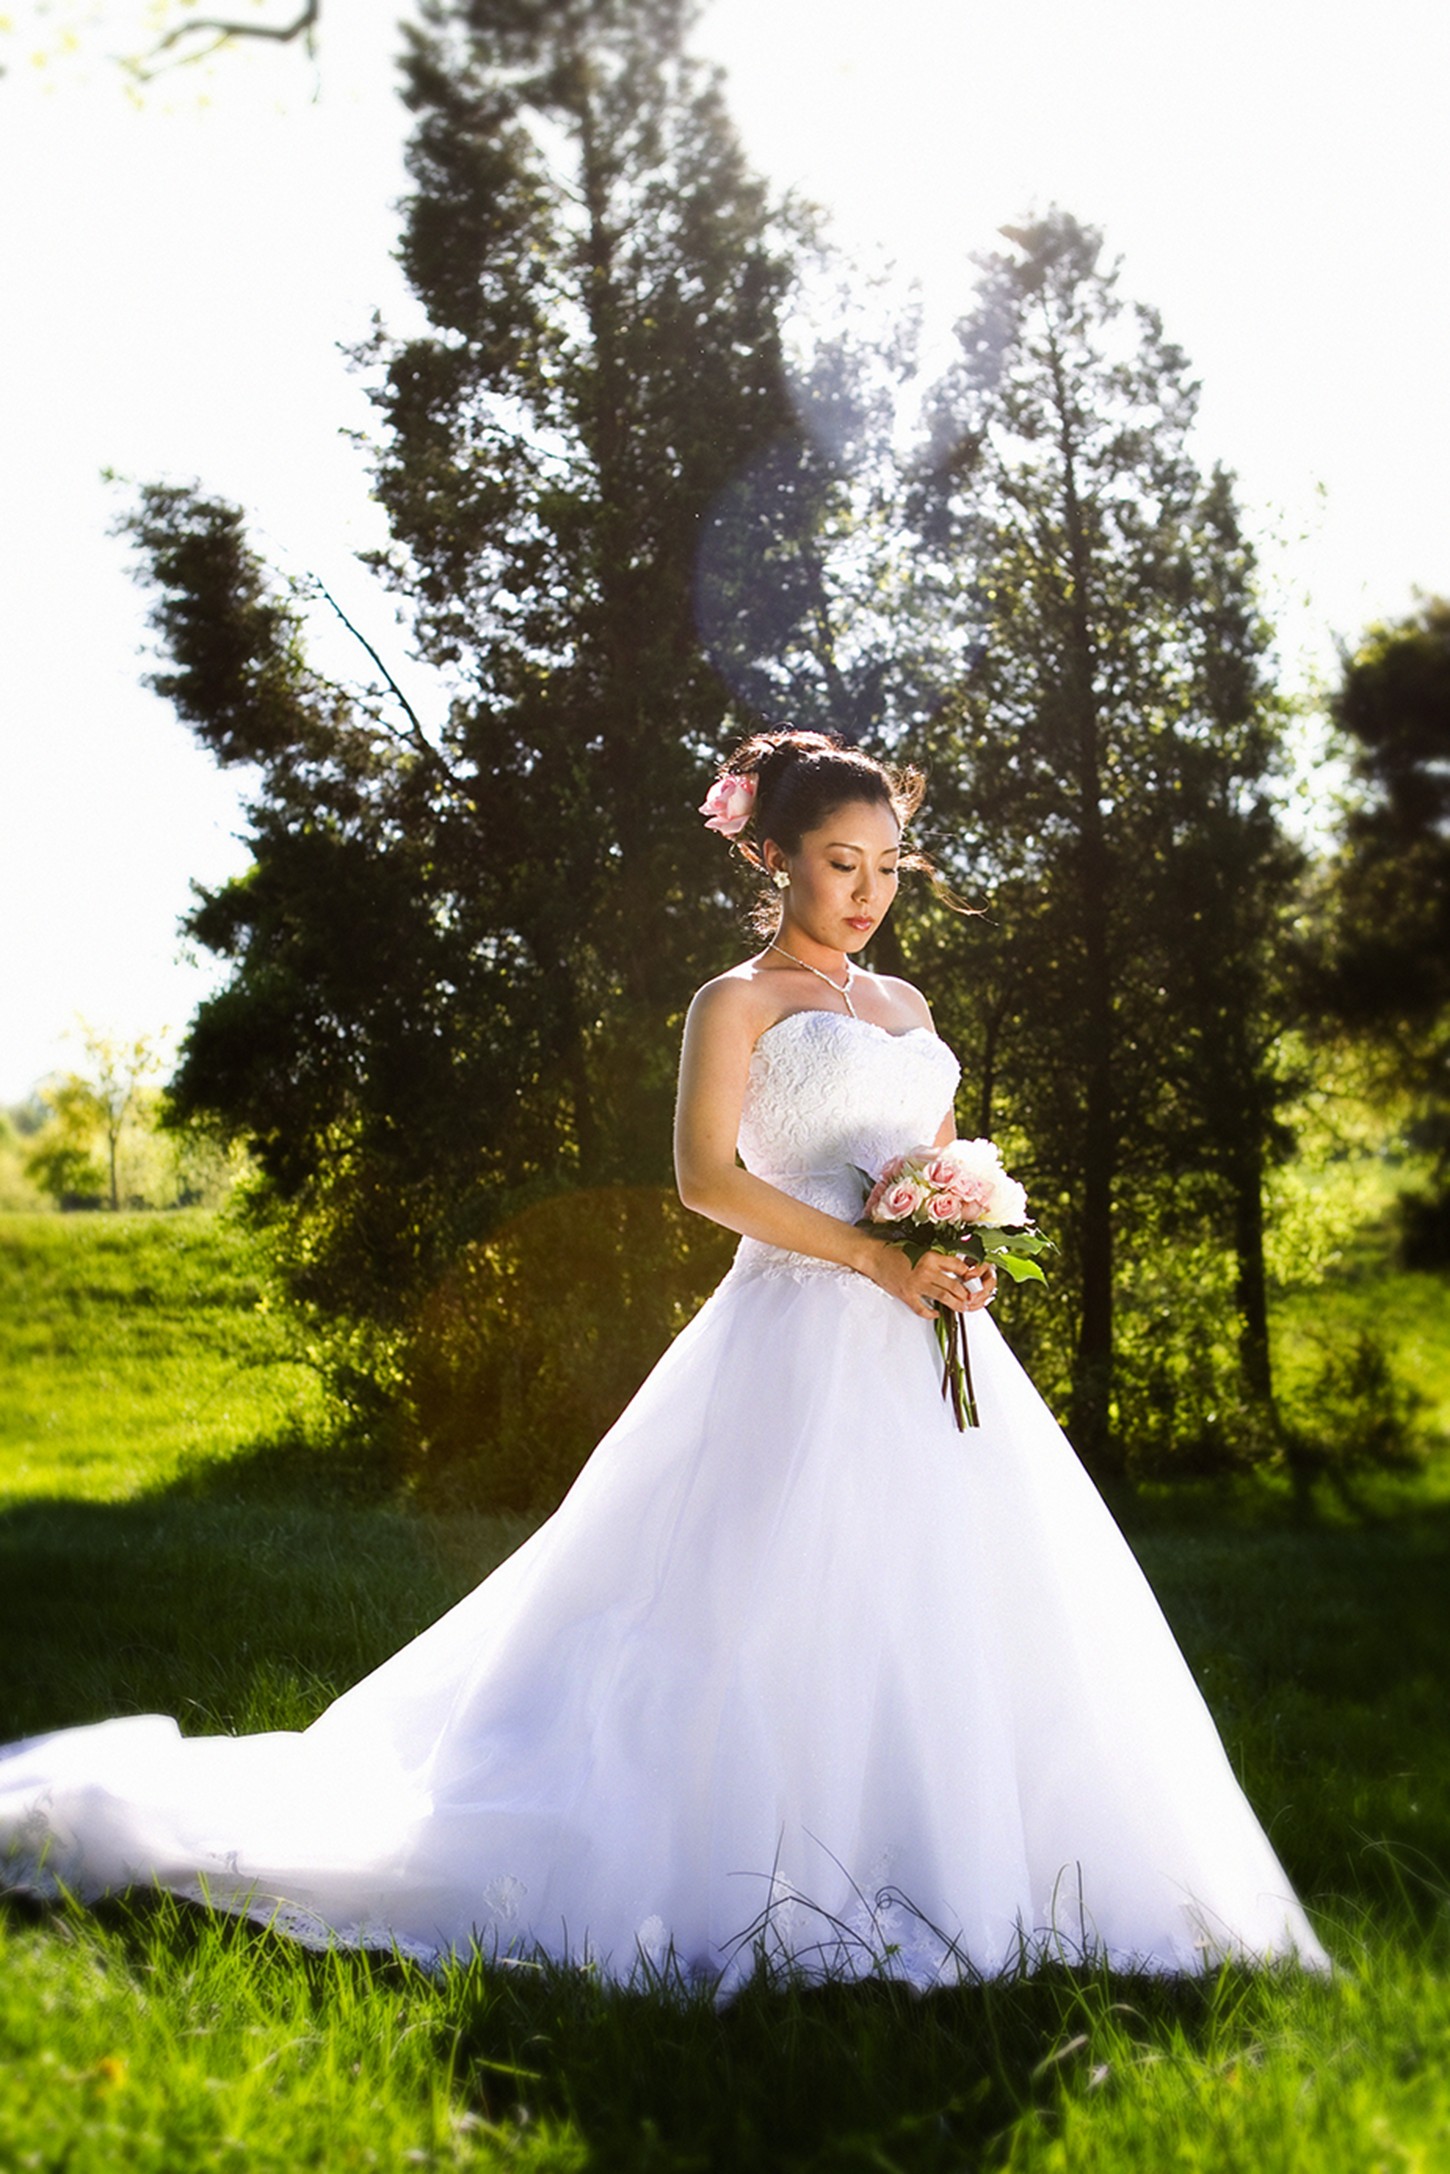
Weddings come with special exposure challenges, mainly due to the traditional white wedding dress for the bride and dark suit or tuxedo for the groom. Consider the bride in her white dress first. The problem is that when the camera’s built-in light meter looks at a scene with a large amount of white or light colors in it, the settings that it recommends usually underexpose the image, causing the white dress to be gray, not white, which could have easily happened in Figure 3-9. However, because I adjusted the exposure accordingly, the bride is lovely in white, as she should be.
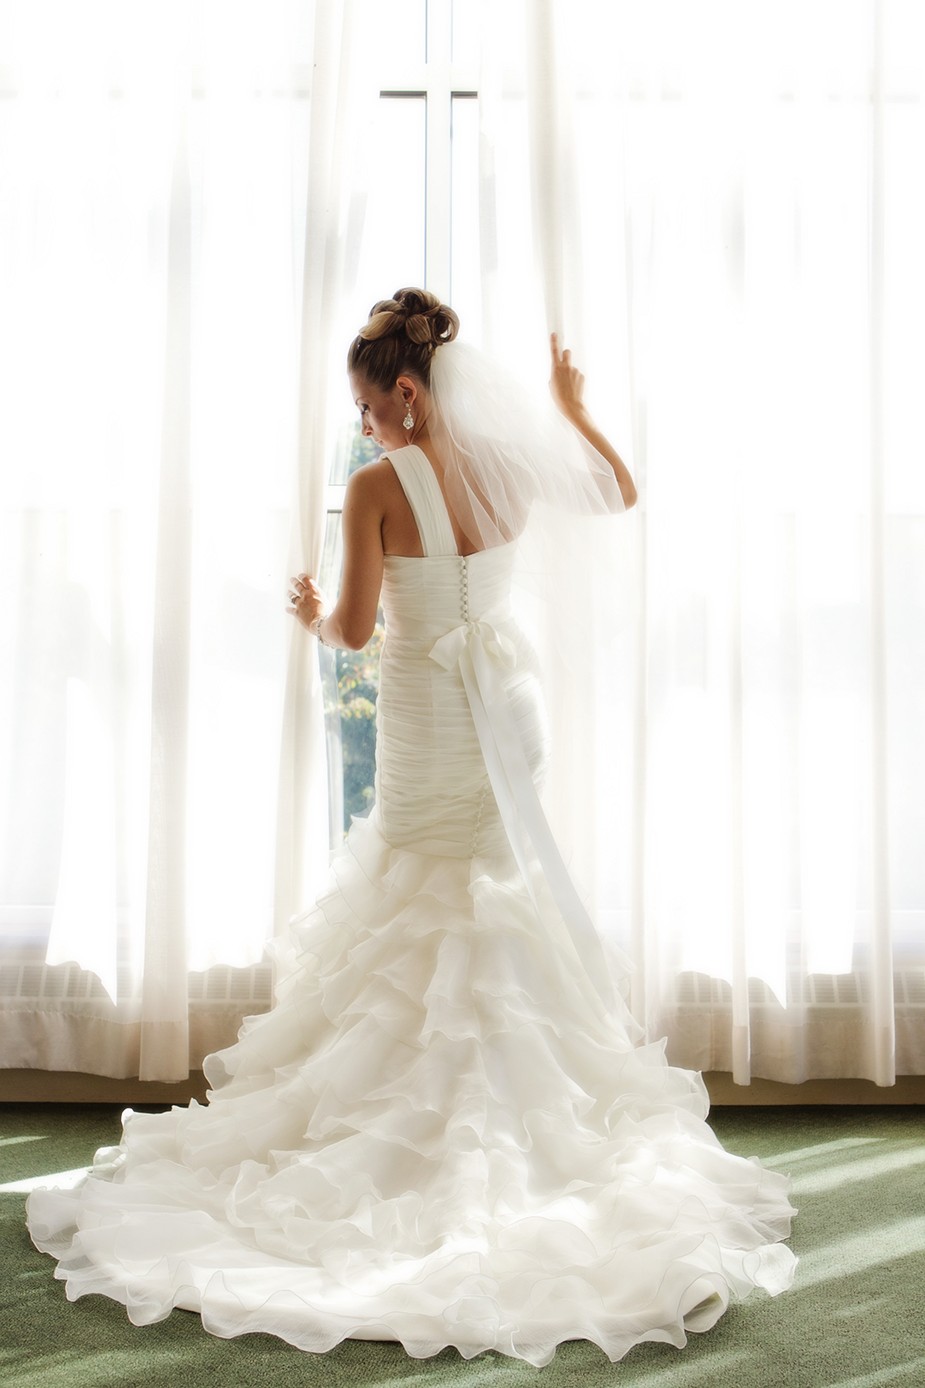
3-9
ABOUT THIS PHOTO Scenes with a lot of white can really throw off the camera’s built-in light meter. This shot of the bride dressed in white in front of the bright white windows can make for a very difficult exposure. Taken at ISO 400, f/4, 1/320 second.
There are a couple of different ways to deal with photographing a scene that is predominantly white, the easiest of which is to use the spot metering setting in your camera and make sure you take the reading from the bride’s face. This works in most situations because the light meter reading is taken from an area that is not solid or predominantly white. The second method is to shoot in Manual mode and purposely overexpose the image until the whites of the dress have detail, but look white and not grey, as in Figure 3-10. You do not want to overexpose the dress to the point where the detail is lost and the dress just looks pure white.
3-10
ABOUT THIS PHOTO If the exposure setting were determined by the camera’s built-in meter, this bride posed outdoors in a bright white dress lit by direct sunlight would have been severely underexposed, because the camera would have tried to average out the scene to an 18% gray. Taken at ISO 100, f/4, 1/250 second.
To purposely overexpose the image until you have a true representation of the scene takes a little practice, but once you get the exposure correct, you can take a series of photographs without worrying about the exposure changing. The following steps should help you get the best exposure in this situation:
1. Set the camera to aperture priority mode or the mode that allows you to set the aperture and the shutter speed.
2. Set the metering to spot metering.
3. Pick the aperture that you want to use.
4. Set the focus point on the bride’s face.
5. Press the shutter release button halfway down to engage the camera’s built-in light meter. Make a mental note of the shutter speed that the camera believes will give a proper exposure.
6. Adjust the exposure by using the exposure compensation setting on your camera. Choosing plus numbers will add more light so I recommend starting at +1.
7. Take a photo.
8. Check the photo on the back of the camera. If the image seems underexposed, then you can increase the exposure compensation; if the image is too bright, then decrease the image compensation.
9. Take another photo and check the image on the back of the camera. If you use the blinking highlight warning, then any area in your photo that is pure white will blink. Remember, it is rare that the dress will be pure white, so if the dress is blinking, the image probably is overexposed.
10. If the image is still too dark, repeat Steps 9 and 10 until the exposure is what you want.
When it comes to photographing the groom in his tuxedo, or several men in dark clothing, as shown in Figure 3-11, the camera’s built-in light meter has a tendency to set the exposure settings to overexpose the image. This is because the light meter suggests exposure settings to create an average, and because most of the frame is filled with dark areas, it tries to lighten those areas. This also causes the faces of the groom and the other people to be overexposed, creating a washed-out image.
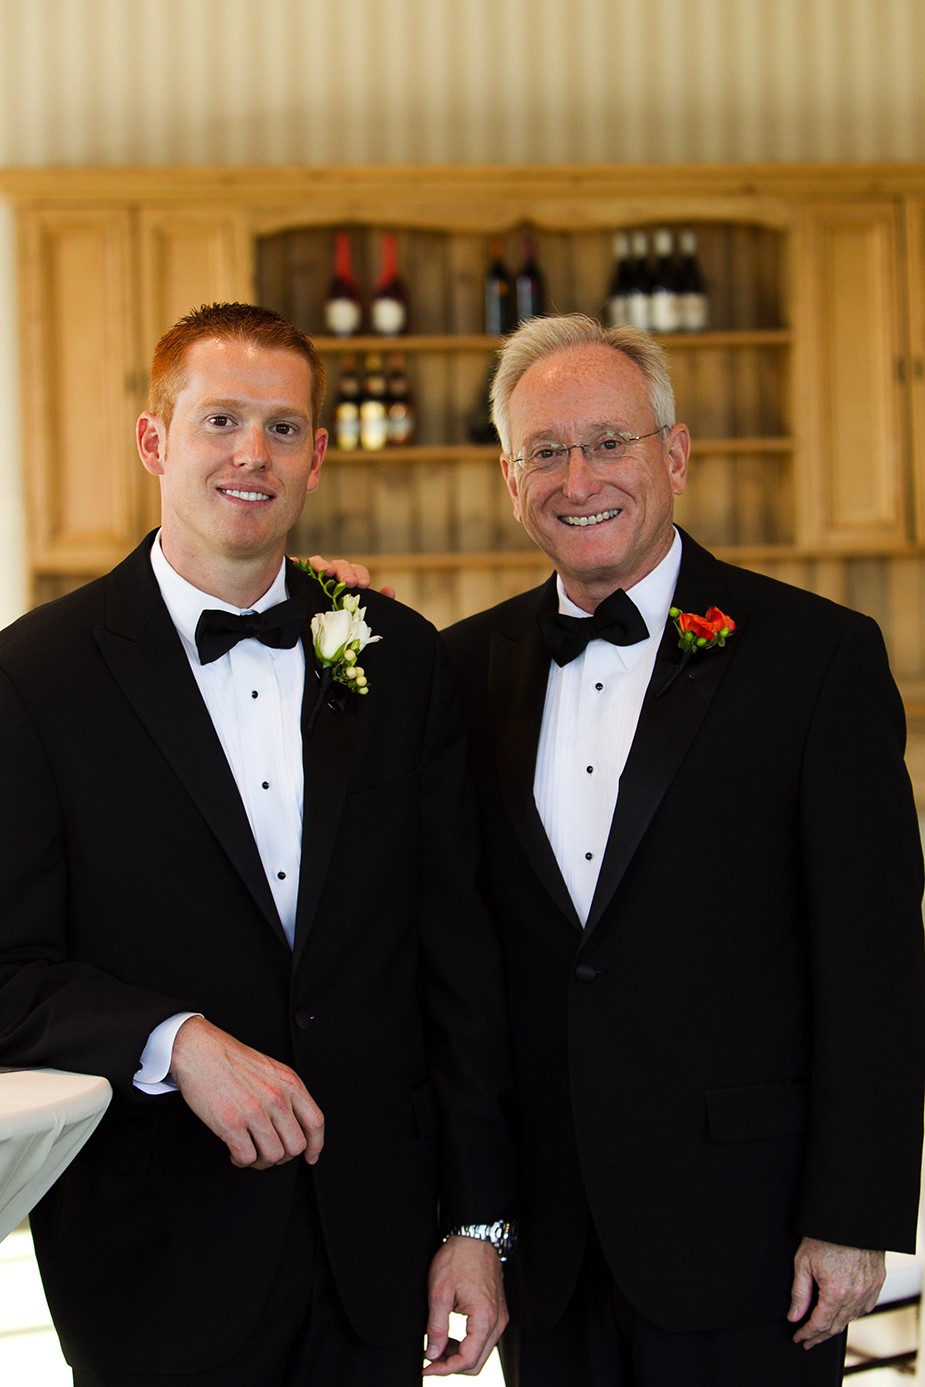
3-11
ABOUT THIS PHOTO Purposely underexposing the scene slightly will render the dark areas correctly while also making sure the skin tones are right. Taken at ISO 800, f/3.5, 1/200 second.
The solution when shooting dark scenes is to purposely underexpose the scene so that the darks stay dark, or to make sure that you get a light reading that ignores the large dark areas. You can do this by using the spot-metering mode and making sure that the metering area is focused on a part of the image that has a neutral tone, like the groom’s face. It is also possible to follow the steps earlier in this section, but instead of overexposing as you would for the bride, you would slightly underexpose for the groom. This means you would increase the shutter speed, or decrease the aperture or ISO. Keep in mind that the groom’s tuxedo is probably not pure black, so don’t underexpose so much that everything is too dark. When it comes to a mix of very dark and very light areas in the same image, using the spot meter on the face of the bride or groom will work to keep the exposure correct, even in those tough situations, as shown in Figure 3-12.
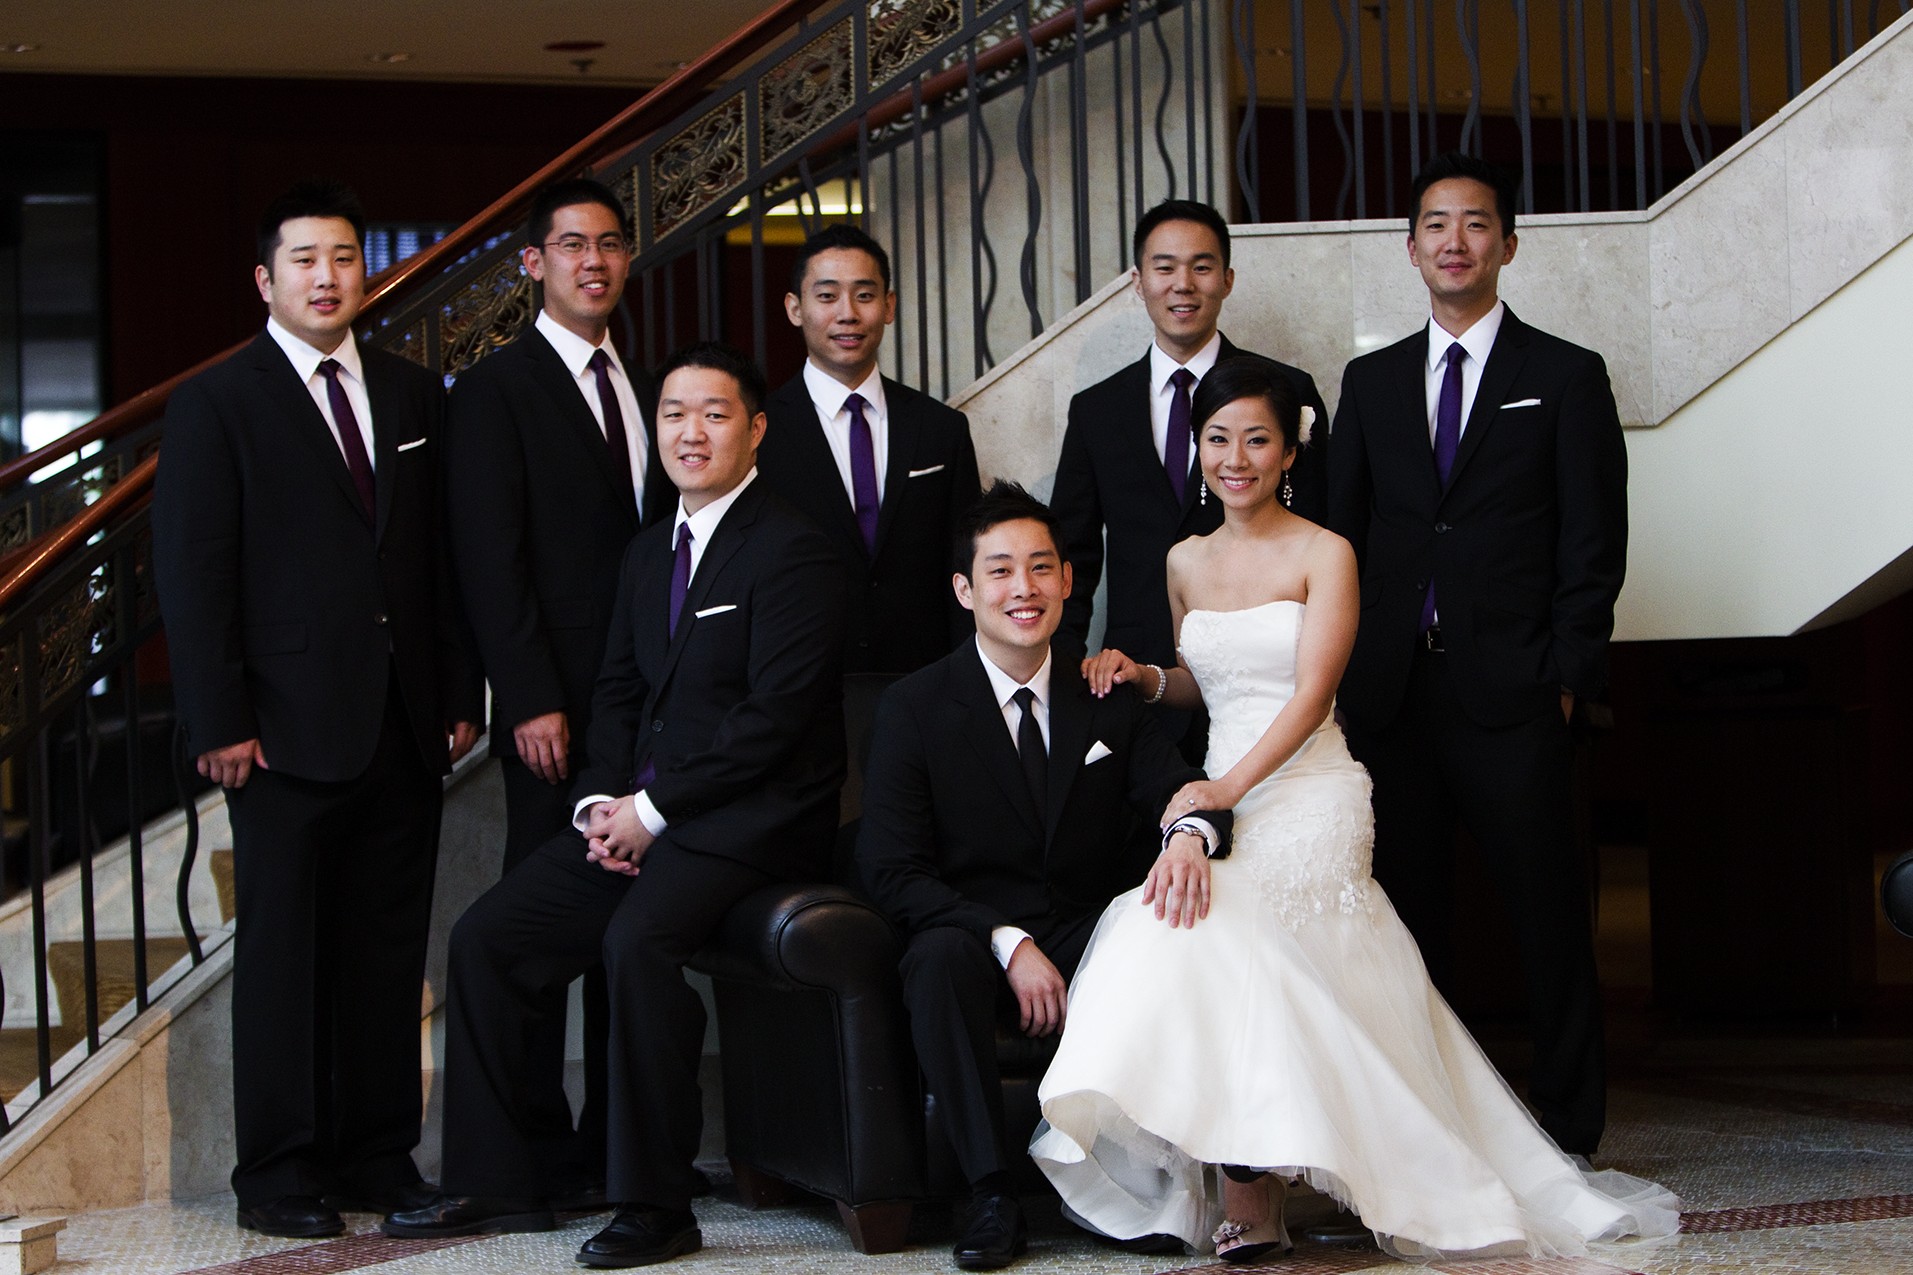
3-12
ABOUT THIS PHOTO Putting a bride, dressed in her beautiful white dress, among the groom and his entourage, all dressed in dark tuxedoes, can be a challenge that spot metering can help you overcome. Taken at ISO 1600, f/2.8, 1/250 second.
Composition
The composition is what you choose to include in your photograph and where the elements in your image are placed. Once you have mastered the exposure, you can start to concentrate on the composition, because it is the composition that can really turn a good photograph into a great photograph. Take Figure 3-13, for example. The placement of the couple and the horizon line were no accident; using the Rule of Thirds here helped create a pleasing image.
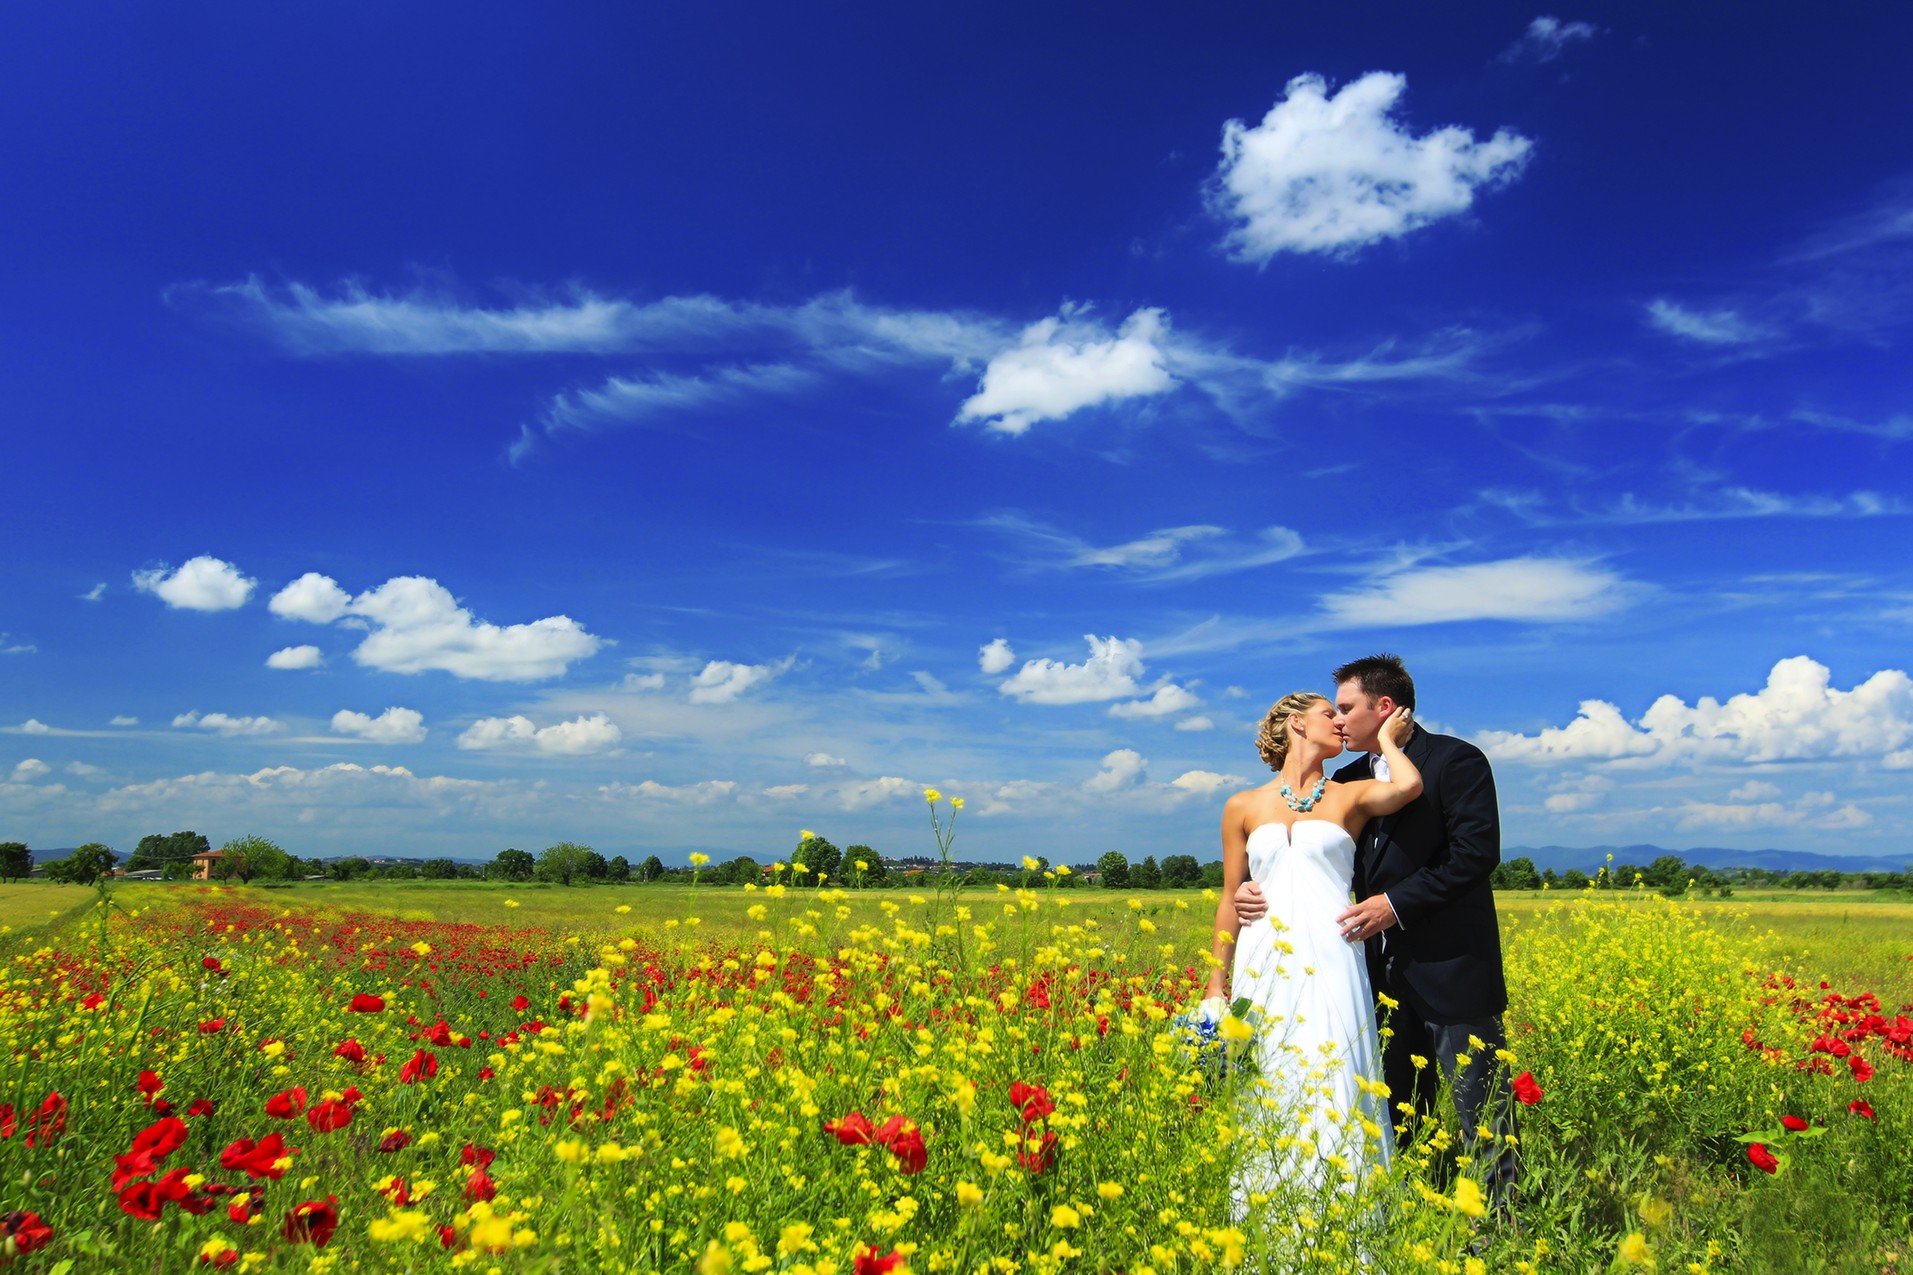
3-13
ABOUT THIS PHOTO This photograph of the bride and groom uses the tried-and-true Rule of Thirds to create a pleasing composition. Notice the placement not only of the bride and groom, but of the horizon line as well. Taken at ISO 100, f/8, 1/80 second.
Basic rules of composition
When it comes to composition, there are no rules set in stone, but there are some things that can really help you create pleasing compositions. The most common and widely used composition guidelines are the Rule of Thirds and using leading lines.
• The Rule of Thirds. The Rule of Thirds is one of the most common and popular composition rules for photographers. This rule is applicable to all types of photography, from portraits to landscapes, and works really well for wedding photography. To follow the rule, imagine lines that divide your image into thirds both horizontally and vertically, like a tic-tac-toe grid. When composing your images using the Rule of Thirds, you place the important elements of your image at one of the four points where these lines intersect. The placement of the couple and the horizon in Figure 3-14 follows the Rule of Thirds and creates a pleasing image.
3-14
ABOUT THIS PHOTO Not only is the happy couple placed one-third in from the left and one-third up from the bottom right where two of the intersecting lines in the Rule of Thirds are, the horizon is placed one-third up from the bottom also following the Rule of Thirds. Taken at ISO 100, f/8, 1/500 second.
Place the horizon line in your photograph one-third of the way from the bottom of the frame or one-third of the way in from the top of the frame, depending on the subject. Having the horizon line in the center of the image can look plain and boring.
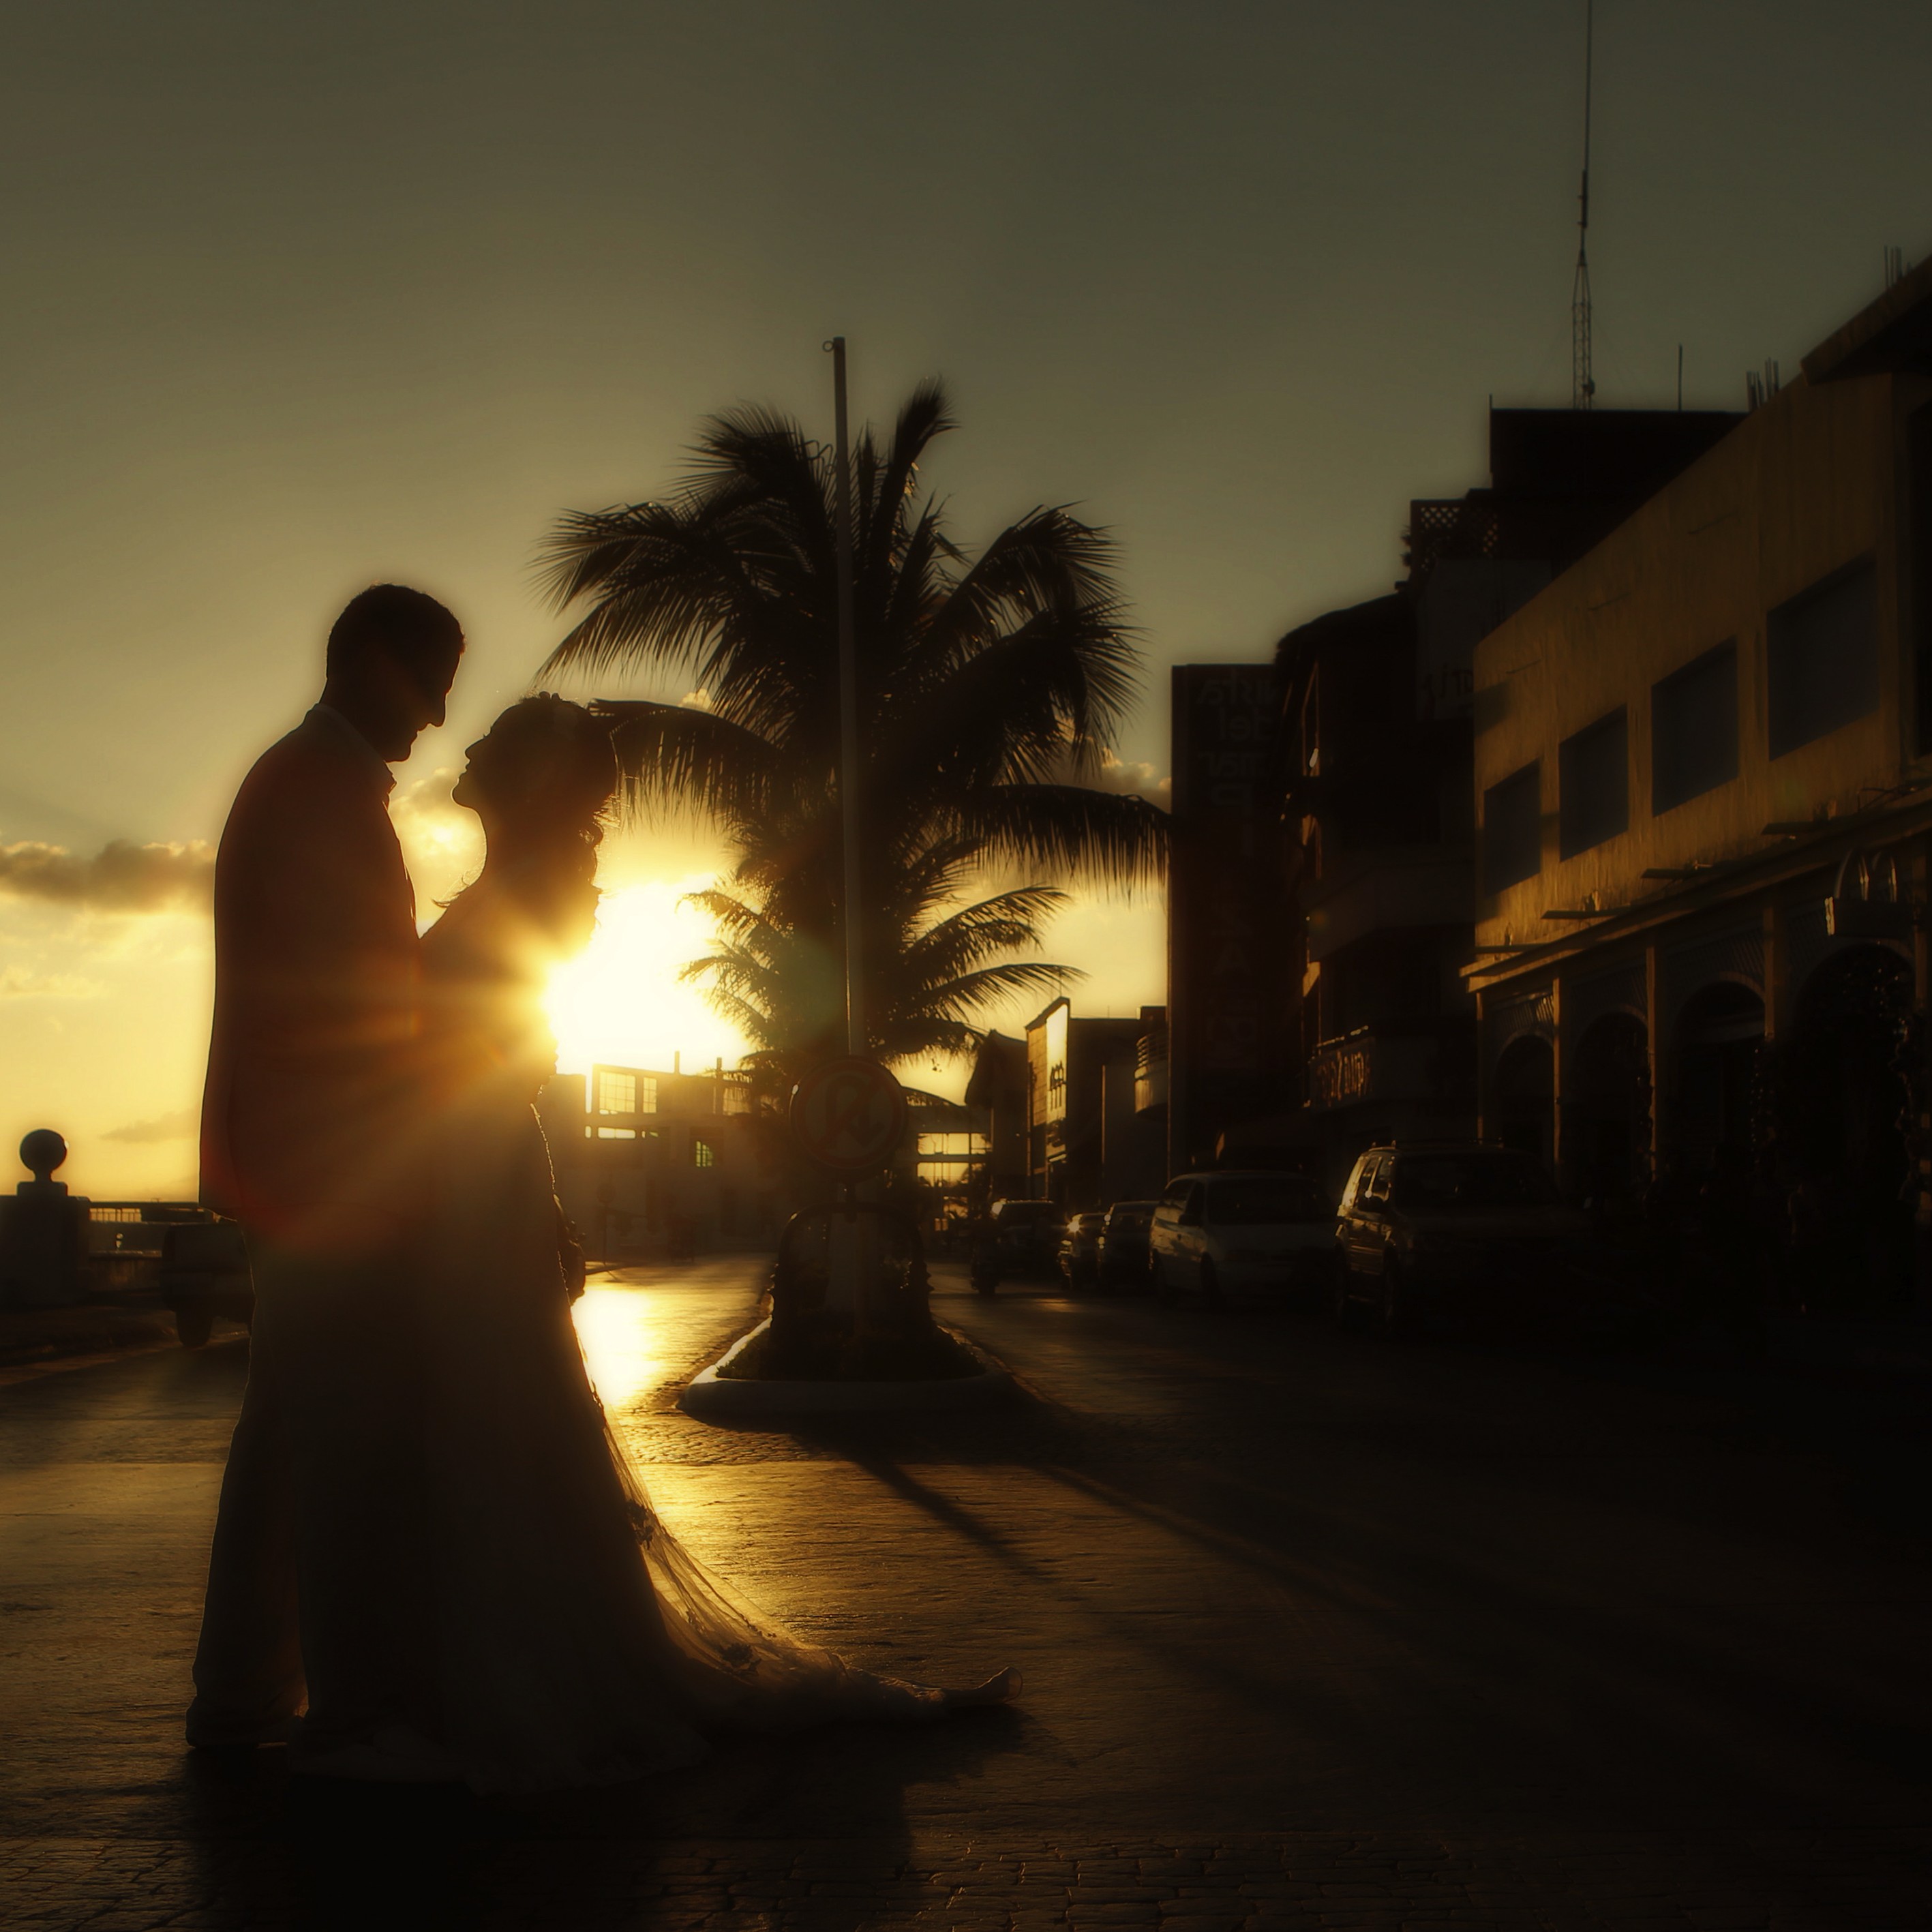
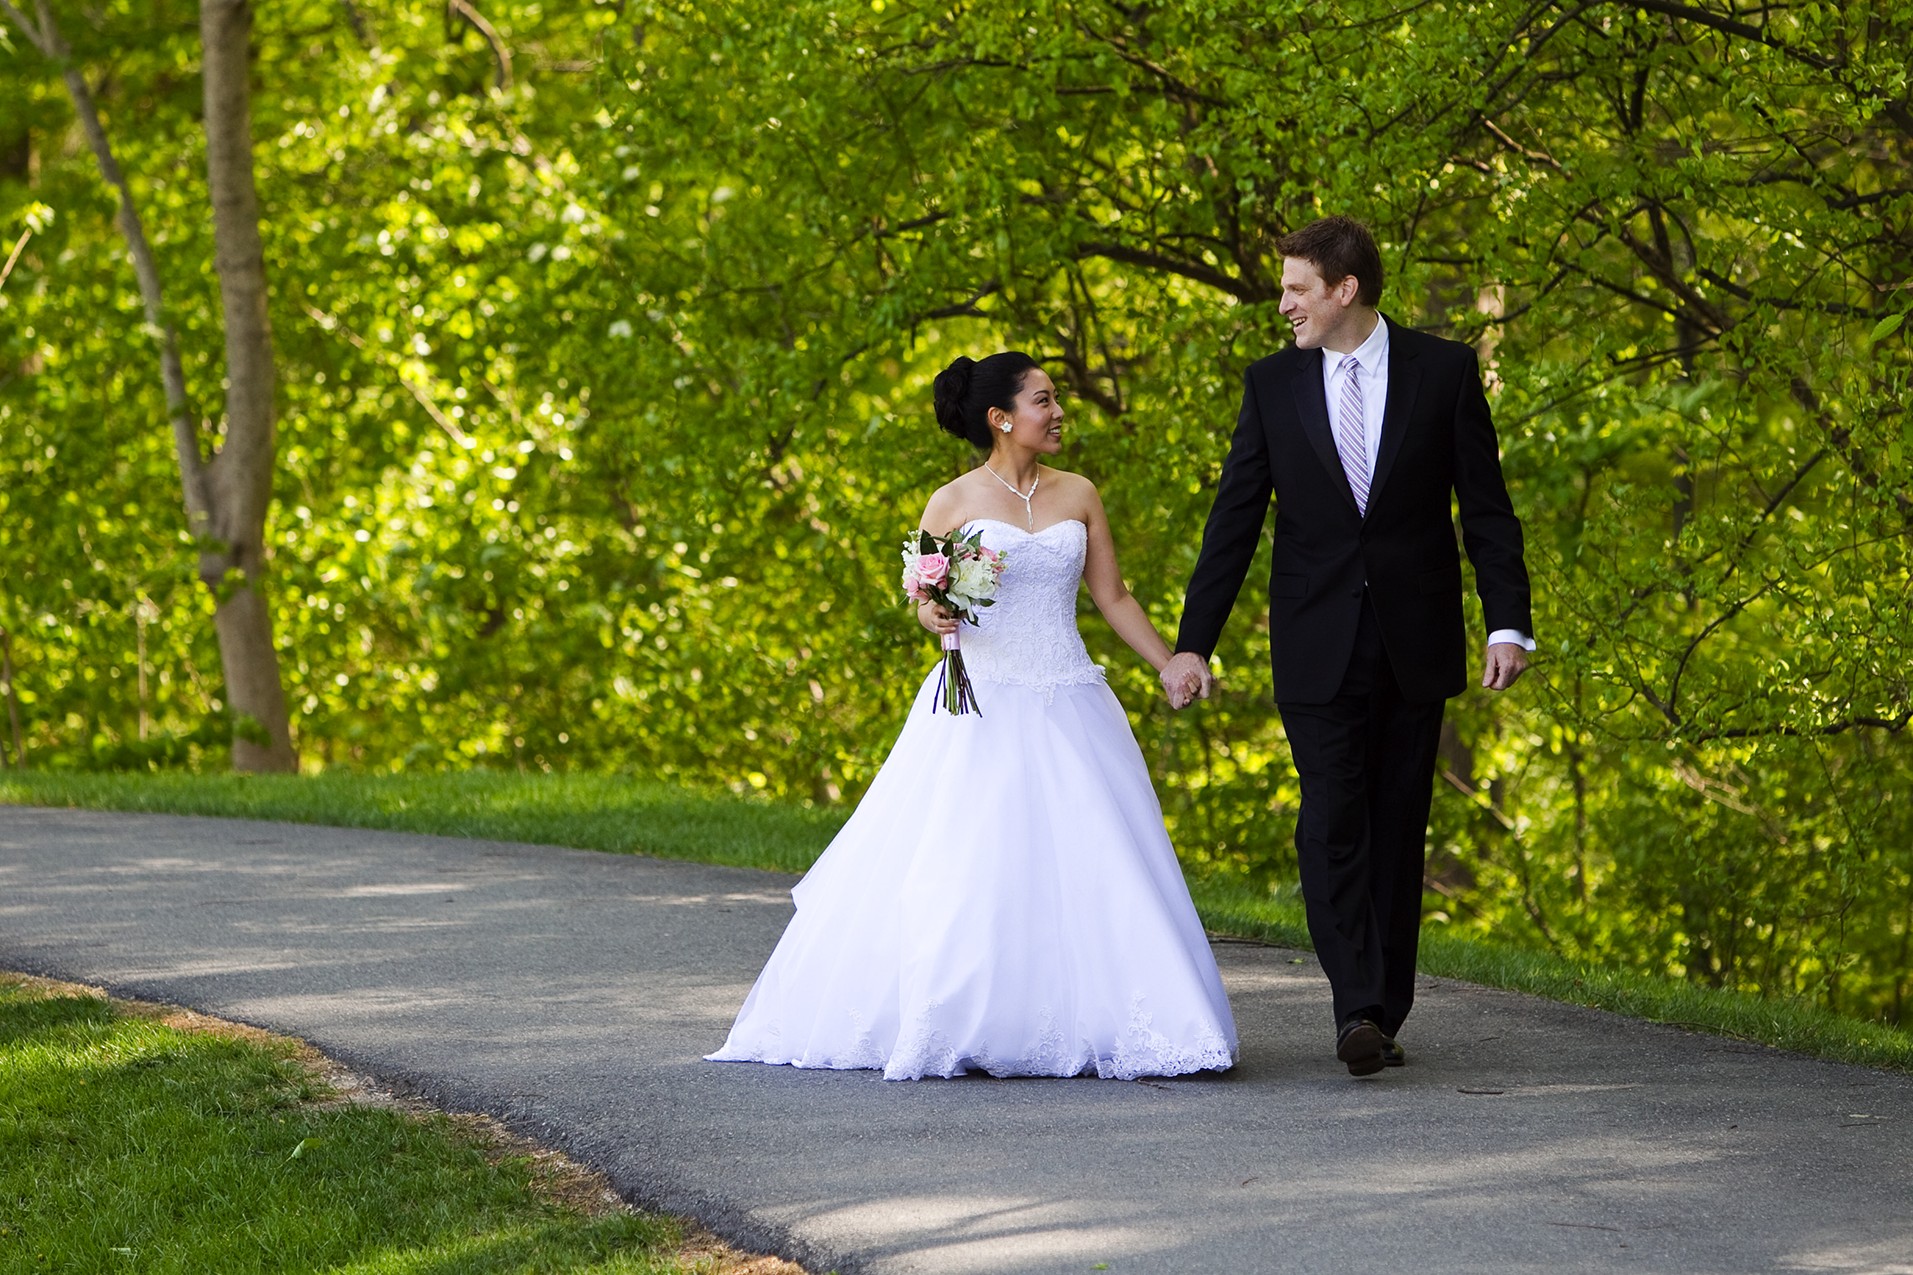
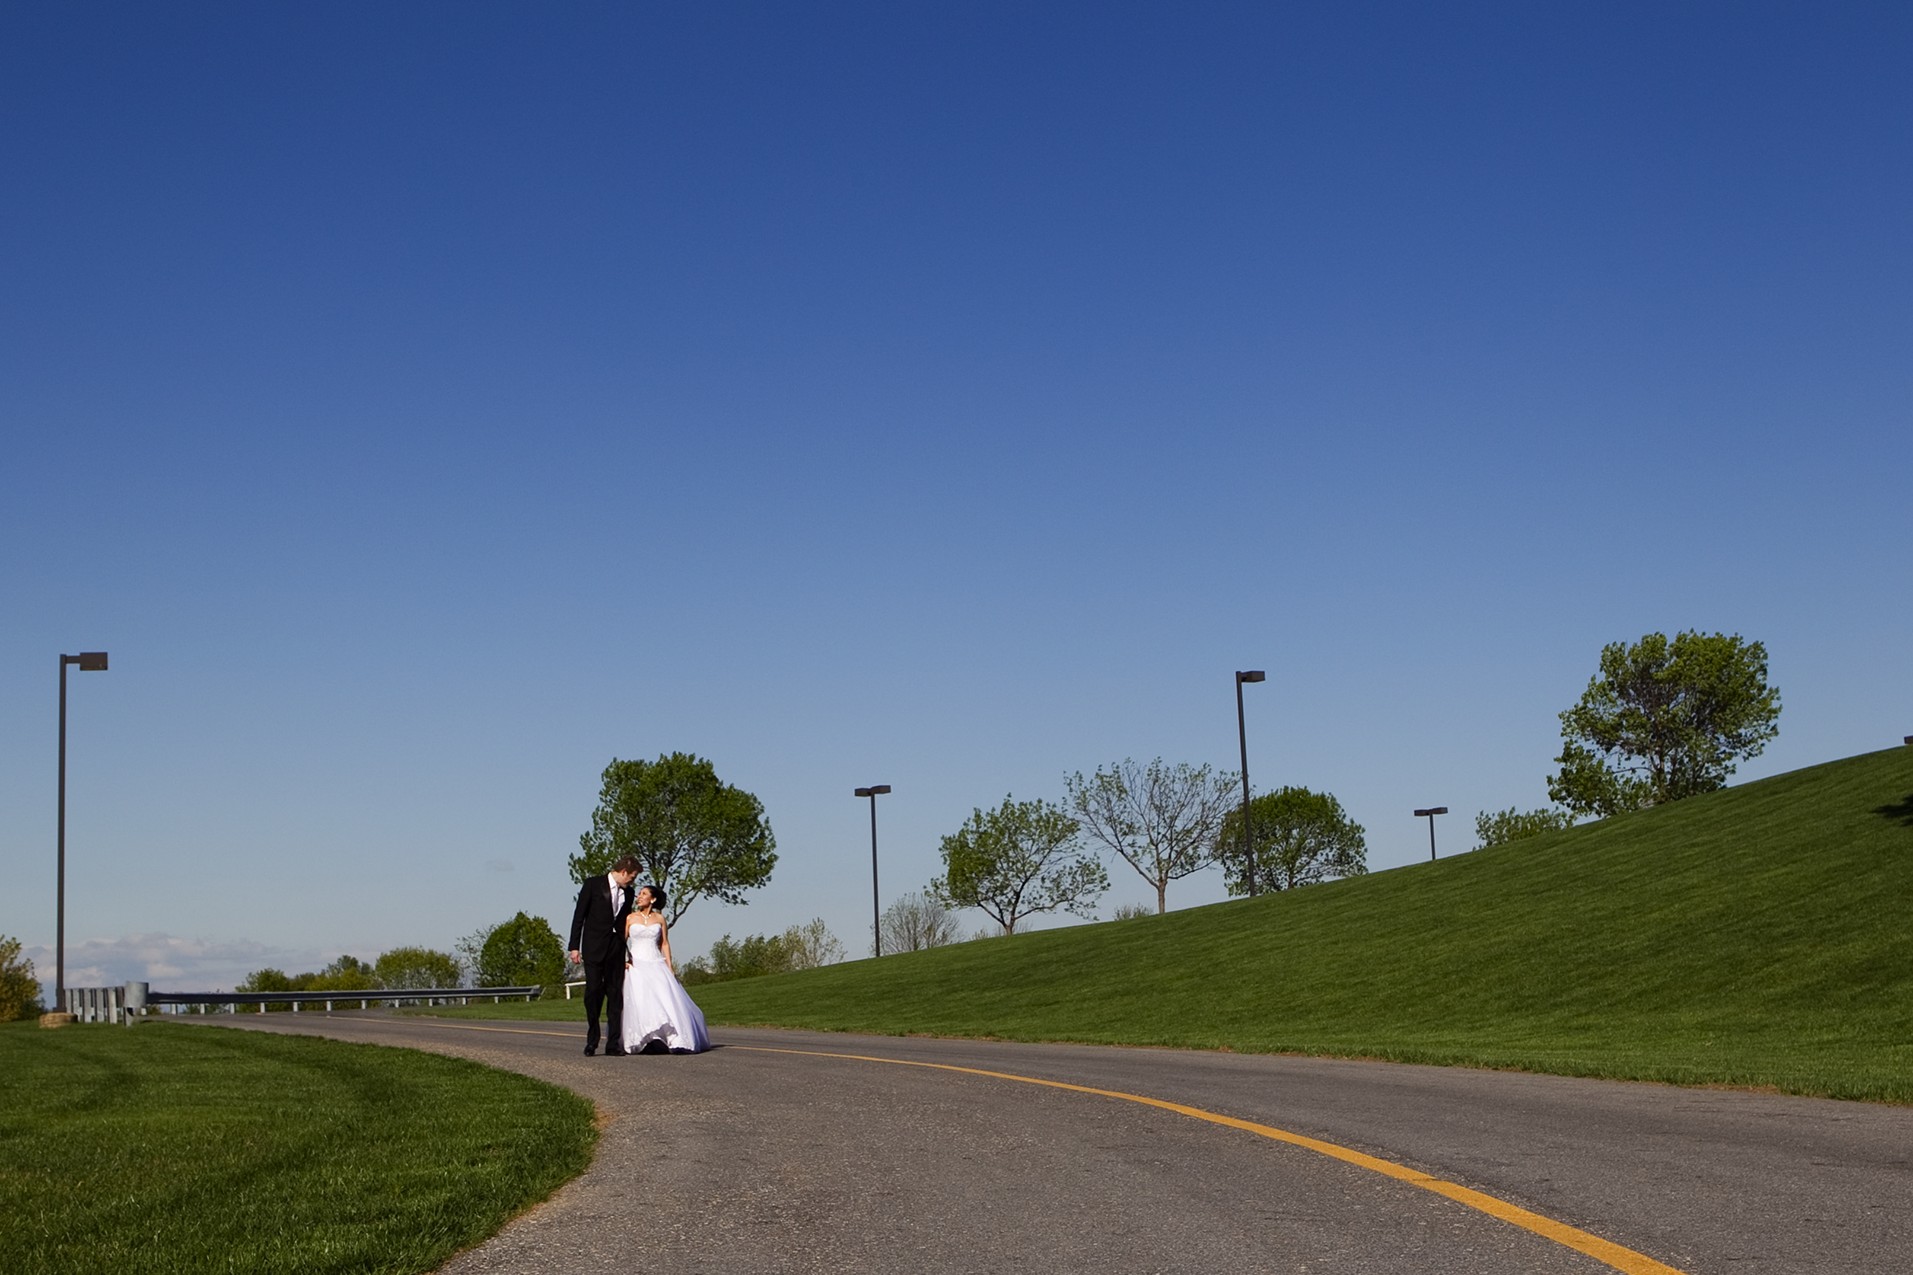
• Leading lines. There are lines everywhere, sometimes really obvious and other times much more subtle, and you can use these lines to strengthen your composition. When you use leading lines in your composition, the placement of the lines helps draw the viewer’s eye to the subject and into the frame. Leading lines are more difficult to use than the Rule of Thirds because you need to not only place the subjects where you want them, but also use elements of the environment. For example, look at the yellow line painted in the road that leads your eye to the couple in Figure 3-15; it is hard not to follow it into the image. The composition in Figure 3-15 is reinforced with the line created by the hill leading in from the right of the image. All these lines in the image reinforce that the couple is the main subject of the photograph.
3-15
ABOUT THIS PHOTO This photo of the bride and groom uses the line in the road to draw the eye into the frame and to the couple. As a bonus, the subjects are placed a third in from the left and a third up from the bottom, at one of the intersecting lines created by the Rule of Thirds.
At times, the lines used in your images are not as clear as the painted street lines, but are still present. There are three different types of leading lines: diagonal lines, straight lines, and curving lines.
> Diagonal lines. These can be some of the strongest for composition, because they lead the viewer’s eye from the outside edge, especially when they are close to the corners of the image, toward the main subject.
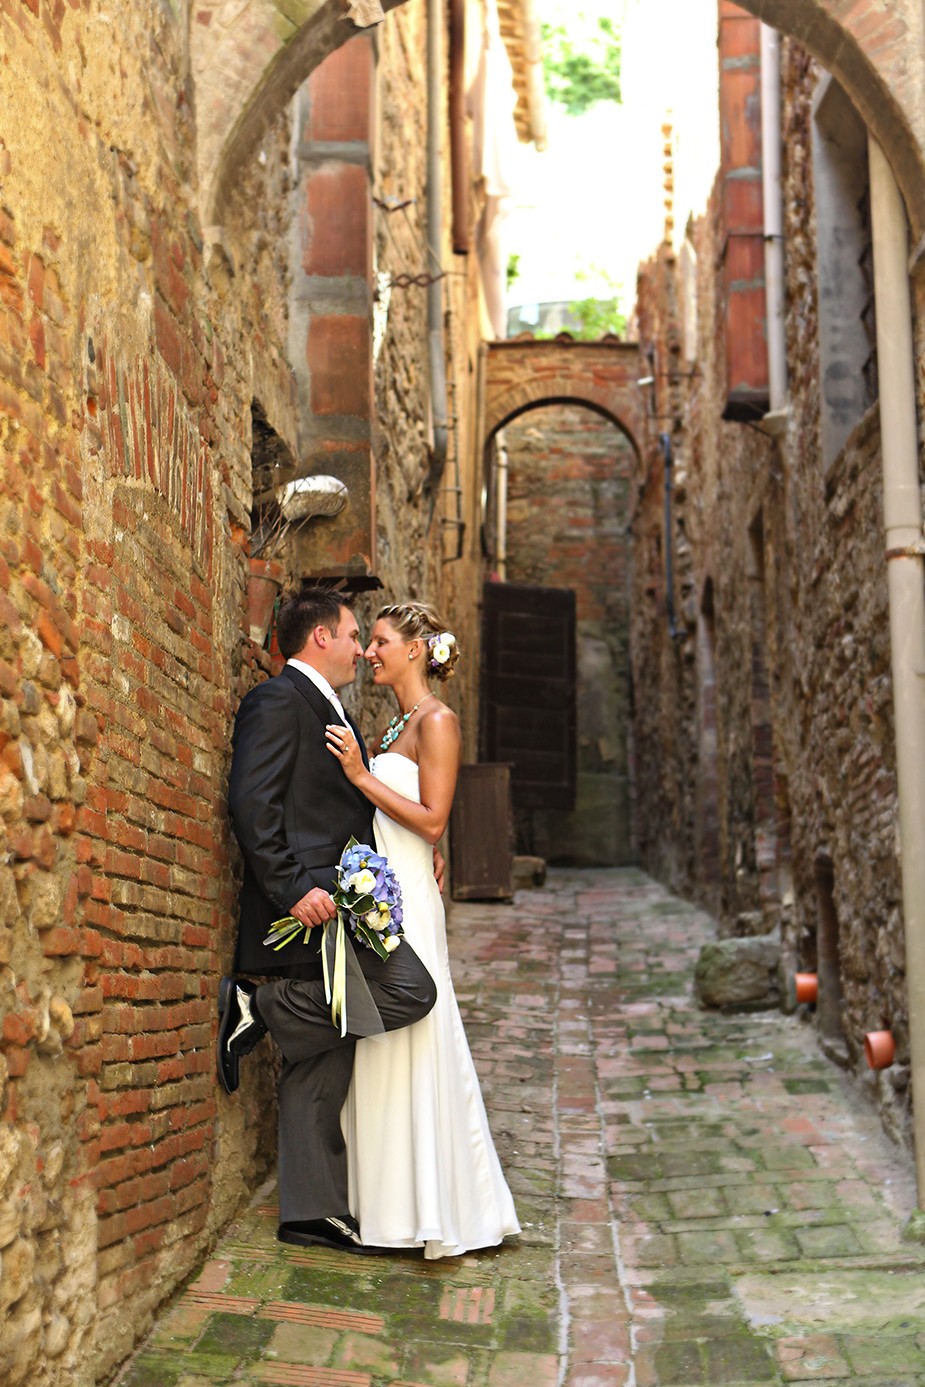
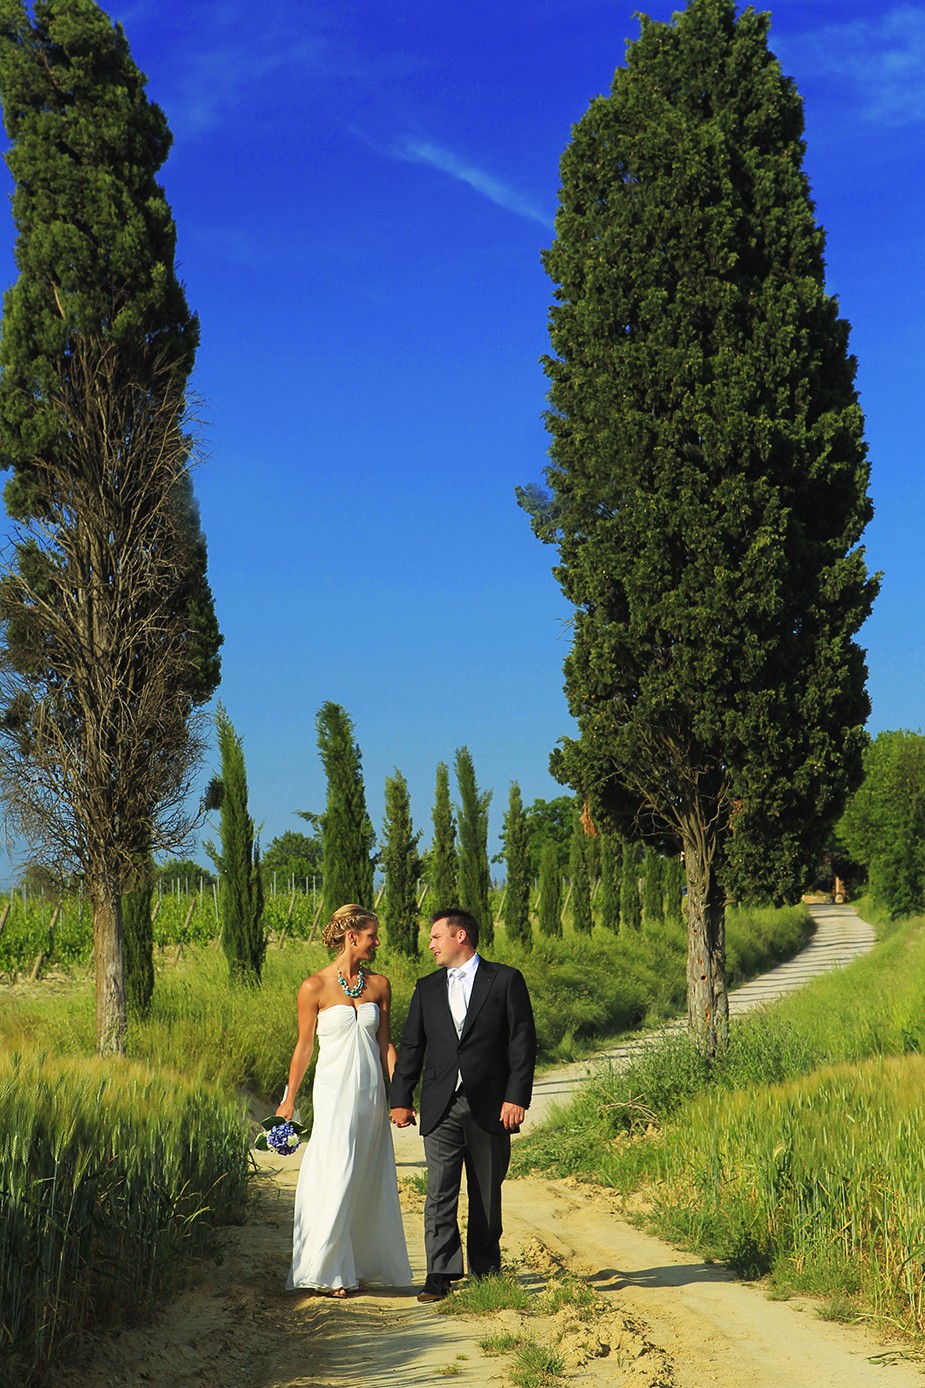
> Straight lines. Using straight lines in your image can run either horizontally or vertically, as the trees do in Figure 3-16. These lines can create a sense of strength and power in your images and can also work to frame your subject. Horizontal lines can add a sense of rest or stability to your images and can also be used as a divider around which your image can be built. A great example of a horizontal line is the horizon, but keep in mind that the horizon needs to be level or your image can feel very unbalanced. It is also a good idea to place the horizon line at one-third up from the bottom or one-third down from the top and not directly in the middle of your image. Because wedding photography is chiefly about photographing people, you have numerous opportunities to use straight lines: Arms, legs, and bodies can all be used in your composition. However, make sure that you do not pose the people in unnatural positions just to create or use a vertical line.
3-16
ABOUT THIS PHOTO Posing the young couple on this outdoor path helps lead the viewer’s eye to them. Taken at ISO 100, f/8, 1/400 second.
For more information on posing people, see Chapters 7, 8 and 9.
> Curved lines. The third type of line is a curved line, and it can be a really great thing, because it not only leads the viewer’s eye into the image, but it can also help to keep the viewer there. Because curved lines have some motion in them, the viewer’s eye travels around the image. Many times the curved line in your image is the shape of the person’s face or body. The simple curve of a hip or position of a shoulder can change the flow in an image.
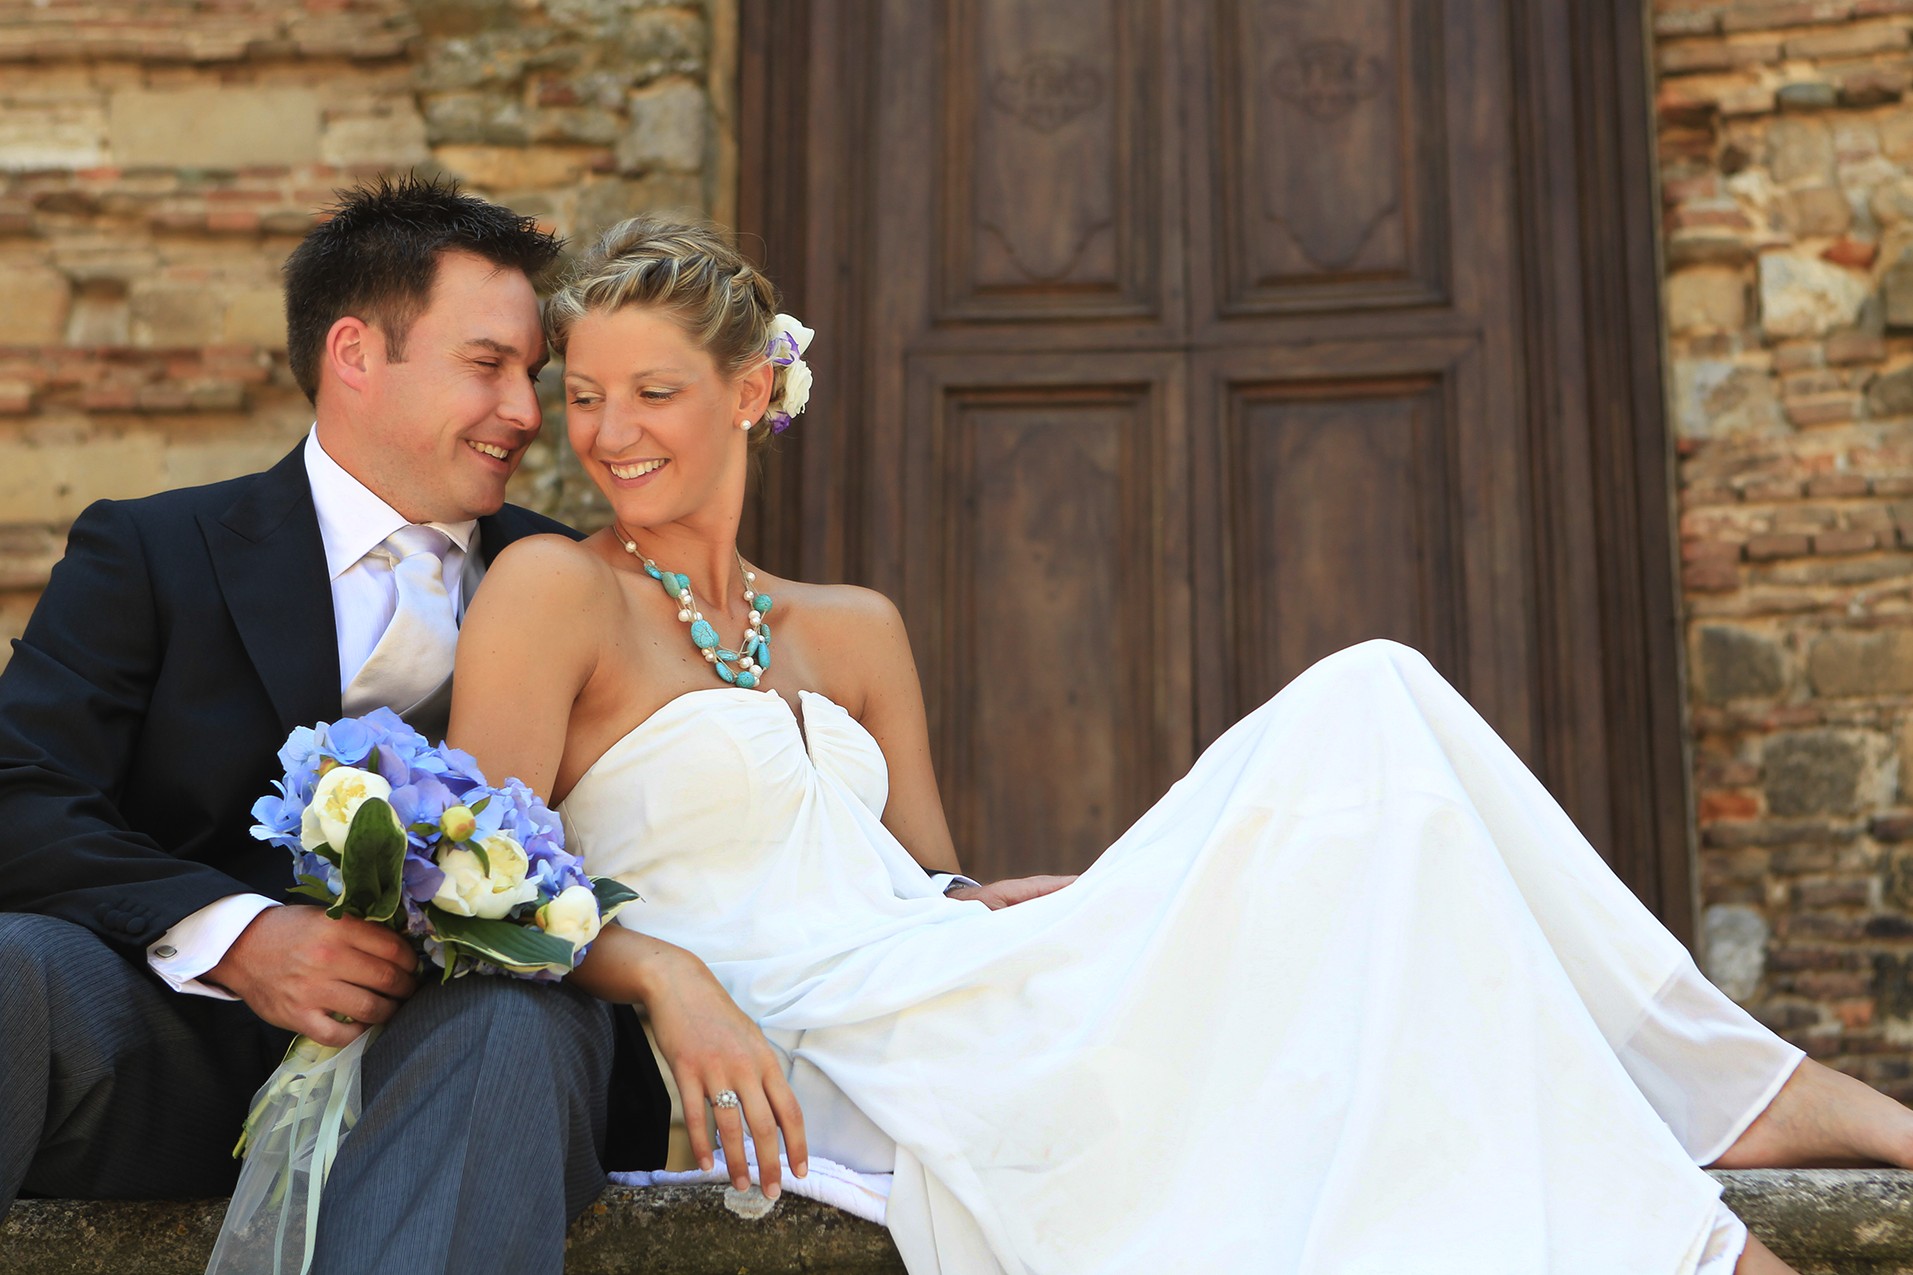
When to break the rules
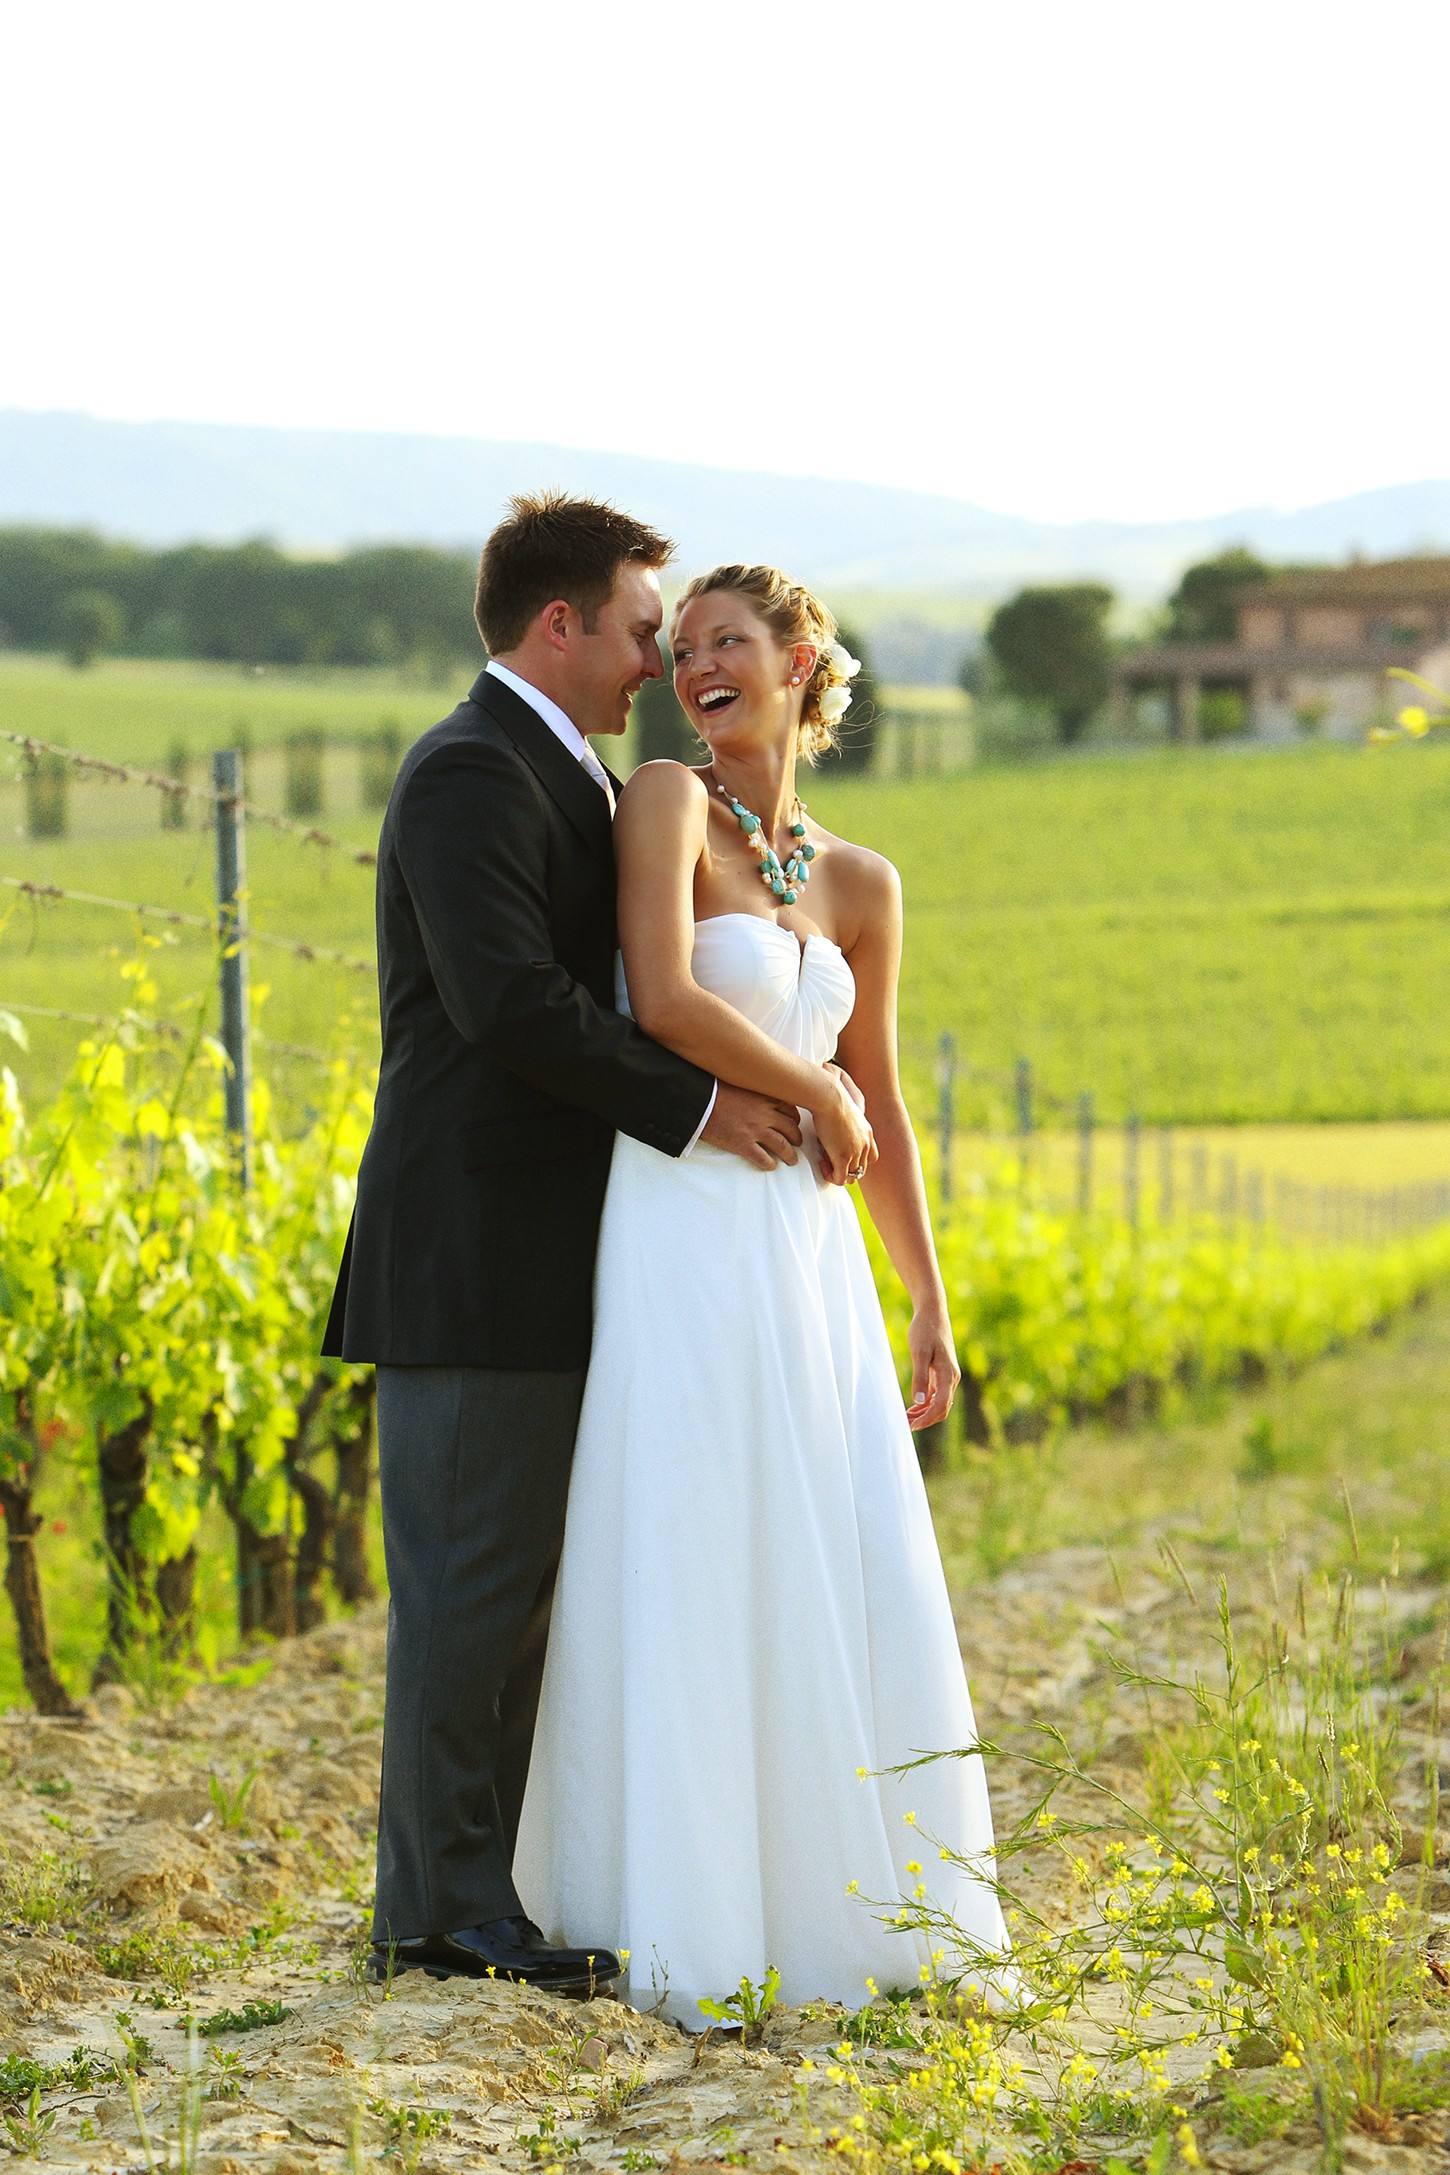
Composition is all about personal choice, and many times it is a good idea to disregard the rules and just go with what you like and what you think looks good. As I said previously, the Rule of Thirds dictates that you divide the scene into thirds with two imaginary horizontal and two imaginary vertical lines and then place the main subject at a point where these lines intersect. Many times it is just fine to place the image right in the center of the frame, ignoring the Rule of Thirds, as shown in Figure 3-17. When you place the subject in the center of the photograph, it can give the image a punch that it wouldn’t have with the Rule of Thirds.
3-17
ABOUT THIS PHOTO The couple is placed in the center of the frame, breaking the Rule of Thirds, but the composition is such that they are the center of attention. Because a shallow depth of field was used, the couple stands out from the background. Taken at ISO 320, f/4.5, 1/320 second.
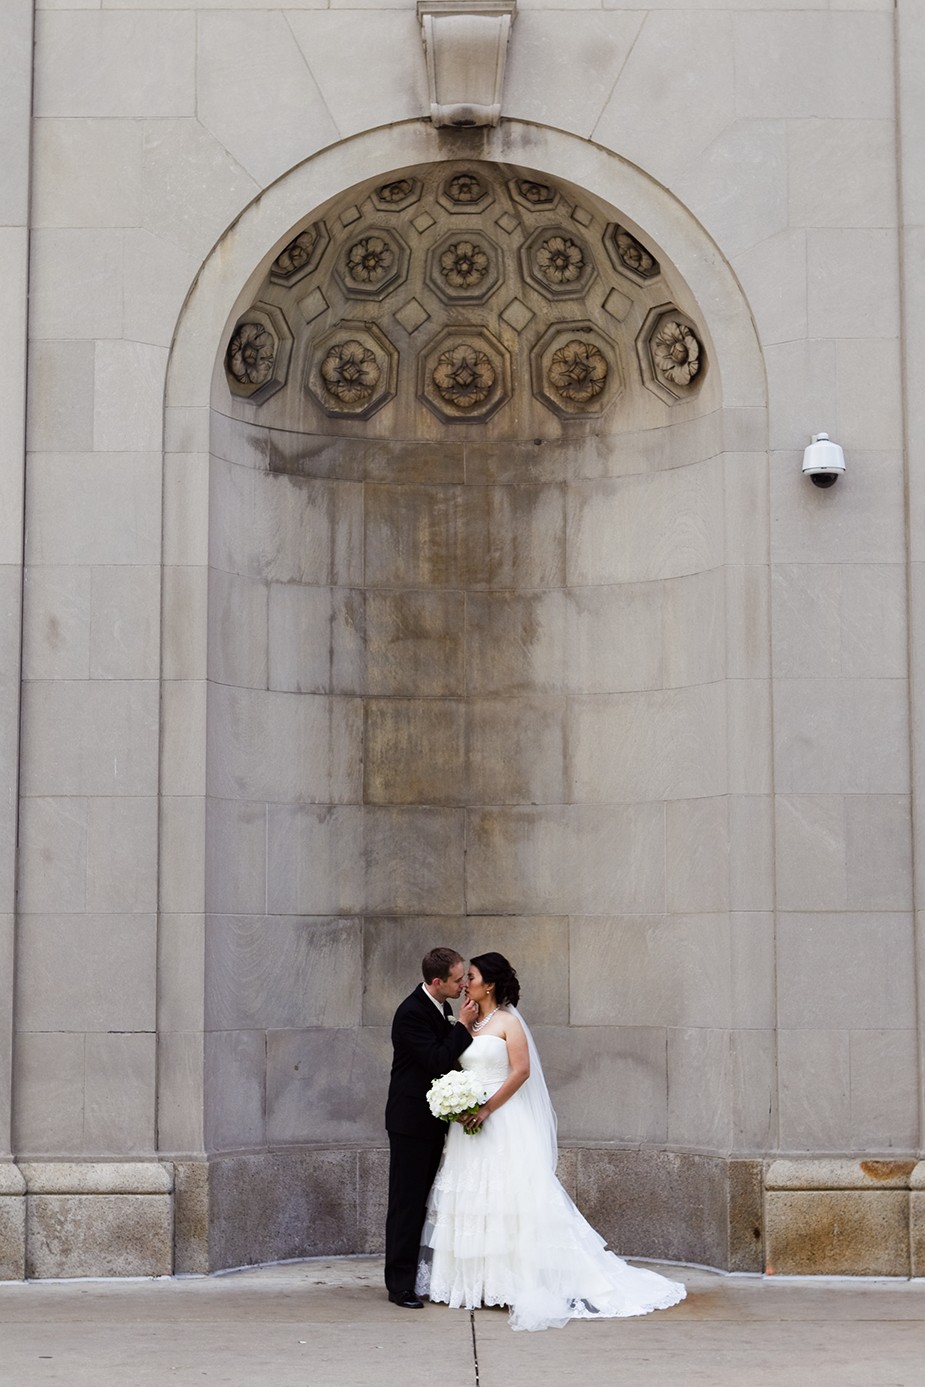
Placing your subject in the middle of the frame to break the Rule of Thirds isn’t the only way to break the rules. For example, it is also possible to create a strong composition by ignoring the leading lines and placing the subject between the lines in the frame, as shown in Figure 3-18.
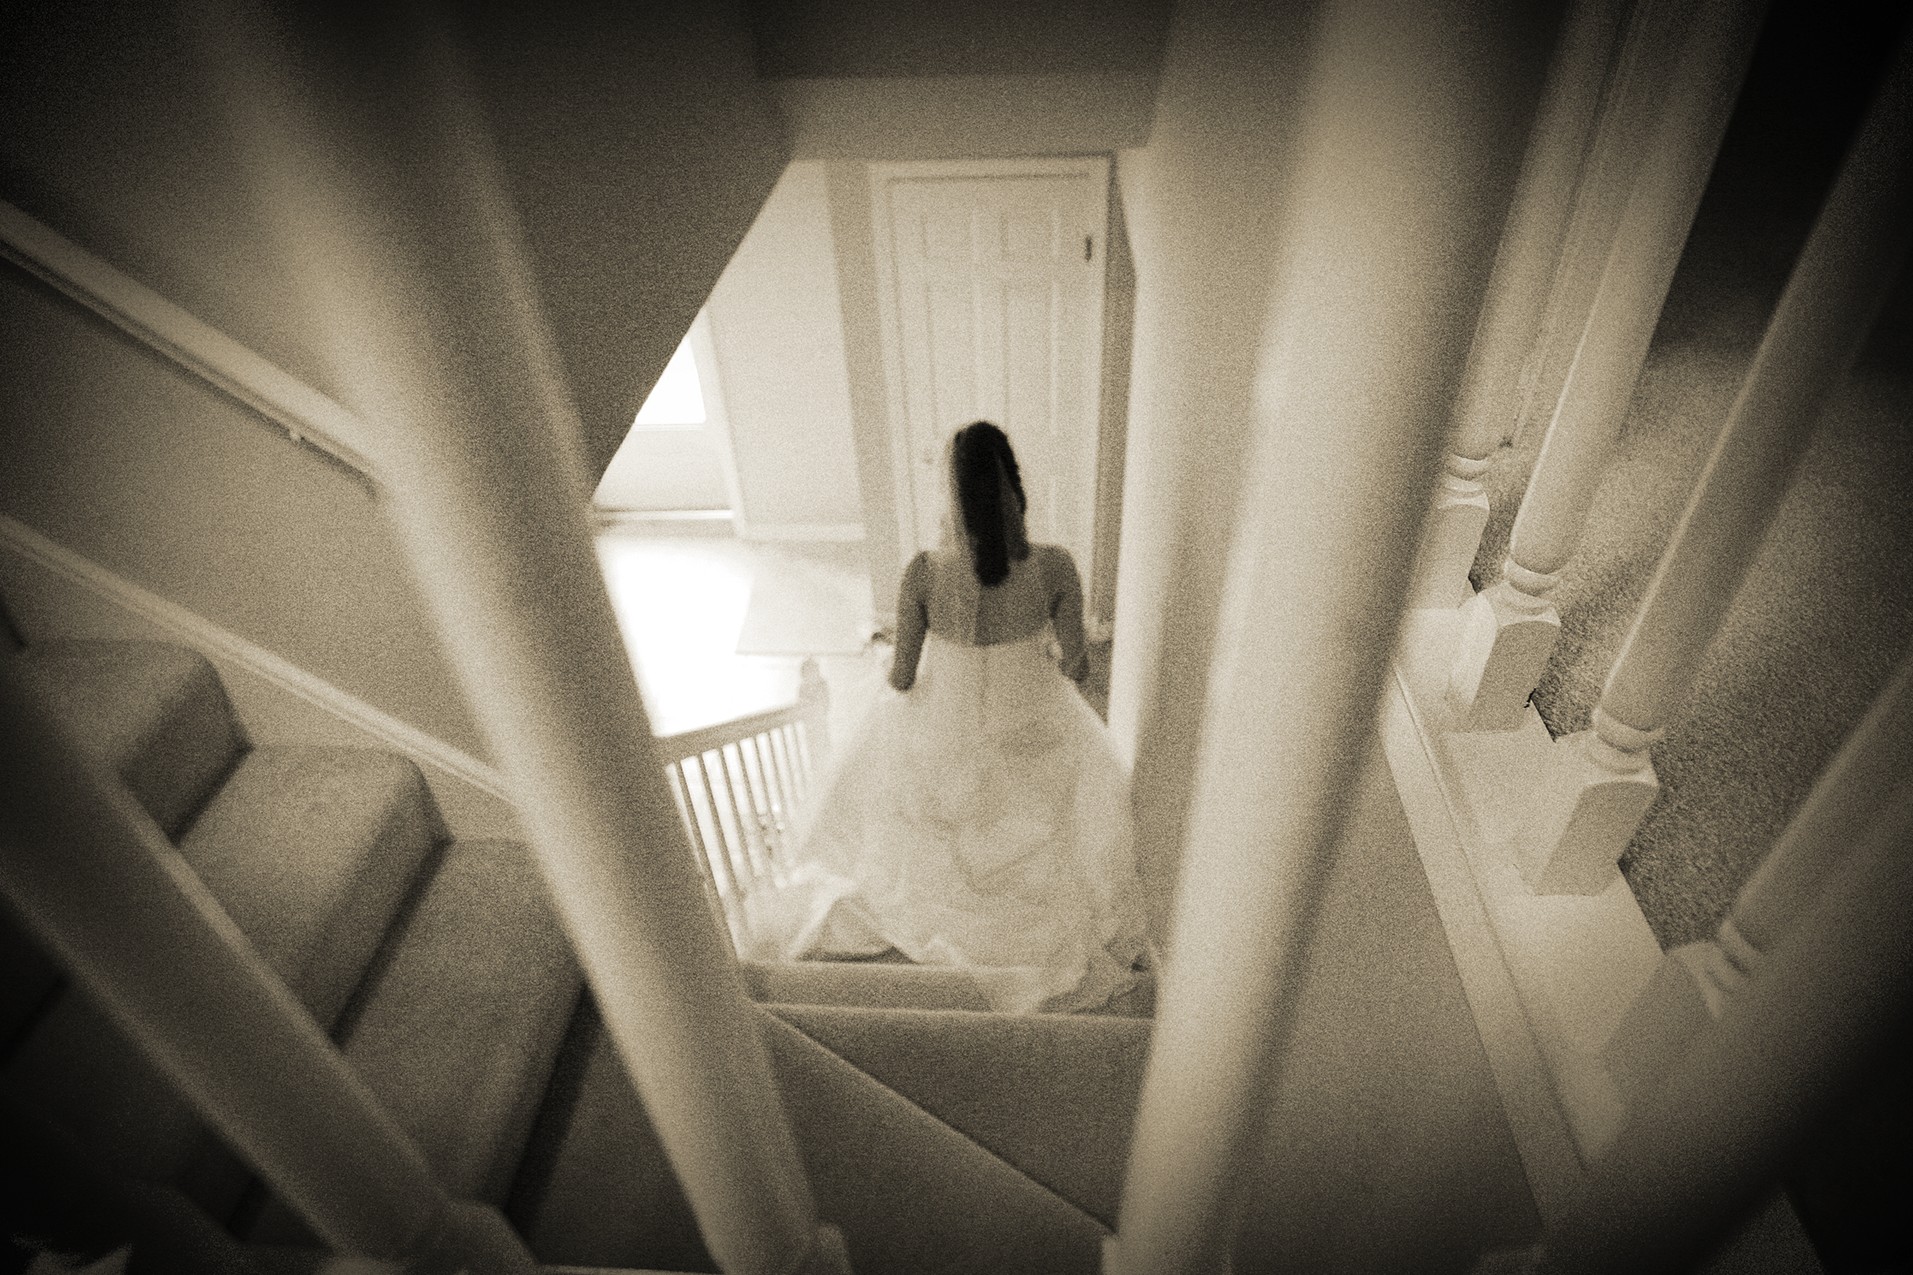
3-18
ABOUT THIS PHOTO Putting the subject in the middle of the frame might not follow the Rule of Thirds, and the two vertical banisters that frame the bride are not leading lines, but the composition still works even though it breaks the rules. Taken at ISO 800, f/2.8, 1/50 second.
Composition really is subjective; don’t let anyone tell you what is right or wrong. If all the wedding photographers out there took photos in the exact same way, the uniqueness and individuality that makes photography a great art form would be lost. The more photographs you go out and take, the easier it becomes to create photographs with a strong composition.
Assignment
Equivalent Exposures
As discussed earlier in this chapter, certain combinations of shutter speed, aperture, and ISO give you the same exposure or equivalent exposures. For example, a photograph taken using ISO 200, f/2.8, and 1/500 second records the same amount of light as one taken at ISO 200, f/8, and 1/60 second. As the aperture is made smaller, the shutter is left open longer, resulting in the same amount of light reaching the sensor.
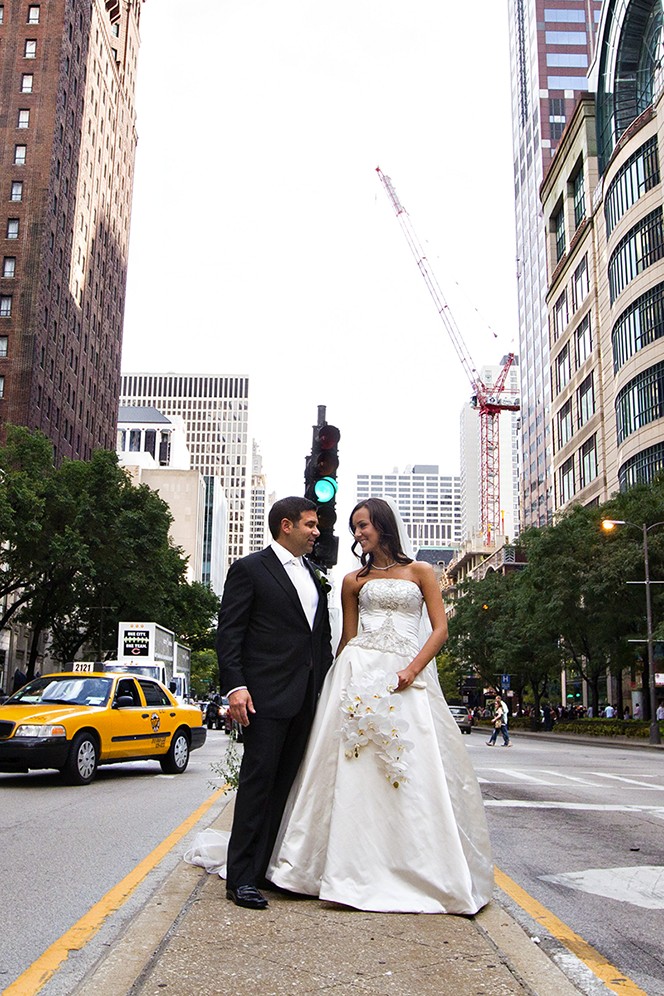
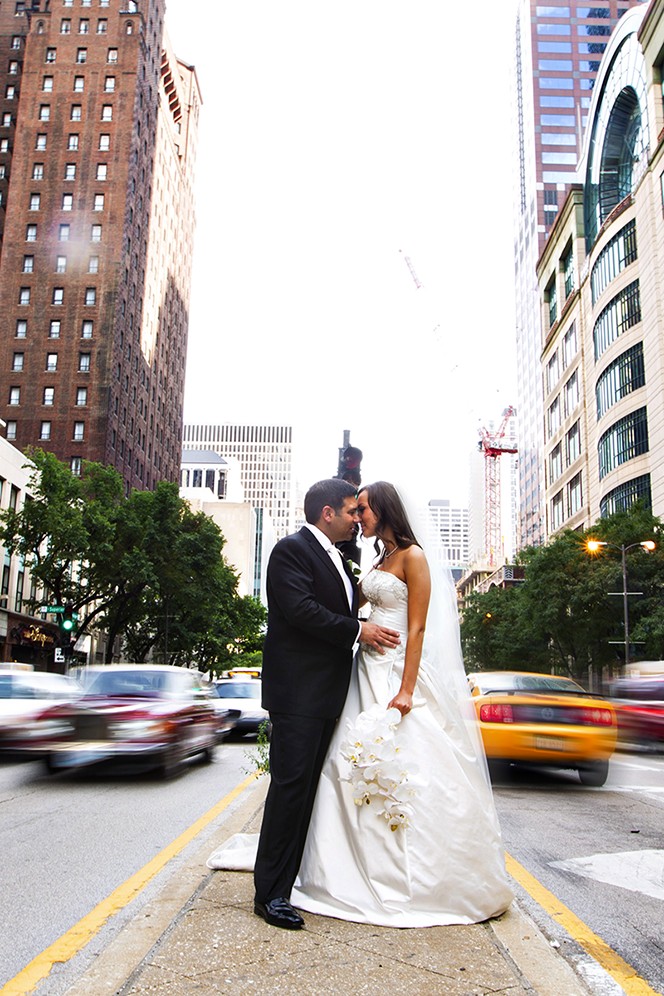
Just because the exposure is equivalent, it doesn’t mean that the images are the same. The depth of field is very different due to the different apertures, and because the shutter speed has changed, there could be more motion in the image than with a higher shutter speed. Go out and photograph the same scene using a variety of equivalent exposures to see what difference they make to the look and feel of the image. Does using a shallow depth of field and fast shutter speed give the same feeling as a deep depth of field and slower shutter speed? Post your favorite of the bunch to the Web site to share.
These two images of the same couple have the same exposure but as you can see, the much slower shutter speed on the second image (on the right) gives the image a very different feel. The left image was shot at ISO 1000, f/5.6 and 1/1000 second, freezing the action, while the right image was taken at ISO 50, f/16 and 1/4 second.
Remember to visit www.pwassignments.com after you complete the assignment and share your favorite photo! It’s a community of enthusiastic photographers and a great place to view what other readers have created. You can also post comments and read encouraging suggestions and feedback.
