
14
Going Live
In the previous chapter, you built a real-time chat server for students using Django Channels. Now that you have created a fully functional e-learning platform, you need to set up a production environment on an online server so that it can be accessed over the Internet. Until now, you have been working in a development environment, using the Django development server to run your site. In this chapter, you will learn how to set up a production environment that is able to serve your Django project in a secure and efficient manner.
This chapter will cover the following topics:
- Configuring a production environment
- Creating a custom middleware
- Implementing custom management commands
Creating a production environment
It's time to deploy your Django project in a production environment. You are going to follow these steps to get your project live:
- Configure project settings for a production environment
- Use a PostgreSQL database
- Set up a web server with uWSGI and NGINX
- Serve static assets through NGINX
- Secure connections using SSL
- Use Daphne to serve Django Channels
Managing settings for multiple environments
In real-world projects, you will have to deal with multiple environments. You will have at least a local and a production environment, but you could have other environments as well, such as testing or preproduction environments. Some project settings will be common to all environments, but others will have to be overridden per environment. Let's set up project settings for multiple environments, while keeping everything neatly organized.
Create a settings/ directory next to the settings.py file of the educa project. Rename the settings.py file to base.py and move it into the new settings/ directory. Create the following additional files inside the settings/ folder so that the new directory looks as follows:
settings/
    __init__.py
    base.py
    local.py
    pro.py
These files are as follows:
base.py: The base settings file that contains common settings (previouslysettings.py)local.py: Custom settings for your local environmentpro.py: Custom settings for the production environment
Edit the settings/base.py file and replace the following line:
BASE_DIR = os.path.dirname(os.path.dirname(os.path.abspath(__file__)))
with the following one:
BASE_DIR = os.path.dirname(os.path.dirname(os.path.abspath(
                           os.path.join(__file__, os.pardir))))
You have moved your settings files to a directory one level lower, so you need BASE_DIR to point to the parent directory to be correct. You achieve this by pointing to the parent directory with os.pardir.
Edit the settings/local.py file and add the following lines of code:
from .base import *
DEBUG = True
DATABASES = {
    'default': {
        'ENGINE': 'django.db.backends.sqlite3',
        'NAME': os.path.join(BASE_DIR, 'db.sqlite3'),
    }
}
This is the settings file for your local environment. You import all settings defined in the base.py file and you only define specific settings for this environment. You copy the DEBUG and DATABASES settings from the base.py file, since these will be set per environment. You can remove the DATABASES and DEBUG settings from the base.py settings file.
Edit the settings/pro.py file and make it look as follows:
from .base import *
DEBUG = False
ADMINS = (
    ('Antonio M', '[email protected]'),
)
ALLOWED_HOSTS = ['*']
DATABASES = {
    'default': {
    }
}
These are the settings for the production environment. Let's take a closer look at each of them:
DEBUG: SettingDEBUGtoFalseshould be mandatory for any production environment. Failing to do so will result in the traceback information and sensitive configuration data being exposed to everyone.ADMINS: WhenDEBUGisFalseand a view raises an exception, all information will be sent by email to the people listed in theADMINSsetting. Make sure that you replace the name/email tuple with your own information.ALLOWED_HOSTS: Django will only allow the hosts included in this list to serve the application. This is a security measure. You include the asterisk symbol,*, to refer to all hostnames. You will limit the hostnames that can be used for serving the application later.DATABASES: You just keep this setting empty. We are going to cover the database setup for production later.
When handling multiple environments, create a base settings file and a settings file for each environment. Environment settings files should inherit the common settings and override environment-specific settings.
You have placed the project settings in a different location than the default settings.py file. You will not be able to execute any commands with the manage.py tool unless you specify the settings module to use. You will need to add a --settings flag when you run management commands from the shell or set a DJANGO_SETTINGS_MODULE environment variable.
Open the shell and run the following command:
export DJANGO_SETTINGS_MODULE=educa.settings.pro
This will set the DJANGO_SETTINGS_MODULE environment variable for the current shell session. If you want to avoid executing this command for each new shell, add this command to your shell's configuration in the .bashrc or .bash_profile files. If you don't set this variable, you will have to run management commands, including the --settings flag, as follows:
python manage.py shell --settings=educa.settings.pro
You have successfully organized settings for handling multiple environments.
Using PostgreSQL
Throughout this book, you have mostly used the SQLite database. SQLite is simple and quick to set up, but for a production environment, you will need a more powerful database, such as PostgreSQL, MySQL, or Oracle. You already learned how to install PostgreSQL and set up a PostgreSQL database in Chapter 3, Extending Your Blog Application. If you need to install PostgreSQL, you can read the Installing PostgreSQL section of Chapter 3.
Let's create a PostgreSQL user. Open the shell and run the following commands to create a database user:
su postgres
createuser -dP educa
You will be prompted for a password and the permissions that you want to give to this user. Enter the desired password and permissions, and then create a new database with the following command:
createdb -E utf8 -U educa educa
Then, edit the settings/pro.py file and modify the DATABASES setting to make it look as follows:
DATABASES = {
   'default': {
       'ENGINE': 'django.db.backends.postgresql',
       'NAME': 'educa',
       'USER': 'educa',
       'PASSWORD': '*****',
   }
}
Replace the preceding data with the database name and credentials for the user you created. The new database is empty. Run the following command to apply all database migrations:
python manage.py migrate
Finally, create a superuser with the following command:
python manage.py createsuperuser
Checking your project
Django includes the check management command for checking your project at any time. This command inspects the applications installed in your Django project and outputs any errors or warnings. If you include the --deploy option, additional checks only relevant for production use will be triggered. Open the shell and run the following command to perform a check:
python manage.py check --deploy
You will see output with no errors, but several warnings. This means the check was successful, but you should go through the warnings to see if there is anything more you can do to make your project safe for production. We are not going to go deeper into this, but keep in mind that you should check your project before production use to look for any relevant issues.
Serving Django through WSGI
Django's primary deployment platform is WSGI. WSGI stands for Web Server Gateway Interface and it is the standard for serving Python applications on the web.
When you generate a new project using the startproject command, Django creates a wsgi.py file inside your project directory. This file contains a WSGI application callable, which is an access point to your application.
WSGI is used for both running your project with the Django development server and deploying your application with the server of your choice in a production environment.
You can learn more about WSGI at https://wsgi.readthedocs.io/en/latest/.
Installing uWSGI
Throughout this book, you have been using the Django development server to run projects in your local environment. However, you need a real web server for deploying your application in a production environment.
uWSGI is an extremely fast Python application server. It communicates with your Python application using the WSGI specification. uWSGI translates web requests into a format that your Django project can process.
Install uWSGI using the following command:
pip install uwsgi==2.0.18
In order to build uWSGI, you will need a C compiler, such as gcc or clang. In a Linux environment, you can install a C compiler with the command apt-get install build-essential.
If you are using macOS, you can install uWSGI with the Homebrew package manager using the command brew install uwsgi.
If you want to install uWSGI on Windows, you will need Cygwin: https://www.cygwin.com. However, it's desirable to use uWSGI in UNIX-based environments.
You can read uWSGI's documentation at https://uwsgi-docs.readthedocs.io/en/latest/.
Configuring uWSGI
You can run uWSGI from the command line. Open the shell and run the following command from the educa project directory:
sudo uwsgi --module=educa.wsgi:application
--env=DJANGO_SETTINGS_MODULE=educa.settings.pro
--master --pidfile=/tmp/project-master.pid
--http=127.0.0.1:8000
--uid=1000
--virtualenv=/home/env/educa/
Replace the path in the virtualenv option with your actual virtual environment directory. If you are not using a virtual environment, you can skip this option.
You might have to prepend sudo to this command if you don't have the required permissions. You might also need to add the --plugin=python3 option if the module is not loaded by default.
With this command, you can run uWSGI on your localhost with the following options:
- You use the
educa.wsgi:applicationWSGI callable - You load the settings for the production environment
- You tell uWSGI to use the
educavirtual environment
If you are not running the command within the project directory, include the option --chdir=/path/to/educa/ with the path to your project.
Open http://127.0.0.1:8000/ in your browser. You should see a screen like the following one:

Figure 14.1: The course list page served with uWSGI
You can see the rendered HTML that corresponds to the course list view, but no CSS style sheets or images are being loaded. The reason for this is that you didn't configure uWSGI to serve static files. You will configure serving static files in the production environment later in this chapter.
uWSGI allows you to define a custom configuration in a .ini file. This is more convenient than passing options through the command line.
Create the following file structure inside the global educa/ directory:
config/
    uwsgi.ini
logs/
Edit the config/uwsgi.ini file and add the following code to it:
[uwsgi]
# variables
projectname = educa
base = /home/projects/educa
# configuration
master = true
virtualenv = /home/env/%(projectname)
pythonpath = %(base)
chdir = %(base)
env = DJANGO_SETTINGS_MODULE=%(projectname).settings.pro
module = %(projectname).wsgi:application
socket = /tmp/%(projectname).sock
chmod-socket = 666
In the uwsgi.ini file, you define the following variables:
projectname: The name of your Django project, which iseduca.base: The absolute path to theeducaproject. Replace it with the absolute path to your project.
These are custom variables that you will use in the uWSGI options. You can define any other variables you like as long as the names are different to the uWSGI options.
You set the following options:
master: Enable the master process.virtualenv: The path to your virtual environment. Replace this path with the appropriate path.pythonpath: The paths to add to your Python path.chdir: The path to your project directory, so that uWSGI changes to that directory before loading the application.env: Environment variables. You include theDJANGO_SETTINGS_MODULEvariable, pointing to the settings for the production environment.module: The WSGI module to use. You set this to theapplicationcallable contained in thewsgimodule of your project.socket: The UNIX/TCP socket to bind the server.chmod-socket: The file permissions to apply to the socket file. In this case, you use666so that NGINX can read/write the socket.
The socket option is intended for communication with some third-party router, such as NGINX, while the http option is for uWSGI to accept incoming HTTP requests and route them by itself. You are going to run uWSGI using a socket, since you are going to configure NGINX as your web server and communicate with uWSGI through the socket.
You can find the list of available uWSGI options at https://uwsgi-docs.readthedocs.io/en/latest/Options.html.
Now, you can run uWSGI with your custom configuration using this command:
uwsgi --ini config/uwsgi.ini
You will not be able to access your uWSGI instance from your browser now, since it's running through a socket. Let's complete the production environment.
Installing NGINX
When you are serving a website, you have to serve dynamic content, but you also need to serve static files, such as CSS style sheets, JavaScript files, and images. While uWSGI is capable of serving static files, it adds an unnecessary overhead to HTTP requests and therefore, it is encouraged to set up a web server, such as NGINX, in front of it.
NGINX is a web server focused on high concurrency, performance, and low memory usage. NGINX also acts as a reverse proxy, receiving HTTP requests and routing them to different backends. As mentioned, generally, you will use a web server, such as NGINX, in front of uWSGI for serving static files efficiently and quickly, and you will forward dynamic requests to uWSGI workers. By using NGINX, you can also apply rules and benefit from its reverse proxy capabilities.
Install NGINX with the following command:
sudo apt-get install nginx
If you are using macOS, you can install NGINX using the command brew install nginx.
You can find NGINX binaries for Windows at https://nginx.org/en/download.html.
Open a shell and run NGINX with the following command:
sudo nginx
Open the URL http://127.0.0.1 in your browser. You should see the following screen:

Figure 14.2: The NGINX default page
If you see this screen, NGINX is successfully installed. 80 is the port for the default NGINX configuration.
The production environment
The following diagram shows the request/response cycle of the production environment that you are setting up:

Figure 14.3: The production environment request/response cycle
The following will happen when the client browser sends an HTTP request:
- NGINX receives the HTTP request
- NGINX delegates the request to uWSGI through a socket
- uWSGI passes the request to Django for processing
- Django returns an HTTP response that is passed back to NGINX, which in turn passes it back to the client browser
Configuring NGINX
Create a new file inside the config/ directory and name it nginx.conf. Add the following code to it:
# the upstream component nginx needs to connect to
upstream educa {
    server      unix:///tmp/educa.sock;
}
server {
    listen       80;
    server_name  www.educaproject.com educaproject.com;
    access_log   off;
    error_log    /home/projects/educa/logs/nginx_error.log;
    location / {
        include      /etc/nginx/uwsgi_params;
        uwsgi_pass   educa;
    }
}
This is the basic configuration for NGINX. You set up an upstream named educa, which points to the socket created by uWSGI. You use the server block and add the following configuration:
- You tell NGINX to listen on port
80. - You set the server name to both
www.educaproject.comandeducaproject.com. NGINX will serve incoming requests for both domains. - You explicitly set
access_logtooff. You can use this directive to store access logs in a file. - You use the
error_logdirective to set the path to the file where you will be storing error logs. Replace this path with the path where you would like to store NGINX error logs. Analyze this log file if you run into any issue while using NGINX. - You include the default uWSGI configuration parameters that come with NGINX. These are located next to the default configuration file for NGINX. You can usually find them in any of these three locations:
/usr/local/nginx/conf/usgi_params,/etc/nginx/usgi_params, or/usr/local/etc/nginx/usgi_params. - You specify that everything under the
/path has to be routed to theeducasocket (uWSGI).
You can find the NGINX documentation at https://nginx.org/en/docs/.
The default configuration file for NGINX is named nginx.conf and it usually resides in any of these three directories: /usr/local/nginx/conf, /etc/nginx, or /usr/local/etc/nginx.
Locate your nginx.conf configuration file and add the following include directive inside the http block:
http {
    include /home/projects/educa/config/nginx.conf;
    # ...
}
Replace /home/projects/educa/config/nginx.conf with the path to the configuration file you created for the educa project. In this code, you include the NGINX configuration file for your project in the default NGINX configuration.
Open a shell and run uWSGI if you are not running it yet:
uwsgi --ini config/uwsgi.ini
Open a second shell and reload NGINX with the following command:
sudo nginx -s reload
Whenever you want to stop NGINX, you can gracefully do so with the following command:
sudo nginx -s quit
If you want to quickly stop NGINX, instead of quit use the signal stop. The quit signal waits for worker processes to finish serving current requests, while the stop signal stops NGINX abruptly.
Since you are using a sample domain name, you need to redirect it to your local host. Edit your /etc/hosts file and add the following line to it:
127.0.0.1 educaproject.com www.educaproject.com
By doing so, you are routing both hostnames to your local server. In a production server, you won't need to do this, since you will have a fixed IP address and you will point your hostname to your server in your domain's DNS configuration.
Open http://educaproject.com/ in your browser. You should be able to see your site, still without any static assets loaded. Your production environment is almost ready.
Now you can restrict the hosts that can serve your Django project. Edit the production settings file settings/pro.py of your project and change the ALLOWED_HOSTS setting, as follows:
ALLOWED_HOSTS = ['educaproject.com', 'www.educaproject.com']
Django will now only serve your application if it's running under any of these hostnames. You can read more about the ALLOWED_HOSTS setting at https://docs.djangoproject.com/en/3.0/ref/settings/#allowed-hosts.
Serving static and media assets
uWSGI is capable of serving static files flawlessly, but it is not as fast and effective as NGINX. For the best performance, you will use NGINX to serve the static files in your production environment. You will set up NGINX to serve both the static files of your application (CSS style sheets, JavaScript files, and images) and media files uploaded by instructors for the course contents.
Edit the settings/base.py file and add the following line just below the STATIC_URL setting:
STATIC_ROOT = os.path.join(BASE_DIR, 'static/')
Each application in your Django project may contain static files in a static/ directory. Django provides a command to collect static files from all applications into a single location. This simplifies the setup for serving static files in production. The collectstatic command collects the static files from all applications of the project into the path defined in STATIC_ROOT.
Open the shell and run the following command:
python manage.py collectstatic
You will see this output:
165 static files copied to '/educa/static'.
Files located under the static/ directory of each application present in the INSTALLED_APPS setting have been copied to the global /educa/static/ project directory.
Now, edit the config/nginx.conf file and change its code, like this:
# the upstream component nginx needs to connect to
upstream educa {
    server      unix:///tmp/educa.sock;
}
server {
    listen       80;
    server_name  www.educaproject.com educaproject.com;
    access_log   off;
    error_log    /home/projects/educa/logs/nginx_error.log;
    location / {
        include      /etc/nginx/uwsgi_params;
        uwsgi_pass   educa;
    }

    location /static/ {
        alias /home/projects/educa/static/;
    }
    location /media/ {
        alias /home/projects/educa/media/;
    }
}
Remember to replace the /home/projects/educa/ path with the absolute path to your project directory. These directives tell NGINX to serve static files located under the /static/ and /media/ paths directly. These paths are as follows:
/static/: Corresponds to the path of theSTATIC_URLsetting. The target path corresponds to the value of theSTATIC_ROOTsetting. You use it to serve the static files of your application./media/: Corresponds to the path of theMEDIA_URLsetting, and its target path corresponds to the value of theMEDIA_ROOTsetting. You use it to serve the media files uploaded to the course contents.
The schema of the production environment now looks like this:

Figure 14.4: The production environment request/response cycle, including static files
Files under the /static/ and /media/ paths are now served by NGINX directly, instead of being forwarded to uWSGI. Requests to any other paths are still passed by NGINX to uWSGI through the UNIX socket.
Reload NGINX's configuration with the following command to keep track of the new paths:
sudo nginx -s reload
Open http://educaproject.com/ in your browser. You should see the following screen:

Figure 14.5: The course list page served with NGINX and uWSGI
Static resources, such as CSS style sheets and images, are now loaded correctly. HTTP requests for static files are now being served by NGINX directly, instead of being forwarded to uWSGI.
Great! You have successfully configured NGINX for serving static files.
Securing connections with SSL/TLS
The Transport Layer Security (TLS) protocol is the standard for serving websites through a secure connection. The TLS predecessor is Secure Sockets Layer (SSL). Although SSL is now deprecated, in multiple libraries and online documentation you will find references to both the terms TLS and SSL. It's strongly encouraged that you serve your websites under HTTPS. You are going to configure an SSL/TLS certificate in NGINX to serve your site securely.
Creating an SSL/TLS certificate
Create a new directory inside the educa project directory and name it ssl. Then, generate an SSL/TLS certificate from the command line with the following command:
sudo openssl req -x509 -nodes -days 365 -newkey rsa:2048 -keyout ssl/educa.key -out ssl/educa.crt
You are generating a private key and a 2048-bit SSL/TLS certificate that is valid for one year. You will be asked to enter data, as follows:
Country Name (2 letter code) []:
State or Province Name (full name) []:
Locality Name (eg, city) []:
Organization Name (eg, company) []:
Organizational Unit Name (eg, section) []:
Common Name (eg, fully qualified host name) []: educaproject.com
Email Address []: email@domain.com
You can fill in the requested data with your own information. The most important field is the Common Name. You have to specify the domain name for the certificate. You use educaproject.com. This will generate, inside the ssl/ directory, an educa.key private key file and an educa.crt file, which is the actual certificate.
Configuring NGINX to use SSL/TLS
Edit the nginx.conf file of the educa project and edit the server block to include SSL/TLS, as follows:
server {
   listen               80;
   listen               443 ssl;
   ssl_certificate      /home/projects/educa/ssl/educa.crt;
   ssl_certificate_key  /home/projects/educa/ssl/educa.key;
   server_name          www.educaproject.com educaproject.com;
   # ...
}
With the preceding code, your server now listens both to HTTP through port 80 and HTTPS through port 443. You indicate the path to the SSL/TLS certificate with ssl_certificate and the certificate key with ssl_certificate_key.
Reload NGINX with the following command:
sudo nginx -s reload
NGINX will load the new configuration. Open https://educaproject.com/ with your browser. You should see a warning message similar to the following one:

Figure 14.6: An invalid certificate warning
This screen might vary depending on your browser. It alerts you that your site is not using a trusted or valid certificate; the browser can't verify the identity of your site. This is because you signed your own certificate instead of obtaining one from a trusted certification authority (CA). When you own a real domain, you can apply for a trusted CA to issue an SSL/TLS certificate for it, so that browsers can verify its identity. If you want to obtain a trusted certificate for a real domain, you can refer to the Let's Encrypt project created by the Linux Foundation. It is a nonprofit CA that simplifies obtaining and renewing trusted SSL/TLS certificates for free. You can find more information at https://letsencrypt.org.
Click on the link or button that provides additional information and choose to visit the website, ignoring warnings. The browser might ask you to add an exception for this certificate or verify that you trust it. If you are using Chrome, you might not see any option to proceed to the website. If this is the case, type thisisunsafe or badidea directly in Chrome on the same warning page. Chrome will then load the website. Note that you do this with your own issued certificate; don't trust any unknown certificate or bypass the browser SSL/TLS certificate checks for other domains.
When you access the site, you will see that the browser displays a lock icon next to the URL, as follows:

Figure 14.7: The browser address bar, including a secure connection padlock icon
If you click the lock icon, SSL/TLS certificate details will be displayed as follows:

Figure 14.8: TLS/SSL certificate details
In the certificate details, you can see it is a self-signed certificate and you can see its expiration date. You are now serving your site securely.
Configuring your Django project for SSL/TLS
Django comes with specific settings for SSL/TLS support. Edit the settings/pro.py settings file and add the following settings to it:
SECURE_SSL_REDIRECT = True
CSRF_COOKIE_SECURE = True
These settings are as follows:
SECURE_SSL_REDIRECT: Whether HTTP requests have to be redirected to HTTPSCSRF_COOKIE_SECURE: Has to be set for establishing a secure cookie for cross-site request forgery (CSRF) protection
Django will now redirect HTTP requests to HTTPS, and cookies for CSRF protection will now be secure.
Redirecting HTTP traffic over to HTTPS
You are redirecting HTTP requests to HTTPS using Django. However, this can be handled in a more efficient way using NGINX.
Edit the nginx.conf file of the educa project and change it as follows:
# the upstream component nginx needs to connect to
upstream educa {
    server      unix:///tmp/educa.sock;
}
server {
    listen 80;
    server_name www.educaproject.com educaproject.com;
    return 301 https://educaproject.com$request_uri;
}
server {
    listen               443 ssl;
    ssl_certificate      /home/projects/educa/ssl/educa.crt;
    ssl_certificate_key  /home/projects/educa/ssl/educa.key;
    server_name  www.educaproject.com educaproject.com;
    access_log   off;
    error_log    /home/projects/educa/logs/nginx_error.log;
    location / {
        include      /etc/nginx/uwsgi_params;
        uwsgi_pass   educa;
    }

    location /static/ {
        alias /home/projects/educa/static/;
    }
    location /media/ {
        alias /home/projects/educa/media/;
    }
}
In this code, you remove the directive listen 80; from the original server block, so that the platform is only available through SSL/TLS (port 443). On top of the original server block, you add an additional server block that only listens on port 80 and redirects all HTTP requests to HTTPS. To achieve this, you return an HTTP response code 301 (permanent redirect) that redirects to the https:// version of the requested URL.
Reload NGINX with the following command:
sudo nginx -s reload
You are now redirecting all HTTP traffic to HTTPS using NGINX.
Using Daphne for Django Channels
In Chapter 13, Building a Chat Server, you used Django Channels to build a chat server using WebSockets. uWSGI is suitable for running Django or any other WSGI application, but it doesn't support asynchronous communication using Asynchronous Server Gateway Interface (ASGI) or WebSockets. In order to run Channels in production, you need an ASGI web server that is capable of managing WebSockets.
Daphne is a HTTP, HTTP2, and WebSocket server for ASGI developed to serve Channels. You can run Daphne alongside uWSGI to serve both ASGI and WSGI applications efficiently.
Daphne is installed automatically as a dependency of Channels. If you went through the steps to install Channels in Chapter 13, Building a Chat Server, Daphne is already installed in your Python environment. You can also install Daphne with the following command:
pip install daphne==2.4.1
You can find more information about Daphne at https://github.com/django/daphne.
Django 3 supports WSGI and ASGI, but it doesn't support WebSockets yet. Therefore, you are going to edit the asgi.py file of the educa project to use Channels.
Edit the educa/asgi.py file of your project and make it look like this:
import os
import django
from channels.routing import get_default_application
os.environ.setdefault('DJANGO_SETTINGS_MODULE', 'educa.settings')
django.setup()
application = get_default_application()
You are loading the default ASGI application using Channels instead of the standard Django ASGI module. You can find more information about deploying Daphne with protocol servers at https://channels.readthedocs.io/en/latest/deploying.html#run-protocol-servers.
Open a new shell and set the DJANGO_SETTINGS_MODULE environment variable with the production environment using the following command:
export DJANGO_SETTINGS_MODULE=educa.settings.pro
In the same shell, from the educa project directory run the following command:
daphne -u /tmp/daphne.sock educa.asgi:application
You will see the following output:
2020-02-11 00:49:44,223 INFO     Starting server at unix:/tmp/daphne.sock
2020-02-11 00:49:44,223 INFO     HTTP/2 support not enabled (install the http2 and tls Twisted extras)
2020-02-11 00:49:44,223 INFO     Configuring endpoint unix:/tmp/daphne.sock
The output shows that Daphne is successfully running on a UNIX socket.
Using secure connections for WebSockets
You have configured NGINX to use secure connections through SSL/TLS. You need to change ws (WebSocket) connections to use the wss (WebSocket Secure) protocol now, in the same way that HTTP connections are now being served through HTTPS.
Edit the chat/room.html template of the chat application and find the following line in the domready block:
var url = 'ws://' + window.location.host +
Replace that line with the following one:
var url = 'wss://' + window.location.host +
Now you will be explicitly connecting to a secure WebSocket.
Including Daphne in the NGINX configuration
In your production setup, you will be running Daphne on a UNIX socket and using NGINX in front of it. NGINX will pass requests to Daphne based on the requested path. You will expose Daphne to NGINX through a UNIX socket interface, just like the uWSGI setup.
Edit the config/nginx.conf file of the educa project and make it look as follows:
# the upstream components nginx needs to connect to
upstream educa {
    server unix:/tmp/educa.sock;
}
upstream daphne {
    server unix:/tmp/daphne.sock;
}
server {
    listen 80;
    server_name www.educaproject.com educaproject.com;
    return 301 https://educaproject.com$request_uri;
}
server {
    listen               443 ssl;
    ssl_certificate      /home/projects/educa/ssl/educa.crt;
    ssl_certificate_key  /home/projects/educa/ssl/educa.key;

    server_name  www.educaproject.com educaproject.com;
    access_log   off;
    error_log    /home/projects/educa/logs/nginx_error.log;
    location / {
        include     /etc/nginx/uwsgi_params;
        uwsgi_pass  educa;
    }
    location /ws/ {
        proxy_http_version  1.1;
        proxy_set_header    Upgrade $http_upgrade;
        proxy_set_header    Connection "upgrade";
        proxy_redirect      off;
        proxy_pass          http://daphne;
    }
    location /static/ {
        alias /home/projects/educa/static/;
    }
    location /media/ {
        alias /home/projects/educa/media/;
    }
}
In this configuration, you set up a new upstream named daphne, which points to a socket created by Daphne. In the server block, you configure the /ws/ location to forward requests to Daphne. You use the proxy_pass directive to pass requests to Daphne and you include some additional proxy directives.
With this configuration, NGINX will pass any URL request that starts with the /ws/ prefix to Daphne and the rest to uWSGI, except for files under the /static/ or /media/ paths, which will be served directly by NGINX.
The production setup including Daphne now looks like this:

Figure 14.9: The production environment request/response cycle, including Daphne
NGINX runs in front of uWSGI and Daphne as a reverse proxy server. NGINX faces the Web and passes requests to the application server (uWSGI or Daphne) based on their path prefix. Besides this, NGINX also serves static files and redirects non-secure requests to secure ones. This setup reduces downtime, consumes less server resources, and provides greater performance and security.
Stop and start uWSGI and Daphne, and then reload NGINX with the following command to keep track of the latest configuration:
sudo nginx -s reload
Use your browser to create a sample course with an instructor user, log in with a user who is enrolled on the course, and open https://educaproject.com/chat/room/1/ with your browser. You should be able to send and receive messages like the following example:
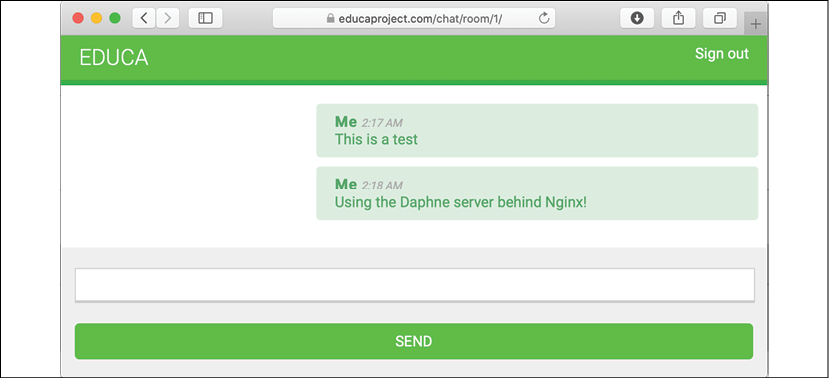
Figure 14.10: Course chat room messages served with NGINX and Daphne
Daphne is working correctly and NGINX is passing requests to it. All connections are secured through SSL/TLS.
Congratulations! You have built a custom production-ready stack using NGINX, uWSGI, and Daphne. You could do further optimization for additional performance and enhanced security through configuration settings in NGINX, uWSGI and Daphne. However, this production setup is a great start!
Creating a custom middleware
You already know the MIDDLEWARE setting, which contains the middleware for your project. You can think of it as a low-level plugin system, allowing you to implement hooks that get executed in the request/response process. Each middleware is responsible for some specific action that will be executed for all HTTP requests or responses.
Avoid adding expensive processing to middleware, since they are executed in every single request.
When an HTTP request is received, middleware are executed in order of appearance in the MIDDLEWARE setting. When an HTTP response has been generated by Django, the response passes through all middleware back in reverse order.
A middleware can be written as a function, as follows:
def my_middleware(get_response):
    def middleware(request):
        # Code executed for each request before
        # the view (and later middleware) are called.
        response = get_response(request)
        # Code executed for each request/response after
        # the view is called.
        return response
    return middleware
A middleware factory is a callable that takes a get_response callable and returns a middleware. A middleware is a callable that takes a request and returns a response, just like a view. The get_response callable might be the next middleware in the chain or the actual view in the case of the last listed middleware.
If any middleware returns a response without calling its get_response callable, it short circuits the process; no further middleware get executed (also not the view), and the response returns through the same layers that the request passed in through.
The order of middleware in the MIDDLEWARE setting is very important because a middleware can depend on data set in the request by other middleware that have been executed previously.
When adding a new middleware to the MIDDLEWARE setting, make sure to place it in the right position. Middleware are executed in order of appearance in the setting during the request phase, and in reverse order for responses.
You can find more information about middleware at https://docs.djangoproject.com/en/3.0/topics/http/middleware/.
Creating a subdomain middleware
You are going to create a custom middleware to allow courses to be accessible through a custom subdomain. Each course detail URL, which looks like https://educaproject.com/course/django/, will also be accessible through the subdomain that makes use of the course slug, such as https://django.educaproject.com/. Users will be able to use the subdomain as a shortcut to access the course details. Any requests to subdomains will be redirected to each corresponding course detail URL.
Middleware can reside anywhere within your project. However, it's recommended to create a middleware.py file in your application directory.
Create a new file inside the courses application directory and name it middleware.py. Add the following code to it:
from django.urls import reverse
from django.shortcuts import get_object_or_404, redirect
from .models import Course
def subdomain_course_middleware(get_response):
    """
    Subdomains for courses
    """
    def middleware(request):
        host_parts = request.get_host().split('.')
        if len(host_parts) > 2 and host_parts[0] != 'www':
            # get course for the given subdomain
            course = get_object_or_404(Course, slug=host_parts[0])
            course_url = reverse('course_detail',
                                 args=[course.slug])
            # redirect current request to the course_detail view
            url = '{}://{}{}'.format(request.scheme,
                                     '.'.join(host_parts[1:]),
                                     course_url)
            return redirect(url)
        response = get_response(request)
        return response
    return middleware
When an HTTP request is received, you perform the following tasks:
- You get the hostname that is being used in the request and divide it into parts. For example, if the user is accessing
mycourse.educaproject.com, you generate the list['mycourse', 'educaproject', 'com']. - You check whether the hostname includes a subdomain by checking whether the split generated more than two elements. If the hostname includes a subdomain, and this is not
www, you try to get the course with the slug provided in the subdomain. - If a course is not found, you raise an HTTP
404exception. Otherwise, you redirect the browser to the course detail URL.
Edit the settings/base.py file of the project and add 'courses.middleware.SubdomainCourseMiddleware' at the bottom of the MIDDLEWARE list, as follows:
MIDDLEWARE = [
    # ...
    'courses.middleware.subdomain_course_middleware',
]
The middleware will now be executed in every request.
Remember that the hostnames allowed to serve your Django project are specified in the ALLOWED_HOSTS setting. Let's change this setting so that any possible subdomain of educaproject.com is allowed to serve your application.
Edit the settings/pro.py file and modify the ALLOWED_HOSTS setting, as follows:
ALLOWED_HOSTS = ['.educaproject.com']
A value that begins with a period is used as a subdomain wildcard; '.educaproject.com' will match educaproject.com and any subdomain for this domain, for example course.educaproject.com and django.educaproject.com.
Serving multiple subdomains with NGINX
You need NGINX to be able to serve your site with any possible subdomain. Edit the config/nginx.conf file of the educa project and replace the two occurrences of the following line:
server_name www.educaproject.com educaproject.com;
with the following one:
server_name *.educaproject.com educaproject.com;
By using the asterisk, this rule applies to all subdomains of educaproject.com. In order to test your middleware locally, you need to add any subdomains you want to test to /etc/hosts. For testing the middleware with a Course object with the slug django, add the following line to your /etc/hosts file:
127.0.0.1 django.educaproject.com
Stop and start uWSGI again, and reload NGINX with the following command to keep track of the latest configuration:
sudo nginx -s reload
Then, open https://django.educaproject.com/ in your browser. The middleware will find the course by the subdomain and redirect your browser to https://educaproject.com/course/django/.
Implementing custom management commands
Django allows your applications to register custom management commands for the manage.py utility. For example, you used the management commands makemessages and compilemessages in Chapter 9, Extending Your Shop, to create and compile translation files.
A management command consists of a Python module containing a Command class that inherits from django.core.management.base.BaseCommand or one of its subclasses. You can create simple commands or make them take positional and optional arguments as input.
Django looks for management commands in the management/commands/ directory for each active application in the INSTALLED_APPS setting. Each module found is registered as a management command named after it.
You can learn more about custom management commands at https://docs.djangoproject.com/en/3.0/howto/custom-management-commands/.
You are going to create a custom management command to remind students to enroll at least on one course. The command will send an email reminder to users who have been registered for longer than a specified period who aren't enrolled on any course yet.
Create the following file structure inside the students application directory:
management/
    __init__.py
    commands/
        __init__.py
        enroll_reminder.py
Edit the enroll_reminder.py file and add the following code to it:
import datetime
from django.conf import settings
from django.core.management.base import BaseCommand
from django.core.mail import send_mass_mail
from django.contrib.auth.models import User
from django.db.models import Count
from django.utils import timezone
class Command(BaseCommand):
    help = 'Sends an e-mail reminder to users registered more
           than N days that are not enrolled into any courses yet'
    def add_arguments(self, parser):
        parser.add_argument('--days', dest='days', type=int)
    def handle(self, *args, **options):
        emails = []
        subject = 'Enroll in a course'
        date_joined = timezone.now().today() -
                      datetime.timedelta(days=options['days'])
        users = User.objects.annotate(course_count=Count('courses_joined'))
            .filter(course_count=0,
                    date_joined__date__lte=date_joined)
        for user in users:
            message = """Dear {},
            We noticed that you didn't enroll in any courses yet.
            What are you waiting for?""".format(user.first_name)
            emails.append((subject,
                           message,
                           settings.DEFAULT_FROM_EMAIL,
                           [user.email]))
        send_mass_mail(emails)
        self.stdout.write('Sent {} reminders'.format(len(emails)))
This is your enroll_reminder command. The preceding code is as follows:
- The
Commandclass inherits fromBaseCommand. - You include a
helpattribute. This attribute provides a short description of the command that is printed if you run the commandpython manage.py help enroll_reminder. - You use the
add_arguments()method to add the--daysnamed argument. This argument is used to specify the minimum number of days a user has to be registered, without having enrolled on any course, in order to receive the reminder. - The
handle()command contains the actual command. You get thedaysattribute parsed from the command line. You use thetimezoneutility provided by Django to retrieve the current timezone-aware date withtimezone.now().date(). (You can set the timezone for your project with theTIME_ZONEsetting.) You retrieve the users who have been registered for more than the specified days and are not enrolled on any courses yet. You achieve this by annotating the QuerySet with the total number of courses each user is enrolled on. You generate the reminder email for each user and append it to theemailslist. Finally, you send the emails using thesend_mass_mail()function, which is optimized to open a single SMTP connection for sending all emails, instead of opening one connection per email sent.
You have created your first management command. Open the shell and run your command:
python manage.py enroll_reminder --days=20
If you don't have a local SMTP server running, you can take a look at Chapter 2, Enhancing Your Blog with Advanced Features, where you configured SMTP settings for your first Django project. Alternatively, you can add the following setting to the settings.py file to make Django output emails to the standard output during development:
EMAIL_BACKEND = 'django.core.mail.backends.console.EmailBackend'
Let's schedule your management command so that the server runs it every day at 8 a.m. If you are using a UNIX-based system such as Linux or macOS, open the shell and run crontab -e to edit your crontab. Add the following line to it:
0 8 * * * python /path/to/educa/manage.py enroll_reminder --days=20 --settings=educa.settings.pro
If you are not familiar with cron, you can find an introduction to cron at http://www.unixgeeks.org/security/newbie/unix/cron-1.html.
If you are using Windows, you can schedule tasks using the Task Scheduler. You can find more information about it at https://docs.microsoft.com/en-us/windows/win32/taskschd/task-scheduler-start-page.
Another option for executing actions periodically is to create tasks and schedule them with Celery. Remember that you used Celery in Chapter 7, Building an Online Shop, to execute asynchronous tasks. Instead of creating management commands and scheduling them with cron, you can create asynchronous tasks and execute them with the Celery beat scheduler. You can learn more about scheduling periodic tasks with Celery at https://celery.readthedocs.io/en/latest/userguide/periodic-tasks.html.
Use management commands for standalone scripts that you want to schedule with cron or the Windows scheduler control panel.
Django also includes a utility to call management commands using Python. You can run management commands from your code as follows:
from django.core import management
management.call_command('enroll_reminder', days=20)
Congratulations! You can now create custom management commands for your applications and schedule them when needed.
Summary
In this chapter, you configured a production environment using NGINX, uWSGI, and Daphne. You secured your environment through SSL/TLS. You also implemented a custom middleware and you learned how to create custom management commands.
You have reached the end of this book. Congratulations! You have learned the skills required to build successful web applications with Django. This book has guided you through the process of developing real-life projects and integrating Django with other technologies. Now you are ready to create your own Django project, whether it is a simple prototype or a large-scale web application.
Good luck with your next Django adventure!