PERSPECTIVE & THE PICTURE PLANE
In the previous chapter, we discussed how to draw circles in perspective. In this chapter, we will focus on accurately drawing non-circular, hard-edged objects—boxes—in perspective. We will also discuss further uses of the picture plane, new information on applying accurate object dimensions and sizes in a complex still-life arrangement, and the best way to simplify a complex arrangement at the onset in order to more easily and successfully block in the subject matter.

Part I: Perspective
Perspective is essentially your viewpoint. When someone asks you how you “feel” about a subject, the person wants to know your point of view, or your perspective. In drawing, we relate perspective to how the subject is viewed by the artist. For example, when you stand at an easel and draw a subject, you see the subject from a different viewpoint, or perspective, than you would if you were sitting in a chair and drawing the same subject.
One-Point Perspective
In relation to box-like constructions like the examples here, or in the case of interior or exterior architecture, one-point perspective is indicated by a front plane and back plane, each parallel to the picture plane, with two side planes that converge toward a common vanishing point within the picture plane. The vanishing point is always on eye level.

Two-Point Perspective
In situations similar to the box-like constructions shown, only the vertical edges of the boxes are parallel to the picture plane in two-point perspective. The parallel sets of sides converge diagonally toward common vanishing points, one on the right side of the picture plane and one on the left. Both of these vanishing points are always on eye level.
Eye Level
Now that you have some familiarity with perspective terminology, let’s put these terms to use in tangible situations. Drawing boxes is a very good way to understand the principles of still life, or “tabletop,” perspective.

In one-point perspective, the front and back of the boxes are parallel to the picture plane, and the vanishing point for the perpendicular sides is within the picture plane.
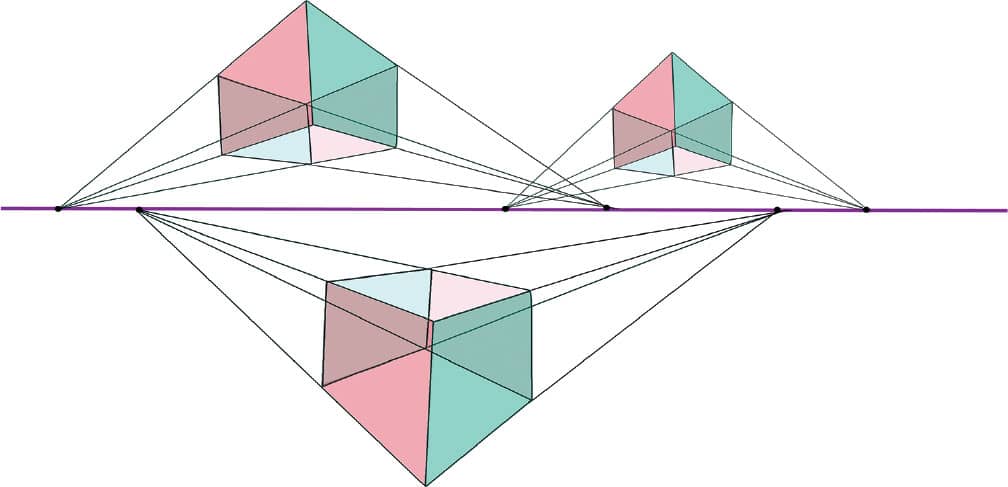
Imagining that the picture plane is located vertically between the boxes and ourselves, we’ll start by viewing a two-point box on top of a one-point box, with eye level within the picture plane. For the two-point box on top, the convergence of its edges is toward eye level, and the subsequent vanishing points are on eye level, one on the left and one on the right. Because the one-point box on the bottom shows only its front face, we know that it is parallel to the picture plane and that its vanishing point is directly behind it, also on eye level.

From this angle, both boxes are now considered two-point boxes. The parallel faces of each box converge to common vanishing points on eye level.
As we rotate the box construction slightly, we can now see that both boxes are in a two-point perspective situation, but each box has it’s own left and right vanishing points, still on the horizon line.
The boxes are still two-point boxes, but now the eye level is above the level of the boxes. The viewer can see the tops of the boxes easily, and the angles of convergence are more acute.
In this third view, the eye level has risen above the picture plane, and the line of vision is looking down onto the tops of the boxes. These new angles of edges, especially on the bottom of the lower box, are particularly acute, with vanishing points now much closer to both boxes than they were at previous locations on eye level.
Drawing the Two-Point Perspective Setup
As you can see from several different viewing angles, the vanishing points for one side or the other can be fairly distant from the box, many times off the edge of the paper. If the front face of a box is slightly turned from a one-point perspective, the diagonals of the face converge to a vanishing point far from the box. In order to draw the boxes accurately, we need a way to illustrate the angles of the boxes’ edges without the vanishing points, which are sometimes (or usually) outside of the picture plane. The way to achieve accuracy is with an angle tool—in this case, a chopstick—which can help us see any angle that the boxes present, as long as we keep it parallel to the picture plane.

STEP 1 Check the angles with a chopstick, and then mark the top and bottom of each box to establish proportions and composition. Sketch lightly and loosely.

STEP 2 Once the boxes are lightly sketched, start to establish the accuracy of all the angles, in this case starting with the bottom box and moving on to the top.

STEP 3 When you are certain of the accuracy of the converging lines, strengthen and refine your drawing. All of this is accomplished without rulers! A ruler may give you a straight line, but it does not necessarily give you an accurate line. Your eye and a good freehand sketch can do a better job.
Part II: The Picture Plane & the XY Grid
Now we will use the picture plane in front of a more complex set of objects that make up a large still life. We will again use a chopstick as a tool for angles and relative sizes, but also for accurate locations. A chopstick is helpful in finding angles on the picture plane when held diagonally, but it can also be used horizontally and vertically to help us line up the subject matter in a simple, straightforward way.
By using the chopstick horizontally and vertically at various points of intersection in the still life, we can superimpose an imaginary grid over our drawing of the still life. The horizontal lines are called “X-axis” lines, and the vertical lines are called “Y-axis” lines. The imaginary grid is called the “XY grid.”

We will use this complex still life setup to demonstrate the use of the XY-grid construction method.
The Drawing Process

STEP 1 After making a thumbnail sketch, start by marking very generalized locations of the tallest, lowest, and widest form edges of the still life. Don’t worry about detail; just concentrate on the top, bottom, and general location of each object. Then use the chopstick to create an “envelope” around the entire still life.
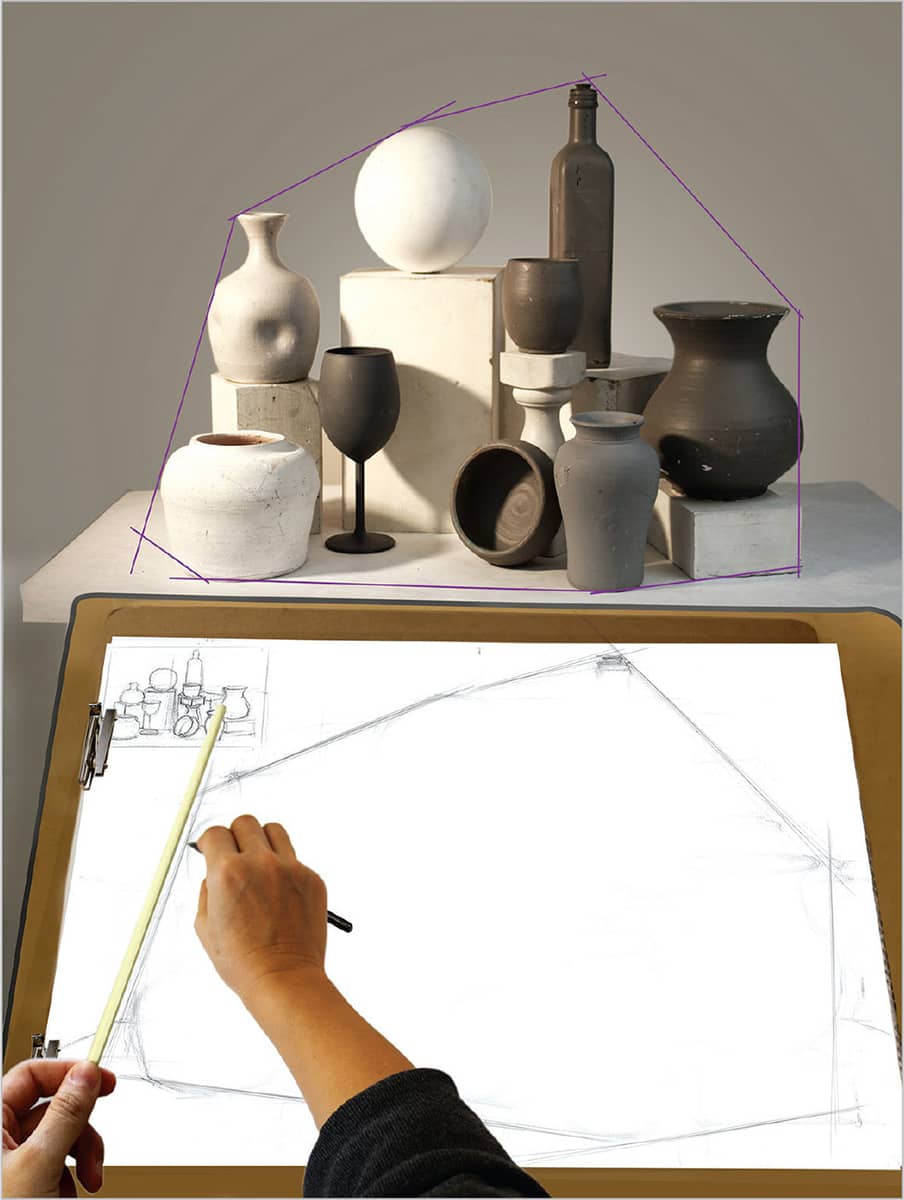

STEP 2 Next is the initial block-in stage. This stage is not about detail or refinement, but only general scale, proportion, and placement. Make use of the chopstick as a proportional measuring tool by selecting one object in the still life to use as the base unit of measurement for all the other forms.

STEP 3 Once most or all of the objects have been blocked in lightly (light forms are key; they are easier to refine and adjust), the XY grid can be initiated. As you check the first horizontal X-axis on the still life, notice which other objects’ heights fall across this line, and apply that information to your drawing with a light horizontal line. If you need to make an adjustment to a form or its location, make a mark for that change. If you have sketched accurately, you won’t need to make many adjustments; move down to the next point of intersection on the still life and create another X-axis on the grid; sketch this on your drawing as another light horizontal line.

STEP 4 As you move down the still life, you should be able to adjust most or all of the height locations of the objects. Then it’s time to check the width and horizontal locations of objects with the Y-axis lines, making sure that all objects are properly aligned with one another. Transfer the imaginary Y-axis lines on the still life as light vertical lines on your drawing, so it resembles a horizontal and vertical grid.
YOUR HOMEWORK
Based on the first demonstration in this chapter shown here, create a still life of stacked boxes (at least three), with your eye level somewhere between the top of the highest box and the base of the lowest box; turn the boxes at different angles to one another.

STEP 1 Mark the top and bottom of the composition based on the highest point of the top box and the lowest corner of the bottom box, respectively. These are “guesstimates“ only and may be adjusted during the course of the drawing. Start with the bottom box sketch, checking angles of edges with your chopstick or pencil.

STEP 2 Use a pencil or chopstick to gauge angles on the still life, and then apply the angles to the second box.

STEP 3 Check for vertical edges on all corners of all of the boxes; refine if needed.
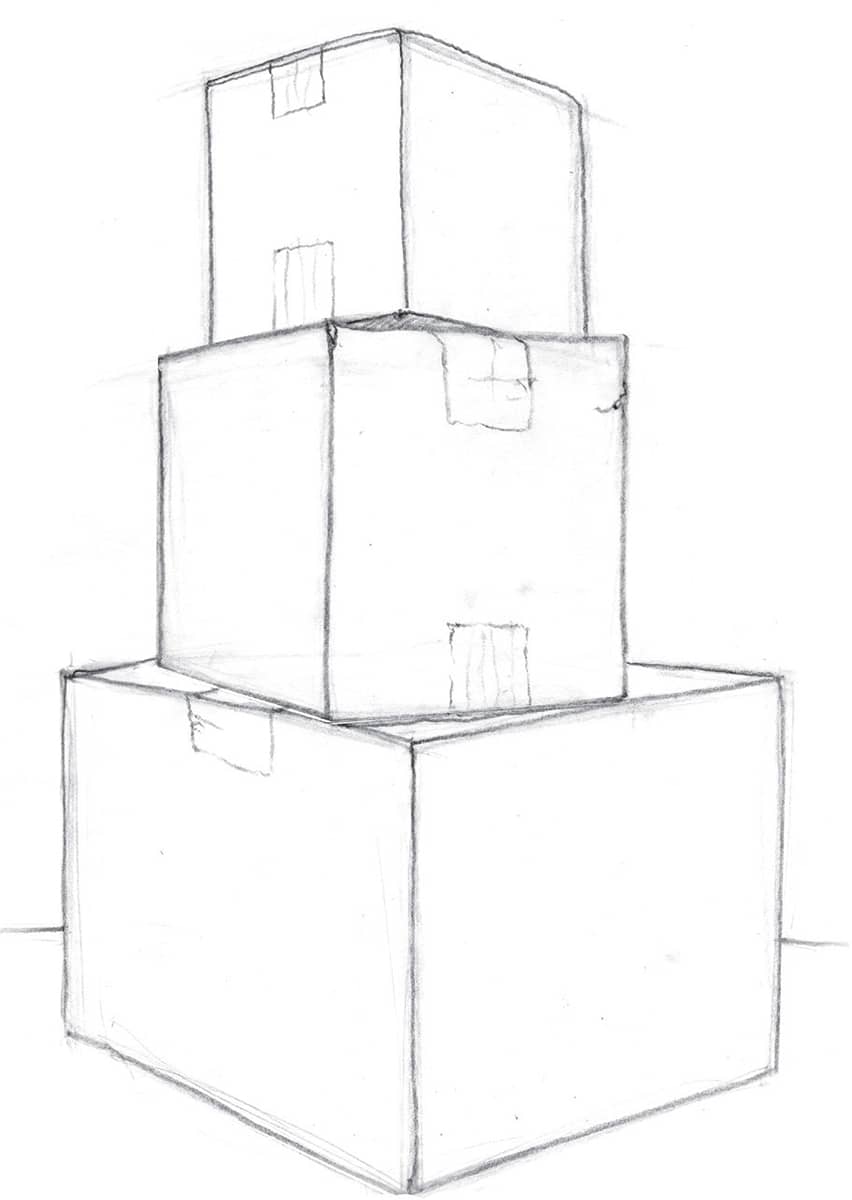
STEP 4 Refine your drawing with weighted contour line, and indicate a ground plane.
EXERCISES FOR PRACTICE
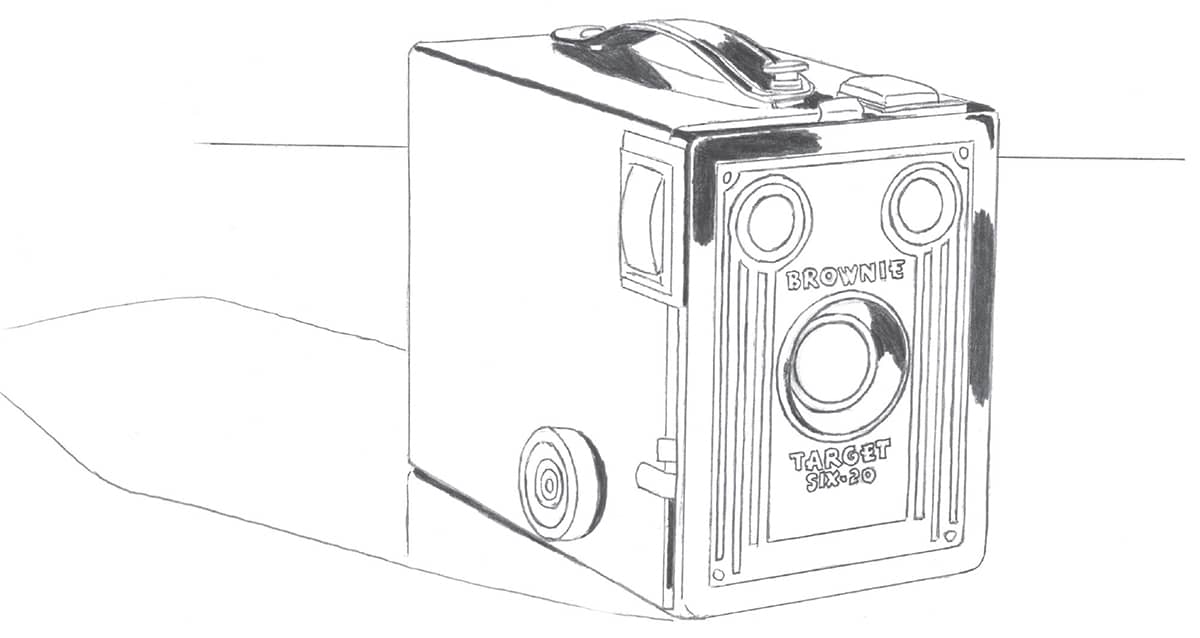
Using a 4B pencil, start shading in the darkest values of the drawing. The subject is very dark in color, but it contains a subtle assortment of values around its face and edges. Really study the camera to discern the different areas of shading and value.

Using a technique called “negative drawing,” fill in the areas around the lettering and the design using a 2B pencil. This emphasizes the lettering and lines on the front of the camera.

To finish the face of the camera, use a 2B pencil to add value with linear hatching, leaving the edges lighter.


