
3. Building Your First Page
After you’ve set up your local site, you can begin filling the site with pages. To do that, you’ll need to create a page, give it a title, add some content to the page, and save it. To check your work, you should view the page in one or more Web browsers before you upload it to your Web server. Dreamweaver has always made it easy to view your work in different browsers, and the new (as of CS5) integration with Adobe’s BrowserLab service makes it even simpler.
If you need a little inspiration, Dreamweaver offers a variety of sample pages that you can use as a jumping-off point for your own creative efforts. You can also choose from a variety of page designs created entirely with CSS.
In this chapter, we’ll also briefly discuss how you add text, images, and links to your pages, although we go into those subjects in much greater detail in Chapters 4, 5, and 6, respectively.
Creating a New Page
The first HTML page that you create in a new site should be the index page, which is the page that a Web browser loads automatically when a visitor goes to the site. Depending on how you are naming pages on your site, the index page could have a variety of names, but it is most often named index.html. After you create the index page, you will want to create other pages for the site.
As is often the case with Dreamweaver, there is more than one way to do the task at hand. You can create a new page using the Welcome screen, or you can use the New Document dialog.
Using the Welcome screen
The Welcome screen is the fastest way to create a new HTML page. It appears when you have closed all other document windows.
To create a new page from the Welcome screen
1. Close any open document windows.
The Welcome screen appears ![]() . Each of the items in the Welcome screen is a link.
. Each of the items in the Welcome screen is a link.

![]() Click the links in the Welcome screen to open a recent item or create a new item.
Click the links in the Welcome screen to open a recent item or create a new item.
2. In the Create New section, click HTML.
Dreamweaver creates the new blank HTML page ![]() .
.
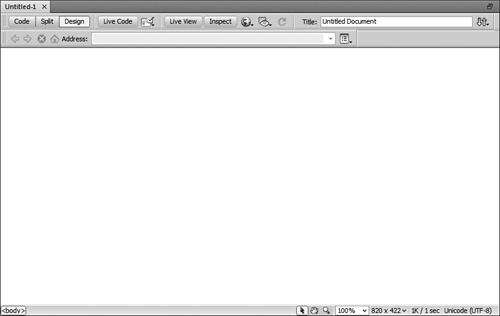
![]() A brand-new page in Dreamweaver showing the Design view.
A brand-new page in Dreamweaver showing the Design view.
Tip
You can also use the Welcome screen to open pages that you recently worked on. Just click the item’s name in the Open a Recent Item section of the Welcome screen.
Tip
Clicking ColdFusion or PHP in the Create New section of the Welcome screen also creates an HTML page. Clicking CSS creates a new CSS style sheet. Clicking any of the other choices creates documents designed for different Web programming languages that you would normally work with in Code view.
Tip
If you don’t want to use the Welcome screen at all, you can turn it off in Dreamweaver’s Preferences. Choose Edit > Preferences (Dreamweaver > Preferences), and click the General category. Then deselect the check box next to “Show Welcome screen.”
To create a new page from the New Document dialog
1. Choose File > New, or press Ctrl-N (Cmd-N).
The New Document dialog appears ![]() set to the Blank Page tab.
set to the Blank Page tab.
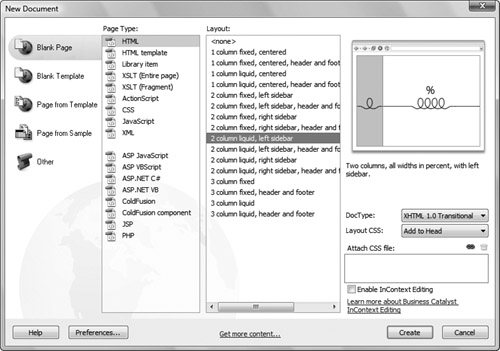
![]() You’ll probably create most of your new pages from the New Document dialog.
You’ll probably create most of your new pages from the New Document dialog.
2. Click to choose one of the tabs in the leftmost column.
The second column changes to show the available items for the tab you selected. The name of this column also changes to match the name of the tab.
If you chose the Blank Page tab and HTML as the page type in the leftmost column, as in ![]() , the second column shows a number of CSS starter layouts. These starter layouts are discussed in more detail in Chapter 8.
, the second column shows a number of CSS starter layouts. These starter layouts are discussed in more detail in Chapter 8.
3. Click the item you want in the second column.
If Dreamweaver has a preview image of the item you selected available, it appears in the Preview pane (previews are mostly available for sample pages and templates) with its description below the preview area.
4. (Optional) Some of the kinds of documents you can create in this dialog allow you to declare their doctype, and for those the DocType pop-up menu will be available. Most of the time the default choice is fine, but if you want you can change the doctype from the pop-up menu ![]() .
.
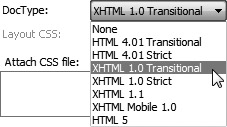
![]() You can choose from the available doctypes in the New Document dialog.
You can choose from the available doctypes in the New Document dialog.
5. Click Create.
Dreamweaver creates the new document and displays it in a new window.
Tip
If you want to change any of the defaults for a new document, click the Preferences button in the New Document dialog. In the resulting dialog ![]() , you can change the default document type for the New Document dialog; the extension used for that document; the default document type (DTD); and the default character encoding. You can also choose whether or not you want the New Document dialog to appear when you press Ctrl-N (Cmd-N), or if you just want Dreamweaver to create a new default document.
, you can change the default document type for the New Document dialog; the extension used for that document; the default document type (DTD); and the default character encoding. You can also choose whether or not you want the New Document dialog to appear when you press Ctrl-N (Cmd-N), or if you just want Dreamweaver to create a new default document.
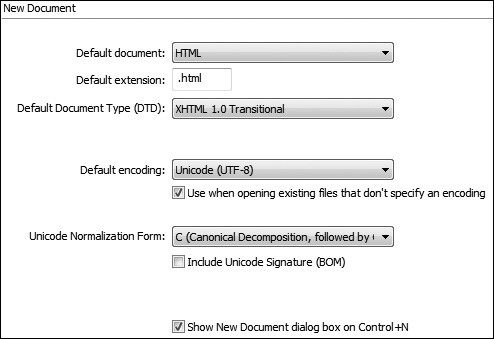
![]() Change the defaults for new pages in the New Document category of Dreamweaver’s Preferences dialog.
Change the defaults for new pages in the New Document category of Dreamweaver’s Preferences dialog.
Tip
We’ll cover the Blank Template and Page from Template tabs of the New Document dialog in Chapter 16.
Using Sample Pages
Dreamweaver has many sample pages available, which do some of the work of creating new pages for you. The sample pages are often good jumping-off points for your own pages. After you create a document from one of the sample pages, you can customize and modify it as you wish.
The sample pages come in two categories:
• CSS Style Sheet chooses external CSS style sheet documents that contain style definitions with a wide variety of looks for your pages. You can click any of the sample style sheets to see a preview and description ![]() .
.
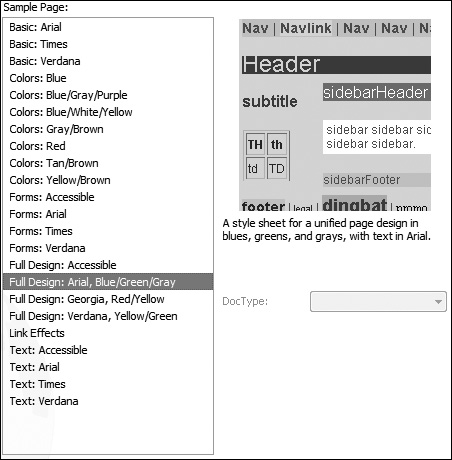
![]() Dreamweaver provides many starter CSS Style Sheets, which you can preview in the New Document dialog.
Dreamweaver provides many starter CSS Style Sheets, which you can preview in the New Document dialog.
• Frameset has 15 premade frameset pages with different frame layouts ![]() . This makes creating framesets considerably easier than doing it by hand.
. This makes creating framesets considerably easier than doing it by hand.
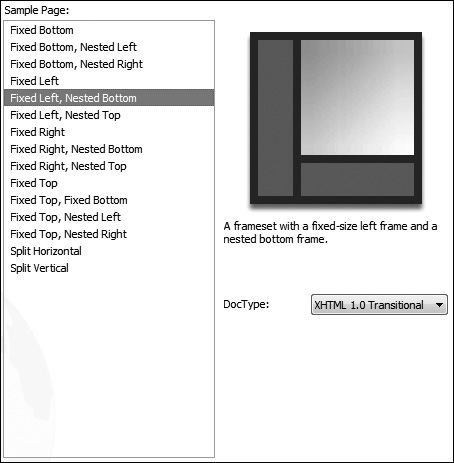
![]() You can preview and choose from the predefined framesets.
You can preview and choose from the predefined framesets.
To create a page from a sample page
1. Choose File > New, or press Ctrl-N (Cmd-N).
The New Document dialog appears.
2. Click the Page from Sample tab in the leftmost column.
The second column changes to show the available items for the tab you selected. The name of this column also changes to Sample Folder.
3. Click the item you want in the second column.
The preview image of the item you selected appears in the Preview pane (previews are mostly available for sample pages and templates) with its description below the preview.
4. Click Create.
Dreamweaver creates the page in a new window.
5. Modify the sample page as you like.
What Happened to the Starter Pages?
In previous versions of Dreamweaver (8 and CS3), the program included themed starter pages, which gave you dozens of prebuilt pages you could use to create whole sites. There were several categories of sites, such as Entertainment, Travel, Spa, and more. Each site type came with a home page and interior pages, all sharing the same basic design. These were useful for quick prototyping of sites, though you would almost always want to use them as jumping-off points for your own page designs. These starter pages were eliminated in Dreamweaver CS4.
The reason is simple: The starter pages may have been handy, but they were all originally built using tables for layout, and their underlying code was, in the words of one Adobe employee, “scary.” Rather than invest developer resources into updating the sample pages into proper CSS layouts, Adobe decided to drop them altogether.
If you’re looking for rapid prototyping of sites, one possibility is to download or purchase one of the many available free or inexpensive Dreamweaver templates; a quick Google search for “Dreamweaver templates” will turn up a large selection. When you find one that you like, make sure that its layout is CSS based, not table based. It makes no sense to use templates that won’t be easy to maintain in the future.
A more robust alternative is WebAssist’s (www.webassist.com) SiteAssist Professional, a wizard-based Dreamweaver extension that steps you through the process of creating the layouts, choosing the navigation menu structure, and building the pages for your site ![]() . SiteAssist lets you choose from a wide variety of CSS-based page and navigation bar styles, and it lets you change your mind and redo the site at any time without losing any custom elements you may have specified. It’s a very good tool for designers who need a technical assist.
. SiteAssist lets you choose from a wide variety of CSS-based page and navigation bar styles, and it lets you change your mind and redo the site at any time without losing any custom elements you may have specified. It’s a very good tool for designers who need a technical assist.
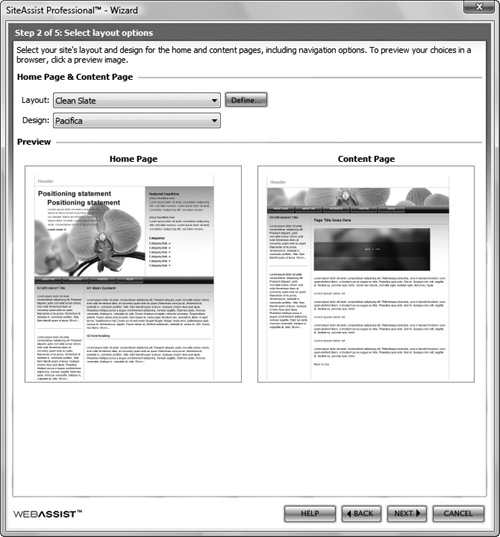
![]() SiteAssist Professional’s wizard steps you through choosing a layout and color design for your site.
SiteAssist Professional’s wizard steps you through choosing a layout and color design for your site.
Titling Your Page
The first thing you should do with your new page is to add a title. The title is the text that appears in the title bar of Web browser windows, at the top of the window ![]() . You’ll enter this text in the Dreamweaver document window.
. You’ll enter this text in the Dreamweaver document window.

![]() The title of an HTML document appears at the top of a Web browser’s window.
The title of an HTML document appears at the top of a Web browser’s window.
To add a title to your page
1. If necessary, open the page you want to title.
2. Click in the Title field at the top of the page’s document window.
3. Type in the title ![]() .
.
![]()
![]() Enter the title in, well, the Title field.
Enter the title in, well, the Title field.
Tip
Don’t forget to add the title; it’s easy to forget, and when you do forget, it makes it harder for people to find your pages using a search engine. As we wrote this, a quick Google search for “Untitled Document” in the title of pages brought up more than 26 million hits. Don’t be one of them!
Adding Text to Your Page
In this section, we’ll cover adding a bit of text to your page, just enough to get you started. You’ll find a much more detailed discussion of working with text in Dreamweaver in Chapter 4. In short, adding text is a lot like typing text in any word processor.
To add text to a page
1. On the new page, click to set a blinking insertion point. You can press Enter (Return) to move the insertion point down on the page.
2. Type your text.
The text appears on the page, aligned to the left.
To format the text
1. In the Insert panel, choose the Text category from the pop-up menu.
The Text category of the Insert panel appears ![]() .
.
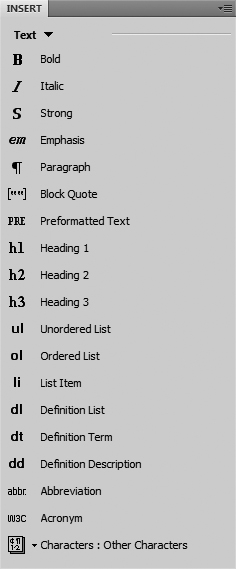
![]() Use the Text category of the Insert panel to format your text using HTML markup.
Use the Text category of the Insert panel to format your text using HTML markup.
2. Using the Insert panel and the HTML tab of the Property Inspector, apply any formatting you want, as you would with a word processor.
See Chapter 4 for much more detail about using the Text category of the Insert panel.
Tip
This formatting would, of course, add HTML markup to your page. You’ll probably want to use CSS formatting for text instead; that’s covered in Chapter 7.
Creating Links
To add a hyperlink to a page, you need to select the text you want to turn into a link, and then provide the URL for the link. A URL (Uniform Resource Locator) is the Web address that you would type into the Address bar of a Web browser.
You will find much more information about adding links to your pages in Chapter 6. You’ll see how to add links to either text or graphics and lots of other linky goodness.
To add a link to a page
1. Select the text you want to turn into a link ![]() .
.

![]() Begin creating a link by selecting the text that you want to turn into the link.
Begin creating a link by selecting the text that you want to turn into the link.
In this example, I want to turn the “HomeCook.info” text at the top of the page into a link to the home page of the site, so I’ve selected that text.
2. Do one of the following:
If you are linking to a page in your site, click the Point to File button in the Property Inspector ![]() , and then drag to a file in the Files panel
, and then drag to a file in the Files panel ![]() . When you release the mouse button, the filename appears in the Link field.
. When you release the mouse button, the filename appears in the Link field.
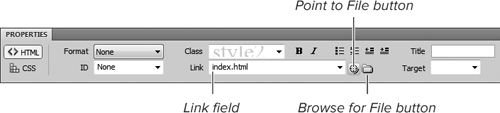
![]() Click the Point to File button to begin the linking process...
Click the Point to File button to begin the linking process...
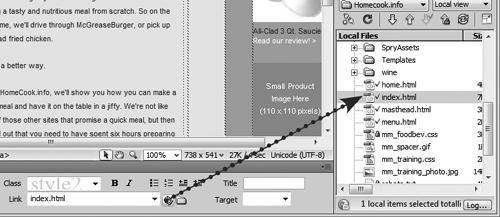
![]() ...then drag to point at the file you want to link to in the Files panel. As you drag, Dreamweaver follows your mouse pointer with an arrow to make it clear which file you’re pointing at.
...then drag to point at the file you want to link to in the Files panel. As you drag, Dreamweaver follows your mouse pointer with an arrow to make it clear which file you’re pointing at.
or
If you are linking to a file on your hard drive (inside or outside of your local site folder), click the Browse for File button in the Property Inspector. The Select File dialog appears ![]() . Navigate to the file you want to link to, select it, then click OK (Choose). The filename appears in the Link field. If the file is outside of the local root folder, Dreamweaver lets you know and offers to copy the file into the local root folder
. Navigate to the file you want to link to, select it, then click OK (Choose). The filename appears in the Link field. If the file is outside of the local root folder, Dreamweaver lets you know and offers to copy the file into the local root folder ![]() .
.
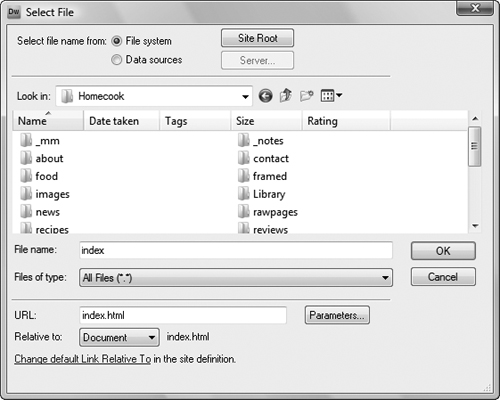
![]() You can also create a link by clicking the Browse for File button in the Property Inspector, which brings up a Select File dialog.
You can also create a link by clicking the Browse for File button in the Property Inspector, which brings up a Select File dialog.
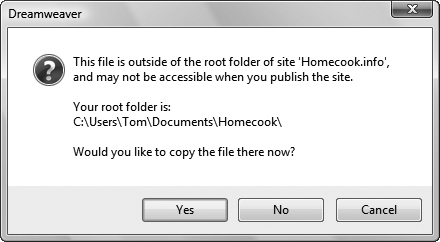
![]() If the file you are selecting is outside your local root folder, Dreamweaver offers to copy the file to that folder as part of the linking process.
If the file you are selecting is outside your local root folder, Dreamweaver offers to copy the file to that folder as part of the linking process.
or
If you are linking to a Web address, click in the Link field in the Property Inspector and type the full URL of the link destination. You must include the http:// portion of the address.
Tip
You can also copy a URL from the Address bar of a Web browser (or anywhere else) and paste the URL into the Link field.
Tip
You aren’t limited to Web links, which begin with http://, of course; you can put any valid URL in the Link field, including links for FTP, email addresses, and more. Again, see Chapter 6 for more information.
Adding Images
Much of the visual interest in Web pages is provided by images, and Dreamweaver makes it easy to add images to your pages. For much more information about adding images, sound, or movie files to your pages, see Chapter 5.
To add an image to your page
1. In your document, click where you want the image to appear.
2. In the Common category of the Insert panel, click the Images button ![]() .
.
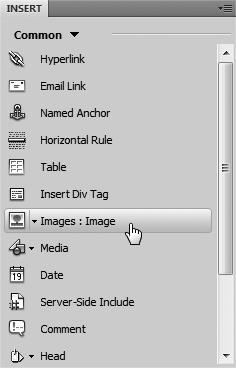
![]() To add an image to your page, click the Images: Image button in the Common category of the Insert panel.
To add an image to your page, click the Images: Image button in the Common category of the Insert panel.
The Select Image Source dialog appears ![]() .
.
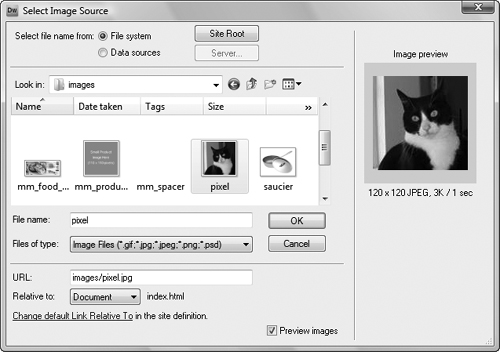
![]() The Select Image Source dialog lets you pick an image and shows you a preview of it as well.
The Select Image Source dialog lets you pick an image and shows you a preview of it as well.
3. Navigate to the image file you want, and select it.
Dreamweaver shows you a preview of the image in the Select Image Source dialog.
4. Click OK (Choose).
If the image is not inside the /images directory of your local root folder, Dreamweaver copies the image to that location. Dreamweaver next displays the Image Tag Accessibility Attributes dialog ![]() .
.
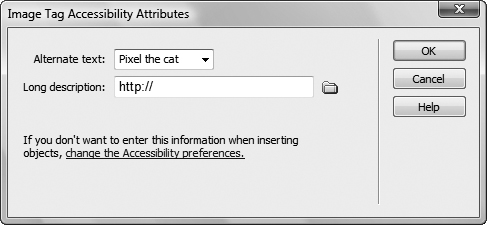
![]() Use this dialog to enter the alternate text for an image.
Use this dialog to enter the alternate text for an image.
5. (Optional, but strongly recommended) Enter the Alternate text for the image.
Alternate text is text attached to the image for use by screen readers for the visually impaired or for people who are browsing with images turned off.
6. Click OK.
The image appears in your document ![]() .
.
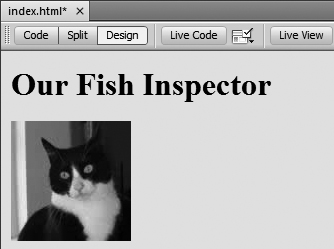
![]() The image appears on the page at the insertion point.
The image appears on the page at the insertion point.
Tip
The Long description field in the Image Tag Accessibility Attributes dialog links to a file that can contain a full description of the image. This option is not often used.
Tip
If you don’t want to add alternate text, you can turn off the prompt dialog in the Accessibility category of Dreamweaver’s Preferences. But you shouldn’t; this is a key attribute to add for the benefit of visually disabled visitors to your site.
Naming and Saving Your Page
After you’ve built your page, you’ll want to name it and save it in your local site folder. After you work on the page, you’ll need to save your changes. You should get in the habit of saving often; there’s nothing more annoying than lost work due to a power failure or because your computer decides to lock up.
It’s important to understand the difference between a page’s title and its name. The title appears at the top of the page in a Web browser; the name is the file’s name and will be part of the Web address, or URL, of the page. For example, “Welcome to HomeCook.info!” is the page’s title, but index.html is the page’s name.
To save your page for the first time
1. Choose File > Save, or press Ctrl-S (Cmd-S).
The Save As dialog appears ![]() .
.
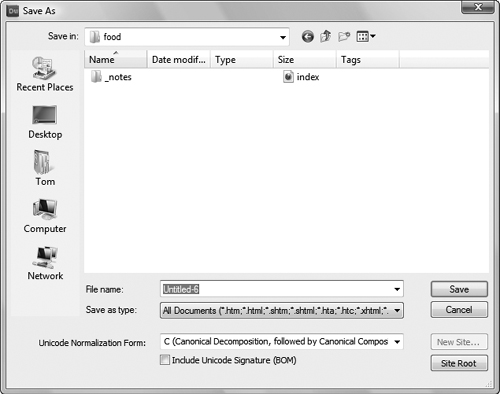
![]() Use the Save As dialog to place your new document where you want it inside your local root folder and also to give it a filename.
Use the Save As dialog to place your new document where you want it inside your local root folder and also to give it a filename.
2. Enter the name for the page.
Dreamweaver gives the page a default name of Untitled-x, where x is the number of pages you’ve created since you launched Dreamweaver. On Windows, the dialog shows the name in the “File name” field without showing the extension; on the Mac, the name appears with the extension, but only the name is selected, ready for replacement with whatever you type ![]() .
.
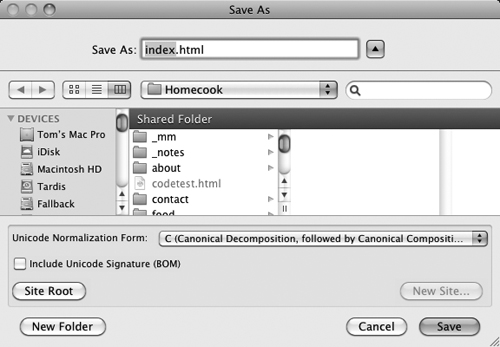
![]() The Mac version of the Save As dialog shows you the document’s extension and selects the name for you.
The Mac version of the Save As dialog shows you the document’s extension and selects the name for you.
Not all characters are acceptable in a filename; be sure to read the “What’s in a Name?” sidebar.
3. You should save the file inside your local site folder. If you want the file to be in a particular folder inside your site, navigate to that folder.
4. Click Save.
To save changes you make in your pages
• Choose File > Save, or press Ctrl-S (Cmd-S).
Opening a Page
Opening a page is straightforward; you’ll usually want to use Dreamweaver’s Files panel. You can also use the File menu or the Welcome screen if you like.
To open a page
1. In the Files panel ![]() , find the page you want to open, and double-click it.
, find the page you want to open, and double-click it.

![]() Use the Files panel to find a page and open it.
Use the Files panel to find a page and open it.
The page opens.
or
Choose File > Open, or press Ctrl-O (Cmd-O).
The Open dialog appears.
2. Navigate to the file, select it, and click Open.
The file opens in a new window (or in a new tab if you already have open windows).
Tip
If you want to open a page that you worked on recently, find the page in the Open a Recent Item category in the Welcome screen, and click it.
Tip
Click the Site Root button in the Open or Save As dialog to jump quickly to the site’s root folder.
Previewing in a Browser
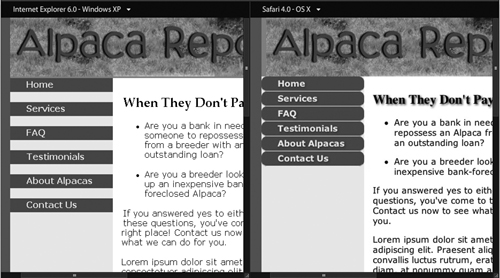
The page preview you see in Dreamweaver’s Design view is useful, but it’s no substitute for previewing your pages in real Web browsers. The reason is simple: The Design view shows one rendering of the HTML page, but Web browsers, which may be based on different rendering software (often called “rendering engines”), may show the same page differently. For example, you’ll often see pages that look different in Internet Explorer for Windows, Mozilla Firefox, Google Chrome, Opera, and Safari on either Mac or Windows. That’s because each of those browsers lays out and draws pages differently ![]() . Even the preview you get in Live View isn’t the same as the most common Windows browsers.
. Even the preview you get in Live View isn’t the same as the most common Windows browsers.

![]() You can see the difference in rendering the same page in different browsers here. Note that Internet Explorer 7 for Windows (top) fails to display the text in the column under the clouds (the text does appear but is incorrectly positioned below the bottom of the window), whereas Mozilla Firefox (middle) and Safari on the Mac (bottom) have no problem displaying the page.
You can see the difference in rendering the same page in different browsers here. Note that Internet Explorer 7 for Windows (top) fails to display the text in the column under the clouds (the text does appear but is incorrectly positioned below the bottom of the window), whereas Mozilla Firefox (middle) and Safari on the Mac (bottom) have no problem displaying the page.
By default, Dreamweaver makes your computer’s default Web browser the default browser for previewing pages, but you can change that if you prefer.
To preview a page in a Web browser
1. Save your page.
Dreamweaver requires that the page be saved before it can create a preview. If you forget, you’ll be asked with a dialog if you want to save. If you click No in this dialog, the preview that appears will be of the last saved version of the page, not necessarily the latest version, so get used to saving before previewing.
2. Press F12 (Opt-F12).
The page opens in the default preview browser.
or
Choose File > Preview in Browser, and then choose a browser from the submenu ![]() .
.
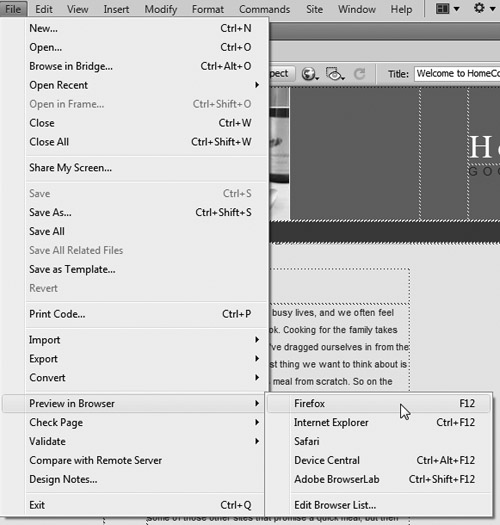
![]() Choose the browser you want to use for the preview from the Preview in Browser submenu.
Choose the browser you want to use for the preview from the Preview in Browser submenu.
The page opens in the browser you selected.
or
Click the Preview/Debug in Browser button on the Document toolbar ![]() . A pop-up menu appears with the browser choices available on your system.
. A pop-up menu appears with the browser choices available on your system.
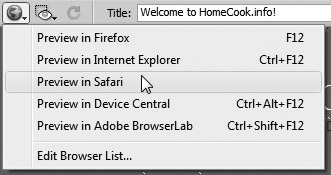
![]() You can also choose your preview browser from the Preview/Debug in Browser button on the Document toolbar.
You can also choose your preview browser from the Preview/Debug in Browser button on the Document toolbar.
Tip
If you’re using the built-in keyboard on a Mac laptop, you may need to press Fn-Opt-F12.
Tip
Depending on which Mac and which version of Mac OS X you’re running, F12 could be assigned by the system to either Exposé or Dashboard. On the Mac, Dreamweaver requires that you use Opt-F12 for the primary browser, and Cmd-F12 for the secondary browser. If you have any Exposé or Dashboard features that use these keys, you can change them to different keys in the Dashboard & Exposé, Keyboard, or Exposé & Spaces panel of System Preferences.
To set the browsers that appear in the Browser list
1. Choose File > Preview in Browser, and then choose Edit Browser List from the submenu.
The Preview in Browser category of Preferences appears ![]() .
.
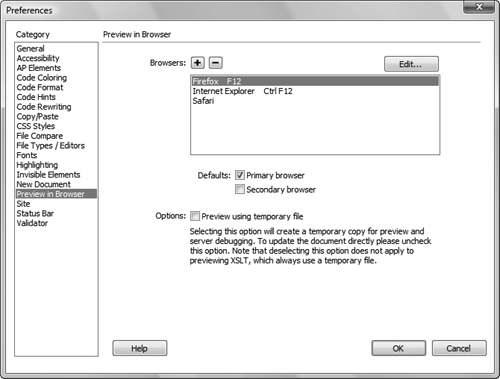
![]() You can choose which browsers on your system appear in the Preview in Browser list and also set browsers as your primary and secondary preview browsers.
You can choose which browsers on your system appear in the Preview in Browser list and also set browsers as your primary and secondary preview browsers.
2. Do one or more of the following:
• To add a browser to the list, click the + button, and then fill out the information in the resulting Add Browser dialog.
• To remove a browser from the list, select the browser and click the − button.
• To set a browser as the primary preview browser (this will cause it to open when you press F12 [Opt-F12]), select it, and then select the Primary browser check box.
• To set a browser as the secondary preview browser (this will cause it to open when you press Ctrl-F12 [Cmd-F12]), select it, and then click the Secondary browser check box.
3. Click OK to close the Preferences dialog.
Tip
Note that there are two choices in ![]() that don’t appear in the list in
that don’t appear in the list in ![]() , the choices for Device Central and Adobe BrowserLab. The former is a program that’s automatically installed along with Dreamweaver, and the later is discussed in the next section. You can’t remove these choices from the submenu.
, the choices for Device Central and Adobe BrowserLab. The former is a program that’s automatically installed along with Dreamweaver, and the later is discussed in the next section. You can’t remove these choices from the submenu.
Viewing Pages in BrowserLab
One of the difficulties of browsers is that there are an awful lot of them, and most of us don’t have the resources to maintain a lab of computers, operating systems, and different browsers to see how a page will look in the myriad combinations of these environments. A service from Adobe, BrowserLab, is specifically designed to solve this problem. It allows you to see how your pages will render in a variety of browsers by emulating how those browsers render pages.
Adobe BrowserLab displays its page renderings using Flash. You can choose which browsers you are emulating, and you can view rendered pages in a 2-up mode, viewing them side by side to see the rendering differences. There’s even an Onion Skin mode that allows you to place one rendered page over another to see how different browsers change the layout of page elements.
Adobe BrowserLab is integrated into Dreamweaver CS5, so you have the benefit of using it as just another preview mode.
To preview a page in Adobe BrowserLab
1. In Dreamweaver, open the page you want to preview in BrowserLab.
2. Choose File > Preview in Browser > Adobe BrowserLab, or press Ctrl-Shift-F12 (Cmd-Shift-F12).
The first time you connect with BrowserLab, you’ll need to create or enter your Adobe ID, the username and password Adobe requires to access its online services.
Dreamweaver will also open a BrowserLab panel ![]() .
.
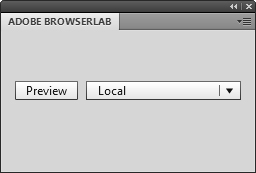
![]() Choose whether you want to preview the local or server copy of your page from the BrowserLab panel.
Choose whether you want to preview the local or server copy of your page from the BrowserLab panel.
3. From the pop-up menu in the BrowserLab panel, choose Local (if you want to preview the local copy of the page you’re working on) or Server (if you want to preview the copy of the page on the server), and then click the Preview button.
Your default browser opens and renders the page as it would appear in BrowserLab’s default, which was Firefox 3.0 for Windows XP when we wrote this ![]() .
.
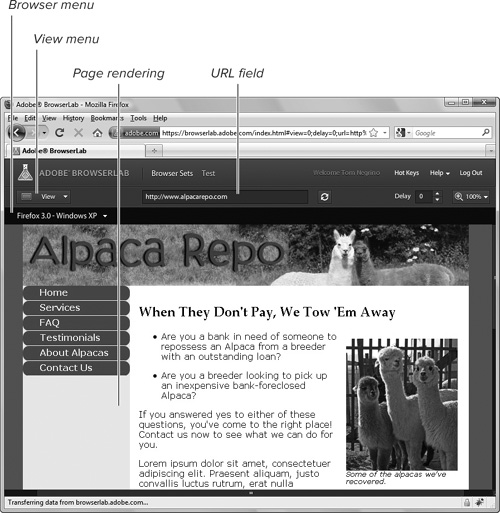
![]() The selected page rendering appears in BrowserLab inside your default browser.
The selected page rendering appears in BrowserLab inside your default browser.
To switch to a different browser rendering
• Click the browser menu in the BrowserLab window, and then choose the browser you want to see ![]() .
.

![]() You can pick from many other browsers and operating systems in BrowserLab.
You can pick from many other browsers and operating systems in BrowserLab.
For example, you could choose a browser that is notorious for browser compatibility issues, Internet Explorer 6. After a moment, the new rendering appears ![]() .
.
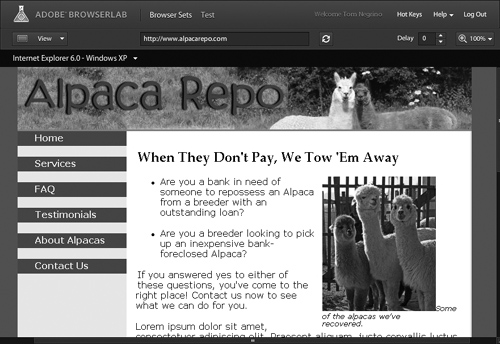
![]() If you compare this figure to
If you compare this figure to ![]() , you can see how differently an older, nonstandards-compliant browser (Internet Explorer 6, in this case) renders the page.
, you can see how differently an older, nonstandards-compliant browser (Internet Explorer 6, in this case) renders the page.
To switch to 2-up or Onion Skin View
• From the View menu in the BrowserLab window, choose 2-up View.
The window splits into two panes to show how the page would render in two different browsers. You can change the browsers you are comparing with the browser menu in each pane ![]() .
.
![]() In the 2-up View, you can compare two different browser renderings. Moving the horizontal or vertical scroll bars in either pane moves the view in both panes simultaneously.
In the 2-up View, you can compare two different browser renderings. Moving the horizontal or vertical scroll bars in either pane moves the view in both panes simultaneously.
or
• From the View menu in the BrowserLab window, choose Onion Skin View.
The Onion Skin View overlays the two renderings with a 50 percent view of each rendering and a slider above ![]() . You can move the slider toward one rendering or the other to make that rendering more visible and get an idea of how that browser is affecting the page elements.
. You can move the slider toward one rendering or the other to make that rendering more visible and get an idea of how that browser is affecting the page elements.
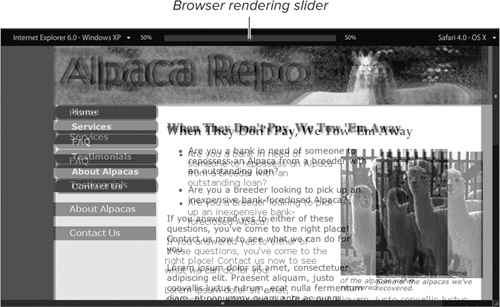
![]() The Onion Skin View overlays the two page renderings, so you can easily see how page elements are moved on the page. You can use the browser rendering slider to make one of the renderings more visible.
The Onion Skin View overlays the two page renderings, so you can easily see how page elements are moved on the page. You can use the browser rendering slider to make one of the renderings more visible.
Tip
Note that BrowserLab displays static renderings of your pages, so if you have user interactive elements using JavaScript or Ajax, those won’t be shown.
Setting Page Properties
Information that is contained in the <head> tag concerns the entire page. These page properties include information about the appearance of the page, how links should be displayed, the font settings for headings, and the encoding to be used, which is the character set a browser should use to render the page.
For example, Dreamweaver defaults to Unicode (UTF-8) encoding, which can safely represent all characters. Dreamweaver and Web browsers use the encoding to load the appropriate character set for the page. If you set the encoding to, say, one of the Chinese encodings, Dreamweaver and the Web browser will load the appropriate Chinese character set.
Dreamweaver defines CSS rules for properties that you specify in the Appearance (CSS), Links (CSS), and Headings (CSS) categories of Page Properties. These rules are placed in the <head> section of the page.
To set page properties
1. Choose Modify > Page Properties, or press Ctrl-J (Cmd-J).
The Page Properties dialog opens ![]() (see the following page).
(see the following page).
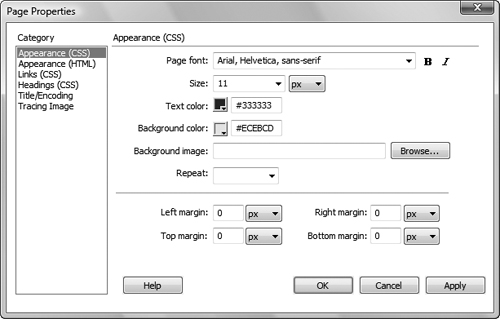
![]() Use the Appearance (CSS) category of the Page Properties dialog to set the page font and size, text and background colors, background images, and margins using CSS styles.
Use the Appearance (CSS) category of the Page Properties dialog to set the page font and size, text and background colors, background images, and margins using CSS styles.
2. Click the category you want.
See the following sections for details on each of the categories and their options.
3. Set the options as you like.
4. Click Apply to see the changes on the open document without closing the Page Properties dialog.
or
Click OK to save your changes.
Tip
Note that the available encodings are different on Windows and Mac. This is not a problem for English, but if you will be working in languages other than English, you should make sure that you use an encoding for that language that will work well across platforms, and test your site using browsers on Windows and Mac.
Appearance (CSS)
The Appearance (CSS) category of the Page Properties dialog ![]() has the following options that apply CSS styles:
has the following options that apply CSS styles:
• Page font specifies the default font family your Web pages will use. Dreamweaver uses the font family you specify unless the font is overridden by a CSS style sheet. You can also set the font to be bold or italic.
• Size sets the default font size. Dreamweaver uses this font size unless the size is overridden by a CSS style sheet. You can choose an absolute size (such as 9, 10, 12, and so forth) or relative sizes (such as small, medium, large, x-large, and so on). Choosing an absolute size allows you to pick any of the measurement units (pixels, points, in, cm, mm, picas, ems, exs, and %).
• Text color lets you set the default color for text. Click the color well to bring up a color picker to help you set the color.
• Background color lets you set the default color for the page background. Click the color well to bring up a color picker to help you set the color.
• Background image allows you to set an image that will appear behind all the text and images on the page. Click the Browse button to bring up the Select Image Source dialog, navigate to the image, and then click OK (Choose). If you set a background image, it overrides the background color.
• Repeat sets how the background image will be displayed if it doesn’t fill the whole page. You can choose repeat to tile the image horizontally and vertically; repeat-x to tile the image horizontally; repeat-y to tile the image vertically; or no-repeat to display the image only once.
• Margins allows you to set the Left, Right, Top, and Bottom margins of the page. You can use any of the measurement systems as units, as you can with text size.
Appearance (HTML)
The Appearance (HTML) category of the Page Properties dialog ![]() has the following options, implemented as HTML markup:
has the following options, implemented as HTML markup:
• Background image allows you to set an image that will appear behind all the text and images on the page. Click the Browse button to bring up the Select Image Source dialog, navigate to the image, and then click OK (Choose). If you set a background image, it overrides the background color.
• Background color lets you set the default color for the page background. Click the color well to bring up a color picker to help you set the color.
• Text lets you set the default color for text. Click the color well to bring up a color picker to help you set the color.
• Links sets the color to apply to link text. Click the color well to bring up a color picker to help you set the color.
• Visited links sets the color to apply to visited link text. Click the color well to bring up a color picker to help you set the color.
• Active links sets the color to apply to link text when you click the text. Click the color well to bring up a color picker to help you set the color.
• Margins allows you to set the Left, Right, Top, and Bottom margins of the page. You can use any of the measurement systems as units.
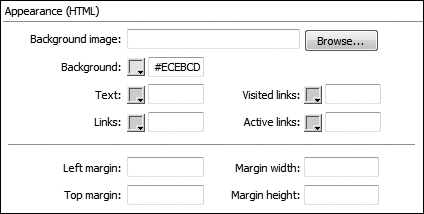
![]() The Appearance (HTML) category applies properties to your page using HTML markup.
The Appearance (HTML) category applies properties to your page using HTML markup.
Tip
If your page already has an underline style defined through an external CSS style sheet, the Underline style pop-up menu displays Don’t change. You can actually change it; the option is there to tell you that there is already a style defined. If you change the underline style in Page Properties, it overrides the previous underline style definition.
Links (CSS)
You find the following options in the Links category—unsurprisingly, all affect how links are displayed ![]() :
:
• Link font specifies the default font family your Web pages use to display links. Dreamweaver uses the font family you specify unless the font is overridden by a CSS style sheet. You can also set the font to be bold or italic.
• Size sets the default font size for link text. Dreamweaver uses this font size unless the size is overridden by a CSS style sheet. You can choose an absolute size or a relative size. Choosing an absolute size allows you to pick any of the measurement units (pixels, points, in, cm, mm, picas, ems, exs, and %).
• Link color sets the color to apply to link text. Click the color well to bring up a color picker to help you set the color.
• Visited links sets the color to apply to visited link text. Click the color well to bring up a color picker to help you set the color.
• Rollover links sets the color to apply to link text when you place the mouse cursor over the text. Click the color well to bring up a color picker to help you set the color.
• Active links sets the color to apply to link text when you click the text. Click the color well to bring up a color picker to help you set the color.
• Underline style sets the way links are underlined. Your choices are Always underline, Never underline, Show underline only on rollover, and Hide underline on rollover.
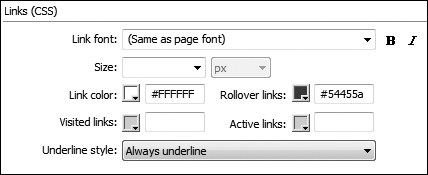
![]() You can control many aspects of how links display with the Page Properties dialog, applied by setting link properties through CSS.
You can control many aspects of how links display with the Page Properties dialog, applied by setting link properties through CSS.
Headings (CSS)
The Headings category ![]() has the following options for headings:
has the following options for headings:
• Heading font specifies the default font family used for headings. Dreamweaver uses the font family you specify unless the font is overridden by a CSS style sheet. You can also set the font to be bold or italic.
• Heading 1 through Heading 6 allows you to set size and color options for each heading size. The size pop-up menus allow you to set absolute sizes (sized with numbers, such as 9, 12, 18, and so on) or relative sizes (such as small, medium, or large), and for absolute sizes, you can choose from any of the available measurement units. Click the color well to bring up a color picker to help you set the heading color.
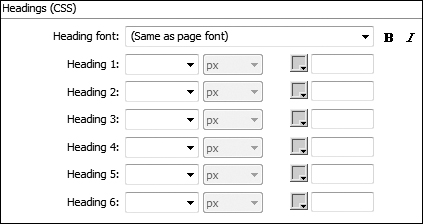
![]() You can set the default font, size, and color for headings in the Headings (CSS) category.
You can set the default font, size, and color for headings in the Headings (CSS) category.
Tip
You’ll get more control over the text if you use a CSS style sheet to redefine a Heading style. See Chapter 7 for more information about redefining HTML styles.
Title/Encoding
The Title/Encoding category allows you to change the title and some of the more arcane items in a Web page ![]() :
:
• Title allows you to change the page title. It’s equivalent to the Title field at the top of a document window.
• Document Type (DTD) allows you to change the doctype of the page. When you make a change here, Dreamweaver changes the page’s code (if necessary) to make it compliant with the selected DTD.
• Encoding sets the text encoding used for the page.
• Unicode Normalization Form and Include Unicode Signature (BOM) are only enabled when you use Unicode UTF-8 as the encoding. Choose Help > Dreamweaver to learn more.
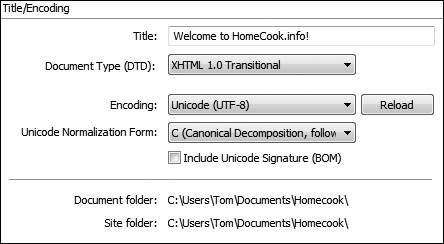
![]() Set the title, document type, and encoding for the page in this dialog.
Set the title, document type, and encoding for the page in this dialog.
Tip
If you keep the default Unicode (UTF-8) encoding, you should also make sure that from the Unicode Normalization Form pop-up menu you choose C (Canonical Decomposition, followed by Canonical Composition). The exact meaning of this is mostly of interest to true character set geeks. What you need to know is that the C setting is the one used for Web pages.
Tracing Image
Some people prefer to design their pages in a graphics tool such as Adobe Photoshop or Adobe Fireworks. They can then export that image and bring it into Dreamweaver as a background image. It isn’t a background image for the page; rather, it is a guide that you can use as a reference to re-create the same look in Dreamweaver. This guide is called a tracing image. The tracing image only appears in Dreamweaver; it doesn’t show up when you preview the page in a browser.
The tracing image category has only two options ![]() :
:
• Tracing image has a Browse button that, when clicked, brings up the Select Image Source dialog. Navigate to the image, and then click OK (Choose).
• Transparency is a slider that controls the opacity of the tracing image. You can set the image from zero to 100% opacity.
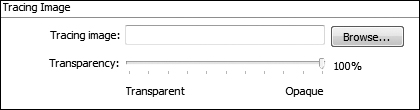
![]() A tracing image can be a useful guide for re-creating page designs created in a graphics program.
A tracing image can be a useful guide for re-creating page designs created in a graphics program.
Defining Meta Tags
Information about the page is contained in a kind of HTML tag called a meta tag. Meta tags can include a variety of the page’s summary information, including keywords to help search engines index the page, a text description of the page, and links to external documents, such as a style sheet.
When you insert meta information, it appears within the document’s <head> tag, inside a <meta> tag:
<meta name="keywords" content=
"HomeCook.info, food, wine, cooking,
home cooking, homecook, dining">
You can set six categories of meta tags:
• Meta is a general category that allows you to add any information you want. You must give it a name and specify the content.
• Keywords adds one or more words to the document for use by search engines to aid them in indexing the page.
• Description adds a text description of the site, again for use by search engines.
• Refresh reloads the current document after a specified interval of seconds or redirects the document to another URL.
• Base sets the base URL for the page. All of the document-relative paths in the page are considered relative to the base URL. For more information about document-relative links, see Chapter 6.
• Link adds a link to an external document. It’s used most often to define the location for an external CSS style sheet.
To add a meta tag
1. Choose Insert > HTML > Head Tags, and then choose the tag you want from the submenu ![]() .
.
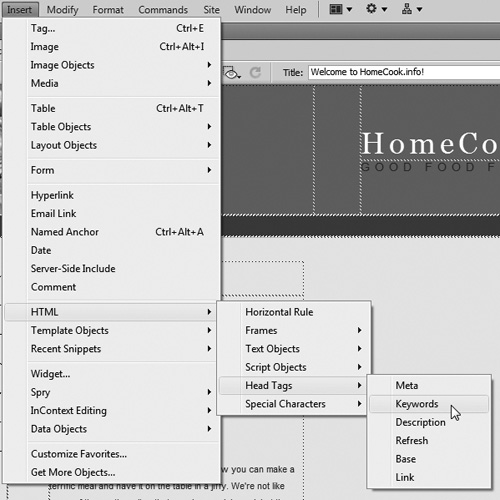
![]() Dreamweaver allows you to set many meta tags for your document.
Dreamweaver allows you to set many meta tags for your document.
Depending on the kind of tag you chose, the appropriate dialog appears. For example, if you choose Keywords, the Keywords dialog appears ![]() . In this dialog, you need to enter the page’s keywords, separated by commas.
. In this dialog, you need to enter the page’s keywords, separated by commas.
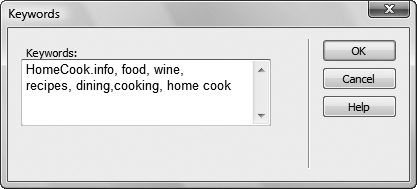
![]() Separate Keywords with commas; Dreamweaver turns these keywords into a meta tag for you.
Separate Keywords with commas; Dreamweaver turns these keywords into a meta tag for you.
2. Fill out the dialog, and then click OK.
Tip
Don’t go overboard with your keywords or description. Search engines have long since figured out that lots of keywords or a very long description are attempts to artificially improve search engine rankings, and sites with excessive keywords or descriptions will be screened out of search results.
Putting It All Together
1. Create new pages from the Welcome screen, from the New Document dialog, and from a sample CSS page.
2. Choose one of the pages you just created, and give it a title.
3. Add and format text on that page.
4. Add links to the page.
5. Add at least one image to your page.
6. Name and save your page.
7. Preview the pages in all the Web browsers installed on your computer.
8. Use BrowserLab to see how your page looks in a browser you don’t have installed.
9. Set page properties for your page.
10. Set any of the six categories of meta tags for your page.